Loading ...
Loading ...
Loading ...
DISASSEMBLY
* Disconnect the power before working on the refrigerator.
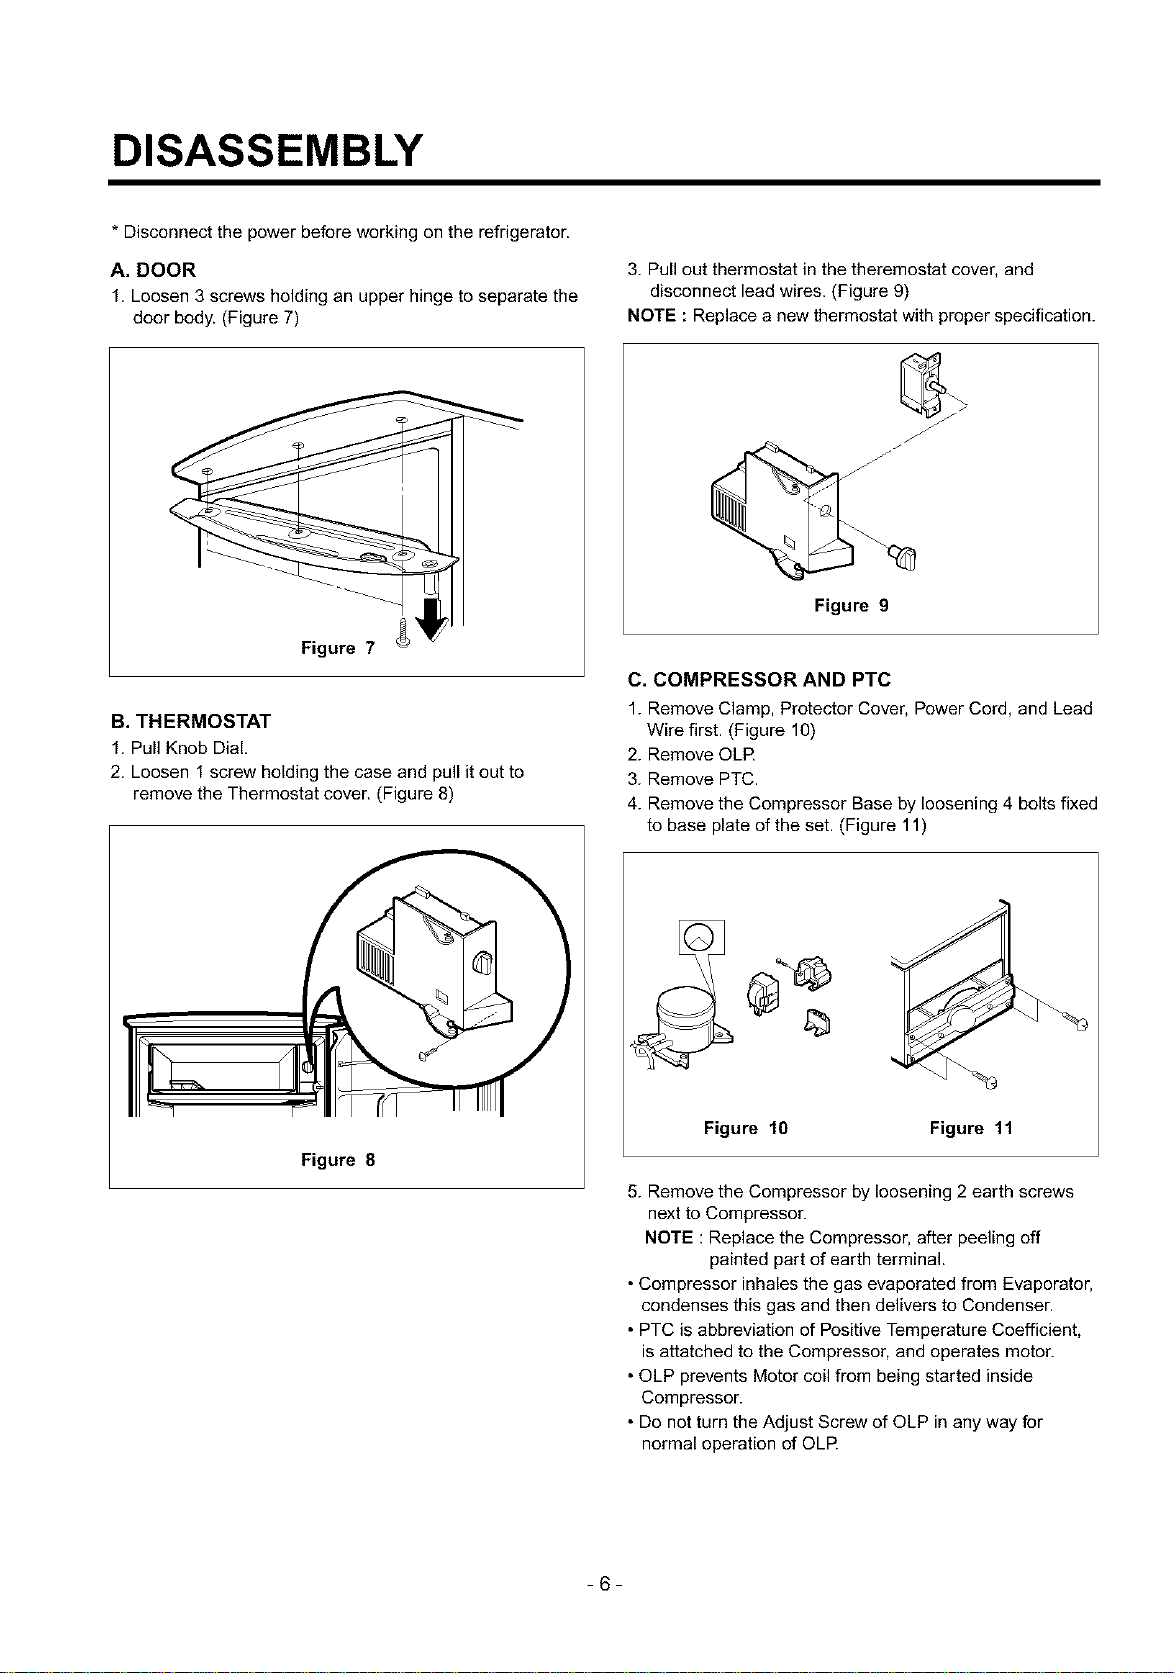
A. DOOR
1. Loosen 3 screws holding an upper hinge to separate the
door body. (Figure 7)
Figure 7
B, THERMOSTAT
1. Pull Knob Dial.
2. Loosen f screw holding the case and pull it out to
remove the Thermostat cover. (Figure 8)
3. Pull out thermostat in the theremostat cover, and
disconnect lead wires. (Figure 9)
NOTE : Replace a new thermostat with proper specification.
Figure 9
C. COMPRESSOR AND PTC
1. Remove Clamp, Protector Cover, Power Cord, and Lead
Wire first. (Figure 10)
2. Remove OLR
3. Remove PTC.
4. Remove the Compressor Base by loosening 4 bolts fixed
to base plate of the set. (Figure 11)
Figure 8
Figure 10 Figure 11
5. Remove the Compressor by loosening 2 earth screws
next to Compressor.
NOTE : Replace the Compressor, after peeling off
painted part of earth terminal.
• Compressor inhales the gas evaporated from Evaporator,
condenses this gas and then delivers to Condenser.
• PTC is abbreviation of Positive Temperature Coefficient,
is attatched to the Compressor, and operates motor.
• OLP prevents Motor coil from being started inside
Compressor.
• Do not turn the Adjust Screw of OLP in any way for
normal operation of OLR
-6-
Loading ...
Loading ...
Loading ...