Loading ...
Loading ...
Loading ...
English
8
Cleaning
WARNING: Blow dirt and dust out of all air vents with
clean, dry air at least once a week. To minimize the risk
of eye injury, always wear ANSI Z87.1 approved eye
protection when performingthis.
WARNING: Never use solvents or other harsh
chemicals for cleaning the non-metallic parts of
the tool. These chemicals may weaken the plastic
materials used in these parts. Use a cloth dampened
only with water and mild soap. Never let any liquid
get inside the tool; never immerse any part of the tool
into aliquid.
Repairs
WARNING: To assure product SAFETY and
RELIABILITY, repairs, maintenance and adjustment
(including brush inspection and replacement, when
applicable) should be performed by a CRAFTSMAN
factory service center or a CRAFTSMAN authorized
service center. Always use identical replacementparts.
WARNING: Risk of Unsafe Operation. Unit cycles
automatically when power is on. When servicing,
you may be exposed to voltage sources, compressed
air, or moving parts. Before servicing unit unplug or
disconnect electrical supply to the air compressor,
bleed tank of pressure, and allow the air compressor
tocool.
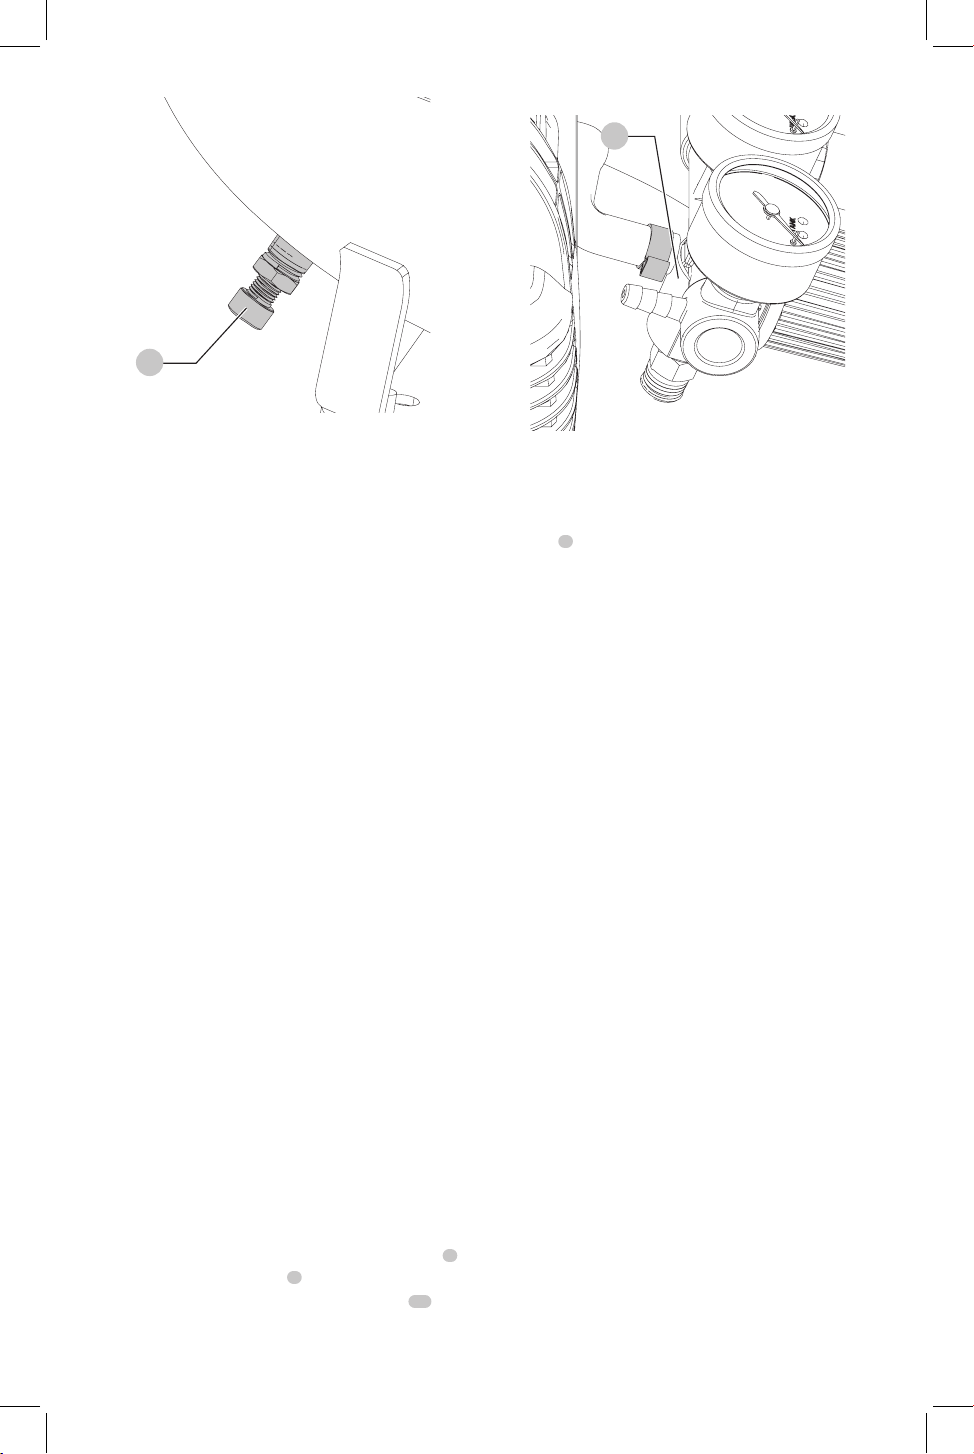
To Replace Regulator (Fig. A, E)
1. Release all air pressure from air tank. See To Drain Tank
in the Maintenancesection.
2. Unplugunit.
3. Remove the console cover.
4. Using an adjustable wrench remove the safety valve
8
from the regulator manifold
7
.
5. Remove the hose by removing the hose clamp
12
.
nOTE: The hose clamp is not reusable. You must
purchase a new hose clamp.
12
Fig. E
6. Remove three pump mounting screws securingpump.
7. Carefully lift pump up away from brackets and out of
theway.
8. Using an adjustable wrench remove the regulator
knob
7
.
9. Apply pipe sealant to new regulator manifold and
assemble, tighten withwrench.
10. Reapply pipe sealant to safety valve.
11. Reassemble all components in reverse order of removal.
Make sure to orient gauges to read correctly and use
wrenches to tighten allcomponents.
10
Fig. D
7. After the water has been drained, close the drain valve.
The air compressor can now bestored.
nOTE: If drain valve is plugged, release all air pressure. The
valve can then be removed, cleaned, thereinstalled.
Storage
Before you store the air compressor, make sure you do
thefollowing:
1. Review the Maintenance section on the preceding
pages and perform scheduled maintenance
asnecessary.
2. Drain water from air tank. See To Drain Tank
underMaintenance.
WARNING: Risk of Bursting. Water will condense
in the air tank. If not drained, water will corrode
and weaken the air tank causing a risk of air
tankrupture.
3. Protect the electrical cord and air hose from damage
(such as being stepped on or run over). Wind air hose
loosely around the compressor handle. Wrap electrical
cord onto the cordwrap.
4. Store the air compressor in a clean and drylocation.
Loading ...
Loading ...
Loading ...