Loading ...
Loading ...
Loading ...
www.XtremeAirUsa.com PAGE 5
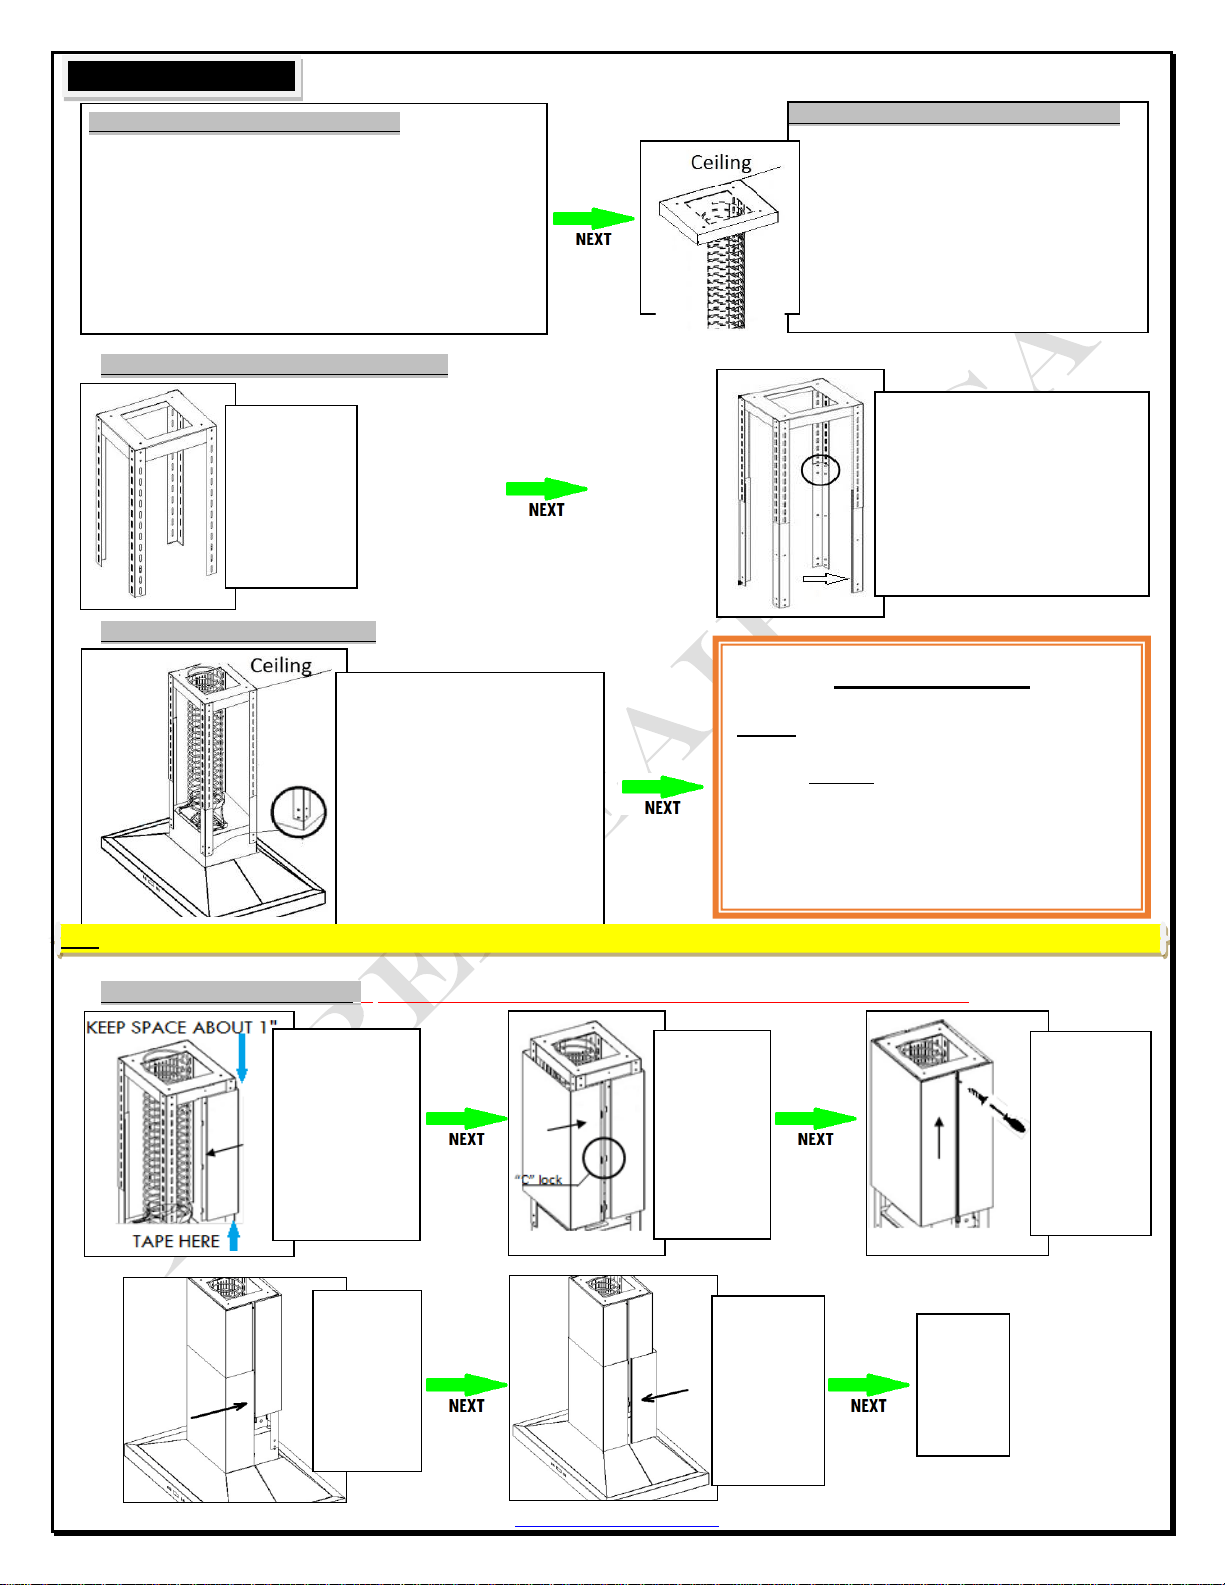
STEP #3: INSTALLING “SUPPORT BRACKET”
STEP #4: ATTACHING HOOD BODY
STEP #5: INSTALLING CHIMNEYS - DO NOT REMOVE CHIMNEY PROTECTIVE FILM UNTIL FINISHED INSTALLATION
STEP #2: INSTALLING “CEILING BRACKET”
A. Cut out a hole in the ceiling where the ducting
will go.
B. Prepare support framework for ceiling
bracket.
C. Place chimney bracket against ceiling & screw
it into place.
D. Drop the ducting and electrical work through
the ceiling.
.
STEP #1: MARKING “CEILING BRACKET”
A. Put a thick, protective covering over counter top, cook top or
Range to protect from damage or debris.
B. Find and mark the center point directly above your cook top.
C. Place the ceiling bracket on the ceiling around the center point.
Make sure it is square with your cook top).
D. Trace the outline of the ceiling bracket onto the ceiling.
E. Trace a circle where the ducting will go.
F. Mark the 4 pre-holes where you will insert the screws.
9. INSTALLATION
D. Have a third person raise up the
island range hood into its position.
Hood should be directly under the
support brackets.
E. Attach the hood to the support
brackets at all 4 corners with bolts.
F. Connect the ductwork to the range
hood. Use aluminum tape to secure
the pipe joint area.
G. Connect power plug.
CAREFULLY
REMOVE
CHIMNEY
PROTECTIVE
FILM.
Set the lower
“HOOK”
chimney piece
into place so
it drops into
the top of the
hood.
Carefully slide
and drop
lower “SLOT”
chimney into
place. Make
sure SLOT and
HOOK are
snapped.
HINT:
Due to the heavy weight of this range hood, use of a vertical jack to lift and support the hood in place is highly recommended.
Slide upper
“slot” chimney
(USC) into place
connecting the
6 “C” locks – 3
on each side.
Slide the entire
chimney up and
secure with the
ceiling bracket
using the 2
provided bolts
– 1 on each
side.
Slide upper “hook”
chimney (UHC) in,
leave about 1” from
the ceiling. Use
tape to hold it up
from falling down if
you don’t have any
helper to hold it.
IMPORTANT
Before moving to STEP5, do the following:
1. Make sure the damper is able to open
FULLY when the hood is on.
2. Test run to see if there is any air leaks
/ abnormal noise.
Attach lower chimney bracket (P3)
vertically to the`inside of the 4
multi-hole brackets (P2) installed in
the previous step. Make sure to
adjust to its “TOTAL BRACKET
LENGH”. Prefer to dimension table
page 4.
Attach the
multi-hole
brackets (P2) to
the outside 4
corners of the
ceiling brackets
(P1).
Loading ...
Loading ...
Loading ...