Loading ...
Loading ...
Loading ...
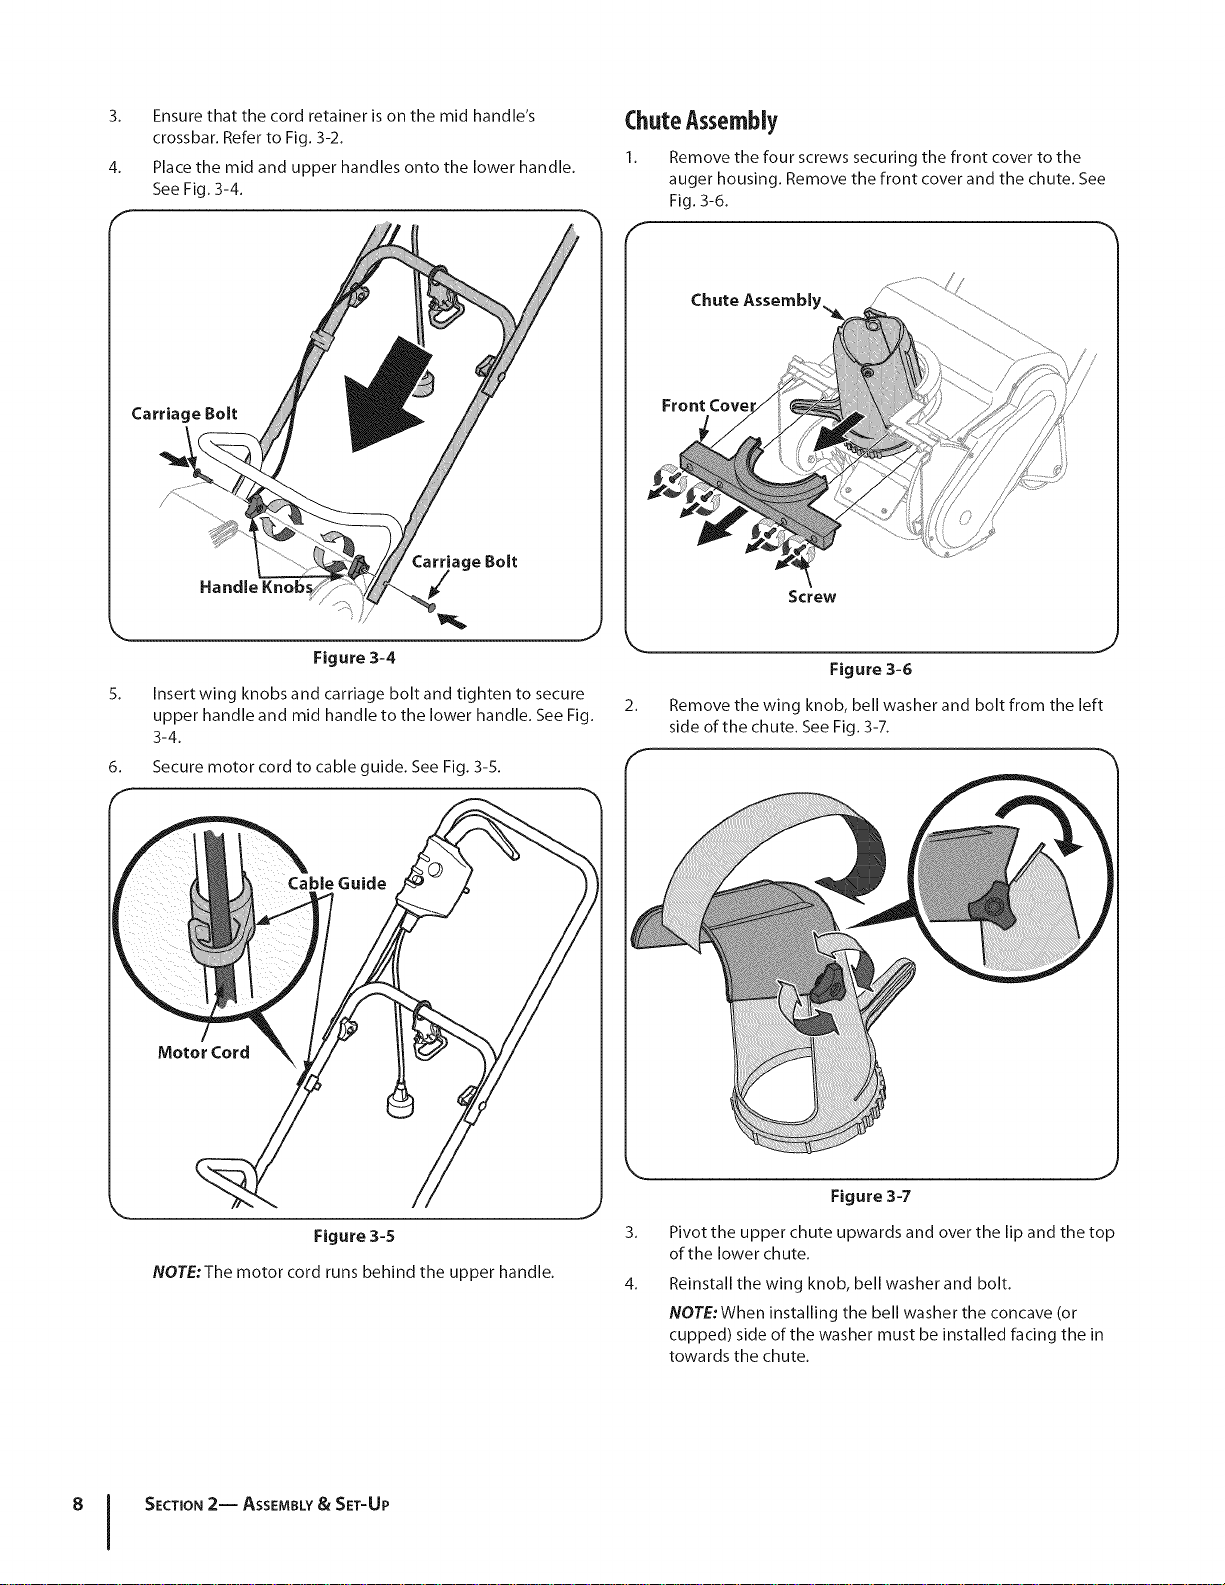
3. Ensurethatthecordretainerisonthemidhandle's
crossbar.RefertoFig.3-2.
4. Placethemidandupperhandlesontothelowerhandle.
SeeFig.3-4.
Carriage Bolt
age Bolt
Handle
Figure 3-4
5,
Insert wing knobs and carriage bolt and tighten to secure
upper handle and mid handle to the lower handle. See Fig.
3-4.
6. Secure motor cord to cable guide. See Fig. 3-5.
ChuteAssembly
Remove the four screws securing the front cover to the
auger housing. Remove the front cover and the chute. See
Fig. 3-6.
F
Chute Assembly,,,_
Front Cove
Screw
2,
Figure 3-6
Remove the wing knob, bell washer and bolt from the left
side of the chute. See Fig. 3-7.
Figure 3-5
NOTE:The motor cord runs behind the upper handle.
3,
4.
Figure 3-7
Pivot the upper chute upwards and over the lip and the top
of the lower chute.
Reinstall the wing knob, bell washer and bolt.
NOTE: When installing the bell washer the concave (or
cupped) side of the washer must be installed facing the in
towards the chute.
8 I SECTION2-- ASSEMBLY& SET-UP
Loading ...
Loading ...
Loading ...