Double 30" Electric Self-Cleaning
Built-In Wall Oven
Horno Electrico
Doble de 30" Empotrado con Autolimpieza
Models, Modelos 911.47752, 47753, 47754, 47759
i i
1....t J I
JI _ iii
iiiiiiii
IIIIIIIIIIIIIII
| ................................... W
_ == H IIIIJlI I
,i
Ir ,
B
m
z,
0
r-
229C4020P308-2 Sears, Roebuck and Co,,
(SR-10497-2) Hoffman Estates, IL 60179 U.S,A, www.sears,com
30" SELF-CLEANINGDOUBLEOVEN
TABLEOFCONTENTS
Oven Safety .......................... 3-4
Features of Your Oven .............. 5
Removal of Packaging Tape .... 5
Oven Control, Clock, Timer ...... 6
Control Display ......................... 7
Clock ........................................ 8
Kitchen Timer ........................... 8
Control Lookout ........................ 8
Tones ........................................ 9
F Code ...................................... 9
Oven Cooking Tips ........... 10-12
Baking .............................. 13-14
Broiling ................................... 15
Setting SpeclaI Features .. 16-20
Self-Cleaning Cvcte .......... 21,22
Control Panel .......................... 23
Broiler Pan and Gnd ............... 23
Oven Interior ........................... 23
Oven Dght Bulb ...................... 23
Oven Racks ............................ 24
Oven Door .............................. 25
Before Cat]ing for
Service .............................. 26, 27
Temperature Adiustment ........ 28
Warranty ................................. 31
Serwce Numbers .................... 60
For your convenience and future reference, please write down your model
and serial numbers in the space provided. They are located on the front
frame behind the oven door.
MODEL NUMBER:
SERIAL NUMBER:
© Sears, Roebuck and Co.
IMPORTANTSAFETY
INSTRUCTIONS
SAVE THESE INSTRUCTIONS
Read all instructions before using this appliance. When using gas or
electrical appliances, basic safety precautions should be followed,
including the following:
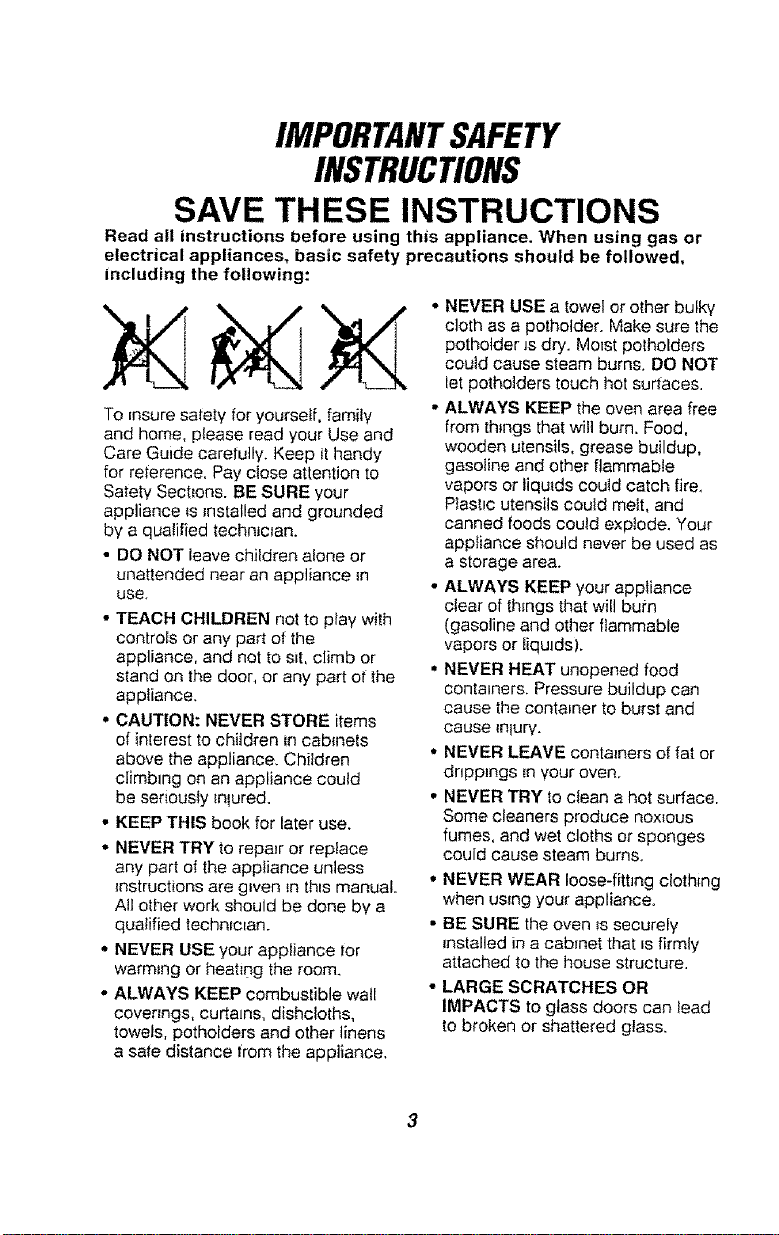
To _nsure safety for yourself, family
and home, please read your Use and
Care Guide carefully. Keep it handy
for reference. Pay close attention to
Safety Sections. BE SURE your
appliance Is installed and grounded
by a qualified technic_an.
• DO NOT leave children alone or
unattended near an appliance _n
use,
• TEACH CHILDREN not to play with
controls or any part of the
appliance, and not to sit, climb or
stand on the door, or any part of the
appliance.
• CAUTION: NEVER STORE items
of interest to children in cabinets
above the appliance. Children
climbing on an appliance could
be seriously _nlured.
• KEEP THIS book for later use.
• NEVER TRY to repair or replace
any part of the appliance unless
_nstructions are given in this manual.
All other work should be done by a
qualified technfcman.
,,,NEVER USE your appliance for
warming or heating the room.
• ALWAYS KEEP combustible wall
covenngs, curtains, dishcloths,
towels, potholders and other linens
a safe distance from the appliance.
• NEVER USE a towel or other bulky
cloth as a potholder. Make sure the
potholder is dry'. Moist potholders
could cause steam burns. DO NOT
let pothotders touch hot surfaces.
,, ALWAYS KEEP the oven area free
from things that will burn. Food,
wooden utensils, grease buildup,
gasoline and other flammable
vapors or liqutds could catch fire,
PIasttc utensils could melt, and
canned foods could explode. Your
appliance should never be used as
a storage area.
• ALWAYS KEEP your appliance
clear of things that will burn
(gasoline and other flammable
vapors or liquids).
, NEVER HEAT unopened food
conta=ners. Pressure buildup can
cause the container to burst and
cause _nlury.
° NEVER LEAVE containers of fat or
dnpp_ngs _nyour oven.
,, NEVER TRY to ctean a hot surface.
Some cleaners produce noxious
fumes, and wet cloths or sponges
could cause steam burns.
•NEVER WEAR Ioose-fitbng clothing
when using your appliance.
• BE SURE the oven is securely
_nstalled in a cabinet that =sfirmly
attached to the house structure.
o LARGE SCRATCHES OR
IMPACTS to glass doors can lead
to broken or shattered glass.
IMPORTANTSAFETY
INSTRUCTIONS
• DO NOTtouch heating efements,
surfaces near themor interioroven
surfaces,These maybe hotenough to
cause burns eventhough theyaredark
mncolor.Dunngand after use, do not
touchor letcIothing or flammable
matenalcontact the elementsor hot
surfaces untilthey havehadtimeto
cool,Other surtaces nearthe oven vent
openings,oven door and w_ndowmay
alsobe hot enough tocause burns.
• PLACE OVEN RACKS _nthe desired
position while the oven _scool if racks
must be moved while oven is hot, do not
let pothotder contact the hot oven
element.
• AFTER BROILING, always take the
broiier pan and grid out of the oven
and c_ean them. Leftover grease _nthe
broiler pan could catch fire the next time
you use your oven.
• ALWAYS USE care when opening the
oven door. Let hot air and steam escape
before moving foods.
• NEVER USE aluminum toi! to line the
oven bottom. Improper use of foil could
start a fire, or electnca! shock could
resutt.
• NEVER BLOCK the oven vent opening.
• CLEAN ONLY the parts listed
_nthis manual. Follow all cleaning
_nstructlons. Be sure to remove the
broiler pan and grid before the
self-clean cvcte.
• NEVER RUB, move, clean or damage
the door gasket on self-cleaning ovens.
It Jsessential for a good seal.
• NEVER TRY to clean utensils,
cookware,removabtepads or broiler
panand grid in theself-clean cycle.
• DO NOTUSEoven cleaners - No
commerctatoven cleaner orprotective
coating of any kindshould be used in or
around any part otthe oven,
• IF THE SELF-CLEANINGmode
malfunctions, tum the oven off and
disconnect the power supply. Have tt
serviced by a quatifiedtechnician.
IMPORTANT SAFETY NOTICE!
The CaliforniaSafe DrinkingWater and
Toxic EnforcementAct requiresthe
governor of Californiato publisha list
of substancesknownto the state to
cause birthdefectsor other
reproductiveharmand requires
businessestowarntheir customersof
potential exposureto such substances.
The fiberglass insulationin a
self-cleaning ovenwill give off a very
smallamountofcarbonmonoxide
duringthe cleaningcycle. Exposure
canbe minimized by ventingwith an
opendoor or windowor using a
ventilationfan or hood.
IMPORTANT; The health of some
birds is extremelysensitive to the
fumes given offduring the self-cleaning
cycleof any range.Move birds to
anotherwell-ventilatedroom.
READ AND UNDERSTAND
THIS INFORMATION NOW!
Besure everyone in your homeknows
what to do in case of fire. Never use
wateron a greasefire; it willonly
spread the flames,
OVENFIRE:
Do not try to movethe pan]
I. Close the ovendoor and turncontrols
off.
2. if fire conhnues,carefullyopen
the door,throwbaking soda on the
fire,or usea dry chemical roam or
halon-typeext_ngulsher.
SAVE THESE INSTRUCTIONS
OPERATION
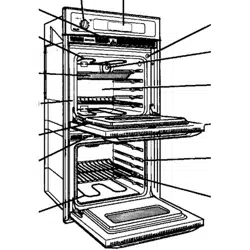
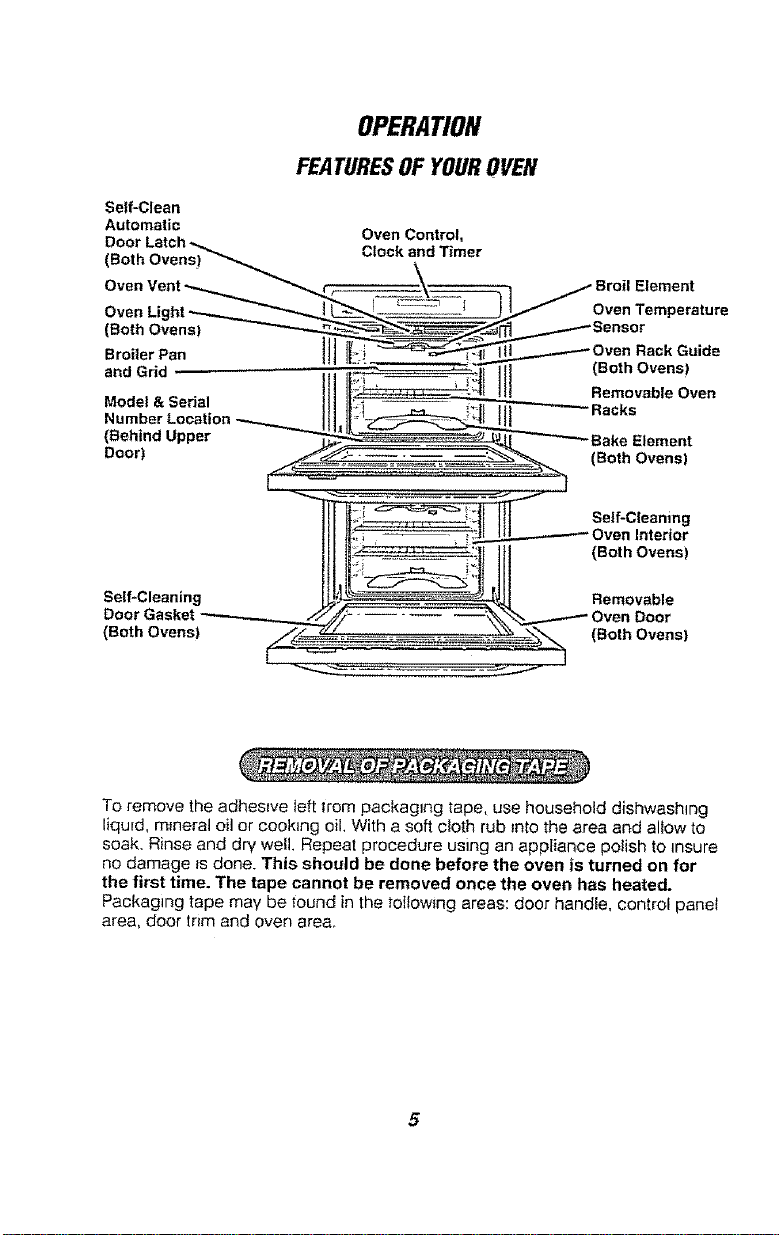
FEATURESOF YOUROVEN
Self*Clean
Automatic
D - - Oven Control,
oor Latch _,.
(Both Ovens)_ ,.,lock and Timer
Oven Vent _ -- _ __ _ _- Broil Element
Oven Ligh Oven Temperature
(Both Ore Sensor
Broiler Pan H] IL] _ItlL_.._,.-.--_ oven Rack Grade
and Grid ,,_;'7! , ,;_l'_']tl (Both Ovens)
L.i:, _i !_|I ill Removable Oven
Model & Serial ['oi ---_=_ '" Racks
aumberLocation---...._ Ill 1t='-__II Ill
(Behind Upper Bake Element
Door) (Both Ovens}
........_,,,,,_ _,_
_T_ II_- _::tl _ Self-Cleaning
Ill l Ove" Interior
]II (Both Ovens)
Self-Cleaning Removable
or Gasket -7// ...... 'X_....---,_ Oven Door
(Both Ovens) {Both Ovens}
To remove the adhesive left trom packaging tape, use household dishwashlng
Iiqufd, mineral oil or cooking oil. With a soft cloth rub into the area and allow to
soak. Rinse and dry well. Repeat procedure using an appliance polish to insure
no damage _sdone. This should be done before the oven is turned on for
the first time. The tape cannot be removed once the oven has heated.
Packaging tape may be round in the toltowtng areas: door handle, control panel
area, door trim and oven area.
5
OPERATION
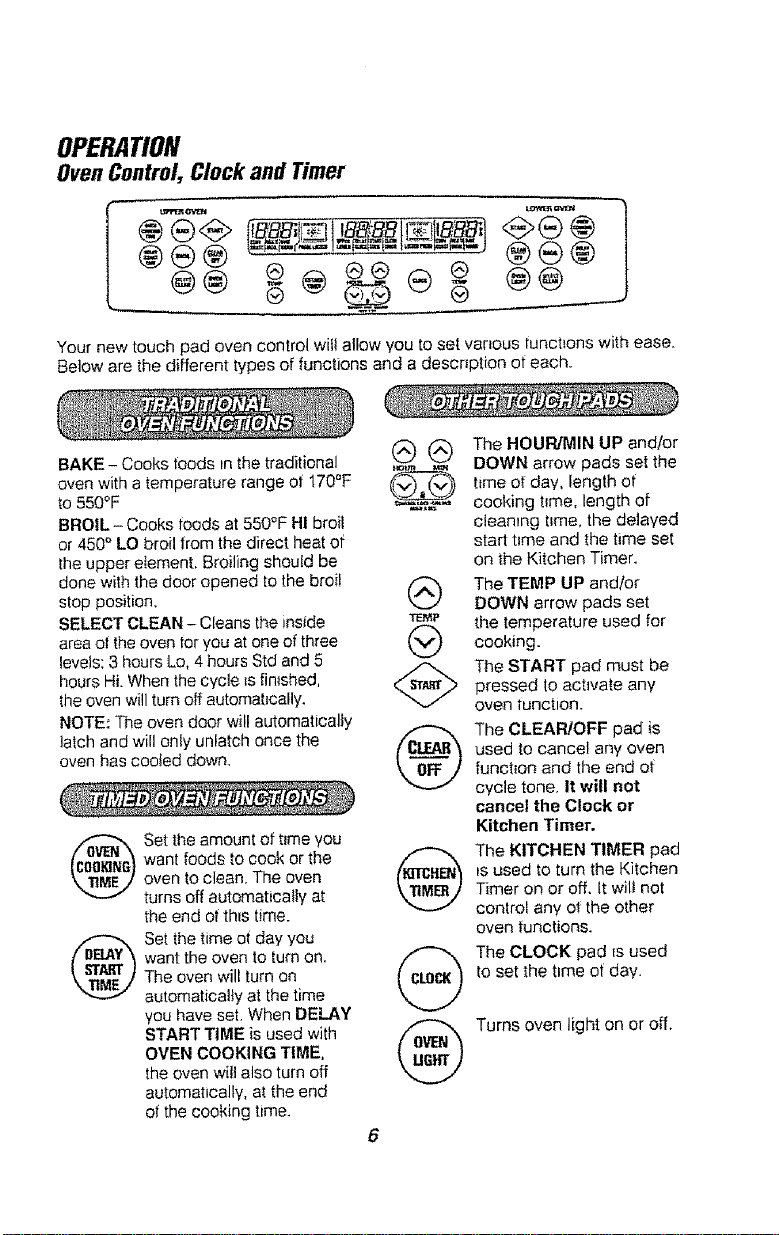
OvenControl, Clock and Timer
@@
Your new touch pad oven control wilt allow you to set various tunct_onswith ease.
Below are the different types of functions and a descrzption of each.
BAKE - Cooks foods In the traditional ',d '--J
oven with a temperature range of 170°F _-'_
to 550'_F _,,,_
BROIL- Cooks roods at 550°F HI broil
or 450 ° LO broil from the direct heat of
the upper element. Broiling should be
done with the door opened to the broil
step position, @
SELECT CLEAN - Cleans the inside T_P
area ol the oven lor you at one of three ('V:)
levels: 3 hours Lo, 4 hours Std and 5
hours Hi. When the cycle _sfin{shed, d'.._,_nr""_
the oven will turn off automatically.
NOTE; The oven door will automatically
latch and will only unlatch once the
oven has cooled down.
@
Set the amount of t{me you
want foods to cook or the
oven to clean, The oven
turns off automatically at
the end of th_s time,
Set the time of day you @
want the oven to turn on.
The oven will turn on
automatically at the time
you have set. When DELAY
START TIME is used with ,,i'n_.,",,
OVEN COOKING TIME,
the oven wil] also turn off
automatically, at the end
of the cooking time.
The HOUR!MIN UP and/or
DOWN arrow pads set the
time of day, length of
cooking time, length of
cleaning t_meothe delayed
start time and the time set
on the Kitchen Timer.
The TEMP UP and/or
DOWN arrow pads set
the temperature used for
cooking.
The START pad must be
pressed to achvate any
oven tuRct/on.
The CLEAR/OFF pad is
used to cancel any oven
function and the end ot
cycle tone. It will not
cancel the Clock or
Kitchen Timer.
The KITCHEN TIMER pad
Jsused to turn the Kitchen
Timer on or off, It will not
control any of the other
oven functions.
The CLOCK pad _s used
to set the tmme of day.
Turns oven light on or off.

OPERATION
ControlDisplay
Upper Oven , Lower Oven
Temperature 'On' . _med Temperature
Indicator maicator Inaicator Indicator
..... i_li_li_slf_ I_I ._Eal_lr'_l_i_l._i=l,i_l_w'_i J
na,ca<or L--__*_,j_ _.,._--,-,'
Oven Function Oven Function Oven Function
indicator Indicator Indicator
The Contro! Display _s an easy
reference for using your oven control
Below are descriptions of how the
Contro! Display works.
OVEN TEMPERATURE INDICATOR -
This indicator has a multiple purpose.
• Displays the temperature
• Displays error code "ERR" -
If the oven temperature tndicator
flashes "ERR", then you have set
an invalid time or temperature.
,, Displays Oven Problems - If your
control flashes "F" and a number
or letter, you have experienced
an even problem. Please read the
section on F-CODES in your manual.
"ON" INDICATOR - Witl light when
the oven turns on.
TIME FUNCTION INDICATORS-
Displays which t_me mndicator has
been set.
SET INDICATOR - The set indicator
witl flash in combination with an oven
function or t_med function to tet you
know you need to set a t_me or
temperature. Example: "SET" and
"BAKE" wilt flash to let you know yeu
need to set the bake temperature.
TIMED INDICATOR - Displays the
t=me of day, cooking time, delay start
t=me, clean=ng t_me or the time set on
the kitchen timer.
• Displays reminder code "PUSH
START" - If the time _ndicator
flashes the words "PUSH START,"
then you need to press the START
pad to activate your setting.
OVEN FUNCTION INDICATORS -
Display which oven function has been
set, when the oven door locks and if
the function is delayed.
OPERATION
Clock, Timer and Control
Lockout
The clock must be set for the correct
time of day before a delayed even
function can work properly. The time o3
day cannot be changed dunng a t_med
oven 1unction, but can be changed
during a bake or broif function.
HOW TO SET THE CLOCK
1. Press the CLOCK pad.
2. Press the HOUR/MIN UP and/or
DOWN arrow pads to set the time.
3. Press the START pad.
RECALL THE CLOCK
While using your oven for cooking,
press the CLOCK pad if you wtsh to
check the t_me of day. The current time
ot day will show in the display.
POWER FAILURE
If you have experienced a power failure,
the time will flash mnthe display and will
be incorrect. Reset your clock.
Any oven cooking function that was _n
process will need to be reset.
The Kitchen Timer _s used to time
cooking processes or other household
activities, it does not control the oven.
it can be set for up to 9 hours and 59
m_nutes, tt will count down tn m_nutes
until the LAST 60 SECONDS is
reached, then the control witl beep
once. When the countdown reaches
ZERO, the control wilt beep 3 times
followed by one beep every 6 seconds
until the KITCHEN TIMER pad is
pressed. The 6 second beep can be
removed for future cycles if desired, For
directions on remowng this continuous
beep, see Tones on the following page,
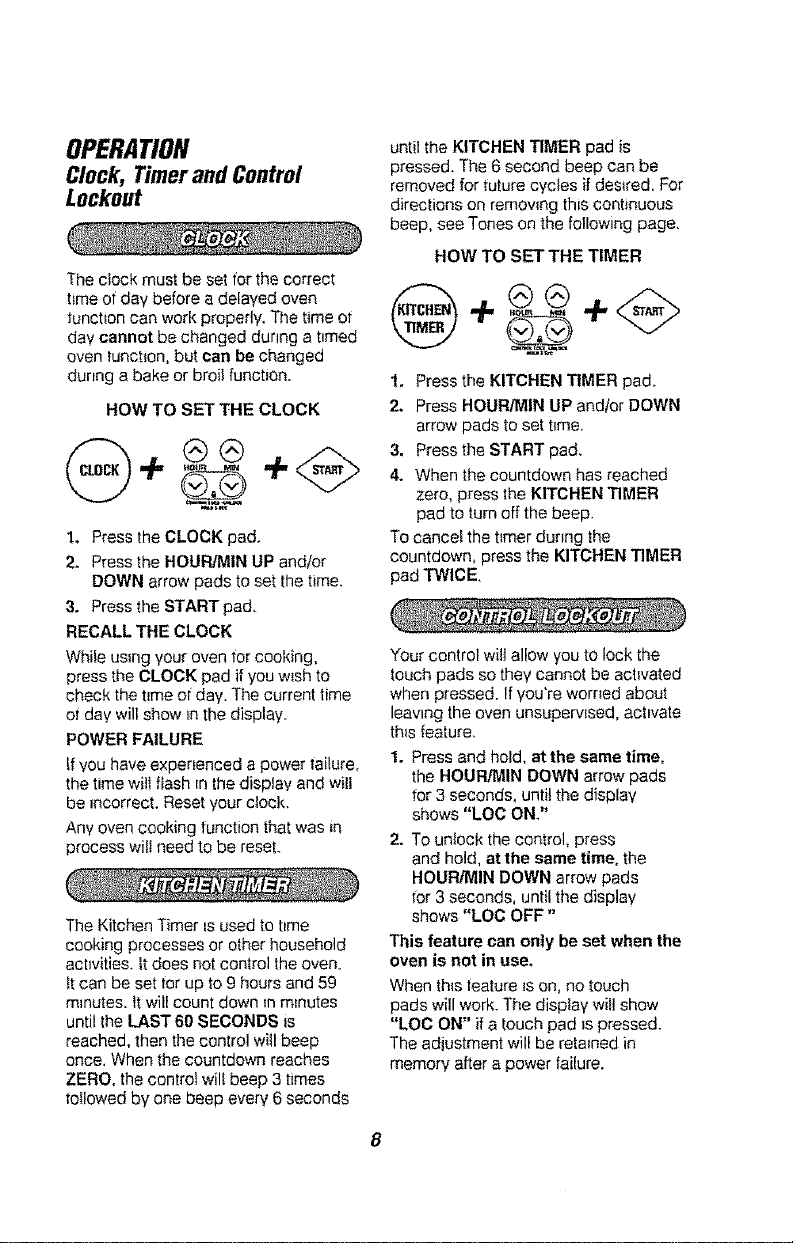
HOW TO SET THE TIMER
t. Press the KITCHEN TIMER pad.
2. Press HOUR/MIN UP and!or DOWN
arrow pads to set t_me.
3. Press the START pad.
4. When the countdown has reached
zero, press the KITCHEN TIMER
pad to turn off the beep.
To caneef the t_mer dunng the
countdown, press the KITCHEN TIMER
pad TWICE.
Your control wilt allow you to lock the
touch pads so they cannot be acWated
when pressed. If you're womed about
leaving the oven unsupervised, activate
th_s feature.
t. Press and hold, at the same time,
the HOUR/MIN DOWN arrow pads
for 3 seconds, until the display
shows "LOG ON"
2. To unlock the control, press
and hold, at the same time, the
HOUR/MIN DOWN arrow pads
tot 3 seconds, until the display
shows "LOC OFF"
This feature can onty be set when the
oven is not in use.
When th_sfeature _son, no touch
pads will work. The disptay will show
"LOG ON" if a touch pad _spressed.
The adiustment will be retained in
memory after a power failure.
OPERATION
OvenControl,Clockand Timer
Your new control has a series of tones
that will sound at different times,
These tones may sound while you set
the control for an oven function, or at
the end of the oven function, It will also
alert you that there may be a problem
with the functions, Be$oware the types
ot tones and a brief description of
each.
TONES WHILE SETTING THE
CONTROL- When you press a touch
pad you wil! hear a beep. This beep
will let you know you have placed
enough pressure on the pad to activate
m (The arrow pads do not beep,)
END OF TIMED CYCLE TONE - At
the end ot a timed cooking function.
you will hear 3 short beeps followed
by 1 beep every 6 seconds. Thfs 6
second beep will contJnue to sound
until the CLEAR/OFF pad Js pressed
or you may select the special feature
to cancel this 6 second beep from
sounding at the end of future cycles,
TO CANCEL THE 6 SECOND BEEP
1. Press and hold the BAKE and
BROIL pads, at the same time for
3 seconds, until the display shows
"SF."
2. Press the KITCHEN TIMER pad.
The display wilt show "CON
DEEP" (continuous beep).
3. Press the KITCHEN TIMER pad
again. The display wilt show
"BEEF" (beep canceled)_
4. Press the START pad to cancel
the 6 second beep and leave the
spec_at teature mode.
Ifyou would like to return the 6 second
beep, repeat steps above until the
disptay shows your choice and press
the START pad.
ATTENTION TONE - Th_stone will
sound if you make an error or an
oversight Jsmade white setting an
oven function,
Examples would be:
a. Setting a clean cycle and the oven
door _snot properly closed.
b. Setting lunction and not pressing
the START pad,
c, Pressrng an additional function pad
without first setting a temperature
or time,
Any of these can be quickly identified
by watch]ng the display.
PREHEAT TONE - When you
select a cooking mode, set an oven
temperature and press the START
pad, the oven starts to heat. When the
temperature _ns_dethe oven reaches
the temperature you have set, a tone
will sound to let you know the oven _s
ready tot baking,
If the control beeps while the display
{sshowing "F" and a number or letter
such as "F4" or "FI" there may be a
problem with the control or oven.
Simply press the CLEAR/OFF pad
and wa_tabout an hour. Try setting the
tunction again, If the code repeats,
write down the ftash_ngcode and call
tot serwce, Tail the technician what
code was flashing.
OPERATION
OvenCookingTips
It _snormal to have some odor when
using your oven tot the first time. To
help eliminate this odor, ventilate the
room by opening a window or
using a vent hood.
IMPORTANT: Never cover the oven
bottom or oven rack with alumlnum
foil. Improper use can cause poor
heat flow, poor baking results and
may damage the oven finish. To
prevent staining trom spitlovers, you
may p_ace a piece ot aluminum foil
or a cookie sheet on the rack below
the food which may spill over.
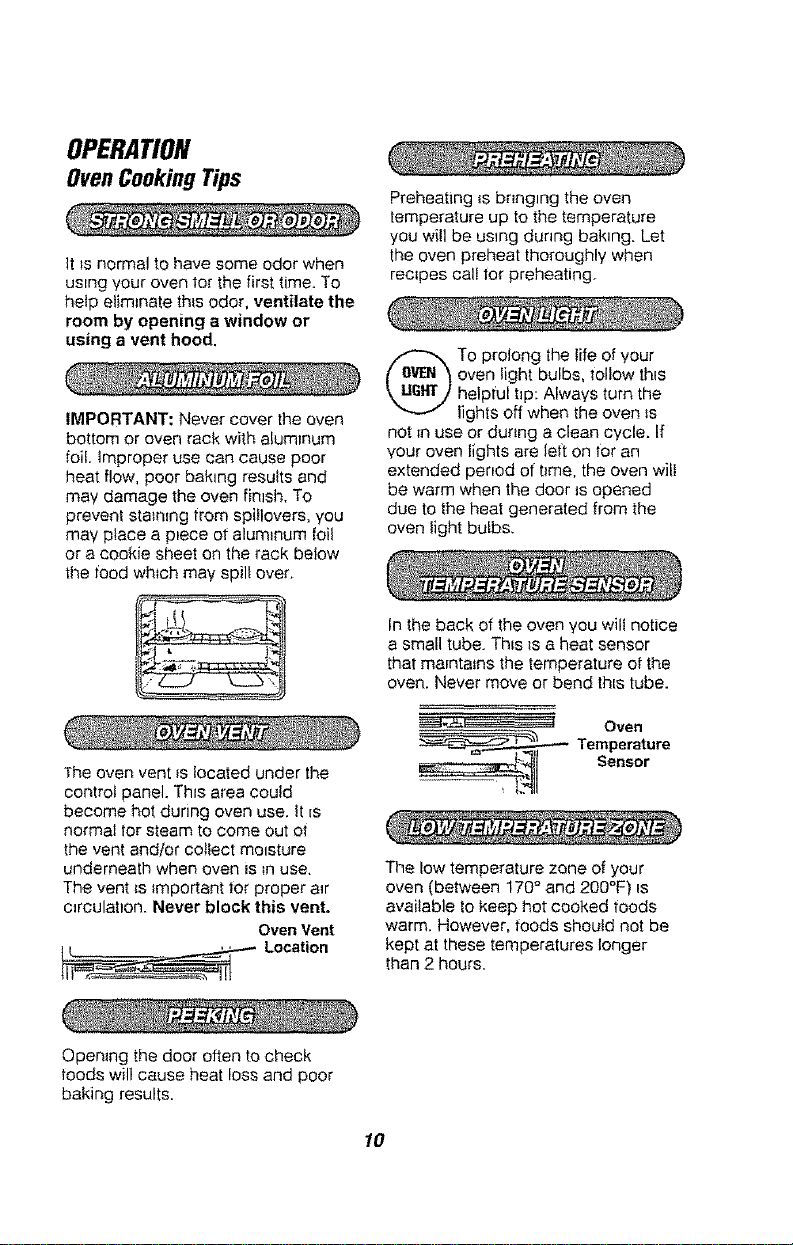
The oven vent _slocated under the
control panel. This area could
become hot during oven use. It =s
normal tot steam to come out ot
the vent and/or collect moisture
underneath when oven is _nuse.
The vent _s _mportant tot proper a_r
c_rculat=on. Never block this vent.
Oven Vent
Location
Preheating _sbr_ng=ng the oven
temperature up to the temperature
you will be using dunng baking. Let
the oven preheat thoroughly when
recipes call for preheating.
To prolong the life of your
oven light bulbs, follow this
helpful hp: Always turn the
lights off when the oven ts
not _nuse or dunng a clean cycle. If
,,four oven lights are left on tot an
extended penod of t_me, the oven will
be warm when the door is opened
due to the heat generated from the
oven light bulbs.
In the back of the oven you will notice
a small tube. Th_s_sa heat sensor
that mafnta_ns the temperature of the
oven. Never move or bend th_stube.
- " Oven
Sensor
Temperature
The low temperature zone of your
oven (between 170° and 200°F) _s
available to keep hot cooked foods
warm. However, foods should not be
kept at these temperatures longer
than 2 hours.
Opening the door often to check
foods will cause heat loss and poor
baking results,
10
OPERATION
OvenCooking Tips
When using your convenient Delay
Start operation, foods such as dairy
products, fish, poultry, etc., should
never sit more than 1 hour before
cooking. Room temperature and the
heat from the oven light promote
bacterial growth.
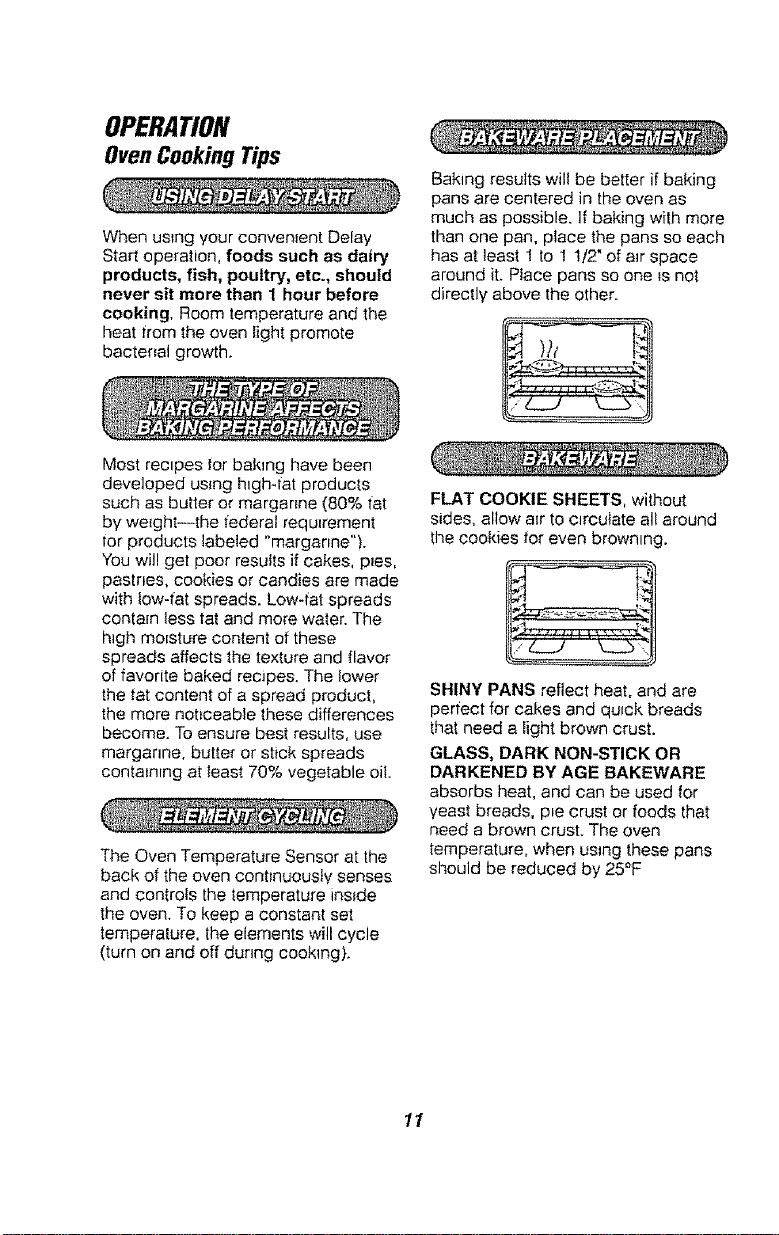
Baking results will be better if baking
pans are centered in the oven as
much as possible, If baking with more
than one pan, place the pans so each
has at least 1 to 1 1/2" of a_rspace
around it. Place pans so one _snot
directly above the other.
Most recipes lot baking have been
developed using high-fat products
such as butter or marganne (80% ;rat
by weight--the federal requirement
for products labeted "margarine").
You will get poor results if cakes, pies,
pastries, cookies or candies are made
with Jew-fat spreads. Low-fat spreads
contain less tat and more water. The
h_gh moisture content of these
spreads affects the texture and flavor
of favorite baked recipes. The lower
the tat content of a spread product,
the more noticeable these differences
become. To ensure best results, use
marganne, butter or stick spreads
contain_ng at least 70% vegetable oil.
The Oven Temperature Sensor at the
back of the oven continuously senses
and controls the temperature inside
the oven. To keep a constant set
temperature, the elements will cycle
(turn on and off during cooking},
FLAT COOKIE SHEETS, without
sides, allow a_r to c_rcutate all around
the cookies tot even browning.
SHINY PANS reflect heat, and are
perfect for cakes and quick breads
that need a light brown crust.
GLASS, DARK NON-STICK OR
DARKENED BY AGE BAKEWARE
absorbs heat, and can be used for
yeast breads, pte crust or foods that
need a brown crust. The oven
temperature, when using these pans
should be reduced by 25'_F
11
OPERATION
OvenCookingTips(cont.)
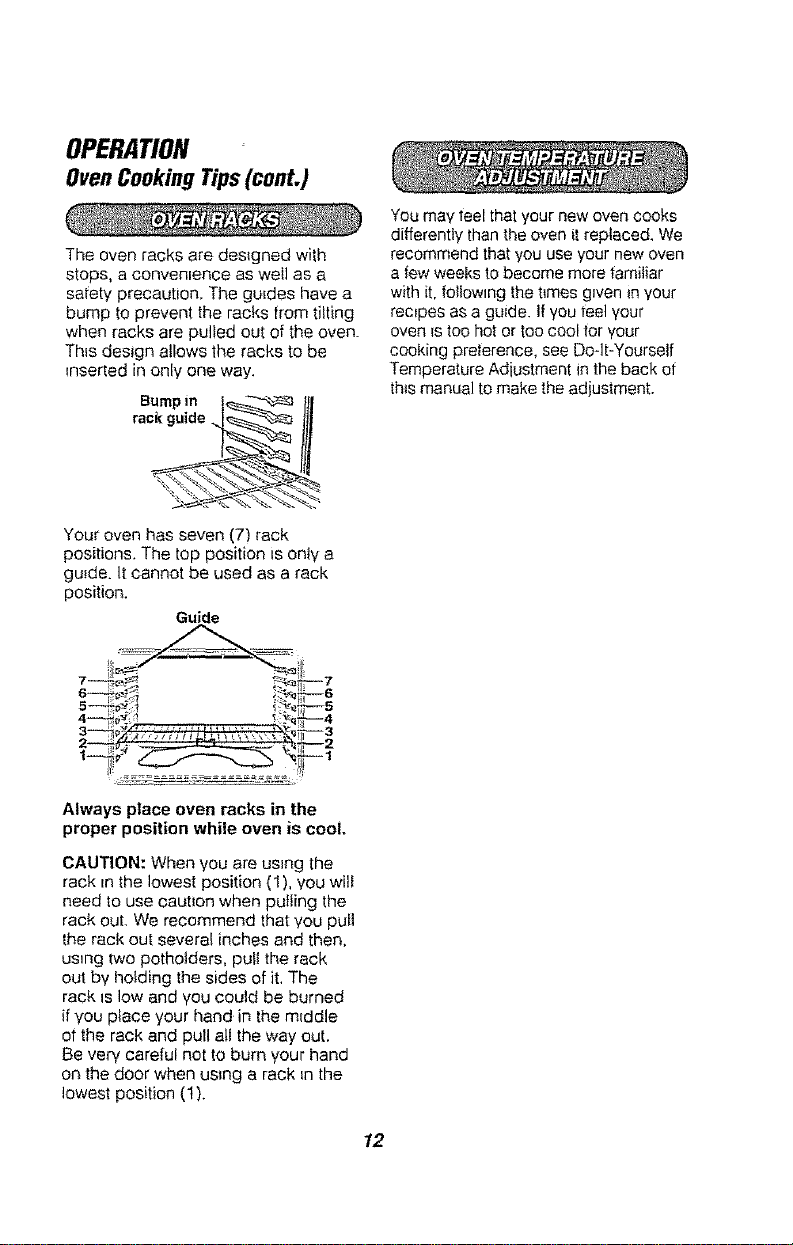
The oven racks are designed with
stops, a convenience as well as a
safety precaution, The guides have a
bump to prevent the racks from tilting
when racks are pulled out of the oven.
Th_sdesign aflows the racks to be
inserted in only one way,
Your oven has seven (7) rack
positions. The top position is only a
guEde.It cannot be used as a rack
position.
Guide
ili l
27 _" '-""_''_ _ 2
Always place oven racks in the
proper position while oven is cool.
CAUTION: When you are using the
rack in the lowest position (1), You wilt
need to use caution when pulling the
rack out. We recommend that you pull
the rack out several inches and then,
using two pothotders, puU the rack
out by holding the sides of it. The
rack is tow and you could be burned
if you place your hand in the m(ddle
ot the rack and pull aU the way out.
Be very careful not to burn your hand
on the door when ustng a rack _nthe
lowest position (1),
You may feel thatyour new oven cooks
differently thanthe oven it replaced, We
recommend that you use your new oven
a fewweeks to become more familiar
with it. foUowlng the t_mesg(ven in your
recipes as a guide, if you feel your
oven (stoo hot or too cool for your
cooking prelerence, see Do*it-Yourself
Temperature Adiustment in the back of
th_smanual to make the adjustment.
12
OPERATION
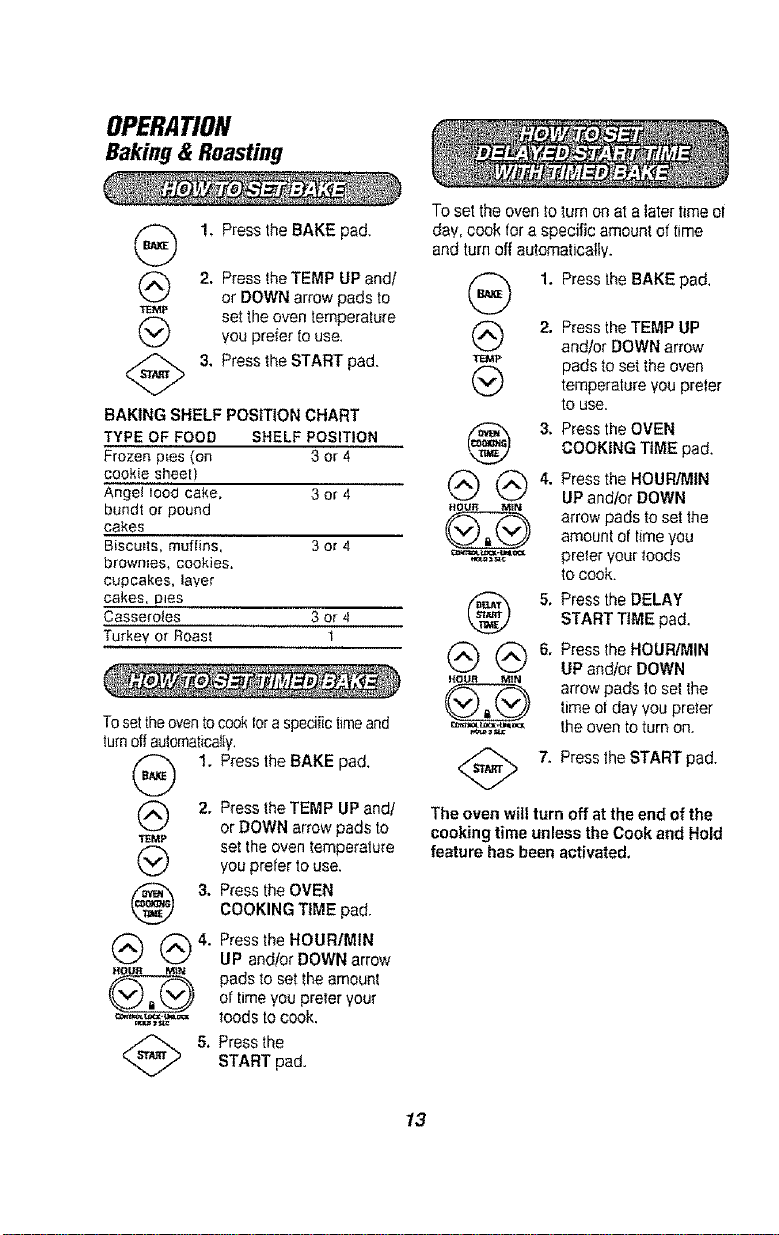
Baking & Roasting
(_ 1. Press the BAKE pad.
(_) 2. Press the TEMP UP and/
or DOWN arrow pads to
set the oven temperature
you prefer to use.
3. Press the START pad.
BAKING SHELF POStTION CHART
TYPE OF FOOD SHELF POSITRON
Frozen p_es (on 3 or 4
cookie shee_'_
Angel Iced cake. 3 or 4
bundt o_"pound
cakes
Biscuits. muffins, 3 or 4
browmes, cookies.
cupcakes, laver
cakes, D_es
Casseroles 3 or 4
Turkey or Roast 1
Tosettheoventocooktoraspecificlimeand
turnoffaulomaticaJIy,
1. Press the BAKE pad.
2. Press the TEMP UP and!
or DOWN arrow pads to
-r_MP set the oven temperature
you prefer to use.
3, Press the OVEN
COOKING TiME pad.
@ @ 4. Pressthe HOUR/MIN
UP and/or DOWN arrow
.ou _ _ pads to set the amount
of time you pre|er your
,,,,,,,,_ roods tOCOOk.
5. Press the
START pad.
To settheoven to turn on atalatertime el
day, cook fora specific amount oftime
andturn off automatically.
(_ 1. Press the BAKEpad.
2. Press the TEMP UP
and/or DOWN arrow
pads to set _heoven
temperature you preler
tO use.
3. Press the OVEN
COOKING TIME pad.
_ 4. Press the HOUR/I_tltN
UP and/or DOWN
arrow pads to set the
amount of time you
_"_,"'"_,,_,,,, preter your roods
to cook.
5. Press the DELAY
START TtME pad.
@ @ 6. Pressthe HOUR/MIN
UP and/or DOWN
arrow pads to set thetime ot day vou prater
=."='._"",_, the oven to turn on.
<_ 7. Press 1heSTART pad.
The oven wilt turn off at the end of the
cooking time unless the Cook and Ho|d
feature has been activated.
13
OPERATION
Baking
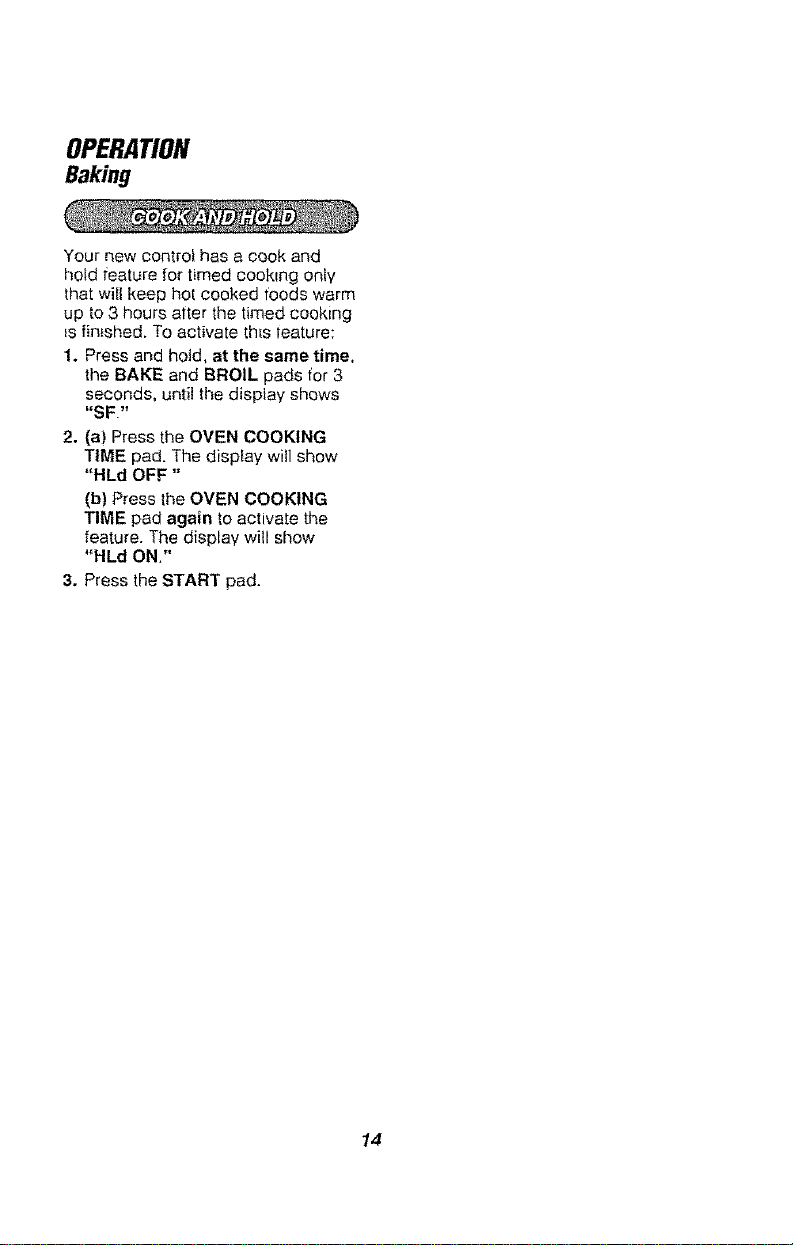
Your new control has a cook and
hotd feature for timed cooking onty
that will keep hot cooked foods warm
up to 3 hours alter the timed cooking
_sfinished. To activate th_s feature:
1. Press and hold, at the same time,
the BAKE and BROIL pads for 3
seconds, until the display shows
"SF"
2. (a) Press the OVEN COOKING
TIME pad. The display will show
"HLd OFF"
(b) Press the OVEN COOKING
TIME pad again to activate the
feature. The display will show
"HLd ON."
3. Press the START pad.
14
OPERATION
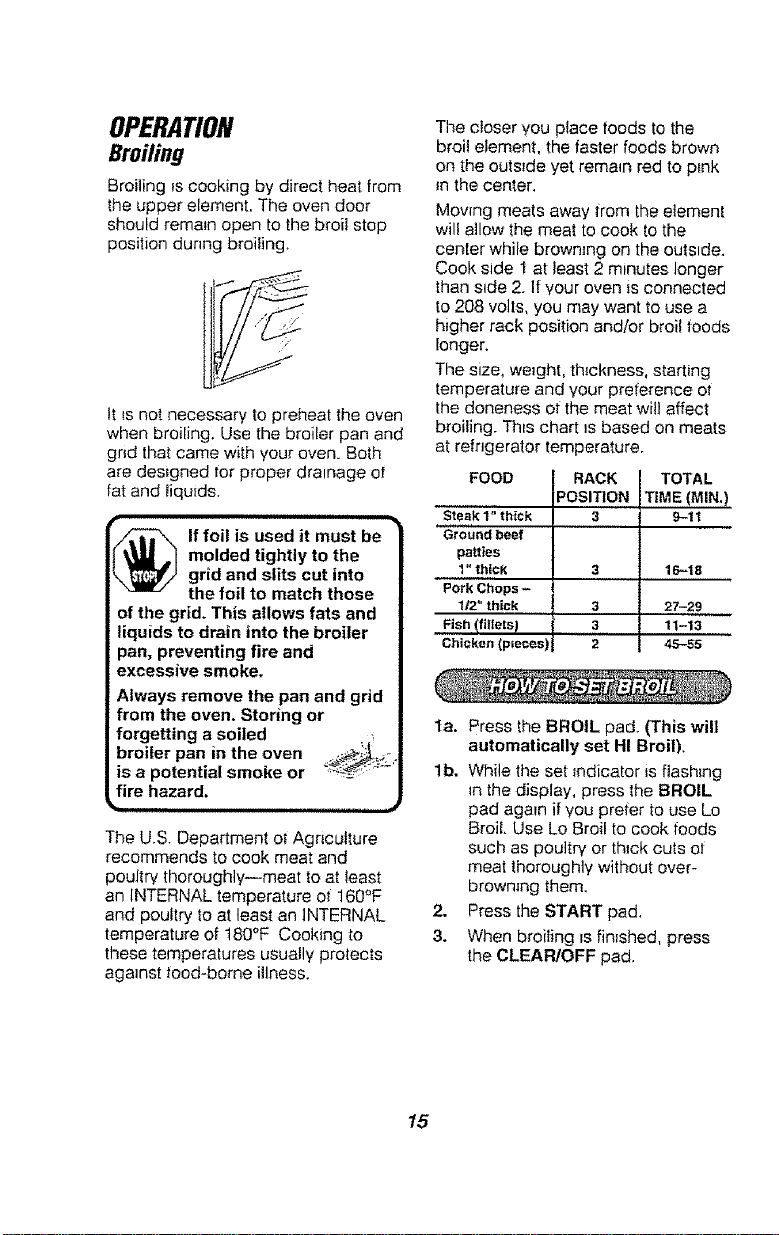
Broiling
Broiling _scooking by direct heat from
the upper element. The oven door
should remain open to the broil stop
position dunng broiling,
It is not necessary to preheat the oven
when broiling. Use the broiler pan and
grid that came with your oven. Both
are designed for proper drainage ot
fat and liquids.
t-
lf foil is used it must be
molded tightly to the
grid and slits cut into
the foil to match those
of the grid. This allows fats and
liquids to drain into the broiler
pan, preventing fire and
excessive smoke,
Always remove the pan and grid
from the oven. Storing or
forgetting a soiled
broiler pan in the oven ,_;_.._
is a potential smoke or
fire hazard,
k._ ................ =j
The U.S. Department ot Agriculture
recommends to cook meat and
poultry thoroughly--meat to at least
an INTERNAL temperature ot 160°F
and poultry to at least an iNTERNAL
temperature of 180°F Cooking to
these temperatures usually protects
against food-borne illness.
The closer you place foods to the
broil element, the faster foods brown
on the outside yet remain red to pink
Enthe center.
Mowng meats away from the element
will ailow the meat to cook to the
center while browning on the outside.
Cook side I at least 2 minutes longer
than s_de 2_If your oven is connected
to208 volls, you may want to use a
higher rack position and/or broit foods
longer.
The size, weight, thickness, starting
temperature and your preference ot
the doneness ot the meat witl affect
broiling. This chart _sbased on meats
at refrigerator temperature.
FOOD
Steak 1" thick
Ground beef
patties
1" thick
Pork Chops -
1/2" thick j
Fis.Ifi.ets_
Chicken (p=eces) I
RACK j TOTAL
POSITION TIME (MIN,)
3 9-11
3 16-18
3 27-29
3 11-13
2 4,5-55
la. Press the BROIL pad. (This will
automatically set HI Broil),
lb. While the set _ndicator is flashing
in the display, press the BROIL
pad again if you prefer to use Lo
Broil Use Lo Broil to cook foods
such as poultry or thick cuts ot
meat thoroughly without over-
browning them,
2. Press the START pad.
3. When broiling =sfin=shed, press
the CLEAR!OFF pad,
15
OPERATION
SettingSpecialFeatures
Your new touch pad control has
additional features that you may choose
to use. After making your setechon, if you
want to change the setting, _,oI!owthe
steps until the display shows your choice.
The control is automatically set to turn off
the oven after I2 hours baking or 3 hours
broiling should you forget and leave the
oven on. If you want to remove this feature:
1, Press and hold, at the same time, the
BAKE and BROIL pads 1or3 seconds,
unlit thedisplay shows "SF,"
2. Press the DELAY START TIME pad.
The display shows "12Shdn" (12 hour
shut-off).
Press the DELAY START TIME
pad again. The display will show
"no Shdn" (no shut-off),
3. Press the START pad.
Yourcontrol is set to use the 12hour
clock. Ifyou prefer to usethe 24 hour
MiRaryTimeclock or black out the
disptay:
1, Press and hold, at the same time,
the BAKE and BROIL pads for
3 seconds, untiithe display
shows "SF7
2, (a) Press the CLOCK pad. The
display shows "12hr." Ifthts ts your
choice, press the START pad.
or
(b) PresstheCLOCK pad agatn.
The display will show"24hr,"
Example:5:00 on the 12 hour clock
will show 17:00hours on the military
clock. [fthins{syour choice, press the
START pad.
or
(c) Press the CLOCK pad again. The
display will show "OFF," Ifth_sisyour
choice, press START. The display
will not show t_me,(The Delay Start
T_mefeature will not operate.)
Yourovencontrol issetfor the Fahrenheit
temperatureselections,Most recipes are
g_venusing the Fahrenheitscale. Youcan
change thisto usethe Celsiusselection.
1, Press andhold, atthe sametime,
the BAKE and BROIL pads tot 3
seconds, until thedisptay shows"SF."
2. (a) Press the BROIL and OVEN
COOKING TIME pads at the same
time, ]he controt display will show
thedegrees s_gnand "F."
(b) Pressthe BROIL and OVEN
COOKINGTIME pads at the same
time again, This wiltchange "F"
(Fahrenheit)to "C" (Celsius),
3, Press the START pad.
16
OPERATION
Setting Special Features
This special feature wilt allow you to
charge the speed; #1 means speed
of change _sslow up to #5 which
means speed ot change _sfast.
To set the speed you prefert folIow
these steps:
1. Press and hold, at the same time,
the BAKE and BROIL pads for 3
seconds, until the display shows
"SF."
2. Press any UP arrow pad. The
display will show the current set
speed.
3. Press any LIP arrow to increase
the speed up to the number 5.
or
Press any DOWN arrow pad to
decrease the speed down to the
number 1.
4. Press the START pad.
• Both ovens cannot self-clean at the
same t_me.
• You can set both ovens for self-clean
at the same tzme, but the second
oven will automatically delay the start
time to beg_n at the end of the first
oven's clean cycle,
• You can set delay start in both
ovens at the same time, but the
second oven will automatically delay
the start time to beg_n at the end of
the first oven's clean cycle.
, You can set one oven to beg_n its
clean cycle now and set delay start
_nthe second oven tor a later time.
17
OPERATION
Setting Special Features
(Designed for use on the Jewish
Sabbath and Holidays.)
The Sabbath feature can be used
for baking/roasting only, It cannot
be used for broiling, self-cleaning
or Delay Start cooking.
NOTE: The oven light comes on
automatically (on some models)
when the door _sopened and goes
off when the door _s closed, The bulb
may be removed. See the Oven Ltght
Replacement section. On models with
an OVEN LIGHT pad, the oven light
may be turned on and left on.
HOW TO SET FOR REGULAR
BAKING/ROASTING
NOTE: To understand how the oven
controf works, practice using regular
baking (non-Sabbath} betore entering
the Sabbath mode,
Make sure the clock shows the
correct time ot day and the oven
_soff.
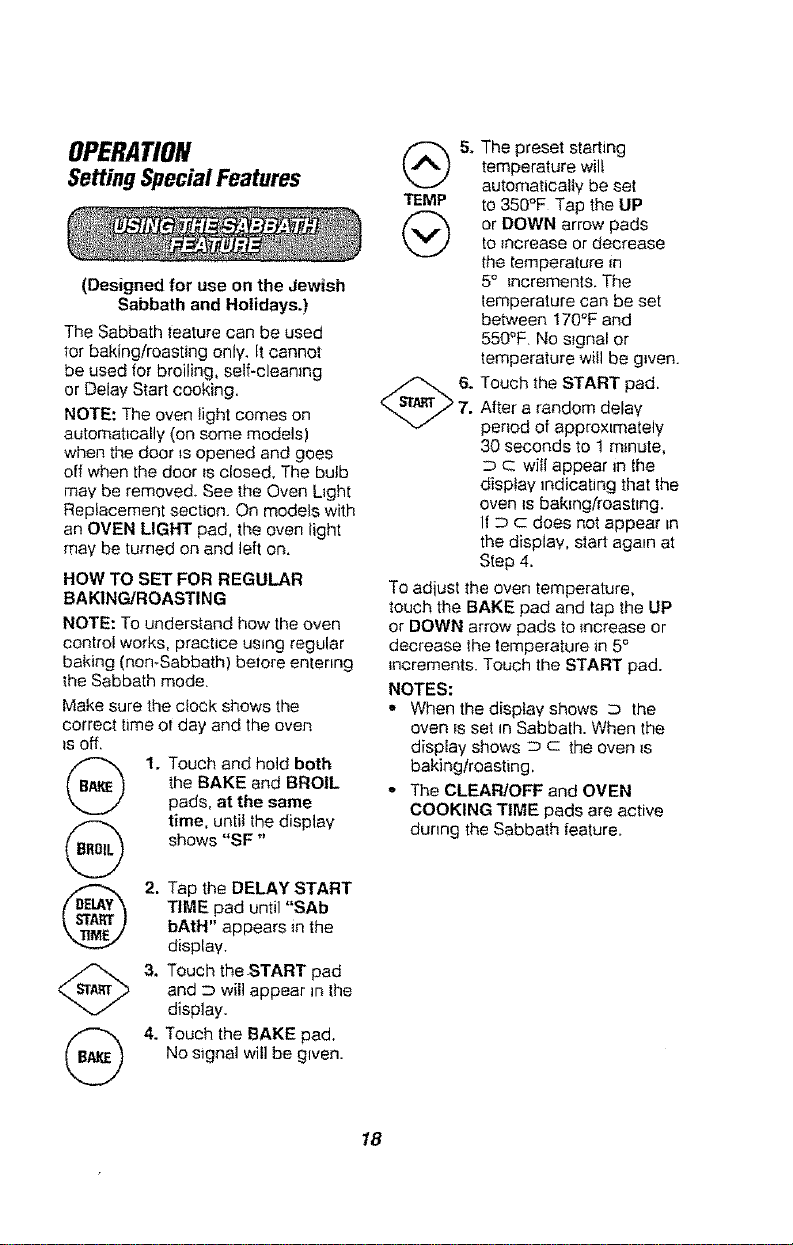
(_ 1. Touch and hold both
the BAKE and BROIL
pads, at the same
time, until the display
(_ shows "SF"
2. Tap the DELAY START
TIME pad until "SAb
bAtH" appears in the
display.
<_ 3. Touch the-START pad
and D will appear _nthe
display.
(_ 4, Touch the BAKE pad.
No signal will be given.
5. he preset starting
temperature wilt
automatically be set
TEMP to 350°F Tap the UP
(_ or DOWN arrow padsto increase or decrease
the temperature in
5° increments. The
temperature can be set
beh, veen 170°F and
550°F. No signal or
temperature will be g_ven,
Touch the START pad.
After a random delay
period of approxLmately
30 seconds to 1 minute,
D c will appear _nthe
display _ndicating that the
oven Is bakmg/roastlng.
1{D c does not appear Jn
the display, start again at
Step 4.
To adiust the oven temperature,
touch the BAKE pad and lap the UP
or DOWN arrow pads to increase or
decrease the temperature in 5°
increments. Touch the START pad.
NOTES:
,,, When the display shows :D the
oven _s set _nSabbath. When the
display shows D c the oven _s
baking/roasting.
o The CLEAR/OFF and OVEN
COOKING TIME pads are active
during the Sabbath |eature.
18
OPERATION
SettingSpecialFeatures
HOW TO SET FOR TIMED BAKING/
ROASTING-IMMEDIATE START
AND AUTOMATIC STOP
NOTE: To understand how the oven
controi works, practice using regular
(non-Sabbath) immediate Start and
Automatic Stop before entenng the
Sabbath mode.
Make sure the clock shows the
correct time of day and the oven
is off.
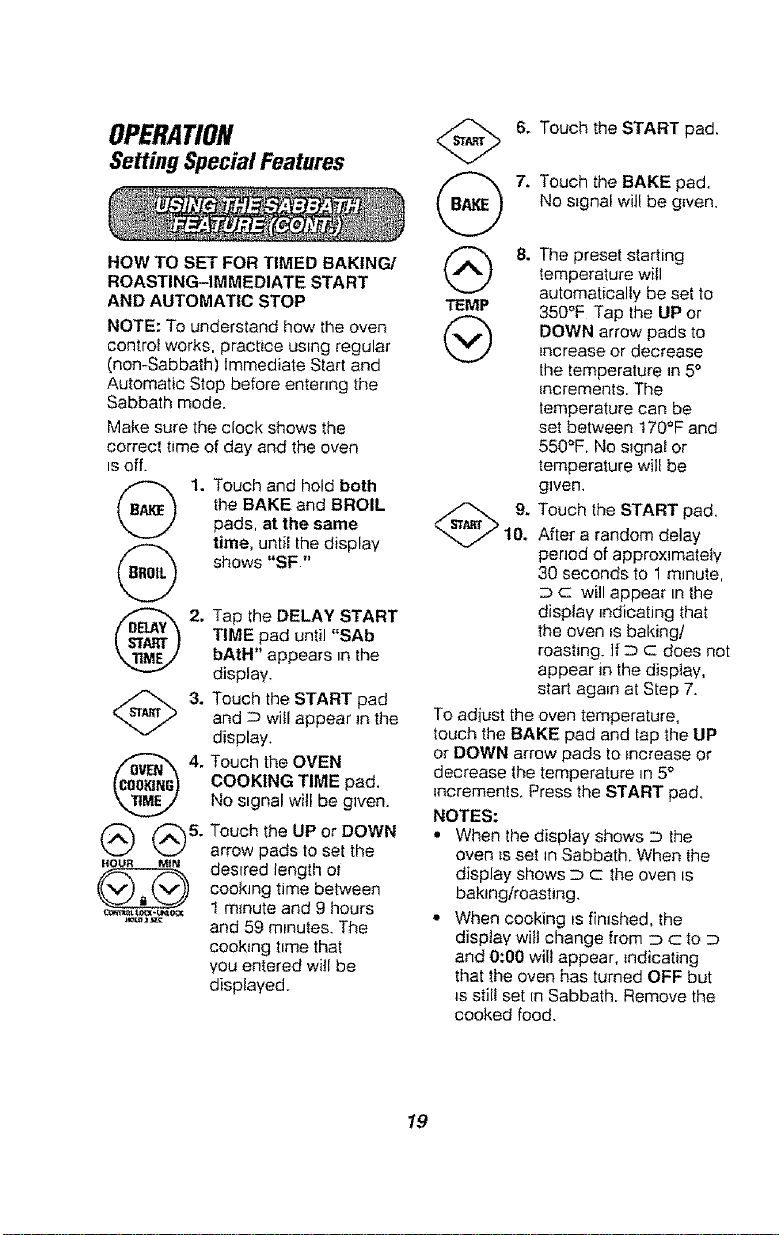
(_ 1. Touch and hold both
the BAKE and BROIL
pads, at the same
time, until the display
_ shows "SF"
2. Tap the DELAY START
TIME pad until "SAb
bAtH" appears _nthe
display.
_) 3. Touch the START pad
and D will appear _nthe
display,
4. Touch the OVEN
COOKING TIME pad.
No s:gnal will be gwen
@ @5. Touch the UP or DOWN
arrow pads to set the
desired length ot
cookJng time between
,_,_%%,._o= 1 minute and 9 hours
and 59 minutes. The
cooking time that
you entered will be
displayed.
TEMP
@
Touch the START pad.
Touch the BAKE pad.
No s_gnal will be g_ven.
The preset starting
temperature will
automatically be set to
350°F Tap the UP or
DOWN arrow pads to
_ncrease or decrease
the temperature _n5°
increments. The
temperature can be
set between 170'_Fand
550°F. No s_gnal or
temperature will be
given.
9. Touch the START pad,
10. After a random delay
penod of approximately
30 seconds to 1m_nute
D c will appear Inthe
display _ndicatJng that
the oven ts baking!
roasting, if _ c does not
appear _nthe display,
start again at Step 7.
To adiust the oven temperature,
touch the BAKE pad and tap the UP
or DOWN arrow pads to increase or
decrease the temperature in 5°
increment& Press the START pad.
NOTES:
• When the display shows D the
oven _sset in Sabbath. When the
display shows D c the oven _s
baking/roasting.
• When cooking is finished, the
display witl change from D c to D
and 0:00 wilt appear, indicating
that the oven has turned OFF but
_sstill set [n Sabbath. Remove the
cooked food.
I9
OPERATION
Setting Special Features
HOW TO EXIT THE SABBATH
FEATURE
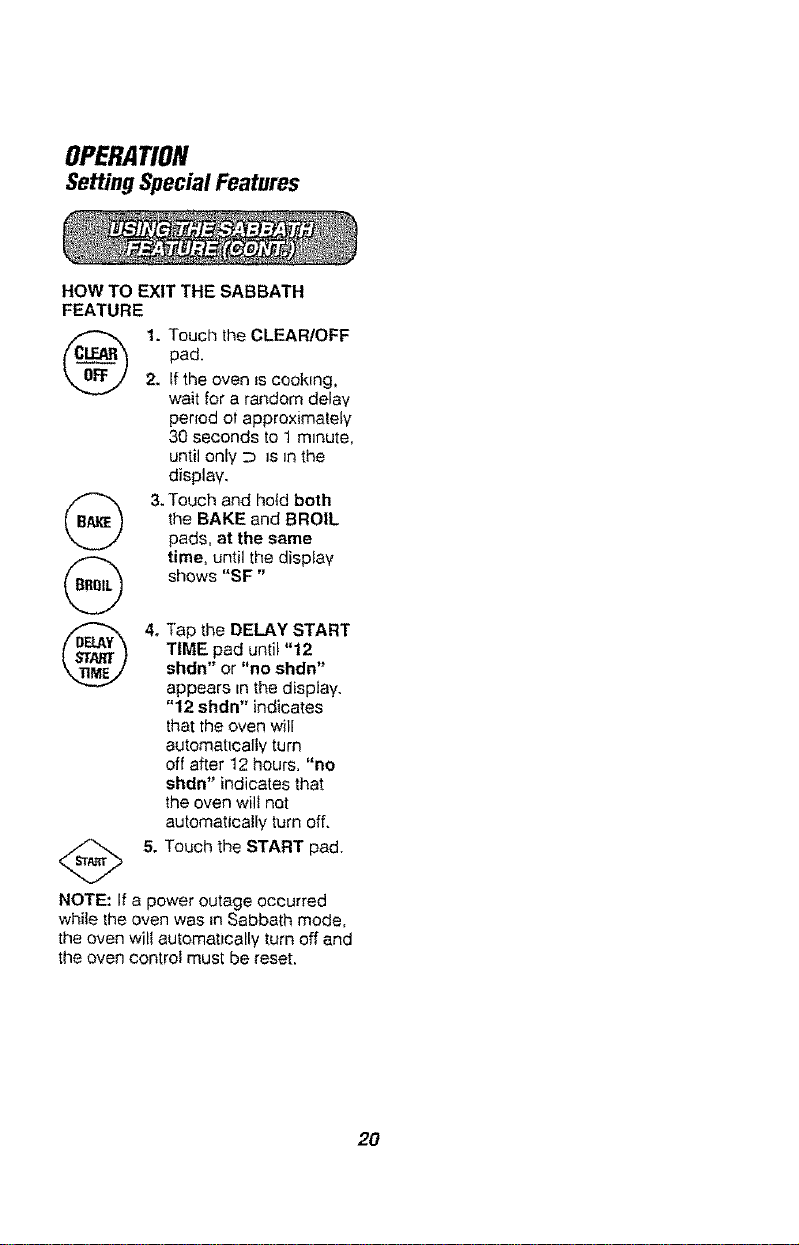
1. Touch the CLEAR/OFF
pad.
2. tf the oven _scooking,
wait for a random delay
period ot approximately
30 seconds to 1 minute,
until only ::3 is in the
display.
(_ 3. Touch and hotd both
the BAKE and BROIL
pads, at the same
time, until the display
(_) shows "SF"
@
4. Tap the DELAY START
TIME pad until "12
shdn" or "no shdn"
appears in the display.
"12 shdn" indicates
that the oven will
automatically turn
off after 12 hours. "no
shdn" indicates that
the oven will not
automatically turn off.
<_ 5. Touch the START pad.
NOTE: If a power outage occurred
while [he oven was _nSabbath mode,
the oven will automatically turn off and
the oven control must be reset.
2O
CAREAND CLEANING
Self-CleaningCycle
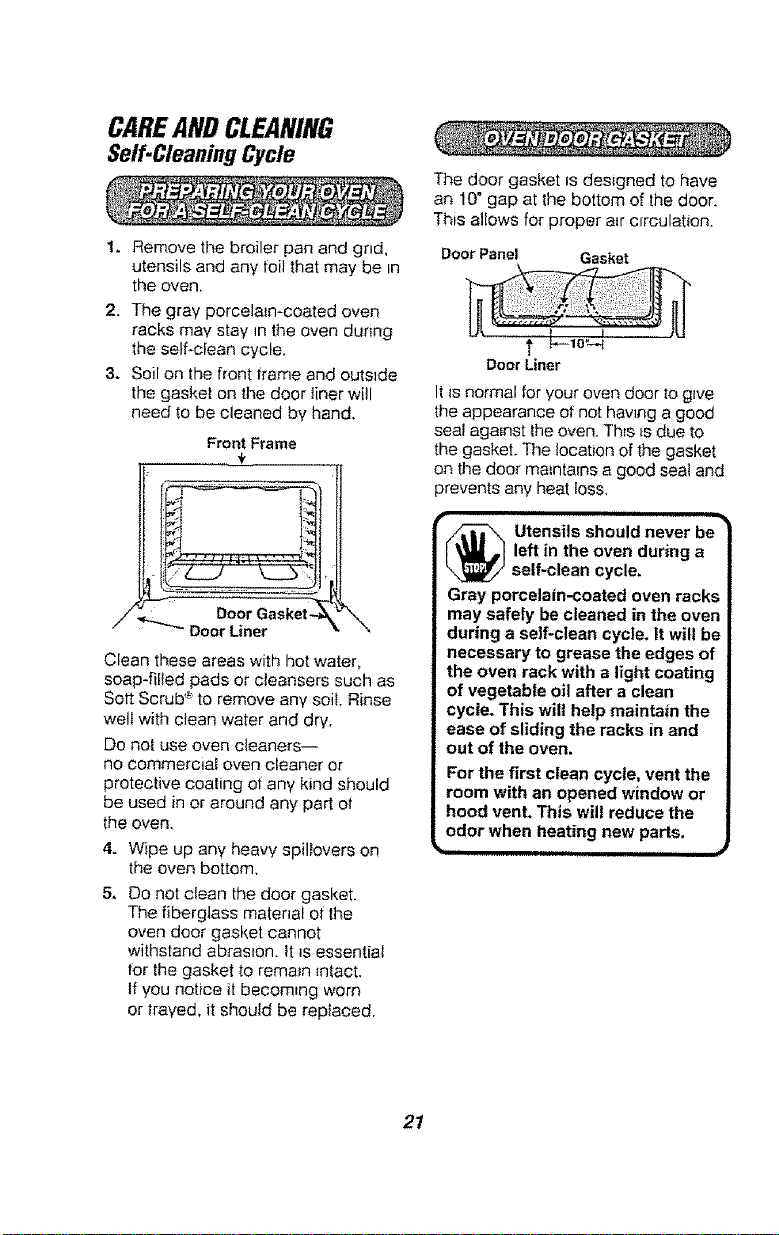
1. Remove the broiler pan and grid,
utensils and any foit that may be in
the oven,
2. The gray porcelain-coated oven
racks may stay _nthe oven during
the self*clean cycle.
3. Soil on the front frame and outside
the gasket on the door liner will
need to be cleaned by hand.
Front Frame
Door Gasket_
Door Liner
Clean these areas with hot water,
soap-filled pads or cleansers such as
Solt Scrub ®to remove any soil Rinse
welt with dean water and dry,
Do not use oven cleaners--
no commercial oven cleaner or
protective coating of any kind should
be used in or around any part ot
the oven,
4. Wipe up any heavy spillovers on
the oven bottom.
5. Do not clean the door gasket.
The fibergJass matenal ot the
oven door gasket cannot
withstand abraston. It _s essential
tot the gasket to remain _ntact,
If you notice it becomtng worn
or trayed, it should be replaced,
The door gasket _sdesigned to have
an 10" gap at the bottom of the door,
This allows for proper a_refrculation.
Door Panel
Door Liner
It is normal for your oven door to gwe
the appearance of not having a good
seal against the oven. Th_s _s due to
the gasket. The location of the gasket
on the door maintains a good sea! and
prevents any heat toss,
Utensils should never be
left in the oven during a
self-clean cycle.
Gray porcelain-coated oven racks
may safely be cleaned in the oven
during a serf-clean cycle. It will be
necessary to grease the edges of
the oven rack with a light coating
of vegetable oil after a clean
cycle. This will help maintain the
ease of sliding the racks in and
out of the oven,
For the first clean cycle, vent the
room with an opened window or
hood vent. This will reduce the
odor when heating new parts.
=,,q,= #
21
CAREANDCLEANING
Self.Cleaning Cycle
The Clean Cycle, _ncluding coot down
time, offers preset options of 3, 4 or 5
hours, but you may change this to any
time between 3 and 5 hours.
I. or 3 hours: Press the
SELECT CLEAN pad. 3
hours and "Lo" will show fn
the display. This setting _s
recommended for small
contained spills. Go to step 3
and press the START pad.
For 4 hours: Press the
SELECT CLEAN pad two
times. 4 hours and "Std"
will show tn the display. This
setting is recommended for a
normally soiled oven. Go to
step 3 and press the START
pad.
For 5 hours: Press the
SELECT CLEAN pad three
times. 5 hours and "Hi" will
show _nthe display. This
setting _srecommended
tot heavily soiled ovens.
Go to step 3 and press the
START pad.
(_) _ 2, If you want to change the
length of clean time, press the
HOUR/MIN UP and/or DOWN
_,_. arrow pads.
<_3, Press the START pad.
The door rocksautomatically. The display
wilt show the clean time remaining. It will
not be possible to open the oven door
until the temperature drops below the lock
temperature and the LOCKED light goes
off. When the LOCKED light is off, open
the door. The word LOCKED will flash and
the oven contro! will s_gnaf if you set the
clean cycle and forget to close the oven
door.
Simply pressthe CLEAR/OFF pad. You
will need towail tot the oventemperature
to drop below thelock temperature
(approx. 1 hour)before attemptingto
openthe door.
After the cycle, you may notice some
white ash _nthe oven. Just wipe _tup with
a damp cloth or sponge.
If white spots remain, scrub them with a
soap-filled steel wool pad. Be sure to
nnse thoroughly. These are usually
deposits el salt that cannot be removed
dunng the cycle.
If your oven _sequipped with porcetam
oven racks, it wiJl be necessary to grease
lhe edges with a light coating or
vegetable of! alter the clean cycle. This
will help maintain the ease ot sliding the
racks _nand out ot the oven.
If for any reason you are net satisfied
with the cleaning results, just repeat
the cycle.
QG 2.
@@4.
22
PresstheSELECT
CLEANpad and choose
theclean leveloteither Lo
(3 hours),Std (4 hours)or Hi
(5 hours).Ifone ofthese=s
your choice, go tostep 3
andset the delay startt=me.
Ifyouwant to change the
lengthof clean t_me,press
the HOUR/MINUP and/or
DOWNarrow pads.
Pressthe DELAYSTART
TIME pad,
Press the HOUR/MIN UP
and/or DOWN arrow pads to
set the time you prater the
clean cycle to start.
Press the START pad.
CAREANDCLEANING
CLEANING MATERIALS
• DishwashJng detergent
• Warm water
• Soft cloth
Do not use abrasive cleaners,
industrial cleaners or bleach.
Clean only as touch-up between clean
cycles. Use dishwash_ng liquid, warm
water or a soap-filled pad. Rinse well
after cleaning and dry.
NEVER USE OVEN CLEANERS IN OR
AROUND ANY PART OF THE OVEN.
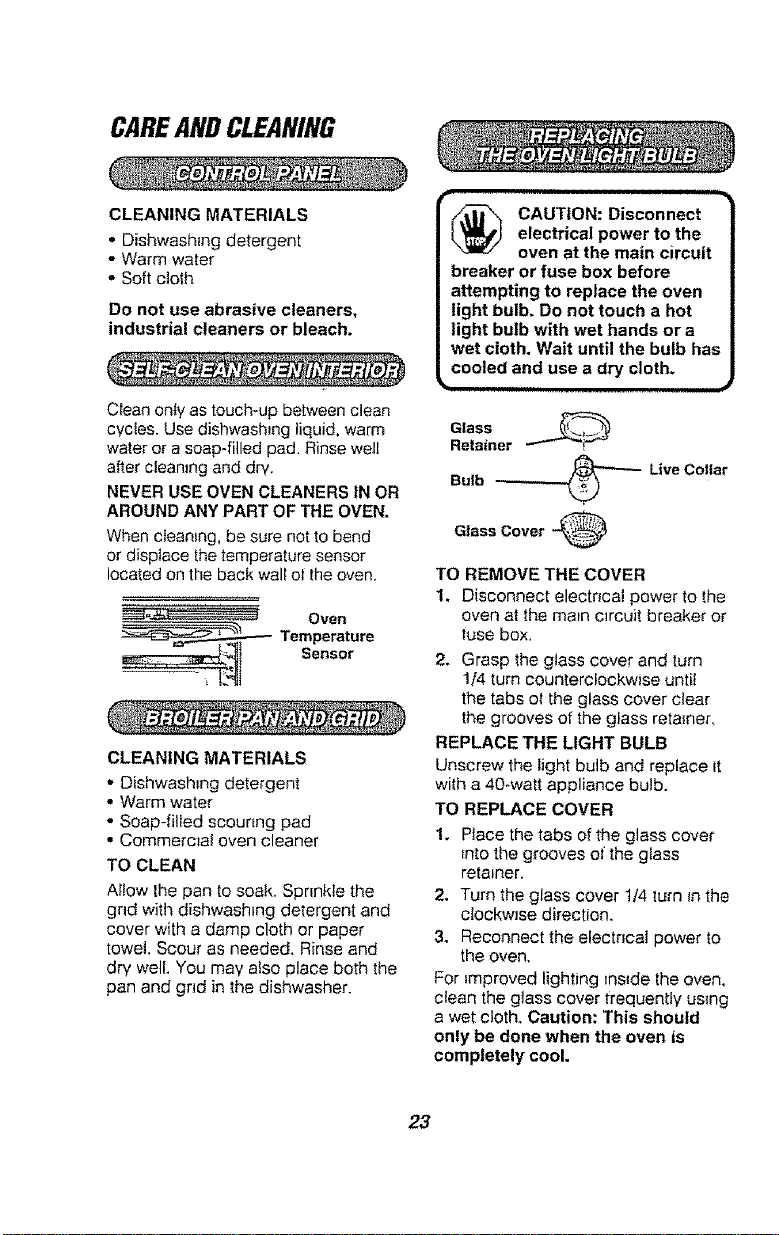
When cteantng, be sure not to bend
or displace the temperature sensor
located on the back wall ot the oven.
_=-_---'----"-_ Oven
__ Temperature
__._ sensor
CLEANING MATERIALS
* Dishwash_ng detergent
* Warm water
- Soap-filled scounng pad
o Commercial oven cleaner
TO CLEAN
AItow the pan to soak. Spnnkte the
grid with dishwashtng detergent and
cover with a damp cloth or paper
towel. Scour as needed, Rinse and
dry well. You may also place both the
pan and gnd in the dishwasher.
CAUTION: Disconnect
electrical power to the
oven at the main circuit
breaker or fuse box before
attempting to replace the oven
light bulb. Do not touch a hot
light bulb with wet hands or a
wet cloth. Wait until the bulb has
cooled and use a dry cloth.
Glass
Retainer
Bulb _ Live Cellar
Glass Cover
TO REMOVE THE COVER
1, Disconnect electncal power to the
oven at the ma=nc_rcuit breaker or
ruse box.
2. Grasp the glass cover and turn
1/4 turn counterclockwise until
the tabs ol the glass cover clear
the grooves of the glass retainer.
REPLACE THE UGHT BULB
Unscrew the light bulb and replace it
with a 40_watt appliance bulb.
TO REPLACE COVER
1. Ptace the tabs of the glass cover
_ntothe grooves ol the glass
retainer.
2. Turn the glass cover t/4 turn in the
clockwise direction.
3. Reconnect the electrical power to
the oven,
For improved lighting ins_dethe oven,
clean the glass cover frequently using
a wet cloth. Caution: This should
only be done when the oven is
completely cool.
23

CAREANDCLEANING
CLEANING MATERIALS
o Dishwash_ng detergent
,, Warm water
o Scounng pad or soap*filled pad
Bump in
Rack Gulde._ _
Raised Back\
of the Rack
_._ , '%. _ _-._..
TO REMOVE
1. Pull the racks out to the stop lock
position.
2. Pull up the front of the rack and
slide under the bump of the rack
guide.
TO CLEAN
Clean with warm water and detergent.
For hard to remove staLns, gently
scrub with a scouring pad or a soap-
filfed pad. Rinse wee
Gray porcelain-coated oven racks
may also be cleaned in the oven
dunng the self-clean cycle. It +s
necessary to w_pe the edges of gray
porcelain-coated oven racks with a
light coating of vegetable oil after
cleaning. Th+s witl help maintain the
ease ot sliding the racks _nand out
of the oven.
TO REPLACE
1. Place the ramsedback of the rack
onto the rack guides+
2. Uft the trent of the rack until the
ra+sedback slides under the
bump of the rack g,J+des.
3. Stide the rack all the way back.
24

CAREANDCLEANING
The door is very heavy.Be carefulwhen
removing and liftingthe door. Donot lift
the door bythe handle,
TO REMOVE
1. Futlyopenthedoor_
2. Pullthe hinge locks
down toward the door
lrame, to the unlocked
position.Th_smay
require a flat-blade
screwdriver.
Hinge Lock
Pul! hinge locks
down to unlock
3, Rrmlygrasp both
sidesof the door at
thelop.
4. Close door to the
door removal
position, which_s
halfway between
the broi_stop and
tuftyclosed.
5. Li_tdoor up
ili i_,,:_ J
RemovalPosition
and out untilthehinge
arm _sclear ot the slot,
TO REPLACE
1. Firmlygrasp both
sides el the door
at thetop.
2. With the door at
the sameangle
as the removal
position,seat the
_ndentat_onel the
hinge arm _nto
the bo_om edge el
Indentation
the hJngeslot.The notch
in the hnge armmust be
tully seated intothe
botlem ot theslot.
Removable Oven Door (cont.)
3. Fufiyopen the
door. If thedoor
willnot tully open,
theindentation _s
not seated
correctly in the
bottom edge of
theslot.
4. Push theh_nge
tocks up against
the fronttrameot
theoven cavity,to
the locked
posilion,
5, C]osethe oven
door.
Hin!• Arm
Hinge Lock
Pushhingelocks
upto lock
TO CLEAN OUTSIDEOF DOOR
• Use soap andwaterto lhoroughlyclean
the top, sides and frontof the oven door.
Rinsewell. Youmay atsouse aglass
cleaner toclean the glasson the oulside
of the door. Do not let waterdnp _ntothe
vent openings.
• Spillageof marinades,truit
tu_ces,tomatosauces and basting
materialscontaining acids may cause
discoloration andshould be wiped up
immediately.When surfaceIs cool,
clean and rinse,
• Do not use oven cleaners, cleanJng
powders or harshabrasives on the
outside of thedoor.
• tf anystain on the door vent trim
_sperststent, use asortabrasive cleaner
and a sponge scrubber ior best results.
TO CLEAN INSIDEOF DOOR
• Because thearea _nsidethegasket _s
cleaned dunng the self-clean cycle, you
do not need to clean this by hand.
• Thearea outside the gaskel and
the door liner can be cleaned with
asoap4illed pad, holwaterand
detergent. Rinsewe_lwith awnegar
andwater solution,
25
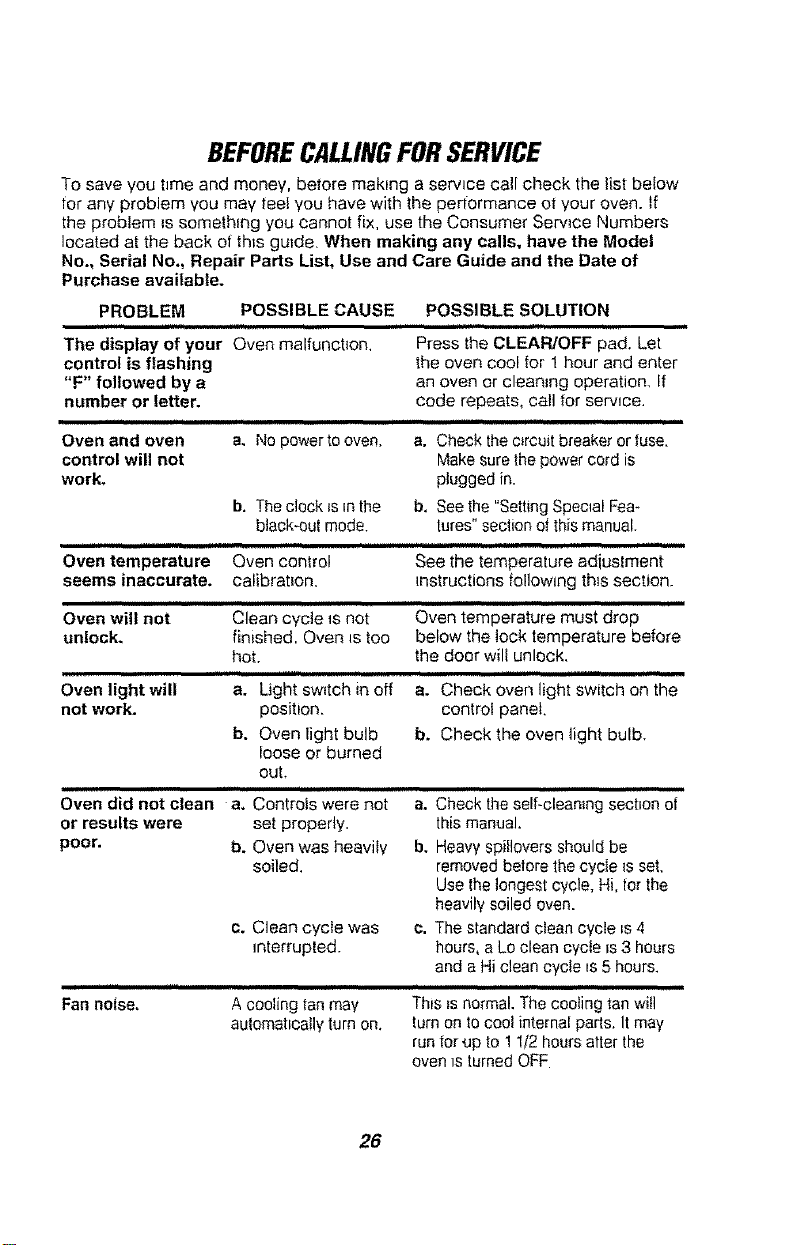
BEFORECALLINGFORSERVICE
To save you t_meand money, before making a service call check the list below
tot any problem you may lee! you have with the performance ot your oven. If
the problem _ssomething you cannot fix, use the Consumer Serwce Numbers
located at the back of thts guide. When making any calls, have the Model
No., Serial No., Repair Parts List, Use and Care Guide and the Date of
Purchase available.
PROBLEM
i iliUm ii1,,i,,
The display of your Oven malfunction.
control is flashing
"F" followed by a
number or letter.
ii ii iii
Oven and oven
control will not
work.
Oven temperature
seems inaccurate.
Oven';ill not ......
unlock.
Oven light will
not work.
POSSIBLE CAUSE POSSIBLE SOLUTION
iii
a. No powerto oven.
b. Theclock _sin the
btack*ou{mode.
Oven control
calibration,
iiii
Clean cyctets not
finished, Oven is too
hot.
a. Light sw_tchin off
position.
b. Oven light bulb
loose or burned
out,
i. ii i iiiiill
Oven did not clean a. Controls were not
or results were set properly,
poor. b. Oven was heavily
soiled.
i iiiii
Fan noise,
ii ii .i.,.... i.q,,
Press the CLEAR/OFF pad. Let
the oven cool lor l hour and enter
an oven or cleaning operation. If
code repeats, call for service.
i i i1,,, ,,,,,,,,,,,,,, i iiiiiHi
a. Check the c_rcuitbreaker or fuse.
Makesurethe power cord is
plugged in,
b, Seethe "SettingSpecial Fea-
tures" section ofthis manual.
i ii iiiii
See the temperature adiusiment
tnstructions following th_ssection.
iim,,, ,,,,,,,,,,,,,,,,. ,11,. t
Oven temperature must drop
below the tock temperature before
the door will unlock,
a. Check oven light switch on the
control panel.
b. Check the oven light bulb.
i ii,IIH,.,..I
a. Check the self-cleaning sectton of
thismanual.
b. HeavyspiIIovers should be
removed before the cycte _sset.
Use the longest cycle. Hi, tot the
heavilysoiled oven.
c. Clean cycle was e. The standard clean cyctets 4
_nterrupted. hours, a Lo clean cycle ws3 hours
and a Hiclean cycle _s5 hours.
i i iii ,,,,,,,,,,,,,,,,,,,,,,,,,,.i
A cooling tan may This _snormal.The cooling tan will
automatically turn on. turn on to cool internal parts. It may
runfor.up to 11/2 hoursafter the
oven_sturned OFF
26
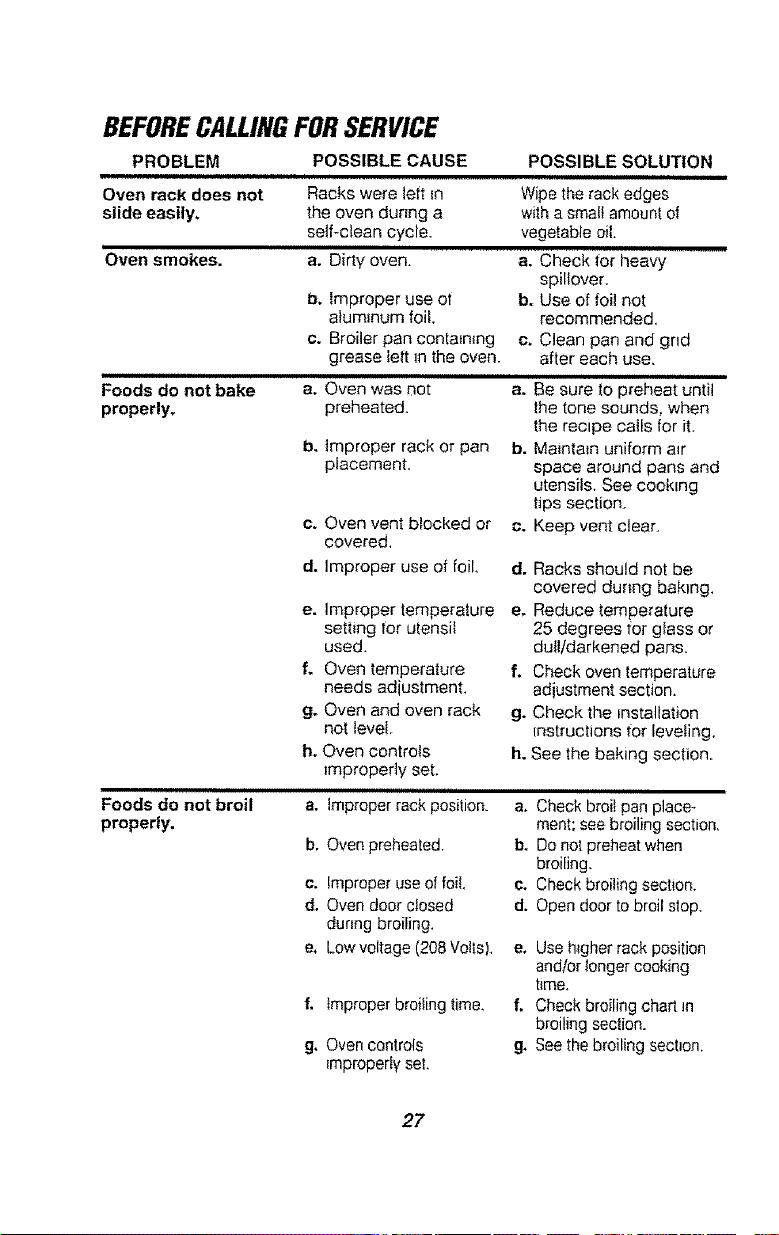
BEFORECALLINGFORSERVICE
PROBLEM
Oven rack does not Racks were left _n
elide easily, the oven during a
self-clean cycle.
i
Oven smokes, a. Dirty oven,
b. improper use of
aluminum foil.
c. Broiler pan containing
grease lett in the oven.
Foods do not bake a.
properly.
POSSIBLE CAUSE POSSIBLE SOLUTION
.H
Wipe the rack edges
with a small amount of
vegetable oil,
a. Check tot heavy
spiltover.
b. Use of foil not
recommended,
e. Clean pan and gnd
after each use,
Illlllllllll,ll,l,,lllllll I I I I I
Oven was not a. Be sure to preheat until
preheated, the tone sounds, when
f=
g.
h.
,, i
Foods do not broil
properly.
b. improper rack or pan
placement,
c. Oven vent blocked or
covered,
d. Improper use of foil,
e.
a.
b, Oven preheated.
c. Improper use of foi!,
d. Oven door closed
dunng broiling.
e, Lowvoltage (208 Volts),
Improper temperature e.
setting for utensil
used.
Oven temperature f,
needs adiustment,
Oven and oven rack
not level.
Oven controls
improperly set.
improper rack position.
f. improper broiling time,
g, Oven controls
_mpropertyset.
the recipe calls for it.
b. Maintain uniform air
space around pans and
utensils. See cooking
tips section.
c. Keep vent clear.
d. Racks should not be
covered dunng baking,
Reduce temperature
25 degrees for glass or
dull/darkened pans.
Check oven temperature
adjustment section.
g. Check the installation
instructions for leveling.
h. See the baking section,
i,H ,i ii
a. Check broil pan place-
ment; see broiling section,
b. De not preheat when
broiling,
o. Check broiling section.
d. Open door to broil stop.
e. Use h_gherrack position
and/or longer cooking
time.
f, Check broiling chart In
broiling section.
g. See the broiling section.
27
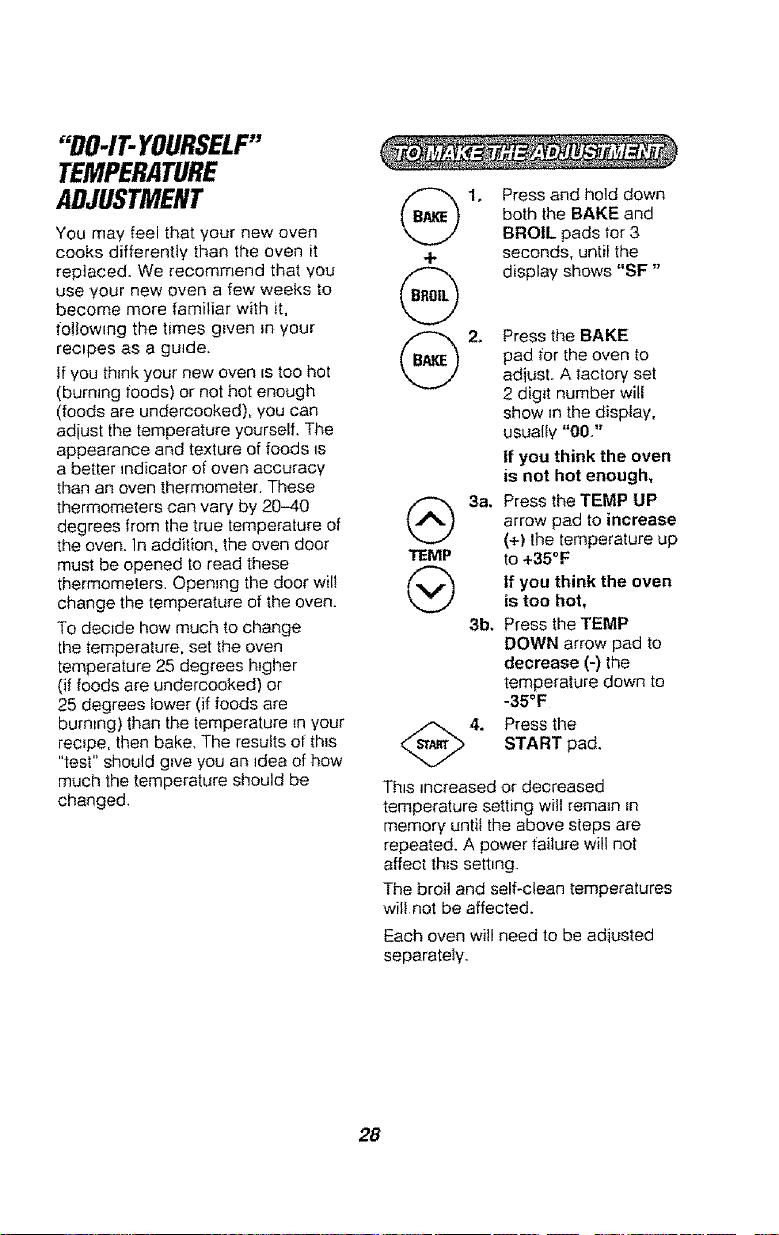
"DO-IT-YOURSELF"
TEMPERATURE
ADJUSTMENT
You may feel that your new oven
cooks differentiy than the oven it
replaced. We recommend that you
use your new oven a few weeks to
become more familiar with it.
foi!ow_ng the times given _nyour
recipes as a guide.
tf you th_nk your new oven is too hot
(burning foods) or not hot enough
(foods are undercooked), you can
adjust the temperature yourself. The
appearance and texture of foods _s
a better _ndicator of oven accuracy
than an oven thermometer. These
thermometers can vary by 20-40
degrees from the true temperature of
the oven, In addition, the oven door
must be opened to read these
thermometers, OpenJng the door wilt
change the temperature of the oven.
To decide how much to change
the temperature, set the oven
temperature 25 degrees higher
(if foods are undercooked) or
25 degrees tower (if foods are
burning) than the temperature in your
recipe, then bake. The results of th_s
"test" should give you an Idea of how
much the temperature should be
changed.
+
_) 3e,
TEMP
@
3b.
1, Press and hold down
both the BAKE and
BROIL pads for 3
seconds, until the
display shows "SF"
Press the BAKE
pad for the oven to
adjust. A factory set
2 digit number will
show in the disptay,
usually "007'
If you think the oven
is not hot enough,
Press the TEMP UP
arrow pad to increase
(+) the temperature up
to +35°F
If you think the oven
is too hot,
Press the TEMP
DOWN arrow pad to
decrease (=)the
temperature down to
-35°F
Press the
START pad.
This increased or decreased
temperature setting will remain _n
memory until the above steps are
repeated. A power failure will not
affect th_s setting
The broil and self-clean temperatures
will not be affected.
Each oven will need to be adiusted
separately.
28

NOTES
29

NOTES
30

BUILT-IN
WALLOVENWARRANTY
f
FULL ONE YEAR WARRANTY ON ALL PARTS
If, within one year from the date of installation, any part fails to function
properly due to a defect _nmaterial or workmanship, Sears will repair or
replace it, at our optTon,free of charge.
]f th_sproduct is subleeted to other than prfvate family use, the above
warranty _seffechve for only 90 days.
WARRANTY SERVICE IS AVAILABLE BY CALLING SEARS SERVICE AT
1-800-4-MY-HOME_o
Th_swarranty g_ves you specific legal rights, and you may atso have other
rights which vaq/from state to state.
Sears Roebuck and Co. Dept. 817 WA Hoffman Estates, IL 60179
Master Protection Agreements
Congratulationson making a smart
purchase. YournewKenmore"_appliance
rsdesigned andmanufactured foryears or
dependable operation.But like all
products, _tmay require preventive
maintenanceor repair from time totEme.
That'swhen havinga MasterProtection
Agreementcan save you moneyand
aggravation.
PurchaseaMasterProtectton
Agreement now and protect yourseff from
unexpected hassteand expense.
The MasterProtectionAgreement
also helps extend the life of yournew
appliance. Here'swhat's_ncluded
mthe Agreement:
v"Expert service byour 12,000
proiess_onalrepair specialists
v' Unlimitedservice and no charge for
pads and Iabor on all coveredrepairs
"No-lemon" guarantee - replacement
ol yourcovered product if morethan
three product tailures occur within
twelvemonths
r,/Product replacement if yourcovered
product can't be fixed
v"Annual Preventive Maintenance
Check at yourrequest- no extra
charge
v' Fast help by phone- non-Iechmcal
and instructionalasmstanceon
products repairedin your home, plus
convenient repairscheduling
v"Power surge protection against
electncai damage due to power
fluctuations
v' Rental reimbursementif repair ot your
covered producttakeslonger than
prommed
Once you purchase the Agreement,a
s_mplephone catl is allthat it takes tot you
to schedule service.You can call anytime
day or n_ght,orschedule a sew_ce
appointment on-line.
Searshas over t2,000 profesmonalrepair
specialists, who haveaccess toover 4.5
mitlionquality pads and accessooes.
That'sthe kind of protess_onalismyou can
counton to help prolong the lifeof your
newpurchase for years tocome.
Purchaseyour Master Protection
Agreement today!
Some limitations and exclusions apply.
For pricesand additional information,
call 1-800-827-6655.
Sears Installation Service
ForSearsguaranteed protesstonat
_nstatlatlonof homeappliances and items
like garage door openers andwater
heaters,call 1-800-4-MY-HOME®
31

HORNODOBLEDE30"CON
AUTOLIMPIEZA
Indice
Seguridad en et
uso del homo ........................... 33, 34
Cafacter{sticas de su homo .......... 35
C6mo sacar la c_nta
de empaque ................................. 35
Control del homo, retol,
cronometro .................................... 36
Panel de contrd ............................ 37
Relo! .............................................. 38
Cron0metrO de la cocina .............. 38
Control de merre ........................... 38
Tonos ............................................ 39
Codigo F ....................................... 39
Conselos para coclnst en el
homo ....................................... 40--42
Como homear ............................... 43
Como asar .................................... 44
Como setecmonar tunc_ones
especlales ............................... 45-49
El mclo de aulolimp_eza .......... 50, 51
Panel de control ............................ 52
tntenor del homo ........................... 52
Cacerola Ypa_filla pa[a asar
a la parritta .................................... 52
Foco de la bz del homo ............... 52
Parrillas del homo ......................... 53
Puerta del homo ........................... 54
Antes de Ilamar para
un servie_o ............................... 55, 56
Ajustes de temperatura ................ 57
Garantia .................................. 58-59
N_meros para serv_mo.................. 60
Para su conveniencia y referencia futura, pot favor escriba el ndmero de modelo y
sene en el espaeio que se provee. Est_n ubicados en el marco frontal detr_s de la
puerta.
NUMERO DE MODELO: NUMERO DE SERIE:
© Sears, Roebuck and Co+
32
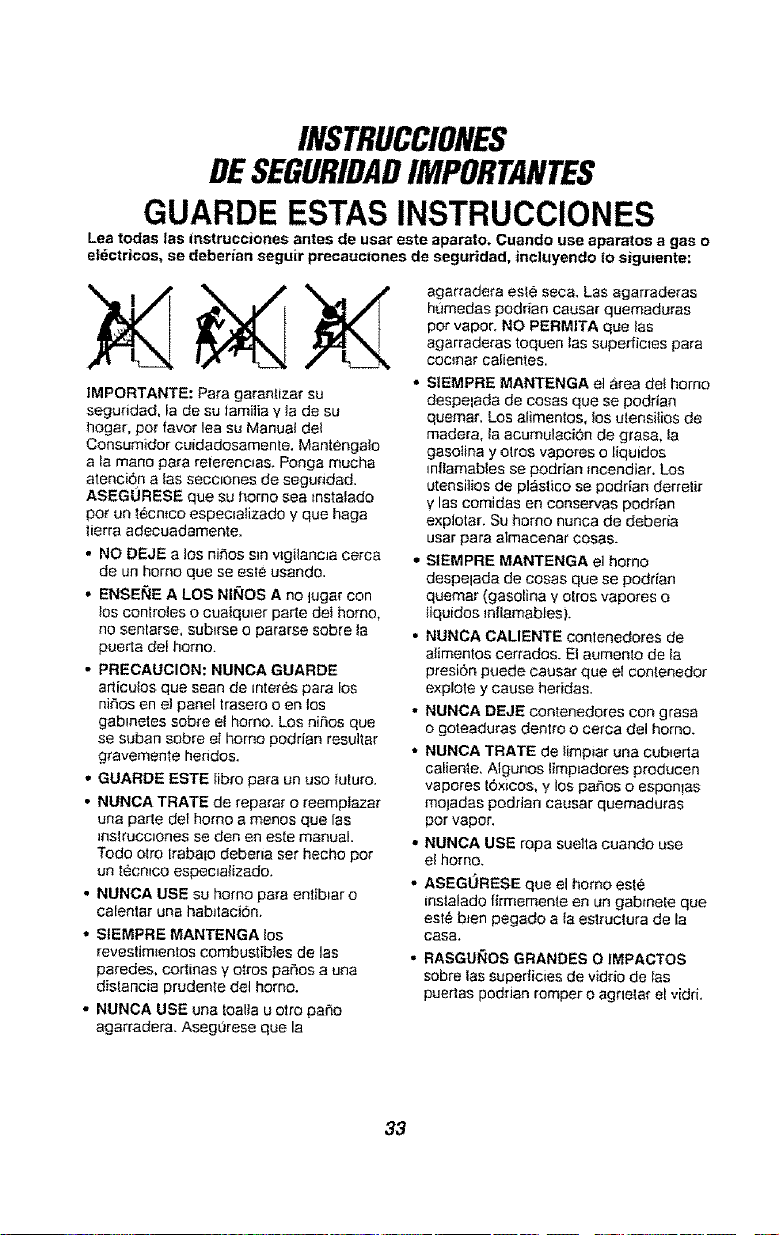
INSTRUCCIONES
DESEGURIDADIMPORTANTES
GUARDE ESTAS INSTRUCCIONES
Lea todas las instrucciones antes de user este aparato, Cuando use aparatos a gee o
efdctricos, se deberian seguir precauciones de seguridad, iecluyendo Io sigutente:
IMPORTANTE: Para garan_izar su
seguridad, la de su iamitia y ta de su
hogar, pot favor lea su Manual del
Consumidor euidadosamente, Mantengalo
ata mane para referencfas. Ponga touche
atenci6 n a los secc_ones de segu_'idad,
ASEGURESE que su homo sea _nstalado
por un t_,cn_coespec_afizado y que haga
tierra adecuadamente.
• NO DEJE a los ni,fios s_nvlgilancJa cerca
do un homo que se este usando.
• ENSEI_E A LOS NINOS A no lugar con
los conlroles o cualqu_er parte det homo,
no sentarse, sub_rseo pararse sobre la
puerla del homo.
• PRECAUCION, NUNCA GUARDE
arliculos que sean de interes pare los
ni,fos en el panel traseroo en los
gablnetes sobre e! homo. Los niJfiosque
se suban sobre ei homo podrian resultar
gravemente heridos,
, GUARDE ESTE Iibro para un uso futuro.
,, NUNCA TRATE de reparar o reemptazar
una parle del borne a menos que/as
Jnslruoolones se den en este manual.
Todo otto |rabaio deberia set hecho por
un [ecn_co espec_a_izado.
• NUNCA USE su homo pare entibtar o
calentar una habJtacion.
- SIEMPRE MANTENGA los
revestim_entos combustibles de los
paredes, cortinas y otros paf"_osa una
distancia prudente del horno.
• NUNCA USE una Loaltau otro paso
agarradera. Aseg0rese que la
agarrade_'a esle seca, Los agarraderas
hamedas poddan causer quemaduras
per vapor. NO PERMITA que los
agarraderas toquen las superficies para
cocmar calientes.
• SIEMPRE MANTENGA e] area de{ homo
despelada de cosas que se podrian
quemar, Los alimentos, los olensifios de
madera, la acumulaci(_n de grasa, la
gasolina y o!ros vapores o liquidos
_nflamabtes se podrian _ncendiar, Los
utensi]ios de plastico se podrian derrelir
y los eomidas en conservas podrian
explotar. Su homo nunca de deberia
usar pare almacenar cosas.
• SIEMPRE MANTENGA el homo
despelada de cosas que se podrian
quemar (gasolina y otros vapores o
_iquidos _nflamables}.
• NUNCA CALIENTE contenedores de
alimentos cerrados. El aumen_o de la
presi6n puede causar queet contenedor
explore y cause heridas.
,* NUNCA DEJE contenedo[es con grasa
o goteaduras dentro o cerca del homo.
• NUNCA TRATE de limp_ar una cub=erie
calien_,e.AIgunos ]imp_adoresproducen
vapores t6xicos, Vlos pa#os o espon!as
mojadas podfian causar quemaduras
por vapor.
', NUNCA USE ropa suelta cuando use
el homo.
• ASEGURESE que el homo este
instalado flrmemen_e en un gabmete que
est_ b_enpegado ata es_ructura de la
CaSe,
• RASGUI_OS GRANDES 0 IMPAGTOS
sobre tas superficies de vidrio de Ias
puerlas poddan romper o agnela_ el vidri.
33
INSTRUCCIONES
DESEGURIDAD
IMPORTANTES
• NO TOQUElassupedic+esparecalentar,las
supedic_esce{ca de eliaso tas superficies
+ntenores,Estaspedrieo ester sufictentemen|e
calientesparequemaf aunquase veande
color oscuro.DuranteVdespues del use,
notoque o permita que ta_opao matenales
_nflamableshagen eontactocon los
super_ctescalienles hasla quahaven
|enidotiempo de enfriarse.Lax otras
superficies co[ca de lasventanillasde
ventilaci6n dethomo, puerlas, y venlanas
lambieo podrian eslar suiic+entemente
catienies parecausar quemaduras.
• COLOQUELAS PARRILLASDELHORNO
en la pes+ciondeseadam_enlrasel homo este
trio.Sitas parritlasse debenmover m+entras
el homo asia caliente,no permita quela
agarraderahaga contacto con el quemador
eatientedel homo.
• DESPUESDEASARA LAPARRILLA,
s+empresaquela cacerotaVla paniIla para
asardeI homo y limpielas.Los sobradosde
grasa enla cacerota pareasarpodrian
tncendiarsela proximovez quausted use
el home.
• SIEMPRE TENGAcddado cuando abra fa
puerla del homo.Dole qua el a_[ecaiieoley el
vaporescapee antes domover losalimonies,
• NUNCAUSE papal deatum+n_opare IorrareI
Iondo del homo. E{use +nadecuadodei papel
dealum_n+opodria _sultar onun +ncendieo
en ungotpe de cerneote.
• NUNCA OBSTRUYAla abertura de la
ventitacion del homo.
• LIMPIE SOLAMENTElas pa_es qua se
listen en estemanual. Siga lodes los
_nsiruce_onespara la iimpieza. Asegurese de
sacar la cacerela Yla parrilla pare asar
anIes def c+clode autofimpeza.
• NUNCA FRIEGUE, mueva,limpte odahe eI
seIIode ia puerta en los homes con
autolimp_eza,Es esenc=alpara un buen
setlado.
• NUNCATRATE de timp+arlosulensilios,
elias, pares removiblesola caceroIay la
pamlla pare asar enel c+c!ode autelimp+eza.
• NO USE timp+adorespara homes- No se
deberia user n3ngunacfasede limp_adorpare
homesdentro o alrededor decuatqu_erparle
del homo.
• S! LA FUNCIONDEAUTOUMPIEZA
1alia,apague e_homo Ydesconecte ta
eleclocidad. Hagate un se_cto par ue
teen,cocatificado.
;ADVERTENCIA DE
SEGURIDAD IMPORTANTE!
California Safe Drinking Water and Toxic
Enforcement Act requ_erequa etgoberoador
de California pubtique una iista de
substencias qua el estado sepa qae
producen defectosde nacimiento uafros
da_os reprodoctivosy requiem que los
hombres de negociosadviertana sos
clientes del contacto potential a fates
substancias. E1aislante de fibre de vidrio en
el homo con autolimpleza emitirauna rouy
pequefia cantidadde monoxide de carbone
duranteel title de eutofimpieza. El centacto
se puede minJm+zarventilandecon una
puerta o ventana abierta o usandoon
ventitadoro una caropanade ventitaci6n.
IMPORTANTE: La salud de algunes
p_jaros esextremadamente sensitive a ies
vaperes producidospar el cicle de
autoiiropiezBde cualqu=erhomo, Ponga los
p_jarosen otre habitaci6n que est_ bien
ventilada.
;LEA Y COMPRENDA ESTA
INFORMACION AHORA!
Asegtireseque lodes en su hogar sepanqua
haceren case de incendio. Nunea useague
sabre un iecendio de grasa;este solamente
extender_tas llamas,
FUEGO ENEL HORNO:
iNe trate de mover la cacerola!
1, Cie+'relapuerto del homo y apague los
confreres.
2. Si el incendio continua, cuidadosamente
abra la puerto, arrefe soda pare coc+nar
sabre el tuege, o use un extintorde
quim+coseco, espuma o "haion"
GUARDE ESTAS INSTRUCCIONES
34
OPERACION
CARACTERISTICAS DE SU HORNO
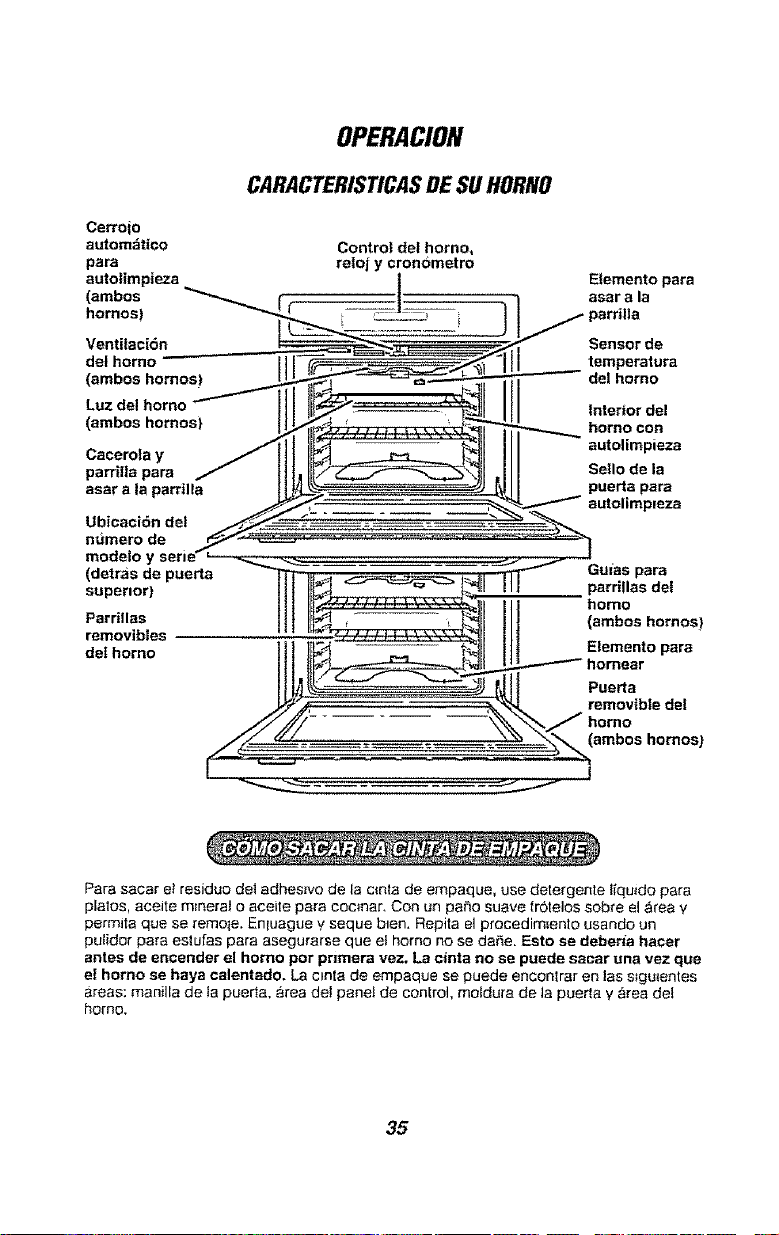
Ce_7oio
autom:_tico Control del homo,
pars retoj y cronbmetro
autolimpieza t
(ambos
hornos| _ ,
Etemento para
asar a la
Ventitaci6n Sensor de
del homo temperatura
(ambos homos) del homo
Luz del hornc Interior del
(ambos hornos} homo con
Cacero_a y autolimpieza
parrilla pars Sello de la
asar a ta parrilla puerta pars
Ubicaci6n del
numero de
modeto y
(detras de puerta Gums pars
superior) , parrillas del
homo
Parrillas {ambos hornos)
removibles
det homo Elemento pars
Puerta
removible del
(ambos homos)
Para sacar el residuo de{ adhes_vo de la c_nla de empaque, use detergente liqu_do para
platos, aceite m_neral o aceite para coc_nar. Con un paso suave fr6telos sobre el area y
permita que se remote. Entuague y seque b_en. Repita el procedim_ento usando un
pulidor para estufas para asegurarse que el homo no se dare. Esto se debem'ahazer
antes de encender el homo por primers vez. La cinta no se puede sacar una vez que
et homo se haya calentado. La cpnta de empaque se puede encon_rar en las s_gulentes
areas: manilla de Ia puerta, &rea del pane} de control, motdura de la pue_la y area de!
homo.
35
OPERACION
Control Dei Homo, Reloj y CronGmetro
@®®
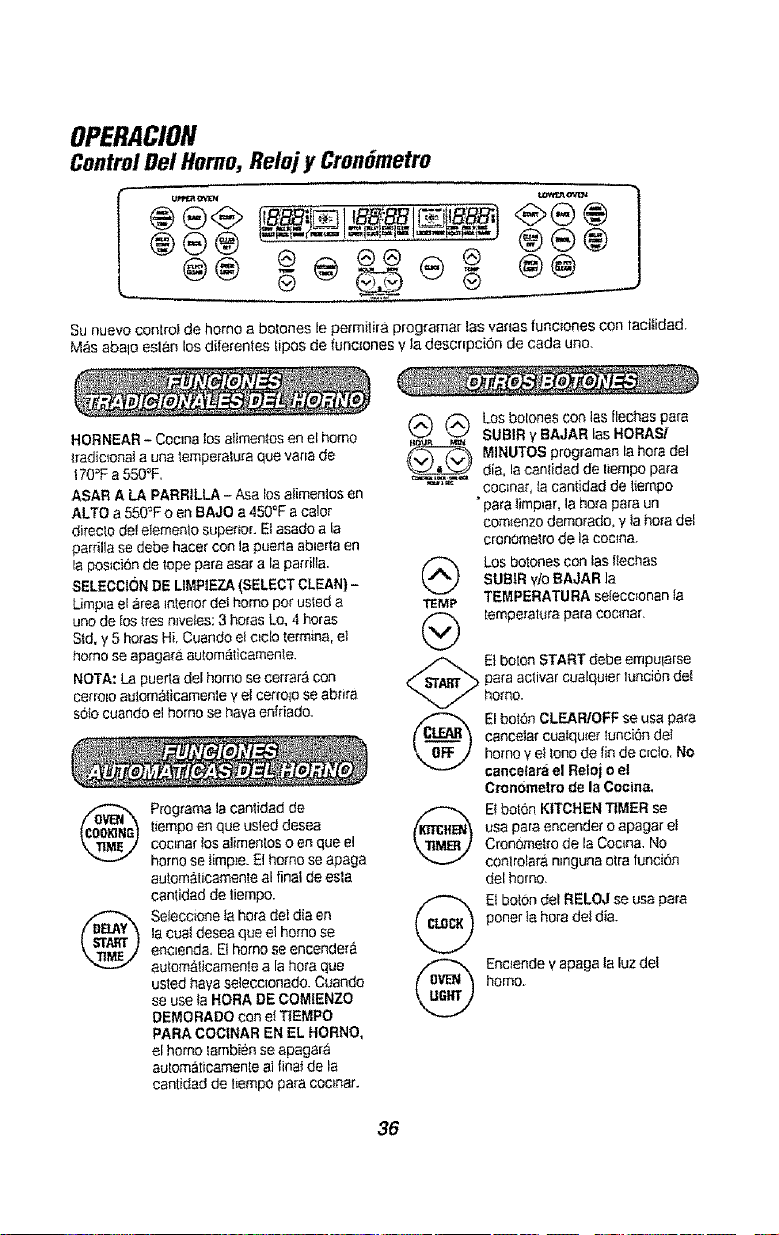
Sunuevo control de homo a botches le pe_milira programar las va_-lasfunoones con lacilidad.
Mas abalo asian los dilerentes tipos de func_onesy la descrfpcisn de carla uric.
(X-h
NORNEAR - Coona los alimonies en el homo '-..--' "---"
|radic_onala una lemperaluraque varla de _'_
ASAR A LA PARRILLA- Asa los alimenlos en
ALTO a 550=Fo en BAJO a 450°Fa calor
didechodel elemenlosuperior. E_asado a la
parfilla se debe hacer con la pueHa ab_er_aen
la postci6nde lope para asar a la pardlla.
SEL£CCIONDELIMPIEZA(SELECTCLEAN)= ___
Limp_ael area _nler_ordel homo po_"usted a TEMP
uno de lostres mveles:3 he[as Lo, 4 horas
Sld, y 5 horas Hi. Cuando e{c_clotermina,el
vkvJ
homo se apaga[a aulematicamenle.
NOTA: La puerla del homo se carfare,con
ce_ro_oaulomalicamenle y e{ cerro_ose abnra
sob cuando el homo se hava enfriado.
Programalacanlidadde
t_empoen que usleddesea
coonar los alimentoso en qua e!
homo se timp_e.£1homo se apaga
automalicamenIe al final deesla
canfidad de liempo.
Sefecc_onela heradel d{aen
la cual desea que el homo se
enoend& Elhomo se encender#.
aulom&lioamenlea [a heraque
usted hera selecc_onado.Cuando
se use _aNORA DEOOMIENZO
DEMORADO con el T_EMPO
PARACOCINAR EN EL HORNO,
el homo Iambien se apagar,_
auloma_ticamenleal finalde la
cantidad de tiempo para coc_nar.
Los belches con lastlechas para
SUB1Ry BAJAR las HORASI
MINUTES programan la hera de]
alia,tacantidad de liempo pafa
coona_, tacanlidad de liempo
"para limp_ar,la ho_apara un
com_enzodemorado, y la horadel
croneme_.rode la coc_na.
Los boIones con fas_lechas
SUBIR vie BAJAR]a
TEMPERATURAse{ecc_onan}a
[emperatura para coc_nar,
EI bolon START debe empularse
para aclivar cualqu_er |ut'ici6rl dot
homo.
@
@
@
Elbotch CLEARfOFF se usa papa
eanceIar cua{qu_e_lunci6n del
homo v el lone de fin de c_cto,No
cancefarbel Relol o el
Cronometrode la Cocin&
Etbotch KITCHENTIMER se
usa paraencendet o apagar el
Cronometro de la Coon& No
conlrela_'an_ngunaolra funci_q
del homo.
El botch del RELOJ se usa para
poner la hora dei dia.
Enc_endev apaga la luz del
homo.
36
OPERACiON
PanelDeControl
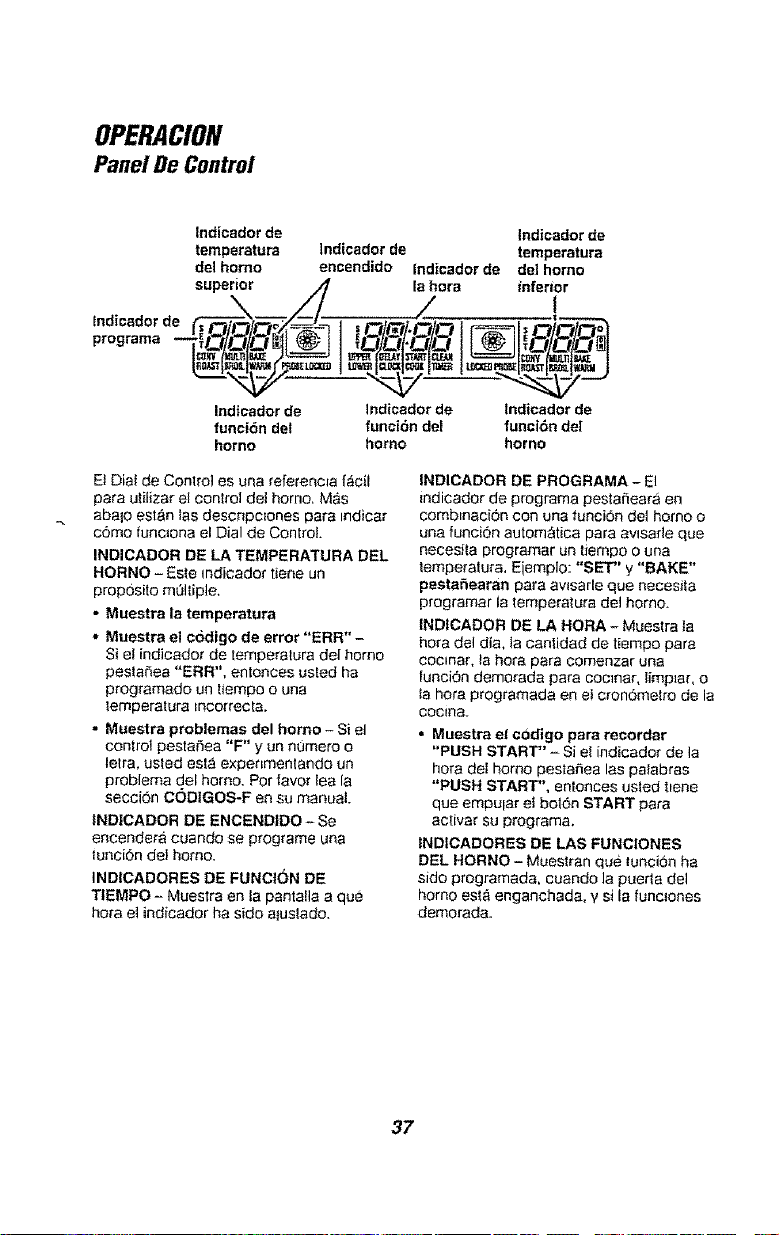
Indicador de Indicador de
temperatura ]ndicador de temperatura
del homo encendido indicador de del homo
super=_ ///7 ,2ora inferior
,.ooro..a I
Indicador de lndicador de lndicador de
funci6n del funci6n del funci6n de!
homo homo horno
Et Dial de Control es una feferencra [acil
para utilizar et conVol del homo, M_s
abalo estan _asdescr_pc_ones para mdicar
c6mo func_ona el Dial de Cont_'oL
INDICADOR DE LA TEMPERATURA DEL
HORNO - Es_eindicador tiene un
proposito mOllipie,
- Muestra la temperatura
- Muestra el codigo de error "ERR" -
Si el indicador de temperatura del homo
pestar_ea "ERR", entonces usted ha
prog_'amado un tiempo o una
temperatura incorrecta.
- Muestra problemas del homo - Si el
control pesta_ea "F" y un n0mero o
letra, usted est,_ expe_tmentando un
problema del homo, Por '_avorlea la
secci6n CODIGOS-F en su manual,
INDICADOR DE ENCENDIDO - Se
encende_'a cuando se programe una
tunciOn del homo.
INDICADORES DE FUNCt(_N DE
TIEMPO - Muestra en la pantafla a que
hora el indicador ha sido a_uslado,
INDICADOR DE PROGRAMA - El
indicador de programa pesta_eara en
combtnaci6n con una _uncidn det homo o
una funci6n autom_tiea para awsade que
necesita programar un [iempo o una
lemperatura, Ejemplo: "SET" y "BAKE"
pestafiearan para awsarle que necesita
programar la temperatura del horno.
INDICADOR DE LA HOBA - Muestra ]a
hora del dia, ta canlidad de tiempo para
coctnar, la hora para comenzar una
[unci6n demo_ada para coclnar, limplar, o
la hora programada en et cronOmetro de la
Coclna_
* Muestra el codigo para recordar
"PUSH START" - Si el indicador de la
hora def homo pestafiea las palabras
"PUSH START", entonces usted tlene
que empular el botSn START para
ac[ivar su program&
INDICADORES DE LAS FUNCIONES
DEL HORNO - Muestran que tunci0n ha
sido programada, cuando ]a puerta del
homo esta enganchada, y si la func_ones
demorada.
37

OPERACION
Relojy CronGmetro
Ettalc1 debe ponerse a la correcla hera
del dia antes qua una funciOndemorada
del homo (uncione cof_ectamente, La hera
de_dia no se puede cambiar durante una
iuncion automrJtica del homo, pete se
puede camb_ar durance una ![uncion para
hornear opara asar a[a parrilla.
cOMO PONER EL RELOJ
1, Empule el borOn CLOCK,
2. Empule los bo_.onescon las flechas
pare SUBIR y/o BAJAR [as HORAS/
MINUTES para poner la hera
correcta del d[a.
3. Empule el bolOn START.
PARA VOLVER AL RELOJ
Mientras est0 usando el homo pare
coclnar, empuIe el botch CLOCK. sl
desea vet la hera del die. La hera
presente del dia severa en el dial.
CORTE DE CORRIENTE
Si ha oounldo un corle de cornente,
lahora peslaSear,_ en et dial y estara
_ncorrecta. Ponga nuevamente el relot
a la hera,
Cualqu_er lunci0n pare cocinar del homo
qua estaba en proeeso tendra qua ser
reprogramada.
El cronometro de la coc_na se usa para
medir el tiempo de los procesos pare
coc_nar u otras aclividades det hogar. No
controfa el homo. Se puede programar
haste 9 horasy 59 mtnutos. Centare. hac_a
a|r_s en m_nu_oshaste que Ilegue a los
ULTIMOS 60 SEGUNDOS, enJ,onces el
control Sahara una vez, Cuando la euenta
Ilegue a CERO, el control sonars. 3 veces
seguido de un sonido cads 6 segundos
hasta qua el bot0n KITCHEN TIMER se
ampule, El sonido de cads 6 segundos se
puede e]im_nar para clc_os _uturos s_se
desea. Para las inslrucelones de come
elimmar estos sonidos continues, yea
tones en la p&gina s_gu_ente.
COMe PROGRAMAR EL CRONOMETRO
Q@ ./.@
t. Empule el bolon KITCHEN TIMER.
2o Empule los bo{ones con tas flechas
para SUBIR y/o BAJAR las HORAS/
MINUTES pare pener la hera.
3. Empule e! belch START,
4. Cuando ta cuenta Ilegue a cero,
ampule el baton KITCHEN TIMER.
Pare canceiar el e[onometro durante la
cuenta, empule e! bolon KITCHEN TIMER
DOS VECES.
El control ie permitira cerrar los bOtCheS
de manera qua no se puedan aclivar
euando los empuie. Si se preocupa de
deter e! homo sm superv_si0n, active este
p_'ograma.
1. Toque y sostenga, al mismo tiempo,
_osbotches con laa I[echas para
BAJAR _asHORAS/MINUTOS
(HOUR/MIN) per tres segundos, basra
que el dial muestre "Lee ON"
(btoquear).
2. Para desbloquear el conic'eL toque y
sostenga, al mismo tiempo, los
belches de las f]echas pare BAJAR
las HORASiMINUTOS (HOUR/MIN)
per Ires segundos, haste qua el dial
muestre "LOC OFF" (desbloquear).
Este programa se puede selecc=onar
selamente cuando el homo no esta
en use.
Cuando este programa est_ achvado,
estos botches no funcionsran. E!dial
mostrar_, "Lee ON" s_se ampule un
botch. El atuste ser_ retenido en ta
memona inclusive despues de una
_nterrupciOn el serwc_o energetico.
38

OPERACION
ControlDel Homo,
Reloj y Cron#metro
E1nuevo conlroi tiene una sene de tones
que sonaran a l_empos diferentes. Estos
tones pueden sonar m_entras usted
programa una IunciCn dei homo, o al final
de una tunciOn del homo. Tambi_n le
avisara s_exlste un prob|ema con una de
las iunc_ones. Mas abalO est,_n los tipos
de tones y una breve descripciOn de
cada Uric.
TONOS MIENTBAS PROGRAMA EL
CONTROL- Cuando empule un boron
usted escuchara un tono. Este tor}o te hara
saber que aplico suficlenle presion sobre
e{ botch para act_varlo. (Los bOtCheScon
las flechas no suenan.}
TONO AL FINAL BE UN ClCLO
AUTOMATICO - Despues de una IunciCn
para coc=nar aulom_tica, usted escuchara
tres tones cortes seguidos per un tone
cada 6 segundos. Et tone de cada 6
segundos segufr& sonar}do basra que
empule el botch CLEAR/OFF o usted
decida setecc_onar et programa espec_a!
para cancelar y evitar que el tono de 6
segundos suene at final de un cLclo future.
C(_MO CANCELAR EL TONO DE
6 SEGUNDOS
1. Empule V sulele los botor}es BAKE
y BROIL, a la misma vez pot 3
segundos, hasla que ei dial
muestre "SF."
2. Empule el botch KITCHEN TIMER.
Et dial mostrar#, "CON BEEP"
(tor}o conJ,inuo).
3. Empule el boron KITCHEN TIMER
nuevamente_ Et dial mostrar_ "BEEP"
(tor}o caneelado).
4. Empule et botch START, para cancetar
el tor}o y salir de esle m6dulo especial.
Si desea regtesar a los tones de 6
segundos, repita los pasos de a_'ribahasta
que ei dial muestre su setecciCn y empule
el boron para el com_enzo (START).
TONO DE ATENCION - Este tono sonarS.
si hace un error u omite algo mEentras
programa una fur}ciOn del horno.
Unos elemplos serian:
a. Programar un c_elo de limp=eza y la
puerta del homo no esta b_en cerrada.
b. Programar ur}a fur}ciCn y no empular el
boron START,
c. Empular un bo:ton para una _ur}ci0n
adic_onal s_nprogramar pnmero la
tempera:tufa o el tiempo.
Cualqu_era de estos se puede identifiear
rapidamente con m_rar e_dial.
TONO DE PREOALENTAMIENTO -
Cuando us:ted selecc_ene un mode de
coclnado, aluste la temperatura de! homo,
y pres_one el botdn para el comter}zo
(START) para que et homo comience a
calentar. Cuando la temperatura dentro
del homo Itega a la temperatura que usled
programo, sonata un lone para avtsade
que et homo est_ listo para homear.
Si e] control suena m_entras et dial hace
pestaSear una "F" y un numero o lelra tat
come "F-4" o "Fl", es posible que ex_sla
un problema con el control o con elhomo,
Simplemenle empule el bo:tCn CLEAR/
OFF y espere una hera, Trate de
programar esa funcion nuevamente.
Si el codigo se repite, escriba et codigo
que pestafiea y I]ame para un servJcto.
Digaie al tecnico que c0digo estaba
peslaSea ndo.
39
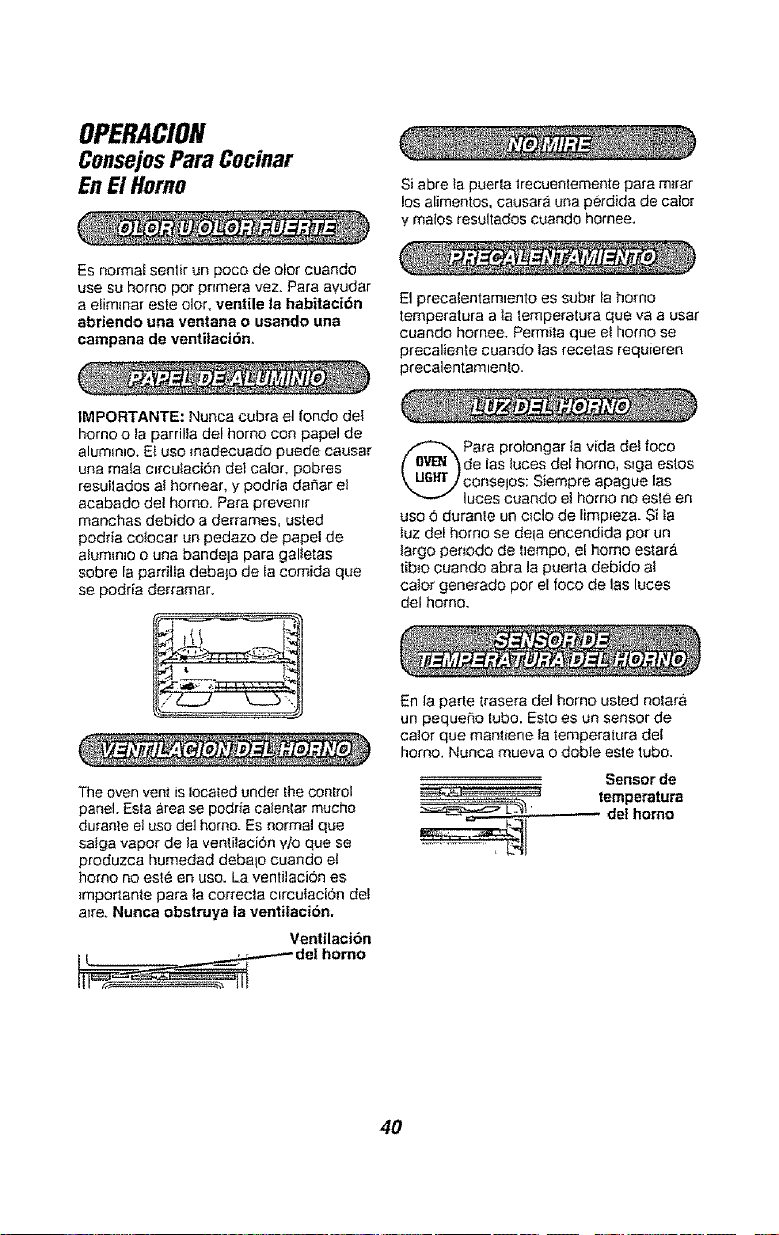
OPERACION
ConsejosPara Cocinar
En E! Homo Si abre la puer_atrecuentemente pare mtrar
los alimentos, eausara una pe[dida de caior
y males resultados cuando homee,
Es norma! sentir un pace de olor cuando
use su homo per pnmera vez, Para avudar
a eiim_nar este e]or, ventile la habitaci6n
abriendo una ventana o usando una
campana de ventilaci6n.
1MPORTANTE: Nunca cubra el rondo de!
homo o ta parrilla del homo con papel de
alum_nlo. El use madecuado puede causar
una maia cErcu_aci6n del calor, pobres
resuitados aEhomear, y podria danar e_
acabado de{ homo. Pa_'apreven_r
manchas debido a derrames, usted
podda co_ocar un pedazo de papel de
alumm_oo una bande]a para galietas
sobre la pardlla debaio de Ia comida que
se podda derramar.
The oven vent is located under the control
panel. Esta &rea se pedria calentar macho
durante el use de] homo. Es normal que
salga vapor de la ventilacibn y/o que se
produzca humedad debalo cuando et
homo no este en use. La ventilaci6n es
_mportante pare ta correc_a c_rcuiaciOn de!
atre. Nunca ebstmya le ventiiaciSn.
Ventilaci6n
de][homo
E1precalentam_ento es saber ta homo
temperatura ala temperatura que va a user
cuando hornee. Permita que e! homo se
precalienie cuando ]as recetas requieren
precalentamlen_o.
Para proiongar ta vida del foco
de las luces del homo, s_gaestos
conselos: Siempre apague las
luces cuando el homo no esle en
use {3durante un e_elo de limp_eza. Sita
luz del homo se dela encendida po_"un
_argo penodo de tlempo, el homo estar_,
tib_o cuando abra la puerta debido a!
calor generado per el foeo de las luces
del homo,
En la pade trasera del homo usted notar,_
un pequeRo tube, Esto es un sensor de
ca!or que mant_ene la temperatara del
homo. Nunca mueva o doble este 'tube.
Sensor de
_-'-_ temperatura
_ _[_' det homo
4O
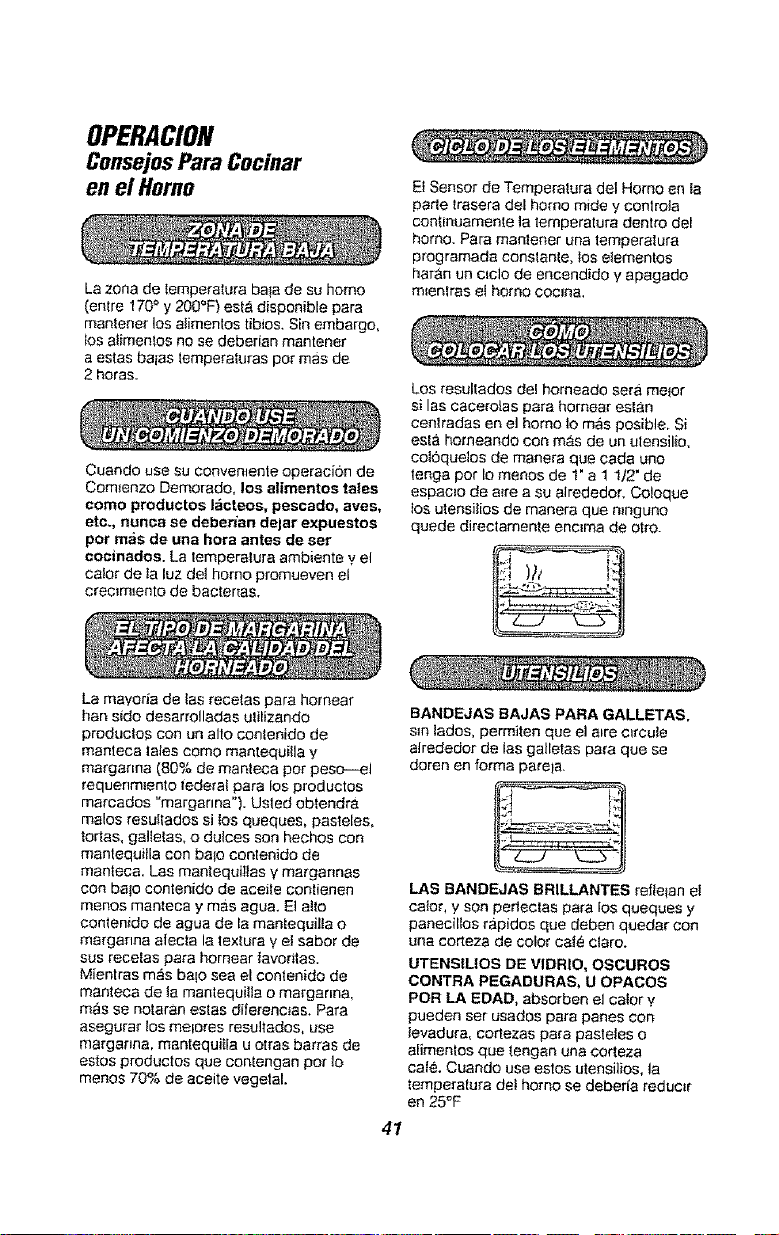
OPERACION
Consejos Para Cocinar
en el Homo
La zona de temperatura bate de su homo
(entre 170° y 200°F) esl,_disponible para
mantener los alimentos tibios. Sin embargo,
los alimentos no se deberian mantener
a estas balas tempera_uras per rues de
2 horns.
Cuando use su Conven_ente operacion de
Com_enzo Demorado, los alimentos tales
como productos I_cteos, pescado, aves,
etc., nunca se debedan delar expuestos
pot mas de una hora antes de set
cocinadoa. La temperatura ambiente y el
ca!or de la luz de_homo promueven el
crec_m_ento de bactenas.
El Sensor de Temperatura del Homo en ta
parte trasera del homo mide ",/controJa
continuamente ]a temperatura dentro del
homo. Para mantener una temperatura
programada constance, Ioselementos
har;&nun ciclo de encendido y apagado
m_enlras et homo coc_na.
Los resultados de! homeado sara metor
si Ins caceroLas para homear esEan
cen_radas en el homo 1omas posible. Si
esl& homeando con mas de un utensilio.
cobquelos de manera qua cada uno
range pot Io menos de 1" a ! 1/2" de
espac_o de a_rea su alrededor. Co!oque
los utensi{ios de manera que e_nguno
quede directamente encEmade otto.
La mayoda de Ins recetas para hornear
ban sido desarrolladas utilizando
productos con un alto contenido de
manteca tates como man_equiila y
marganna (80% de manteca pot pesc--_l
requenm=ento tedera{ para los productos
marcados "marganna"). Usted obtendra
malos resultados si los queques, pasteles,
tortas, galietas, o dunces son hechos con
mantequitla con ba{o contenido de
manteca. Las mantequi!_as Vmargannas
con ba!o contenido de aceite contienen
menos manteca y mas agua. E]atto
contenido de agua de la mantequilla o
margaana aiecta la textura yet sabor de
sus recetas para homear favorttas.
Mientras mas ba!o sea el contenido de
manteca de la mantequi_la o marganna,
m_s se notaran estas diferenc_as. Para
asegurar los melores resultados, use
marganna, mantequilla u otras barras de
estos productos qua contengan pot ]o
menos 70% de aeeite vegetal.
BANDEJAS BAJAS PARA GALLETAS,
s_nlados, permiten qua e] atre clrcute
a|rededor de las galletas pa_'aqua se
doren en forma parel&
LAS BANDEJAS BRILLANTES reQelan ei
calor, y son perlectas para los queques y
panecilIos r;Jpidos que deben quedar con
une corteza de color cale ctaro.
UTENSILIOS DE VIDRIO, OSCUROS
CONTRA PEGADURAS, U OPACOS
POR LA EDAD, absorben el eator y
pueden ser usados para panes con
levadura, cortezas para pasteles o
alimentos qua tengan una cor_eza
cale. Cuando use estos utensilios, la
temperatura de! homo se deberia reducer
en 25°F
41
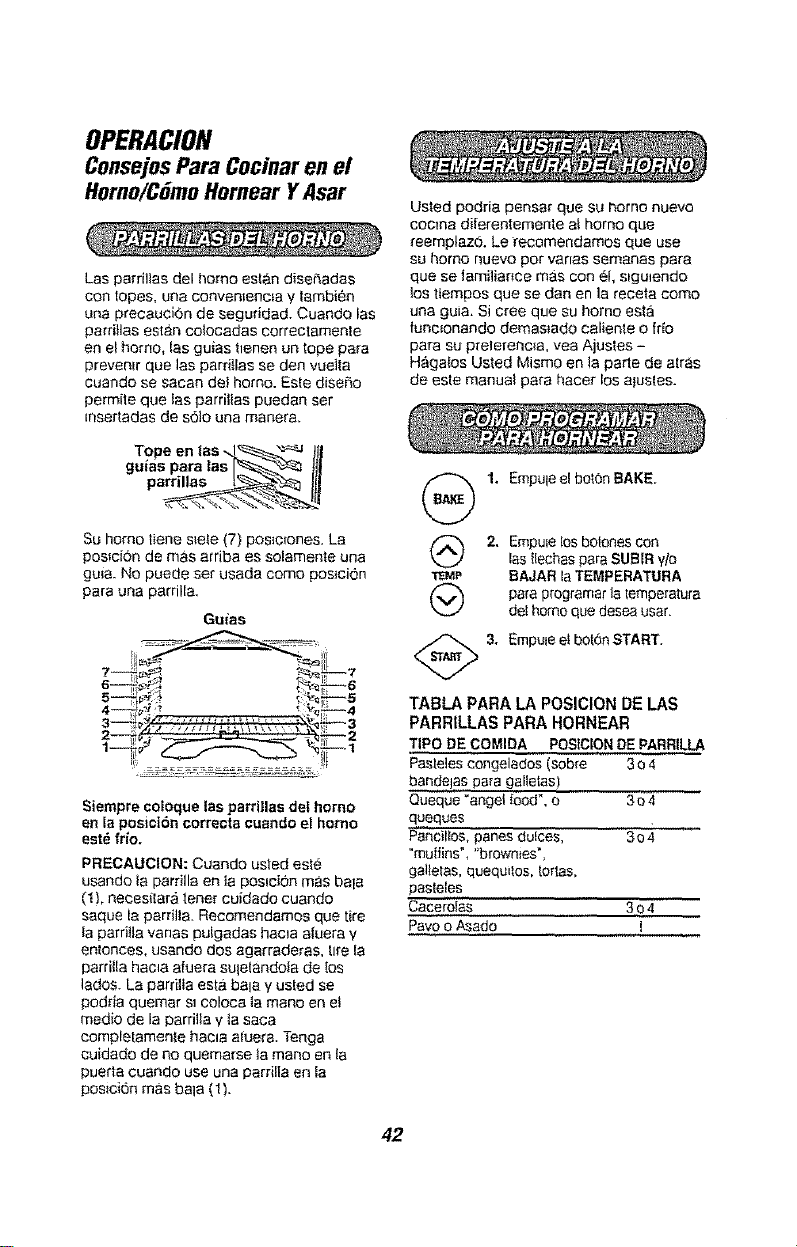
OPERACION
ConsejosPara Cocinar en el
Horno/CGmo Hornear Y Asar
Los parrillas del hob'noest&n dise5adas
con topes, una conven_enc_a y lambi_n
una preeauciOn de segudded. Cuando las
pardlles esten colocadas correctamenie
en el homo, Jes gu{es _lenen un tope para
preveelr que las pard}las se den vue_ta
cuendo se secen de_ homo. Este diseRo
permite quetes pardltas puedan ser
tnsertadas de s61oune manera.
Tope en tas -.LI_--_ "_4 JJJ
guies pare las I__--_,_ tI_
parrillas__ltl
Su homo tiene s_ele(7) pos_c_ones.La
pos_ci6n do mas arriba es solamente una
gut& No puede se_ usada come pos_ci6n
para una parrill&
Guias
[_ if
Siempre coloque las pardllas del homo
en la posici6n correcta cuando el homo
est_ frio.
PRECAUCION: Cuando usted este
usando _epardlla en le poslci6n m_s bale
(1!, neces(tara tenor cuidedo cuando
saquela pardlia. Recomendamos que tire
ta parrit]a vanes pulgades hac_a afuera v
entonces, usando dos agerrederas, tl_reIa
parril!a hec_a afue_a sutetandola de los
lades. La parrilta esta balay usted se
podda quemar s_coloca la mane en ei
medio de la parritla y ta saca
completamente hacla a_uere.Tenga
cuidado de no quemarse ia mane en le
puerta cuando use una perri!la an la
posiciOn mas bale (1).
Usted podria pensa_"que su homo nuevo
cocma di{erentemente a! homo que
reemplazO. Le recomendamos que use
su homo nuevo per vanes semanas pare
que se tamiliaace mas con el, s{gulendo
los tiempos que se dan en la receta come
una guia. Si cree que su homo esta
func_onandodemas_edo calien_.eo fdo
pare su pfelerenc_a, yea Ajustes -
Haga_os Usted Mismo en la parte de aires
de este manual pa_-ahaee_ los a}ustes.
!. Empuleel bet0n BAKE.
2. Empule[es botonesco_
las !lechas pare SUBIR yio
_' BAJAR laTEMPERATURA
pare programar letemperature
def homo que desea usar.
<_& Empuieel boronSTART.
TABLA PARA LA POSICION DE I.AS
PARRILLAS PARA HORNEAR
TIPO DE COMIDA POStCIONDE PARRILLA
Pastelescongetedos (sobre 3o 4
bandelas para galletas)
Queque _anget food', e 3o 4
queques
F_a_cillos,panes dulces, 3o 4
"muiiins'_ "brown es',
galtelas, quequitos, tortes,
pasteles
Caceroles 3o 4
Pave o Asado I
42
OPERACION
C6moHornearYAsar
Pare`programar qua el homo coctne
per un liempo determ_nadoy se apague
automalicamenle:
I. EmpuleeJbol6nBAKE,
2. Empulelos botones con los
flechas pare SUBIRvlo
TEMP BAJAR la TEMPERATURA
para seFecc_onarla
temperaluradel homo qua
usled desea user.
3.
Empulee} bot6n OVEN
COOKING TIME.
Empulelos botones con _as
flechas para SUB|R V/o
BAJAR Ias HORAS/MINUTOS
para selecc=onartacantidad
de tiempo enqua desea qua
losalimonies se coc_nen.
Empuleel bo[6n START.
Pare`programar queel homo se enc_endaa
una heraposterior de!die, coc_neper une,
cantidad de tiempo espedfica Vse e,pague
automaficamente,
(_ 1. Empuleel bot6n BAKE,
2, Empulelos bolones con tas
tlechas pare SUBIR v/o
_EM_ BAJAR la TEMPERATURA
pare selecc_onerla
temperaturedel homo qua
prefie[e user.
3. Emputeel belbn OVEN
COOKING TIME,
_ 4, Empulelos belches con los
ffechaspare SUBtR vie
BAJAR los HORAS/
._. MINUTES pare,seleccJonar
la cantidad de tiempe,en
que desea coc=narlos
alirnenlos.
5. Empuiee_bol0n DELAY
START TIME
1_ 6. Empule los belches con los
,.._j
flechas pareSUBIR vie
BAJAR ]asHORAS/
= MINUTES pare progre,marla
heradel die en la cual desea
qua el homoenenc_enda.
7, Empuleel botch START.
Et homo se apagara af tdrmino del
tiempo pare cocinar a manes qua el
programa para mantenci6n de
temperature se haya activado.
Su nuevo control tiene una lunciOn pare
coc_ne,ry manlener la temperalure, pa_a
coc_nar automaticamenle solamente que
mantendr,& los alimen_[os tibios he,sta 3
horas despues qua el coc_nado
automat_co have terra,node. Pe,re,activar
esla lunciOn:
1, Empule y sulete, e,Imismo tiempo,
los botones BAKE y BROIL per 3
segundos, hasta que el dial muestre,
"SF',
2_ (a) Empuie et boron OVEN COOKING
TIME El die,lmos/re,r_, "HLd OFF",
(b) Empu!e el belch OVEN COOKING
TIME nuevamente pare e,ctive,reste
program& El dial mostre,rQ "HEal ON"
3. Empule el bot6n START,
43
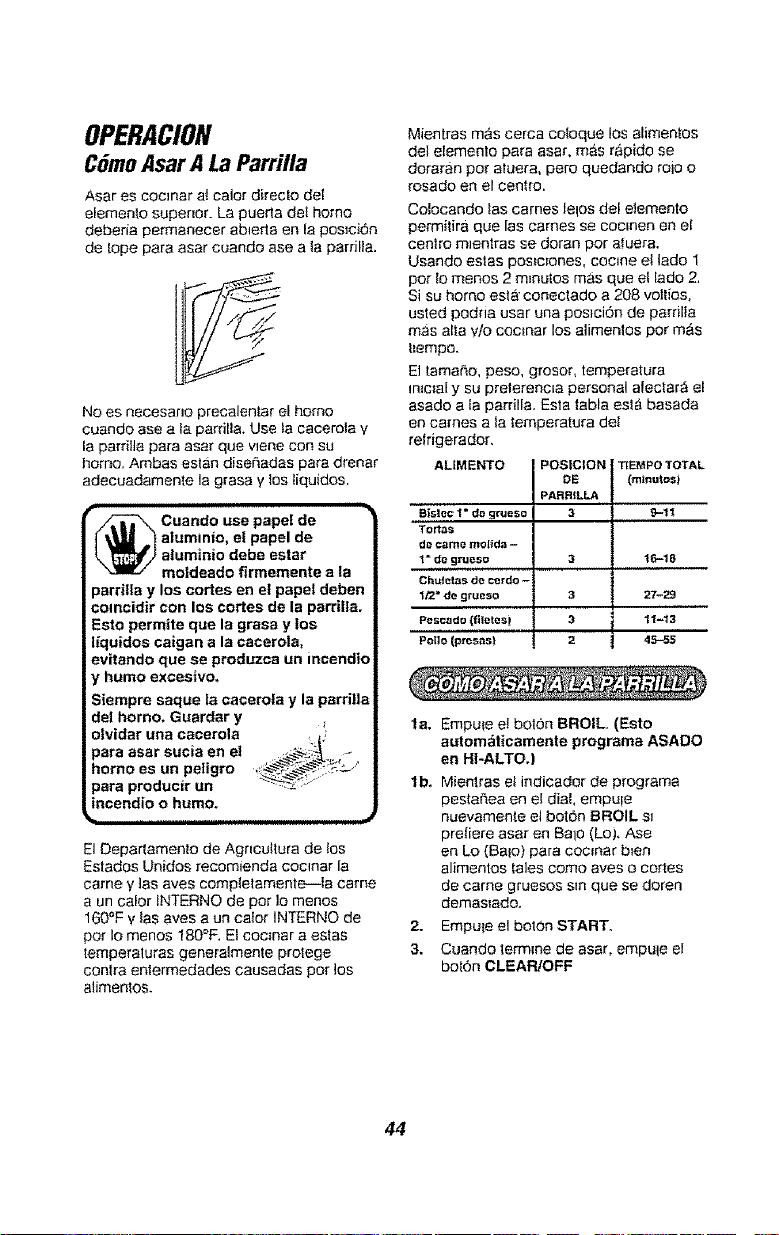
OPERACION
CSmoAsarA LaParrilla
Asar es coc_nar a! calor directo del
elemento supenor_ La puerta del homo
debeda permanecer ab_erta en la pos]oi6n
de lope para asar cuando ase a la parrilia.
_4"/,/
No es necesano precalen[ar el homo
cuaado ase a ta parril]& Use _acacerota y
la parrflla para asar que vlene con su
homo, Ambas eslan diseAadas para drenar
adecuadamente la grasa y los tiquidos.
r_ Cuando use papel de
a|umin|o, e| papel de
aluminio debe estar
moldeado firmemente a la
parrilla y los codes en el papet deben
comcidir con los codes de la parrilla.
Esto permite que la grasa y los
Ifquidos caigan a la cacerola,
evitando que se produzca un iocendio
y humo excesivo,
Siempre saque la cacero|a y la parri!la
de| homo, Guardar y
olvidar una cacerola u
para asar sucia en el _t_;_.[
homo es un peligro _:_ :_° "
para producir un _'_:_: ......
incendio o humo.
L_ __1
El DeparlamenZo de Agncultura de los
Estados Unidos reeomienda coonar la
came y tas aves compleiamente.--la came
a un calor INTERNQ de por 1omenos
160°F Vlas ayes a un calor INTERNO de
por Io menos 180°F. El coc_nar a estas
temperaluras generalmente prolege
contra enlermedades causadas por los
alimenlos.
Mientras mas cerca coIoque los alimen|os
del elemenlo para asar, mas rapido se
doraran por aluera, pero quedando rolo o
rosado en el cent[o.
Cotocando tas cames lewesdel etemento
permitira que las cames se coclnen en el
cenlro mlenlras se doran por afuera.
Usando es|as pos_e_ones,coone et tado 1
por 1omenos 2 m_nutos masque ef lado 2.
Si su homo esla" conectado a 208 vollios,
usted podria usar una poslci6n de pamlla
mas alla V/o coonar los alimenlos por m_s
t_empo.
El tamaf_o, peso, grosor, temperatura
in_c_aly su prelerenc_a personal afectar_ el
asado a la parHIfa. Esla |abla esla basada
en cames a ia temperatura de!
relrigerador.
ALIMENTO
aisloc 1" de grueso
Tortes
do _..amo mo[_da -
1" de grueso
Chute.s de cerdo -
lt2* de grueso
Pescado (fiietes_
POlio Ipresas}
POS|C|ON | "REMPO TOTAL
DE _ (rninutos_
PARRI_ I
3 9---t_
3 16-18
la. Empule e! bolSn BROIL, (Esto
autom_ticamente programa ASADO
en HI-ALTO.)
lb, Mienlras e_indicador de programa
pestafiea en el dial, empule
nuevamenie et boron BROIL s_
preliere asar en Balo (Lo), Ase
en Lo (Balo) para coc_nar b_en
alimentos _alescomo aves o cortes
de came gruesos sm que se doren
demasiado.
2. Empule el bot0n START,
3, Cuando lerm_ne de asar, empule el
boron CLEAR!OFF
44
OPERACION
CGmoSeleccionar Programas
Especiales Del Control
El nuevo control a botones tiene
programas adiclonales que usied puede
selecc_onan Despues de haoer su
selecci6n, si desea camb_arla, s_galos
pesos hasla que el dial mueslre su nueva
selecci6n,
2. (a) Empule los bol6ns BROIL y OVEN
COOKING TIME al mismo tiempo. El
dial del control mostrara el s_gno pa_'a
grade y "F."
(b) Empuie los borons BROIL y OVEN
COOKING TIME al mismo tiempo
nuevamenle. Esto camb_ar_ "F"
(Fahrenheit) a "C" (Cenligrado).
3. Empu!e el bolon START.
Etcontrol se programa autom&licamente
pare apagarse despues de homear por 12
horas o despues de asar ala parrilla per 3
bores en caso que se le olvide v deie el
homo encendido. Si desea elim=nar este
programa:
1. Empule V su(ete, al mismo tiempo, e!
botch RAKE v BROIL pot 3 segundos,
hasla que el dial mueslre "SF".
2. Empu!e el bot6n DELAY START
TIME. El dial muestra "12Shdn"
(apegado en 12 horas).
Empule el bolon DELAY START TIME
nuevamente. Et dial mostrara "'no
Shdn" (no apagado).
3. Empuie et belch START.
EIcontrol det homo esta programatic
para la seleccion de temperatures en
Fahrenheit. La mayoria de ]as recelas se
dan usando la escala Fahrenheit. Usted
puede camb_ar esto y usar una seleccion
en Centlgrados,
1. Empu!e y sulele, al mismo tiempo,
los bolones BAKE v BROIL pot 3
segundos, hasla que el dial muestre
"SF".
Su conlrol esi& programado para usar el
reloi en !2 horas. Si usted prefiere user
Hora Mititar de 24 horas o poner et dial en
blanco, se hace asi:
1. Empuje y suieie, aI mismo tiempo, e]
borOn BAKE y BROIL pot 3 segundos,
hasla que el dial muestre "SF"o
2. (a) Empule el bot0n CLOCK. El
dial mostrara "12hr'. Siesta es su
selecciSn, empule e{ bot6n START.
o
(b) Empule el bolon CLOCK
nuevamente. El dial mostra_ "24hr'.
Eiempb: 5:00 en el relo{ de 12 heros
leera 17:00 en el relol de 24 bores. Si
esla es su selecci6n, empule el bo16n
START.
o
(o) Empuie el bot6n CLOCK
nuevamente. El dial ahora mostrara
"OFF". Siesta es su selecci6n,
empute et botch START. La hera no se
mostrara en el dial. (La luncion
comienzo demorado no funcionara,.)
45
OPERACION
C6moSeleccionar Programas
Especiales Del Control
Este Programa Especial le permitira
cambiar ta vefocidad; #1 s_gnifica qua el
carabao de velocidad es lento haste #5
que s_gnifica qua e! cambio de vefocidad
es r,_pido. Pare selecclonar ta vetocidad
qua prefiere, s_gaestos pasos:
t. Empu}e y sulete, al mismo tiempo,
Ios botones BAKE y BROIl,. pot 3
segundo& basra qua et die! muest_-e
"SF'L
2. Empule algun bolSn con la flecha
SUBIR
El dial le mostrara una pos_ci6n de
velocidad ent[e I y 5.
3. Empuje atguna ftecha SUBIR
pare aumenlar Javelocidad has|a e_
numero 5.
o
Empute algun boton con la flecha
BAJAR para dismlnu_r la vetocidad
hasta el numero 1,
4. Empule eJbot,bn START,
• Ambos homos no pueden $imp_arse
automat_eamente al mismo ttempo.
• Usted puede programar ambos
homos pare autolimp_eza al m_smo
tiempo, pero el segundo homo demorarA
autom&ticamente la hera de com_enzo
pare empezar a! final det c_clo de
timpJeza del primer homo.
• Usted puede programar un com_enzo
demorado en ambos homes al m_smo
tiempo, pero eI segundo homo demorara
automa1_camente la hera de comlenzo
pare empezar at iinaI de_c_clo de
limp_eza del pnmet" homo.
• Usted puede p_'ogramar un homo pare
que emp_ece su clcto de limp_eza ahora
y programar un comlenzo demorado en
et segundo homo pare una hora
postenor.
46
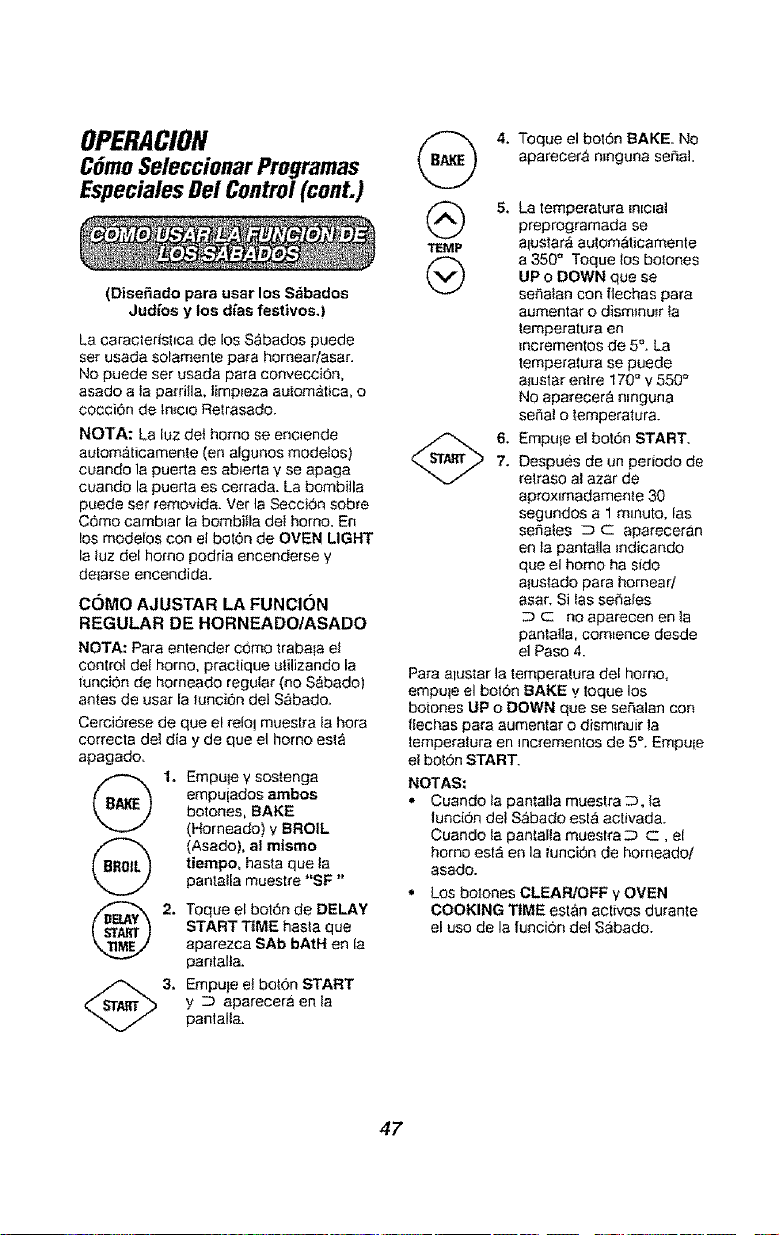
OPERACION
CSmoSeleccionarProgramas
EspecialesDeiControl(cont.)
(Disefiado para usar los Sabados
Judfos y los dfas festivos.}
La caracteristlca de los Sabados puede
set usada solamente para hornear/asar.
No puede ser usada para convecciGn,
asado a la parrifla, timp_eza automatica, o
cocciOn de tn_ctoRetrasado.
NOTA: La luz deI homo se enclende
aulomaticamente (en algunos modelos)
cuando la puerta es ab_erta V se apaga
cuando la puerla es cerrada. La bombilla
puede ser removida. Ver la Seccion sobre
CGmo camblar la bombi_la del homo. En
los modelos con el bot6n de OVEN LIGHT
la luz del homo podria encenderse y
delarse encendida.
COMO AJUSTAR LA FUNCI(3N
REGULAR DE HORNEADO/ASADO
NOTA: Para entender c0mo trabala el
COntrOldet homo, praclique utilizando la
funciGn de horneado regular (no S_bado)
antes de usar la tunciGn del S_bado.
CerciGrese de que el relo! muestra la hera
correcta del dia y de que el homo esl_
apagado.
1. Empule y sostenga
empuiados ambos
botches, BAKE
(Horneado) V BROIL
(Asado), al mismo
tiempo, hasta que ta
panta!la muestre "SF"
Toque el bolGn de DELAY
START TiME hasia que
aparezca SAb bAtH en la
pantalta.
Empule et baton START
y _ aparecera en la
pantalla.
(_ 5. La temperatura _n_c_a]preprogramada se
TEMP alustara automaticamenle
a 350" Toque los bolones
UP o DOWN que se
se5alan con flechas para
aumentar o dism_nu_rta
_emperatura en
_ncremenlos de 5%La
temperatura se puede
a_ustar entre 170" v 550°
NO aparecer_ n_nguna
sepal o temperatura.
6. Empute el botd,n START.
7. Despues de un periodo de
retraso al azar de
aproxJmadamente 30
segundos a 1 mnuto, las
sefiates _ C apareceran
en la pantafla mdicando
que el homo ha sido
afustado para homear/
asar. Si Ins sef_ales
c no aparecen en la
pantatta, comKence desde
el Paso 4.
Para alustar la temperalura del homo,
empute el botGn BAKE v toque los
botches UP o DOWN que se seSalan con
Ilechas para aumentar o dism_nuir la
lemperatura en mcrementos de 5% Empule
el boI6n START.
NOTAS:
. Cuando la pantalla muestra _, la
luncion det Sabado esta activada.
Cuando la pantalta muestra_ c, el
homo esta en la lunciGn de homeado!
asado.
• Los botches CLEAR/OFF VOVEN
COOKING TIME est_n aclivos du_'ante
el uso de la funcion del Sabado.
4, Toque el bot6n BAKE. NO
aparecera n_nguna seSal.
47
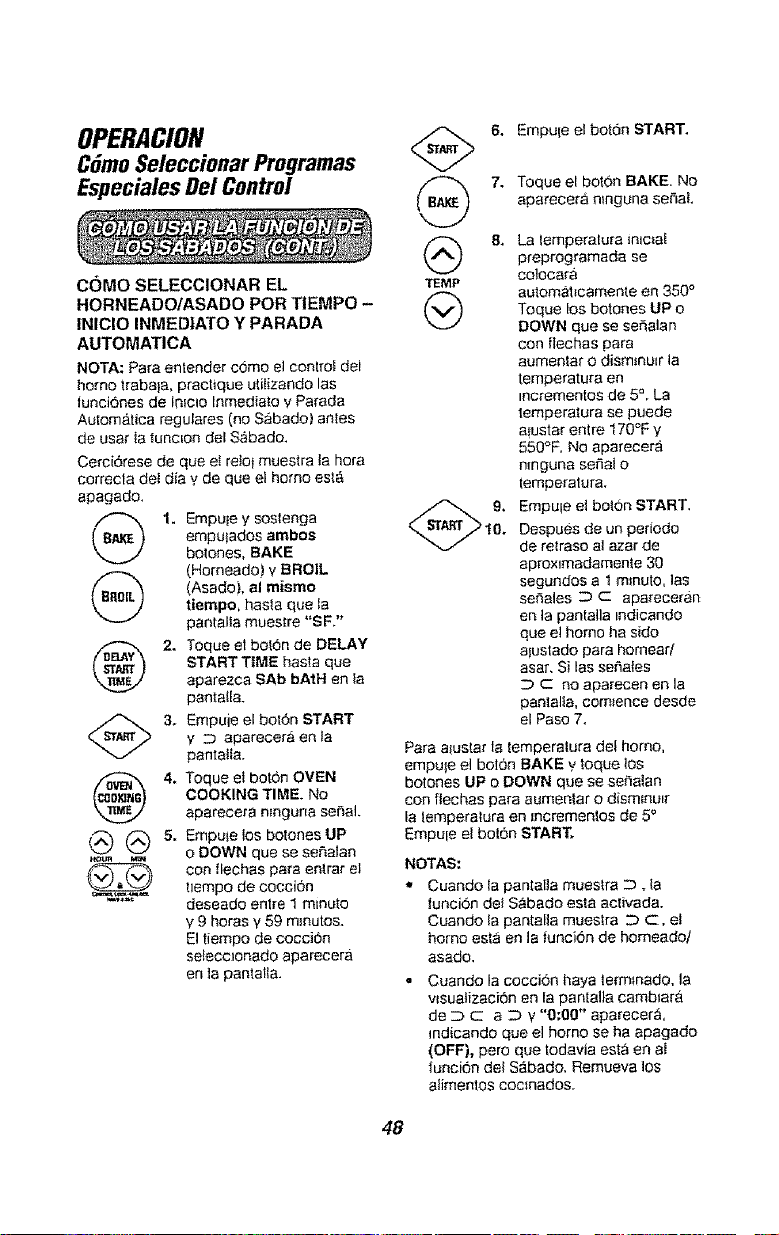
OPERACION
CSmo Seleccionar Programas
Especiales Del Control
COMO SELECCIONAR EL
HORNEADO/ASADO POR TIEMPO -
INICIO INMEDIATO Y PARADA
AUTOMATICA
NOTA: Para entender cOmo el control del
homo trabala, practique utilizando las
tunciGnes de In_cio Inmediato v Pa_ada
Automa.tica regulares (no Sabado) antes
de usar laluncton del S,_bado.
CerciGrese de que el retof muestra la horn
correcta det din v de que ei homo esta
apagado.
1. Empule y soslenga
empuiados ambos
botches+ BAKE
(Homeado) v BROIL
(Asado), el mismotiempo, hasla que la
pantalla muestre "SF."
2, Toque el bolon de DELAY
START TIME hasta que
aparezca SAb bAtH en la
pantalla.
(_ 3. Empuie el botGn START
y D aparecera en la
pantatla.
4. Toque el bOtCh OVEN
COOKING TIME. No
aparecera nmguna sePaL
(_ @ 5. Empute los botches UP
0 DOWN que se se£_alan
con Ilechas pata entrar el
= tlempo de coccion
_'= deseado entre 1 minuto
V9 horas y 59 re;autos.
El tiempo de coccion
seieccionado aparecera
en ]a panta!la.
@
"'fEMP
@
6. Empule el botGn START.
7, Toque el botch BAKE. No
aparecera n_nguna seSal.
8. La lemperatura mlciat
preprogramada se
co]cent&
aulomat_camente en 350°
Toque los botones LIP o
DOWN que se seSalan
con Ilechas pa_'a
aumentar o dismmulr la
temperatura en
mcrementos de 5_LLa
temperatura se puede
aiustar entre 170°F y
550°F, No aparecer_
ninguna serial o
temperatura.
Empule el bo!On START,
Despues de un periedo
de relraso al azar de
aproximadamente 30
segundos a 1 m_nuto, ins
se_ales D c apa_'eceran
en ta pantalla indicando
que e! homo ha sido
alustado para hornear/
asar. Si las sefiates
D C no aparecen en la
panlalla, commencedesde
el Paso 7.
Para a!uslar la lemperalura det homo,
empute el bolon BAKE y toque los
botches UP o DOWN que se se_alan
con flechas para aumenlar o dismmu=r
la temperalura en Jncremenlos de 5°
Empule el botGn START,
NOTAS:
,, Cuando {apantalla muestra D. la
luncion del Sabado esta aclivada.
Cuando la pantalla mueslra D Co el
homo asia en la |unciGn de homeado/
asado.
• Cuando laeoeciOn haya ieimtnado, la
v_suatizaciGn en la panlal]a cambiara
de D C a D y "0;00" aparecer&
indicando que el homo se ha apagado
(OFF), pero que todavia est_ en aI
tunciGn del SAbado. Remueva los
alimentos coc_nados.
48
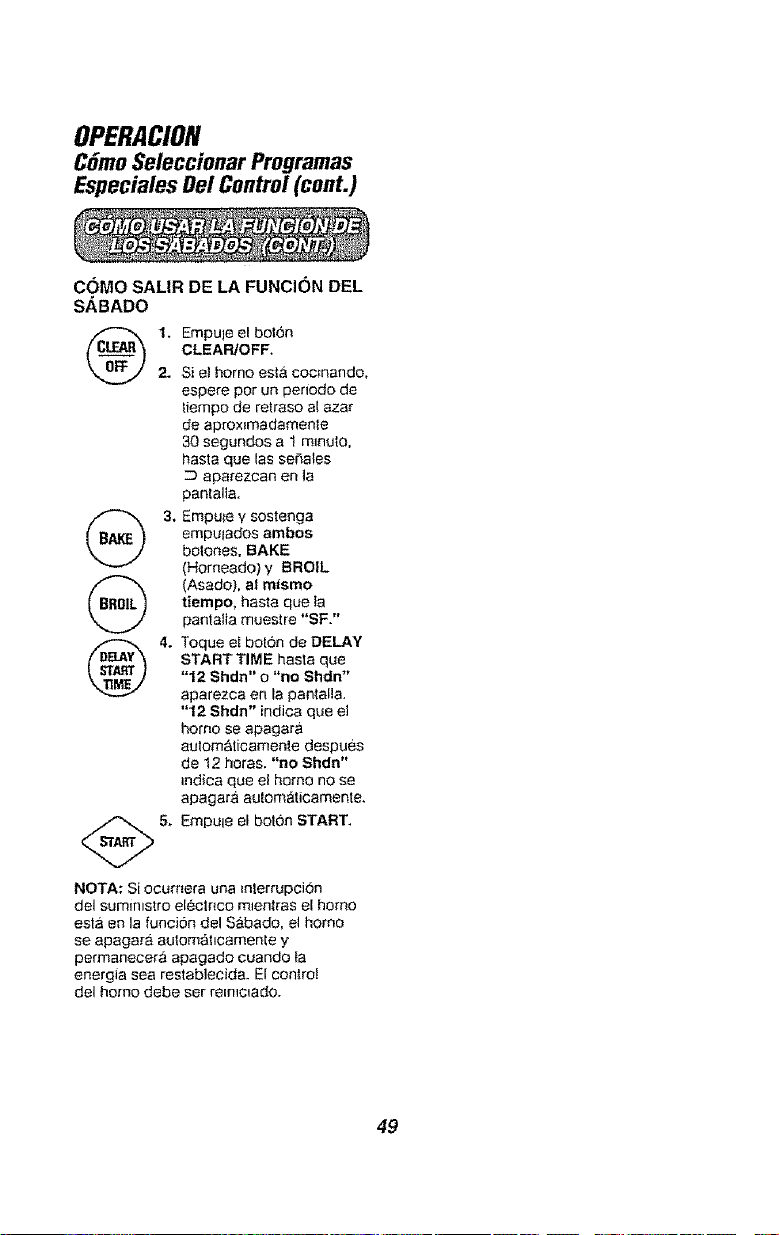
OPERACION
CGmoSeleccionar Programas
Especiales Dei Control(cont.)
COMO SAL|R DE LA FUNCION DEL
S/_BADO
1. Empule el bol0n
CLEAR/OFF.
2. Si el homo est_ coc_nando,
espere per un perlodo de
tiempo de retraso al azar
de aprox_madamen_e
30 segundos a t m_nuto,
basra que lab seP,ales
aparezcan en _a
pantalla_
(_ 3. Empu_ey sostenga
empulados ambos
bolones. BAKE
(Homeado} y BROIL
(_) (Asado}, a! mismo
tiempo, haste que la
pantal]a muestre "SF."
4. Toque el bot6n de DELAY
START TIME hasta que
"12 Shdn" o "no Shdn"
aparezca en la pantalla,
"12 Shdn" indica que e]
homo se apagara
automalicamenle despues
de 12 horas. "no Shdn"
_ndica que el homo no se
apagara auloma.ticamente,
<_5. Empule el boron START.
NOTA: Si ocumera una _nlerrupci0n
del suminlstro electr_co mlentres el homo
esta en la funciSn del Sabado, el homo
se apagara autom&t_camente y
permanecera apagado cuando ta
energia sea restablecida. El coniro!
del homo debe ser rem_c_ado.
49

OPERACiON
Ciclode Autolimpieza
1, Saque Ia cacerola y la parfilla para
asar, utensiiios y cuaiqu_er papet
de alum_n_oqua podria quedar en
el homo.
2, Las parrillas cub_ertas de porcelana gns
m_smas deben ser removidas durante el
c_cio de Iimp_eza autom,_tica.
3. La suctedad sobre el marco lrontal
v afuera de] sello det revestlmlento de
la puerta necesitar_ set limp_ada
a mare.
Marco frontal
±
Revestim_ento de
la puerta
\
Limp_e estas areas con agua calien_e,
lani]las con _ab6n o limp_adores come Sot'{
Scrub e pa_'asacar cualqu_er sucledad.
Enluague b_encon agua timp_a ,/seque.
No use timpJadores de hornos--nlngun
limp_ador de homes para uses comerciales
o revestim_enlo de prolecci6n debe set
usado en el intenor o alrededor del homo.
4, Limp_e cuatquJer derrame pesado det
_ondo del homo,
5. No limple el selle de la puerta del homo.
El ma{enal de fibra de vidrio de Japuerta
del homo nosoporta la abrasidn. Es
esenc_alqua el sello permanezca _ntac_o.
Si usled nora que se es'Lagaetando o
trlzando, deberla set reemplazado.
El se_lode la puerta es'_a,diseSado para
que tenga un espac_o de 10" en el rondo
del homo.
Panel de la puerta Sello
Revestimento de la puerta
Esto permite la ctreulaci6n adecuada
del a=re.Es normai que su homo de la
apanenc=a de no tenet un buen sello
sobre el homo. Esto se debe al sel_o.
La ub_caciSn del sello sobre la pueda
mantiene la pueda sellada y prewene
cualqu_er perdida de calor.
Los utensilios nunca se
deberlan dejar dentro del
homo durante un ciclo de
autolimp_eza.
Las parritlas cubiertas de porcelana
gria pueden ser timpiadas con
segurided en el interior det homo
durante el ciclo de limpieza autom_tica.
Serzi necesario para engrasar los
extremes de la parrilla del homo con
una capa ligera de aceite vegetal
despues de un cmlo de limpieza. Esto
ayudara a que se haga f_icil deslizar los
estantes o rejillae en el homo,
Durante el primer ciclo de limpmza,
ventile la habitaci6n con una ventana
abiarta o una campaea de ventilacidm
Esto ev[lara el olor fuerte pmducido
per el calentamiento de las partes
noavas.
5O
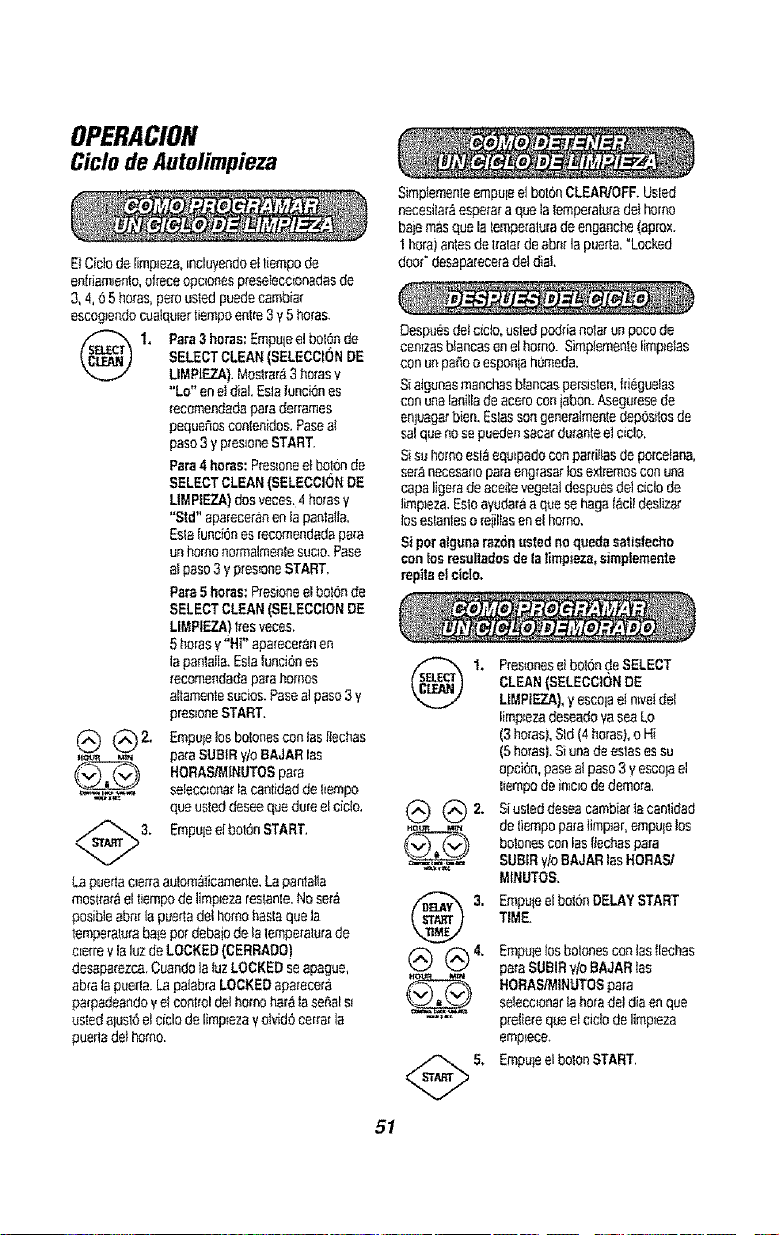
OPERACION
CiclodeAutolimpieza
ElCidode rimp_eza,_ncluvendoe_tiempode
entdam_ento,effaceopctoo_ p_ese',ecc_on_dasde
3,4,O5horas,peruustedpuedecambiar
escog_ondocua!qu_ertiempoentre3V5hera&
1. Pare3heros:Empuleel boI?'nde
SELECTCLEAN(SELECCIONDE
UMPIEZA}.Mootrar_3 ho_aav
"Lo" eneldie!.Eolaluncbnes
_ecomeodadaparaderrames
poqua_osconler_idos.Pasea_
paso3ypres_oneSTART.
Para4 hares:P_es_oneel boLonde
SELECTCLEAN(SELECCiONDE
LIMPIEZA)dosveces.4herosy
"Std" apareceranenla paolalta.
Eslafuoci6nes reoomeodadapare
unhomonotmWmoolesuclo.Paso
al paso3 yp_es_oneSTART.
Pare5 heros:Presioneel belchde
SELECTCLEAN(SELECCIONDE
UMPIF.ZA}_resraces.
5 herosy"Hi" apatoceranen
Iapanlalla.EslaIunci6nes
recomendadaparahomes
altamentesucios.Pasoa!paso3y
pes_oneSTART.
(_'_-'_2. Empufelosbotchesconlasl_ect'_as
paraSUBIRyloBAJARlaS
%J %u
HORA&tMINUTOSpapa
,.,._. seleccmna_lacaetidaddel_empo
quausteddeseecluedupeelcicfo,
3. Empofeelboloe START.
LapuertooerraautomWicamente.Lapanlatla
mos_,'arael Iiempodelimpezarestanle.Nose_'_
podbleabor[apue,ladd homohastequala
lemperaloraba_epo_debaiode_alemperatwade
c_e[rev IsluzdeLOCKED(CERRADO)
de_parezca.CuandoIalazLOCKEDseapagua,
abrala puer_a.LapatabraLOCKEDaparecera
parpadeandove}controldelhomoharelasdial s_
usledalusl6elcfc!odeIimpfezayoMd6 cer_'atla
pueriadelhomo.
Simplemenleampuleel bol6nCLEAR/OFF.Usled
necesitar_espe[ataqualalemperaiomdel homo
bajemasquala temperaWradeengaeche(aprox.
1hera)anlesdel_'alardoabr_[la puott&"Locked
door"desapareoe[add dial
Despuesdotciclo,oaredpodriaeclatuopacede
can_zasb_ancasanelhomo. Simplemenlelimpelas
conunpa_ooesponiah0moda.
Siatgunasmoochesblancaspersislen,fdegualas
conunalanilladeaceroconiabon.Asegdesede
e[wagarbion,Eslassengeneratmenledepds_losde
salquanoso pueder_sacardutanteel cic!o,
Sisuhomoasiaeqwpadoconpardflasde porcelana,
serenecesa_oparaengrasarIooexb'emoscon uoa
capelige_'adeaceilevegelaidespuesdelciclode
limpez&Estoayudaraa quasehagai_.cildesliza'r
losestanleso _'e_ilasenel homo.
Sipotalgunarazonustednoquadasatistecho
conlosresultadoodefalimp;eza,simplemeote
repitoel ciclo.
51
@
3,
@@'.
@
Pros{onesel boI6ndeSELECT
CLEAN(SELECCIONDE
LIMPIEZA),y escolael o_veldel
limp_ezadeoeadoyaseaLo
(3 horas},Sld(4 betas),o Hi
(5 ho_as).Siunadeeslases su
apei6n,pasoaipaso3y escojael
liempodoin_c_odedemote,
Siusleddeseacambiar_acaelidad
detiempopa_alimper,ampulelos
bo_oneoconleoilechaspore
SUSIRy/oSAJARlasNORASI
MfNUTOS,
EmpuleelboronDELAY START
TIME
Empulelosbotonescoalas!laches
pareSUBIRy/oBAJARlas
NORASiMINUTOSpata
selecoonar}aho,'adetdieenqua
prefierequeel050 delimp_eza
empece.
EmpuleeiboIonSTART.
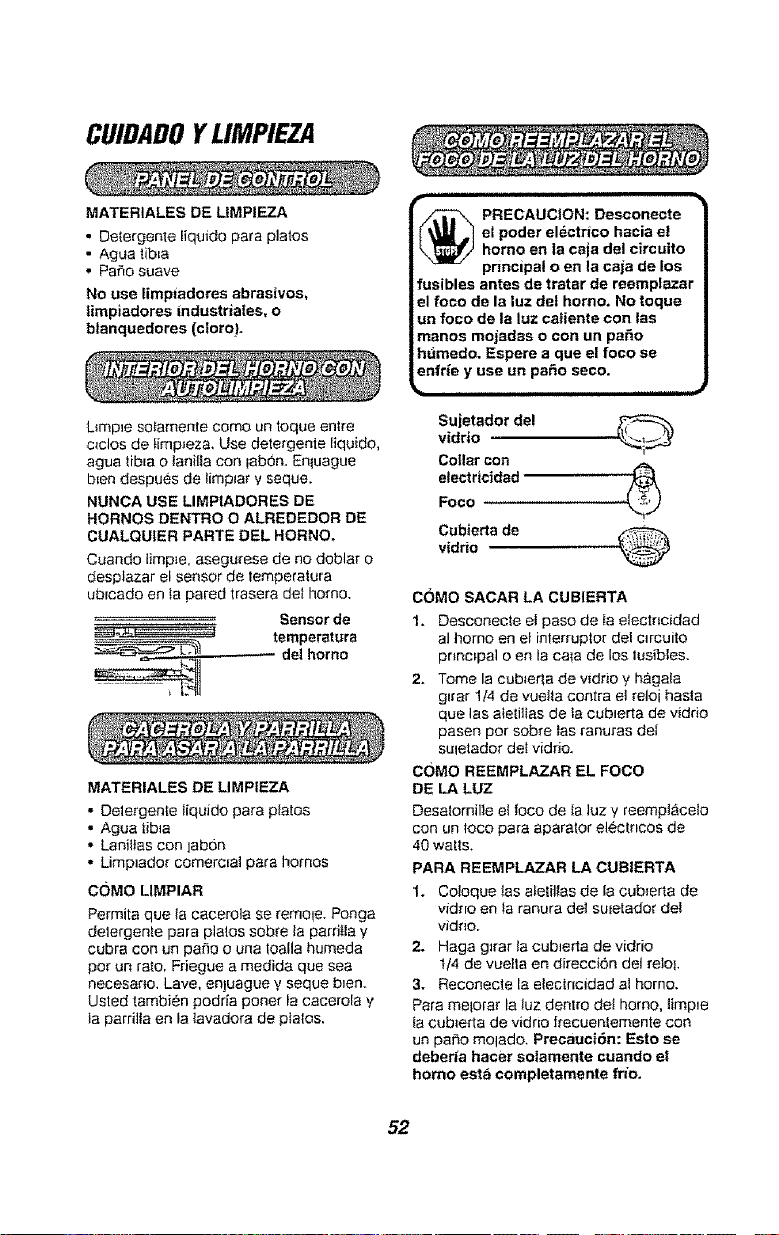
CUIDADOYLIMPIEZA
MATERIALES DE LIMPIEZA
• Detergenle liquido para platos
• Agua tibia
• Patio suave
No use limpiadores abrasivos,
timpiadores industriales, o
blanquedores (ctoroL
L_mp_esotamente como un toque entre
c_clos de fimp_eza. Use detergenie liquido,
agua Iib_ao tanilia con lab0n. Enluague
b_endespues de limp_ar Yseque.
NUNCA USE LIMPIADORES DE
HORNOS DENTRO 0 ALREDEDOR DE
CUALQUfER PARTE DEL HORNO_
Cuaedo Iimp_e,asegurese de no doblar o
desplazar el sensor de temperatura
ubfcado en la pared trasera del homo.
Sensor de
temperatura
__ del homo
MATERIALES DE LIMPIEZA
• DeIergente Iiquido para platos
• Agua libla
• LaniIlas con laban
• Limp_ador comercfal para hornos
cOMO LIMPIAR
Permita que la cacerola se remoqe. Ponga
delergente para platos sob[e la parrJfla y
cubra con un patio o una toalla humeda
pot un taro, Friegue a medida que sea
necesarlo. Lave, eniuague y seque b_en.
Usted (ambiee podria poner la cacerola 7
la pardlla en la lavadora de plalos,
Fill I
_ RECAUCION: Desconecte
el poder el_ctrico hacia e!
homo en la caja del circuito
pnncipal o en la caja de los
fueibles antes de tratar de reemplazar
el foeo de la luz del homo. No toque
un foco de la luz caliente con las
manos mo]adas o con un paso
humedo, Espere a que el foco se
enfrie y use un paso seco.
Sujetador del 0
vidrio
Cotler con
electricidadFoeo
Cubierta de
vidrio
COMO SACAR LA CUBIERTA
1. Descoeecte el paso de ta etectncidad
al homo en et interruptor del circuitO
principal o en la cala de los tusibles.
2,. Tome la eub_eda de viddo v h,_gala
glrar 1t4 de vue!ta comra el reloi hasta
que las aietilias de ta cublerta de vidrio
pasen pot sobre tas ranuras del
suqetador del vidrio.
cOMO REEMPLAZAR EL FOCO
DE LA LUZ
Desalornil_e el ioco de Ia luz Vreempl_celo
con un loco pa_'aapara_or elecmcos de
40 watts.
PARA REEMPLAZAR LA CUBIERTA
1. Coloque las aletil{as de la cub_erta de
vidrvo en ta ranura del suietador del
vidrio.
2. Haga g_'ar la cub_erta de vidrio
t14 de vuella en direcci6n del relol.
3. Reconecte la eiectncidad at homo.
Para melorar la luz dentro del homo, limp_e
Ia cub_eria de vidrio frecuenlemente con
un patio molado, Precauci6n: Esto se
deberfa hacer solamente cuando el
homo esta completamente frm.
52
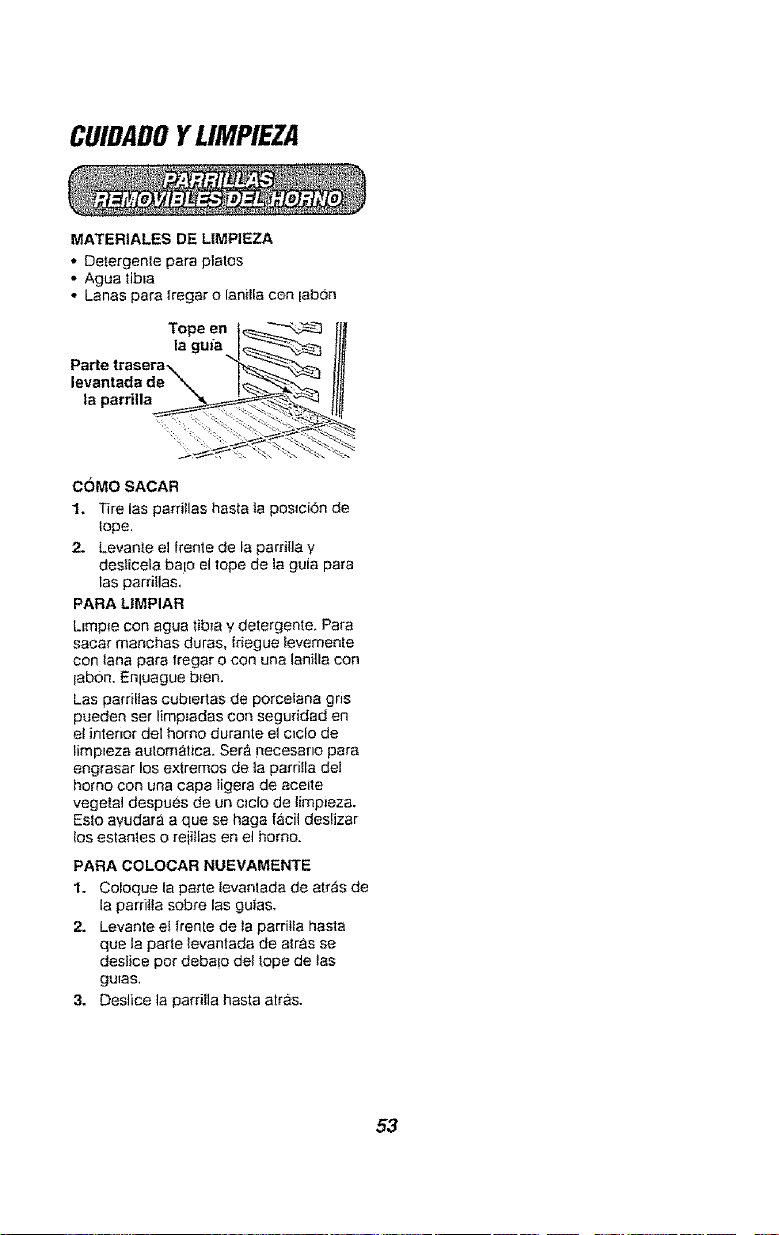
CUIDADOYLIMPIEZA
MATERIALES DE LIMPIEZA
* Detergenle para plates
* Agua tibia
• Lanas para tregar o lanilla con labon
Tope en _ H_
.:.e Ill
la parrilla tl_
COMO SACAR
1. Tire las parfillas hasta la pos_ciOn de
tope,
2. Levante el fl'enle de la parrilla y
desficela balo el lope de la guia para
las pardllas,
PARA LIMPIAR
L_mple con agua tibia y detergente+ Para
sacar manchas duras, fdegue levemenle
con lana para fregar o con una lanilla con
labOn, Enluague blen.
Las parriltas cubiertas de porcetana gris
pueden set limp_adas con seguridad en
et interior del homo durante el c_clo de
Iimp=eza aulomalica. Ser_ necesario para
engrasar los extremos de la parrilla del
homo con una capa tigera de aceite
vegelal despues de un c_clo de timp_eza,
Eslo avudara a que se haga tacit deslizar
los eslanles o reiitlas en el homo.
PARA COLOCAR NUEVAMENTE
1. Coloque la pa_'tetevantada de alras de
la parfifia sobre las guias,
2. Levanle el ffenle de la parriila hasta
que la parle levantada de alras se
deslice pot deba!o del lope de tas
guias,
3. Deslice la parrilla hasta atras.
53
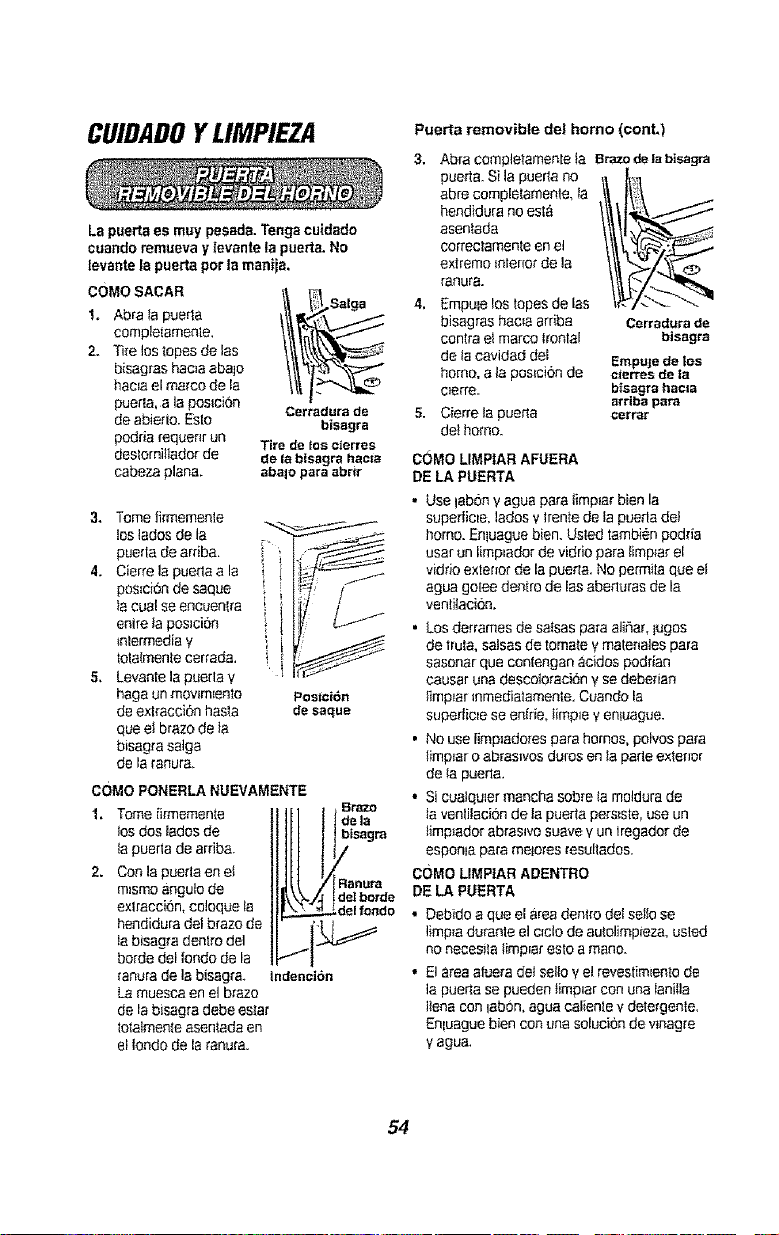
CUIDADOYLIMPIEZA
La puertaes muy pesada.Tengacuidado
cuandoremuevay ]evante lapuerta. No
levantela puerta par Iamaniia,
C0MO SACAR I/ _Salga
1, Abra la puerla _t/t_
completamente,
2. "fke los lopes de las
bisagras hac_aabajo
hac_ael marco de ra
puerla,ala pos_cion Cettadurade
de abierto. Esto bisagra
podda requer_run Tire de los cterres
destomi_iadorde de |a bisagra hacia
cabeza plan& abalo paraabrir
3. Tomelin'nemenle
los ladesde _a
pueda de arriba.
4. Cierre la puerla ala
pos_ci6nde saque
}acue! se eecueelra
entre la pos_ci6n
_nlermediay
lolaImente cerrada,
5. Levantela pue_lay
haga unmov_m_ento
deextfacci6n hasla
qua el braze de la
bisagra salga
de la ranur&
t
Posici6n
de saque
COMO PONERLA NUEVAMENTE
1. Tome iirmemenle
_osdos lades de
la peoria de arriba.
2. Can la puerta en et
m_smoangulo de
exlracci6n, celoque fa
hendidura dot braze de
la bisagra denlro del
borde del rondo de la
ranura de la bisagra.
La muesca en e! b_'azo
8r_
i1ll°o,°
bisagra
Indencidn
de la bisagra debe es_at
lolalmenle asenlada en
el lo[_dode la tenure.
Puerta removible de| homo (cont.)
3, Abra compleiamenle la Brazedela bisagra
pueda. Sila puer_ano tl _1
abre complelamenle, Ia
hendidura noesta
asentada
cor[ec,'amenle enel
extreme _otenorde la
raRura.
4, Empulelos lopesde las - '
bisagras haoa arriba Cerradurade
contra el marco _ronlal bisagra
de tacavidad dei EmpuJede los
homo, ala pos_ci6nde cierresde la
cerre, bisagrahama
arriba para
5. Cierre lapue_la cerrar
del homo.
COMOLIMPtAR AFUERA
DE LAPUERTA
• Useleben Vague pare limplar bien la
supeffic_e,lades y lrenfe de la pueria de!
homo. Enluague bien. Usled tambienpodria
usarun limp_adorde viddo para limp_arel
viddoextenot de la pue_la.No permila que el
aguagotee denlro de lasaberiuras de la
venlitaci6n.
, Los derrames de salsas paraeither, lugos
de truta, salsasde female Ymalerlates pare
sasenarqua contenganacidos poddan
causar unadesco_oraci6ny se debe[ian
timp_arInmediatamenle, Cuando la
superfic_ese entrie, timp_ey enluague.
° No use limp;adores pare homes, pelves pafa
Iimptaro abrasives duros en la parle exterior
de la puerla.
• Si cualqu_ermancha sabre la moldura de
_avenlJiaci6nde la pueda pers_ste,use un
Jimp_adorabrasive suavevun lregador de
esponla pare metoresresullados,
C0MO LIMP|AR ADENTRO
DE LAPUERTA
• Debido a que el area deniro del sello se
limp_adurante el oclo de aulolimp_eza,usled
nonecesila limp_areslo a mane.
• Elarea atuera detsello Vel revestimiento de
la pueria se pueden _imp_arcon una laniIla
lianacan leben, ague calienle v dele_genle,
Enluaguebien con una soluci6nde v_nag_e
Vague.
54

ANTESDE LLAMAR PARAUN SERVICIO
Para aborter tiempo y dinero, antes de Ilamar para un servlclo, revise la lista de rn&s abaio
para cualqu_er probtema qua us_ed crea que tiene con el funclenamtento de su homo, Si
ef probtema es aigo qua usted no puede reparar, use los NQmeros de Serv_c_opa[a ei
Consumldor que se encuentran al final de este guia, Cuando haga un Ilamado, tonga
disponible el ndmero de modelo, ntimero de serie, lista de partes para reparacmnes,
guia de use y cuidado y la fecha de compra.
PROBLEMA POStBLE CAUSA
ii,H,
E1dial dei control Mal funcionamientodet
pesta_ea una "F" homo.
seguida per un
nSmeroo latra.
i i ,i
Elhomo y tos
coatrotes del homo
no funcmnen.
a, No pasa
electr{cidad a}homo,
b, El_elolesta en la Tunc_6n
en btanco,
Latemperature del homo Caiib_aciondot coni'rotdel
pareceester inexact& homo,
Lapueda del
homo nO Sa
desengancha,
POSIBLE SOLUCION
Empuleel bot6n CLEAPJOFF.Permita
qua el homo se enffie peruna hera y
ponga nuevamenle el homo en
Iunc_enam_ento.Si el problema se
repite, Ilamepa,raun serwcio.
ao Rewse tacain del cr_'cuito
o ios_usibies.Asegurese
qua el cordon de la
comente este enchutado.
b. Yea laseccion de "Cdmo
P,'ogrammarFunc_ones
Espec_ales_enesle manual.
Yea _as_ns_.r,Jcczonesparealusla_
la temperaturequa s_guenasia
secci0rt,
El c_clode timp_ezano ha Latemperature dei homodebe
lerm_nado,Elhomo asia be!ata menosde _atemperature
demas_adocalienle, de enganche antes qua la pue,la
pueda abnrse.
La luz del hor_o a. Interrupto_'de la luzen
no funcmna, pos_ci6nde apagado.
b. Focode la luz esta
suelto o quemado,
Elhomo no se a. LOSconlrotes no se
timpi6 o los pusieron bien.
resultados b. EIhomo estaba
fueron males, demas_adosuoo,
Laparrilla del homo
no sedesfiza con
facilidad,
a. Rewsela pos_ci6ndel
_nterruptorde la luz del homo.
b. Reviseel Ioco de la luz del
horno.
a. Leala secc[6n de aute_}mp_ezade
este manual.
b. Los detrames g_andesdeben set
removides antes de que el c_efode
limp_ezamn_cle.Useel c_c!om&s
p[oFongado,Hi pare loshomes n'_,s
SUClOS.
0, Etc_clode Iimp_ezarue c. Elcrclo de limp_ezaestandar es4
_nterrumpido. horns, unc_ctode _imp_ezaLoes
de 3horns, y un c_cIode limpleza
Hies 5 betas.
ul
Las parriflas lue:ron deladas Paseun |rape moledo con un poco de
en etinterior del homo aceite vegetal a losextremes de la
duranle el proceso de pardlla.
limp_ezaautomatlca,
Ruido del Unventi}ado_de
ventilador, refrigeraci_n se podda
encender automaticamente.
55
Esioes normal, Elventilado_de
reffigeraci_n se encendera pare
_etrigerarIns partes _nIemas.E!
venti_adorpodda func_onarper
I 1/2holes despues de qua el
homo se have apagado (OFF).
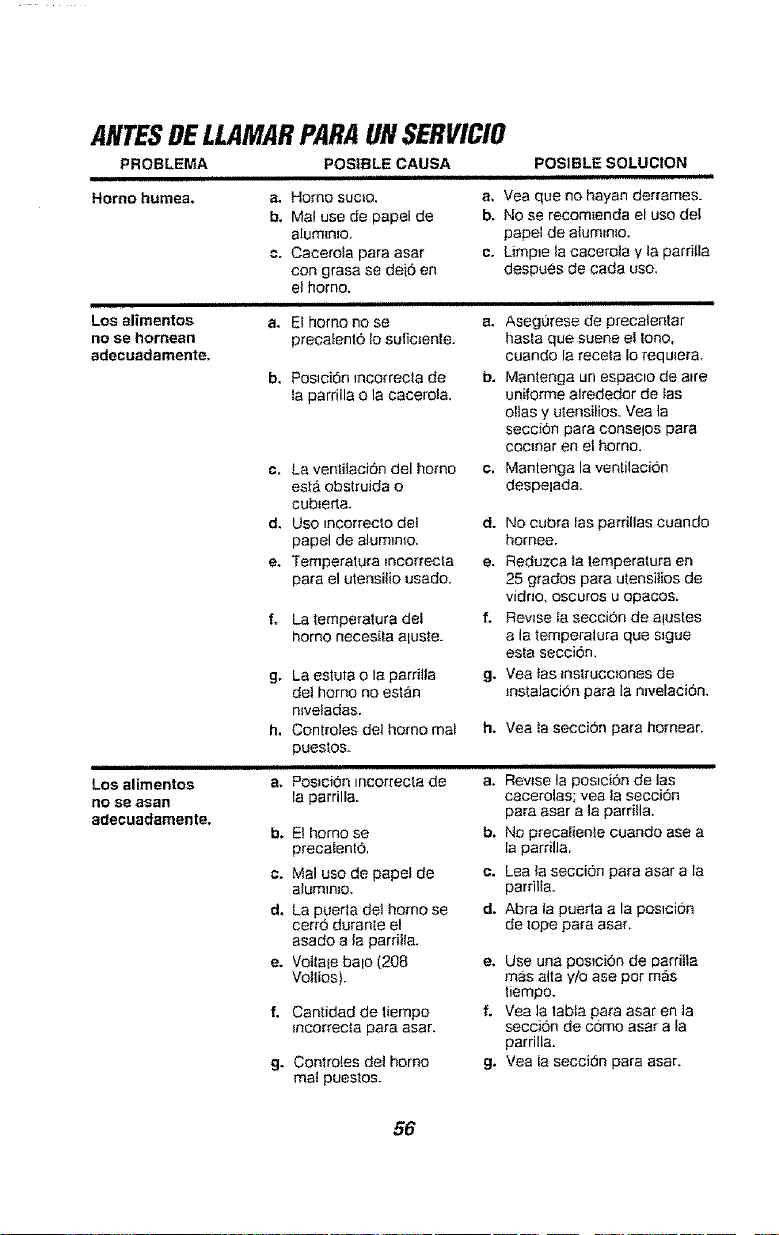
ANTESDELLAMARPARAUNSERVICIO
PROBLEMA POSIBLE CAUSA
i i ,HI
Homo humea, a, Home suc+o.
b, Mal use de papel de
a[umin+o+
0. Cace_'ola para asar
con grasa se dei6 en
el homo,
iii m,,,m,
Los alimentos a. El homo no se
no se hornean preca_enlo lo sufic_ente.
adecuadamente,
PosJci6n mco+-rectade
ta parrilla o la cacerola,
c, La ventitaci6n del homo
estb,obsb'uida o
cub+erta,
d. Use mcorrecto det
papel de alumm_o.
e. Temperatu+'a +nco+'recta
para el utensilio usado.
f. La temperalura det
homo necesita aluste.
iiiiiii
Los alimentos
nO ee asan
adecuadamente.
g.
h,
H
a,
b.
C.
d.
e.
f.
g.
La estuta o la parril+a
del homo no est,_n
nlveladas.
Controles del homo maf
pueslos.
POSIBLE SOLUCION
a, Yea que no hayan deffames.
b. No se recom_enda el use del
papel de alumm_o.
c. Limp_e +acacerola Vta parrilla
despues de cada use,
a,
b.
C,
do
e.
f,
g-
h.
Asegurese de preeaientar
basra que suene el tone,
cuando la recefa Io requ+e+a+
Mantenga un espaclo de alre
unilorme akededor de tas
o!tas y utensilios. Vea la
seccidn para conselos pare
cocmar en el homo,
Mantenga la ventilaci6n
despe!ada.
No cub+a las parrillas cuando
hornee.
Reduzca la temperatura en
25 grades pa_'autensilios de
video, oscuros u opacos+
RevBe ia seccion de alustes
a la tempe+'alura que s_gue
esta secci6n.
Yea las +nslrucc+ones de
+nslalacion para la n+velacion.
Vea ta seccion para homear.
Pos_ci0n mco+'recta de
la parrilla.
E!homo se b,
precaienlo,
Mal use de papel de c.
alumln+o.
La pueda de] homo se d.
cerrO durante el
asado a la parritla.
Voltale bale (208 e.
Votlios).
Cantidad de tiempo f.
_ncorrecta para asar.
Contmles det homo g.
mal puestos.
a, Rewse la pos_cisn de las
cacerolas; yea la secoi0n
para asar a ta parrifla.
No preealiente cuando ase a
la pardlla,
Lea la seccion pa+'aasar a la
parrilta.
Abra la pue,rta a la poslci6n
de tope para asar+
Use una pomci6n de parri!la
mas alta y/o ase per m&s
tiempo,
Yea la labia pa+'aasar en ta
seccion de c6mo asar a la
parrilla.
Vea la secci6n para asar.
56
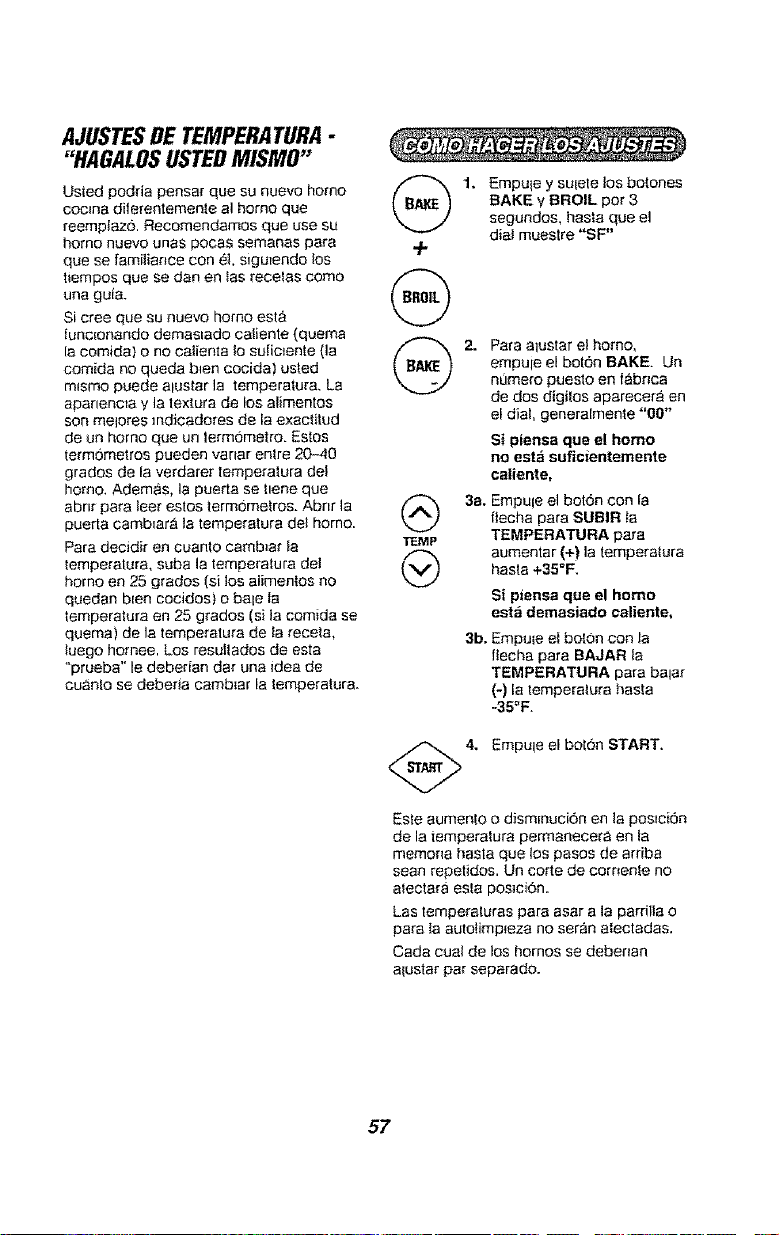
AJUSTESDE TEMPERATURA-
"HAGALOSlISTEDMISMO"
Usted podda pensa{- qua su nuevo homo
eocene dilerentemenle el homo que
reempfaz6, Recomendamos qua use su
homo nuevo unas pocas semanas paca
que se familiance con (_, sigu_endo los
ttempos que se dan entas recetas come
una gu{a.
Si cree que su nuevo homo asia
lunc_onando demaslado cafiente (quema
[a comida} o no calienta lo sufic_ente (la
comida no queda b_en cocida) usted
mlsmo puede alustar la temperatura. La
aparlencta y la lextura de los alimentos
son meleres mdicadores de la exactitud
de un homo que un lermOmetro. Estos
te_'mometrespueden yarner entre 20,-40
grades de la verdarer tempera_.ura del
homo, Ademas, la puerla se Ilene qua
abnr pare leer estos term0metros. Abnr la
puerla cambtar#, la temperature det homo.
Para decidir en cuanto camb_at ia
temperatuca, suba la tempe_'atura del
homo en 25 grades (si los alimentos no
quedan blen cocidos) o bale ta
temperatura en 2.5grades (si la comida se
quema) de la temperatura de la receta,
tuego homee, Los resullades de esta
"prueba" le deberian da_"una idea de
cuanlo se debeTia camb_ar la temperalura.
(_ 1. Empu_e y sulele ios botones
BAKE VBROIL per 3
segundos, basra que el
dial muestre "SF"
./-
2. Pare alustar el homo,
empuie el botdn BAKE. Un
n_Jmempuesto en fabnca
de dos digi{os aparecera en
el dial, generalmente "OO"
Si piensa que e! homo
no estd suficfentemente
caliente,
(_ 3a. Empule el bot6n con laflecha para SUBIR ta
TEMP TEMPERATURA para
aumentar (+') la tempera|ura
haste +35_F.
Si piensa que el homo
estd demasiado caliente,
3b. Empule e_boron con la
ftecha para BAJAR la
TEMPERATURA para baler
{-) la _.empe_a{urahaste
-35_'F.
4, Empule el botdn START.
Este aumento o dismfeuci6n en la postciOn
de la temperature permanecera en la
memor_a haste que los pasos de arriba
sean repetidos. Un corte de corr_ente no
atectara esta pos_ciOn.
Las lemperaturas para asar ala parrilla o
para la autolimp_eza no ser_Jna{ectadas,
Cede cual de los hornos se debenaa
aEustarpar separado.
57
GARANTIADELHORNODE
PAREDEMPOTRADO
UN AI_IO COMPLETO DE GARANT|A PARA TODAS LAS PARTES
Si, dentro de un a_o de ia fecha de instalaci6n, cuatqu_er parte dela de
tuncionar adecuadamente deb_do a un defecto en el matertal o la obra de
mano. Sears la reparara o reemplazara, a nues_:ra opcidn, sin costo.
Si este producto es sometzdo a un uso que no sea et familiar prxvado, la
garantia de arriba es efectiva por solamente 90 dias.
EL SERVIClO DE GARANT[A EST/i. DISPONIBLE AL LLAMAR A SEARS
SERVICE AL I*800-4-MY-HOMEeo
Esta garant[a te brlnda derechos Jegates especificos, y usted tambien
podria tenet otros derechos que varian de estado a estado.
Sears Roebuck and Co. Dept. 817 WA Hoffman Estates, _L60179
58
Contrato de protecci6n
maestra
Fetic_taclones per su compra
_nteligente. Su nuevo apara|o
Kenmore_"est,. diseSado y [abricado
para touches aries de operaci6n
confiable, Sin embargo, at igual que
redes los productos, puede requenr
de mantenlm_ento o reparaci6n
preventivas en cualquier memento. Es
ahi cuando el contrato de protection
maestra te puede ahorrar dinero y
molestias.
Adqutera un Contrato de proteccion
maestra ahora mtsmo y proteiase
contra _noonvententes y gastos
_nesperados.
El Contrato de protecci6n maestra
tambien le ayuda a amptiar ta vida de
su electrodomest_co. Lo s_gulente es
Io que se _ncluye en el contrato:
v"Servicio experto per parte de
nueslros 12,000 especialistas
profesionales de reparacion
¢ Servicio ilimitado sin coste per
partes y mane de obra en todas las
reparactones cub_ertas
v"Garantfa total - reposlcion de su
producto cub=erto si ocurren m,_s
de tres fallas del producto denlro
de doce meses
v"Reposici6n del producto si el
producto cub_erto no se puede
reparar
v"Revisi6n anual de mantenimiento
preventive a su soticitud - sin
cargo adic_onal
v"Ayuda telef(Snica r;ipida -
as_stenc_ano tecn=ca y de
_nstrucciones sobre los productos
reparados en su casa, ademas
de una conven_ente programaci6n
de reparacEones
v"Protecci6n contra descargas
et_ctricas para dafios deb_do a
fluctuaciones electricas
v' Reembolso per alquiler si la
reparaci6n del producto cub_erto
toma mas tiempo del prometido
Una vez adqu_era el contrato, solo
necesita una llamada telef6n_ca para
programar et servicio. Puede Ilamar a
cualqu_er hera de! dfa o de la noche o
programar la c_tade! servlclo per
lntemet.
Sears cuenta con mb,s de 12,000
espec_atistas profes_onales de
reparacion, qu_enes lienen aoceso a
mas de 4.5 railleries de partes y
accesortos de catidad. Este es el t_po
de profeslonalismo en el que puede
contra para ayudar a prolongar la
wda de su nueva compra para los
aSos ven_deros, iAdqutera el Contrato
de protecci6n maestra hey m_smo!
Apliean ciertas limitaciones y
exclusiones.
Para precios e informaci6n
adicional, Ilame al 1-800-827-6655.
Servicio de instalaci6n de Sears
Para la tnstatacidn profeslona!
garantlzada de Sears de
electrodomest_cos y articulos para et
hogar come dispositivos para abnr
puertas de garaie y calentadores de
agua, en los EE.UU. tlame al
1-800-4-MY-HOME ®
59

Your Home
For repair-in your home-of all ma_or brand appliances,
lawn and garden equipment, or heating and cooling systems,
no matter who made it, no matter who sotd it!
For the replacement parts, accessones anff
owner's manuats that you need to do-it-yourself.
For Sears professional installation of home appliances
and items like garage door openers and water heaters.
1-800-4-MY-HOME _' (1-800-469-4663)
Call anytime, day or n_ght(U.S.A. and Canada)
www.sears,com w_',_!.sear s ,ca
Our Home
For repair of carry-in items _ikevacuums, lawn equipment,
and electronics, call or go omline for the location at your nearest
Sears Parts & Repair Center.
1-800-488-1222
Catl anytime, day ornight (U.S.A. only}
WWW.$_aP_.corR
To purchase a protection agreement (U.S.A.)
or maintenance agreement (Canada} on a product serviced by Sears:
1-800-827-6655 (U.S.A.) 1-800-361-6665 (Canada)
Para pedi_ serv=c_o de reparaciSn
a damlcilio, y para ordenar p_ezas:
1-888-SU-HOGAR _
(1-888-784-_27)
Au Canada pour service en fran;ais:
1-800-LE-FOYER "c
(1-800-533-6937)
iiiii,'_::il
6O