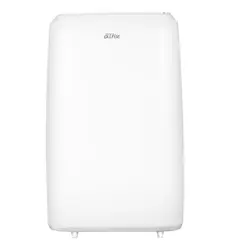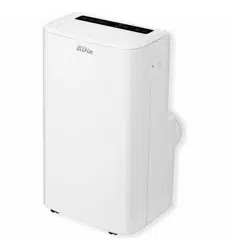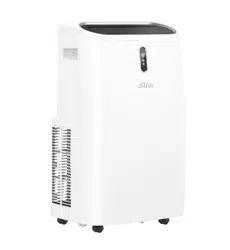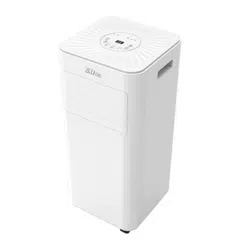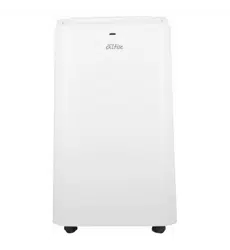
OAPC1617
PORTABLE AIR CONDITIONER

2
Table of Contents
Table of Contents.......................................................................... 2
Important Safeguards ................................................................... 3-4
Placement and Installation ............................................................ 5-6
Parts List ....................................................................................... 6-7
Control Panel ................................................................................ 8
Remote Control .............................................................................. 9
Operation Methods ........................................................................ 9-10
Water Drainage ............................................................................. 11
Maintenance ................................................................................. 12
Troubleshooting ........................................................................... 13
Technical Data ............................................................................. 14
Circuit Diagram ...…………………………………..….….... Appendix A

3
Important Safeguards
Please read this manual
Inside you will find many helpful hints on how to use and maintain your air
condition properly. Just a little preventative care on your part can save you a
great deal of time and money over the life of your air condition. You will find
many answers to common problems inside this manual.
CAUTION
•
Contact the authorised service centre for repair of this air condition
•
This air condition is not intended for use by young children or infirm
persons, without Supervision.
•
Young children should be supervised to ensure that they do not play with the
appliance.
•
If the power cord is damaged it must be repaired by an authorised agent of
Omega Altise
SAFETY RULES
To prevent injury to the user or other people and to prevent property damage,
the following instructions must be followed. Incorrect operation due to not
reading the instructions may cause harm or damage.
•
Your air air condition should be used in such a way that it is
protected from moisture (e.g. condensation or water) do not store or
place the air condition where it can fall from an elevated surface.
•
Always transport the air condition in a vertical position and stand it on
a stable, level surface during operation.
•
Turn off the air condition when not in use.

4
•
Always contact an authorized qualified service agent to carry out repairs.
•
If the supply cord is damaged it must be repaired by a qualified repairer
•
Keep the area clear around the air condition. There needs to be an air path of a
minimum of 50cm all around the air condition from walls, furniture and curtains.
•
If the air condition is knocked over during use turn off the air condition and
unplug it from the power point.
•
Do not operate the air condition in a wet room such as a bathroom or laundry
•
Do not touch the air condition with wet hands
•
Do not press buttons on the air condition with anything but fingers.
•
Do not remove fixed covers. Do not use this air condition if it is
malfunctioning or has been dropped or damaged
•
Never use the power point switch to start or stop the air condition. Use the
control panel first.
•
Do not obstruct the inlet or outlet grills
•
Do not use harsh chemicals to clean the air condition.
•
Do not run the air condition near dangerous chemicals and or hazardous
chemicals.
•
Do not use this air condition for functions other than those described in this
instruction manual.
ENERGY SAVING
•
Use the air condition in the recommended room size
•
Locate the air condition where furniture cannot obstruct air flow
•
Keep blinds and curtains closed to keep out the sun
•
Keep the filters clean
•
Keep doors and windows closed to keep cool air in and hot air out
5
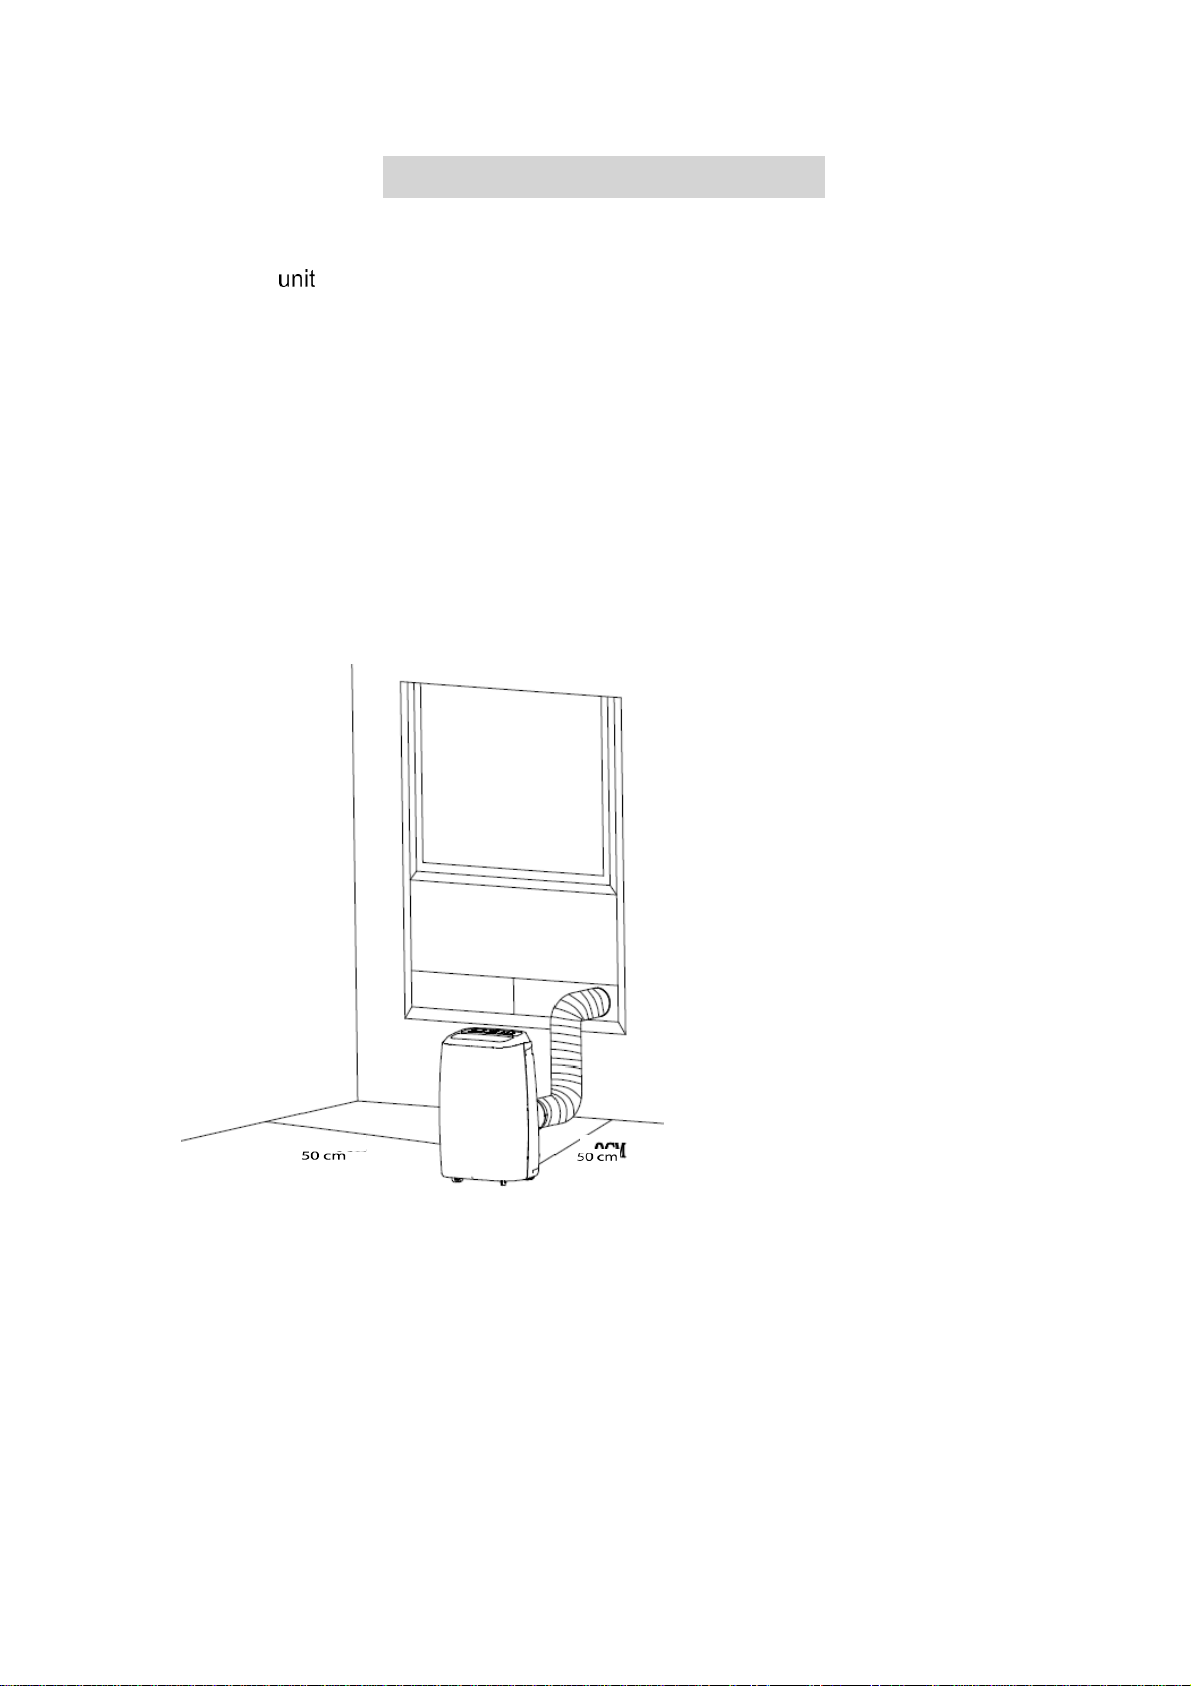
Placement
Placement and Installation
Place the on flat and dry ground, and keep at least 50 cm from walls etc
(figure 1)
Installation
•
Spin slide bar connector into exhaust hose first, then spin the exhaust hose into
exhaust connector (counter-clockwise).
•
Put slide bar connector into adjustable slide bar, adjust window open width in
order slide bar match window well, and the length of slide bar is adjustable.
(figure 2)
FIGURE 1
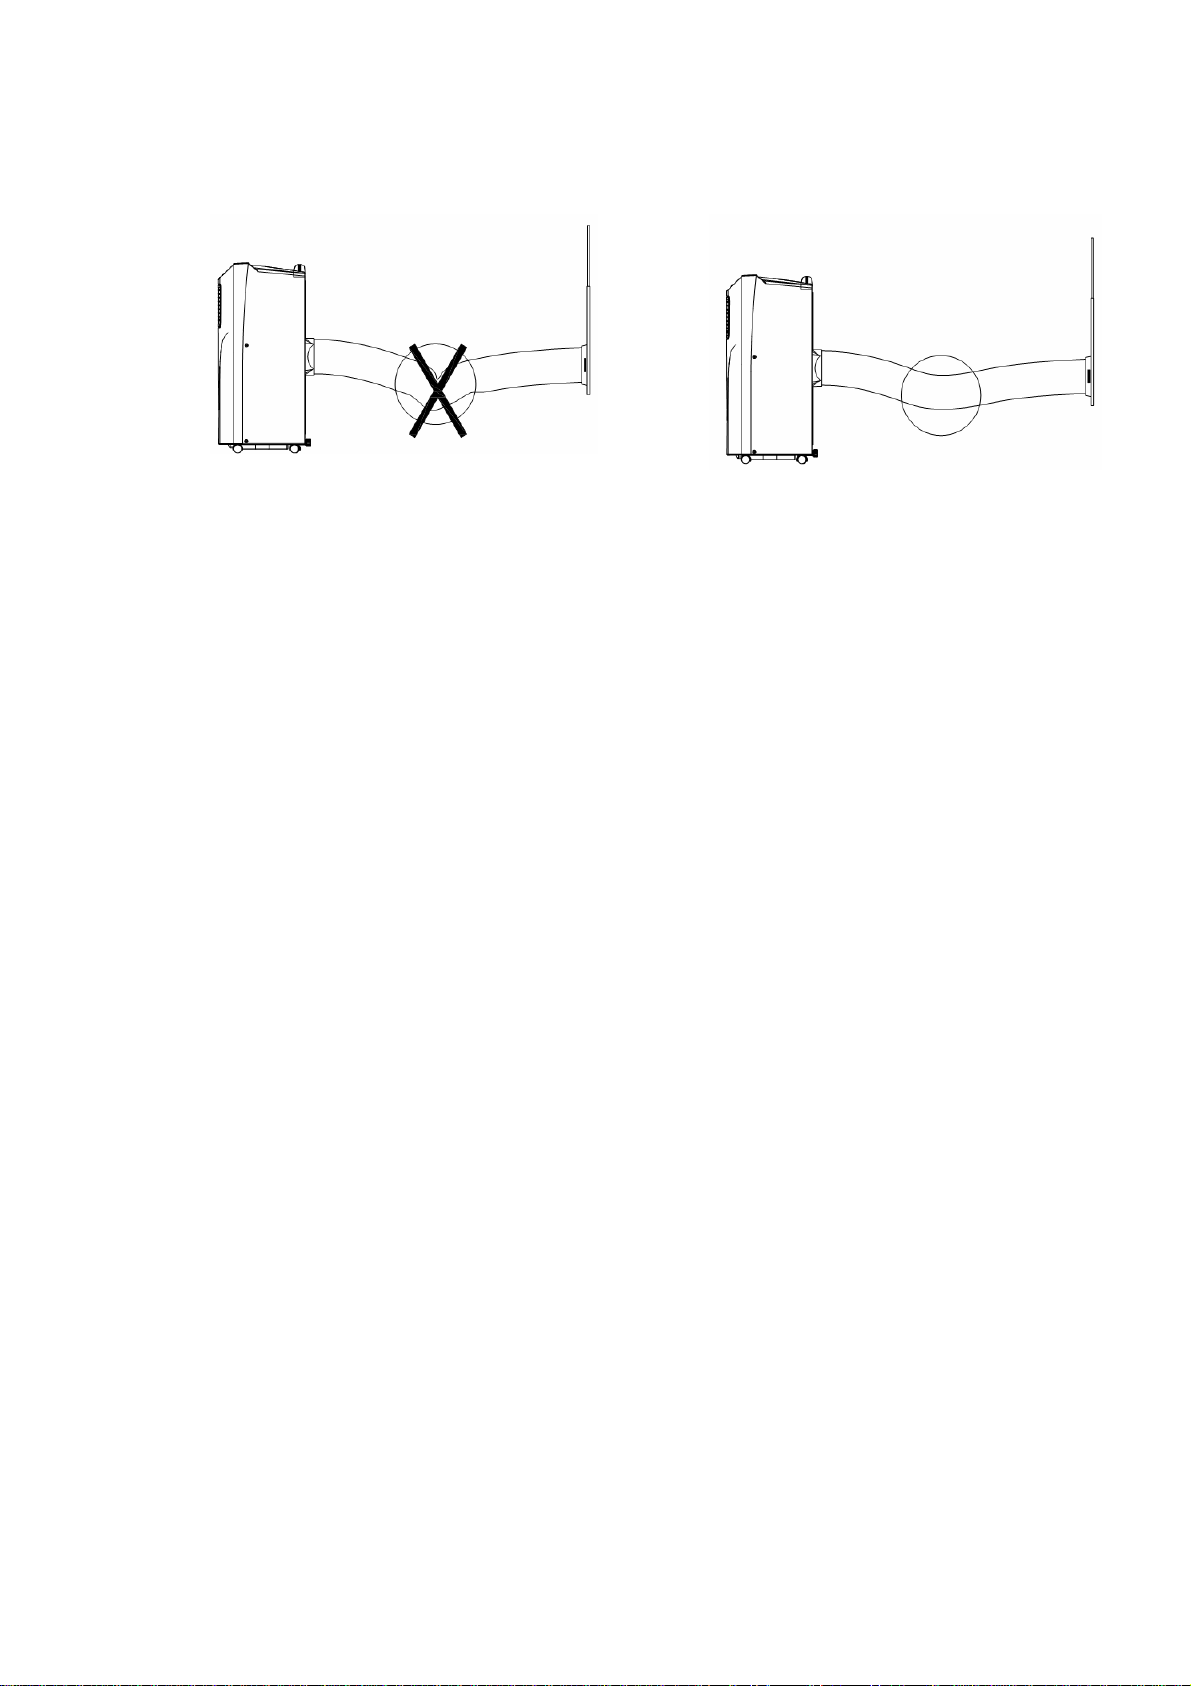
Installation Errors
•
Free access of exhaust pipe is important, If air is not taken out it will affect
performance of the appliance.
•
Avoid sharp bends in the exhaust-pipe (figure 2)
•
Make sure air in exhaust pipe can run smoothly (figure 3)
6
FIGURE 2 FIGURE 3
Warning
Use only the exhaust pipe supplied. Longer or extended pipes may damage the
appliance
Note: Maximum length of unfolding exhaust pipe is 1500mm, please shorten the
length as much as possible and keep it level as much as possible when
installing
7
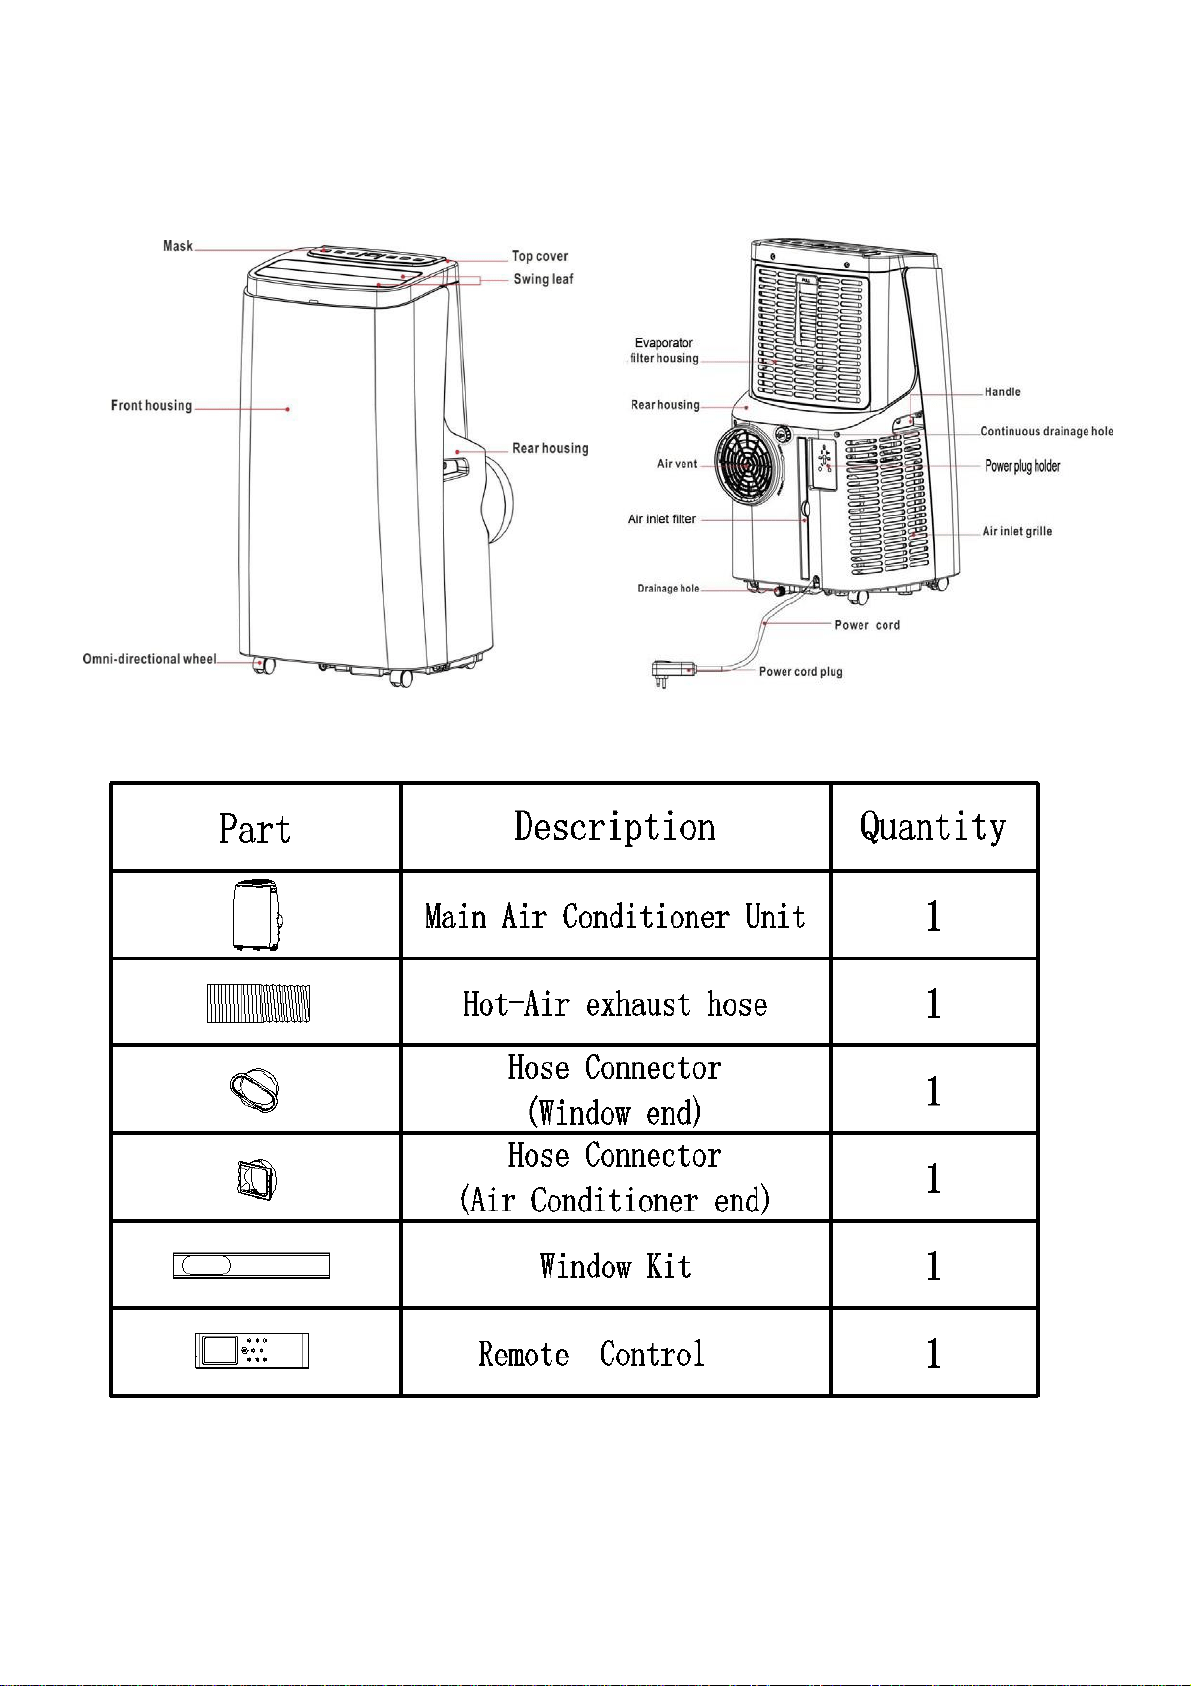
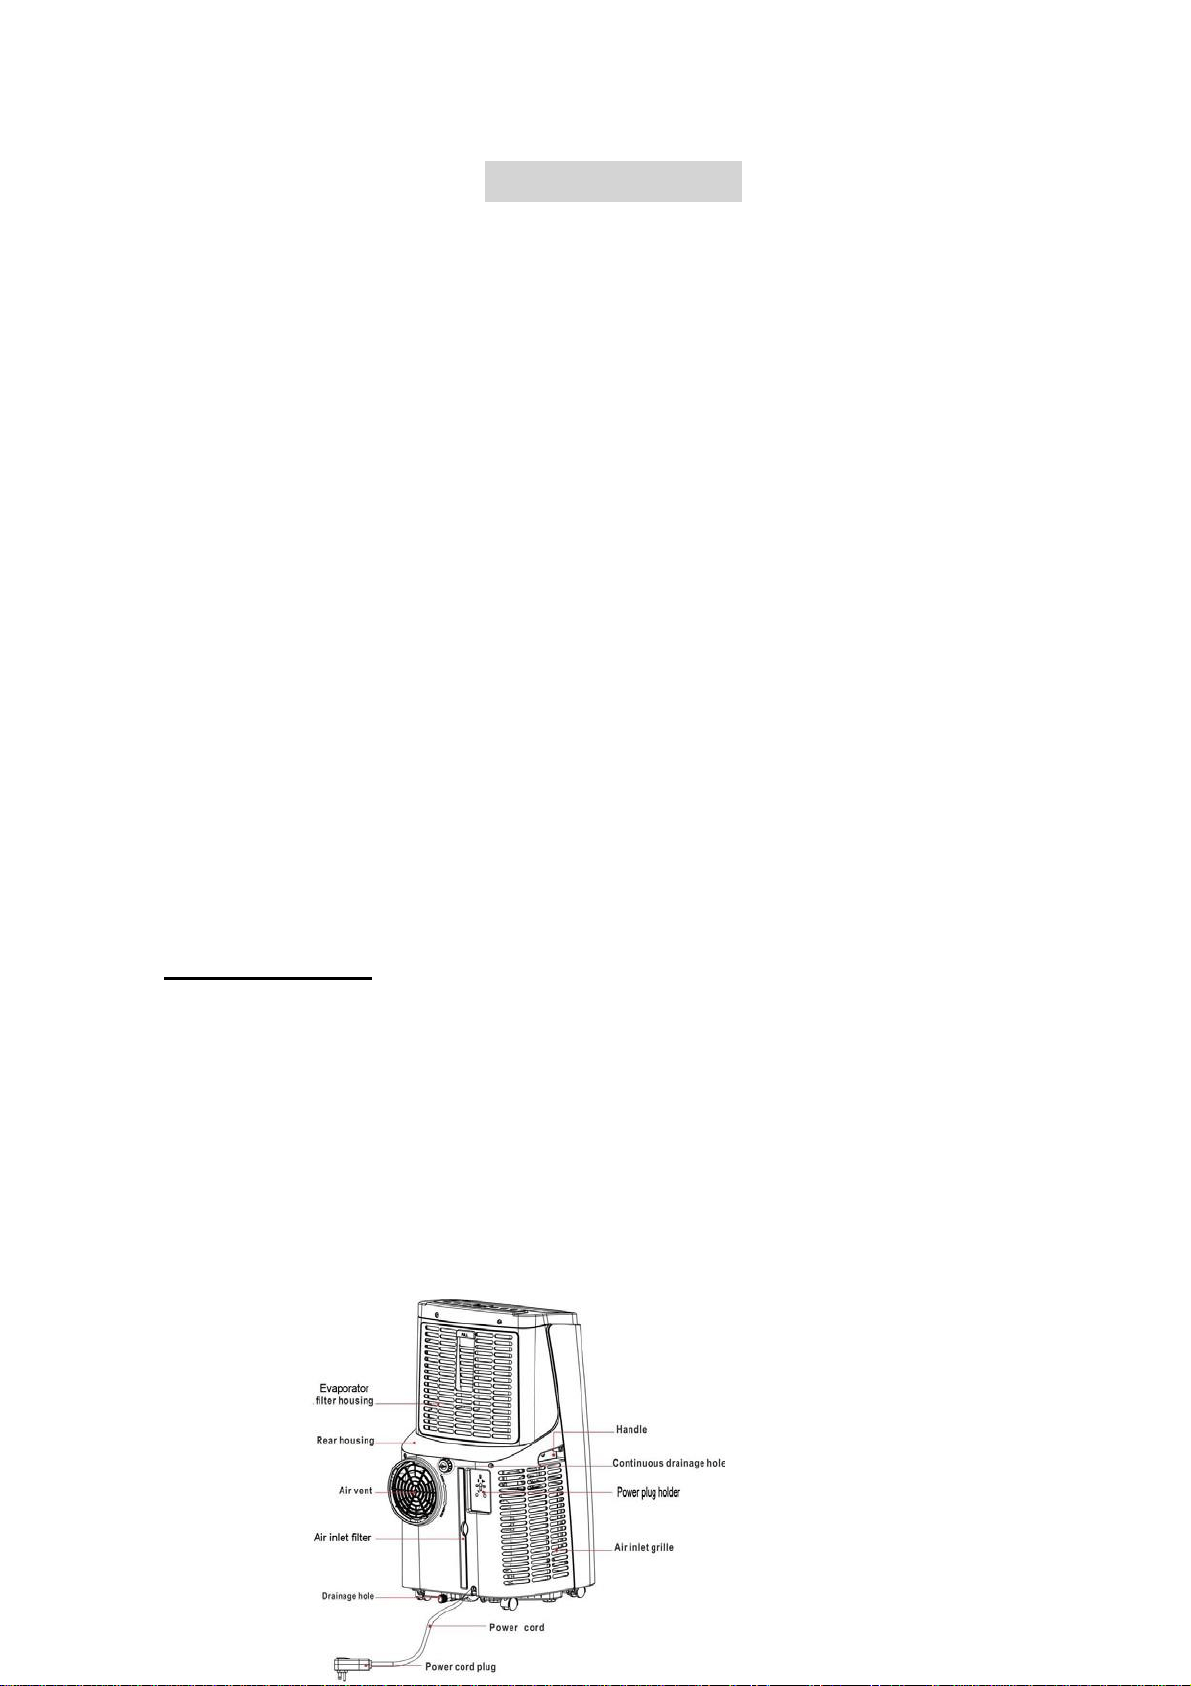
Parts List
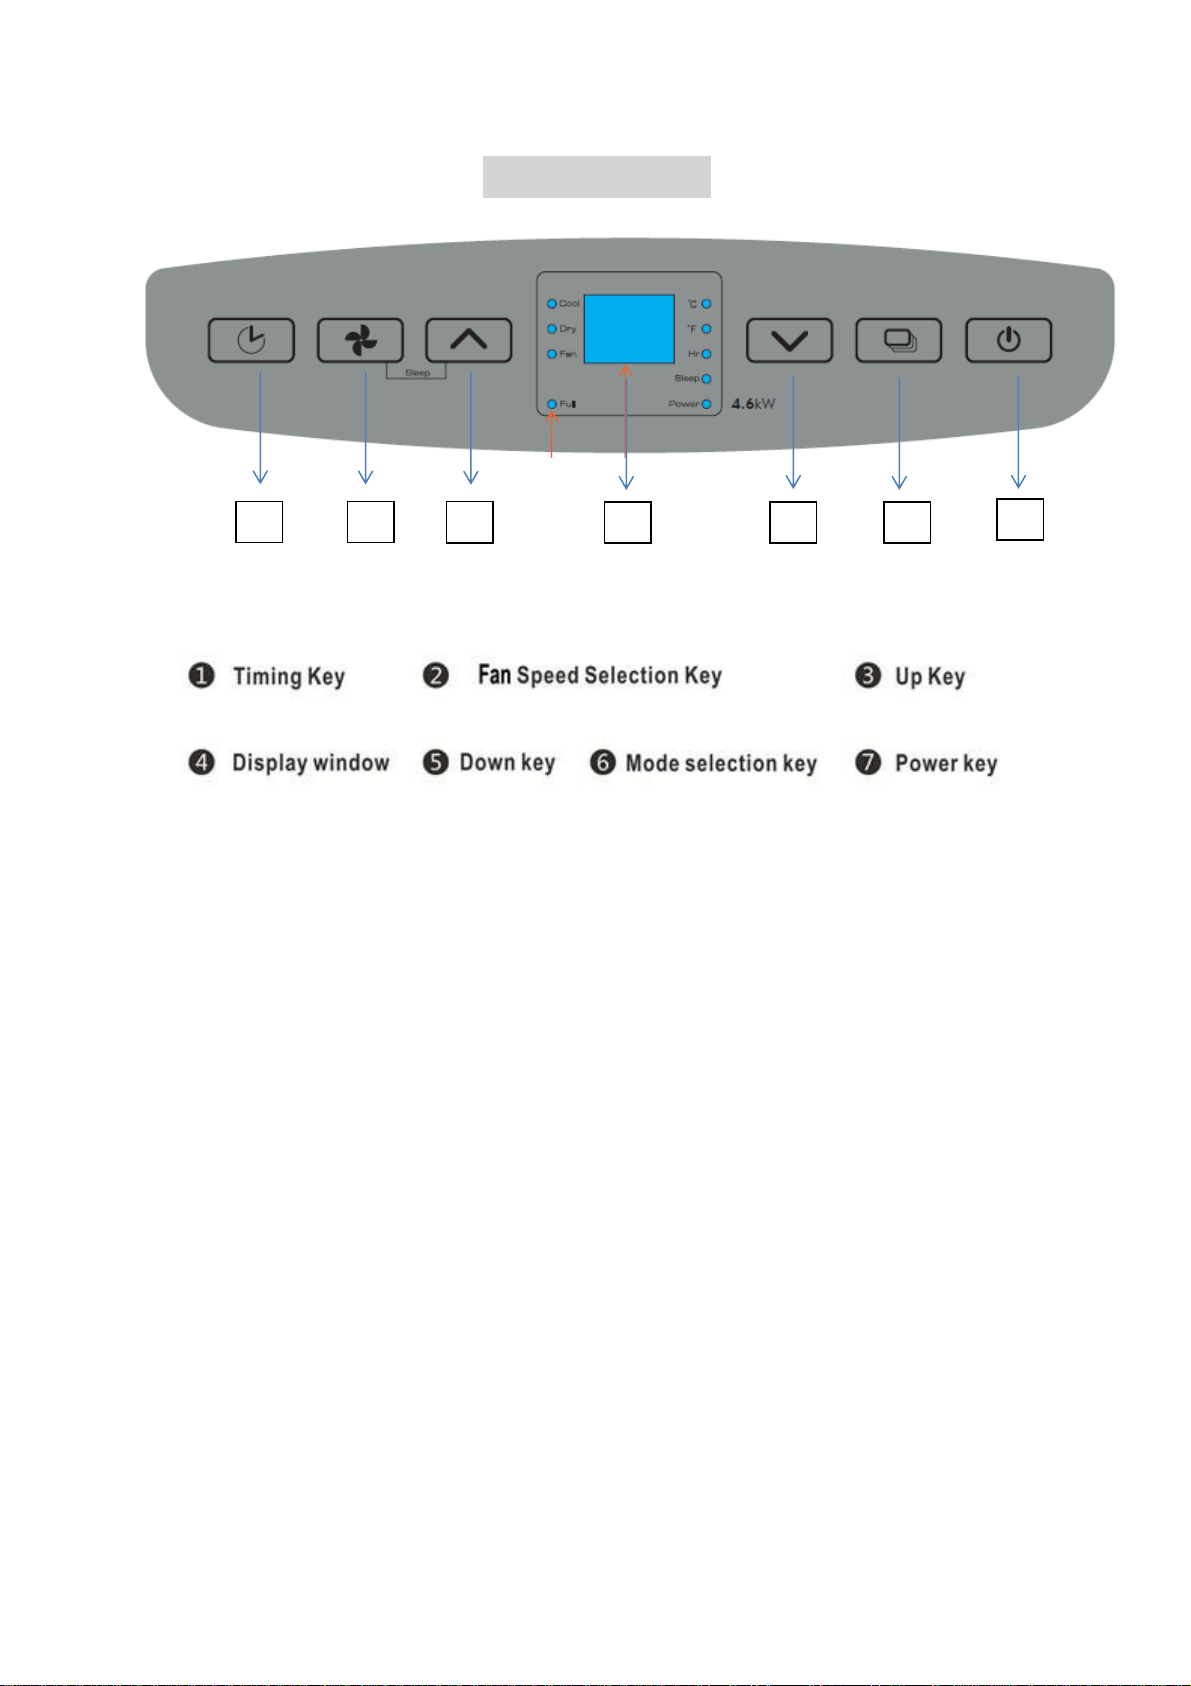
Control Panel
NOTE: Above blue background color represents the display on the unit when turned on.
1. TIMER: under power-on or standby mode, press this key to setup on/off time from
1~24.
2. FAN: after air condition turns on, press this key to select fan speed (high, medium
and low).
3. UP: under cooling mode, press this key to increase the temperature from 16 -
31C°, under timer mode, press this key to increase the hours displayed.
4. DISPLAY WINDOW: Display window will show the temperature and mode setting
when the air condition is operational.
5. DOWN: under cooling mode, press this key to decrease setting temperature from
16 - 31C°, under timer mode, press this key to decrease the hours displayed.
6. MODE: after air condition turns on, press this key to select cooling, fan or dehumidify mode.
7. POWER: press this key to turn the air condition On/Off. After the air condition
turns on, default value is cooling mode with low fan speed.
NOTE: Once the air condition has been operated, it will revert to the settings prior
to it being switched off.
8
1
2
3
4
5
6
7
9
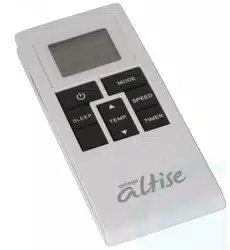
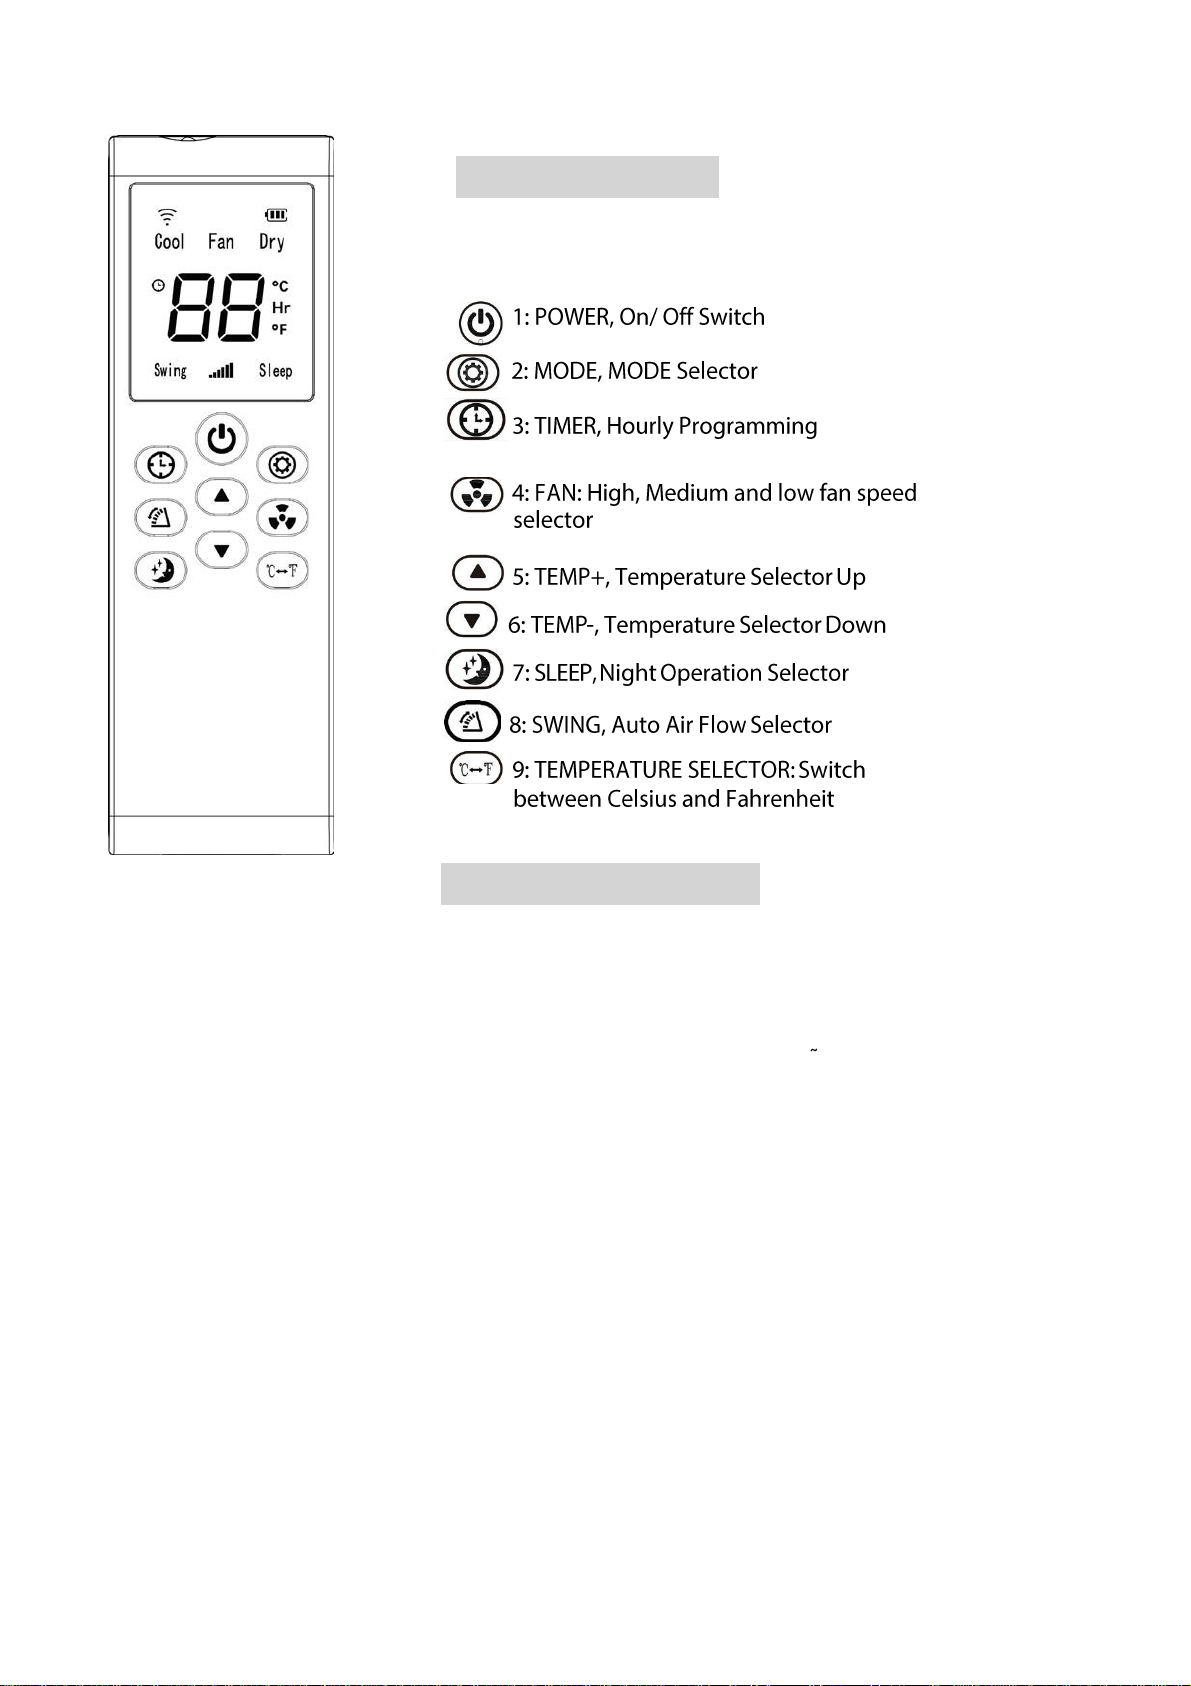
Remote Control
Cooling mode
Operation Methods
•
After the air condition turns on, it will revert to the setting that was last used.
•
Press “MODE” to select cooling mode, cooling mode inductor turns on.
•
Press “UP” or “DOWN” to adjust temperature (from 16 to 31 ).
•
Press “FAN” to select high, medium or low fan speed.
Fan mode
•
Press “MODE” to select fan mode, fan mode indicator turns on.
•
Press “FAN” to select high, medium and low.
•
Temperature and sleep function cannot be setup.

10
Timer mode
•
Select the timer mode by pressing , then use the
and
buttons to adjust hours from 1-24. You can only set the auto-shut
off timer while the air condition is operating (on) You can only set the auto-
start timer while the air condition is switched off (standby) After you have set
the timer it will initiate and the air conditions will start/ stop after the selected
time. If you adjust the timer or press the power key previous settings will be
cleared. Timer functions cannot be combined or repeated.
Dehumidifying mode
•
Press “MODE” to select dehumidifying mode, dehumidifying mode indicator
turns on.
•
Under dehumidifying mode fan speed is low.
Sleep mode
•
In the cooling Mode, Press the “UP” and “FAN” buttons together to turn on
the sleep mode, then the air condition will work on Energy-Saving and
lowest fan mode.
Compressor protection
If turned ON/OFF/ON at startup it takes 3 minutes for the compressor to
start.
11
Water Drainage
This air condition has an auto-water-evaporating system. Condensed-water cycle is
used to cool down the condenser, which not only improves cooling efficiency, but also
saves energy.
•
When water in the water pan exceeds the warning level, the air condition will
automatically sound an alarm, and the LCD temperature display area will show
"FL". At this point, you need to move the drainage pipe connecting the air
condition or the water outlet to sewer or other drainage area to empty the
water.
•
Shut off the air condition and unplug. Try not to move the model abruptly as
this may cause water to spill out from internal water tank.
•
Place a tray under the water plug.
•
Screw off the drain plug and unplug the water rubber stopper
- water will drain from the container.
•
Put the water rubber stopper back and screw the drain
•
Plug cap back into place After the water is emptied, the air condition will
automatically return to the original state.
•
Continuous Drainage
When you plan to leave this air conditioner unused for a long time, please remove the rubber
blockage from the drainage hole at the middle of the air conditioner, and connect a drain
hose (supplied with the unit) as shown below. The other side of the hose can be placed in
the sink and the water drained.
If water pump is damaged, continuous drainage can be used, and under this condition, the
water pump is not activated. The air conditioner can also work well.

12
Maintenance
Note: in order to avoid electric shocks, please turn off at the control panel,
switch off the power point then unplug the appliance before cleaning
Cleaning
Filter
•
Please switch off at the control panel, then at the power point then unplug before
cleaning .
•
Use soft semi-dry cloth to clean the air condition. Don’t use chemical agents, such
as benzene, alcohol, gasoline etc ; otherwise the air condition surface can be
damaged.
•
Use only a moist cloth not a wet or dripping cloth as if water enters the control
panel or the air condition it will cause damage.
•
Seasonal Cleaning
If the air condition is not being used for a long time, please follow these steps.
•
Pull out drainage plug upper / lower to empty any water out.
•
Let the air condition run under fan mode for 2 hours to dry out the air condition
internals
•
Turn off the air condition, switch off the power point and remove the plug.
•
Clean and dry filters then reinstall them.
•
Pull out exhaust pipe for safe keeping.
•
Put the air condition into a plastic bag and place it in a dry place.
•
Clean the filters as required, or every two weeks, if filters are blocked by
dust, air condition efficiency will be reduced.
•
Clean the filters in warm water with neutral detergent then dry the cleaned
filters in the shade
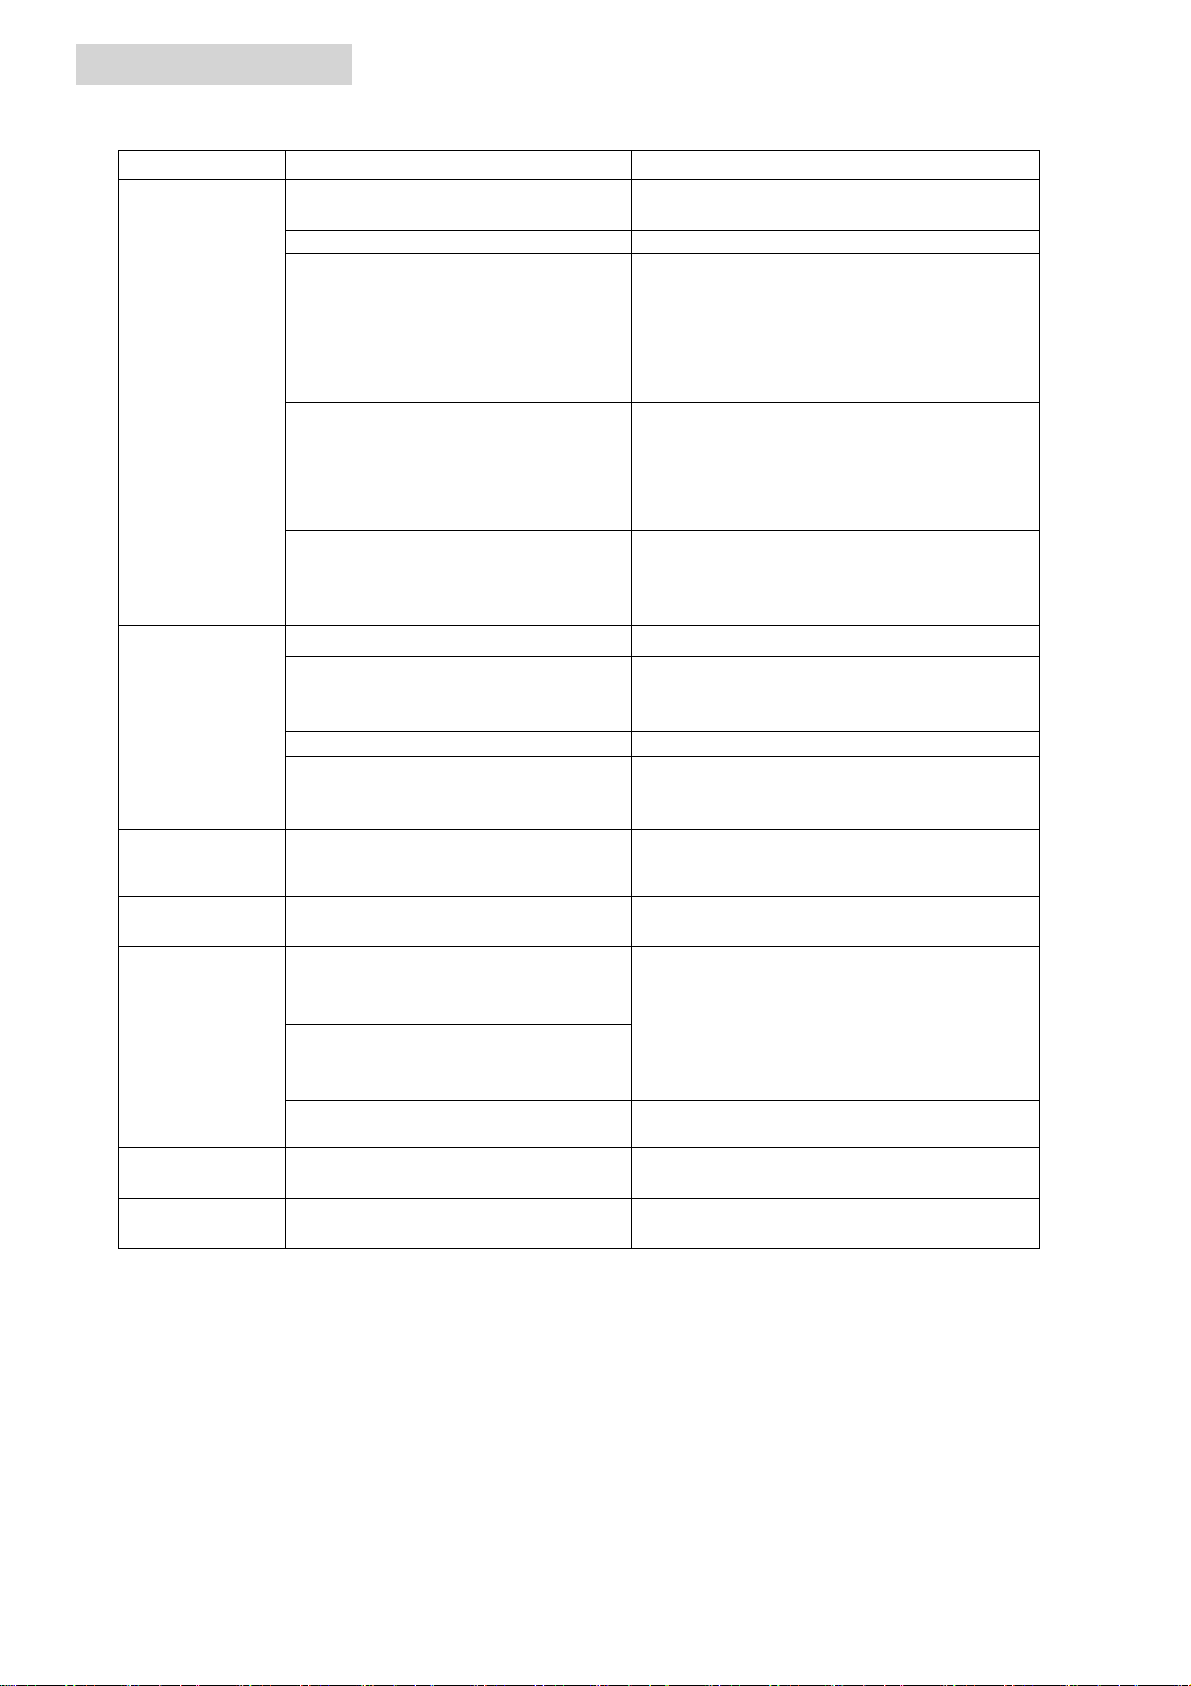
Troubleshooting
Do not repair or disassemble the air conditioning by yourself. Unqualified repair will lead to failure
of the warranty card, and may cause damage to users or their properties.
Problems
Reasons
Solutions
The air
conditioning
does not work.
There is no electricity.
Turn it on after connecting it to a socket with
electricity.
The overflow indicator displays "FL".
Discharge the water inside.
The ambient temperature is too low
or too high
Recommend to use the air condition in at the
temperature of 7-35℃(44-95℉).
In cooling mode, the room
temperature is lower than the set
temperature; in heating mode, the
room temperature is higher than the
set temperature.
Change the set temperature.
In dehumidification mode, the
ambient temperature is low.
The air condition is placed in a room with an
ambient temperature of greater than 17 ℃.
(62 ℉).
The cooling or
heating effect is
not good
There is direct sunlight.
Pull the Curtain.
Doors or windows are open; there are
a lot of people; or in cooling mode,
there are other sources of heat.
Close doors and windows, and add new air
conditioning.
The filter screen is dirty.
Clean or replace the filter screen.
The air inlet or outlet is blocked.
Clear obstructions.
Big Noise
The air conditioning is not placed on a
flat surface.
Put the air conditioning on a flat and hard
place (to reduce noise).
Compressor
does not work.
Overheat protection starts.
Wait for 3 minutes until the temperature is
lowered, and then restart the air condition.
The remote
control does not
work.
The distance between the air
condition and the remote control is
too far.
Let the remote control get close to the air
conditioning, and make sure that the remote
control directly faces to the direction of the
remote-control receiver.
The remote control is not aligned
with the direction of the remote
control receiver.
Batteries are dead.
Replace batteries.
Displays 'E1'.
The pipe temperature sensor is
abnormal.
Check the pipe temperature sensor and
related circuitry.
Displays 'E2'
The room temperature sensor is
abnormal.
Check the room temperature sensor and
related circuitry.
If problems not listed in the table occur or recommended solutions do not work, please contact the
professional service organization.
13

Technical Data
Model
OAPC1617
Cooling capacity
BTU/h
16000
Mains
Power consumption
W
1700
Current
A
6
Refrigerant
R410A
Compressor
Rotary
Fan speeds
3
Thermostat
℃
16-31
Timer
h
0-24
Dimensions(W*H*D)
mm
420, 722, 360
Net weight
kg
30
14
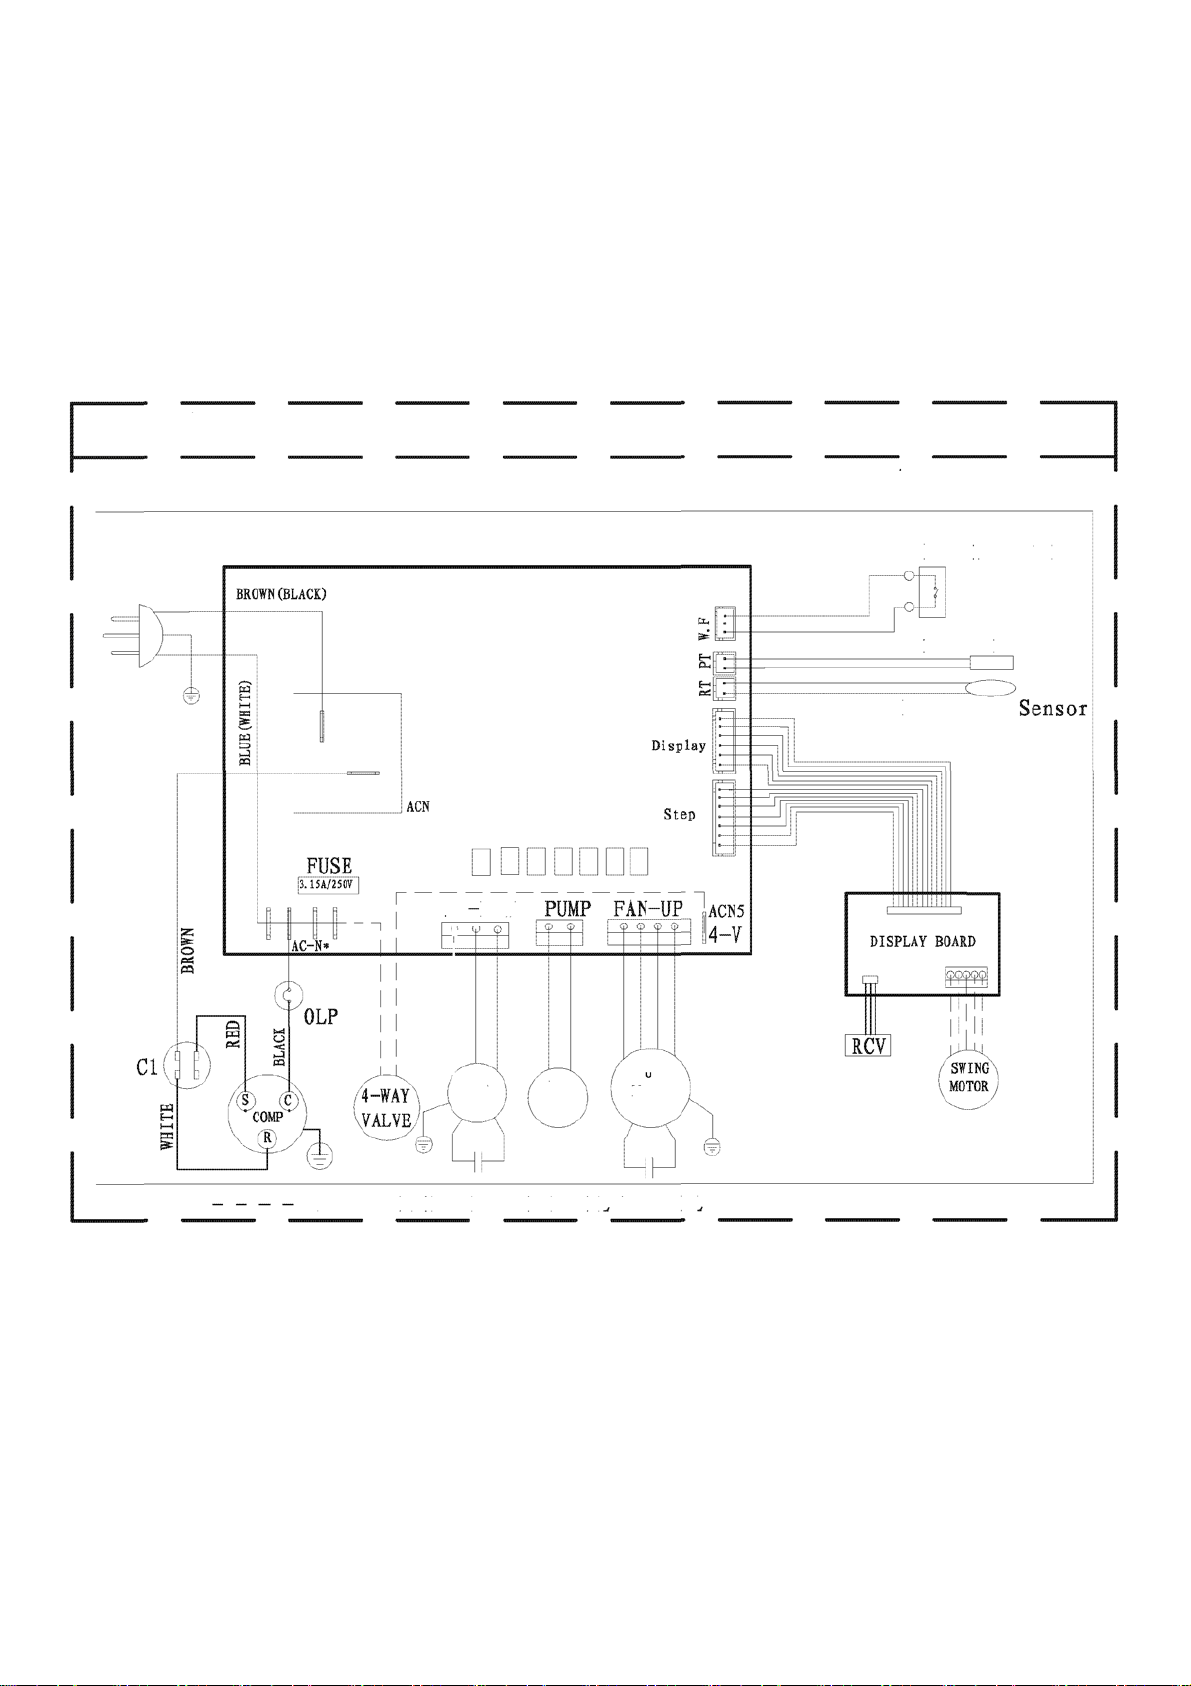
Appendix A
Circuit Diagram