PREFERRED
SETTINGS
For more info, head over to GoPro Tips YouTube.
03/
PREFERRED SETTINGS
GOPRO
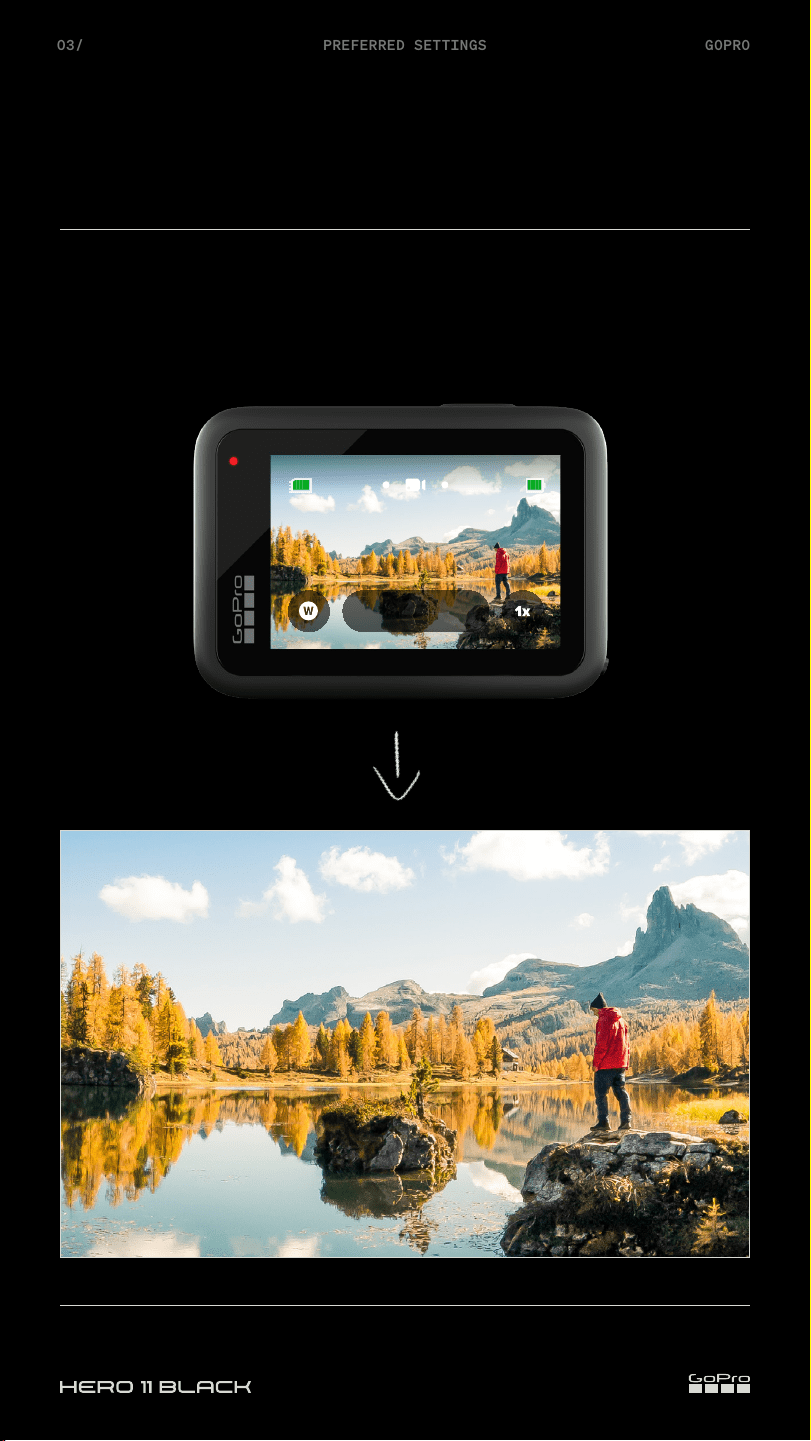
Easy Controls
Come preloaded with ultra versatile capture settings that are great for most
shots. You’ll notice fewer settings and capture choices so you can just frame
your shot and hit the Shutter button for amazing results.
Video
1x Speed
100%9H:59
For more info, head over to GoPro Tips YouTube.
04/
PREFERRED SETTINGS
GOPRO
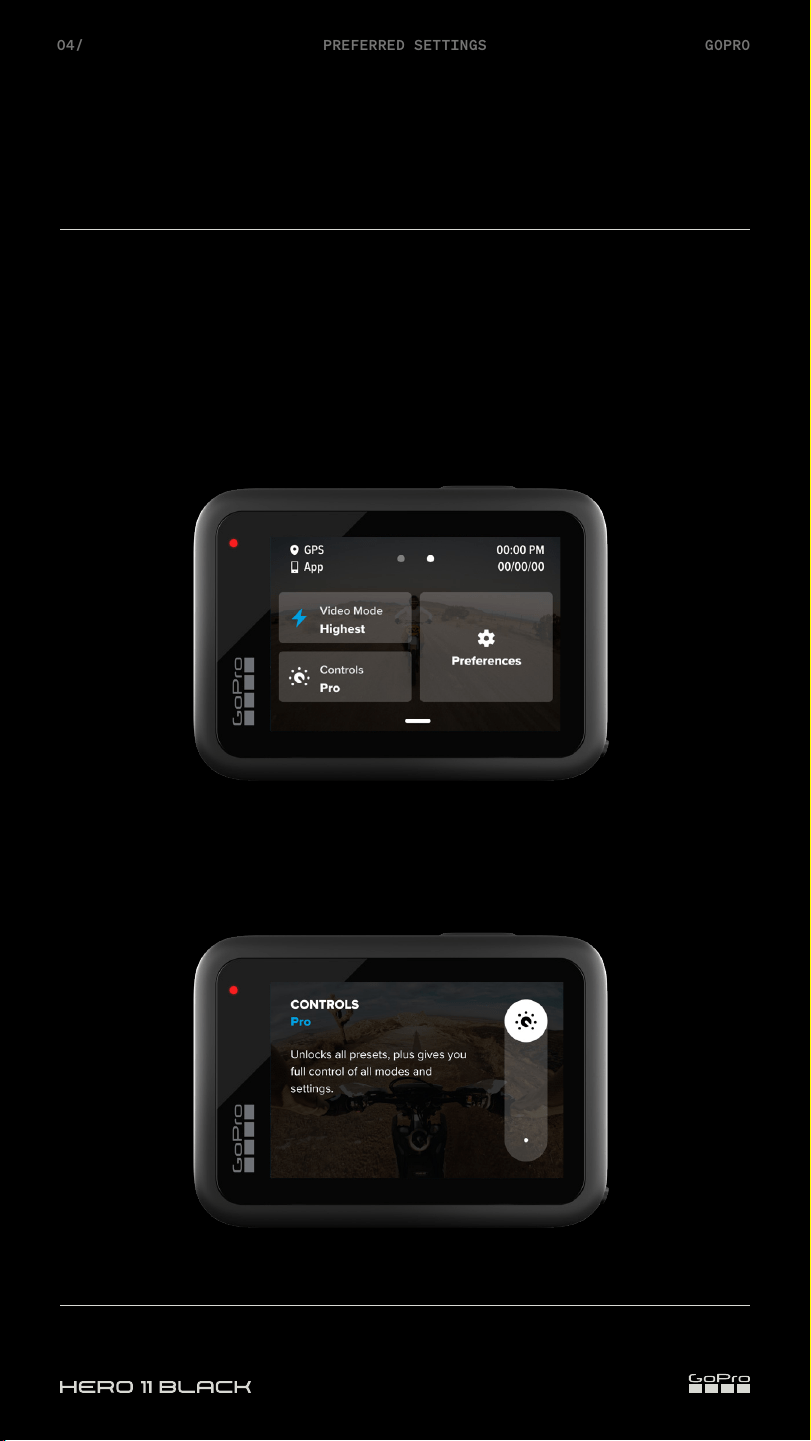
Pro Controls
Toggling Pro Controls
Users can quickly turn on Pro Controls for full camera control from the
camera dashboard, accessible via the rear LCD screen or in the Quik app.
Swipe down > Camera Dashboard
Swipe Left > Toggle Pro Control

For more info, head over to GoPro Tips YouTube.
06/
PREFERRED SETTINGS
GOPRO
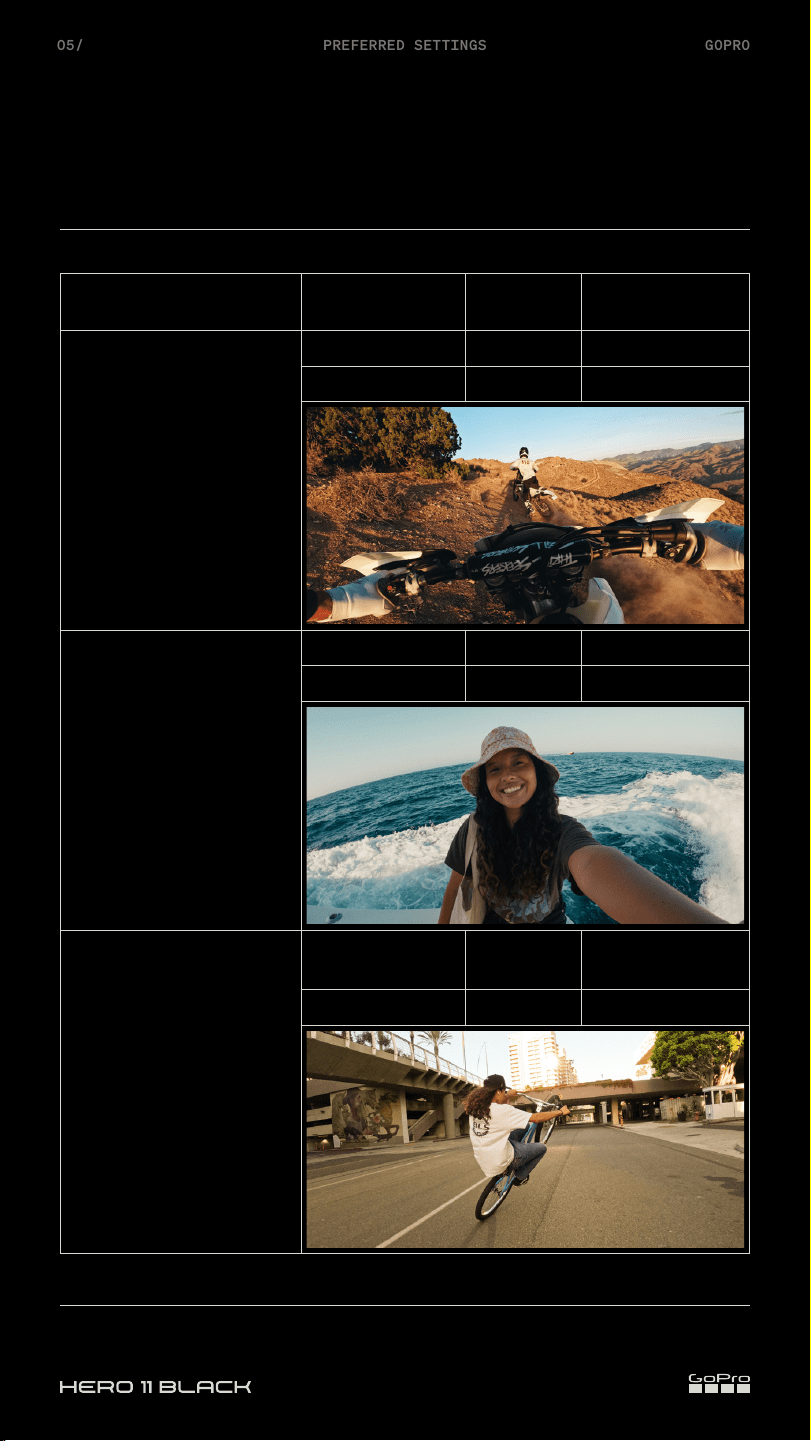
Video
Pro Tips
Slo-Mo Guide
Standard video plays back at 30fps. Try a higher frame rate for epic slo-mo
shots.
60 FPS = 2x slo-mo 120 FPS = 4x slo-mo 240 FPS = 8x slo-mo
Go the Distance With Extended Battery Mode
Mid-range quality video resolutions and frame rates to help you capture
stunning quality footage while extending your battery life.
Keep the Horizon Locked + Steady
Use the Linear + Horizon Lock digital lens to keep your footage steady and
straight even if your camera rotates 360° during capture.
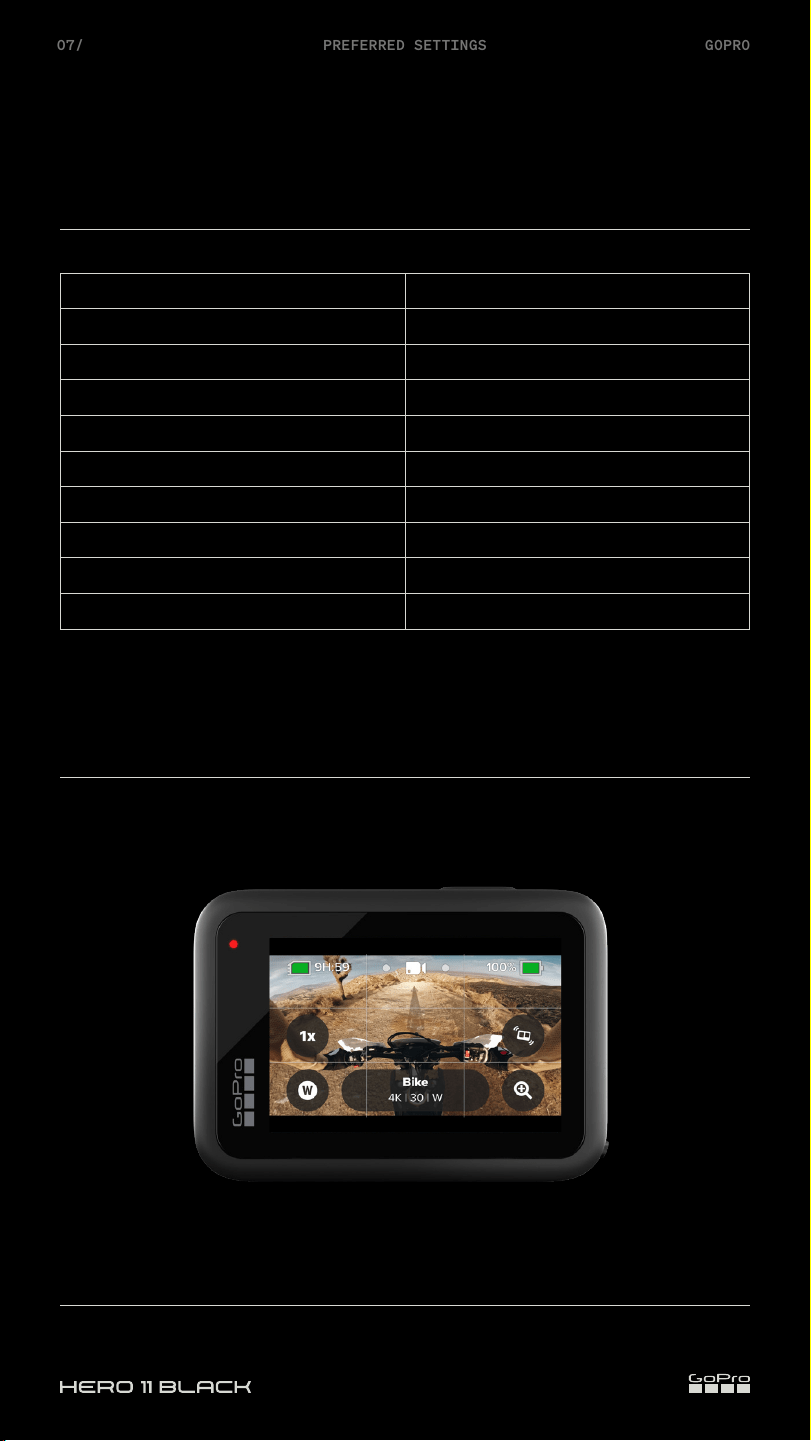
Not sure which level of stabilization to use?
Use HyperSmooth AutoBoost.
HyperSmooth AutoBoost dynamically crops your footage based on the
speed and movement in your shot. The result is maximum video stabilization
and the wides field of view possible.
For more info, head over to GoPro Tips YouTube.
08/
PREFERRED SETTINGS
GOPRO
Photo
Photo Output
RAW
Saves your photo as both .jpg and .gpr files. RAW files give you more post-
production flexibility.
HDR
Captures photos using High Dynamic Range processing. Great for shooting
high-contrast scenes with minimal motion.
SuperPhoto
Automatically analyzes the scene and intelligently applies the best image
processing for the shot.
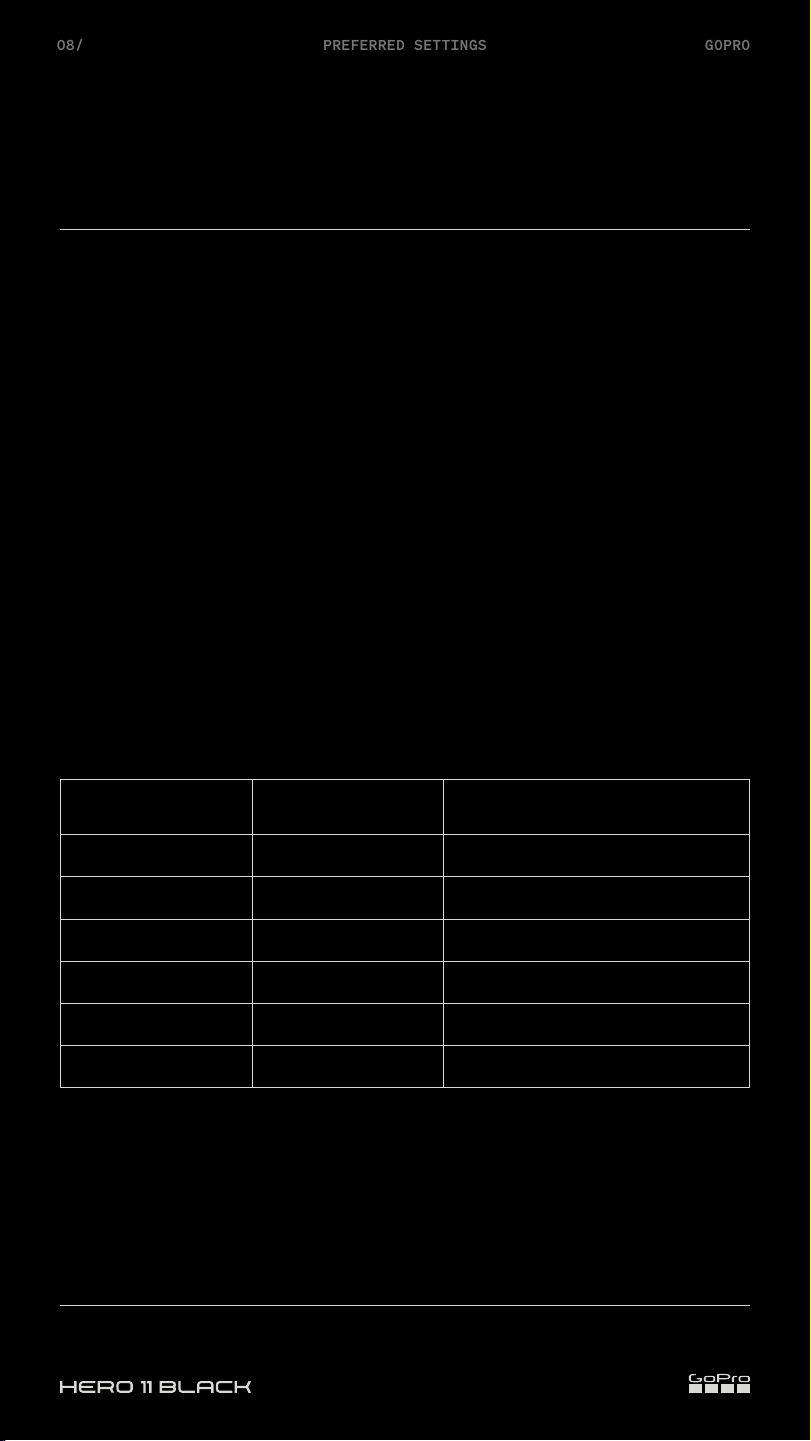
Frame Grab Resolution
Resolution Aspect Ratio Frame Grab Resolution
5.3K 87 24.7MP
5.3K 43 21MP
5.3K 169 15.8MP
4K 87 12.9MP
4K 43 12MP
4K 169 8MP
For more info, head over to GoPro Tips YouTube.
09/
PREFERRED SETTINGS
GOPRO
Time Lapse
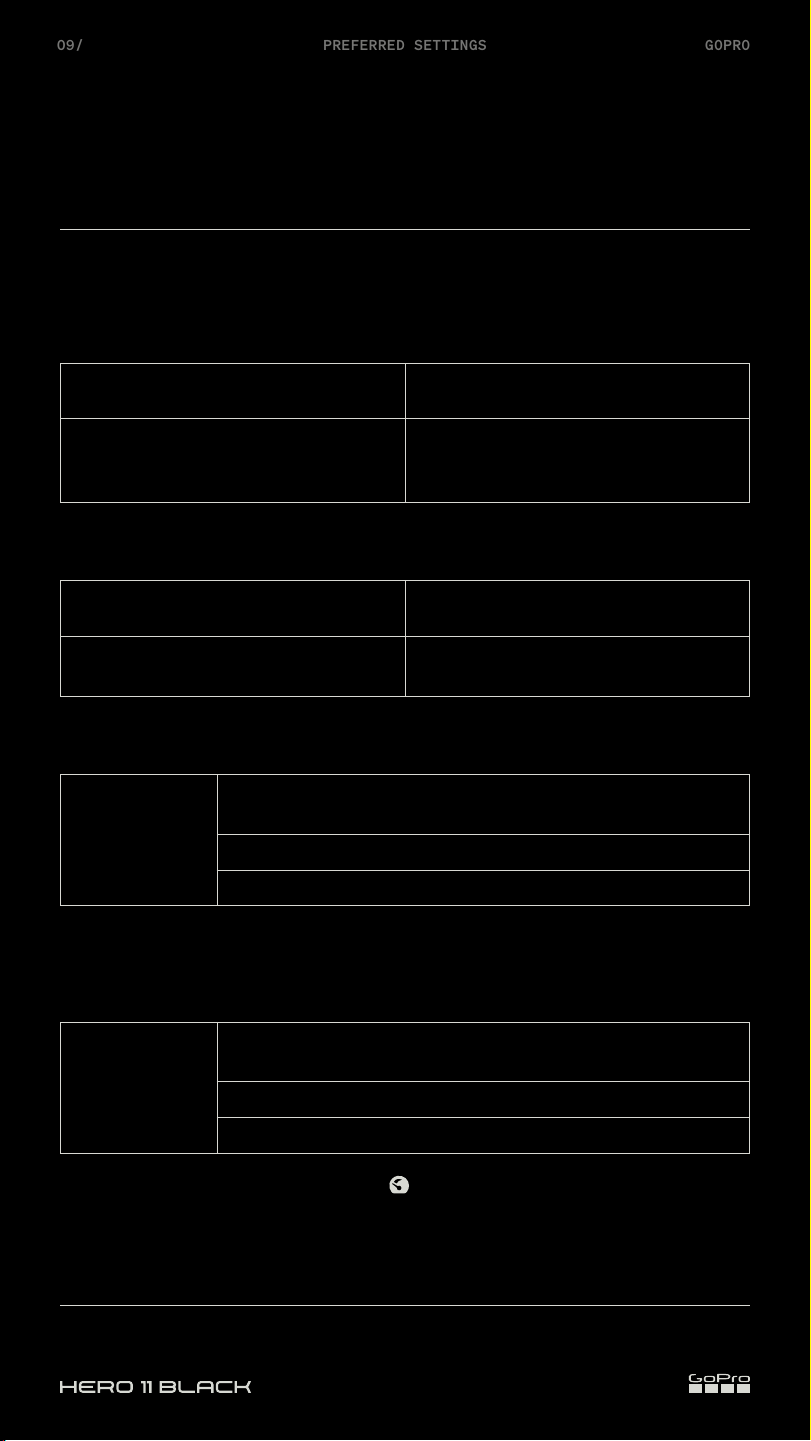
Time Lapse vs. TimeWarp
What is it?
Time Lapse Video TimeWarp
Transforms long events into short
sharable moments by taking a
frame of video at set intervals.
Speeds up time to create an ultra
smooth time lapse video while while
you're on the move.
When to Use it
Time Lapse Video TimeWarp
When your camera is mounted to a
tripod or stationary.
Body-mounted footage or any shot
when your GoPro is in motion.
Recommended Settings
Time Lapse
Video
The longer the interval, the faster time will appear to pass,
and your resulting video will be shorter.
0.5 - 1sec: Fast Action > Busy street
2sec or more: Slow Action > Sunsets
Time Lapse Video Pro Tip: Tap and hold the screen to toggle Exposure Control
to ensure that the selected part of the screen is always well exposed.
TimeWarp Auto: Automatically adjusts capture speed based on
lighting and other conditions.
5x - 10x: Shorter or Limited-Motion Activities
15x - 30x: Longer or Higher-Motion Activities
TimeWarp Pro Tip: Tap Speed Ramp
while recording to slow your video
down to Real Speed or Half Speed.

For more info, head over to GoPro Tips YouTube.
10/
PREFERRED SETTINGS
GOPRO
Time Lapse
Night Eects
Light up the night with three amazing new night effects.
What is it?
Preferred
Settings
Star Trail Captures beautiful trails of lights
across the sky.
Mount your camera to a stationary
object or tripod, point it toward the
night sky.
Trail Length:
Maximum
Light Painting Uses long exposure to create brilliant
brush stroke effects with moving
lights.
Mount your camera to a stationary
object or tripod, grab a flashlight, glow
stick, or other light source, and get
creative.
Trail Length:
Long
Vehicle Lights Record night-time traffic and transform
it into stunning light trail footage.
Mount your camera to a stationary
object or tripod and point your camera
at moving vehicles to create stunning
light trail footage.
Trail Length:
Short
Pro Tip: Choose a longer exposure (up to 30sec) and bump up the ISO (up to
1600) for darker environments.
Scheduled + Duration Capture
Pro Tip: Use Scheduled Capture to set a start time for your shot.
Use Duration Capture to set how long your camera records before it
automatically stops.