
AVR-4520CI
INTEGRATED NETWORK AV RECEIVER
Owner’s Manual
Basic version
Advanced version
Informations
DVD

I
n
SAFETY PRECAUTIONS
CAUTION
RISK OF ELECTRIC SHOCK
DO NOT OPEN
CAUTION:
TO REDUCE THE RISK OF ELECTRIC SHOCK, DO NOT REMOVE
COVER (OR BACK). NO USER-SERVICEABLE PARTS INSIDE.
REFER SERVICING TO QUALIFIED SERVICE PERSONNEL.
The lightning flash with arrowhead symbol, within an equilateral
triangle, is intended to alert the user to the presence of
uninsulated “dangerous voltage” within the product’s enclosure
that may be of sufficient magnitude to constitute a risk of
electric shock to persons.
The exclamation point within an equilateral triangle is intended
to alert the user to the presence of important operating
and maintenance (servicing) instructions in the literature
accompanying the appliance.
WARNING:
TO REDUCE THE RISK OF FIRE OR ELECTRIC SHOCK, DO NOT
EXPOSE THIS APPLIANCE TO RAIN OR MOISTURE.
CAUTION:
To completely disconnect this product from the mains, disconnect the plug
from the wall socket outlet.
The mains plug is used to completely interrupt the power supply to the unit
and must be within easy access by the user.
IMPORTANT SAFETY
INSTRUCTIONS
1. Read these instructions.
2. Keep these instructions.
3. Heed all warnings.
4. Follow all instructions.
5. Do not use this apparatus near water.
6. Clean only with dry cloth.
7. Do not block any ventilation openings.
Install in accordance with the manufacturer’s instructions.
8. Do not install near any heat sources such as radiators, heat registers,
stoves, or other apparatus (including amplifiers) that produce heat.
9. Do not defeat the safety purpose of the polarized or grounding-type plug. A
polarized plug has two blades with one wider than the other. A grounding
type plug has two blades and a third grounding prong. The wide blade or the
third prong are provided for your safety. If the provided plug does not fit into
your outlet, consult an electrician for replacement of the obsolete outlet.
10. Protect the power cord from being walked on or pinched particularly at
plugs, convenience receptacles, and the point where they exit from the
apparatus.
11. Only use attachments/accessories specified by the manufacturer.
12. Use only with the cart, stand, tripod, bracket, or table
specified by the manufacturer, or sold with the apparatus.
When a cart is used, use caution when moving the cart/
apparatus combination to avoid injury from tip-over.
13. Unplug this apparatus during lightning storms or when
unused for long periods of time.
14. Refer all servicing to qualified service personnel.
Servicing is required when the apparatus has been damaged in any way,
such as power-supply cord or plug is damaged, liquid has been spilled or
objects have fallen into the apparatus, the apparatus has been exposed to
rain or moisture, does not operate normally, or has been dropped.
15. Batteries shall not be exposed to excessive heat such as sunshine, fire or
the like.
FCC INFORMATION (For US customers)
1. COMPLIANCE INFORMATION
Product Name: Integrated Network AV Receiver
Model Number: AVR-4520CI
This product complies with Part 15 of the FCC Rules. Operation is subject
to the following two conditions: (1) this product may not cause harmful
interference, and (2) this product must accept any interference received,
including interference that may cause undesired operation.
Denon Electronics (USA), LLC
(a D&M Holdings Company)
100 Corporate Drive
Mahwah, NJ 07430-2041
Tel. (201) 762-6665
2. IMPORTANT NOTICE: DO NOT MODIFY THIS PRODUCT
This product, when installed as indicated in the instructions contained
in this manual, meets FCC requirements. Modification not expressly
approved by DENON may void your authority, granted by the FCC, to use
the product.
3. IMPORTANT
When connecting this product to network hub or router, use only a
shielded STP or ScTP LAN cable which is available at retailer.
Follow all installation instructions. Failure to follow instructions could void
your authority, granted by the FCC, to use the product.
4. NOTE
This product has been tested and found to comply with the limits for
a Class B digital device, pursuant to Part 15 of the FCC Rules. These
limits are designed to provide reasonable protection against harmful
interference in a residential installation.
This product generates, uses and can radiate radio frequency energy and,
if not installed and used in accordance with the instructions, may cause
harmful interference to radio communications. However, there is no
guarantee that interference will not occur in a particular installation. If this
product does cause harmful interference to radio or television reception,
which can be determined by turning the product OFF and ON, the user
is encouraged to try to correct the interference by one or more of the
following measures:
•Reorientorrelocatethereceivingantenna.
•Increasetheseparationbetweentheequipmentandreceiver.
•Connect the product into an outlet on a circuit different from that to
which the receiver is connected.
•Consultthelocalretailerauthorizedtodistributethistypeofproductor
an experienced radio/TV technician for help.
For Canadian customers:
This Class B digital apparatus complies with Canadian ICES-003.
CAUTION:
HOT SURFACE. DO NOT TOUCH.
The top surface over the internal heat sink may become hot
when operating this product continuously.
Do not touch hot areas, especially around the “Hot surface
mark” and the top panel.
Hot
surface
mark
Basic version
Advanced version
Informations
DVD
II
n
NOTES ON USE
WARNINGS
•Avoid high temperatures.
Allow for sufficient heat dispersion when installed in a rack.
•Handle the power cord carefully.
Hold the plug when unplugging the cord.
•Keep the unit free from moisture, water, and dust.
•Unplug the power cord when not using the unit for long periods of time.
•Do not obstruct the ventilation holes.
•Do not let foreign objects into the unit.
•Do not let insecticides, benzene, and thinner come in contact with the unit.
•Never disassemble or modify the unit in any way.
•Ventilation should not be impeded by covering the ventilation openings
with items, such as newspapers, tablecloths or curtains.
•Naked flame sources such as lighted candles should not be placed on
the unit.
•Observe and follow local regulations regarding battery disposal.
•Do not expose the unit to dripping or splashing fluids.
•Do not place objects filled with liquids, such as vases, on the unit.
•Do not handle the mains cord with wet hands.
•When the switch is in the OFF (STANDBY) position, the equipment is not
completely switched off from MAINS.
•The equipment shall be installed near the power supply so that the power
supply is easily accessible.
•Do not keep the battery in a place exposed to direct sunlight or in places
with extremely high temperatures, such as near a heater.
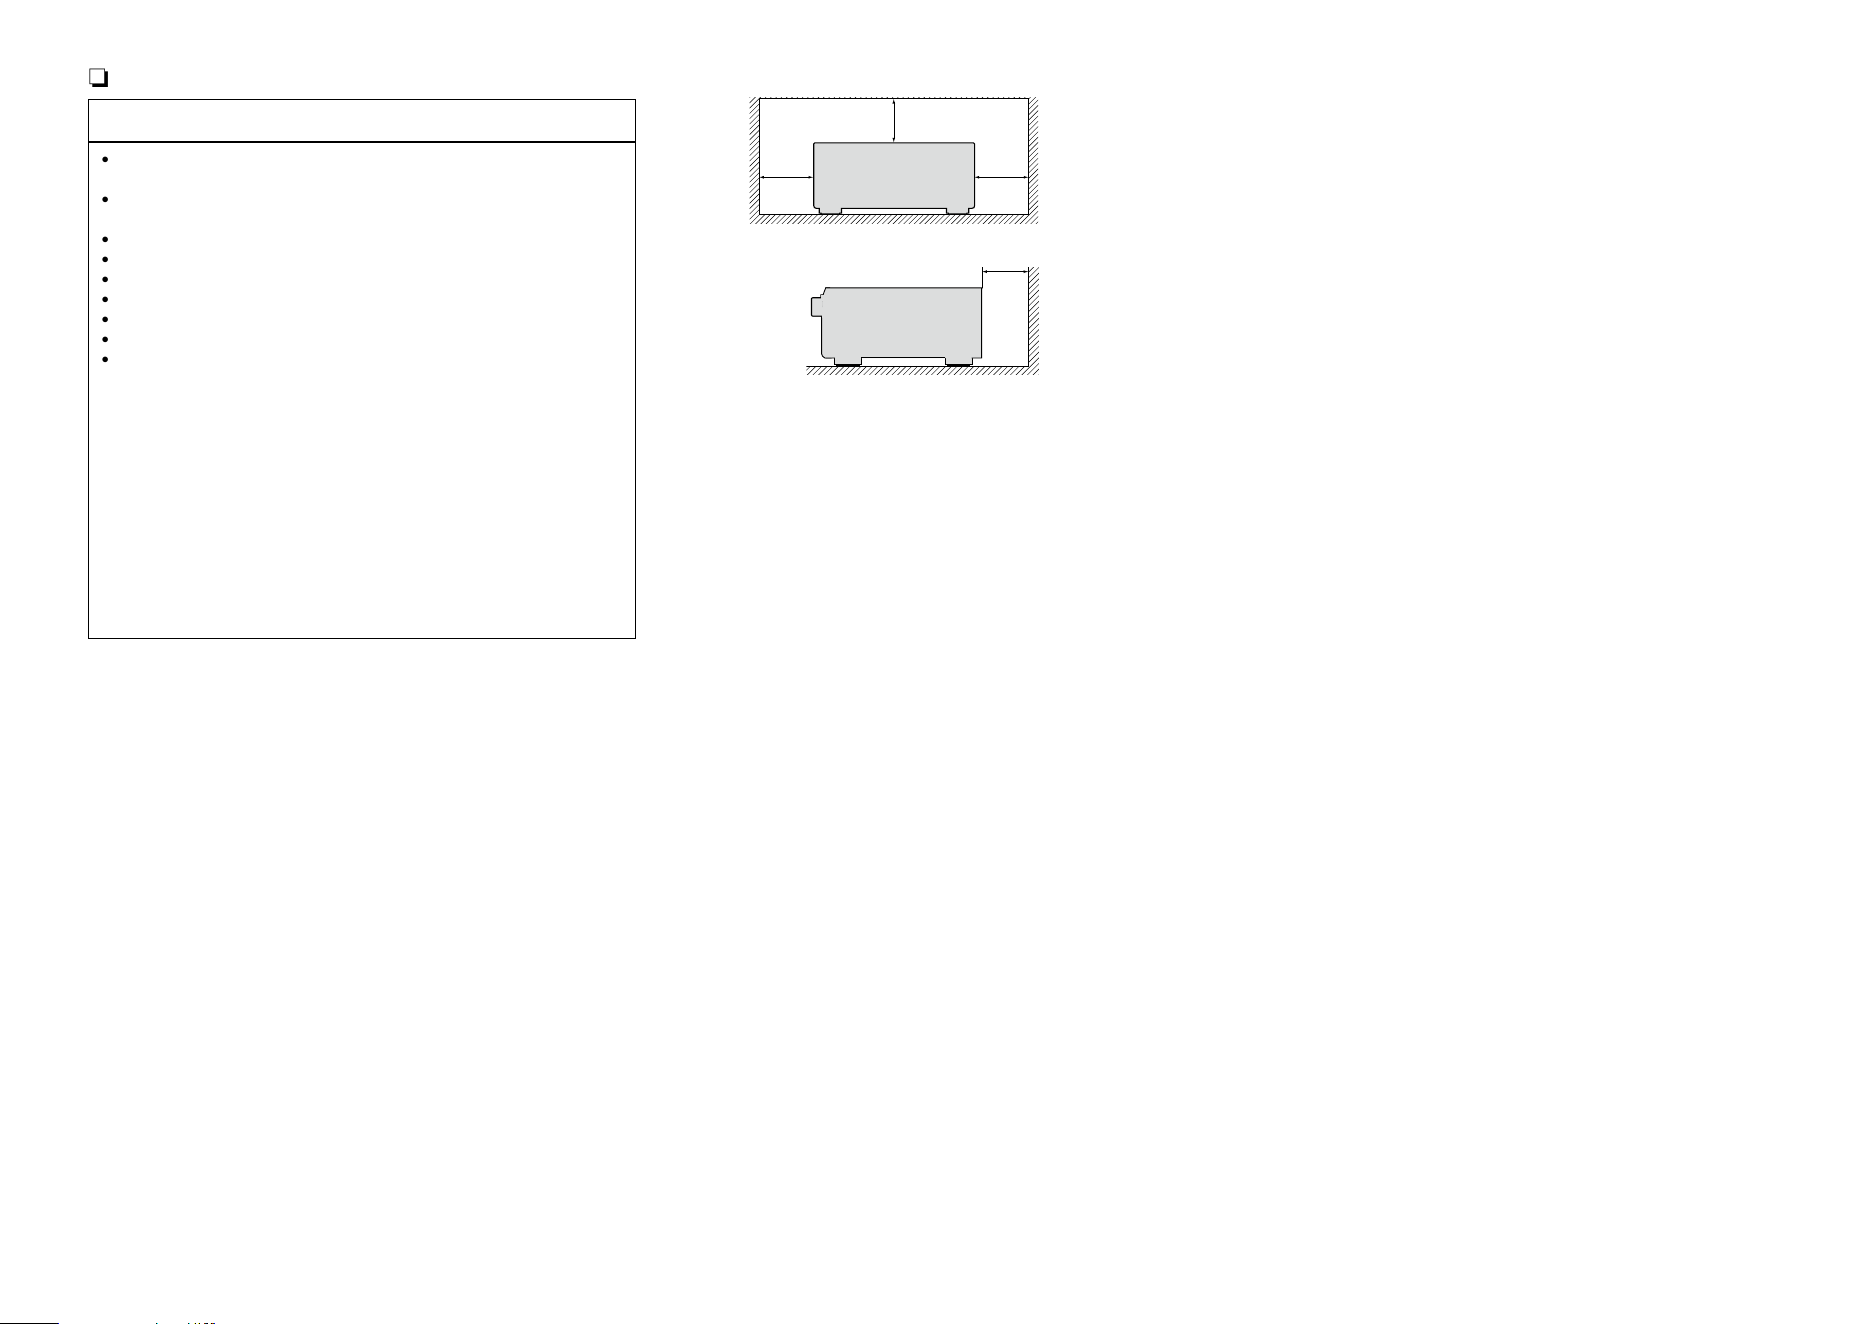
n CAUTIONS ON INSTALLATION
z z
z
Wall
z
z For proper heat dispersal, do not install this unit in a confined
space, such as a bookcase or similar enclosure.
•More than 12 in. (0.3 m) is recommended.
•Do not place any other equipment on this unit.
Basic version
Advanced version
Informations
DVD
1
Thank you for purchasing this DENON product. To ensure proper operation, please read this owner’s manual carefully before using the product.
After reading them, be sure to keep them for future reference.
Getting started
Basic version ············································································5
Connections ··················································································· 6
Important information ··································································· 6
Connecting an HDMI-compatible device ······································9
Connecting an HDMI-incompatible device ·································15
Connecting a device with a multi-channel output connector ······28
Connecting a external power amplifier ······································· 29
Connecting an external control device ········································30
Connecting to a home network (LAN) ········································31
Connecting the power cord ························································32
Setup ····························································································33
Set up speakers (Audyssey
®
Setup) ··········································33
Making the network settings (Network) ····································· 40
Playback (Basic operation) ·························································41
Important information ································································· 41
Playing a Blu-ray Disc player/DVD player ···································· 42
Playing a Blu-ray Disc player compatible with Denon Link HD ··· 42
Playing Super Audio CD ······························································43
Playing a CD player ····································································· 43
Playing an iPod············································································44
Playing a USB memory device ····················································47
Listening to HDRadio stations ···················································50
Network contents ·······································································59
Listening to Internet Radio ·························································59
Playing back files stored on a PC and NAS ·································62
Using online services ··································································66
Convenient functions ··································································76
AirPlay function ···········································································82
Selecting a listening mode (Sound Mode) ·······························84
Selecting a listening mode··························································84
Advanced version ································································90
Installation/connection/setup of speakers (Advanced) ··········91
Speaker installation ·····································································91
Speaker connection ····································································93
Set up speakers ·········································································· 99
Playback (Advanced operation) ···············································102
HDMI control function ······························································102
InstaPrevue function ·································································104
Sleep timer function ·································································105
Quick select function ································································ 106
REC OUT mode ········································································107
Web control function ································································108
Various memory functions ························································110
Playback in ZONE2/ZONE3/ZONE4 (Separate room) ············111
Audio output ·············································································111
Video output ·············································································112
Playback ····················································································113
Sleep timer function ·································································113
How to make detailed settings ················································114
Menu map ················································································114
Examples of menu screen displays ··········································116
Examples of menu and front display ········································117
Inputting characters ·································································· 118
Audio·························································································120
Video ·························································································128
Inputs ························································································134
Speakers ··················································································· 139
Network ···················································································· 146
General ·····················································································150
Operating external devices with the remote control ············157
Registering preset codes ··························································157
Operating external devices ······················································· 160
Operating devices ·····································································161
Operating learning function ······················································163
Operating macro function ························································· 165
Specifying the zone used with the remote control unit ············167
Setting the Remote ID ······························································167
Setting the display time length of the remote control unit
display ·······················································································167
Setting the back light ······························································· 168
Restoring all settings of the remote control unit to default ······ 168
Informations·········································································169
Part names and functions·························································170
Front panel ················································································170
Display ······················································································172
Rear panel ·················································································173
Remote control unit ·································································· 174
Other information ·····································································176
Trademark information ······························································176
Relationship between the Amp Assign mode settings and
audio output ··············································································177
Surround ···················································································184
Relationship between video signals and monitor output ··········190
Explanation of terms ·································································193
Troubleshooting ········································································ 196
Resetting the microprocessor ··················································201
Specifications ············································································202
Getting started ··············································································1
Accessories ··················································································2
Features ························································································2
Cautions on handling ····································································4
Contents
Basic version
Advanced version
Informations
DVD
2
Features
Digital video processor up-scales analog video
signals (SD resolution) to 4K
This unit is equipped with the 4K video upscaling function, which
allows for outputting analogue or SD (standard video quality) video
to HDMI at 4K (3840 × 2160 pixels). This enables the unit and a TV
connected with a single HDMI cable and any video source to be
reproduced precisely with HD level of quality.
DENON’s unique high quality playback technology
“Denon Link HD” (vpage42)
By connecting to a DENON Blu-ray Disc player compatible with
Denon Link HD, the sound localization becomes more precise,
reproducing a clear and three-dimensional sound image. Because
this unit makes the integrated circuits operate while sharing the
same clock with the Blu-ray Disc player, the transmitted digital
audio has less jitter. This effect applies to any media audio source
from the Blu-ray Disc player.
Equipped with “Hybrid PLL Jitter Reducer”
capable of reducing jitter and phase noise that
negatively affect sound quality
“Hybrid PLL Jitter Reducer” provided with this unit improves the
sound localization, reproducing a natural sound field.
Equipped with a Multi-Zone Function 4 source, 4
zone output
This unit is equipped with a multi-zone function, so you can enjoy
separate sound sources in four rooms including MAIN ZONE.
Equipped with an HDMI output for ZONE4
This unit is equipped with an HDMI output for ZONE4, which
allows you to enjoy video and audio in a room in ZONE4 as well.
You can enjoy video sources other than those in MAIN ZONE.
With a discrete-circuit configuration, the power
amplifier provides identical quality for all 9
channels (190 W x 9ch)
The unit is equipped with a power amplifier that reproduces high-
fidelity sound in sound mode with equal quality and power for all
channels, true to the original sound.
The power amplifier circuit adopts a discrete-circuit configuration
that achieves high-quality surround sound reproduction.
Supports Internet Radio, music, and photograph
streaming
Supports AirPlay
®
(vpage82)
You can enjoy a wide variety of content, including listening to
Internet Radio, playing the audio files stored on your PC, and
displaying on a TV the photographs stored on your PC.
This unit also supports AirPlay that lets you stream your music
library from an iPhone
®
, iPad
®
, iPod touch
®
or iTunes
®
.
Compatible with “Denon Remote App” for
performing basic operations of the unit with an
iPad, iPhone
z1
or Android smartphone
“Denon Remote App” is application software that allows you to
perform basic operations with an iPad, iPhone, Android smartphone
or Android tablet such as turning the unit ON/OFF, controlling the
volume, and switching the source.
z1 Download “Denon Remote App” from iTunes
®
App Store.
The unit needs to be connected to a LAN and the iPhone/iPod
touch needs to be connected to the same network by Wi-Fi
(wireless LAN).
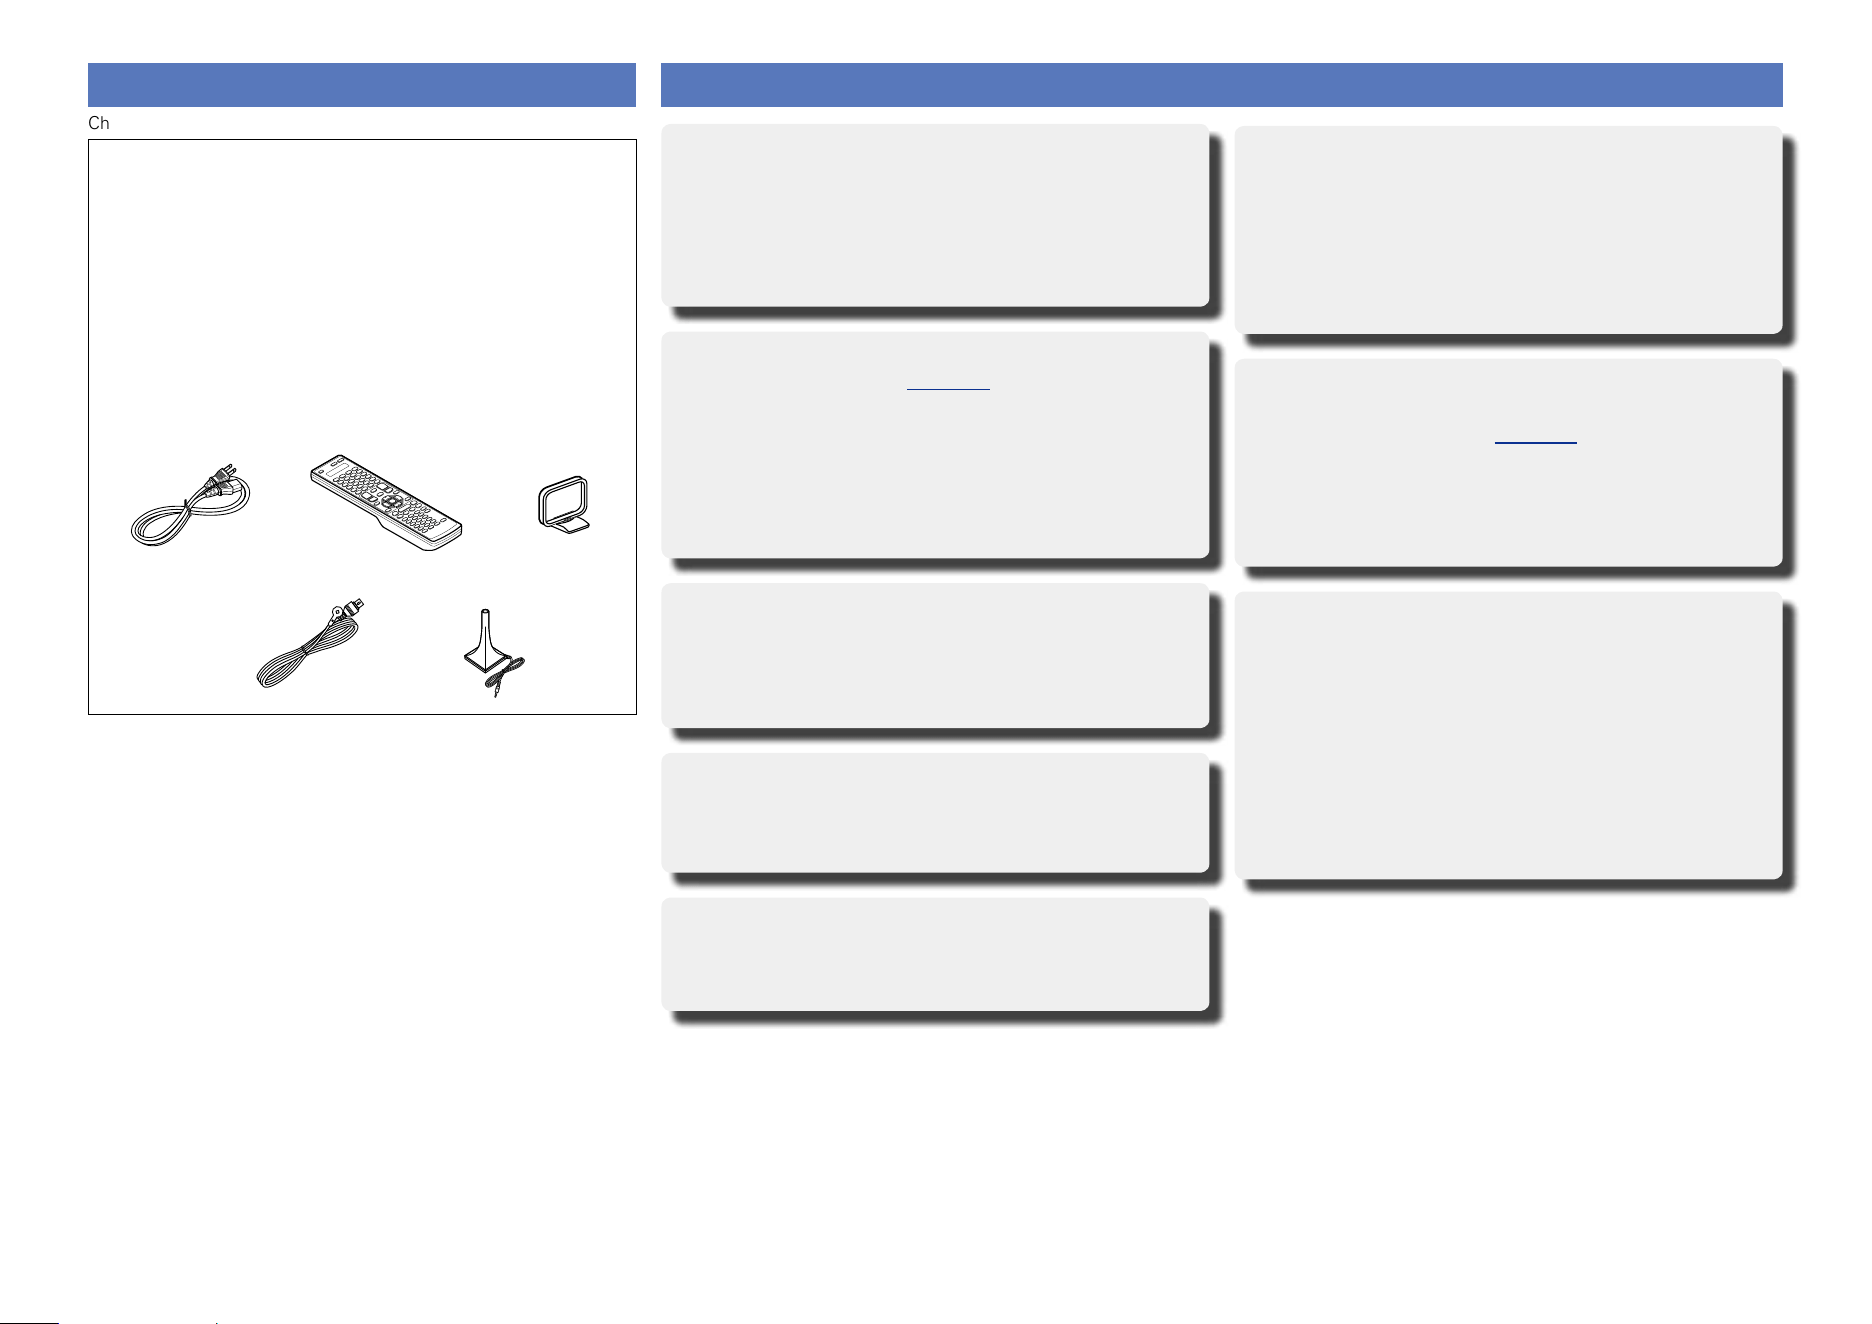
Accessories
Check that the following parts are supplied with the product.
q Getting Started ........................................................................ 1
w CD-ROM (Owner’s manual) .................................................... 1
e Safety Instructions .................................................................. 1
r Warranty (for North America model only) ................................ 1
t Service network list ................................................................. 1
y Power cord .............................................................................. 1
u Remote control unit (RC-1165) ................................................ 1
i LR6/AA batteries ..................................................................... 2
o AM loop antenna ..................................................................... 1
Q0 FM indoor antenna .................................................................. 1
Q1 Setup microphone ................................................................... 1
(ACM1HB)
u
Q1
oy
Q0
Basic version
Advanced version
Informations
v See overleaf
DVD

3
Features
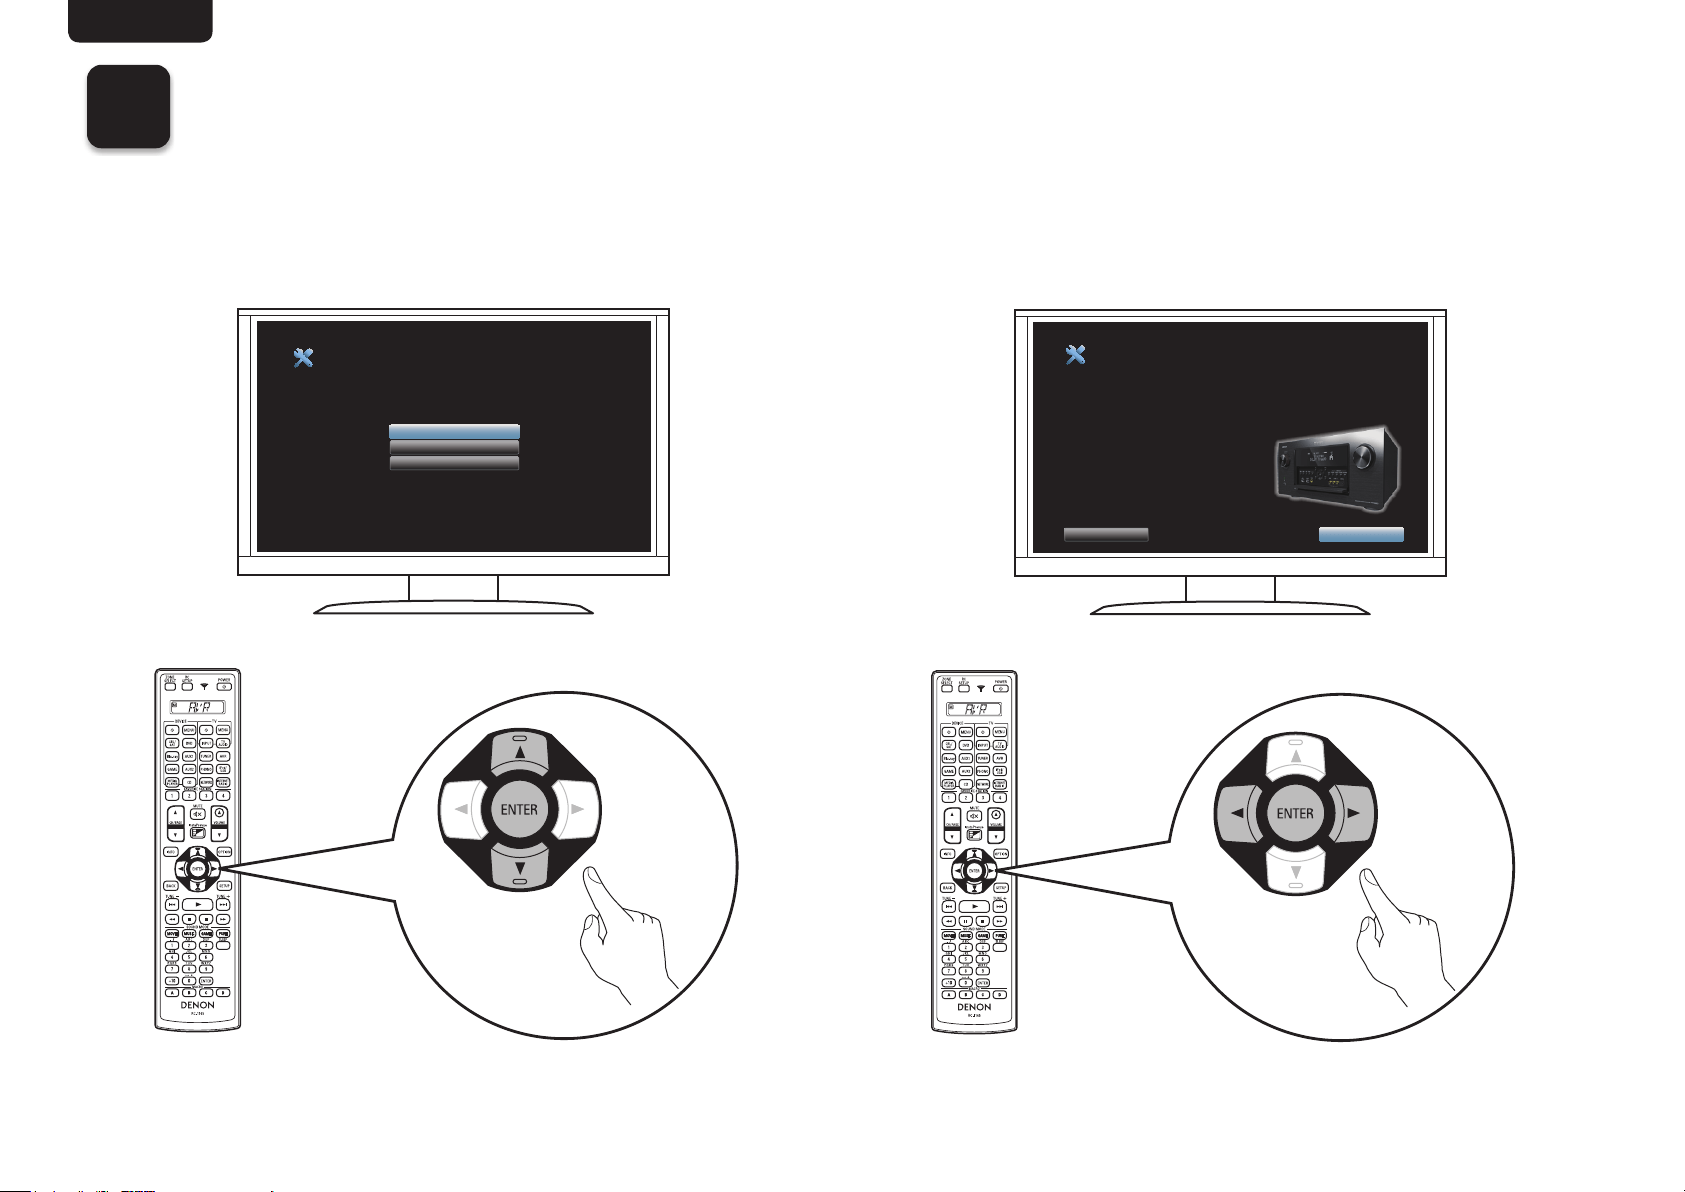
“Setup Assistant”, providing easy-to-follow setup
instructions
First select the language when prompted. Then simply follow the
instructions displayed on the TV screen to set up the speakers,
network, etc.
Easy to use, Graphical User Interface
This unit is equipped with an easy to see “Graphical User Interface”
that uses menu displays and levels. The use of level displays
increases operability of the this unit.
HDMI connectors enable connection to various
digital AV devices (input: 7, output: 3)
The unit is equipped with 7 HDMI input connectors for connecting
devices with HDMI connectors, such as a Blu-ray Disc player,
game machine, HD digital camcorder, etc.
Supports HDMI (3D, ARC, Deep Color, “x.v.Color”,
Auto Lip Sync, 4K) and HDMI control function
(vpage9)
In addition to HDMI 3D and ARC (Audio Return Channel) functions,
this unit supports the video pass-through function, which outputs
video to TV without changing the video quality when video signals
of 4K (3840×2160 pixels) are input, and the GUI overlay function,
which overlays the menu screen (GUI) on the 4K video screen.
Simultaneous playback on two HDMI channels
(for MAIN ZONE)
This unit is equipped with two HDMI MONITOR outputs. You can
connect one output to a projector and the other output to a TV for
simultaneous signal outputs.
Direct play for iPod and iPhone via USB
(vpage23)
Music data from an iPod can be played back if you connect the
USB cable supplied with the iPod via the iPod/USB port of this unit,
and also an iPod can be controlled with the remote control unit for
this unit.
Audyssey DSX
®
This unit is equipped with Audyssey DSX
®
processor. By
connecting front height speakers to this unit and playing back
through Audyssey DSX
®
, you can experience a more powerful
playback expression in the height audio range. By connecting front
wide speakers, you can experience a more powerful playback
expression in the wide audio range.
DTS Neo:X
This technology enables the playback of 2-channel source audio
or 7.1/5.1 multi-channel source audio through a maximum 11.1
channel speakers, achieving an even broader sound field.
Audyssey LFC™ (Low Frequency Containment)
Audyssey LFC™ solves the problem of low frequency sounds
disturbing people in neighboring rooms or apartments. Audyssey
LFC™ dynamically monitors the audio content and removes the
low frequencies that pass through walls, floors and ceilings. It then
applies psychoacoustic processing to restore the perception of low
bass for listeners in the room. The result is great sound that no
longer disturbs the neighbors.
Discrete subwoofers and Audyssey Sub EQ HT™
The unit has two subwoofer output capability and can adjust the
level and delay for each subwoofer individually.
Audyssey Sub EQ HT makes the integration seamless by first
compensating for any level and delay differences between the two
subwoofers and then applying Audyssey MultEQ
®
XT 32 to both
subwoofers together.
InstaPrevue Technology
Live picture-in-picture preview of HDMI input connected to an AV
receiver.
MHL (Mobile High-Definition Link) function
You can charge your mobile device that supports MHL by providing
power from this unit while outputting video from that mobile
device. You can also control mobile devices that support MHL
through this unit.
Basic version
Advanced version
Informations
DVD

4
Cautions on handling
•Before turning the power on
Check once again that all connections are correct and that there are
no problems with the connection cables.
•Power is supplied to some of the circuitry even when the unit is
set to the standby mode. When going on vacation or leaving home
for long periods of time, be sure to unplug the power cord from the
power outlet.
•About condensation
If there is a major difference in temperature between the inside of
the unit and the surroundings, condensation (dew) may form on
the operating parts inside the unit, causing the unit not to operate
properly.
If this happens, let the unit sit for an hour or two with the power
turned off and wait until there is little difference in temperature
before using the unit.
•Cautions on using mobile phones
Using a mobile phone near this unit may result in noise. If that
occurs, move the mobile phone away from this unit when it is in use.
•Moving the unit
Turn off the power and unplug the power cord from the power
outlet. Next, disconnect the connection cables to other system units
before moving the unit.
•About care
•Wipe the cabinet and control panel clean with a soft cloth.
•Follow the instructions when using a chemical cleaner.
•Benzene, paint thinner or other organic solvents as well as
insecticide may cause material changes and discoloration if brought
into contact with the unit, and should therefore not be used.
Basic version
Advanced version
Informations
DVD
Basic version
5
F Connections vpage6
F Setup vpage33
F Playback (Basic operation) vpage41
F Network contents vpage59
F Selecting a listening mode (Sound Mode) vpage84
Basic version
Here, we explain the connections and basic operation methods for this unit.
Basic version
Advanced version
Informations
Basic version
DVD
6
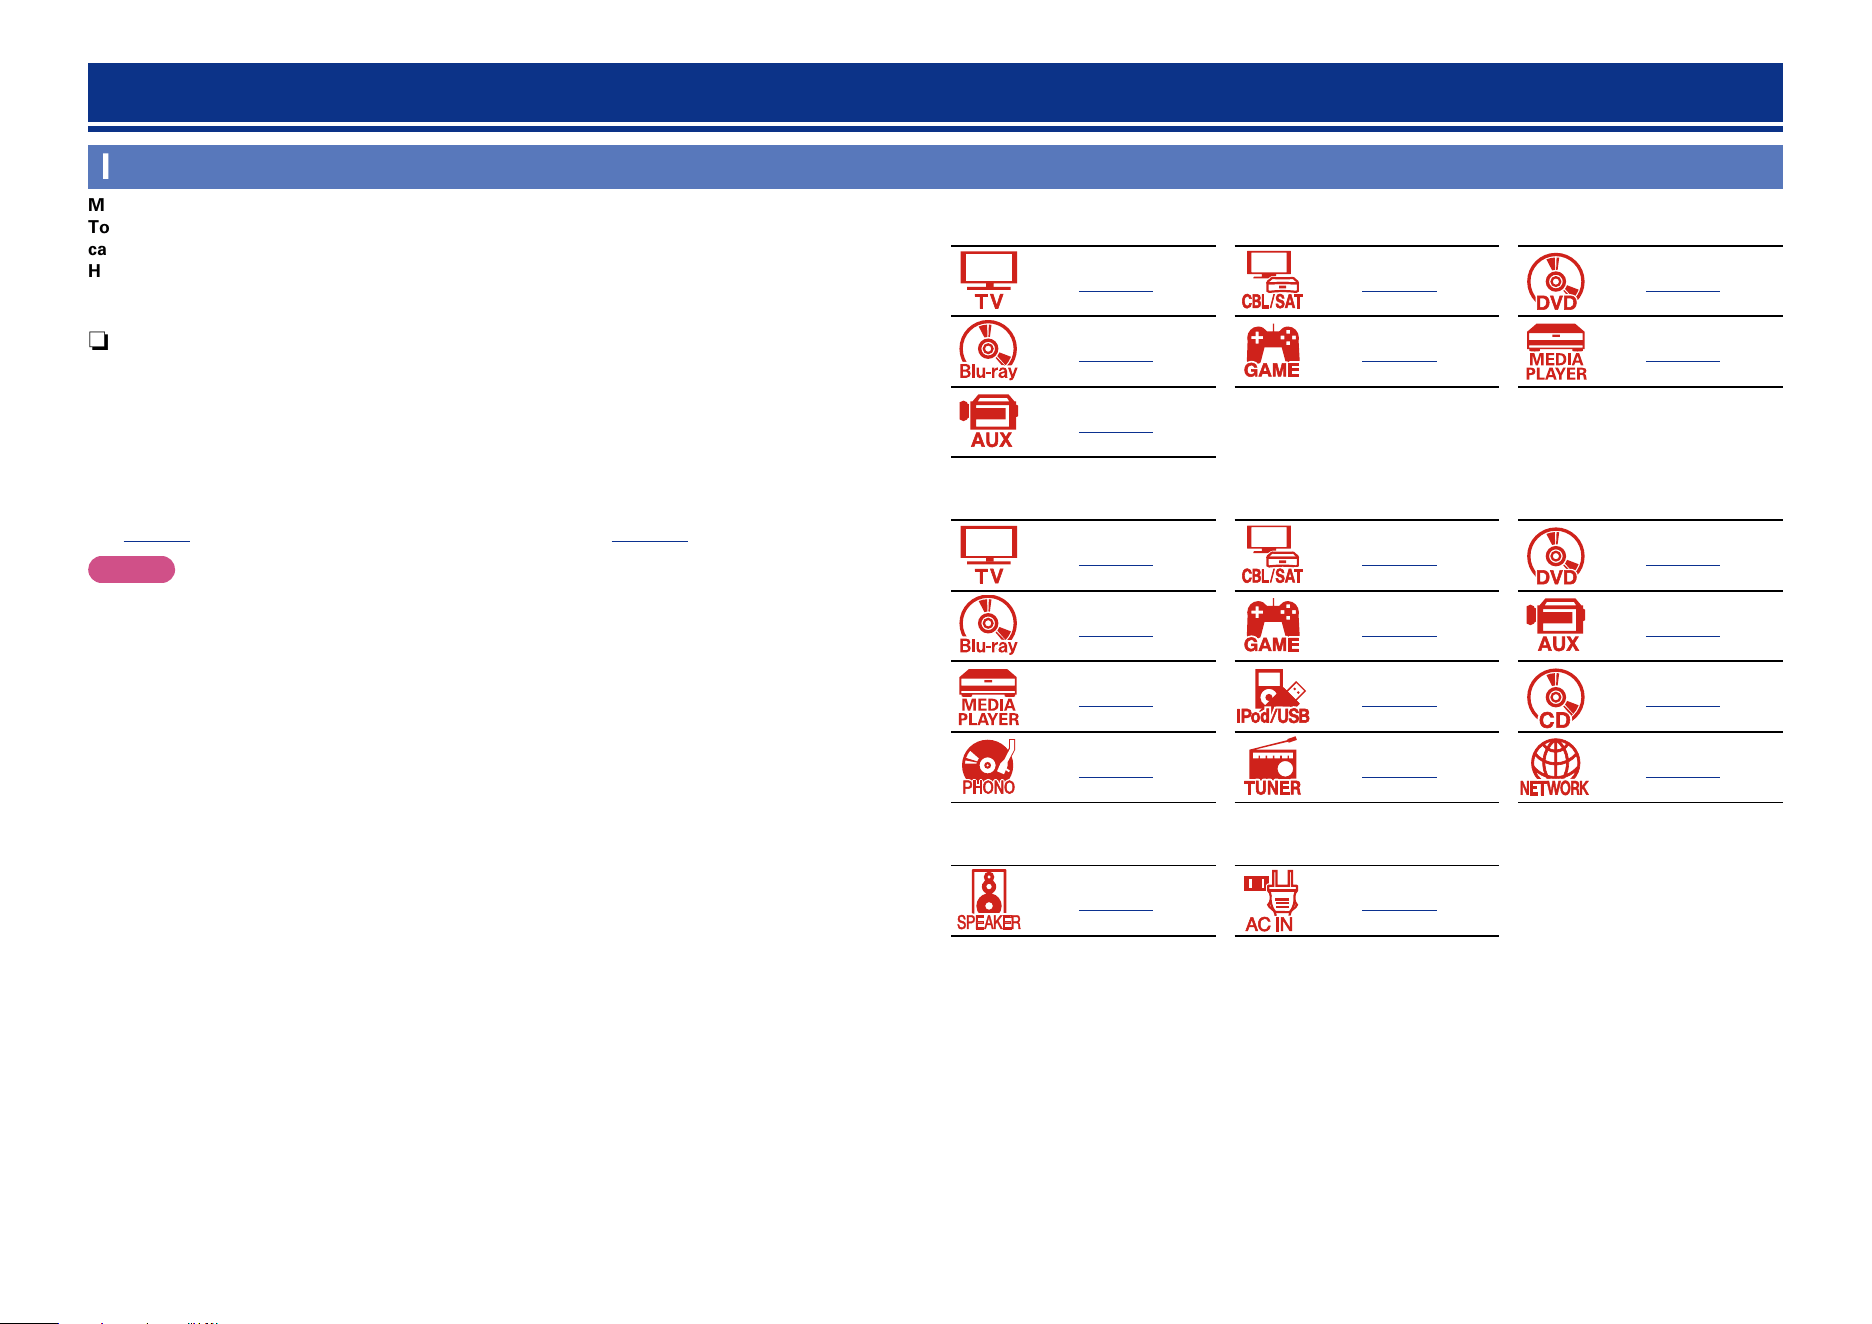
Important information
Make connections before using this unit.
To create a home theater that can play back higher quality video and audio by fully utilizing the
capabilities of this unit and your video devices, connect this unit to each of your video devices with
HDMI cables.
n HDMI-compatible device
If your video device does not support HDMI connections, use the following connection.
n HDMI-incompatible device
This unit can change the source that is assigned to the DIGITAL AUDIO IN, ANALOG AUDIO IN,
COMPONENT VIDEO IN and VIDEO IN connectors.
For details on assigning a source to connectors, see “Changing the source assigned to connectors”
(vpage15). For the setting method, see “Input Assign” (vpage135).
NOTE
•While signals are being upscaled to 4K, the menu screen is only displayed on a TV that is connected
to this unit via HDMI.
•Do not plug in the power cord until all connections have been completed. However, when the
“Setup Assistant” is running, follow the instructions in the “Setup Assistant” (C page 7) screen
for making connections. (During “Setup Assistant” operation, the input/output connectors do not
conduct current.)
•When running the “Setup Assistant” (C page 7), turn off the power supply of connected devices.
•When making connections, also refer to the operating instructions of the other devices being connected.
•Be sure to connect the left and right channels properly (left with left, right with right).
•Do not bundle power cords together with connection cables. Doing so can result in noise.
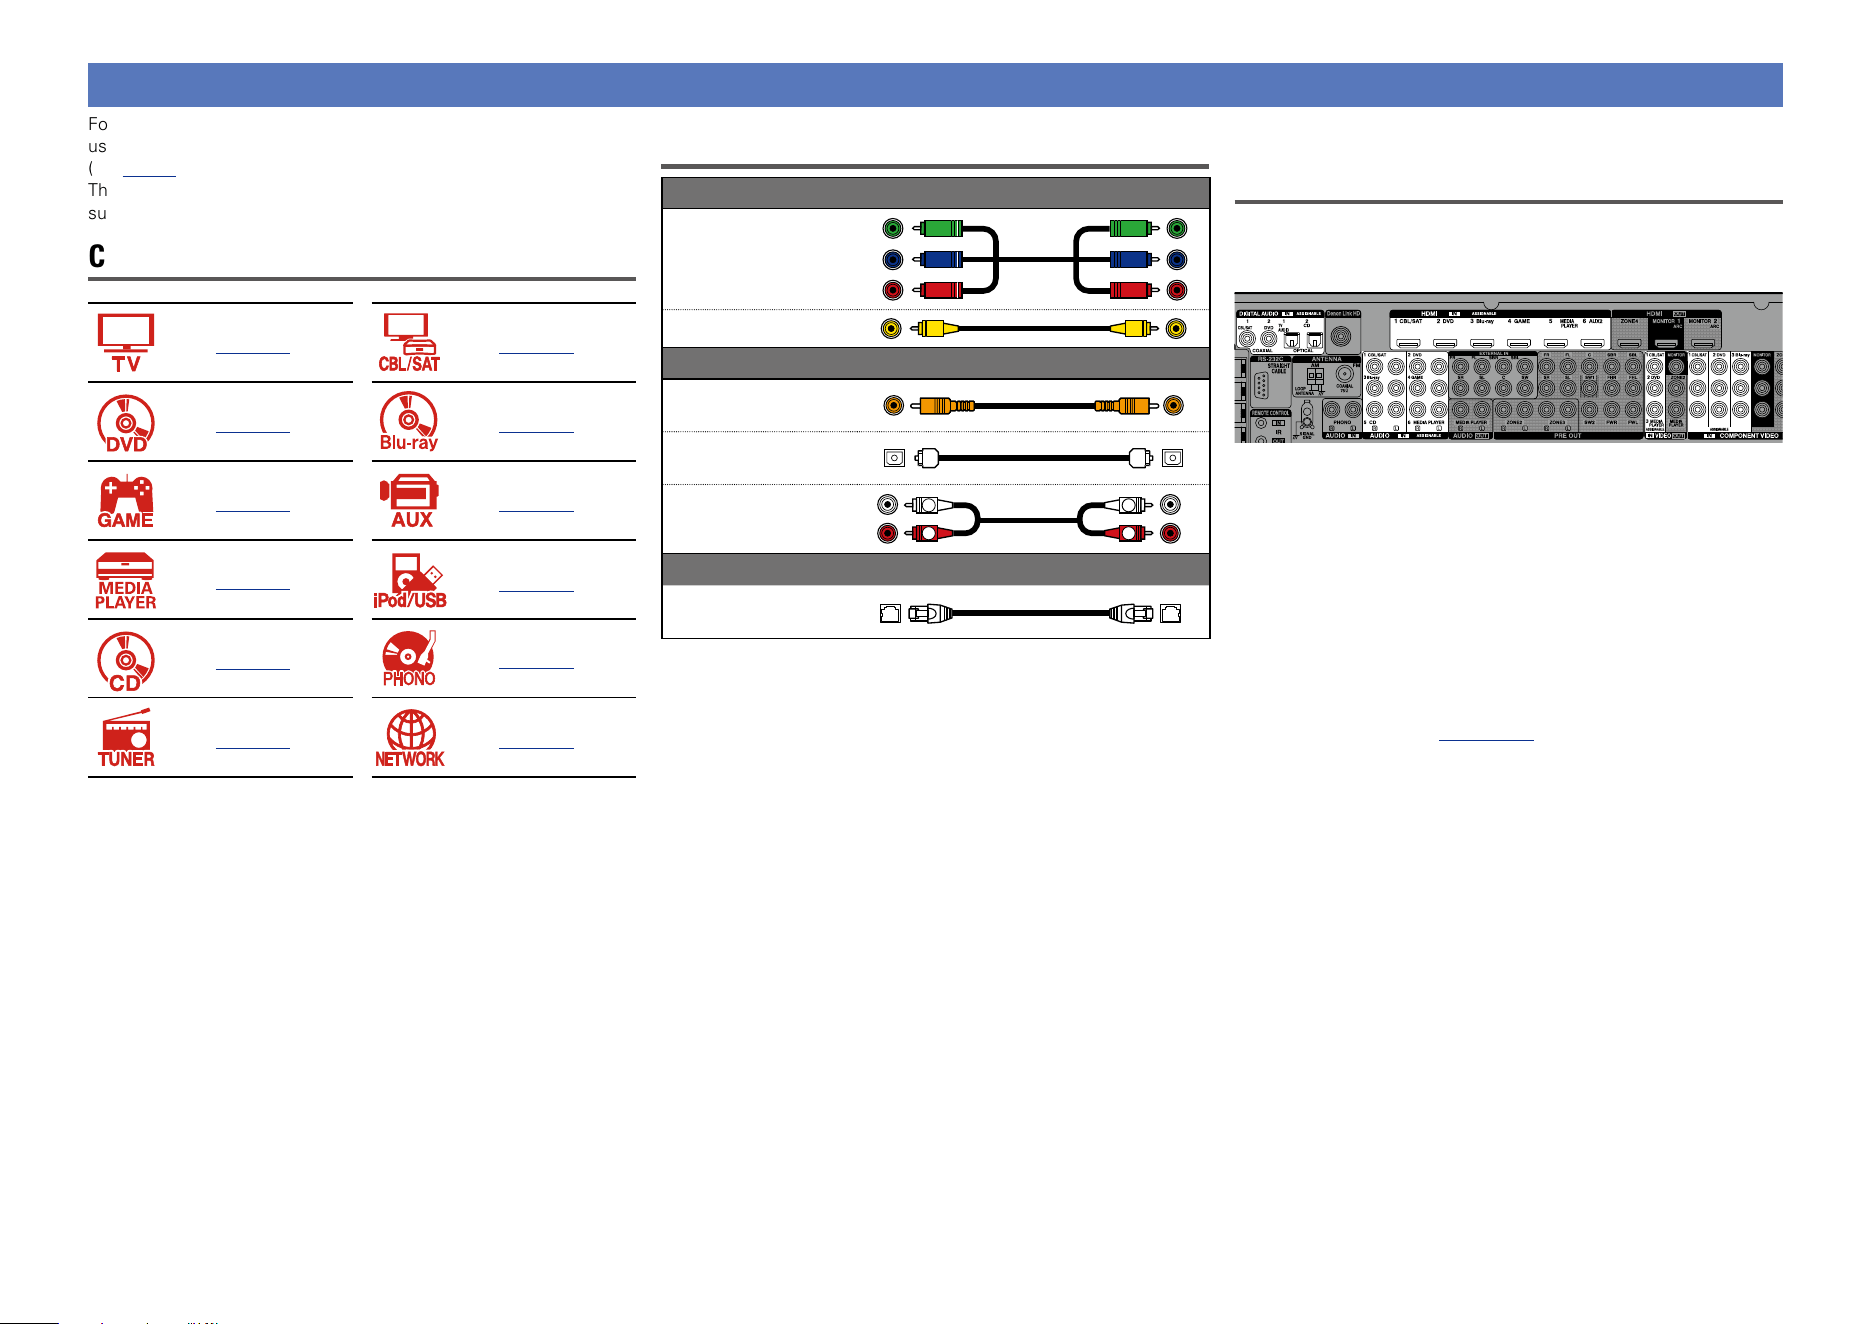
Connections
n HDMI-compatible device
vpage10 vpage12 vpage12
vpage12 vpage12 vpage12
vpage12
n HDMI-incompatible device
vpage16 vpage17 vpage18
vpage19 vpage20 vpage21
vpage22 vpage23 vpage25
vpage26 vpage27 vpage31
n Others
vpage93 vpage32
Basic version
Advanced version
Informations
Basic version
DVD

7
Important information
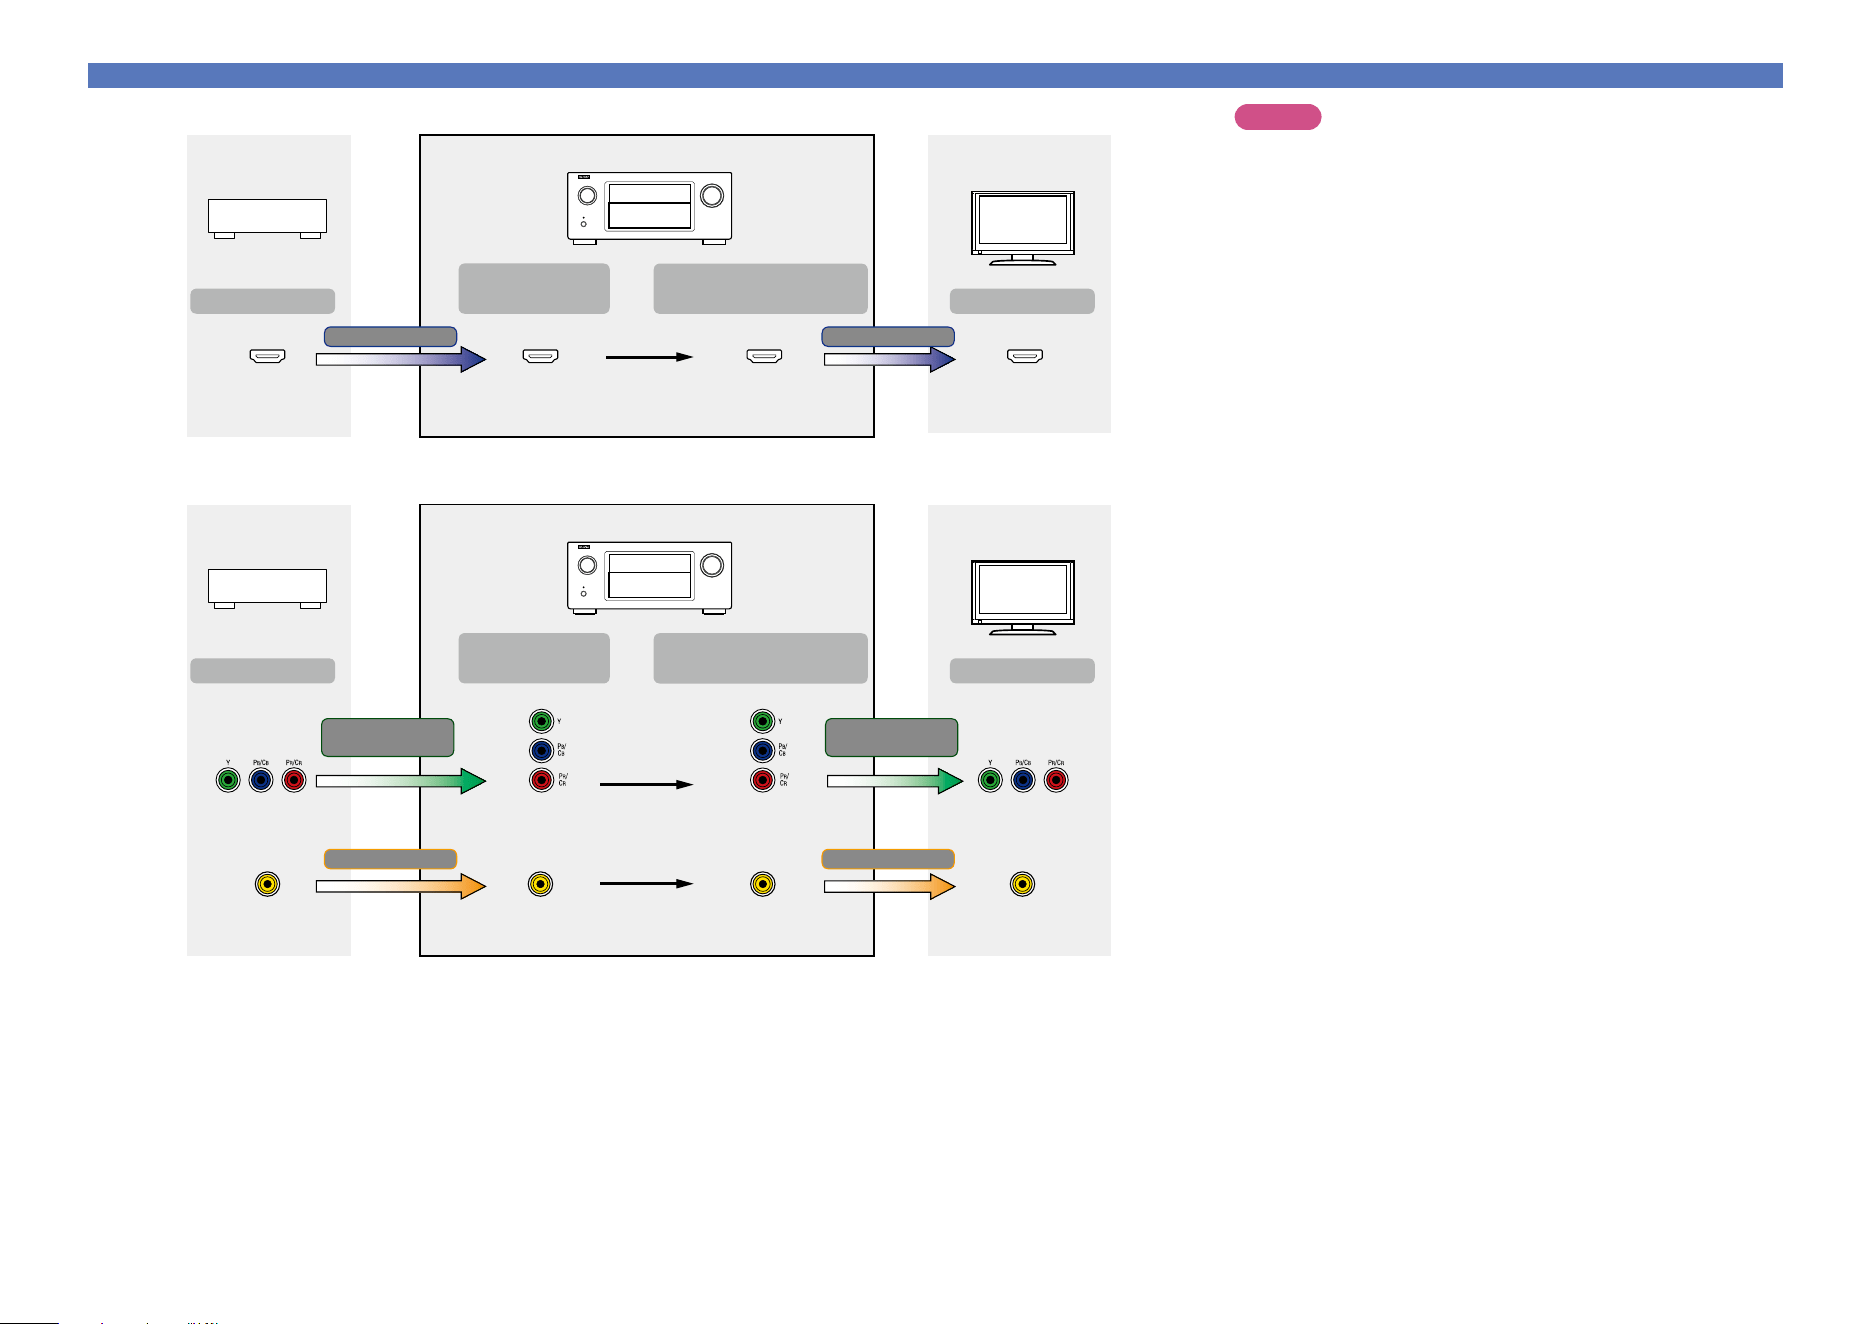
Converting input video signals for output (Video conversion function)
This unit is equipped with three types of video input connectors (HDMI, Component video and video) and three types of video output connectors
(HDMI, Component video and video).
This function automatically converts various formats of video signals input to this unit into the formats used to output the video signals from
this unit to a monitor.
GFlow of video signals for MAIN ZONEH
HDMI connector
HDMI signal HDMI signal
Component video
signal
Component video
signal
Video signal Video signal
Video connector
HDMI-compatible TV
HDMI-incompatible
TV
HDMI connector
Component video
connectors
Component video
connectors
Component video
connectors
Component video
connectors
Video connector Video connector Video connector
HDMI connectorHDMI connector
: when 480i/576i signals are input
Video device
This unit
Output
Input
(IN)
Output
(MONITOR OUT)
Input
For example, when an HDMI-compatible TV is connected to this unit with an HDMI cable, input signals other than HDMI video signals are
automatically converted to HDMI signals that are then output from the HDMI connector to the TV. Only one type of video signals is output, so
video signals output from this unit to the TV do not change even when the source for playback is switched to a device that outputs video signals
in a different format, which allows you to continue with playback without the need to switch the video input source on the TV. Furthermore,
the video quality improves because analog video signals such as video and component video signals that are input to this unit are converted to
digital HDMI video signals with a higher resolution for output. When a TV does not support the HDMI connection, make an analog connection
between this unit and the TV for video signals. This unit cannot convert HDMI input signals to analog video signals, so when signals are input
from an HDMI device, use the component video input connector or video input connector. In this case, the component video signals that are
input to this unit are converted to video signals.
•If you do not want this unit to convert video signals automatically,
use the following setting item to disable this function.
“Video Conversion” (vpage131)
•If you want to change the resolution of video signals output to
the TV, use the following setting item to do so.
“Resolution” (vpage132)
Make Settings as Necessary
•The video conversion function supports the NTSC, PAL, SECAM,
NTSC 4.43, PAL-N, PAL-M and PAL-60 formats.
•Resolutions of HDMI-compatible TVs can be checked at “Video” –
“HDMI Monitor 1” or “HDMI Monitor 2” (vpage153).
NOTE
•While signals are being upscaled to 4K, the menu screen is only
displayed on a TV that is connected to this unit via HDMI.
•When a non-standard video signal from a game machine or some
other source is input, the video conversion function might not
operate.
Basic version
Advanced version
Informations
Basic version
DVD
8
Important information
GFlow of video signals for ZONE4H
HDMI connector
HDMI signal HDMI signal
HDMI-compatible TV
HDMI connector HDMI connectorHDMI connector
Video device
This unit
Output
Input
(IN)
Output
(ZONE4 MONITOR OUT)
Input
GFlow of video signals for ZONE2H
Component video
signal
Component video
signal
Video signal Video signal
Video connector
HDMI-incompatible
TV
Component video
connectors
Component video
connectors
Component video
connectors
Component video
connectors
Video connector Video connector Video connector
Video device
This unit
Output
Input
(IN)
Output
(ZONE2 MONITOR OUT)
Input
NOTE
•HDMI signals are digital. HDMI signals cannot be converted into
analog signals.
•The HDMI ZONE4 function is only compatible with the HDMI 1 – 6
IN connectors. It is not compatible with the HDMI 7 IN connector.
Basic version
Advanced version
Informations
Basic version
DVD
9
Connecting an HDMI-compatible device
You can connect up to ten HDMI-compatible devices (7-inputs/3-outputs) to the unit.
When a TV is connected to the HDMI ZONE4 OUT connector, you can play back a video or audio from the
device connected to the HDMI 1 – 6 IN connector in ZONE4 (vpage111).
If the device connected to this unit is equipped with an HDMI connector, it is recommended to use HDMI
connections. Connections with an HDMI cable offer the following benefits that can not be achieved with
other connection methods.
•High quality playback by transmitting audio and video via digital signals
HDMI connections can transmit high definition video and high quality audio formats adopted by Blu-
ray disc players (Dolby Digital Plus, Dolby TrueHD, dts-HD, dts-HD Master Audio).
HDMI connections also convey information required for playback between devices. The information
is used for copyright protection and TV resolution recognition, the ARC function, the HDMI control
function, etc.
•Transmission of audio and video signals with a single HDMI cable
Previous connections require multiple audio and video cables, but HDMI connections require only a
single HDMI cable to transmit audio and video signals. This allows wires in a home theater system,
which tend to be complicated, to be more organized.
•Mutual control through the HDMI control function (vpage102)
This unit and the HDMI device connected via HDMI can be linked to perform operations such as
power control, volume control, and input source switching.
•Other video and audio functions, such as 3D video playback, Content Type, the ARC function,
are supported (vpage13).
•There is more than one version of HDMI standard. The supported functions and the performance vary
according to the version. This unit complies with the HDMI standard, supporting the ARC and 3D playback
functions. To enjoy these functions, the HDMI device connected to this unit also needs to use the same
version of the standard. For the version of the HDMI standard on the device connected to this unit, see
the device’s manual.
•Some TVs do not support audio input via HDMI connections. For details, see your TV’s manual.
n Before connecting this unit to TV via HDMI connections (vpage10)
n Connecting this unit to a TV via HDMI connections (vpage11)
n Connecting this unit to video devices via HDMI connections (vpage12)
n HDMI function (vpage13)
n Settings related to HDMI connections (vpage14)
Basic version
Advanced version
Informations
Basic version
DVD
10
Connecting an HDMI-compatible device
n About ARC (Audio Return Channel) function
This function plays TV audio on this unit by sending the TV audio signal to this unit via HDMI cable.
If a TV without the ARC function is connected via HDMI connections, video signals of the playback
device connected to this unit are transmitted to the TV, but this unit can not play back the audio from
the TV. If you want to enjoy surround audio for TV program, a separate audio cable connection is
required.
In contrast, if a TV with the ARC function is connected via HDMI connections, no audio cable connection
is required. Audio signals from the TV can be input to this unit through the HDMI cable between this
unit and the TV. This function allows you to enjoy surround playback on this unit for the TV.
When the ARC function is used, connect a device with a “Standard HDMI cable with Ethernet” or “High
Speed HDMI cable with Ethernet” for HDMI.
Refer to the owner’s manual for your TV for details about TV connection and settings.
NOTE
The HDMI ZONE4 OUT connector is not compatible with the ARC function.
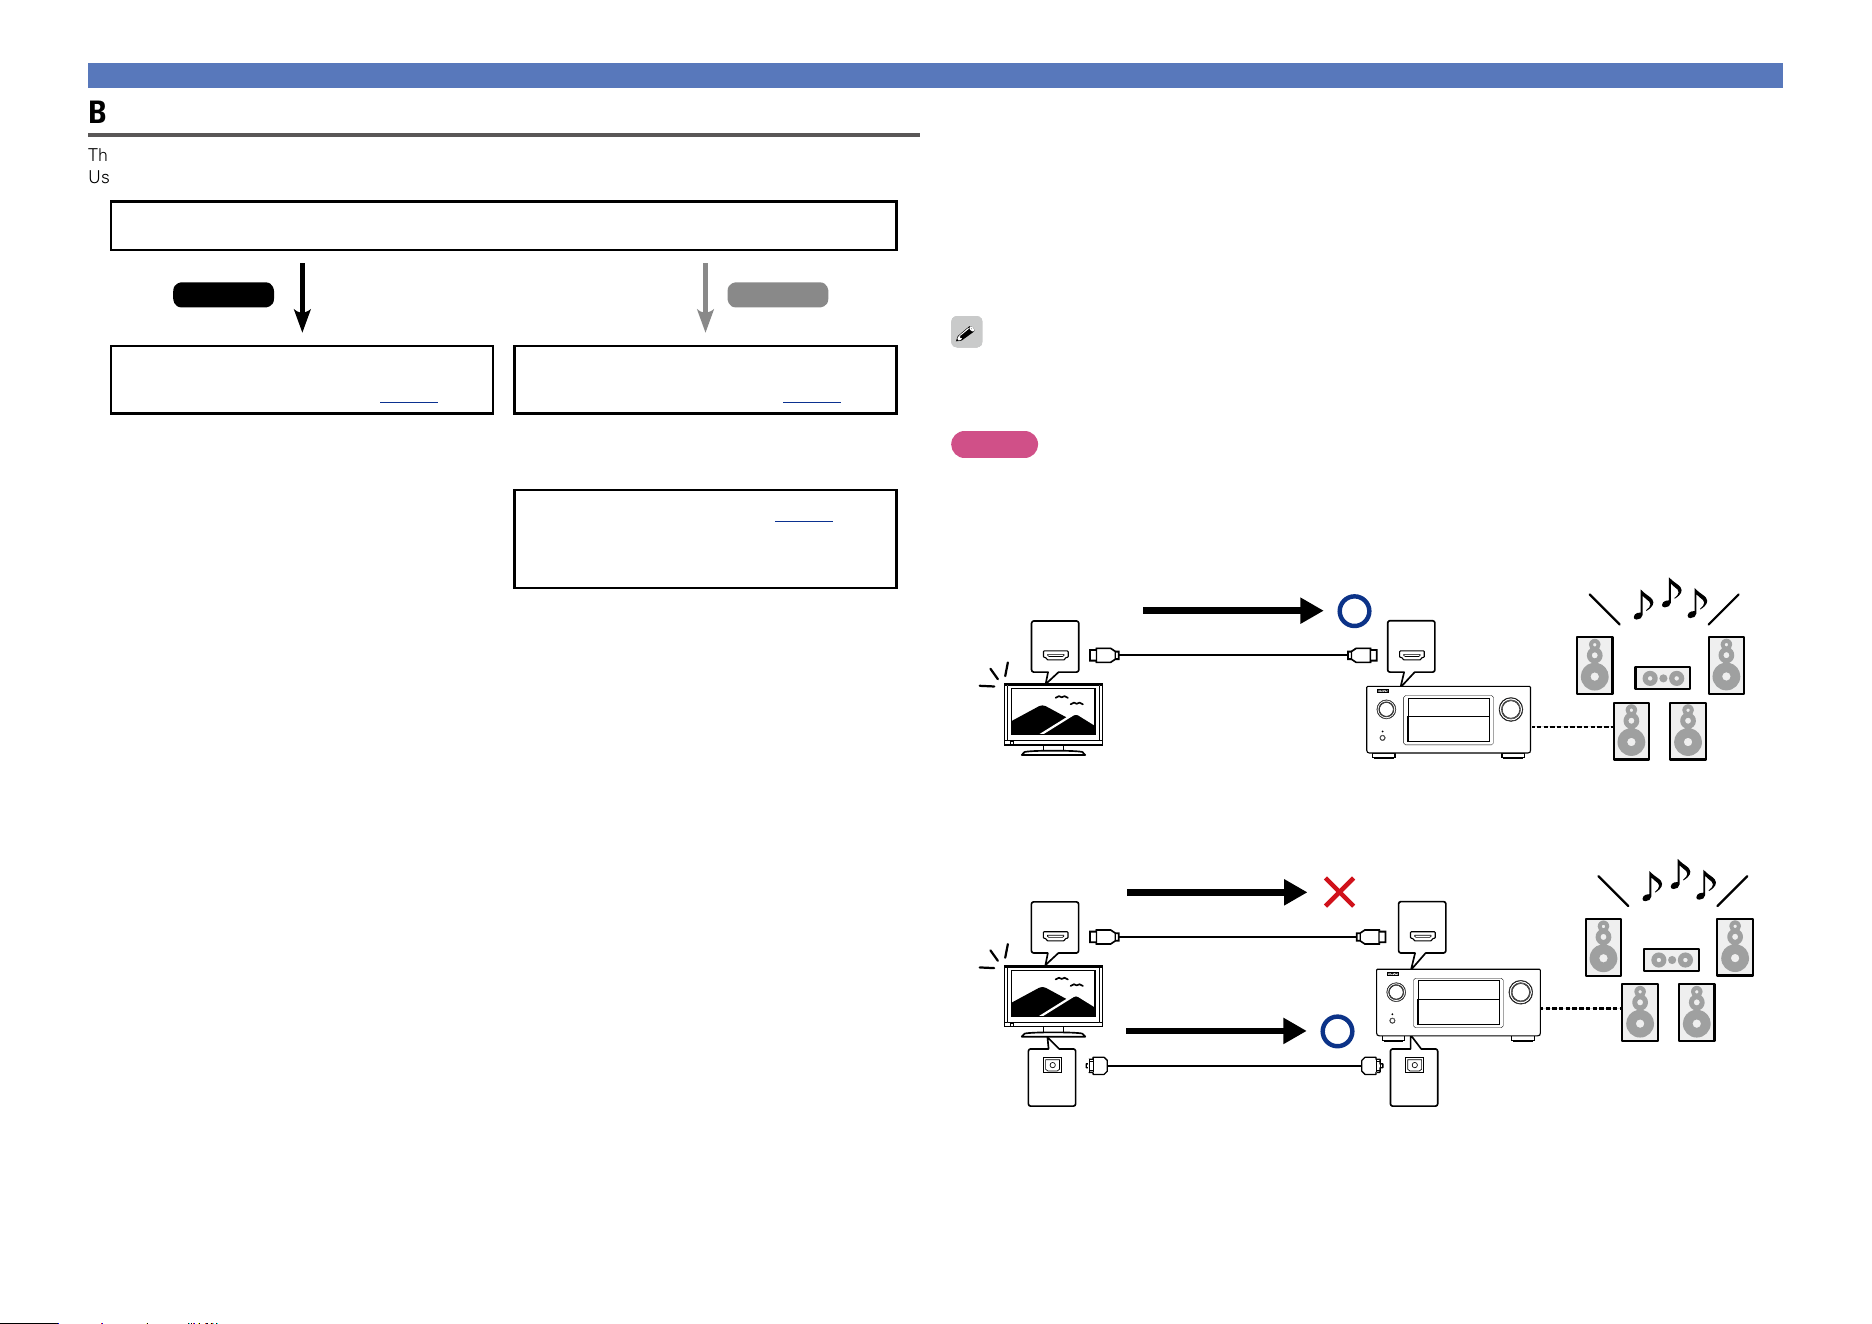
GConnection to a TV with the ARC functionH
IN OUT
Audio signals from the TV
Audio from the TV
This unit SpeakersTV
GConnection to a TV without the ARC functionH
IN OUT
INOUT
Audio signals from the TV
Audio signals from the TV
Optical cable
Audio from the TV
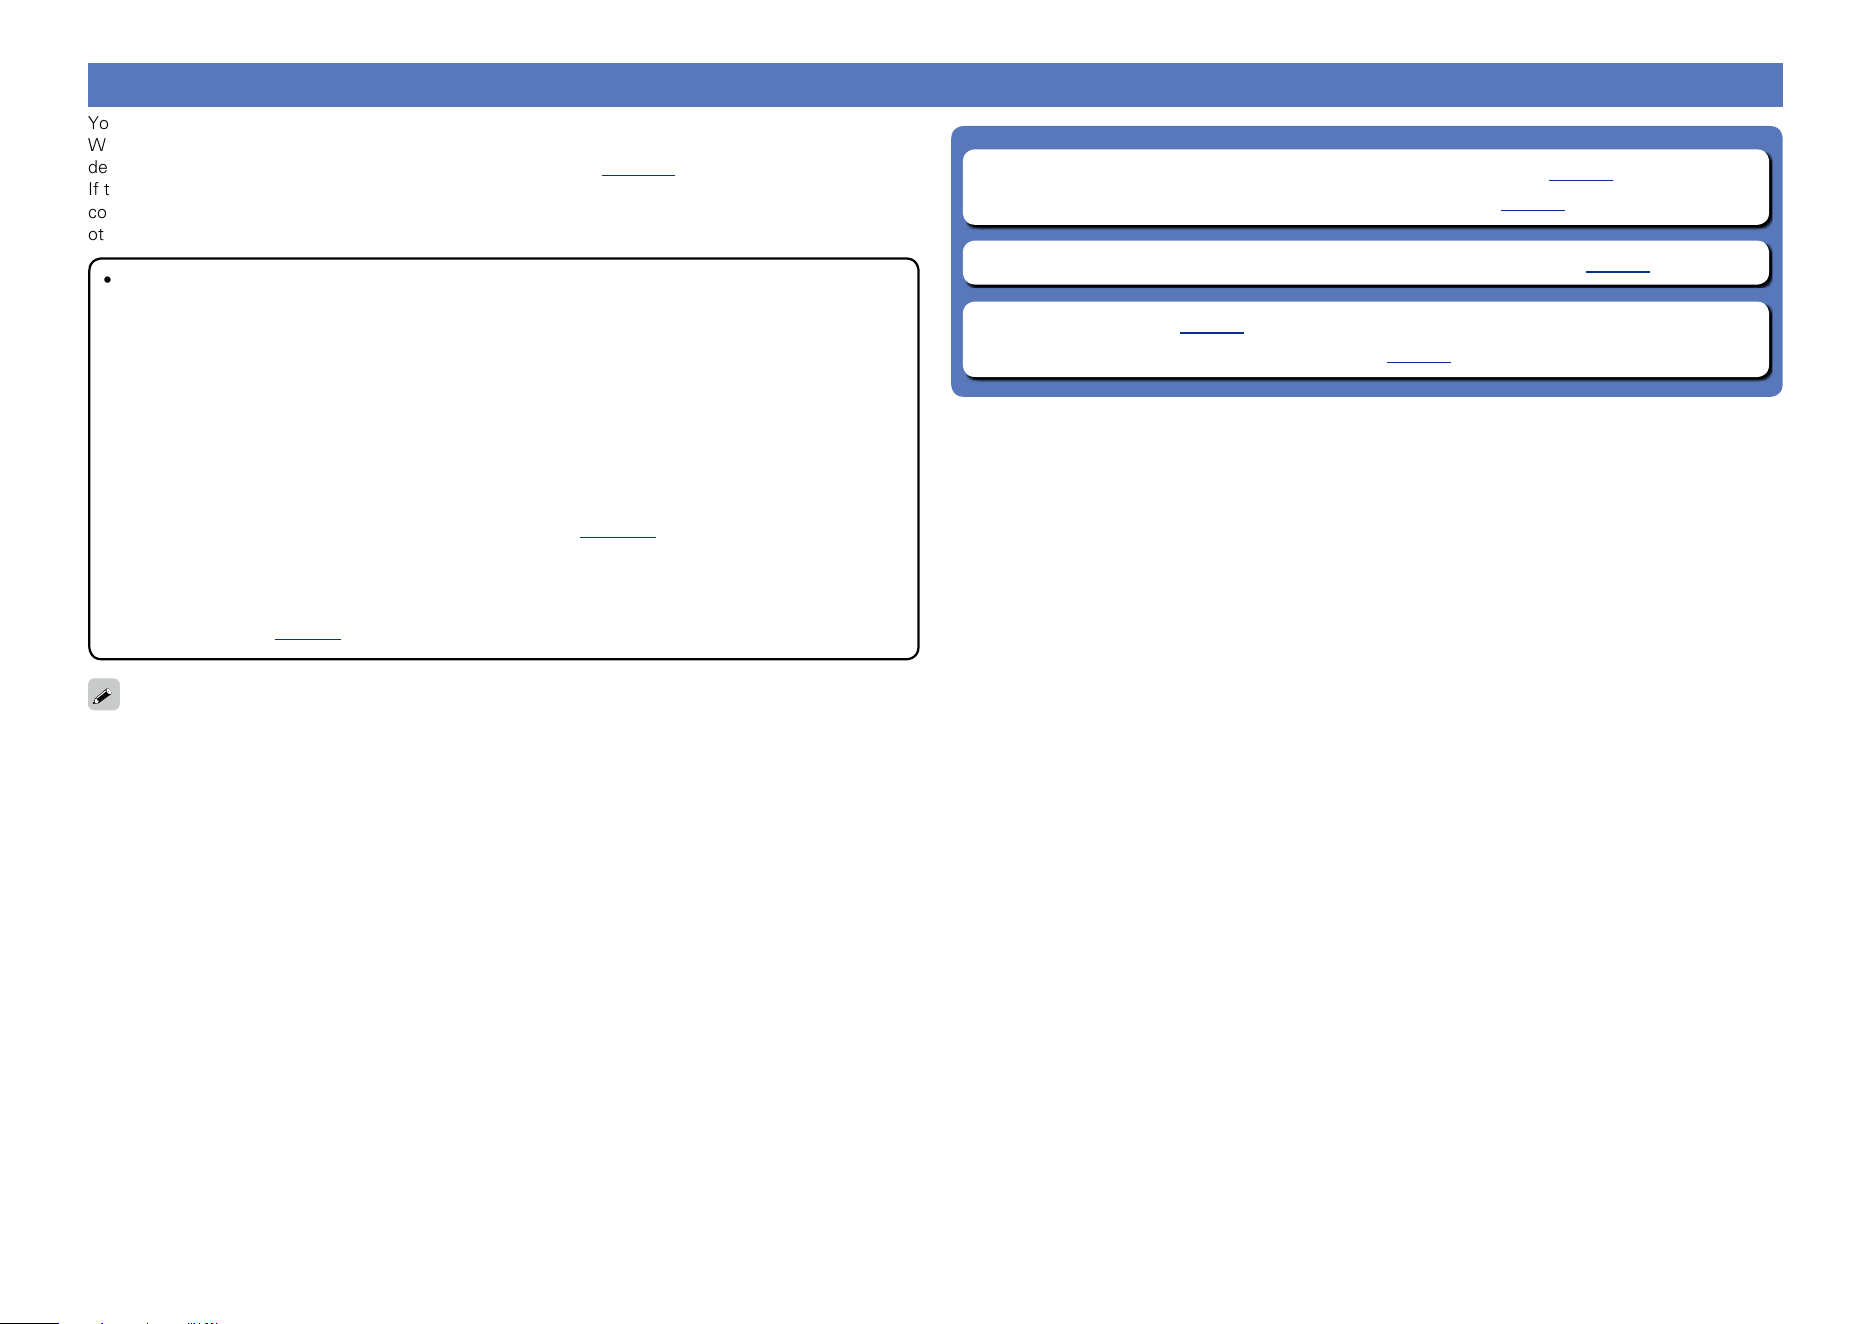
Before connecting this unit to TV via HDMI connections
There are 2 methods to connect HDMI-compatible TV to this unit.
Use the connection method that suits your TV.
Does the TV to be connected to this unit support the ARC function?
Connecting this unit to a TV via
HDMI connections (vpage11)
Connecting this unit to a TV via
HDMI connections (vpage11)
Connecting a TV (vpage16)
For audio connections, use a method other
than HDMI connections.
Yes No
+
Basic version
Advanced version
Informations
Basic version
DVD
11
Connecting an HDMI-compatible device
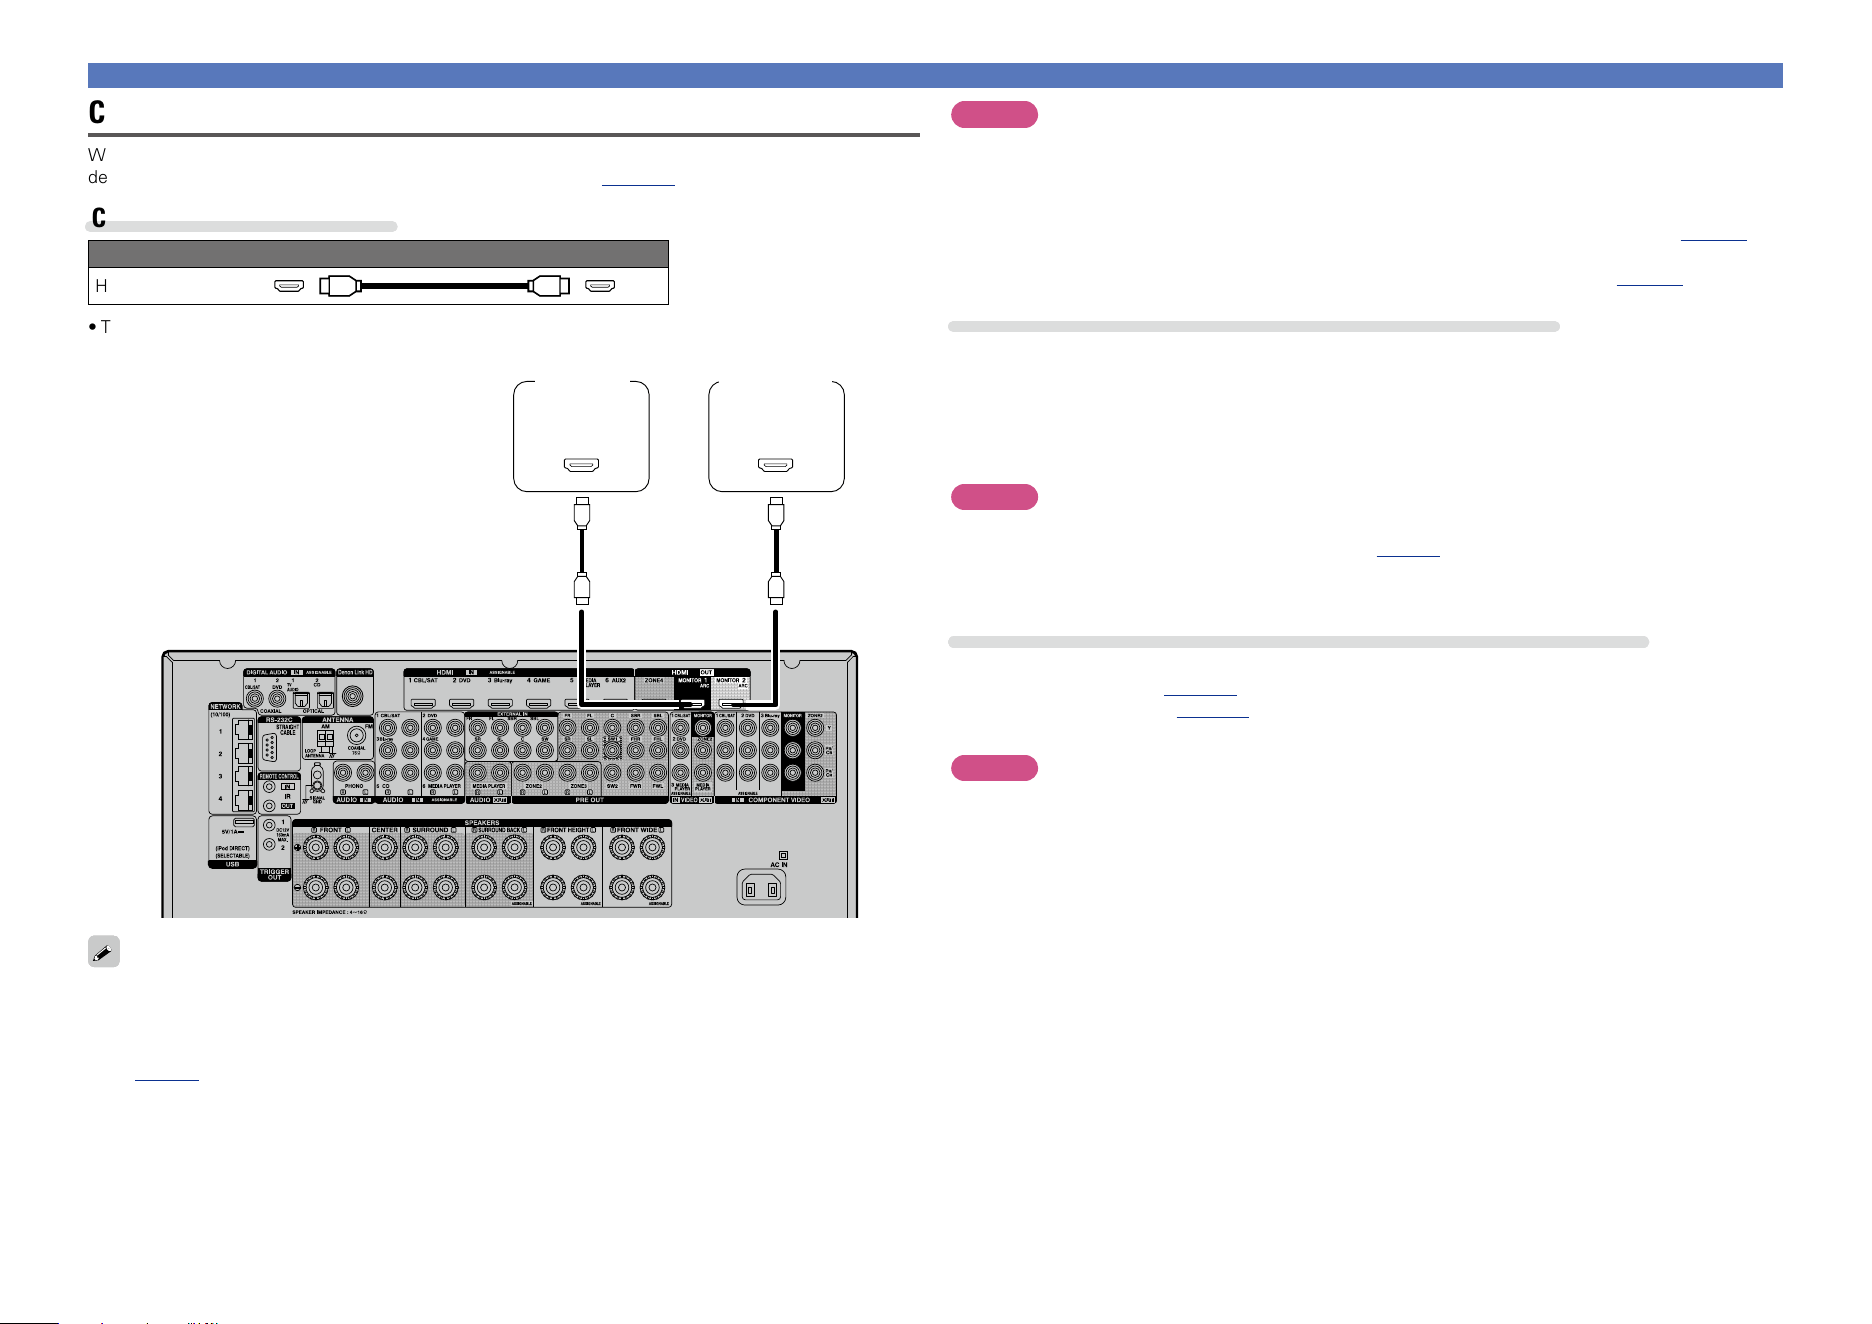
Connecting this unit to a TV via HDMI connections
When a TV is connected to the HDMI ZONE4 OUT connector, you can play back a video or audio from the
device connected to the HDMI 1 – 6 IN connector in ZONE4 (vpage111).
Cables used for connections
Audio and video cable (sold separately)
HDMI cable
•This interface allows transfer of digital video signals and digital audio signals over a single HDMI cable.
(ARC)
IN
HDMI
(ARC)
IN
HDMI
TV 1
(Primary)
TV 2
(Secondary)
•Video signals are not output if the input video signals do not match the monitor’s resolution. In this case,
switch the Blu-ray Disc/DVD player’s resolution to a resolution with which the monitor is compatible.
•When this unit and monitor are connected with an HDMI cable, if the monitor is not compatible with
HDMI audio signal playback, only the video signals are output to the monitor. Make audio connections
(vpage16 “Connecting a TV”).
NOTE
•The HDMI 7 / MHL connector on the front panel does not support the HDMI ZONE4 function.
•The audio signal from the HDMI output connector (sampling frequency, number of channels, etc.) may be
limited by the HDMI audio specifications of the connected device regarding permissible inputs.
•When connecting a TV that does not support the ARC function, an audio cable connection is
required in addition to the HDMI cable. In this case, refer to “Connecting a TV” (vpage16) for
the connection method.
For the ARC function, see “About ARC (Audio Return Channel) function” (vpage10).
Connecting to a device equipped with a DVI-D connector
The DVI-D (Digital Visual Interface) method is also used for video transmission via digital signals. This is
developed mainly for computers, and some AV devices such as projectors are equipped with this interface.
To output HDMI video signals to a DVI-D video input compatible device, use an HDMI/DVI conversion
cable, which converts HDMI video signals to DVI signals.
The DVI-D connector can transmit high quality digital signals, but the copy guard and other issues may
hinder normal operations for some device combinations.
NOTE
•No sound is output when connected to a device equipped with a DVI-D connector. Make audio
connections as described in “Connecting a TV” (vpage16).
•Signals cannot be output to DVI-D devices that do not support HDCP.
•Depending on the combination of devices, the video signals may not be output.
Settings required when using a TV that supports the ARC function
When using a TV that supports the ARC function, make the following settings.
•Set “HDMI Control” (vpage130) to “On”.
•Set “Control Monitor” (vpage130) to match the number of the HDMI MONITOR connector connected
to the TV that supports the ARC function.
NOTE
If the TV that supports the ARC function is connected to both HDMI MONITOR 1 and HDMI MONITOR 2
connectors, you cannot use ARC function at the same time.
Basic version
Advanced version
Informations
Basic version
DVD
12
Connecting an HDMI-compatible device
OUT
HDMI
OUT
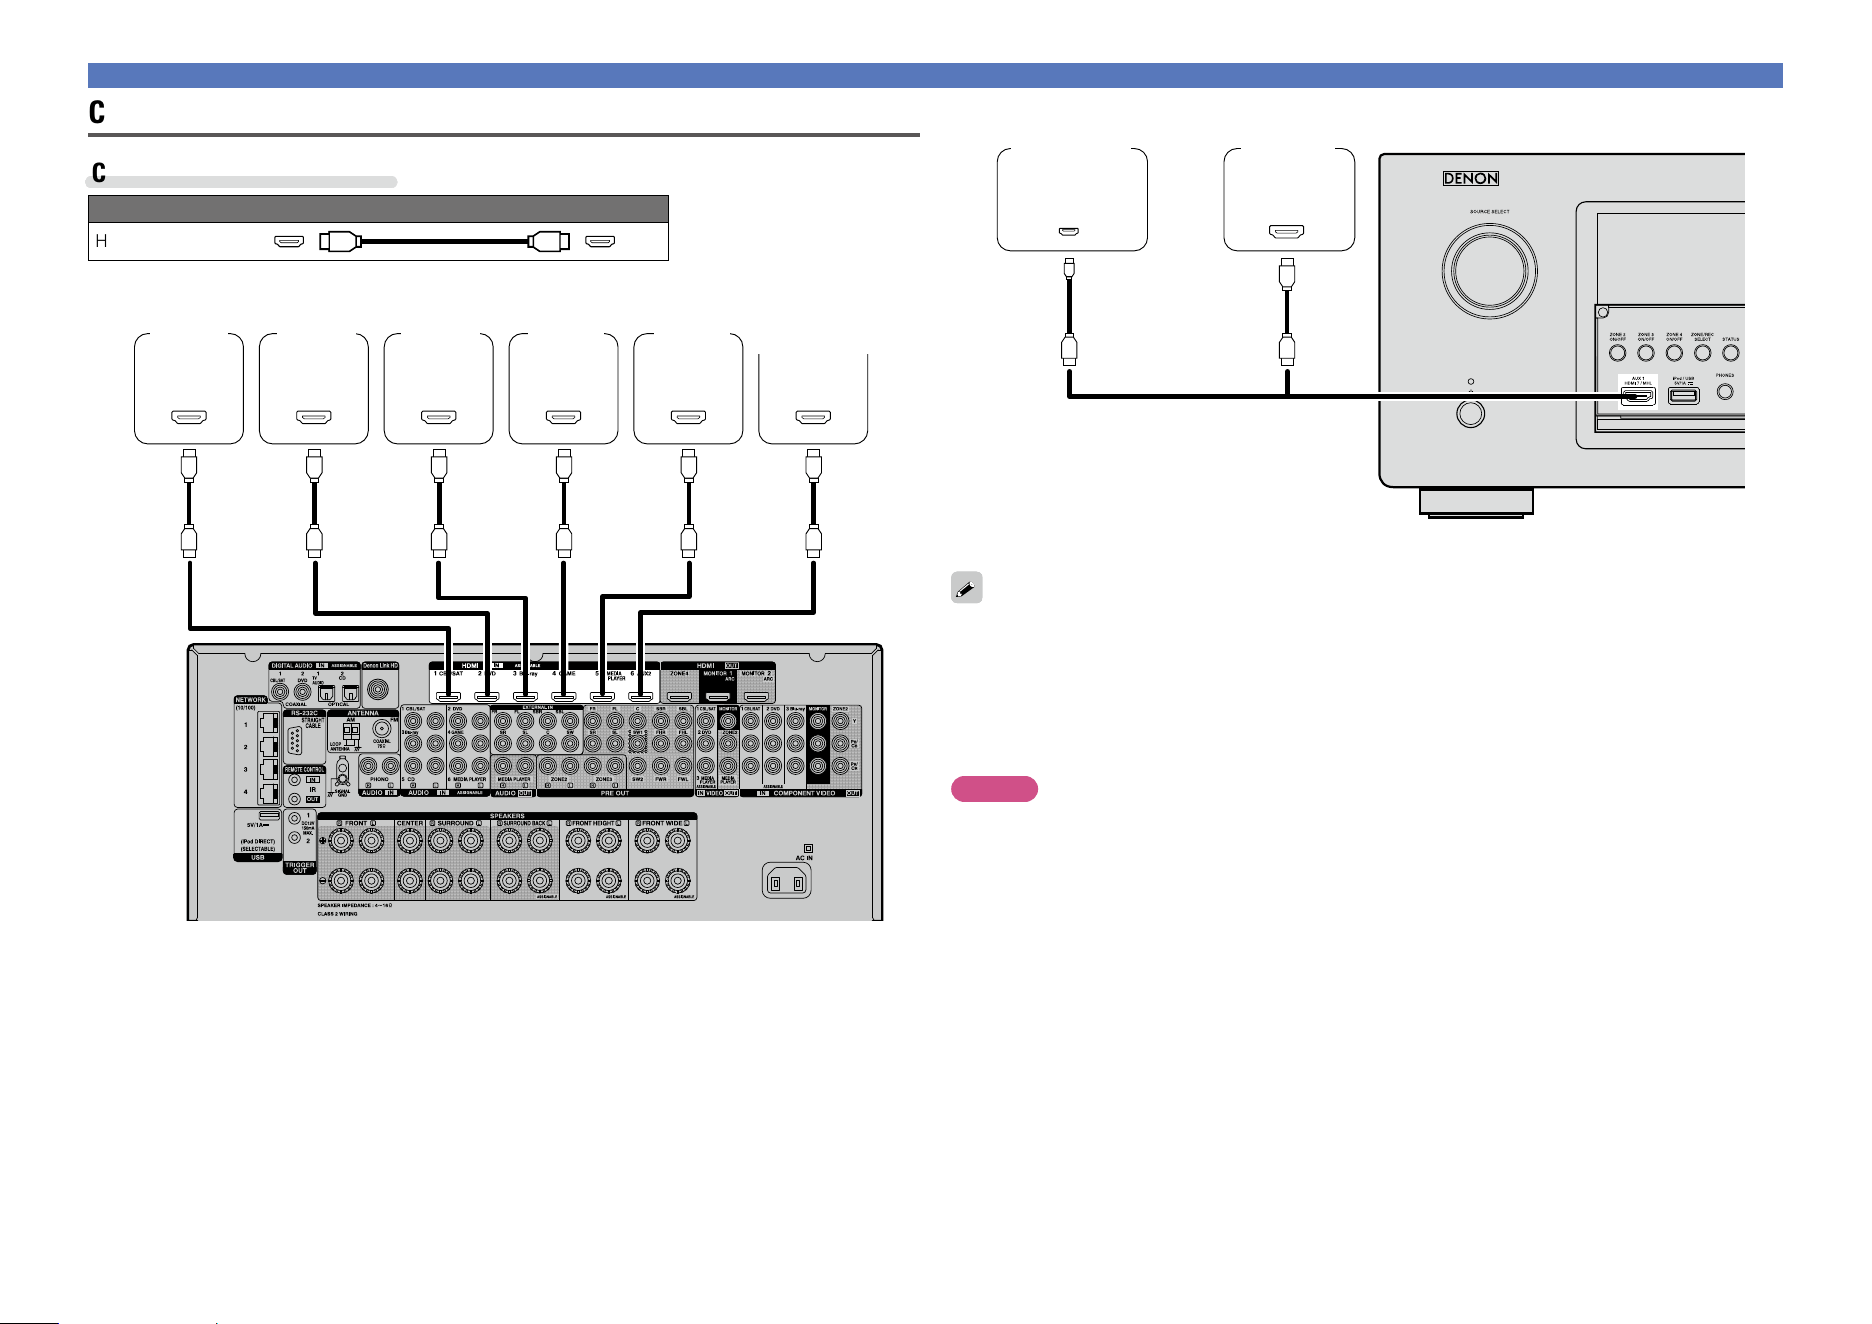
MHL
GFront panelH
Digital
camcorder
(Primary)
Mobile
(Smartphone
etc.)
or
MHL cable
•Connect Mobile (Smartphone etc.) to the HDMI 7 / MHL connector on the front panel.
•When this unit is connected to other devices with HDMI cables, connect this unit and TV also with an
HDMI cable.
•When connecting a device that supports Deep Color or 4K, please use a “High Speed HDMI cable” or
“High Speed HDMI cable with Ethernet”.
•Video signals are not output if the input video signals do not match the monitor’s resolution. In this case,
switch the Blu-ray Disc/DVD player’s resolution to a resolution with which the monitor is compatible.
NOTE
•The HDMI 7 / MHL connector on the front panel does not support the HDMI ZONE4 function.
•The HDMI 7 / MHL connector on the front panel does not support the InstaPrevue function.
•The HDMI 7 / MHL connector on the front panel does not support the 4K.
Connecting this unit to video devices via HDMI connections
Cables used for connections
Audio and video cable (sold separately)
HDMI cable
OUT
HDMI
OUT
HDMI
OUT
HDMI
OUT
HDMI
OUT
HDMI
OUT
HDMI
Blu-ray
Disc
player
DVD
player
Media
player
Digital
camcorder
(Secondary)
Set-top
box
Game
console
GRear panelH
Basic version
Advanced version
Informations
Basic version
v See overleaf
DVD
13
Connecting an HDMI-compatible device
HDMI function
This unit supports the following HDMI functions:
n About 3D function
This unit supports input and output of 3D (3 dimensional) video signals of HDMI.
To play back 3D video, you need a TV and player that provide support for the HDMI 3D function and a
pair of 3D glasses.
NOTE
•When playing back 3D video, refer to the instructions provided in the manual of your playback device
together with this manual.
•When playing back 3D video content, the menu screen or status display screen can be superimposed
over the image. However, the menu screen or status display screen cannot be superimposed over
certain 3D video content.
•If 3D video with no 3D information is input, the menu screen and status display on this unit are displayed
over the playback video.
•If 2D video is converted to 3D video on the television, the menu screen and status display on this unit
are not displayed correctly. To view the menu screen and status display on this unit correctly, turn the
television setting that converts 2D video to 3D video off.
n About 4K function
This unit supports input and output of 4K (3840 x 2160 pixels) video signals of HDMI.
When a device supporting 4K is connected, use a cable compatible with “High Speed HDMI cable” or
“High Speed HDMI cable with Ethernet”.
n HDMI pass through function (vpage130)
Signals input to the HDMI input connector are output to the television or other device connected to the
HDMI output connector, even if the power of this unit is in standby.
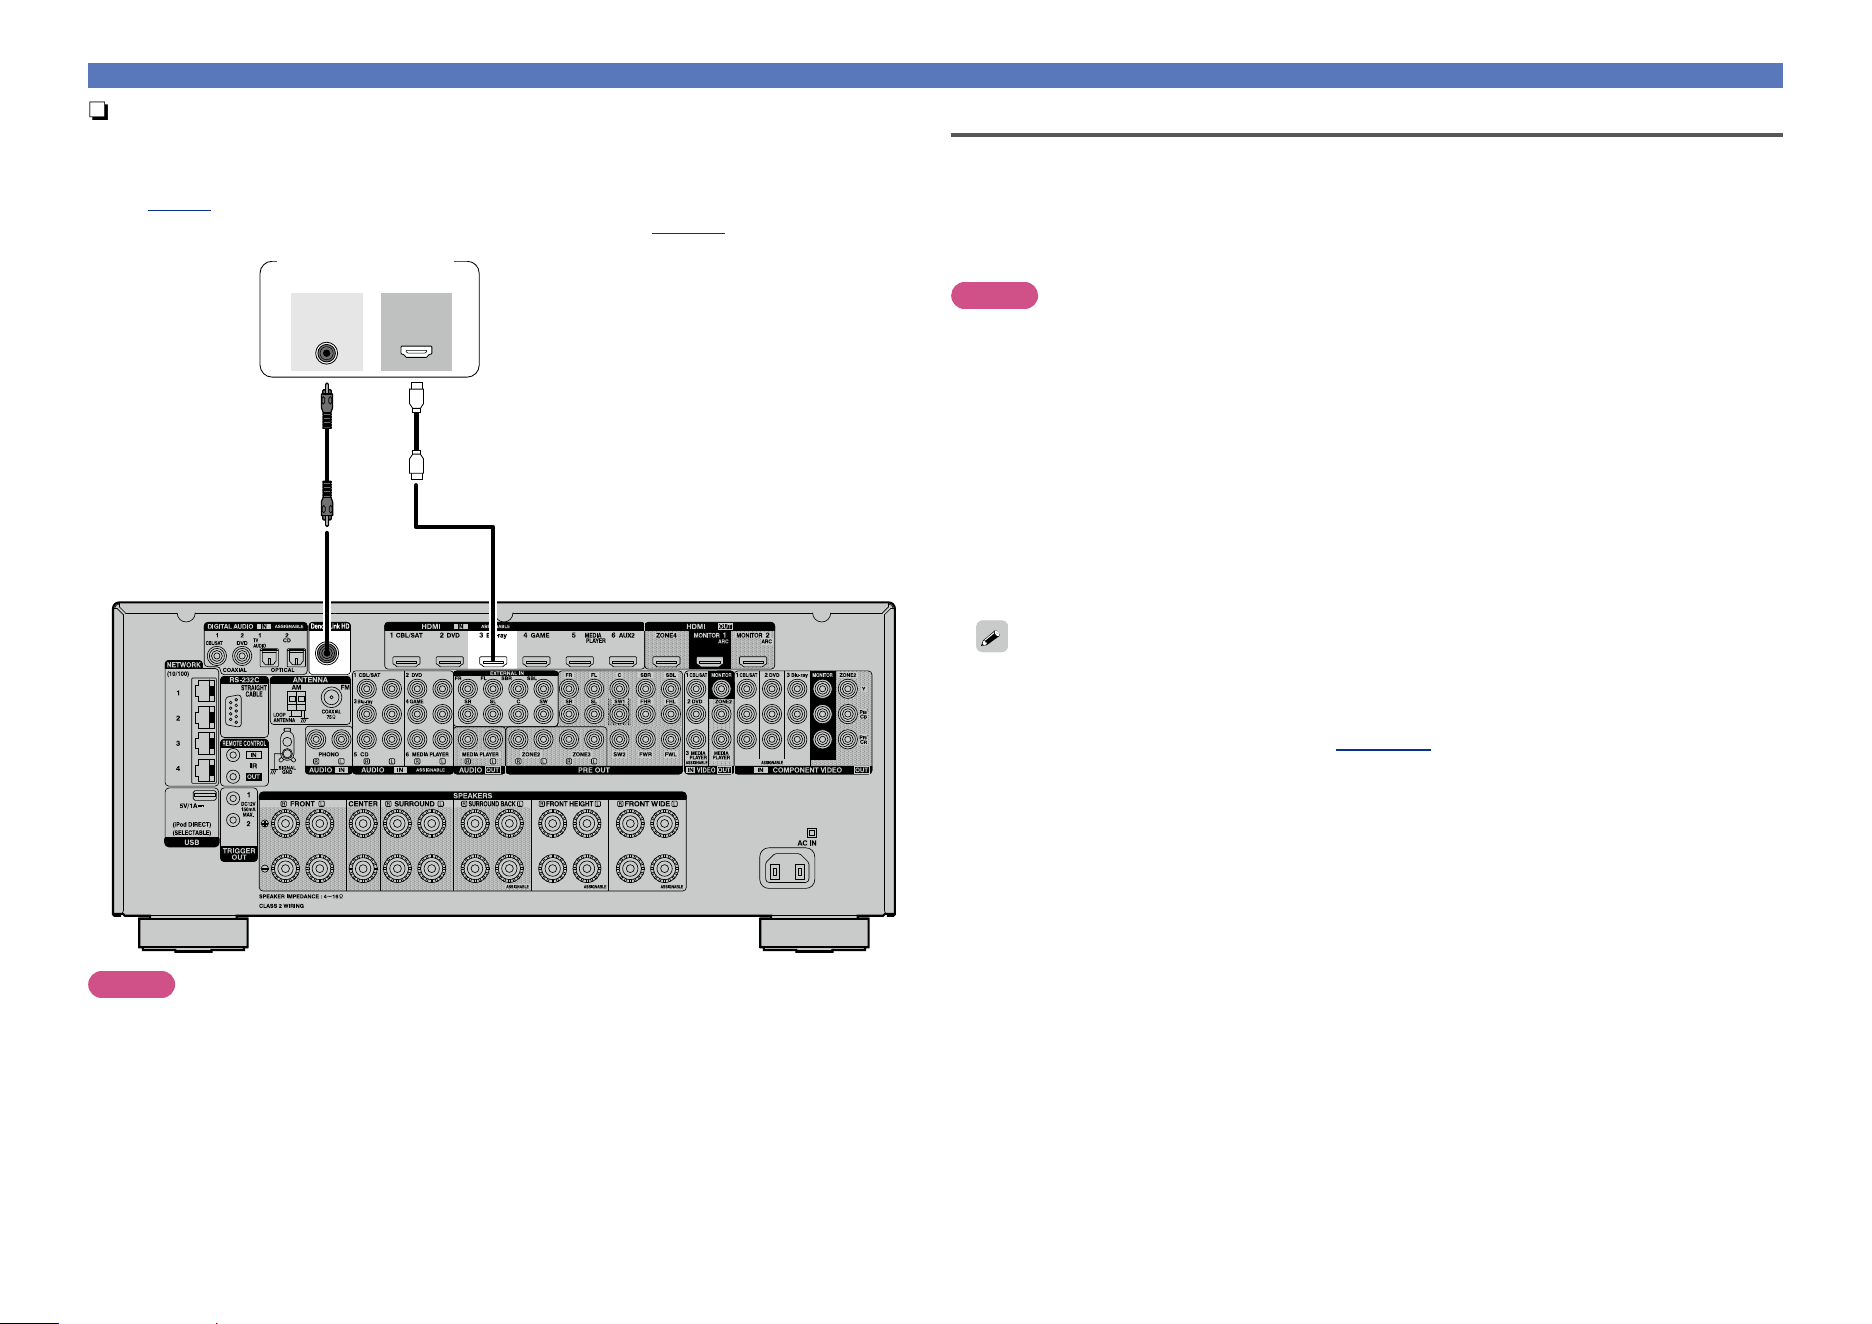
n Connecting a player compatible with the Denon Link HD function
By making a Denon Link HD connection to a player compatible with the Denon Link HD function, you
can enjoy higher quality playback compared with when only the HDMI connector connection is made.
For the playback method, see “Playing a Blu-ray Disc player compatible with Denon Link HD”
(vpage42).
When making this connection, set “Input Assign” – “DIGITAL” (vpage136) to “D.LINK”.
Link HD
Denon
OUT
HDMI
Blu-ray Disc player
NOTE
The Denon Link HD connector is not an audio signal input connector. Audio signals cannot be played back
only by making a connection with the Denon Link HD connector.
Basic version
Advanced version
Informations
Basic version
v See overleaf
DVD

14
Connecting an HDMI-compatible device
n HDMI control function (vpage102)
This function allows you to operate external devices from the unit and operate the unit from external
devices.
NOTE
•The HDMI control function may not work depending on the device it is connected to and its settings.
•You cannot operate a TV or Blu-ray Disc player/DVD player that is not compatible with the HDMI control
function.
•The HDMI ZONE4 function is compatible with the HDMI control function. To enable the HDMI control for
the ZONE4 HDMI monitor, set “Control Monitor” (vpage130) to “ZONE4”.
n About Content Type
This function was added with the HDMI standard. It automatically makes settings suitable for the video-
output type (content information).
NOTE
To enable the Content Type, set “Video Mode” to “Auto” (vpage131).
n Deep Color (vpage193)
When a device supporting Deep Color is connected, use a cable compatible with “High Speed HDMI
cable” or “High Speed HDMI cable with Ethernet”.
n Auto Lip Sync (vpage129, 193)
n “x.v.Color”, sYCC601 color, Adobe RGB color, Adobe YCC601 color
(vpage193, 195)
n High definition digital audio format
n ARC (Audio Return Channel) (vpage10)
Copyright protection system
In order to play back digital video and audio such as BD-Video or DVD-Video via HDMI connection, both
this unit and TV or the player need to support the copyright protection system known as HDCP (High-
bandwidth Digital Content Protection System). HDCP is copyright protection technology comprised of
data encryption and authentication of the connected AV devices. This unit supports HDCP.
•If a device that does not support HDCP is connected, video and audio are not output correctly. Read
the owner’s manual of your television or player for more information.
Settings related to HDMI connections
Set as necessary. For details, see the respective reference pages.
n HDMI Setup (vpage129)
Make settings for HDMI video/audio output.
•Auto Lip Sync •Vertical Stretch •Pass Through Source
•HDMI Audio Out •HDMI Pass Through •Control Monitor
z
•Video Output •HDMI Control
z
•Power Off Control
z Only these items are supported for HDMI ZONE4.
NOTE
To output audio signals that are input from the HDMI input connector to a TV connected via HDMI, set
“HDMI Audio Out” (vpage129) to “TV”.
Audio signals input via the Analog/Coaxial/Optical input connectors cannot be output from the HDMI
MONITOR output connector.
Basic version
Advanced version
Informations
Basic version
DVD
15
Connecting an HDMI-incompatible device
For high quality video and surround playback, it is recommended to
use an HDMI cable to connect this unit to TV and other video devices
(vpage9 “Connecting an HDMI-compatible device”).
This section describes connections when your device does not
support HDMI connections.
Connection methods for various devices
vpage16 vpage17
vpage18 vpage19
vpage20 vpage21
vpage22
vpage23
vpage25
vpage26
vpage27 vpage31
Cables used for connections
Video cable (sold separately)
Component video
cable
Video cable
Audio cable (sold separately)
Coaxial digital cable
Optical cable
Audio cable
R
L
R
L
Cable (sold separately)
Ethernet cable
Changing the source assigned to
connectors
This unit can change the source that is assigned to the HDMI IN,
DIGITAL AUDIO IN, COMPONENT VIDEO IN, VIDEO IN and AUDIO
IN connectors.
Let us take a digital audio connection for Blu-ray Disc players for an
example. The rear panel digital audio input connectors do not have the
input connector indication for Blu-ray disc players (Blu-ray). However,
DIGITAL AUDIO IN connectors have the “ASSIGNABLE” indication,
which means that you can change the source assigned to these
connectors. You can assign Blu-ray disc players to these connectors
to use them for Blu-ray disc players. Select “Blu-ray” when switching
functions on this unit to play back the source connected to these
connectors.
n How to change the source assigned to
connectors (vpage135)
Basic version
Advanced version
Informations
Basic version
DVD
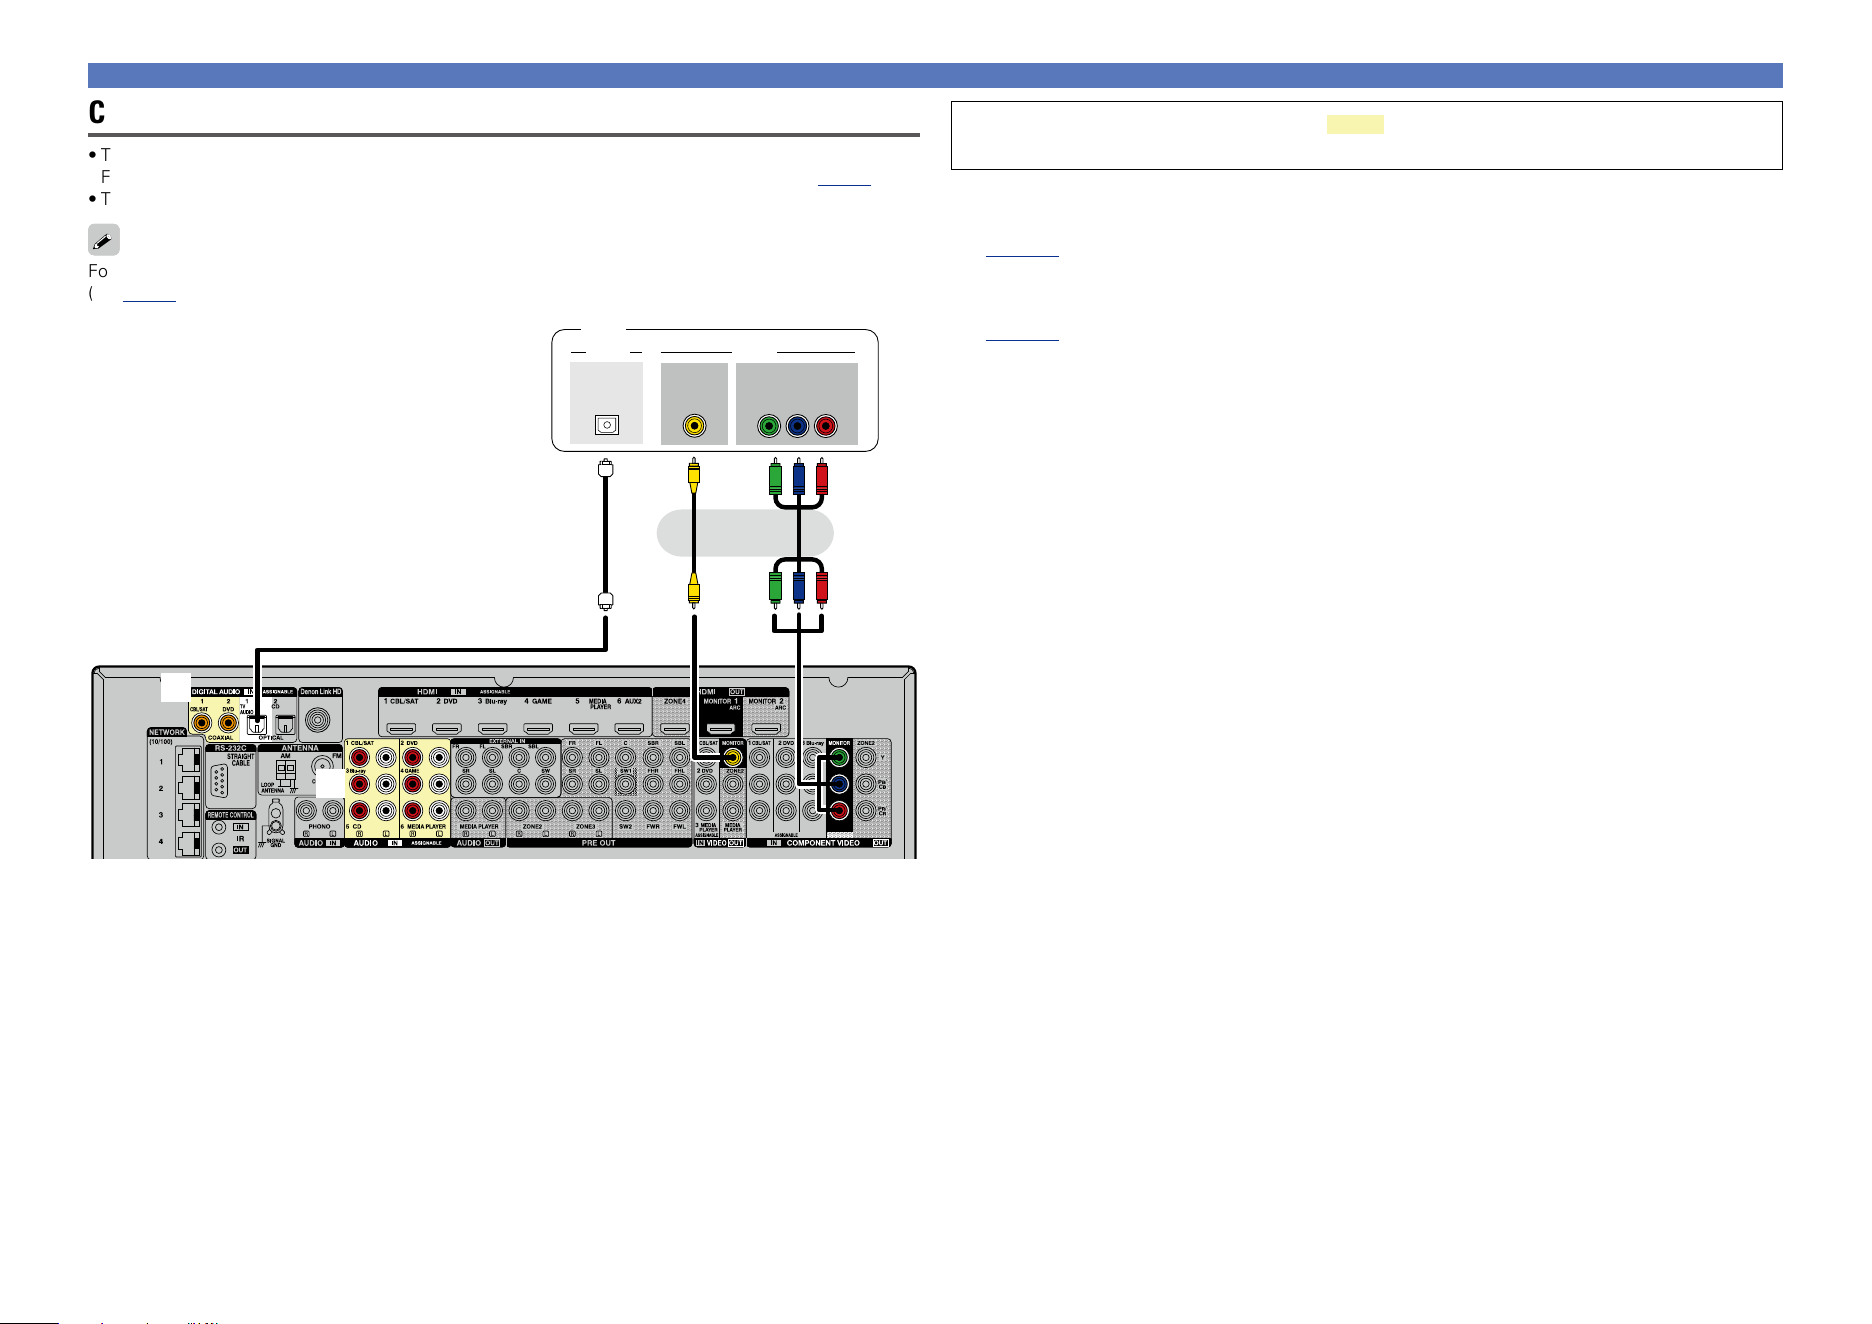
16
Connecting a TV
•This section describes how to connect when your TV does not support HDMI connections.
For instructions on HDMI connections, see “Connecting an HDMI-compatible device” (vpage9).
•To listen to TV audio through this device, use the optical digital connection.
For video connections, see “Converting input video signals for output (Video conversion function)”
(vpage7).
a
s
VIDEOAUDIO
IN
VIDEO
OPTICAL
OUT
COMPONENT VIDEO
Y P
B PR
IN
TV
or
You can also make connections for the part on the connection diagram. To make
connections for these connectors, you need to make the input connector settings.
To make connections for connectors indicated by a
Assign a connector to which an audio cable is inserted to “TV AUDIO” in “Input Assign” – “DIGITAL”
(vpage136).
To make connections for connectors indicated by s
Assign a connector to which an audio cable is inserted to “TV AUDIO” in “Input Assign” – “ANALOG”
(vpage136).
Connecting an HDMI-incompatible device
Basic version
Advanced version
Informations
Basic version
DVD
17
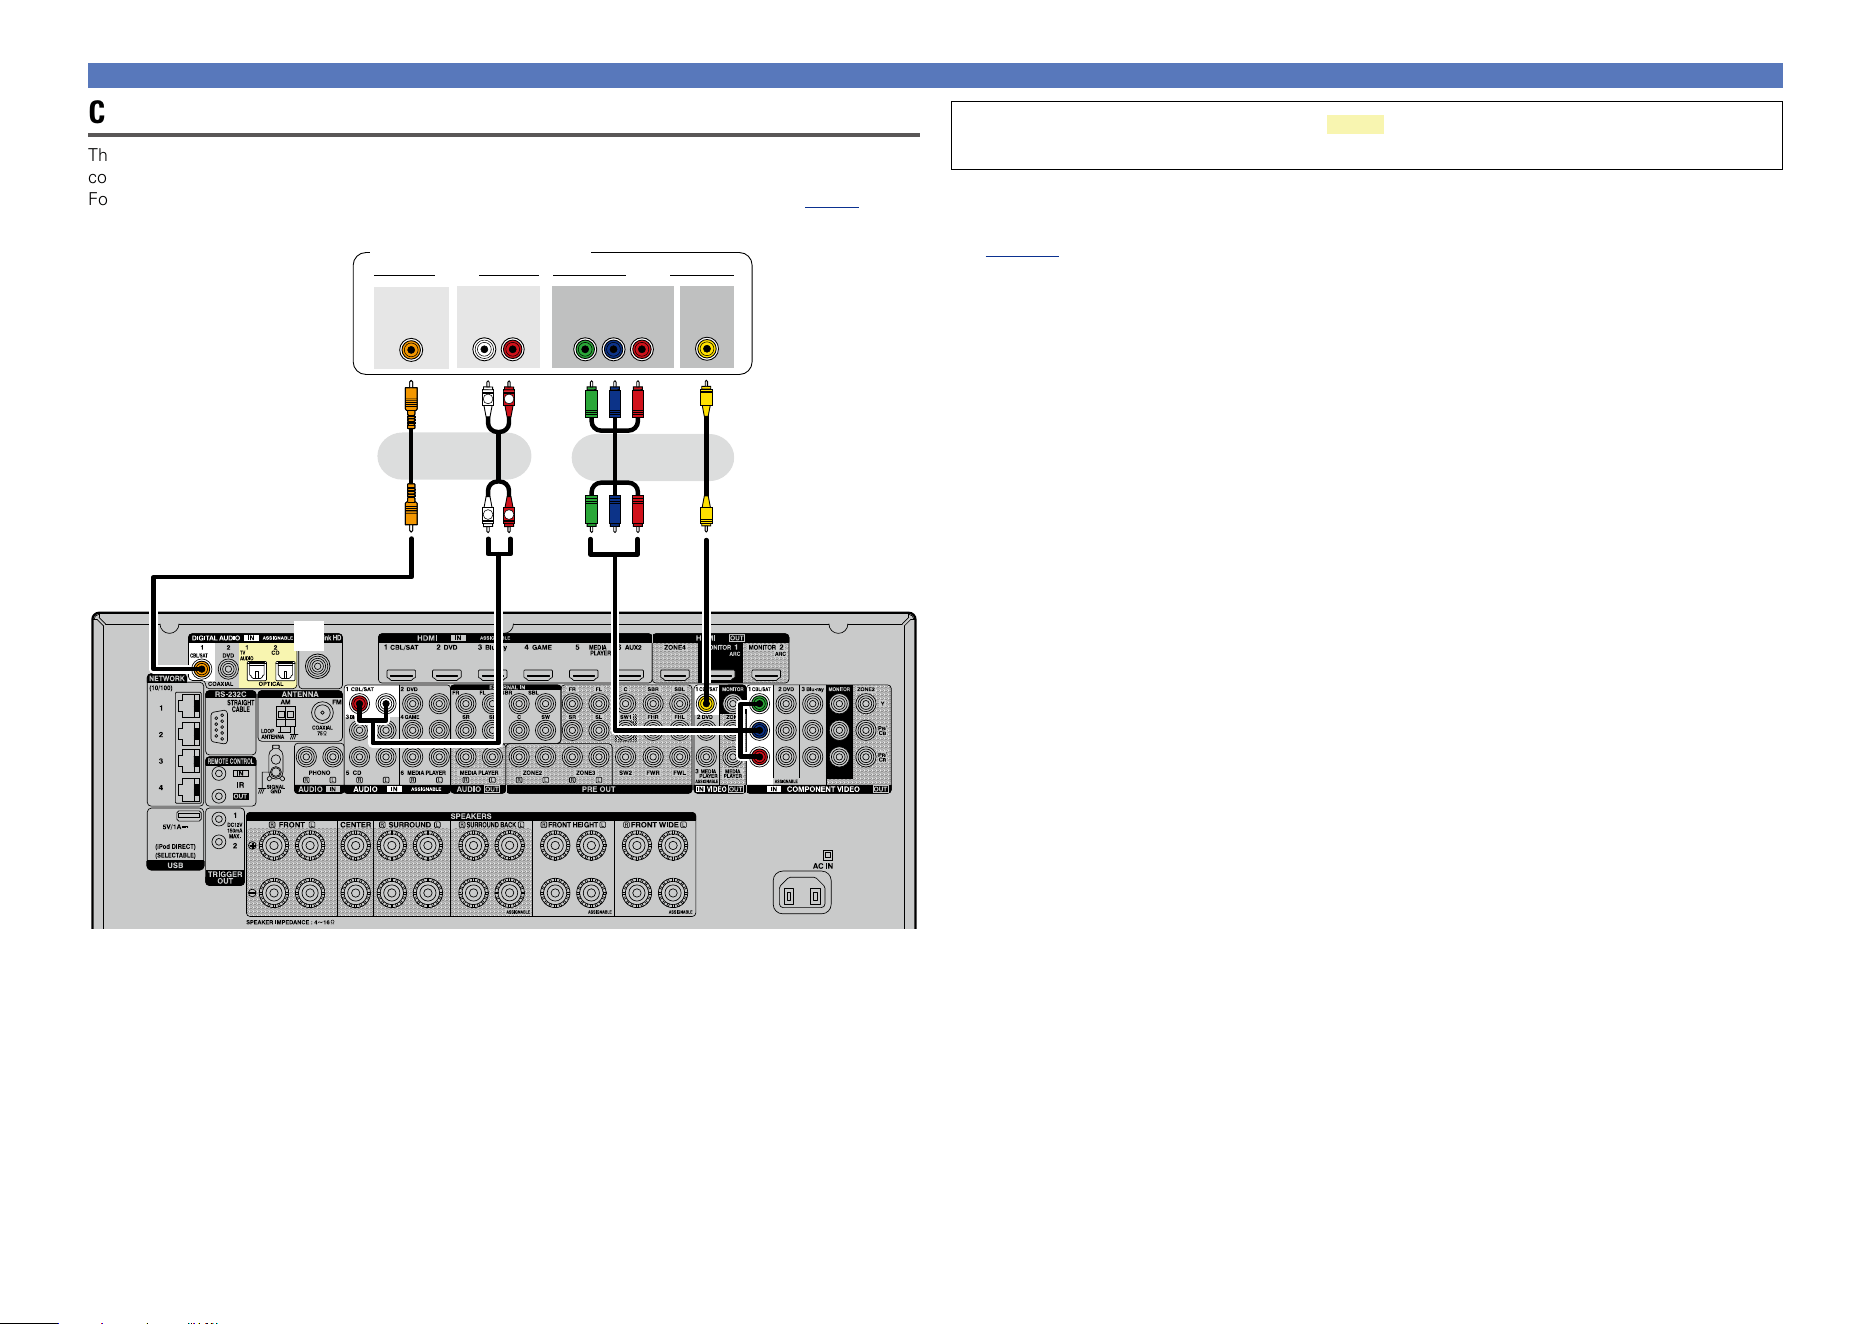
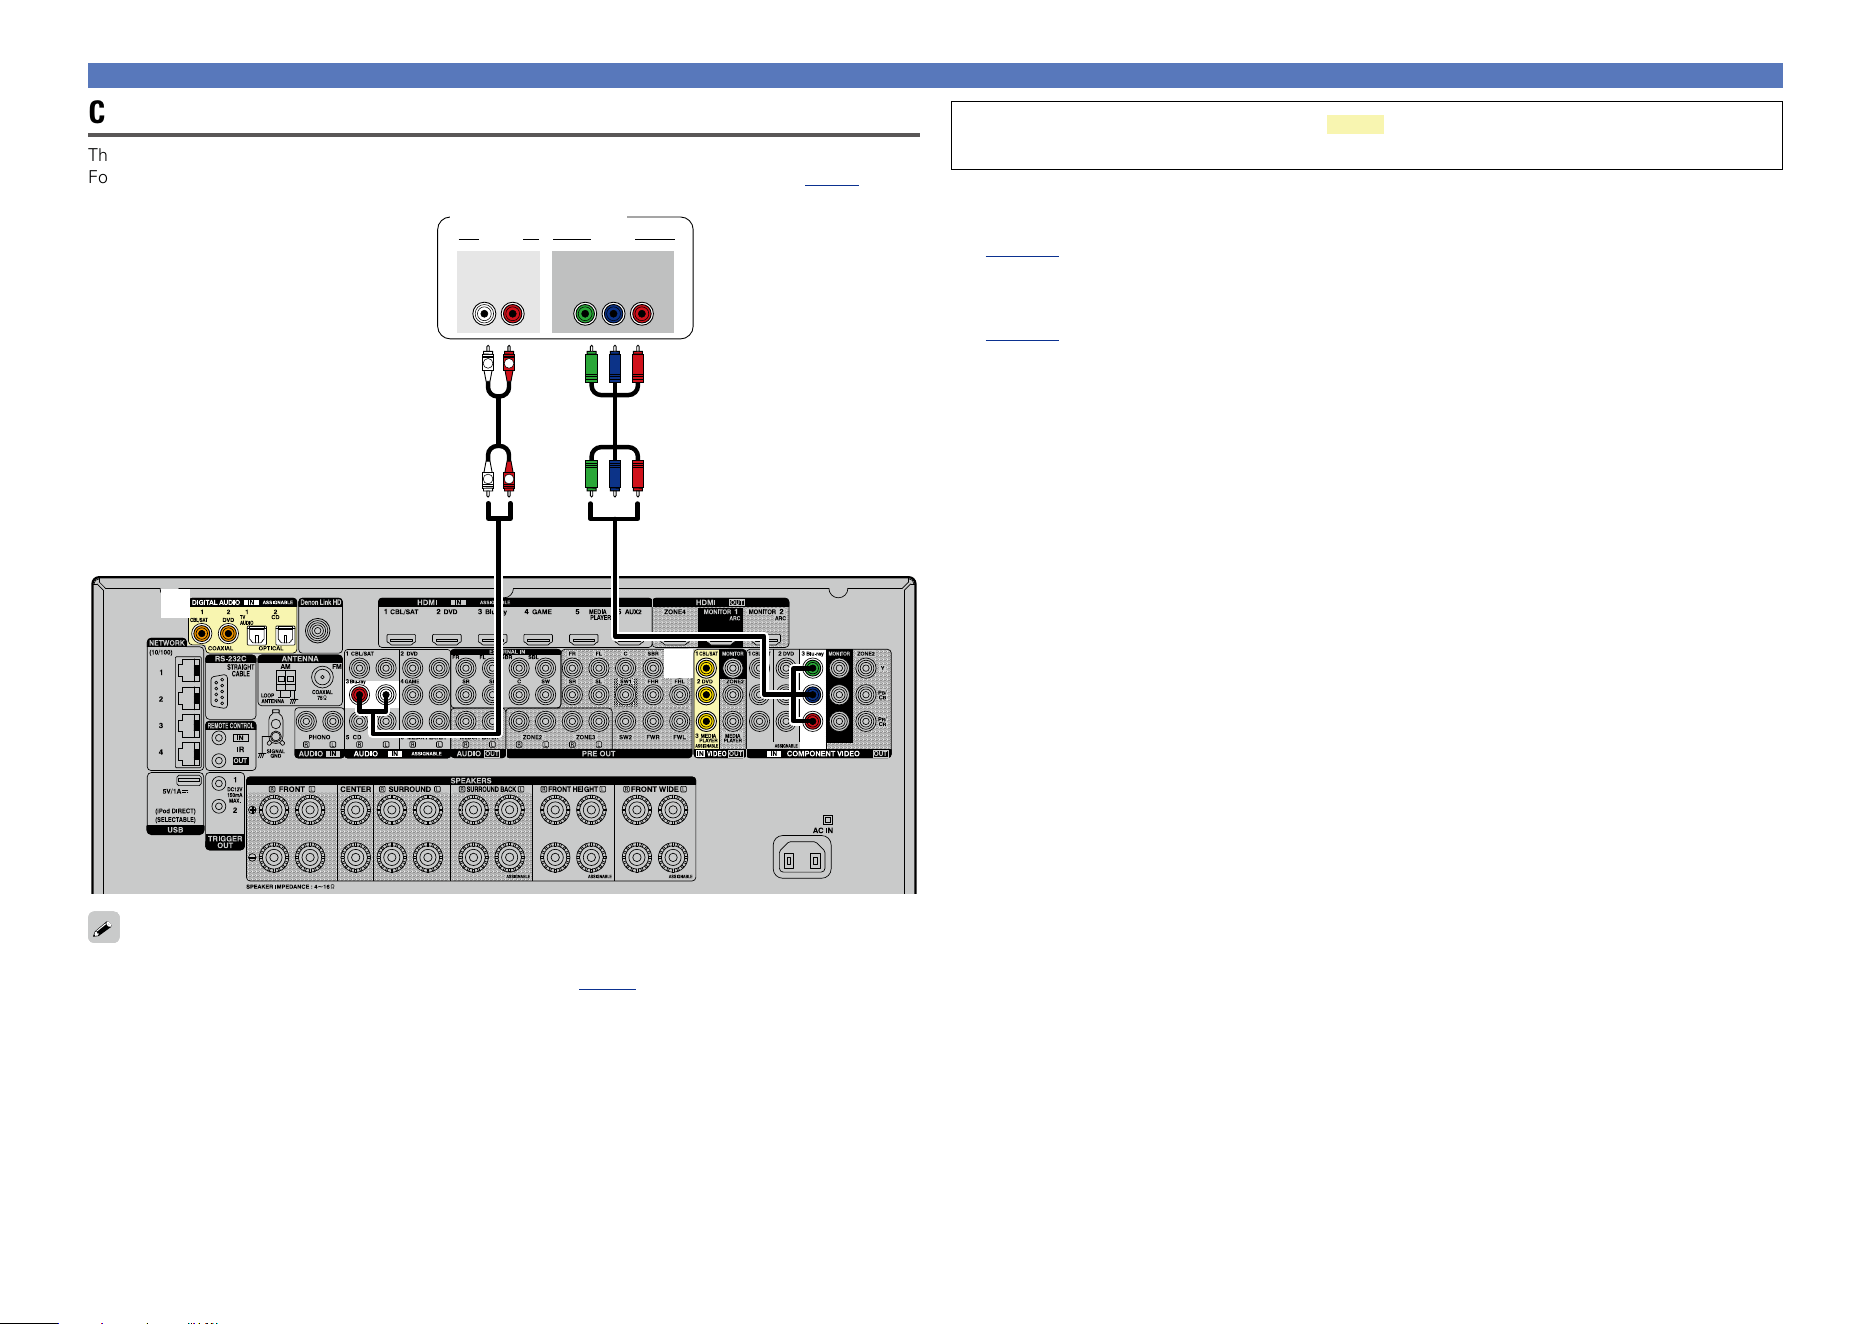
You can also make connections for the part on the connection diagram. To make
connections for these connectors, you need to make the input connector settings.
To make connections for connectors indicated by a
Assign a connector to which an audio cable is inserted to “CBL/SAT” in “Input Assign” – “DIGITAL”
(vpage136).
Connecting a set-top box (Satellite tuner/cable TV)
This section describes how to connect when your satellite tuner or cable TV does not support HDMI
connections.
For instructions on HDMI connections, see “Connecting an HDMI-compatible device” (vpage9).
a
R
L
R
L
VIDEOAUDIO
AUDIO
RL
OUT
OUT
VIDEO
COMPONENT VIDEO
Y P
B PR
OUT
OUT
COAXIAL
Satellite tuner/Cable TV
or or
Connecting an HDMI-incompatible device
Basic version
Advanced version
Informations
Basic version
DVD
18
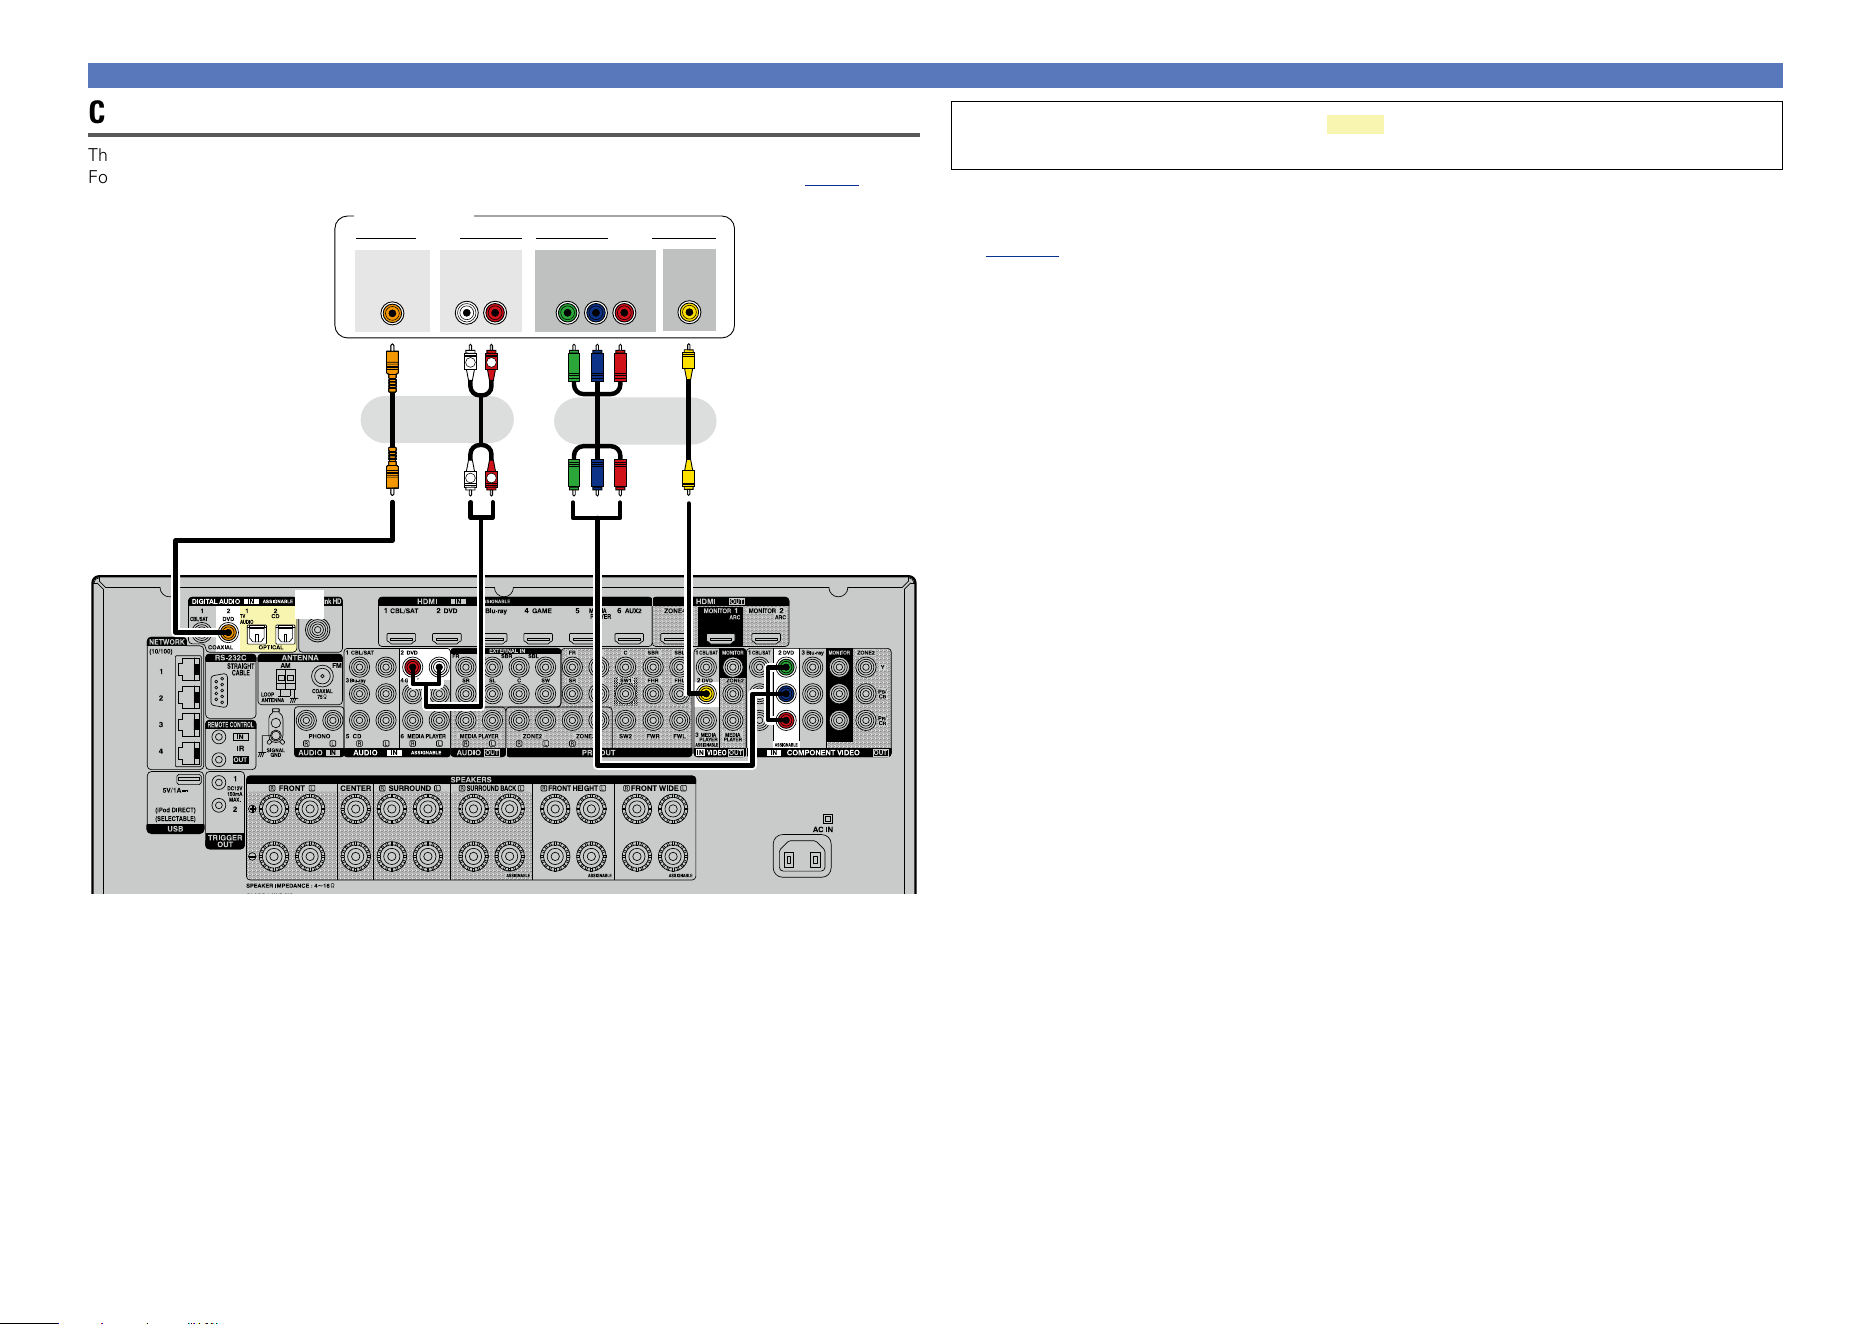
Connecting an HDMI-incompatible device
Connecting a DVD player
This section describes how to connect when your DVD player does not support HDMI connections.
For instructions on HDMI connections, see “Connecting an HDMI-compatible device” (vpage9).
a
R
L
R
L
VIDEOAUDIO
AUDIO
RL
OUT
OUT
VIDEO
COMPONENT VIDEO
Y P
B PR
OUT
OUT
COAXIAL
DVD player
or or
You can also make connections for the part on the connection diagram. To make
connections for these connectors, you need to make the input connector settings.
To make connections for connectors indicated by a
Assign a connector to which an audio cable is inserted to “DVD” in “Input Assign” – “DIGITAL”
(vpage136).
Basic version
Advanced version
Informations
Basic version
DVD
19
Connecting an HDMI-incompatible device
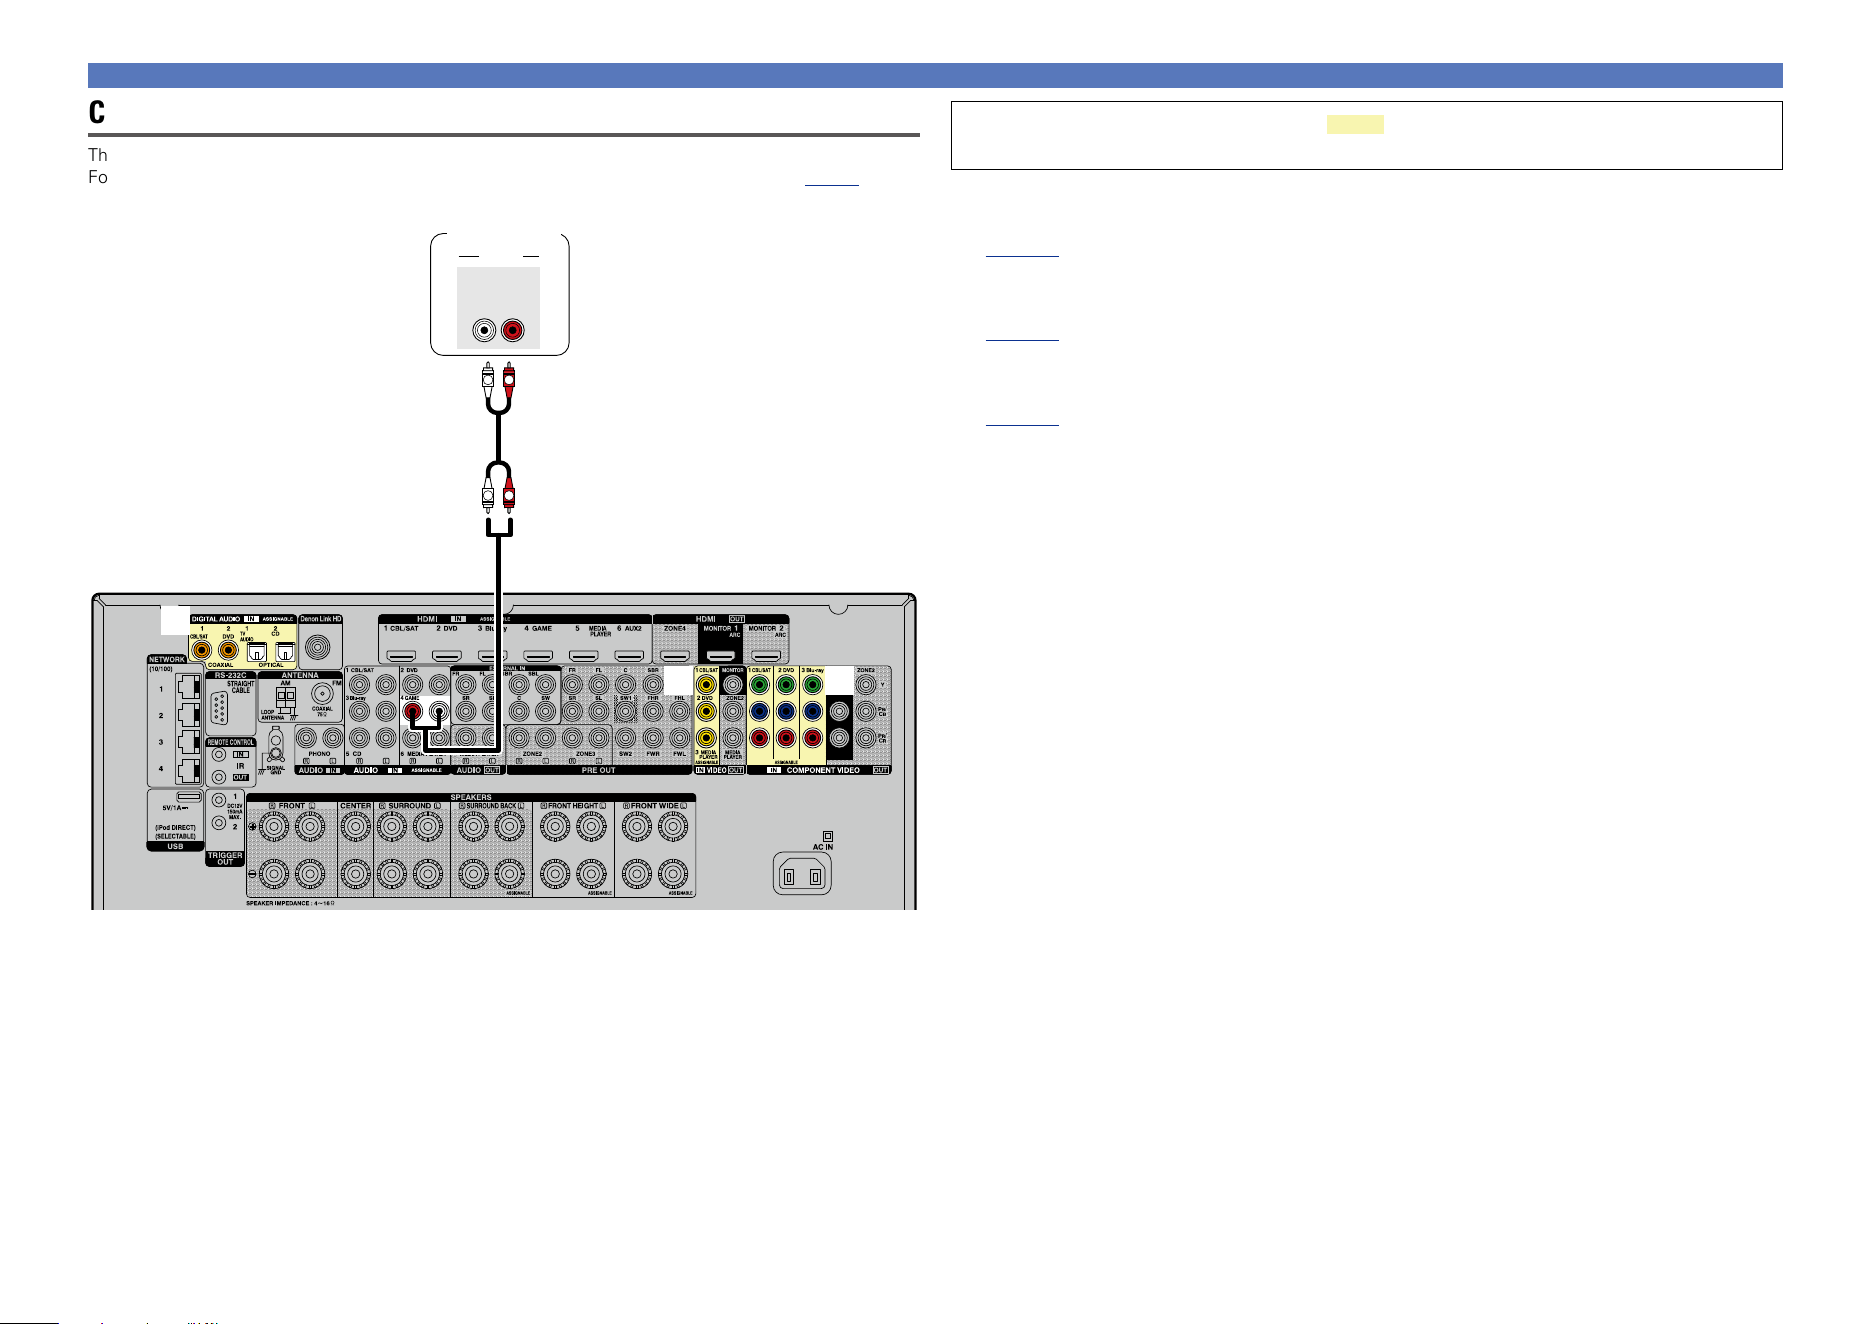
Connecting a Blu-ray Disc player
This section describes how to connect when your Blu-ray disc player does not support HDMI connections.
For instructions on HDMI connections, see “Connecting an HDMI-compatible device” (vpage9).
a
s
R
L
R
L
VIDEOAUDIO
AUDIO
RL
OUT
COMPONENT VIDEO
Y P
B PR
OUT
Blu-ray Disc player
When you want to play back HD Audio (Dolby TrueHD, DTS-HD, Dolby Digital Plus, DTS Express) and Multi-
channel PCM with this unit, use an HDMI connection (vpage 9 “Connecting an HDMI-compatible
device”).
You can also make connections for the part on the connection diagram. To make
connections for these connectors, you need to make the input connector settings.
To make connections for connectors indicated by a
Assign a connector to which an audio cable is inserted to “Blu-ray” in “Input Assign” – “DIGITAL”
(vpage136).
To make connections for connectors indicated by s
Assign a connector to which a video cable is inserted to “Blu-ray” in “Input Assign” – “VIDEO”
(vpage136).
Basic version
Advanced version
Informations
Basic version
DVD
20
Connecting an HDMI-incompatible device
Connecting a game console
This section describes how to connect when your game console does not support HDMI connections.
For instructions on HDMI connections, see “Connecting an HDMI-compatible device” (vpage9).
a
s d
R
L
R
L
AUDIO
AUDIO
RL
OUT
Game
console
You can also make connections for the part on the connection diagram. To make
connections for these connectors, you need to make the input connector settings.
To make connections for connectors indicated by a
Assign a connector to which an audio cable is inserted to “GAME” in “Input Assign” – “DIGITAL”
(vpage136).
To make connections for connectors indicated by s
Assign a connector to which a video cable is inserted to “GAME” in “Input Assign” – “VIDEO”
(vpage136).
To make connections for connectors indicated by d
Assign a connector to which a video cable is inserted to “GAME” in “Input Assign” – “COMP”
(vpage136).
Basic version
Advanced version
Informations
Basic version
DVD
21
Connecting an HDMI-incompatible device
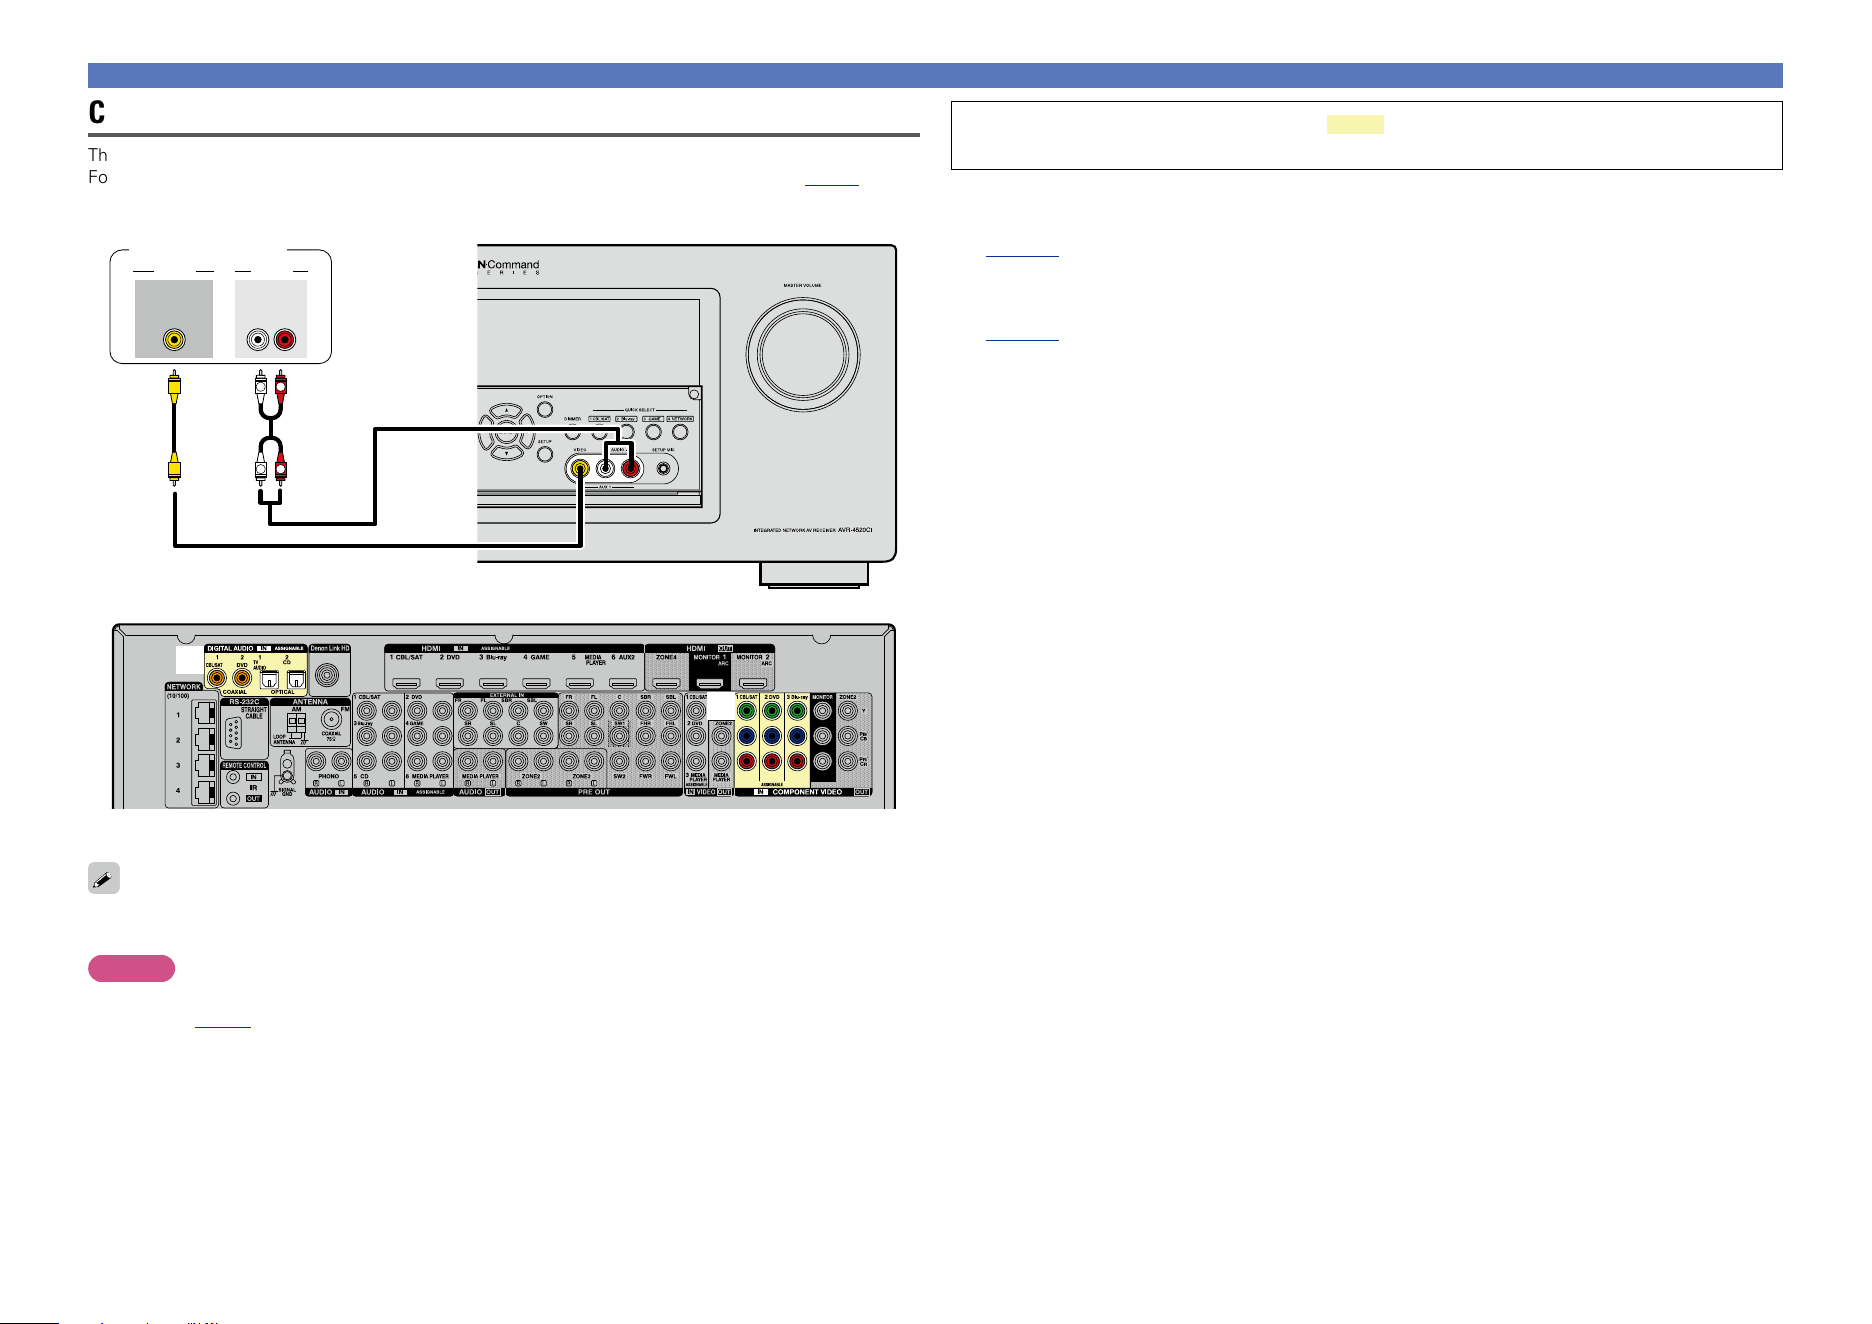
Connecting a digital camcorder
This section describes how to connect when your digital camcorder does not support HDMI connections.
For instructions on HDMI connections, see “Connecting an HDMI-compatible device” (vpage9).
R
L
R
L
OUT
AUDIOVIDEO
VIDEO
AUDIO
RL
OUT
Digital camcorder
GFront panelH
a
s
GRear panelH
You can enjoy games by connecting a game machine via the AUX1 input connector. In this case, select
the input source to “AUX1”.
NOTE
When a non-standard video signal from a game machine or some other source is input, the video conversion
function (vpage 7) might not operate. In this case, use the monitor output of the same connector
as the input.
You can also make connections for the part on the connection diagram. To make
connections for these connectors, you need to make the input connector settings.
To make connections for connectors indicated by a
Assign a connector to which an audio cable is inserted to “AUX1” in “Input Assign” – “DIGITAL”
(vpage136).
To make connections for connectors indicated by s
Assign a connector to which a video cable is inserted to “AUX1” in “Input Assign” – “COMP”
(vpage136).
Basic version
Advanced version
Informations
Basic version
DVD
22
Connecting an HDMI-incompatible device
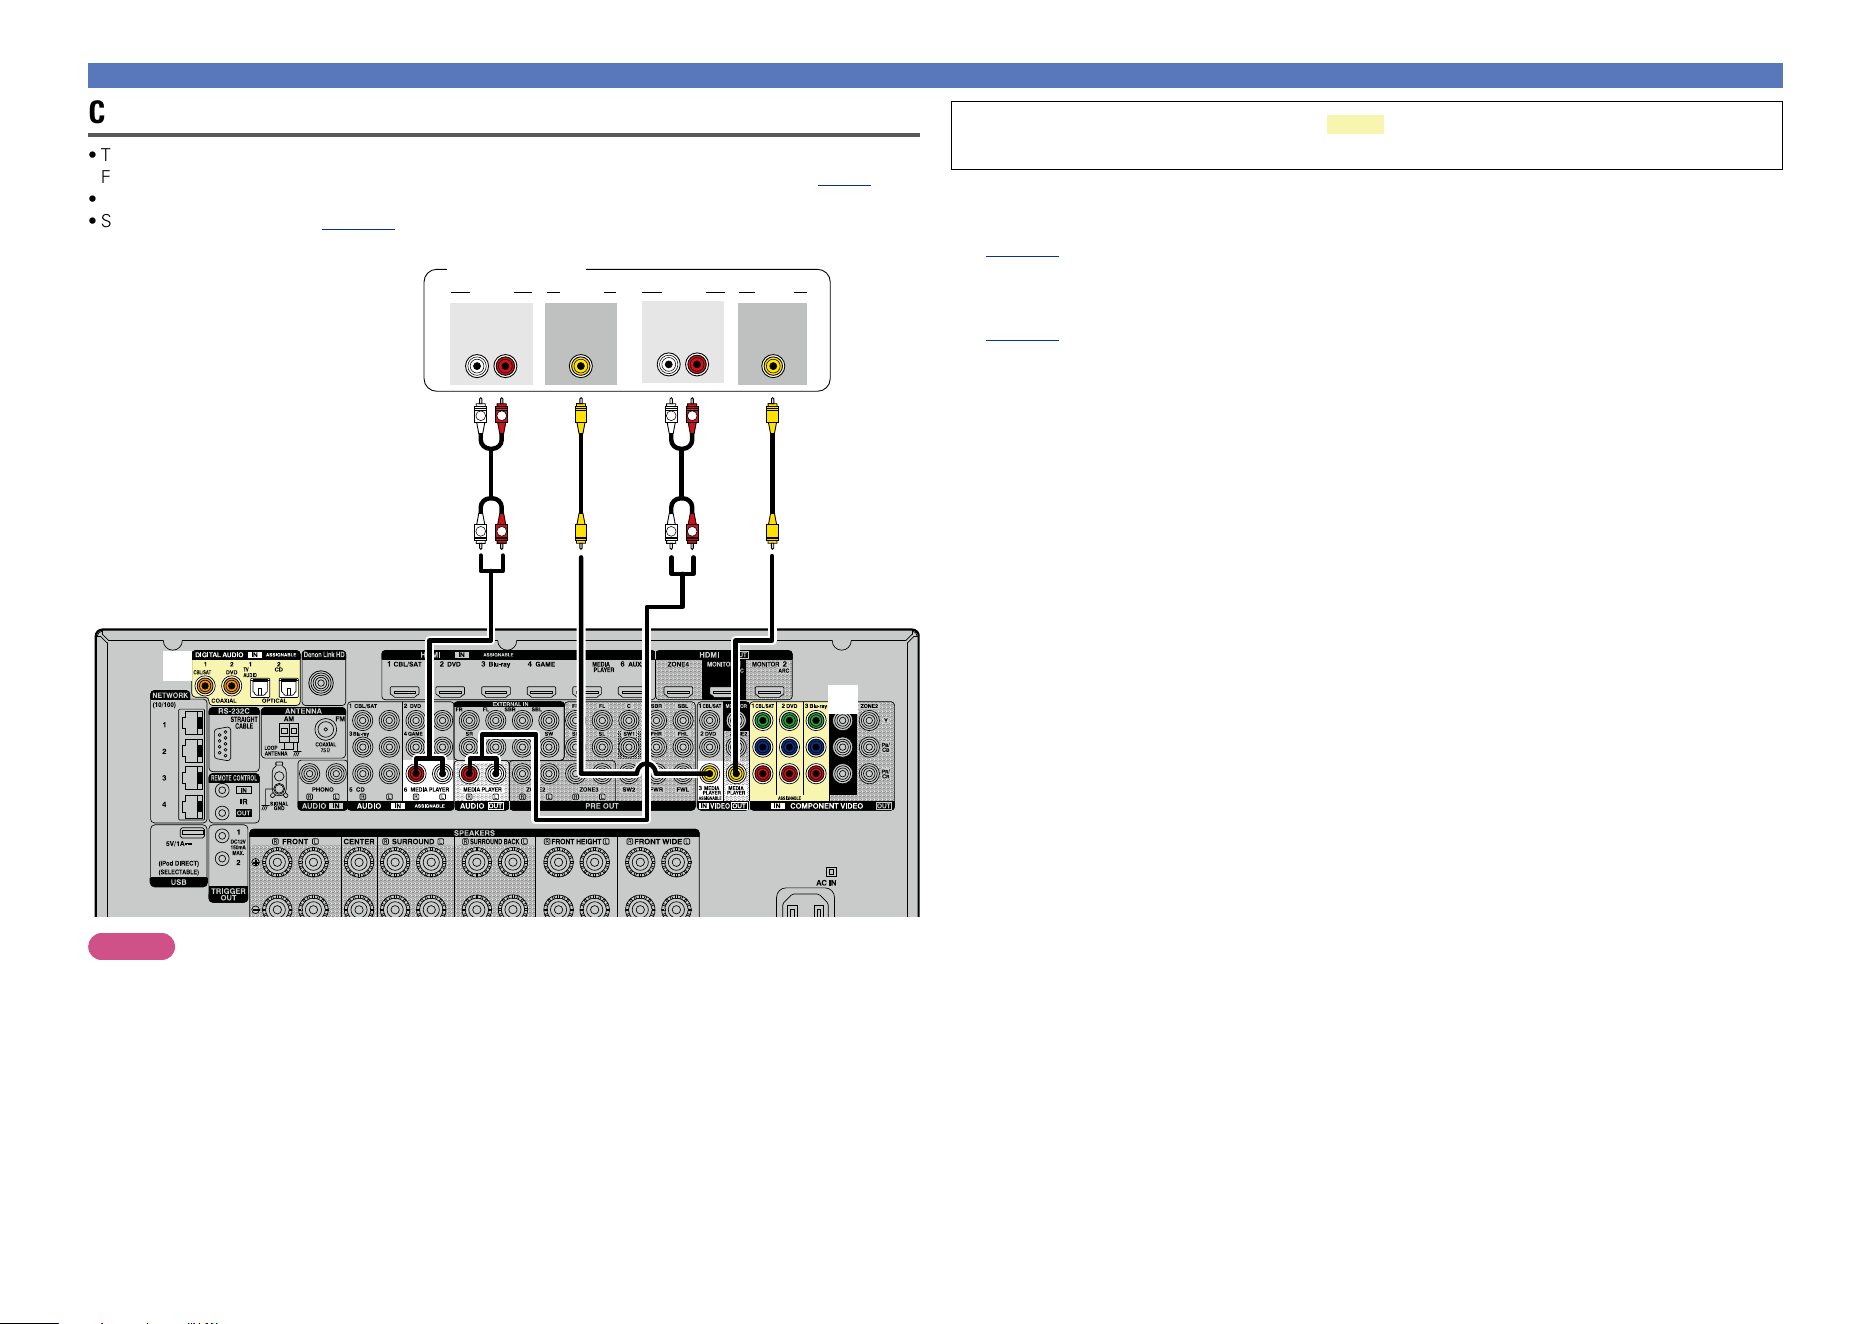
Connecting a media player
•This section describes how to connect when your media player does not support HDMI connections.
For instructions on HDMI connections, see “Connecting an HDMI-compatible device” (vpage9).
•When recording analog audio, use the analog connection.
•See “REC OUT mode” (vpage107) for operating instructions.
a
s
R
L
R
L
R
L
R
L
VIDEOAUDIO
AUDIO
RL
IN
IN
VIDEO
VIDEOAUDIO
AUDIO
RL
OUT
OUT
VIDEO
Media player
NOTE
To record video signals through this unit, use the video cable for connection between this unit and the
player.
You can also make connections for the part on the connection diagram. To make
connections for these connectors, you need to make the input connector settings.
To make connections for connectors indicated by a
Assign a connector to which an audio cable is inserted to “MEDIA PLAYER” in “Input Assign” – “DIGITAL”
(vpage136).
To make connections for connectors indicated by s
Assign a connector to which a video cable is inserted to “MEDIA PLAYER” in “Input Assign” – “COMP”
(vpage136).
Basic version
Advanced version
Informations
Basic version
DVD
23
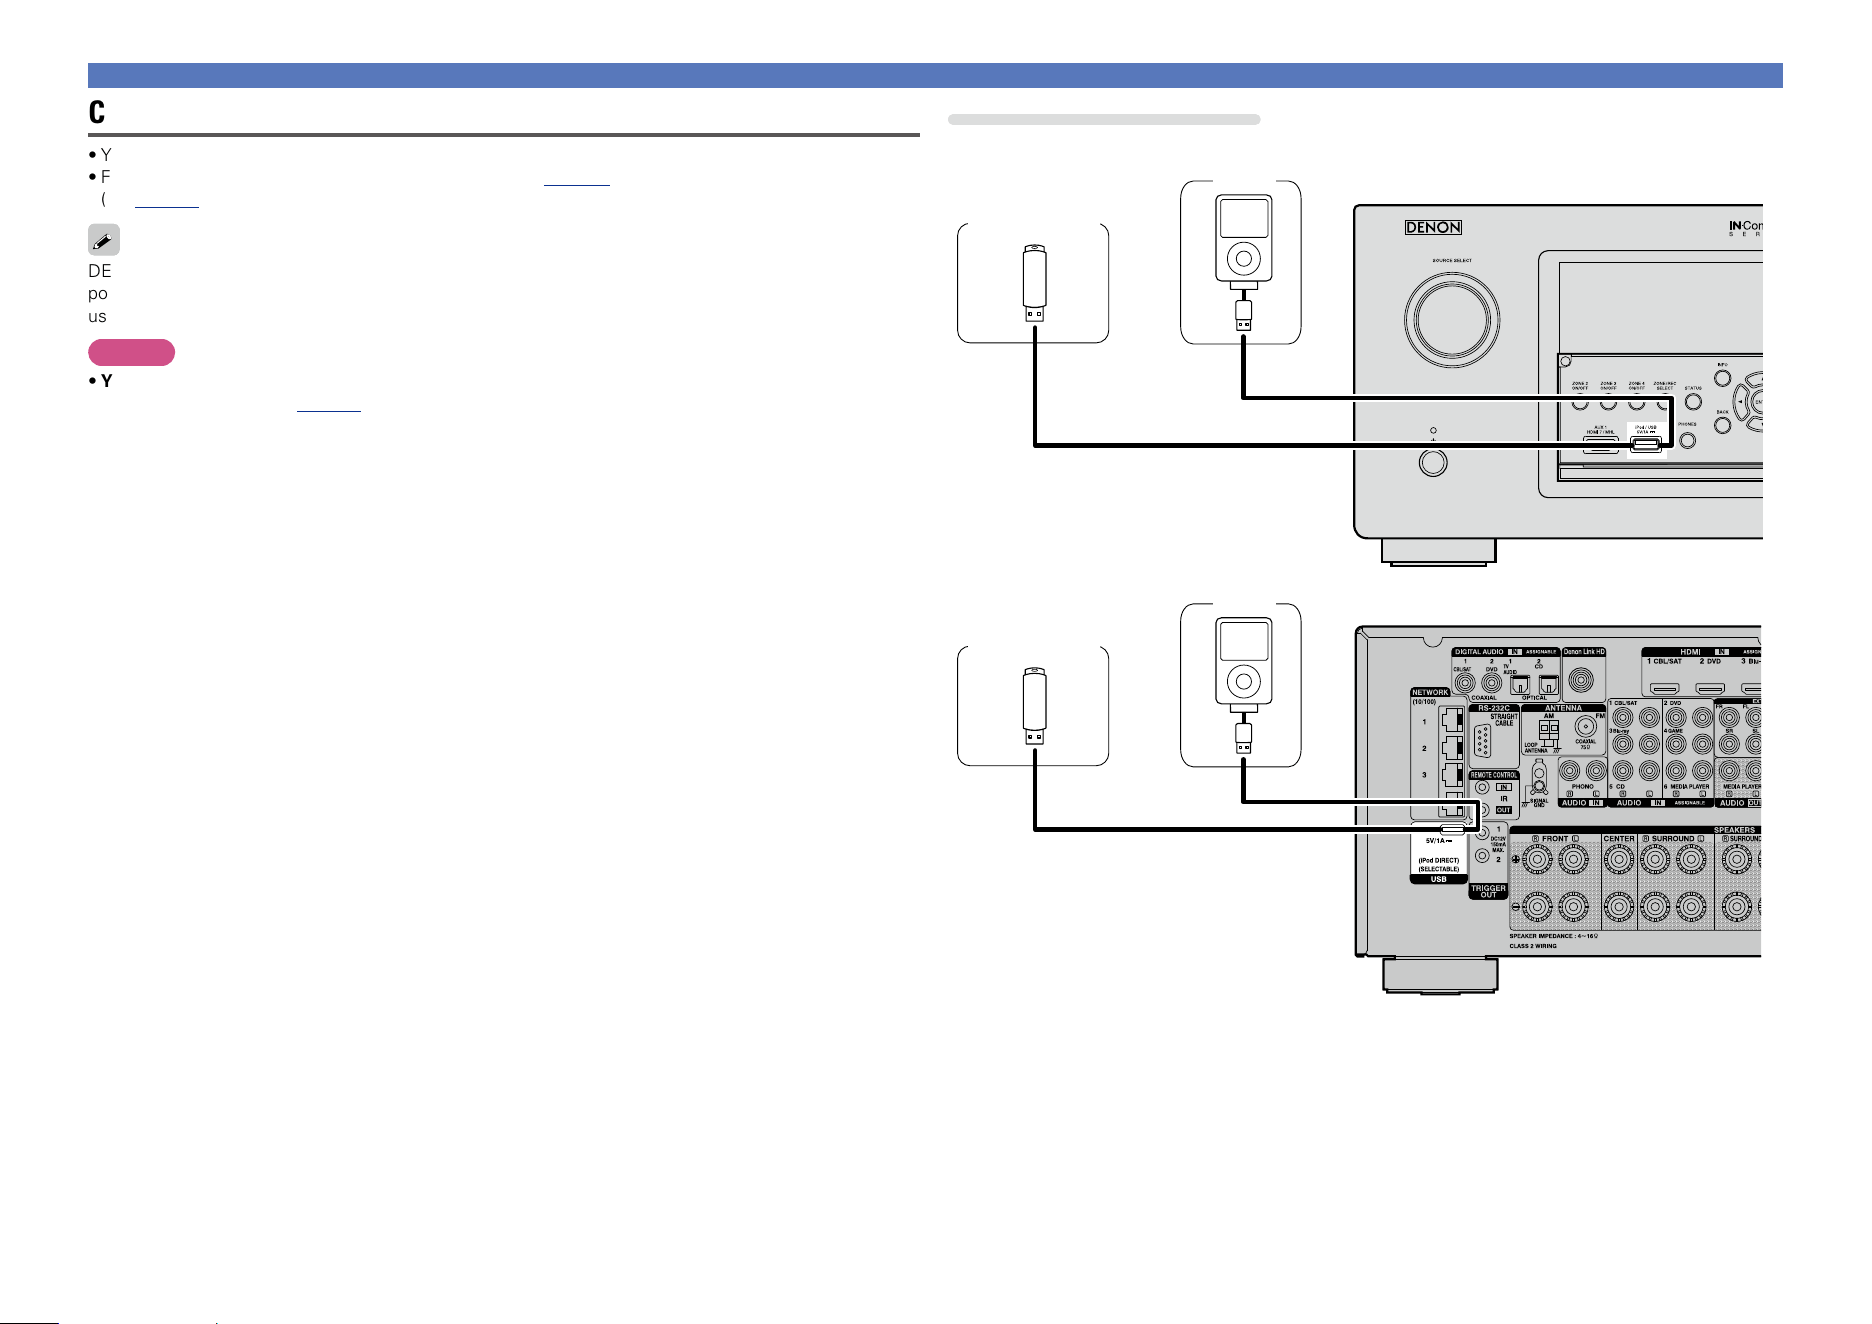
Connecting an iPod or USB memory device to the iPod/USB port
•You can enjoy music stored on an iPod or USB memory device.
•For operating instructions see “Playing an iPod” (vpage 44) or “Playing a USB memory device”
(vpage47).
DENON does not guarantee that all USB memory devices will operate or receive power. When using a
portable USB connection type HDD of the kind to which an AC adapter can be connected to supply power,
use the AC adapter.
NOTE
•You cannot use the USB ports on the front panel and rear panel simultaneously. Select and connect
the USB port to use (vpage76).
•USB memory devices will not work via a USB hub.
•It is not possible to use this unit by connecting the unit’s iPod/USB port to a PC via a USB cable.
•Do not use an extension cable when connecting a USB memory device. This may cause radio interference
with other devices.
•When connecting an iPhone to this unit, keep the iPhone at least 20 cm away from this unit. If the iPhone
is kept closer to this unit and a telephone call is received by the iPhone, noise may be output from this
device.
•If the iPod is connected using an iPod cable (commercially available) that is longer than 6.6 ft (2 m), sound
may not be played correctly. In this case, use a genuine iPod cable, or a cable that is shorter than 3.3 ft
(1 m).
Connecting an HDMI-incompatible device
Cables used for connections
To connect an iPod to this unit, use the USB cable supplied with the iPod.
USB memory
device
iPod
or
GFront panelH
USB memory
device
iPod
or
GRear panelH
Basic version
Advanced version
Informations
Basic version
v See overleaf
DVD
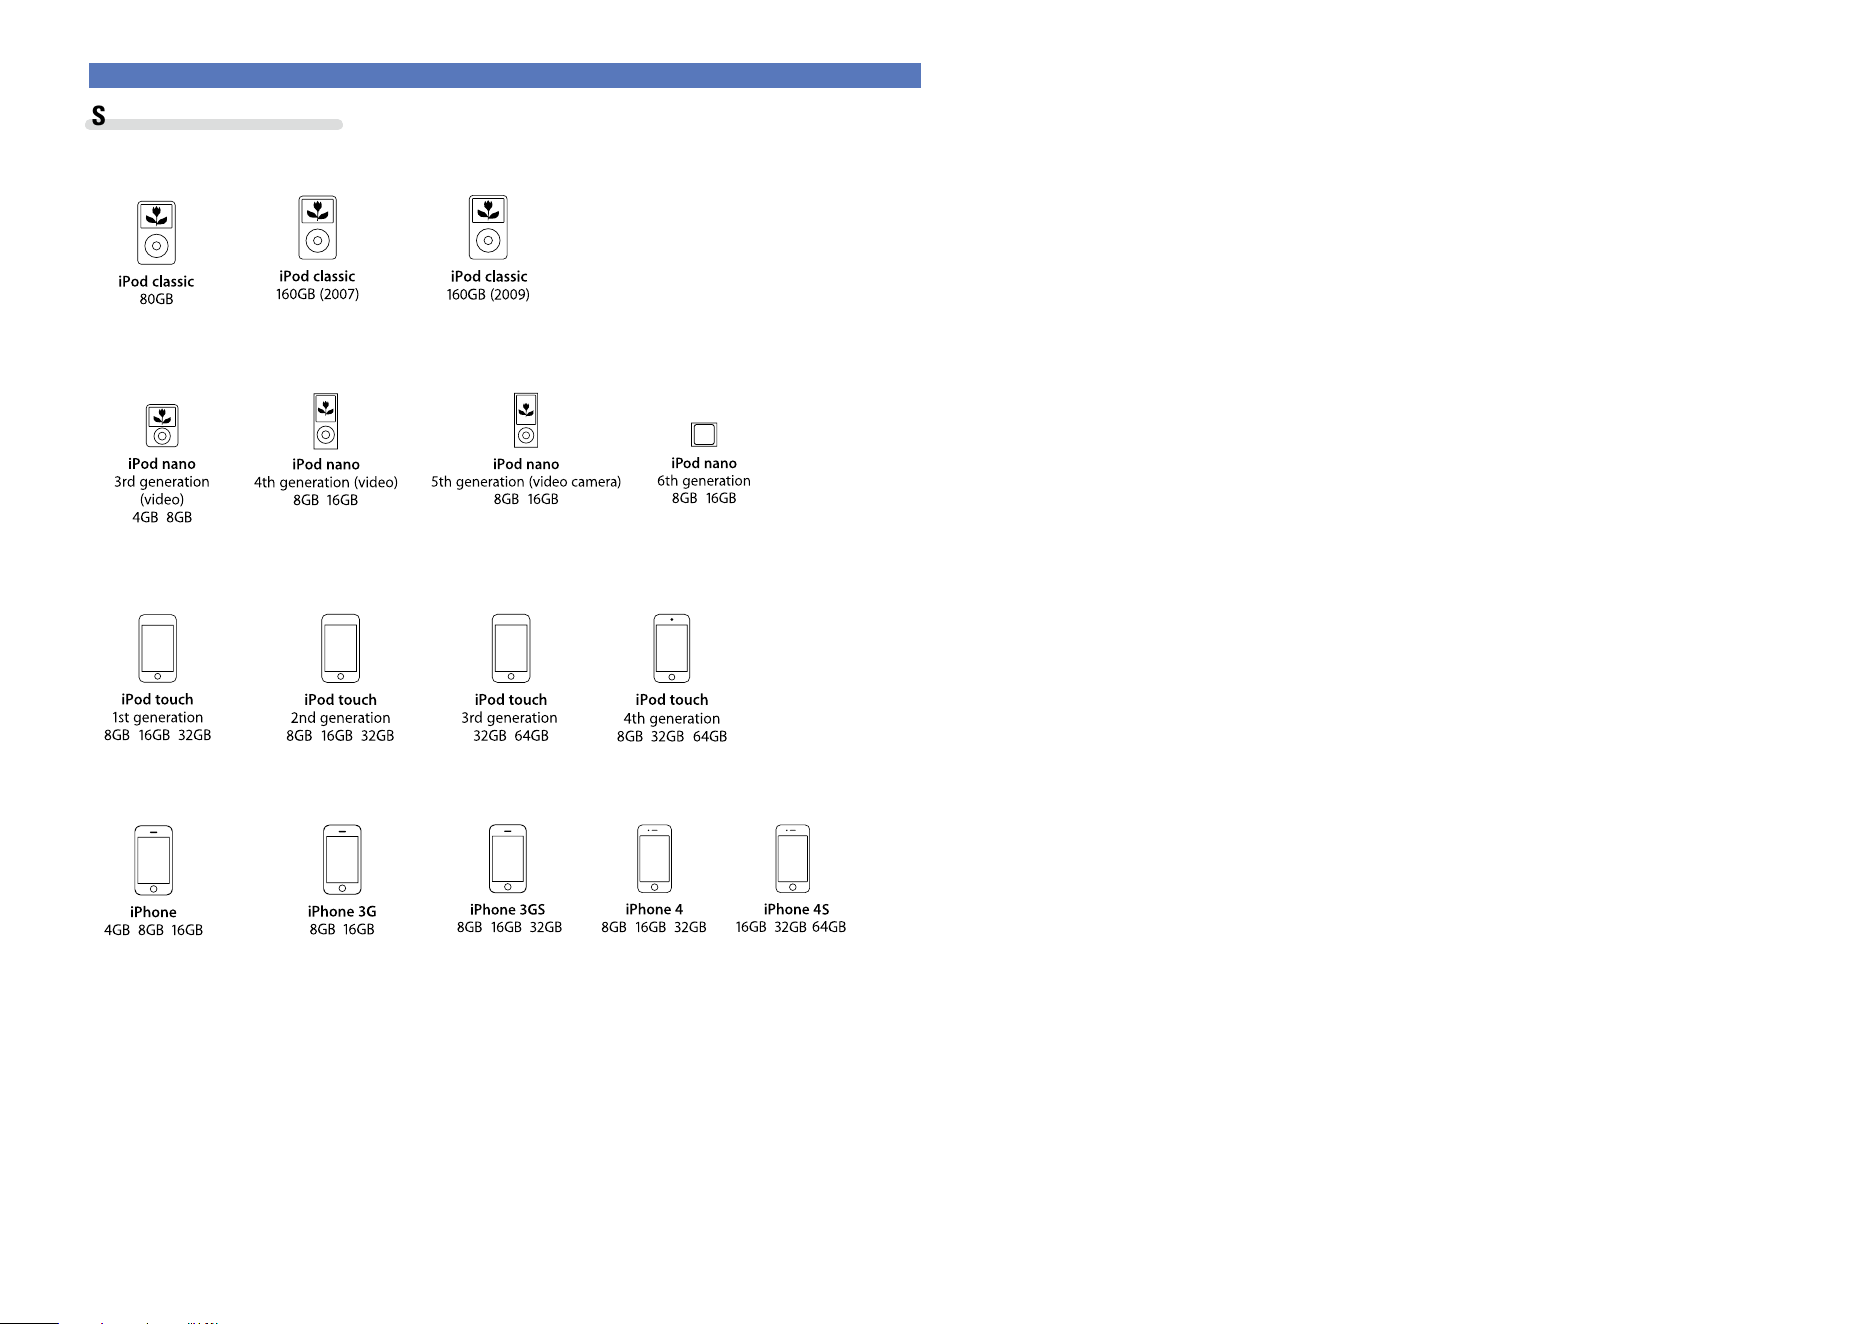
24
Supported iPod models
•iPod classic
•iPod nano
•iPod touch
•iPhone
(as of August 2012)
Connecting an HDMI-incompatible device
Basic version
Advanced version
Informations
Basic version
DVD
25
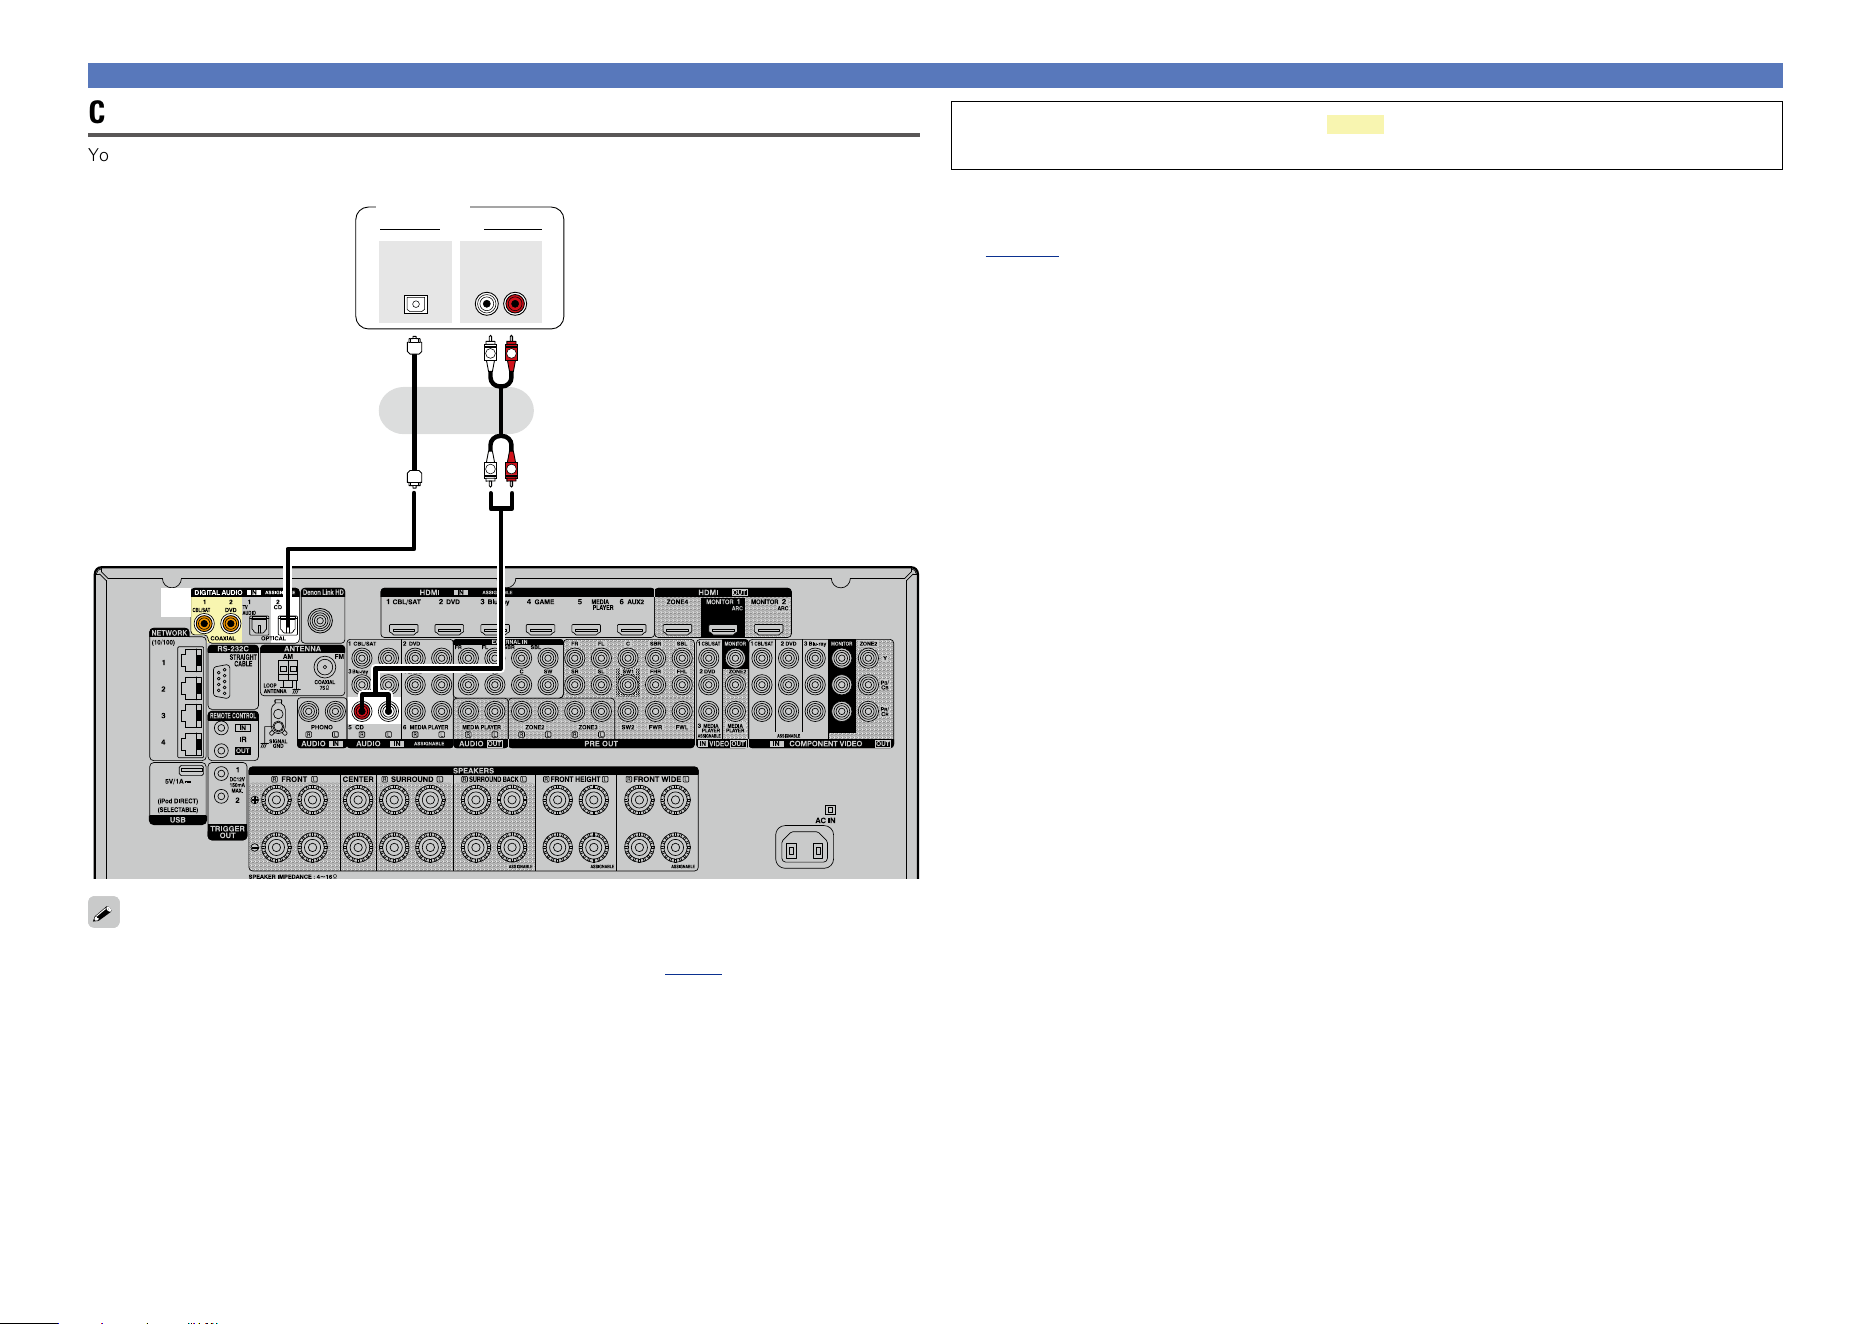
Connecting an HDMI-incompatible device
Connecting a CD player
You can enjoy CD sound.
a
R
L
R
L
AUDIO
AUDIO
RL
OUT
OPTICAL
OUT
CD player
or
When you want to play back HD Audio (Dolby TrueHD, DTS-HD, Dolby Digital Plus, DTS Express), DSD
and Multi-channel PCM with this unit, use an HDMI connection (vpage 9 “Connecting an HDMI-
compatible device”).
You can also make connections for the part on the connection diagram. To make
connections for these connectors, you need to make the input connector settings.
To make connections for connectors indicated by a
Assign a connector to which an audio cable is inserted to “CD” in “Input Assign” – “DIGITAL”
(vpage136).
Basic version
Advanced version
Informations
Basic version
DVD
26
Connecting an HDMI-incompatible device
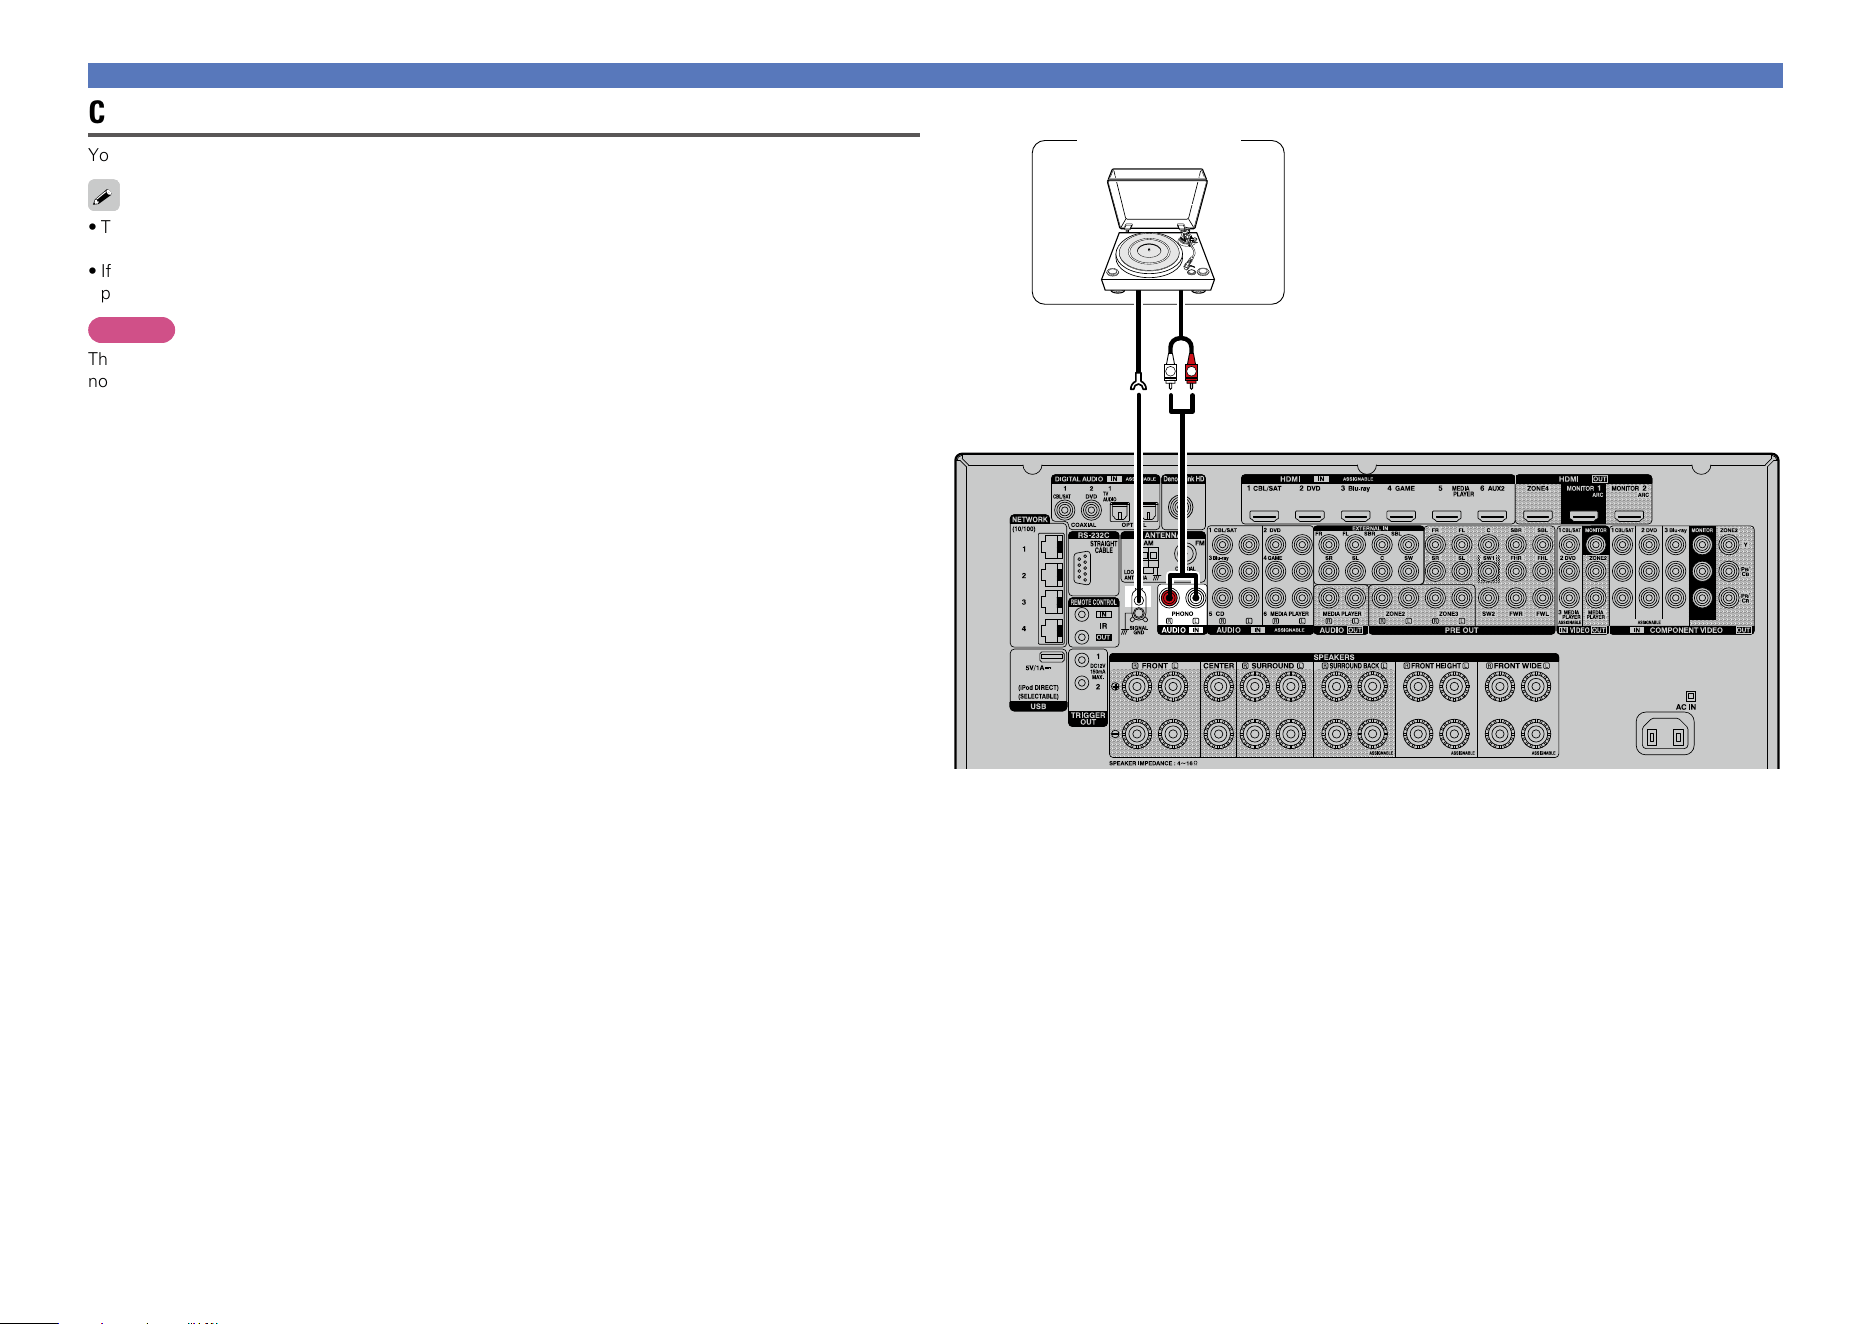
Connecting a record player
You can enjoy playing records.
•This unit is compatible with record players with an MM cartridge. When you connect to a record player
with an MC cartridge, use a commercially available MC head amp or a step-up transformer.
•If you set this unit’s input source to “PHONO” and increase the volume without connecting the record
player, there may be a “booming” noise from the speakers.
NOTE
The SIGNAL GND terminal of this unit is not a safety ground connection. Connect it to reduce noise when
noise is excessive. Note that depending on the record player, connecting the ground line may have the
reverse effect of increasing noise. In this case, it is not necessary to connect the ground line.
GND
AUDIO
OUT
L
R
Record player
(MM cartridge)
Basic version
Advanced version
Informations
Basic version
DVD
27
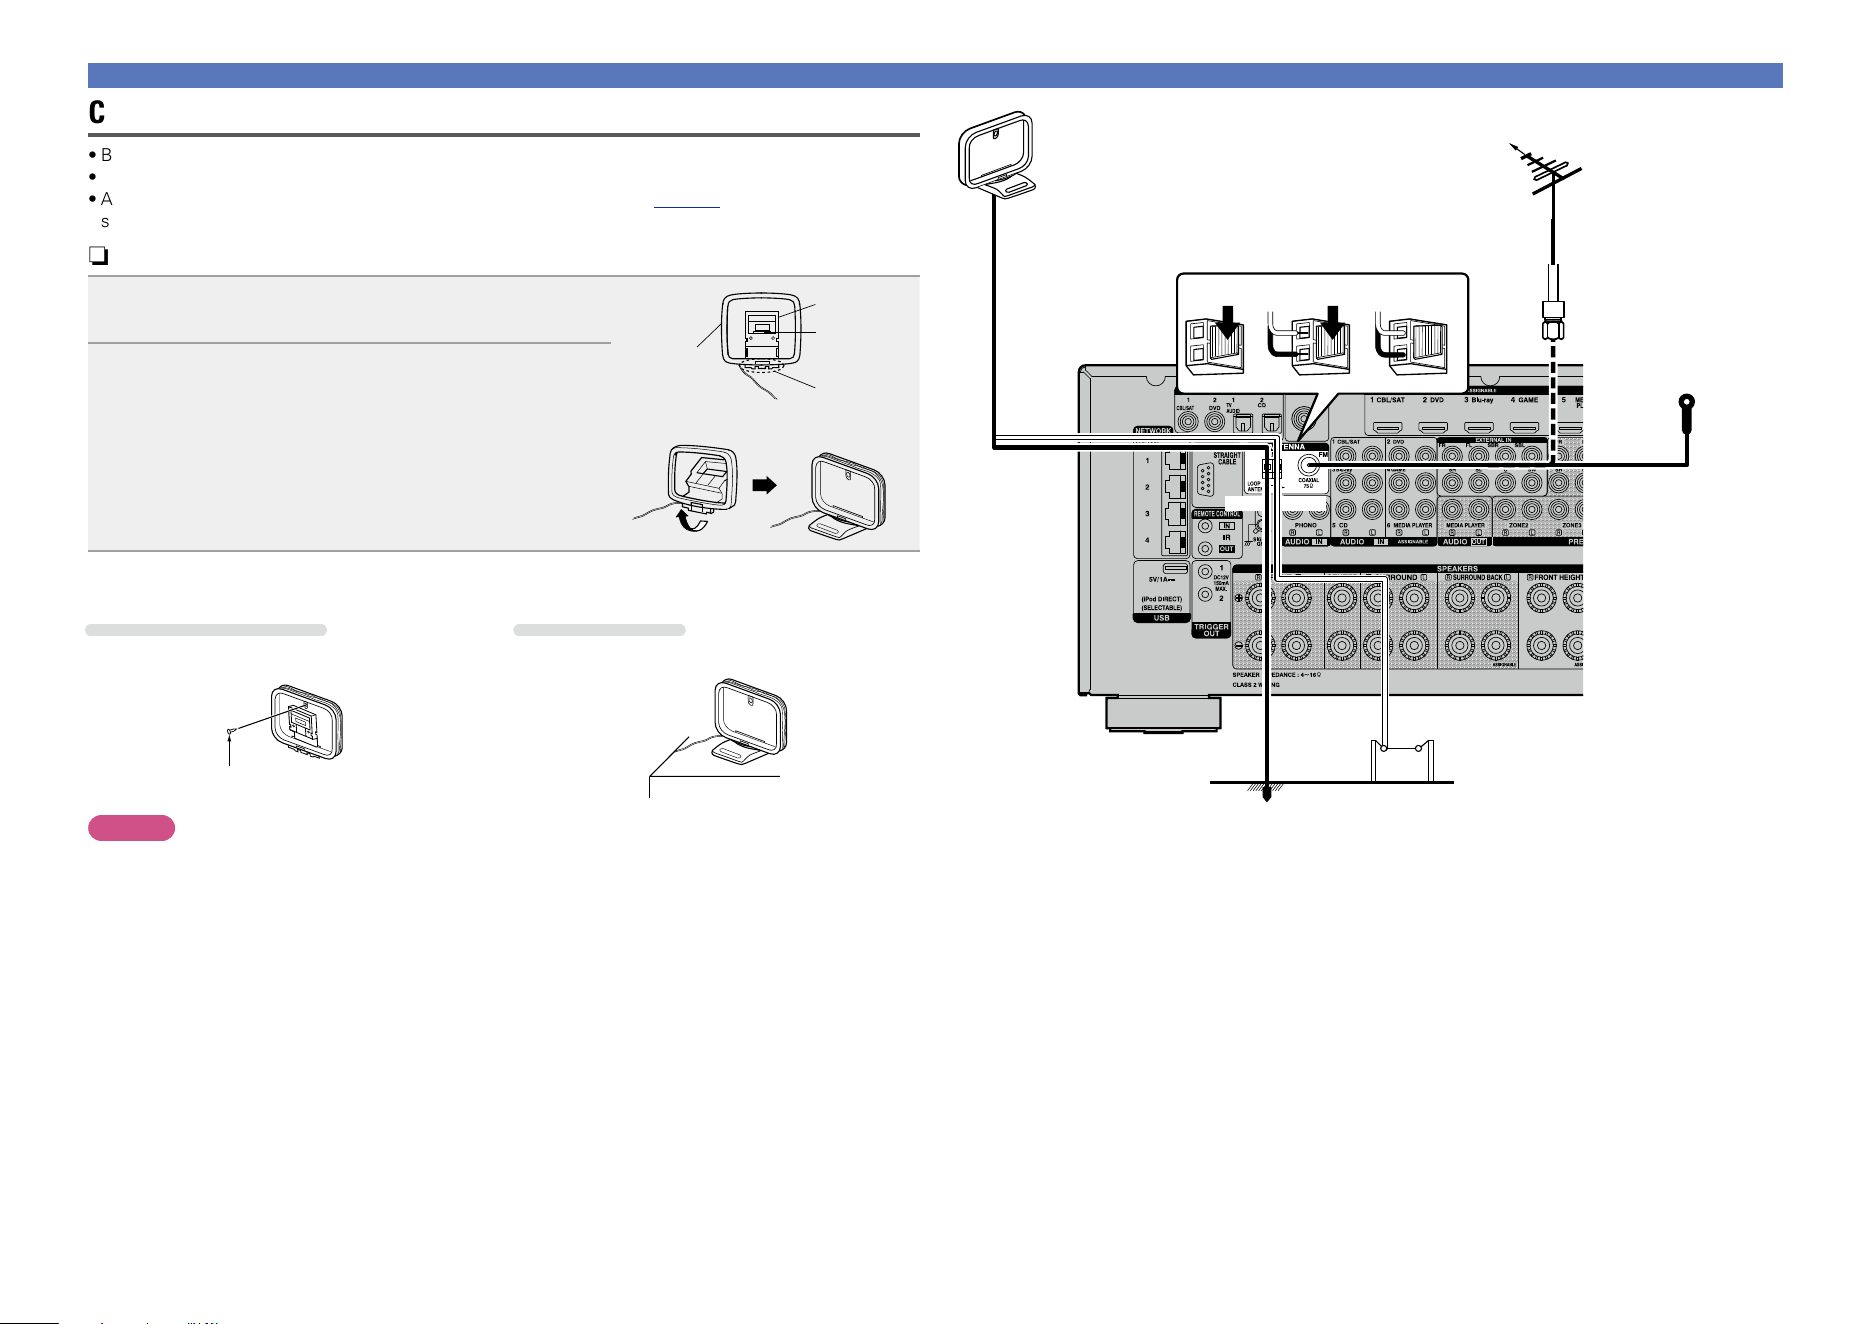
Connecting an HDRadio receiver
•By connecting a HDRadio antenna to this unit, you can receive HDRadio programs.
•HDRadio broadcasting currently is available in the United States and select other countries.
•After connecting the antenna and receiving a broadcast signal (vpage 51 “Listening to HD Radio
stations”), fix the antenna with tape in a position where the noise level becomes minimal.
n AM loop antenna assembly
1
Put the stand section through the bottom of the
loop antenna from the rear and bend it forward.
Stand
Square
hole
Projecting
part
Loop
antenna
2
Insert the projecting part into the square hole in
the stand.
n Using the AM loop antenna
Suspending on a wall
Suspend directly on a wall without assembling.
Standing alone
Use the procedure shown above to assemble.
Nail, tack, etc.
NOTE
•Do not connect two FM antennas simultaneously.
•Even if an external AM antenna is used, do not disconnect the AM loop antenna.
•Make sure the AM loop antenna lead terminals do not touch metal parts of the panel.
•If the signal has noise interference, connect the ground terminal (GND) to reduce noise.
•If you are unable to receive a good broadcast signal, we recommend installing an outdoor antenna. For
details, inquire at the retail store where you purchased the unit.
Connecting an HDMI-incompatible device
w eq
FM outdoor
antenna
Direction of broadcasting station
75 Ω coaxial
cable
FM indoor antenna
(for HDRadio
broadcasting, supplied)
Ground
AM outdoor
antenna
AM loop antenna (for HDRadio
broadcasting, supplied)
•To prevent interference, install at least 3.3
ft/1 m away from the antenna connected
to the this unit’s other AM tuner terminal.
Black White
Basic version
Advanced version
Informations
Basic version
DVD

28
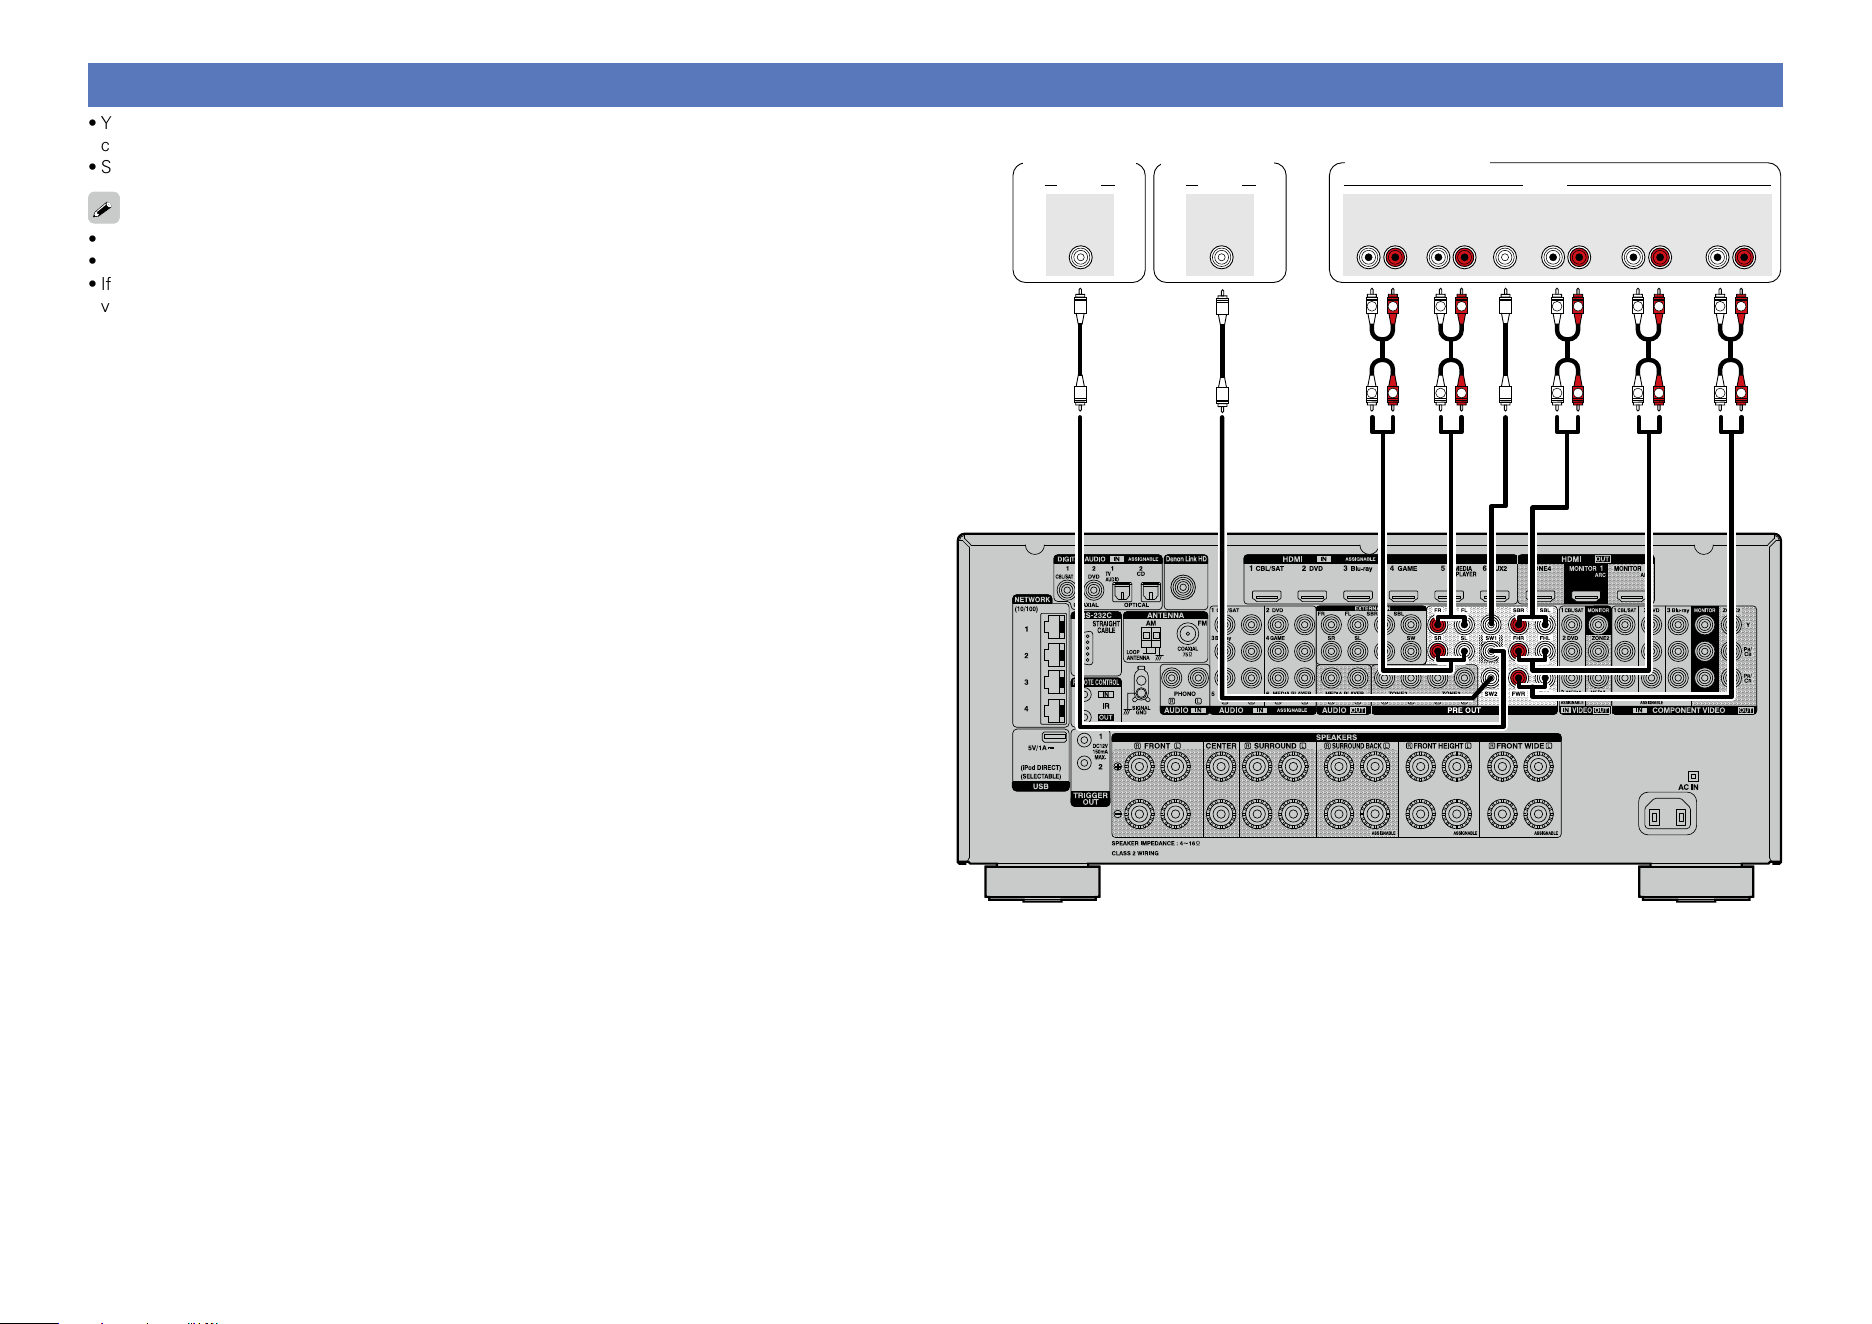
Connecting a device with a multi-channel output connector
•You can connect this unit to an external device fitted with multi-channel sound audio output connectors
to enjoy music and video.
•To play analog signals input from EXTERNAL IN connectors, set “Input Mode” (vpage 138) to
“EXTERNAL IN”.
•The video signal can be connected in the same way as a Blu-ray Disc player / DVD player (vpage18
“Connecting a DVD player”, vpage19 “Connecting a Blu-ray Disc player”).
L
L
L
L
R R
RR
L
L
R
R
CENTER
RL
FRONT
RL
AUDIO
SUB-
WOOFER
SURROUND
BACK
RL
SURROUND
Devices with a multi-channel
output connector
(Blu-ray Disc player, DVD player,
External decoder etc.)
Basic version
Advanced version
Informations
Basic version
DVD
29
Connecting an external power amplifier
•You can use this unit as a pre-amp by connecting a commercially available power amp to the PRE OUT
connector. Adding a power amp to each of the channels provides an even greater sound presence.
•Select the terminal to use and connect the device.
•When using just one surround back speaker, connect it to the left channel (L) terminal.
•Use the volume control on the subwoofer to control subwoofer volume.
•If the subwoofer volume sounds low, use the volume control provided on the subwoofer to adjust the
volume.
L
L
L
L
L
L
R R R
RR R
L
L
R
R
L
L
R
R
CENTER
RL
FRONT HEIGHT
RL
FRONT
RL
AUDIO
SUB-
WOOFER
2
AUDIO
SUB-
WOOFER
1
AUDIO
RL
FRONT WIDESURROUND
BACK
RL
SURROUND
Power amplifier
Subwoofer
(Primary)
Subwoofer
(Secondary)
Basic version
Advanced version
Informations
Basic version
DVD
30
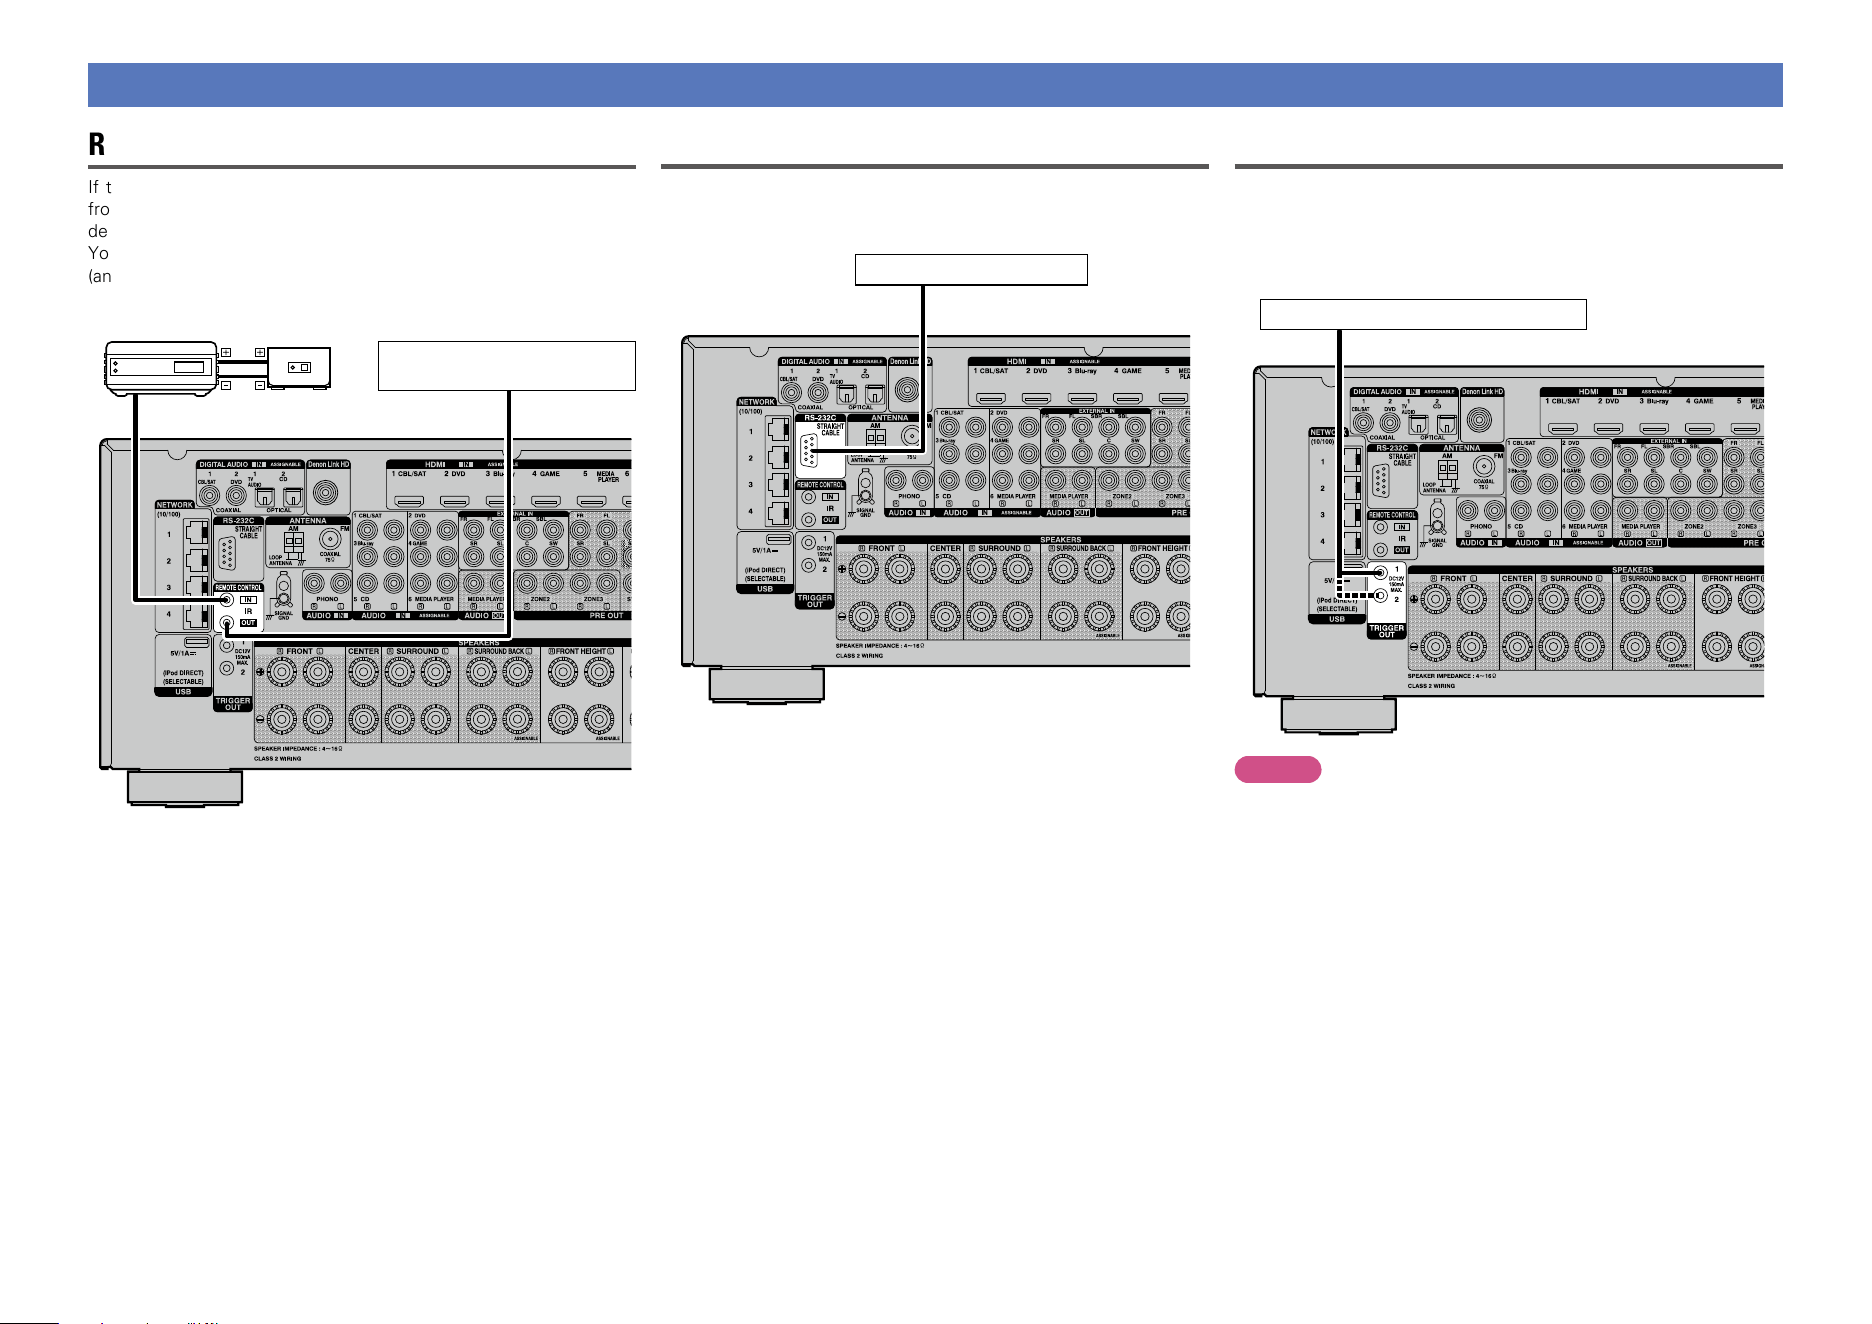
Connecting an external control device
REMOTE CONTROL jacks
If this unit is installed in a location that is out of range of the signal
from the remote control unit, you can still operate the unit and the
devices connected to it by using a commercially available IR receiver.
You can also use it to remotely control ZONE2, ZONE3 and ZONE4
(another room).
AUX
OUT
Device equipped with a
REMOTE CONTROL IN jack
Infrared
retransmitter
Infrared
sensor
Output
Input
RS-232C connector
When you connect an external control device, you can control this
unit with the external control device (such as power supply operation,
volume adjustment, and input source switching).
External serial controller
Perform the operation below beforehand.
q Turn on the power of this unit.
w Turn off the power of this unit from the external controller.
e Check that the unit is in the standby mode.
TRIGGER OUT jacks
When a device with TRIGGER IN jack is connected, the connected
device’s power on/standby can be controlled through linked operation
to this unit.
The TRIGGER OUT jack outputs a maximum 12 V/150 mA electrical
signal.
12 V/150 mA trigger-compatible device
NOTE
•Use the monaural mini-plug cable for connecting TRIGGER OUT
jacks. Do not use the stereo mini-plug cable.
•If the permissible trigger input level for the connected device is larger
than 12 V/150 mA, or has shorted, the TRIGGER OUT jack cannot be
used. In this case, turn off the power to the unit, and disconnect it.
Basic version
Advanced version
Informations
Basic version
DVD
31
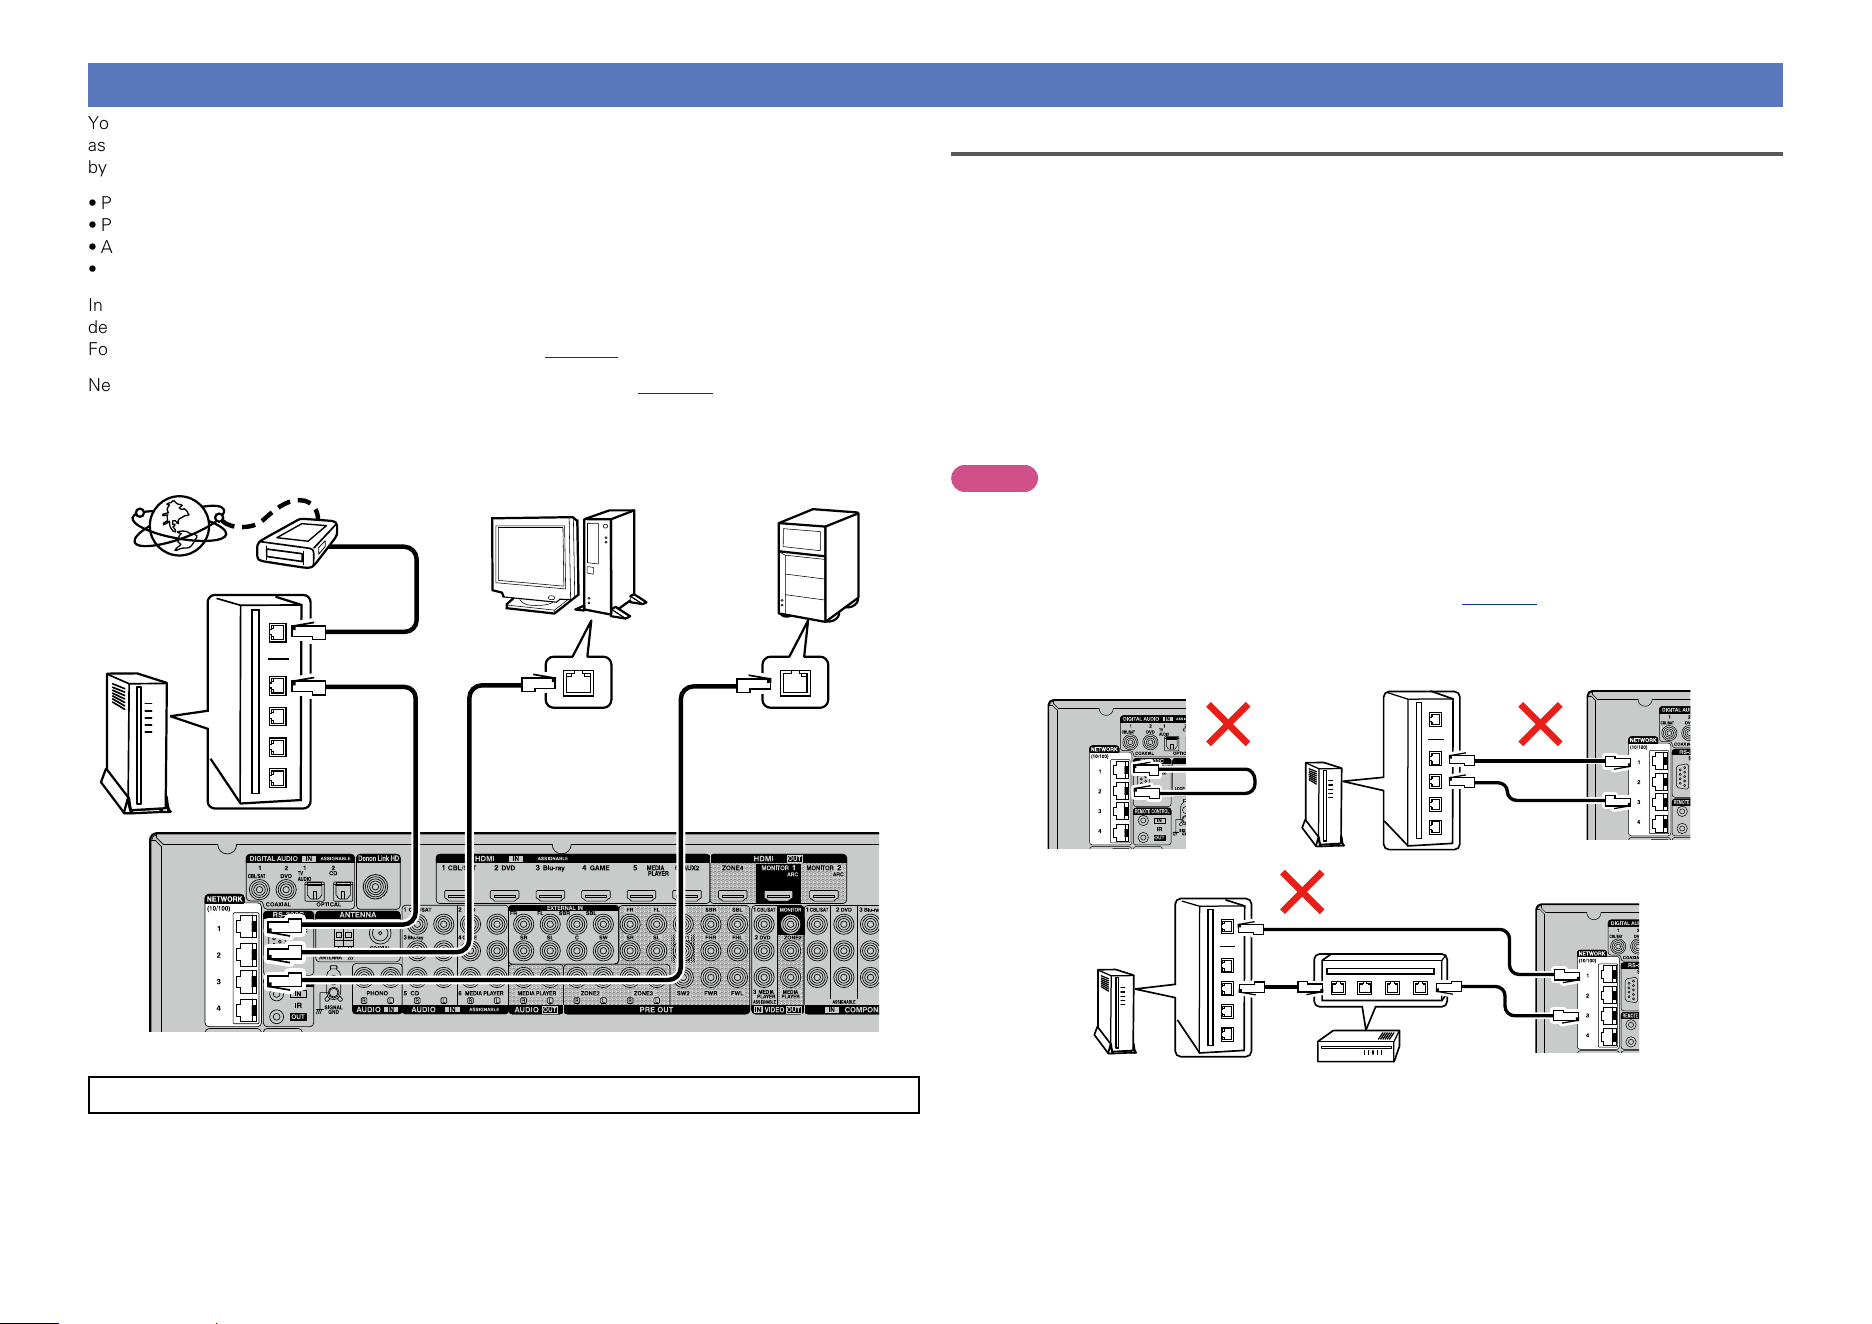
Connecting to a home network (LAN)
You can connect this unit to your home network (LAN) to perform various types of playbacks and operations
as follows. This unit is also equipped with a switching hub function. Make network connections for this unit
by carefully reading information on this page.
•Playback of network audio such as the Internet Radio and Media Servers
•Playback of music from online services
•AirPlay
•Operations on this unit via the network
In addition, when an updated firmware becomes available for improving this unit, the update information is
delivered from us to this unit over the network. You can then download the latest firmware.
For more information, on the menu, select “Update” (vpage154).
Network settings are necessary. See “Network” on the menu (vpage 146) for more information on
network setting.
Internet
To WAN side
Router
To LAN port
To LAN port
LAN port/
Ethernet
connector
LAN port/
Ethernet
connector
PC
NAS
(Network Attached
Storage)
Modem
The figure above is an example. Connect the LAN cable to any of the NETWORK connectors from 1 – 4.
For connections to the Internet, contact an ISP (Internet Service Provider) or a computer shop.
Required system
n Broadband internet connection
n Modem
Device that connects to the broadband circuit and conducts communications on the Internet.
A type that is integrated with a router is also available.
n Router
When using this unit, we recommend you use a router equipped with the following functions:
•Built-in DHCP server
This function automatically assigns IP addresses on the LAN.
•Built-in 100BASE-TX switch
When connecting multiple devices, we recommend a switching hub with a speed of 100 Mbps or
greater.
NOTE
•Connect the router to one of the NETWORK connectors on this unit. Furthermore, do not use more than
2 LAN cables when connecting this unit with a router.
•When connecting a hub to this unit, connect using just 1 LAN cable per hub. Connecting with two or
more LAN cables may cause a malfunction.
•To use a NETWORK connector as a hub, set “Network” (vpage147) in the menu to “Always On”
(default).
•The loop detection function is not provided.
•Do not connect in the following ways.
Router
Router
Switching
hub
Basic version
Advanced version
Informations
Basic version
v See overleaf
DVD
32
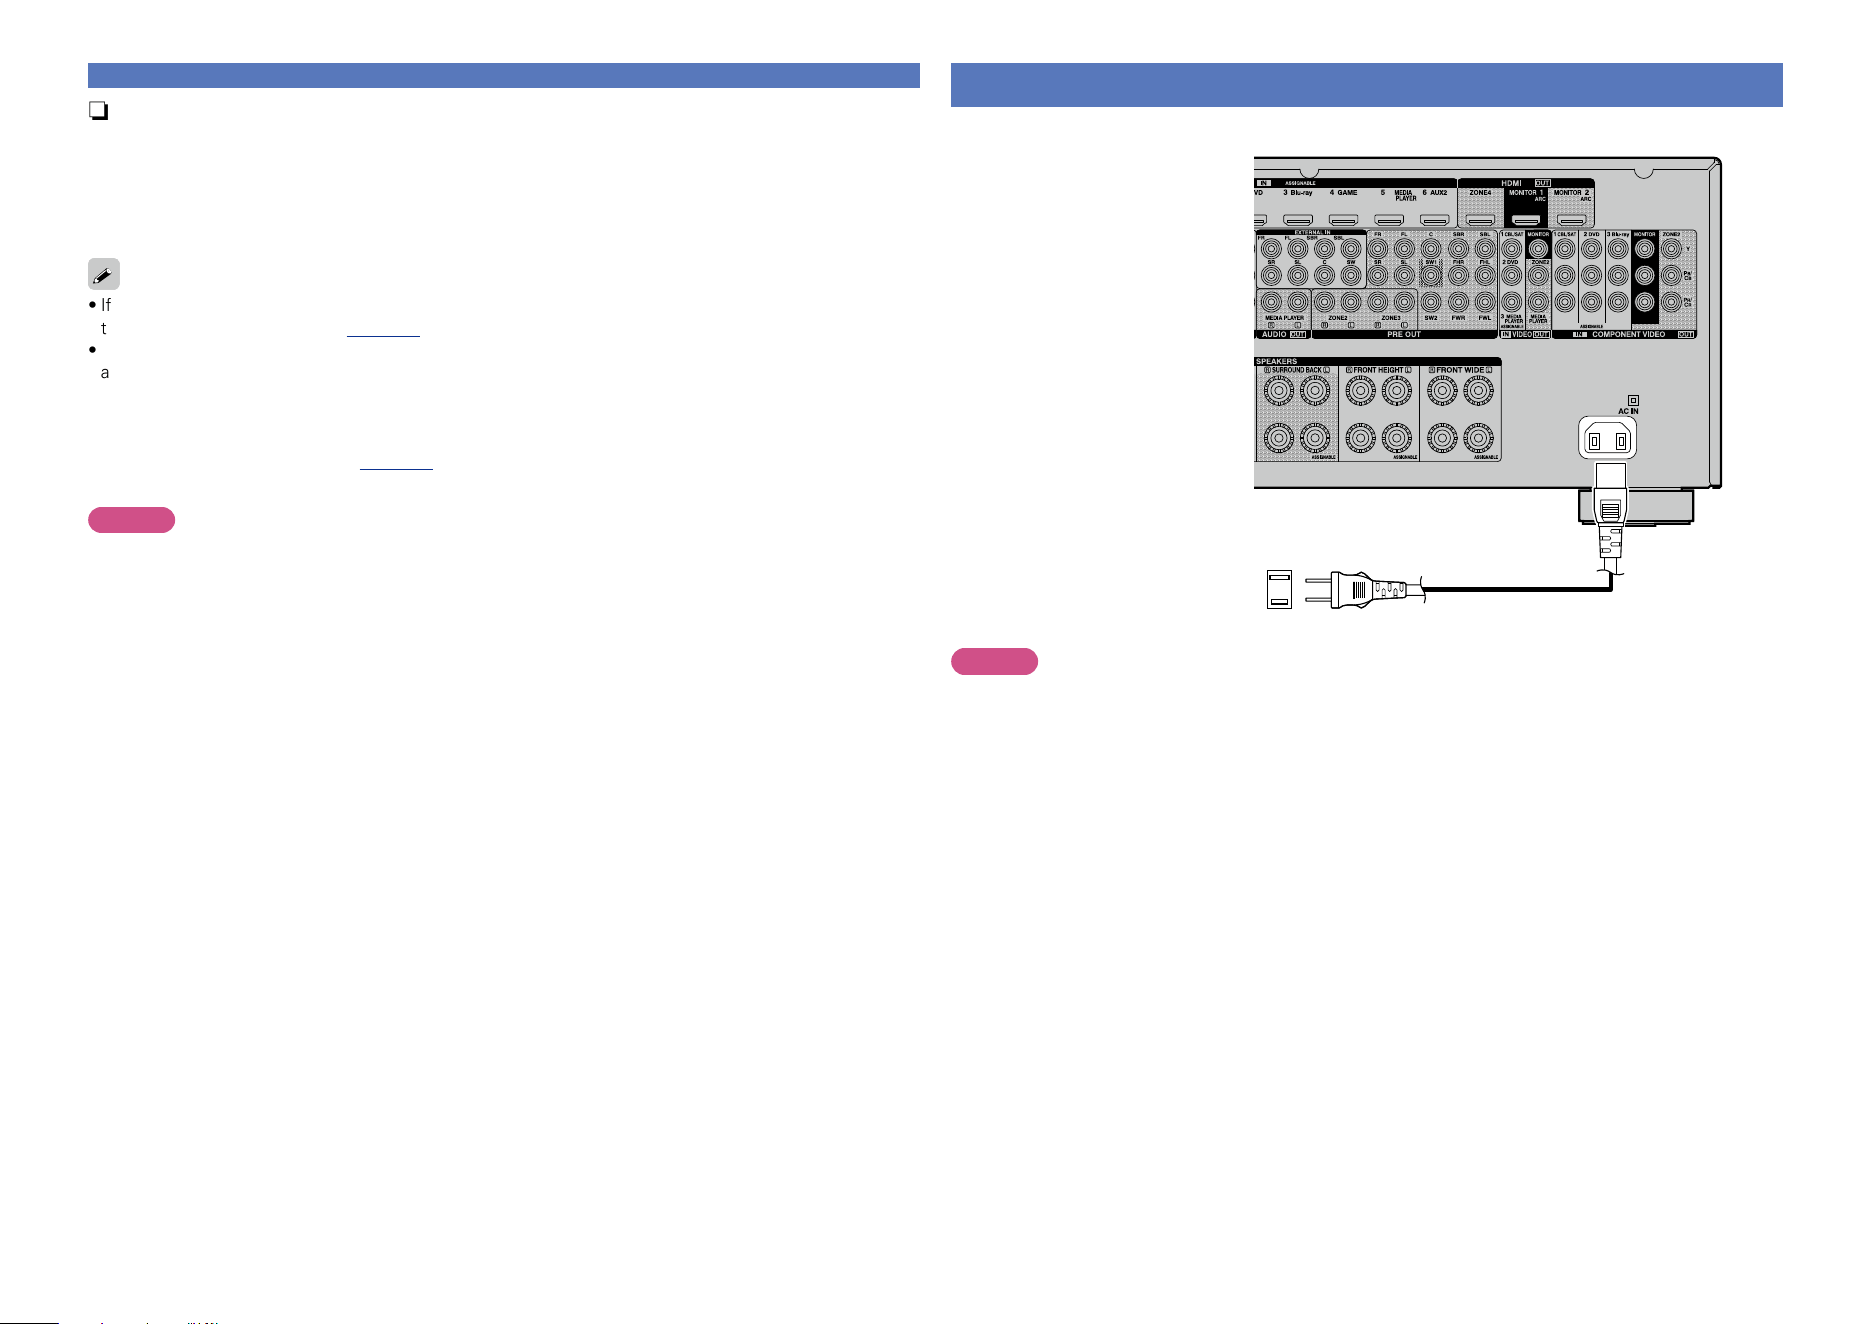
Connecting the power cord
After completing all the connections, insert the power plug into the power outlet.
To household power outlet
(AC 120 V, 60 Hz)
Power cord (supplied)
NOTE
•Do not plug in the power cord until all connections have been completed.
•Do not plug in the power cord until all connections have been completed. However, when the
“Setup Assistant” is running, follow the instructions in the “Setup Assistant” (C page 7) screen
for making connections. (During “Setup Assistant” operation, the input/output connectors do not
conduct current.)
•Do not bundle power cords together with connection cables. Doing so can result in humming or noise.
n Ethernet cable
(CAT-5 or greater recommended)
•Use only a shielded STP or ScTP LAN cable which is available at retailer.
•The normal shielded-type Ethernet cable is recommended. If a flat-type cable or unshielded-type cable
is used, other devices could be affected by noise.
•This product is equivalent to the crossover cable.
•If you have an Internet provider contract for a line on which network settings are made manually, make
the settings at “Network” (vpage146).
•With this unit, it is possible to use the DHCP and Auto IP functions to make the network settings
automatically.
•When using this unit with the broadband router’s DHCP function enabled, this unit automatically performs
the IP address setting and other settings.
When using this unit connected to a network with no DHCP function, make the settings for the IP
address, etc., at “Network” (vpage146).
•When setting manually, check the setting contents with the network administrator.
NOTE
•A contract with an ISP is required to connect to the Internet.
No additional contract is needed if you already have a broadband connection to the Internet.
•The types of routers that can be used depend on the ISP. Contact an ISP or a computer shop for details.
•DENON assumes no responsibility whatsoever for any communication errors or troubles resulting from
customer’s network environment or connected devices.
•This unit is not compatible with PPPoE. A PPPoE-compatible router is required if you have a contract for
a type of line set by PPPoE.
•To listen to audio streaming, use a router that supports audio streaming.
Connecting to a home network (LAN)
Basic version
Advanced version
Informations
Basic version
DVD
33
The acoustic characteristics of the connected speakers and
listening room are measured and the optimum settings are made
automatically. This is called “Audyssey
®
Setup”.
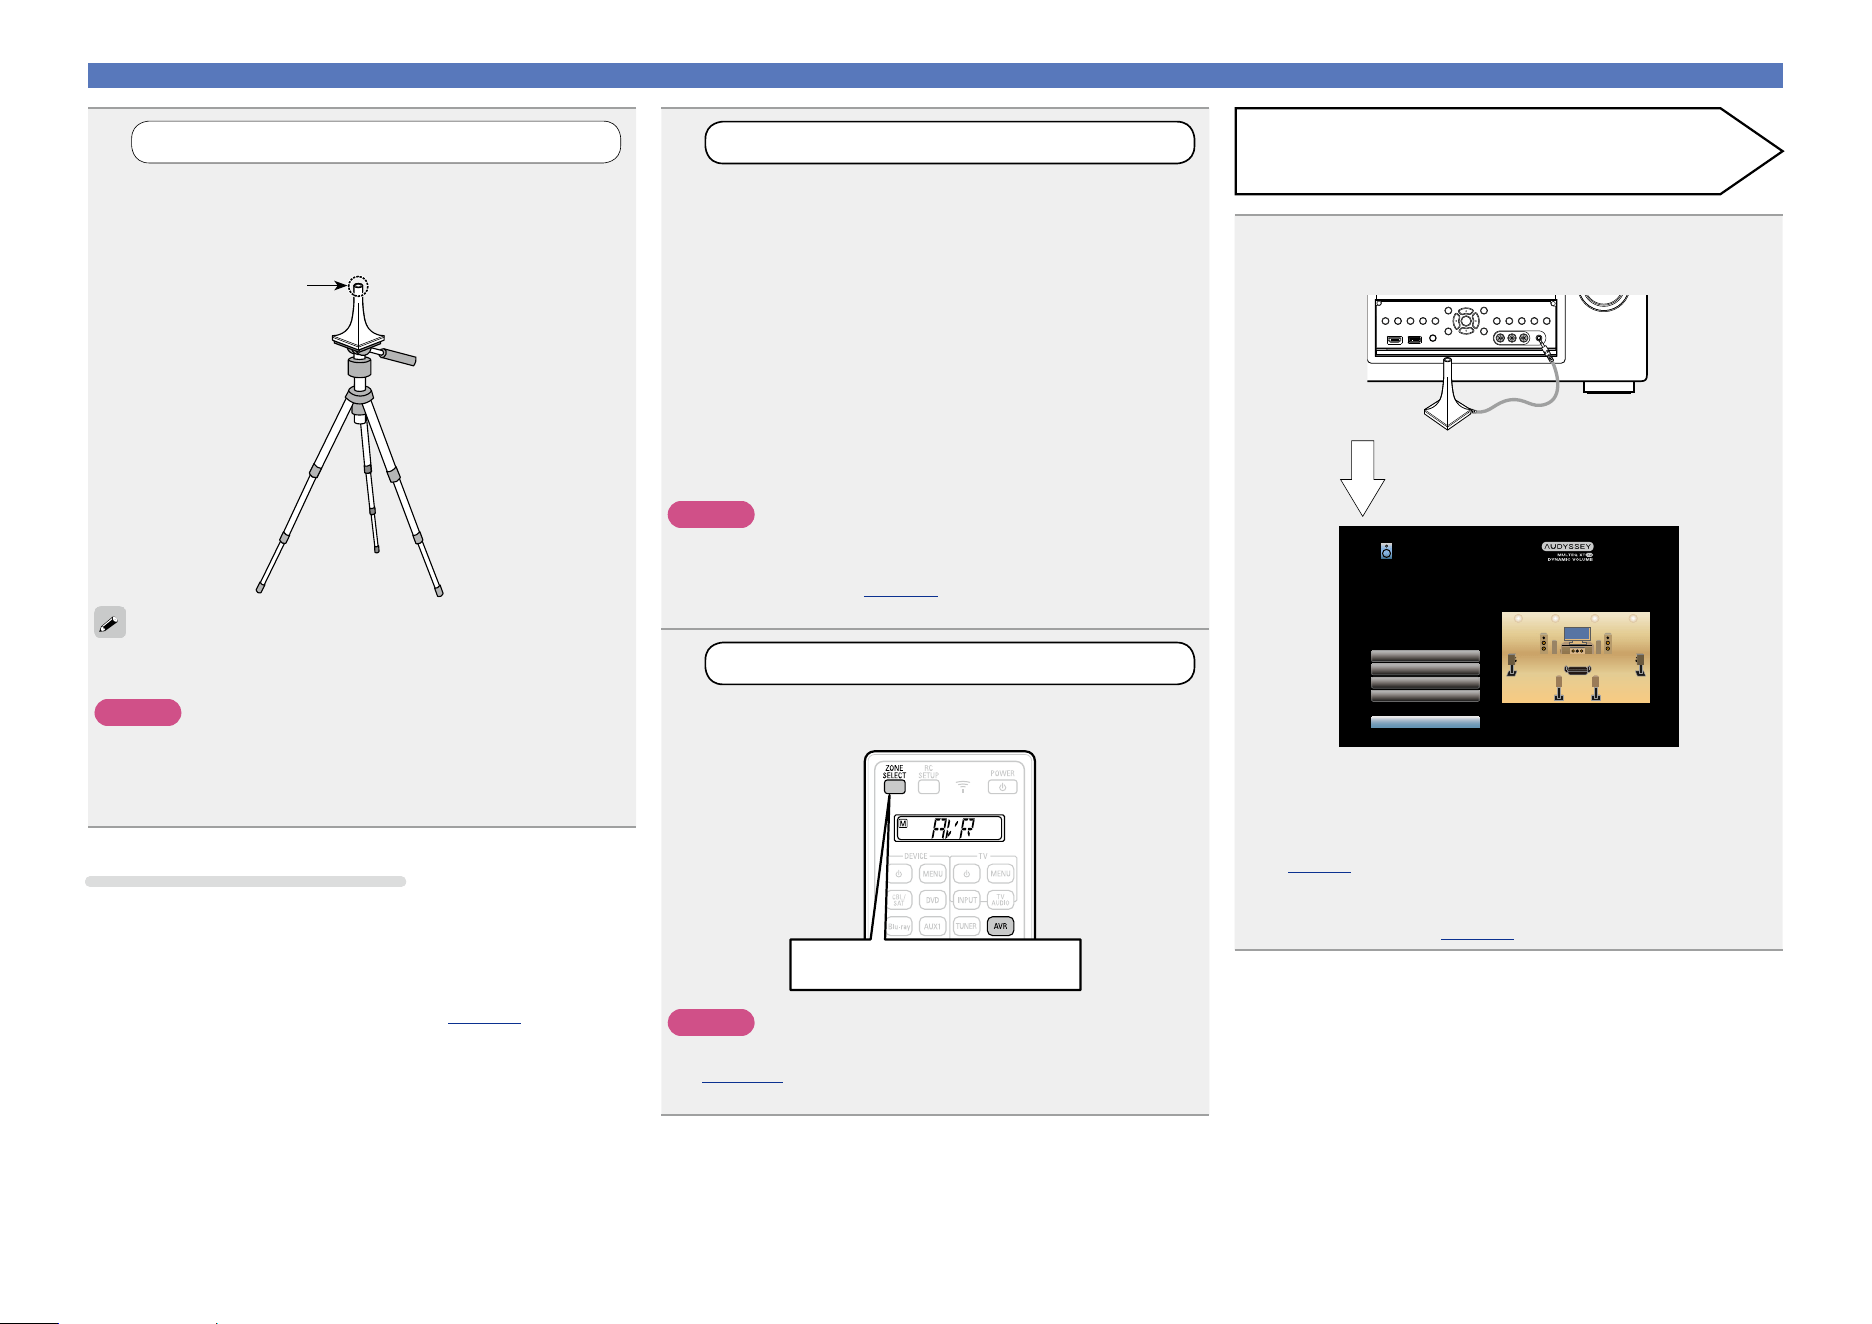
To perform measurement, place the setup microphone in
multiple locations all around the listening area. For best results,
we recommend you measure in six or more positions, as shown
in the illustration (up to eight positions).
•When performing Audyssey
®
Setup, Audyssey MultEQ
®
XT 32/
Audyssey Dynamic EQ
®
/Audyssey Dynamic Volume
®
functions
become active (vpage125, 126).
•To set up the speakers manually, use “Speakers” (vpage 139)
on the menu.
NOTE
•Make the room as quiet as possible. Background noise can disrupt
the room measurements. Close windows and turn off the power on
electronic devices (TVs, radios, air conditioners, fluorescent lights,
etc.). The measurements could be affected by the sounds emitted
by such devices.
•During the measurement process, place cell phones outside the
listening room. Cell phone signals could disrupt the measurements.
•Do not unplug the setup microphone from the main unit until
Audyssey
®
Setup is completed.
•Do not stand between the speakers and setup microphone or allow
obstacles in the path while the measurements are being made. This
will cause inaccurate readings.
•During the measurement process, loud test sounds may be played,
but this is part of normal operation. If there is background noise in
room, these test signals will increase in volume.
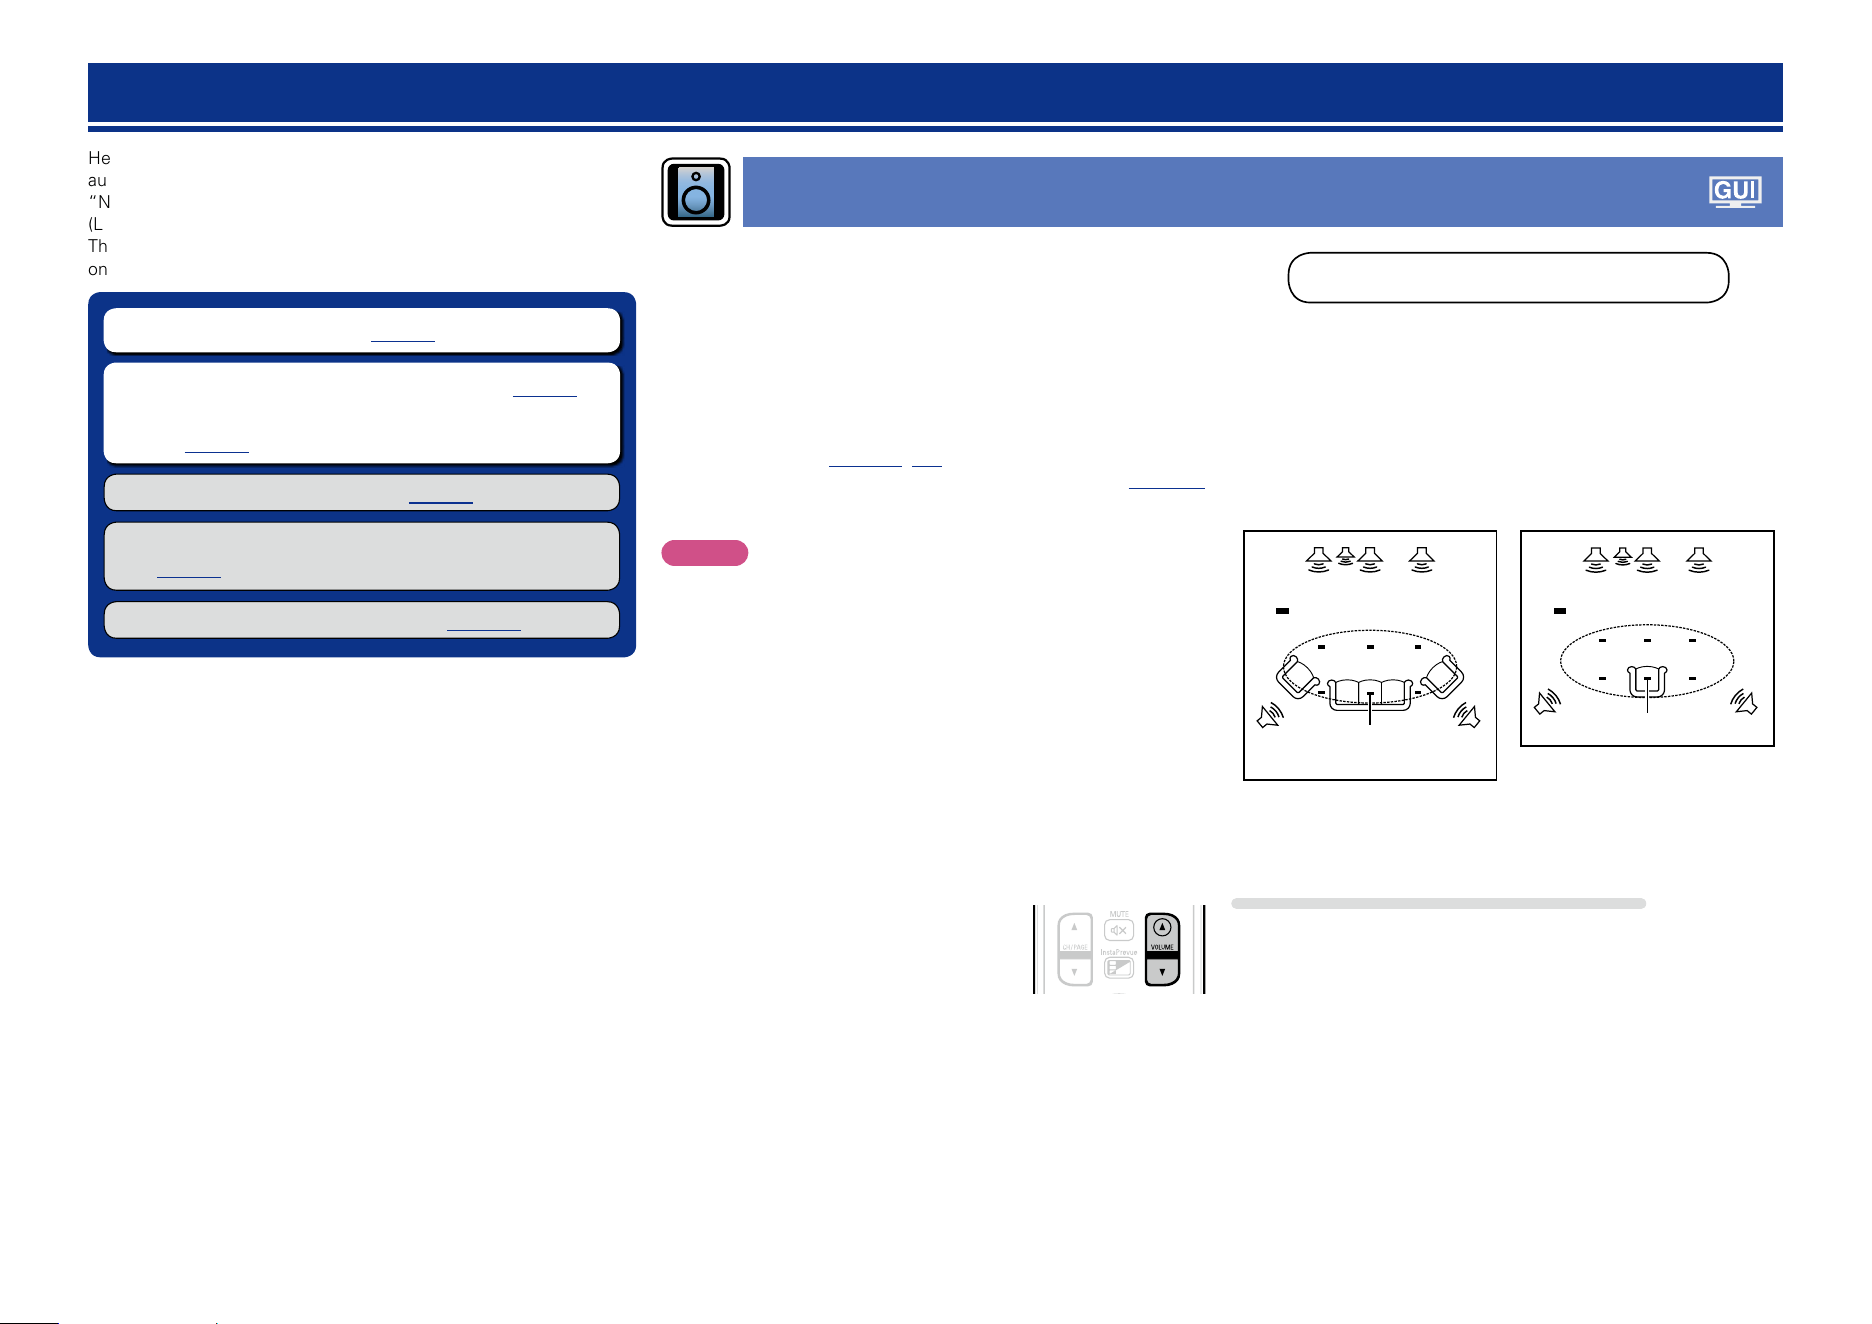
•Operating
VOLUME df on the remote
control unit or MASTER VOLUME on the
main unit during the measurements will
cancel the measurements.
•Measurement cannot be performed when headphones are
connected. Unplug the headphones before performing Audyssey
®
Setup.
Setup
Here, we explain “Audyssey
®
Setup”, which allows you to
automatically make the optimal settings for your speakers, and
“Network”, which allows you to connect this unit to a home network
(LAN).
This unit lets you play via your home network (LAN) music files stored
on a computer and music content such as that from Internet Radio.
n Speaker connection (vpage93)
n Set up speakers (Audyssey
®
Setup) (vpage33)
n Making the network settings (Network)
(vpage40)
Playback (Basic operation) (vpage41)
Selecting a listening mode (Sound Mode)
(vpage84)
Playback (Advanced operation) (vpage102)
Set up speakers (Audyssey
®
Setup)
About setup microphone placement
•Measurements are performed by placing the setup microphone
successively at multiple positions throughout the entire listening
area, as shown in GExample qH. For best results, we recommend
you measure in six or more positions, as shown in the illustration (up
to eight positions).
•Even if the listening environment is small as shown in GExample wH,
measuring at multiple points throughout the listening environment
results in more effective correction.
FL SW C FR
SRSL
*
M
FL SW C FR
SRSL
*
M
(
: Measuring positions)
GExample qH GExample wH
(
: Measuring positions)
FL Front speaker (L) SW Subwoofer
FR Front speaker (R) SL Surround speaker (L)
C Center speaker SR Surround speaker (R)
About the main listening position (*M)
The main listening position is the position where listeners would
normally sit or where one would normally sit alone within the listening
environment. Before starting Audyssey
®
Setup, place the setup
microphone in the main listening position. Audyssey MultEQ
®
XT
32 uses the measurements from this position to calculate speaker
distance, level, polarity, and the optimum crossover value for the
subwoofer.
Basic version
Advanced version
Informations
Basic version
v See overleaf
DVD
34
2
Set up the subwoofer
If using a subwoofer capable of the following
adjustments, set up the subwoofer as shown below.
For details, see your subwoofer’s manual.
n When using a subwoofer with a direct mode
Set the direct mode to “On” and disable the volume adjustment
and crossover frequency setting.
n When using a subwoofer without a direct mode
Make the following settings:
•Volume : “12 o’clock position”
•Crossover frequency : “Maximum/Highest Frequency”
•Low pass filter : “Off”
•Standby mode : “Off”
NOTE
When using 2 subwoofers at the same time, before starting
Audyssey
®
Setup. adjust the volume of the subwoofers by using
“Subwoofer Level” (vpage121) from the menu. You cannot set
the volume for individual subwoofers.
3
Set up the zone mode
Press ZONE SELECT to switch the zone mode.
The J indicator lights.
Press ZONE SELECT
NOTE
When using a remote control with preset codes registered
(vpage 160), press AVR to set the remote control to the AVR-
operation mode before operation.
1
Prepare the included setup microphone
Mount the setup microphone on a tripod or stand
and place it in the main listening position.
When placing the setup microphone, adjust the height of the
sound receptor to the level of the listener’s ear.
Sound receptor
Setup microphone
If you do not have a tripod or stand, set up the microphone on, for
example, a seat without a back.
NOTE
•Do not hold the setup microphone in your hand during
measurements.
•Avoid placing the setup microphone close to a seat back or wall as
sound reflections may give inaccurate results.
Set up speakers (Audyssey
®
Setup)
4
Connect the setup microphone to the SETUP MIC
jack of this unit.
Audyssey Setup
Channel Select
Amp Assign
Check Results
Restore...
Start
Your AV receiver can automatically measure the acoustics of
your room then optimize your speakers using the included
microphone.
Set the following items
if necessary.
When the setup microphone is
connected, the following screen is
displayed.
•Here, we explain setup using the example of 7.1-channel speaker
playback.
For settings other than 7.1-channel speaker playback, select “Amp
Assign” and perform step 3 to 10 of “Set up “Amp Assign””
(vpage99).
If unused channels are set with “Channel Select”, measuring time
can be shortened. For setting, perform steps 13 to 19 of “Set up
“Channel Select”” (vpage101).
Preparation
About Audyssey Sub EQ HT™
Audyssey Sub EQ HT™ makes the integration seamless by first
compensating for any level and delay differences between the two
subwoofers and then applying Audyssey MultEQ
®
XT 32 to both
subwoofers together.
z To run Audyssey Sub EQ HT™ you must select “Measure (2
spkrs)” in “Set up “Channel Select”” (vpage101).
Basic version
Advanced version
Informations
Basic version
v See overleaf
DVD
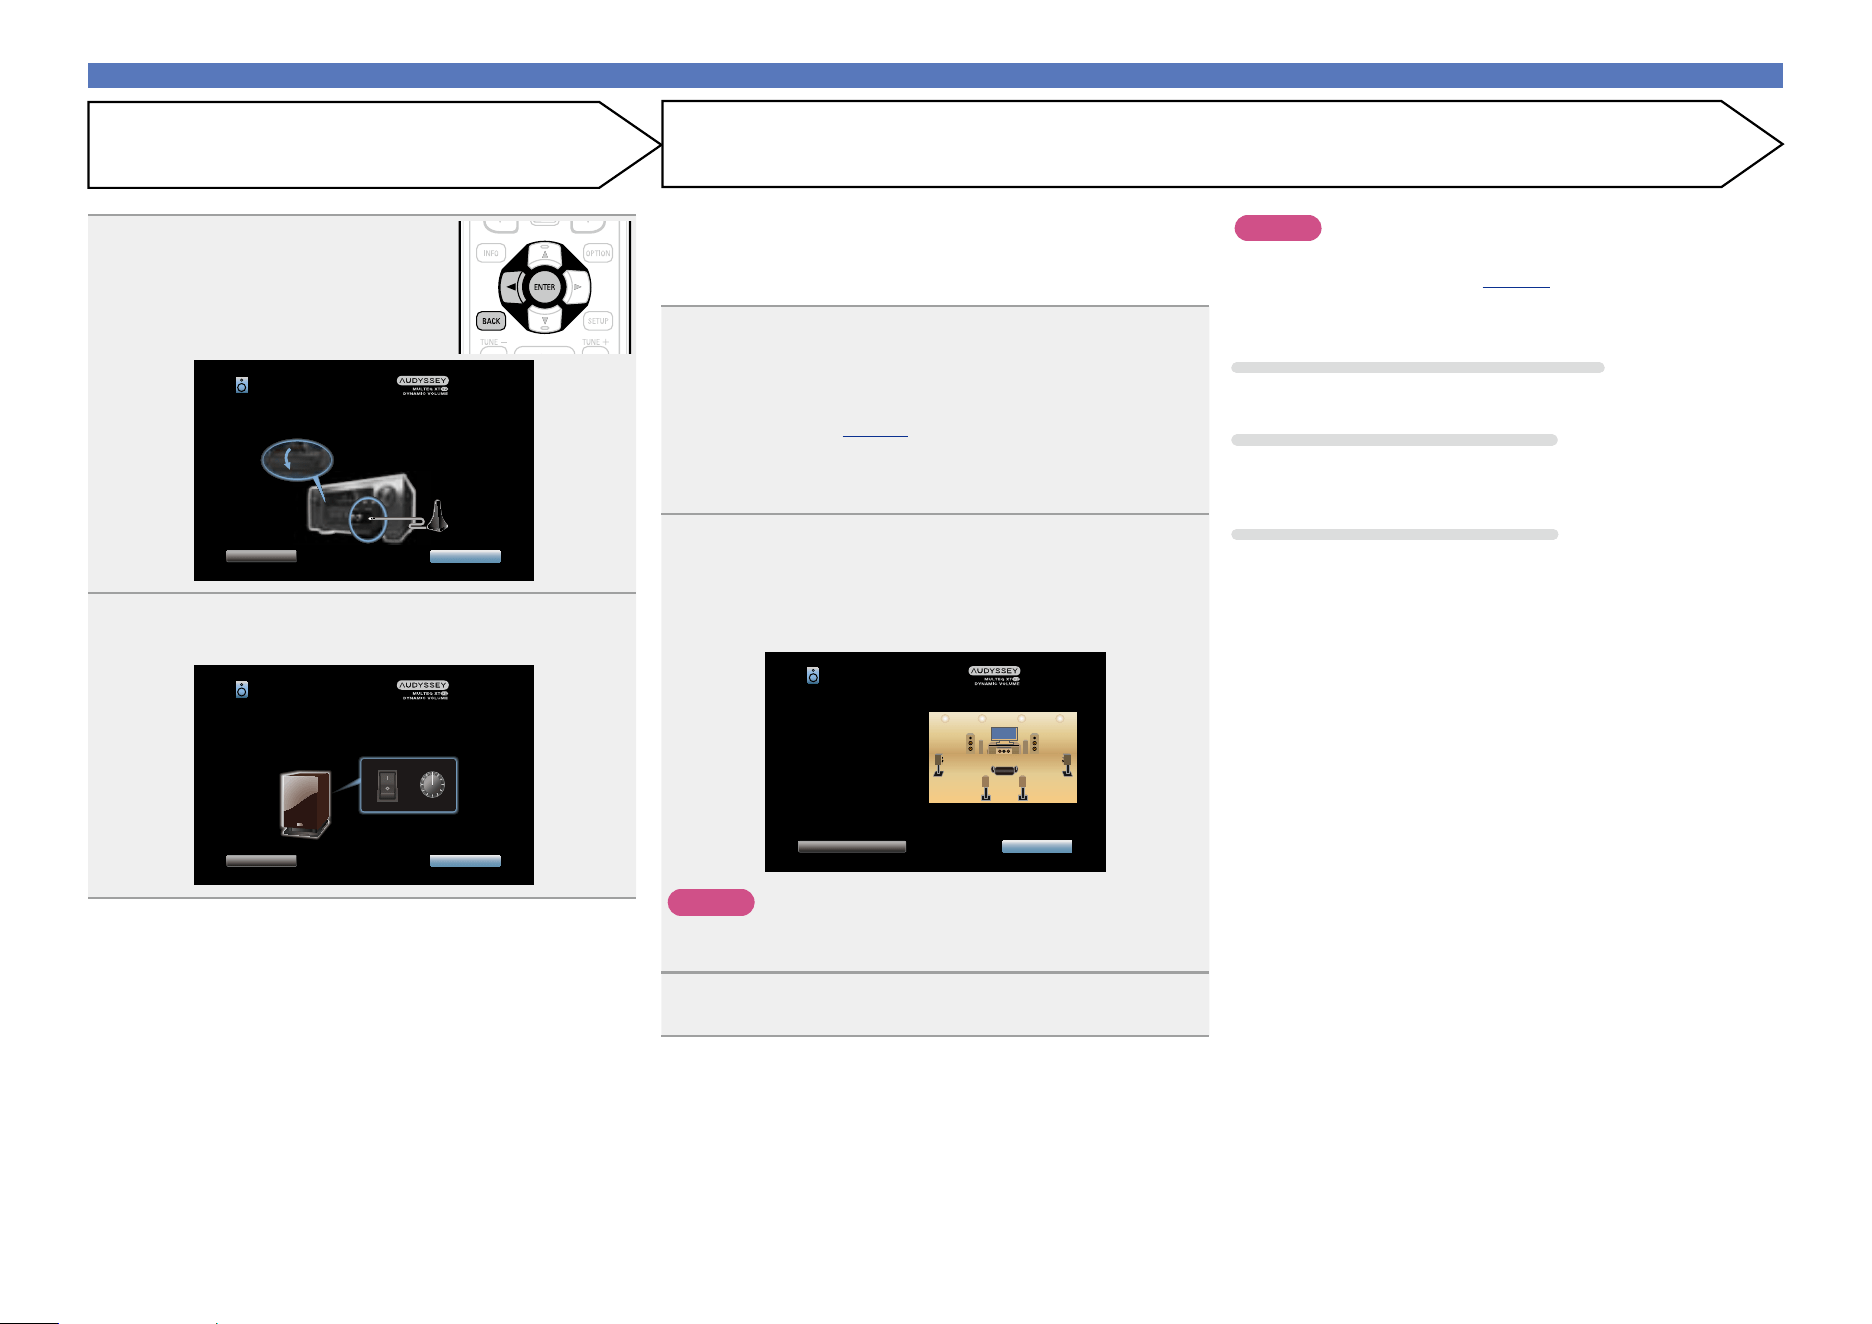
35
Preparation (Continued)
Detection & Measurement (Main)
Set up speakers (Audyssey
®
Setup)
5
Select “Start” and then press
ENTER.
Audyssey Setup
Back Next
Open the front panel door and connect the calibration
microphone to the SETUP MIC input.
6
Select “Next” and then press ENTER.
The subwoofer volume setting screen is displayed.
Audyssey Setup
Back Next
Make sure your subwoofer is plugged in and turned on. If your
subwoofer has a volume control on it, please set it at 50%...
VOLUMEPOWER
ON
OFF
MIN
MAX
NOTE
If “Caution!” is displayed on TV screen:
Go to “Error messages” (vpage 38). Check any related items,
and perform the necessary procedures.
If the problem is resolved, return and restart “Audyssey
®
Setup”.
Going back to the previous screen
Select “Back” and then press ENTER.
When measuring has stopped
q Press BACK to display the popup screen.
w Press o to select “Yes”, and then press ENTER.
Setting up the speakers again
Repeat the operation from step 4.
This step automatically checks the speaker configuration and speaker
size, and calculates the channel level, distance, and crossover
frequency.
It also corrects distortion in the listening area.
7
Select “Begin Test” and then press ENTER.
The volume level for the subwoofer is measured.
•If the volume level for the subwoofer is not appropriate, an error
message is displayed. See “Subwoofer level error message and
how to adjust” (vpage39) and adjust the volume level for the
subwoofer.
•Measurement requires several minutes.
•To stop measuring, select “Cancel” and then press ENTER.
8
The detected speakers are displayed.
•The illustration below shows an example of when the front
speakers, center speaker, subwoofer, surround and surround back
speakers have been detected.
Audyssey Setup
Repeat Last Test Next
Speaker Detection
Front
Center
Subwoofer
Surround
Surr. Back
:Yes
:Yes
:2spkrs
:Yes
:2spkrs
NOTE
If a connected speaker is not displayed, the speaker may not be
connected correctly. Check the speaker connection.
9
Select “Next” and then press ENTER.
Basic version
Advanced version
Informations
Basic version
v See overleaf
DVD
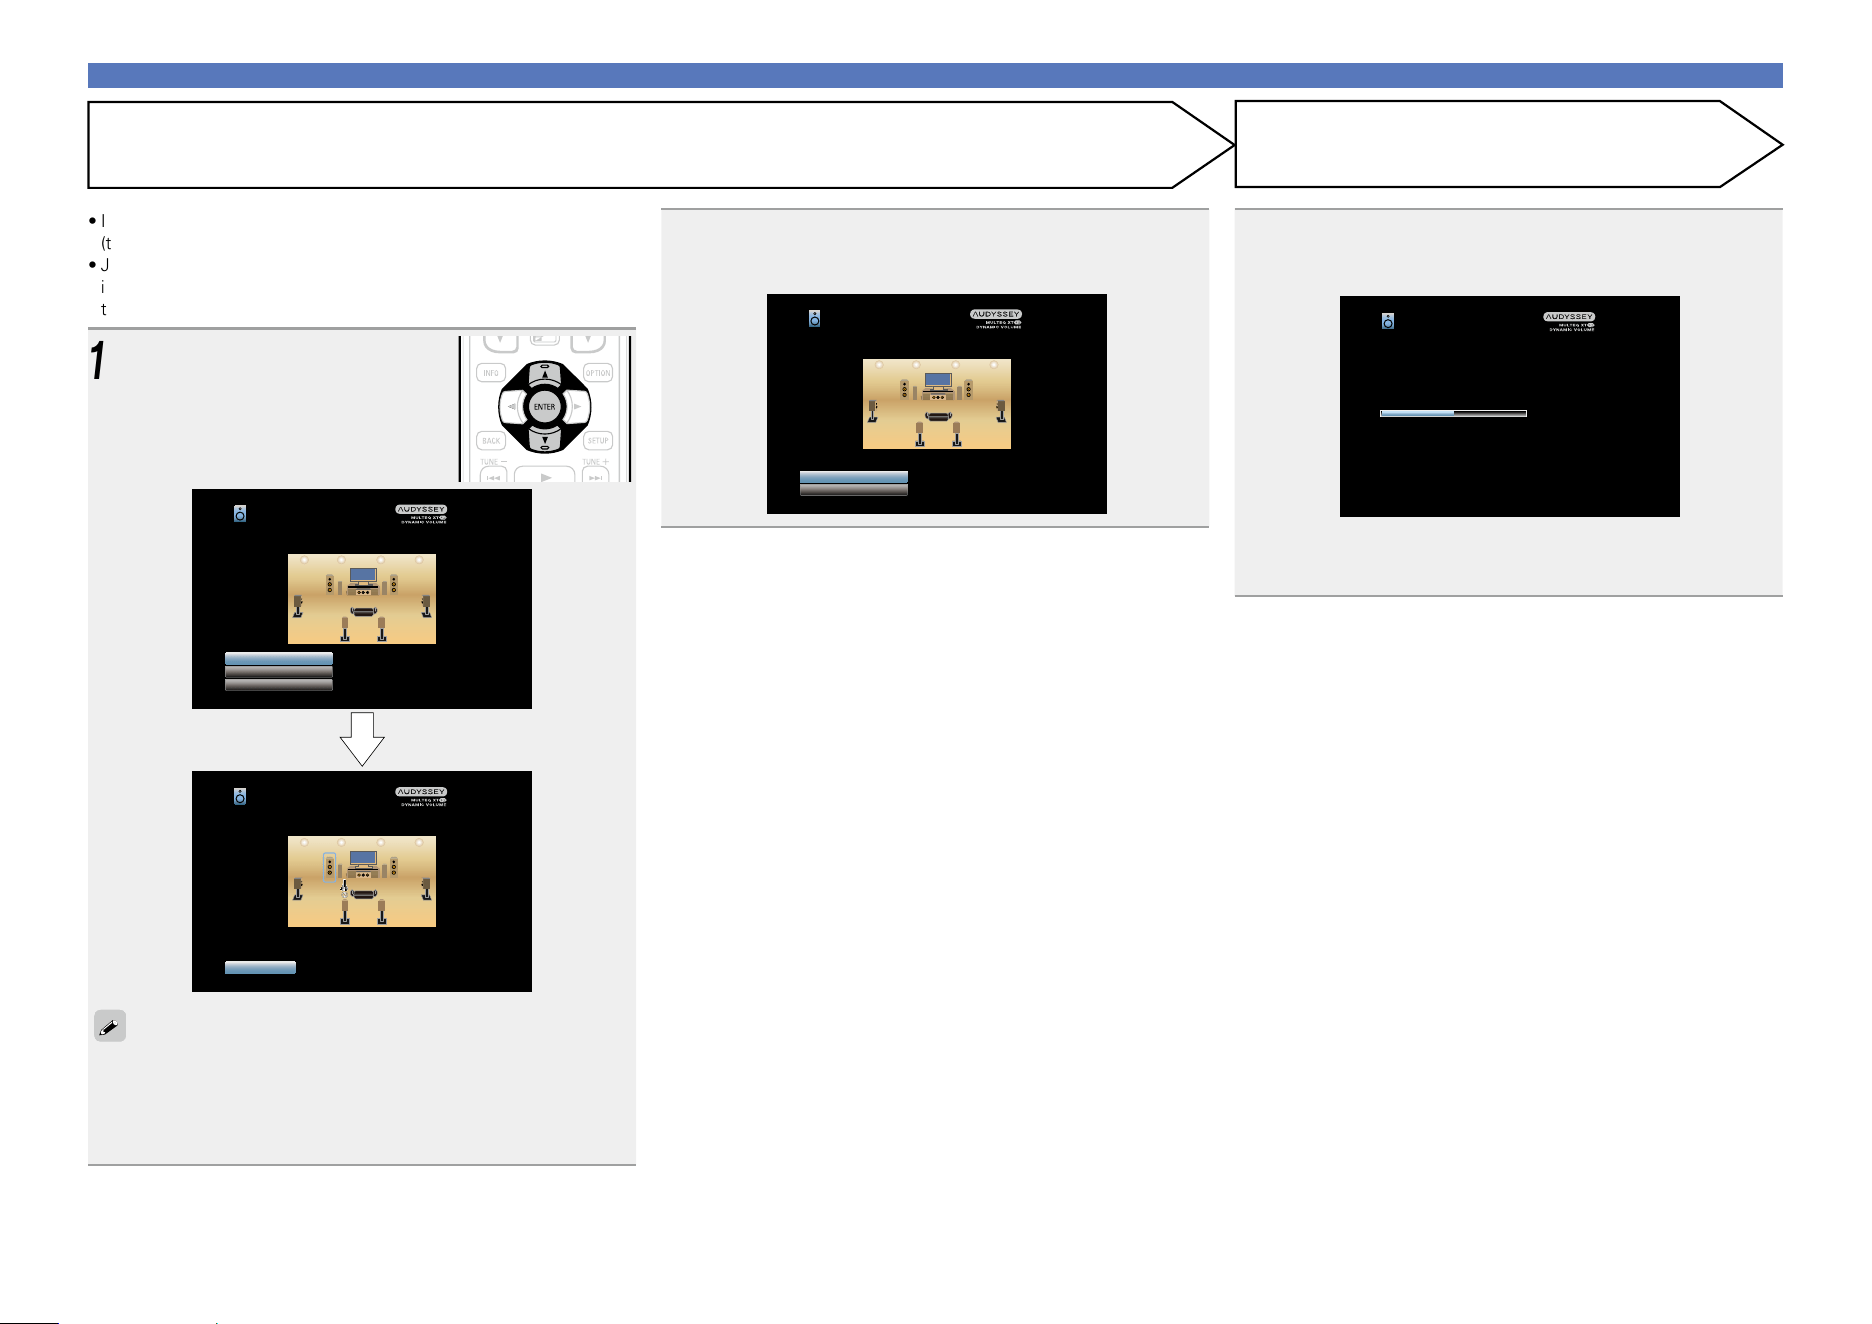
36
Calculation
Set up speakers (Audyssey
®
Setup)
11
Repeat step 10, measuring positions 3 to 8.
When measurement of position 8 is completed, a
“Measurements finished.” message is displayed.
Audyssey Setup
Repeat Last Test
Calculation
Measurements finished.
12
Select “Calculation” and then press ENTER.
Measuring results are analyzed, and the frequency response of
each speaker in the listening room is determined.
Audyssey Setup
Calibration completed! Now calculating...Please wait.
50%
•Analysis takes several minutes to complete. The more speakers
and measurement positions that there are, the more time it takes
to perform the analysis.
Measurement (2nd – 8th)
•In this step, you will perform measurements at multiple positions
(two to eight positions) other than the main listening position.
•Just one position can be measured but measuring multiple positions
increases the accuracy of the correction of acoustic distortion within
the listening area.
10
Move the setup microphone to
position 2, select “Continue”,
and then press ENTER.
The measurement of the second
position starts. Measurements can be
made in up to eight positions.
Audyssey Setup
Cancel
Measuring the LEFT FRONT SPEAKER...
Audyssey Setup
Calculation
Back
Continue
Place the microphone at ear level at the 2nd listening position,
then select “Continue”...
•To skip measuring the third and subsequent listening position, use
ui to select “Calculation” and press ENTER to proceed to step
13.
•To measure the second position again, use ui to select “Repeat
Last Test” and press ENTER.
Basic version
Advanced version
Informations
Basic version
v See overleaf
DVD
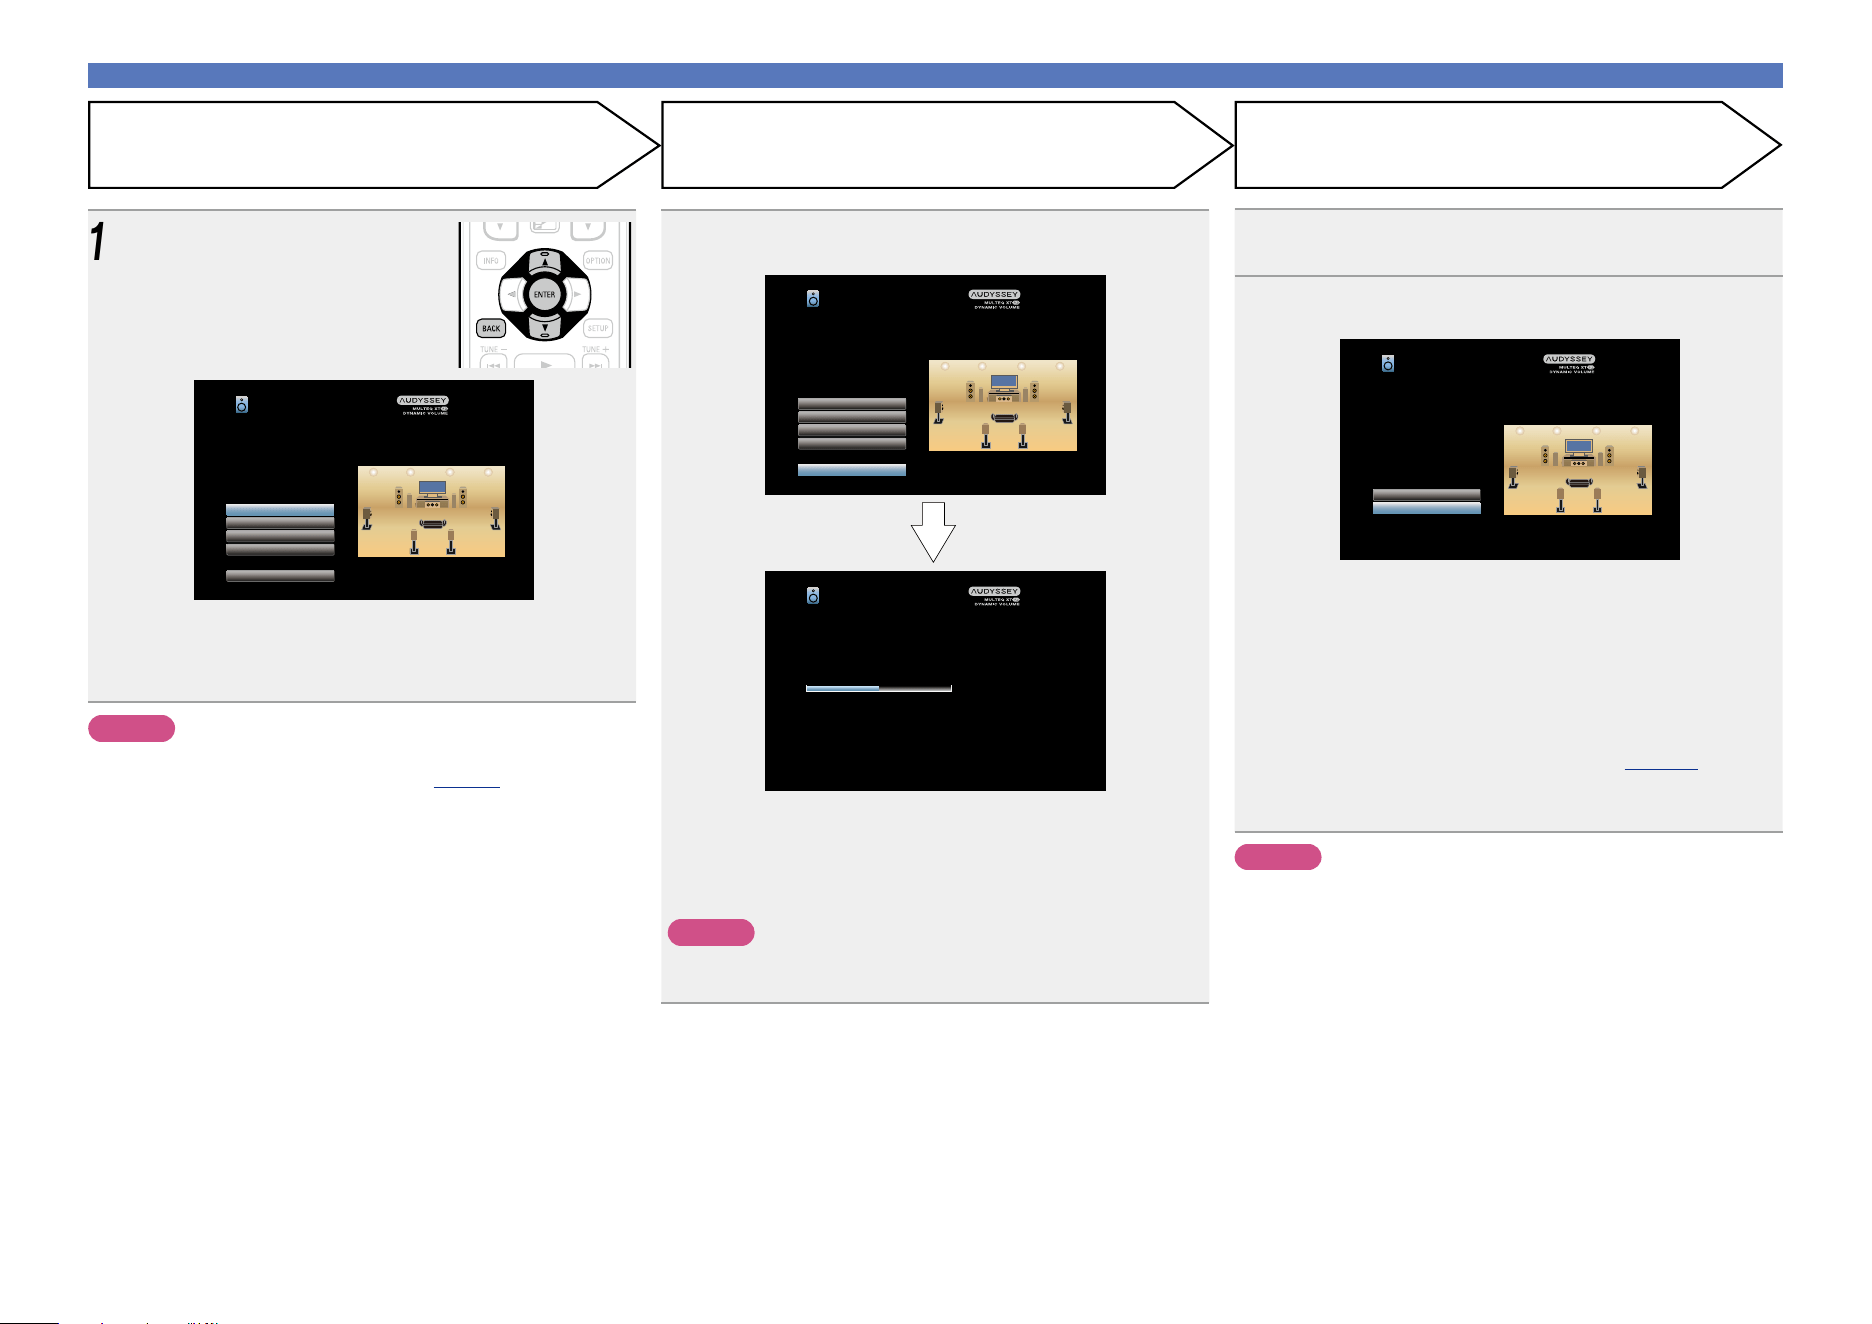
37
Set up speakers (Audyssey
®
Setup)
14
Select “Store” and then press ENTER.
Save the measurement results.
Audyssey Setup
Now storing...Please wait.
50%
Audyssey Setup
Distances
Speaker Config.
Levels
Crossovers
Store
Check processing results. To proceed, press “Store”.
•Saving the results requires about 20 seconds.
•During saving of measurements results, “Now storing...Please
wait.” is displayed. When saving is completed, “Storing complete.
Audyssey
®
Setup is now finished. Please unplug microphone.” is
displayed.
NOTE
During saving of measurement results, be sure not to turn off the
power.
15
Unplug the setup microphone from the unit’s SETUP
MIC jack.
16
Set Audyssey Dynamic Volume
®
.
Audyssey Setup
Yes
No
You can set Dynamic Volume function, which automatically
adjust volume level for all content.
Do you want to enable?
•This feature adjusts the output volume to the optimal level while
constantly monitoring the level of the audio input to the unit.
Optimal volume control is performed automatically without any
loss in the dynamism and clarity of the sound when, for example,
the volume suddenly increases for commercials shown during
television programs.
n When turning Dynamic Volume on
•Press u to select “Yes”, and then press ENTER.
The unit automatically enters “Medium” (vpage126) mode.
n When turning Dynamic Volume off
•Press i to select “No”, and then press ENTER.
NOTE
After performing Audyssey
®
Setup, do not change the speaker
connections or subwoofer volume. In event of a change, perform
Audyssey
®
Setup again.
Store FinishCheck
13
Use ui to select the item you
want to check, and then press
ENTER.
Audyssey Setup
Distances
Speaker Config.
Levels
Crossovers
Store
Check processing results. To proceed, press “Store”.
•Subwoofers may measure a greater reported distance than
the actual distance due to added electrical delay common in
subwoofers.
•If you want to check another item, press BACK.
NOTE
•If the result differs from the actual connection status, or if “Caution!”
is displayed, see “Error messages” (vpage 38). Then carry out
Audyssey
®
Setup again.
• If you change speaker positions or orientation, perform Audyssey
®
Setup again to find the optimal equalizer settings.
Basic version
Advanced version
Informations
Basic version
DVD
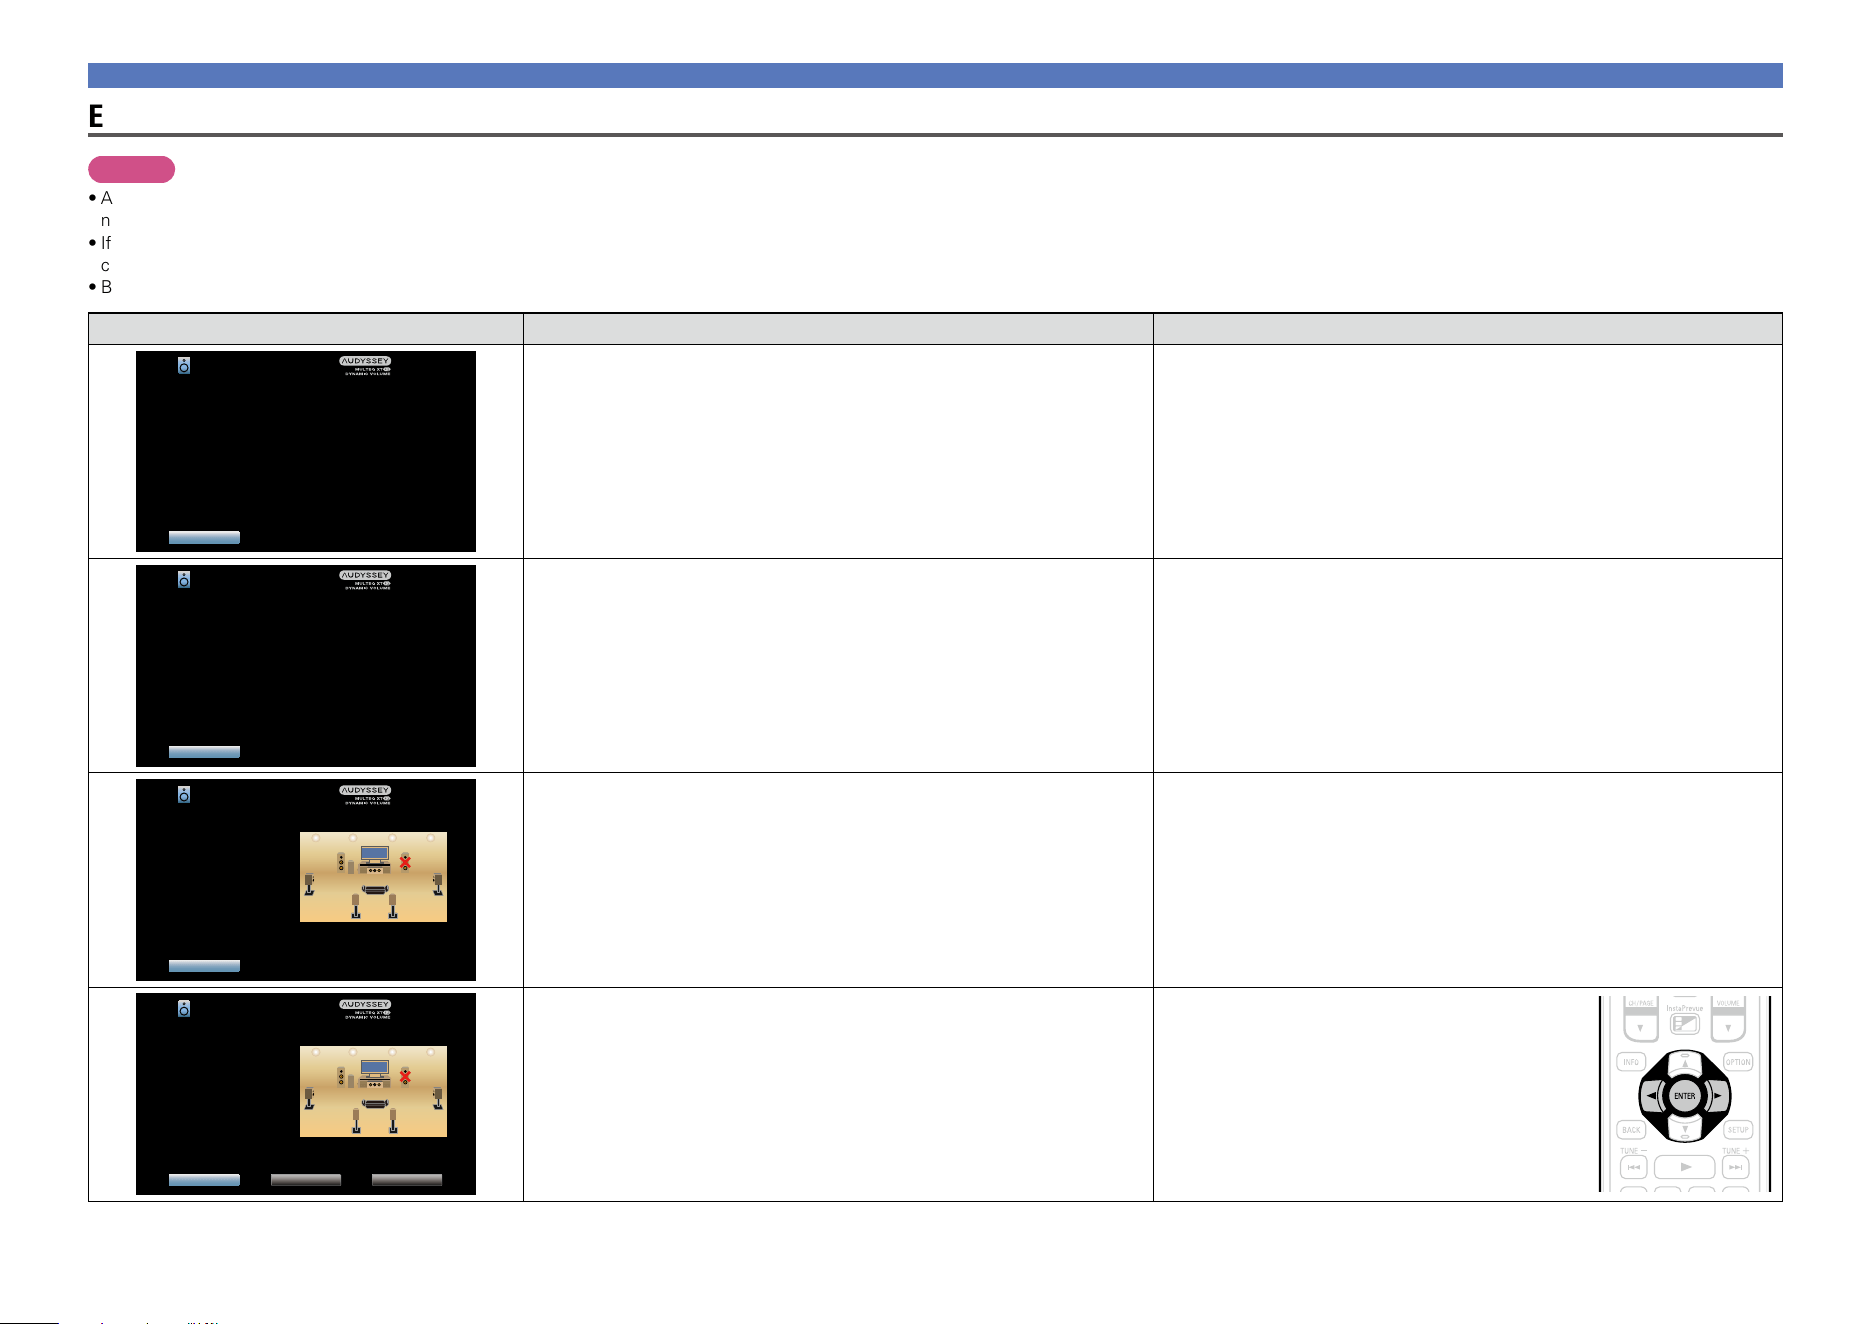
38
Error messages
NOTE
•An error message is displayed if Audyssey
®
Setup could not be completed due to speaker placement, the measurement environment, etc. If an error message is displayed, check the relevant items and perform the
necessary measures. Then perform Audyssey
®
Setup again.
•If the result still differs from the actual connection status after remeasurement or the error message still appears, it is possible that the speakers are not connected properly. Turn this unit off, check the speaker
connections and repeat the measurement process from the beginning.
•Be sure to turn off the power before checking speaker connections.
Examples Error details Measures
Audyssey Setup
Retry
Caution! : Please check the cable connection and retry.
Microphone or Speaker is None
•The connected setup microphone is broken, or a device other than the
supplied setup microphone is connected.
•Not all speakers could be detected.
•Connect the included setup microphone to the SETUP MIC jack of this unit.
•Check the speaker connections.
Audyssey Setup
Retry
Caution!
Ambient noise is too high or level is too low
•There is too much noise in the room for accurate measurements to be
made.
•Speaker or subwoofer sound is too low for accurate measurements to be
made.
•Either turn off any device generating noise or move it away.
•Perform again when the surroundings are quieter.
•Check the speaker installation and the direction in which the speakers are
facing.
•Adjust the subwoofer’s volume.
Audyssey Setup
Retry
Caution! : Please check the cable connection and retry.
Front R :None
•The displayed speaker could not be detected.
(The screen on the left indicates that the front right speaker cannot be
detected.)
•Check the connections of the displayed speaker.
Audyssey Setup
Retry Skip ErrorPhase Info.
Caution! : Please check the cable connection and retry.
Front R :Phase
•The displayed speaker is connected with the polarity reversed.
(The screen on the left indicates that the polarity phases of the front right
speakers are reversed.)
•Check the polarity of the displayed speaker.
•For some speakers, this error message may be
displayed even if the speaker is properly connected.
If you are sure the connection is correct, use o p
to select “Skip Error”, then press ENTER.
Set up speakers (Audyssey
®
Setup)
Basic version
Advanced version
Informations
Basic version
DVD
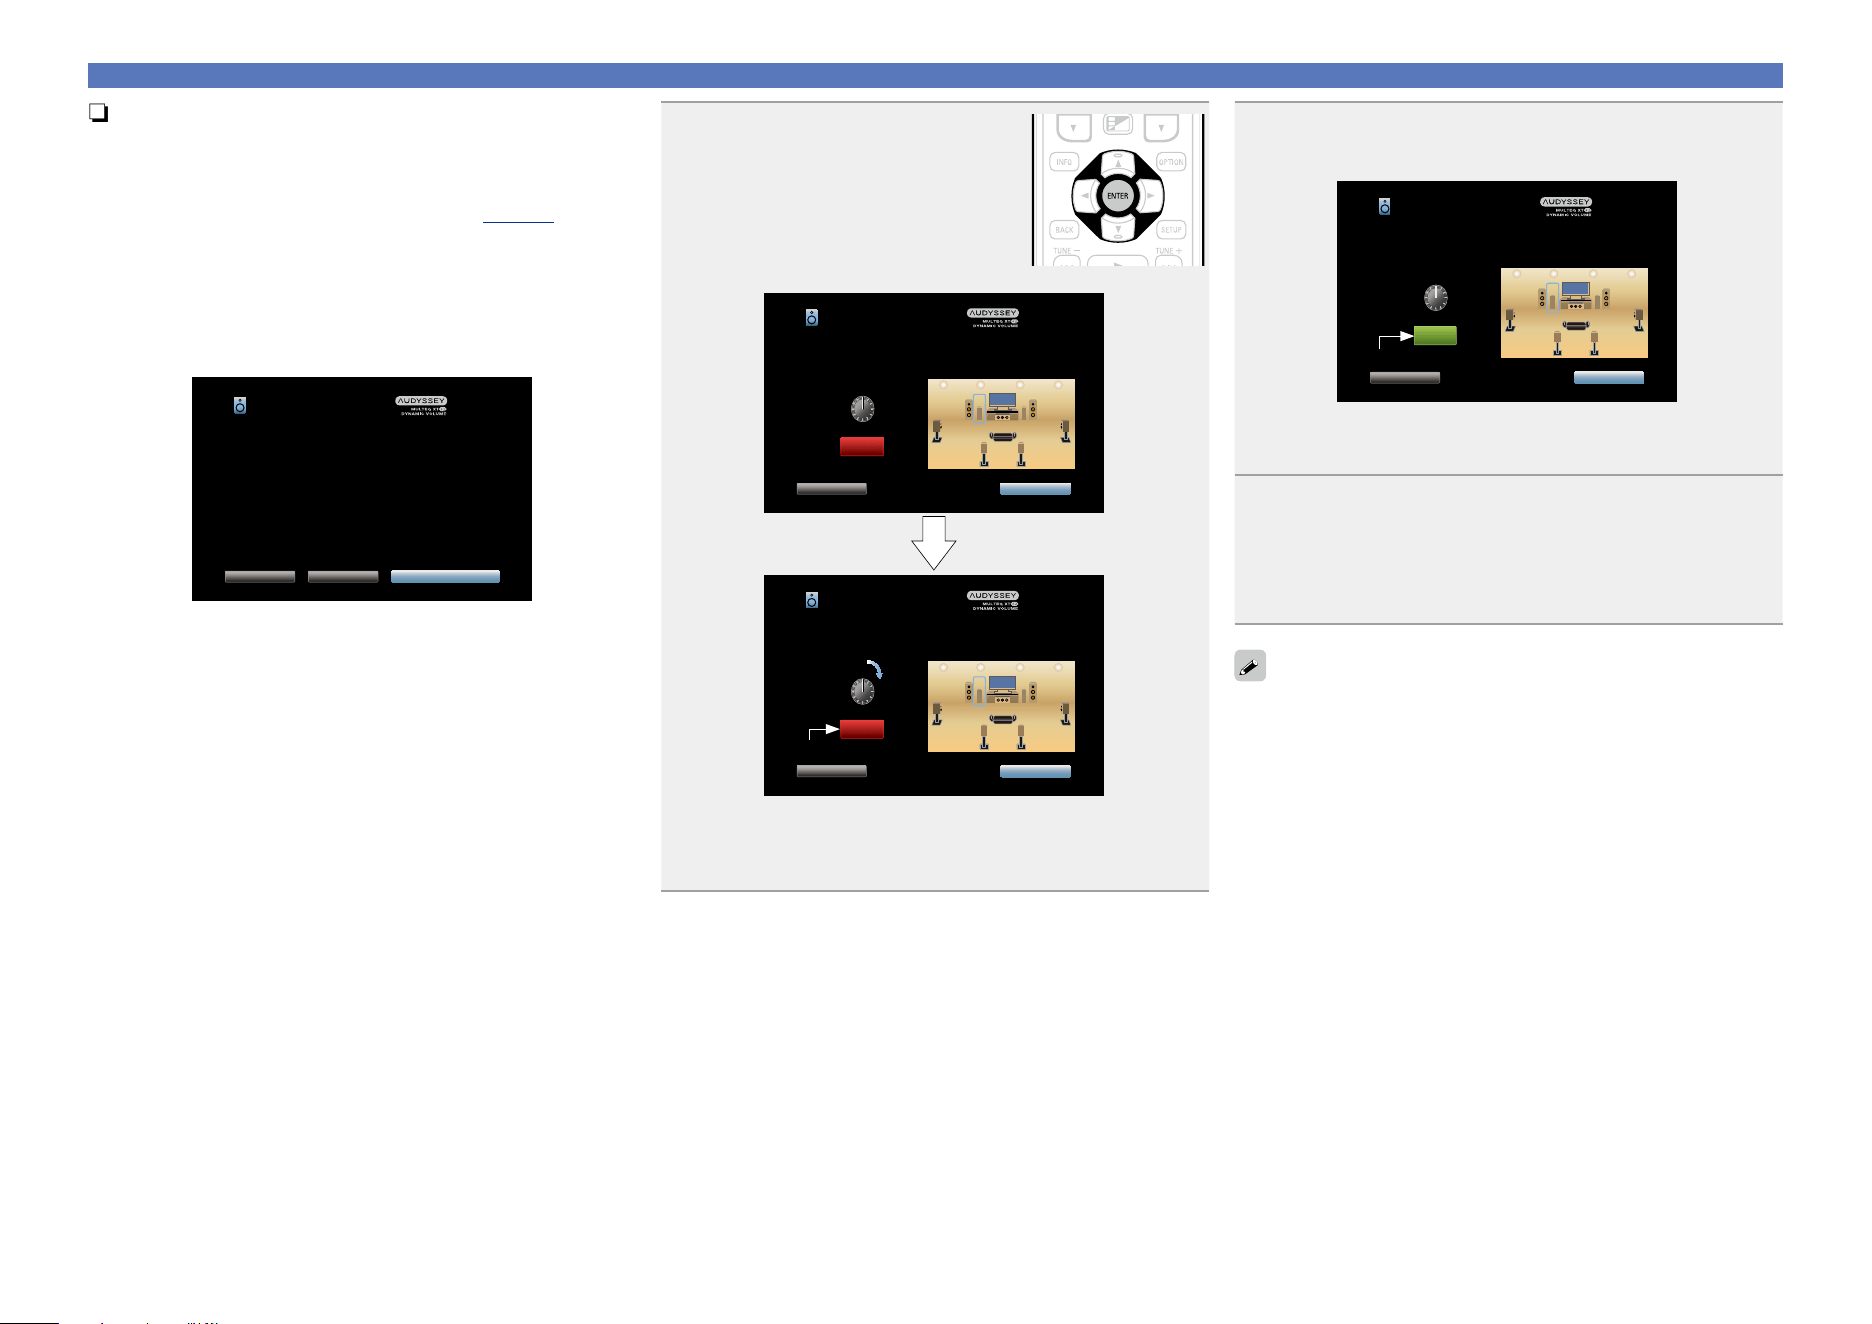
39
Set up speakers (Audyssey
®
Setup)
n Subwoofer level error message and how to
adjust
The optimal level of each subwoofer channel for Audyssey Setup
measurement is 75 dB.
During subwoofer level measurement (vpage 33 “Set up
speakers (Audyssey® Setup)”), an error message is displayed
when one level of subwoofers is outside the 72 – 78 dB range.
When using a subwoofer with built-in amplifier (active type), adjust
the subwoofer volume so that the subwoofer level is within the 72
to 78 dB range.
GError messageH
Audyssey Setup
Back SW Level MatchingSkip
Your Subwoofer 1’s level is too high.
If your subwoofer has a volume control on it,
Select “SW Level Matching” to interactively adjust the level of
your subwoofer.
If your subwoofer does not have a volume control,
or if you do not want to use a subwoofer, select “Skip”.
1
Select “SW Level Matching” and
then press ENTER.
Subwoofer level measurement begins.
During measuring, a “Calibrating…”
message is displayed.
The measured level appears on the level
indicator after about 3 to 5 seconds.
Audyssey Setup
Next
60.0dB
Back
Calibrating...
Adjust the volume on your first subwoofer so that the level
below indicates 75dB
VOLUME
MIN
MAX
Audyssey Setup
Next
--.-dB
Back
Calibrating...
Adjust the volume on your first subwoofer so that the level
below indicates 75dB
VOLUME
MIN
MAX
Red
•If the measured level is outside the 72 to 78 dB range, the level
indicator is red.
•When measuring finishes, select “Back” and then press
ENTER.
2
Adjust the volume control on your subwoofer so that
the measured level is within the 72 to 78 dB range.
Audyssey Setup
Next
75.0dB
Back
Calibrating...
Adjust the volume on your first subwoofer so that the level
below indicates 75dB
VOLUME
MIN
MAX
Green
•If the measured level is within the 72 to 78 dB range, the level
indicator is green.
3
When the measured level is within the 72 to 78 dB
range, select “Next” and then press ENTER.
•If you use two subwoofers, the second subwoofer’s adjust will be
started.
Repeat the operation from step 2, 3.
When you use two subwoofers, adjust each subwoofer so that the
volume levels of Subwoofer 1 and Subwoofer 2 are appropriate for
your needs.
Basic version
Advanced version
Informations
Basic version
DVD

40
Check Results
This function enables you to check the measurement results and equalizer characteristics after Audyssey
®
Setup.
1
Press SETUP to display the menu on the TV screen.
2
Use ui to select “Speakers” – “Audyssey
®
Setup” and then press ENTER or p.
3
Use ui to select “Check Results” and then press ENTER.
Audyssey Setup
Channel Select
Amp Assign
Check Results
Restore...
Start
Your AV receiver can automatically measure the acoustics of
your room then optimize your speakers using the included
microphone.
Set the following items
if necessary.
Check Results
Distances
Levels
Crossovers
Speaker Config.
Equalizers
Check Audyssey Setup Measurement results.
4
Use ui to select the item you want to check, then press ENTER.
Measurement results for each speaker are displayed.
Speaker Config.
Check the speaker configuration.
Distances
Check the speaker distance.
Levels
Check the speaker channel level.
Crossovers
Check the speaker crossover frequency.
Equalizers
Check the equalizer.
•If “Equalizers” is selected, press
ui to select equalizing curve (“Audyssey” or “Audyssey Flat”) to
be checked.
Use ui to switch the display between the different speakers.
5
Press o or BACK.
The confirmation screen reappears. Repeat step 2.
Retrieving Audyssey
®
Setup settings
If you set “Restore...” to “Restore”, you can return to Audyssey
®
Setup measurement result (value
calculated at the start by MultEQ
®
XT 32) even when you have changed each setting manually.
Set up speakers (Audyssey
®
Setup)
Making the network settings
(Network)
This unit can be connected to a home network (LAN) to listen to Internet Radio or play back music files and
still image (JPEG) files stored on a computer.
1
Connect the Ethernet cable (vpage 31 “Connecting to a home network (LAN)”).
2
Turn on this unit (vpage 41).
This unit performs automatic network setup due to the DHCP function.
When connecting to a network that has no DHCP function, perform the setting in “Settings”
(vpage148).
Basic version
Advanced version
Informations
Basic version
DVD
41
Playback (Basic operation)
Setup (vpage33)
n Turning the power on (vpage41)
n Selecting the input source (vpage41)
n Adjusting the master volume (vpage42)
n Turning off the sound temporarily (vpage42)
n Playing a Blu-ray Disc player/DVD player
(vpage42)
n Playing a Blu-ray Disc player compatible with
Denon Link HD (vpage42)
n Playing Super Audio CD (vpage43)
n Playing a CD player (vpage43)
n Playing an iPod (vpage44)
n Playing a USB memory device (vpage47)
n Listening to HDRadio stations (vpage50)
n Listening to Internet Radio (vpage59)
n Playing back files stored on a PC and NAS
(vpage62)
n Using online services (vpage66)
n Convenient functions (vpage76)
n AirPlay function (vpage82)
Selecting a listening mode (Sound Mode)
(vpage84)
Playback (Advanced operation) (vpage102)
Important information
Before starting playback, make the connections between the different
devices and the settings on the unit.
NOTE
Also refer to the operating instructions of the connected devices
when playing them.
Turning the power on
Press POWER X to turn on power to
the unit.
The power indicator flashes green and the
power turns on.
You can also switch the power to standby by pressing X on the main
unit.
n When power is switched to standby
Press POWER X.
GPower indicator status in standby modeH
•Normal standby : Off
•When “HDMI Pass Through” or “HDMI Control” (vpage130)
is set to “On” : Red
•When “Network” (vpage147) is set to “Always On” : Red
•When a mobile device that supports MHL is being charged : Red
Selecting the input source
Press the input source select button
(CBL/SAT, Blu-ray, GAME, MEDIA
PLAYER
, DVD, AUX1, AUX2, CD,
TUNER, PHONO, NETWORK, TV
AUDIO
, iPod/USB or INTERNET
RADIO
) to be played back.
The desired input source can be selected
directly.
You can also use the following operation to select an input
source.
n Select the input source using the main unit
Turn SOURCE SELECT.
•Turning SOURCE SELECT switches the input source, as shown
below.
GAME AUX1 AUX2
MEDIA
PLAYER
iPod/USBHD RadioNETWORK CDTV AUDIO
PHONO
Blu-rayDVDCBL/SAT
Basic version
Advanced version
Informations
Basic version
DVD
42
Adjusting the master volume
Use VOLUME df to adjust the
volume.
•The volume display method varies
depending on the “Scale” setting
(vpage124).
n When the “Scale” setting
(vpage124) is “0 – 98”
GAdjustable rangeH
0.0
0.5 – 98.0
n When the “Scale” setting (vpage124) is “–79.5dB –
18.0dB”
GAdjustable rangeH
– – –.–
–79.5dB – 18.0dB
•The variable range differs according to the input signal and channel
level setting.
You can also adjust the master volume by turning MASTER VOLUME
on the main unit.
Turning off the sound temporarily
Press MUTE :.
•“MUTE” indicator on the display flashes.
•: appears on a TV screen.
•The sound is reduced to the level set at “Mute Level” (vpage124).
•To cancel, press MUTE : again. Muting can also be canceled by
adjusting the master volume.
Important information
Playing a Blu-ray Disc player/DVD
player
The following describes the procedure for playing Blu-ray Disc player/
DVD player.
1
Prepare for playback.
q Turn on the power of the TV,
subwoofer and player.
w Change the TV input to the input of
this unit.
e Load the disc in the player.
2
Press POWER X to turn on power
to the unit.
3
Press Blu-ray or DVD to switch an input source for a
player used for playback.
4
Play the Blu-ray Disc player or DVD player.
•Make the necessary settings on the player (language setting,
subtitles setting, etc.) beforehand.
Playing a Blu-ray Disc player
compatible with Denon Link HD
•Denon Link HD uses the clock of the AV amplifier connected by
Denon Link to achieve HDMI signal transfer with low jitter when
playing BD.
•To play Denon Link HD signals, make HDMI and Denon Link
connections with a compatible Blu-ray disc player (vpage 13
“Connecting a player compatible with the Denon Link HD function”).
1
Prepare for playback.
q Turn on the power of the TV,
subwoofer and player.
w Change the TV input to the input of
this unit.
e Load the disc in the player.
2
Press POWER X to turn on power to the unit.
3
Perform the settings of the “Input Assign” menu
(vpage 135).
q Assign HDMI connectors for the input source
(example: Blu-ray).
w Set “DIGITAL” to “D.LINK”.
•The default assign of “D.LINK” is “Blu-ray”.
4
Press the input source select button (example: Blu-
ray) to switch an input source assigned in step 3 - q.
5
Set the audio input mode to “Auto” or “HDMI” using
the “Input Mode” menu (vpage 138).
•The default setting of “Input Mode” is “Auto”.
6
Play the component connected to this unit.
•Make the necessary settings on the player (language setting,
subtitles setting, etc.) beforehand.
Basic version
Advanced version
Informations
Basic version
v See overleaf
DVD

43
NOTE
•Set the Blu-ray disc player’s “Denon Link” setting to “On”. For
instructions on operation, refer to the Blu-ray disc player’s manual.
•When a Blu-ray disc is played with the “Input Mode” (vpage138)
set to “Auto” or “HDMI”, playback is performed in the Denon Link
HD mode.
Playing Super Audio CD
The following describes the procedure for playing Super Audio CD.
1
Prepare for playback.
q Turn on the power of the subwoofer
and player.
w Load the disc in the player.
2
Press POWER X to turn on power
to the unit.
3
Perform the settings of the “Input Assign” menu
(vpage 135).
Assign HDMI connectors for the input source(example: DVD).
4
Press the input source select button (example: DVD)
to switch an input source assigned in step 3.
5
Set the audio input mode to “Auto” using the “Input
Mode” menu (vpage 138).
•The default setting of “Input Mode” is “Auto”.
6
Play the component connected to this unit.
The indicator lights on the display.
When playing back Super Audio CD, DSD signals are converted into
PCM signals which are then converted into analog signals.
Playing a CD player
The following describes the procedure for playing CD player.
1
Prepare for playback.
q Turn on the power of the subwoofer
and player.
w Load the disc in the player.
2
Press POWER X to turn on power
to the unit.
3
Press CD to switch the input
source to “CD”.
4
Play the CD player.
Playing a Blu-ray Disc player compatible with Denon Link HD
Basic version
Advanced version
Informations
Basic version
DVD
44
Playing an iPod
You can use the USB cable provided with the iPod to connect the iPod
with the unit’s iPod/USB port and enjoy music stored on the iPod.
For information on the iPod models that can be played back with this
unit, see “Connecting an iPod or USB memory device to the iPod/USB
port” (vpage23).
Listening to music on an iPod
The iPod display modes include “From iPod” and “On-Screen”.
By default, “From iPod”, where you directly operate iPod itself while
seeing the iPod screen, is set.
To change to “On-Screen”, where you perform operations while
having the iPod information displayed on the TV screen, see “Setting
operation mode (iPod Browse Mode)” (vpage45).
1
Using the USB cable provided
with the iPod, connect the
iPod to the iPod/USB port
(vpage 23).
2
Press POWER X to turn on
power to the unit.
3
Press iPod/USB to switch the
input source to “iPod/USB”.
“Remote iPod” is displayed on the
display of this unit.
•Nothing is displayed on the TV screen.
4
Operate iPod itself directly while
seeing the iPod screen to play
back music.
n Streaming music stored in iPhone, iPod touch,
or iPad directly to the unit (vpage82)
n Playing iTunes music with this unit
(vpage82)
Operations available through the OPTION button
Press the OPTION button to display a menu of functions that can be
used on the TV screen. Select the function you want to use from this
menu. You can easily find and use the desired function.
n Setting the USB port to use (USB Select)
(vpage76)
n Setting operation mode (iPod Browse Mode)
(vpage45)
n Performing repeat playback (Repeat)
(vpage46)
n Performing random playback (Random)
(vpage46)
n Adjusting the picture quality for your viewing
environment (Picture Mode) (vpage80)
n All Zone Stereo function (vpage80)
Basic version
Advanced version
Informations
Basic version
DVD
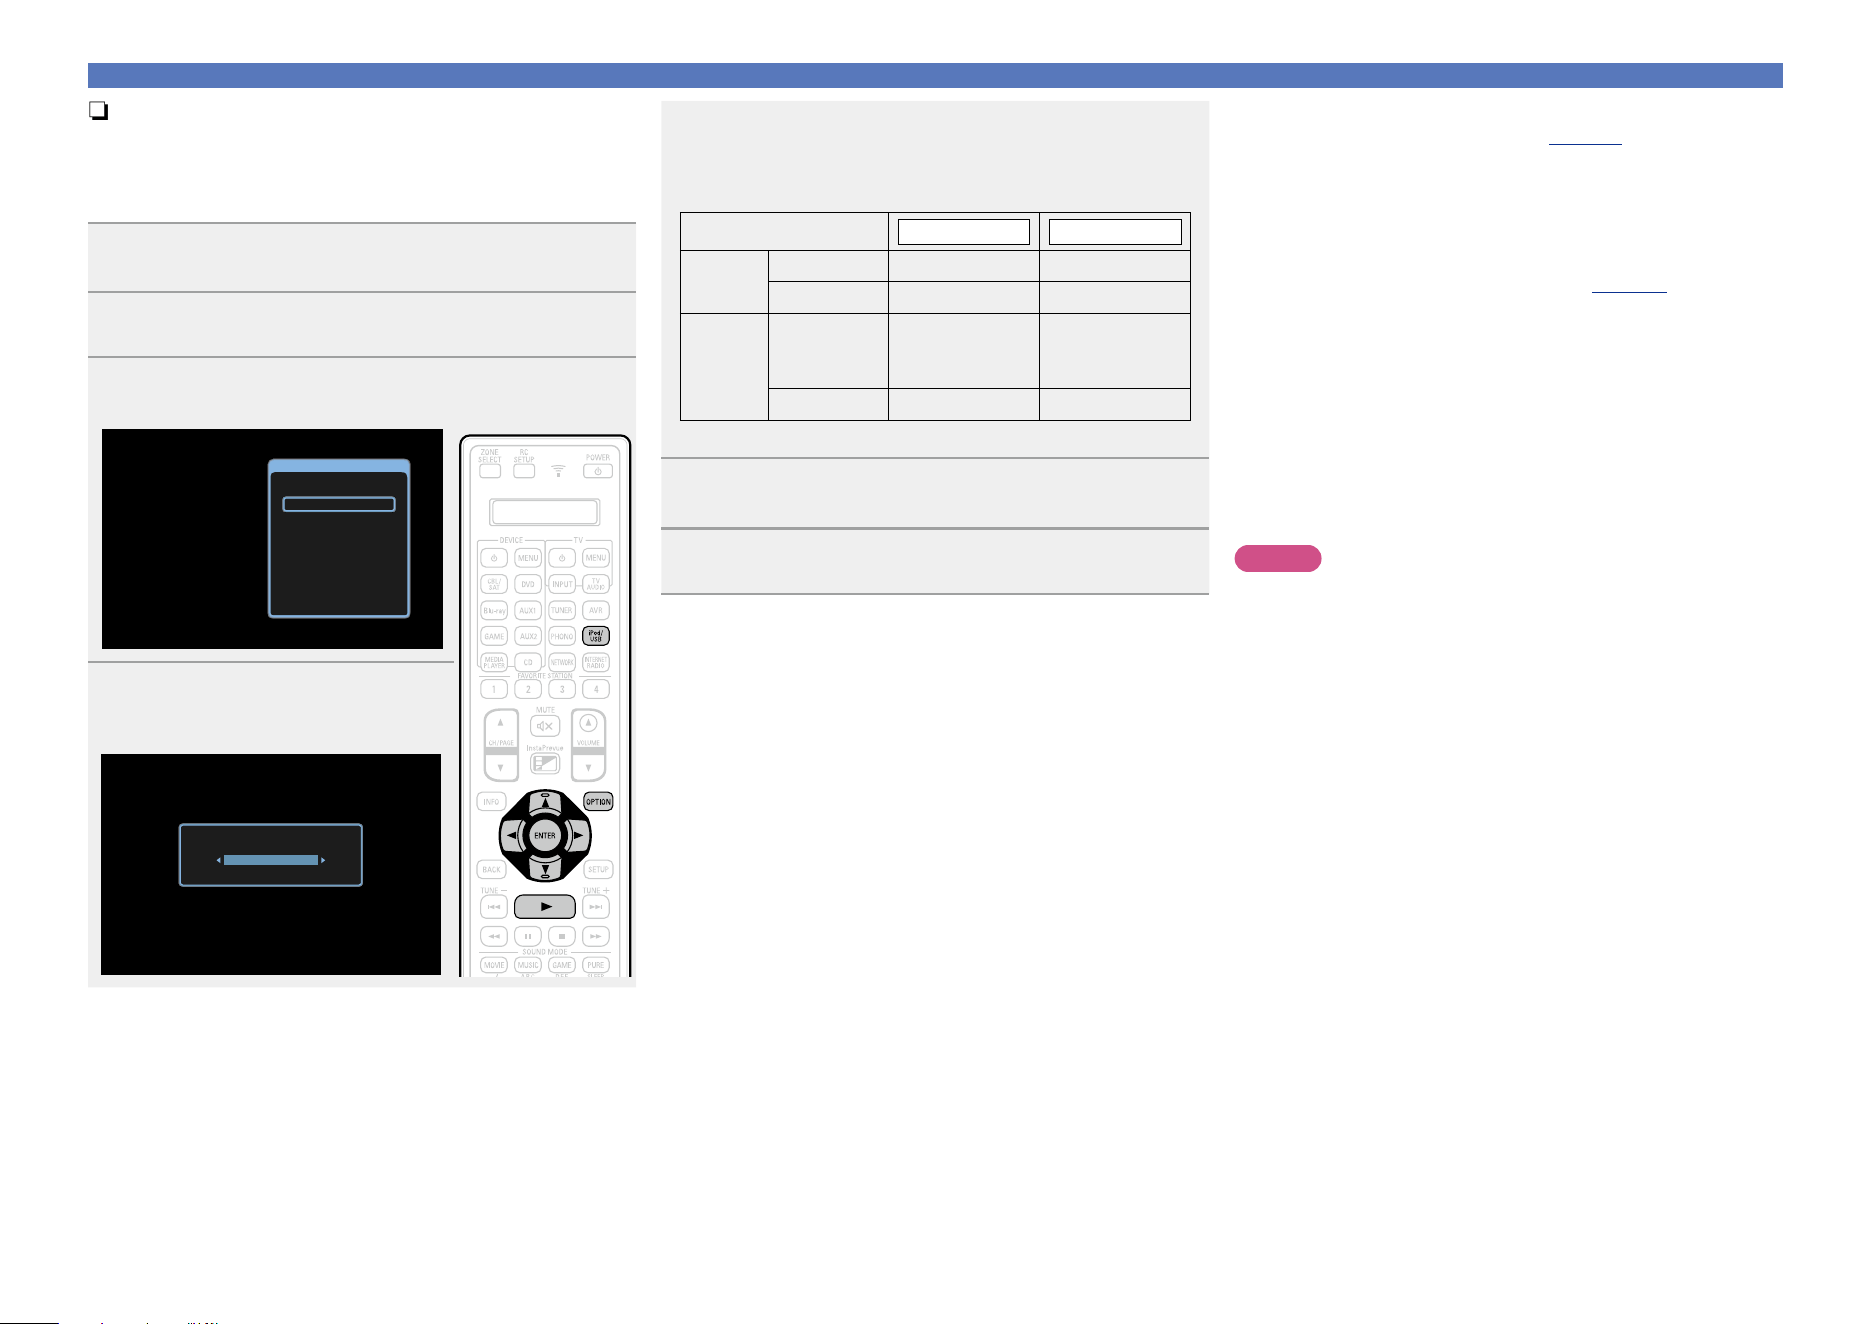
45
Playing an iPod
n Setting operation mode (iPod Browse Mode)
In this mode, various lists and screens during playback on iPod are
displayed on the TV screen.
This section describes the steps up to playing back tracks on iPod
in “On-Screen”.
1
Press iPod/USB to switch the input source to “iPod/
USB”.
2
Press OPTION.
The option menu screen is displayed.
3
Select “iPod Browse Mode”, then press ENTER.
The “iPod Browse Mode” screen is displayed.
Option
USB Select
iPod Browse Mode
Picture Mode
All Zone Stereo On
4
Use o p to select “On-Screen”,
then press ENTER.
The iPod screen is displayed.
iPod Browse Mode
On-Screen
•English letters, numbers and certain symbols are displayed.
Incompatible characters are displayed as “.” (period).
•Operations available for “On-Screen” and “From iPod” are listed
below.
Display mode
From iPod On-Screen
Playable
files
Music file
P P
Video file
z
Active
buttons
Remote
control unit
(This unit)
P P
iPod
P
z Only the sound is played.
5
Use ui to select the item, then press ENTER or p to
select the le to be played.
6
Press ENTER, p or 1.
Playback starts.
n Adjusting the sound quality (Restorer)
Make this setting at “Restorer” (vpage124) in the menu.
You can use the “Restorer” function to restore to a state close
to the audio before compression while correcting the bass feel to
enjoy a richer playback experience. The default setting is “Mode
3 (Low)”.
n Changing the screen display duration
Make this setting at “Now Playing” (vpage133) in the menu.
The default setting is “Always On”.
When “Auto Off” is set, the on-screen display is turned off 30
seconds after an operation.
Press uio p while the display is off to return to the original
screen.
n Switching the screen display
Press STATUS on this unit during playback with “iPod Browse
Mode” set to “On-Screen”.
The display switches between track title, artist name, and album
title etc. each time the button is pressed.
NOTE
•Depending on the type of iPod and the software version, some
functions may not operate.
•Note that DENON will accept no responsibility whatsoever for any
problems arising with the data on an iPod when using this unit in
conjunction with the iPod.
Basic version
Advanced version
Informations
Basic version
DVD
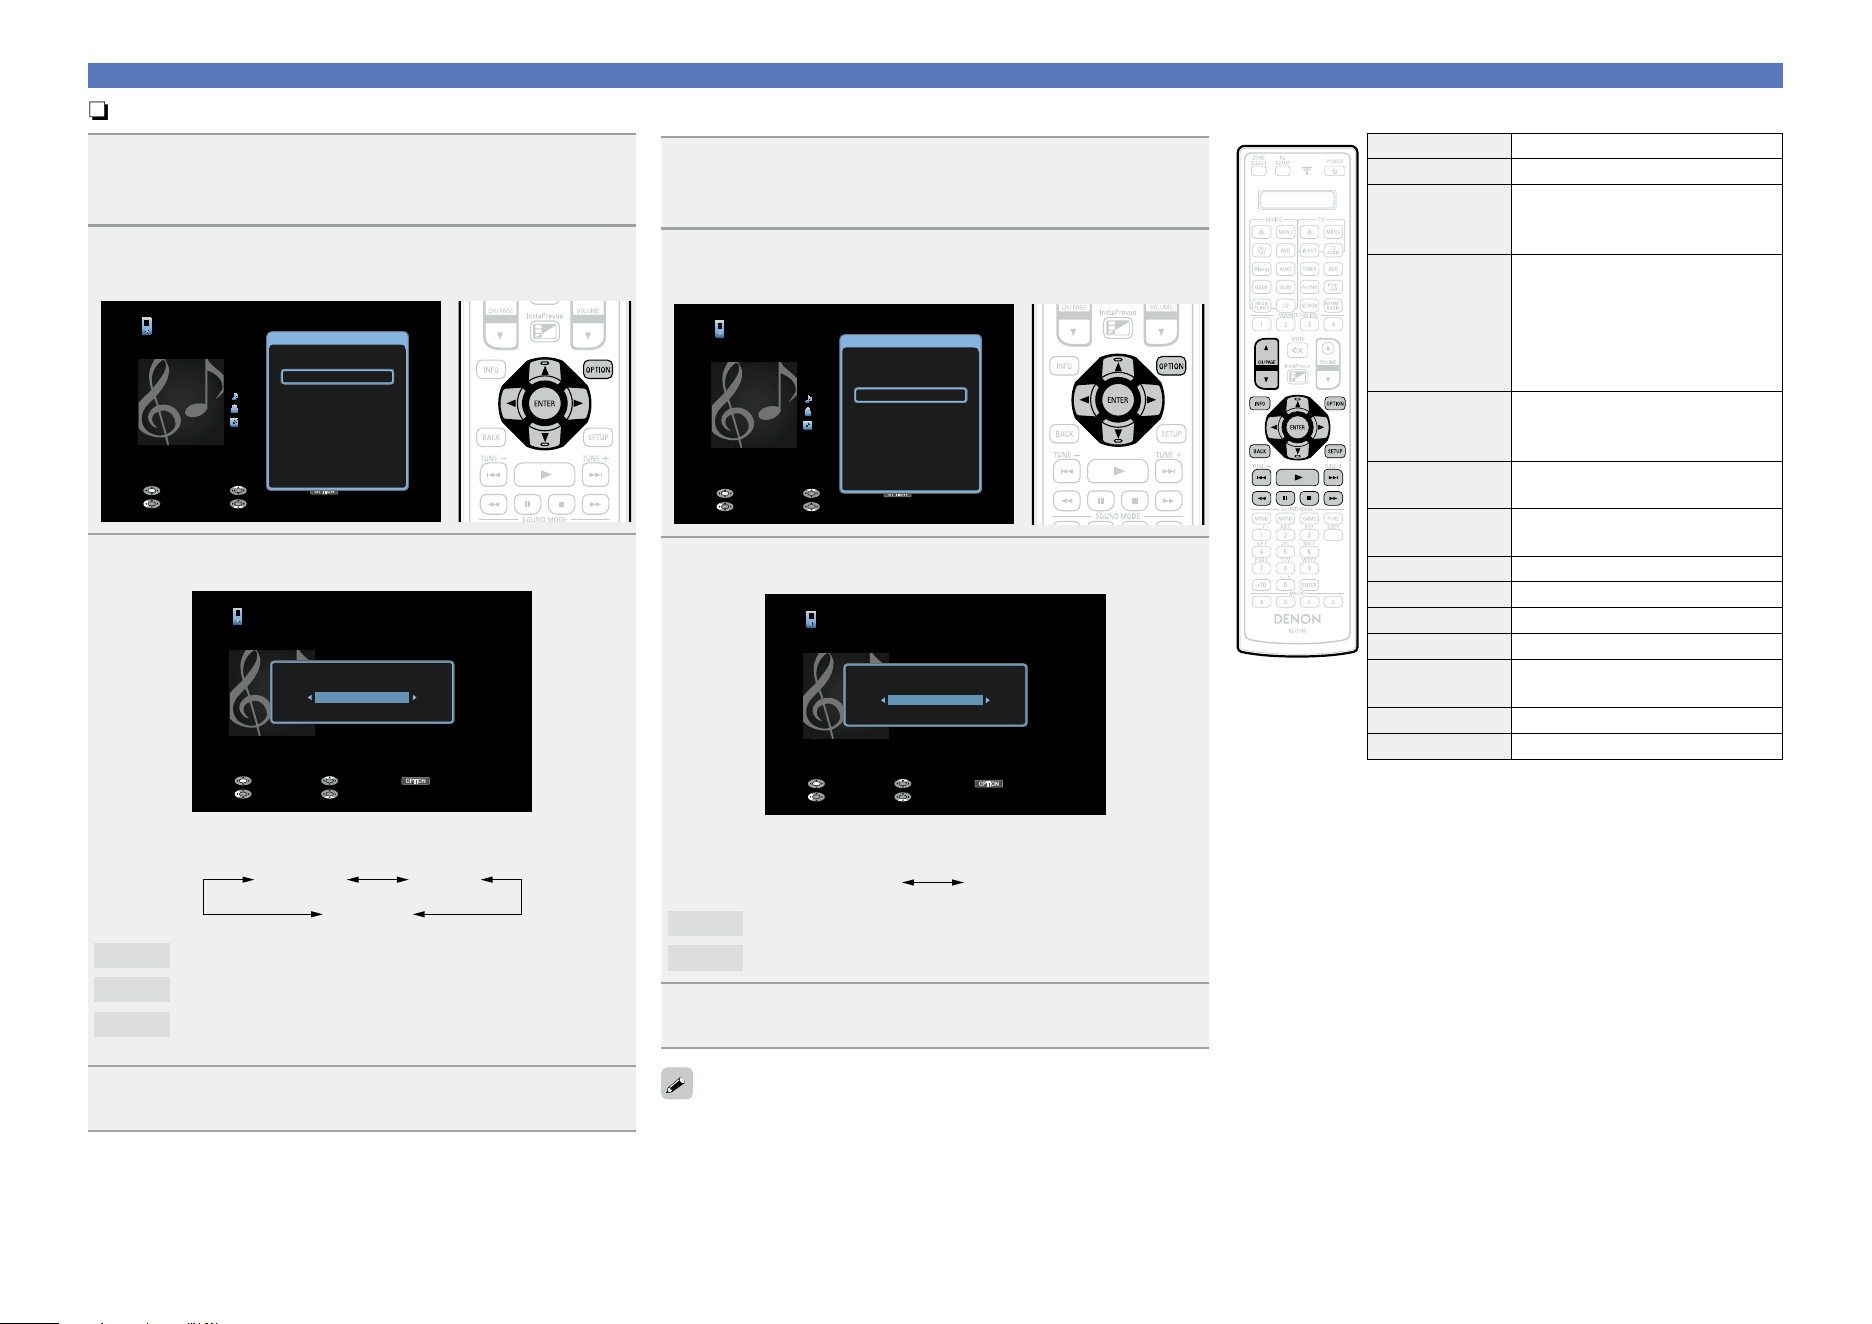
46
Playing an iPod
n Performing repeat playback (Repeat)
1
Press OPTION with “iPod Browse Mode” set to
“On-Screen”.
The option menu screen is displayed.
2
Use ui to select “Repeat”, then press ENTER.
OPTION
iPod
Title
Now Playing
Artist
Album
00:06 100%
Previous OptionPause
NextBack
Option
USB Select
Repeat
Random
iPod Browse Mode
Picture Mode
All Zone Stereo On
3
Use o p to select repeat playback mode.
OPTION
iPod
Title
Now Playing
Artist
Album
00:06 100%
Previous OptionPause
NextBack
Repeat
All
•Each time o p is pressed, the setting is changed as shown below.
Off One
All
Off
Repeat playback mode is canceled.
One
A file being played is played repeatedly.
All
All files in the folder currently being played are played
repeatedly.
4
Press ENTER.
The display returns to the playback screen.
n Performing random playback (Random)
1
Press OPTION with “iPod Browse Mode” set to
“On-Screen”.
The option menu screen is displayed.
2
Use ui to select “Random”, then press ENTER.
OPTION
iPod
Title
Now Playing
Artist
Album
00:06 100%
Previous OptionPause
NextBack
Option
USB Select
Repeat
Random
iPod Browse Mode
Picture Mode
All Zone Stereo On
3
Use o p to select random playback mode.
OPTION
iPod
Title
Now Playing
Artist
Album
00:06 100%
Previous OptionPause
NextBack
Random
Off
•Each time o p is pressed, the setting is changed as shown below.
Off On
Off
Disable random playback.
On
Enable random playback.
4
Press ENTER.
The display returns to the playback screen.
The random playback randomly selects a track to play back from all
tracks every time a track ends. Therefore, the same track may be
played back consecutively.
n iPod operation buttons
Operation buttons Function
CH/PAGE df
Page search
INFO
Display of information such as the
source name, volume, and sound mode
name
OPTION
USB Select /
Repeat playback /
Random playback /
iPod Browse Mode switching /
Picture Mode /
All Zone Stereo
uio p
Cursor operation /
Auto search (cue, ui) /
Manual search (Press and hold, ui)
ENTER
(Press and release)
Enter
ENTER
(Press and hold)
Stop
BACK Return
SETUP Setup menu
8 9
Auto search (cue)
1
Playback / Pause
6 7
(Press and hold)
Manual search
(fast-reverse/fast-forward)
3
Pause
2
Stop
Basic version
Advanced version
Informations
Basic version
DVD
47
Playing a USB memory device
Playing back music or still picture (JPEG) files recorded on a USB memory device.
Important information
•Only USB memory devices conforming to mass storage class and MTP (Media Transfer Protocol)
standards can be played on this unit.
•This unit is compatible with USB memory devices in “FAT16” or “FAT32” format.
•This unit is compatible with MP3 files conforming to “MPEG-1 Audio Layer-3” standards.
•File types that this unit can play back and specifications are shown below.
GSupported file typesH
Supported file types USB memory devices
z1
WMA (Windows Media Audio)
P
z2
MP3 (MPEG-1 Audio Layer-3)
P
WAV
P
MPEG-4 AAC
P
z3
FLAC (Free Lossless Audio Codec)
P
JPEG
P
ALAC (Apple Lossless Audio Codec)
P
z1 USB memory device
•This unit is compatible with MP3 ID3-Tag (Ver.2) standard.
•This unit can show the artwork that was embedded by using MP3 ID3-Tag Ver.2.3 or 2.4.
•This unit is compatible with WMA META tags.
•If the image size (pixels) of an album artwork exceeds 500 × 500 (WMA/MP3/WAV/FLAC) or 349 ×
349 (MPEG-4 AAC), then music may not be played back properly.
•WAV format Quantization bit length: 16 or 24 bits.
•FLAC format Quantization bit length: 16 or 24 bits.
z2 Copyright-protected files can be played on certain portable players compatible with MTP.
z3 Only files that are not protected by copyright can be played on this unit.
Content downloaded from pay sites on the Internet are copyright protected. Also, files encoded in
WMA format when ripped from a CD, etc. on a computer may be copyright protected, depending on
the computer’s settings.
NOTE
File types that this unit does not support are not displayed.
GCompatible formatsH
Sampling frequency Bit rate Extension
WMA (Windows Media Audio) 32/44.1/48 kHz 48 – 192 kbps .wma
MP3 (MPEG-1 Audio Layer-3) 32/44.1/48 kHz 32 – 320 kbps .mp3
WAV
32/44.1/48/88.2/96/
176.4/192 kHz
– .wav
MPEG-4 AAC 32/44.1/48 kHz 16 – 320 kbps
.aac/
.m4a/
.mp4
FLAC (Free Lossless Audio Codec)
32/44.1/48/88.2/96/
176.4/192 kHz
– .flac
ALAC (Apple Lossless Audio Codec)
z
32/44.1/48/88.2/96 kHz – .m4a
z Copyright [2012] [D&M Holdings. Inc.]
Licensed under the Apache License, Version 2.0 (the “License”); you may not use this file except in
compliance with the License. You may obtain a copy of the License at http://www.apache.org/licenses/
LICENSE-2.0
n Maximum Number of Playable Files and Folder
The limits on the number of folders and files that can be displayed by this unit are as follows.
Media
Item
USB memory devices
Memory capacity FAT16 : 2 GB, FAT32 : 2 TB
Number of folder directory levels
z1
8 levels
Number of folders 500
Number of files
z2
5000
z1 The limited number includes the root folder.
z2 The allowable number of files may differ according to the USB memory device capacity and the file
size.
Basic version
Advanced version
Informations
Basic version
DVD
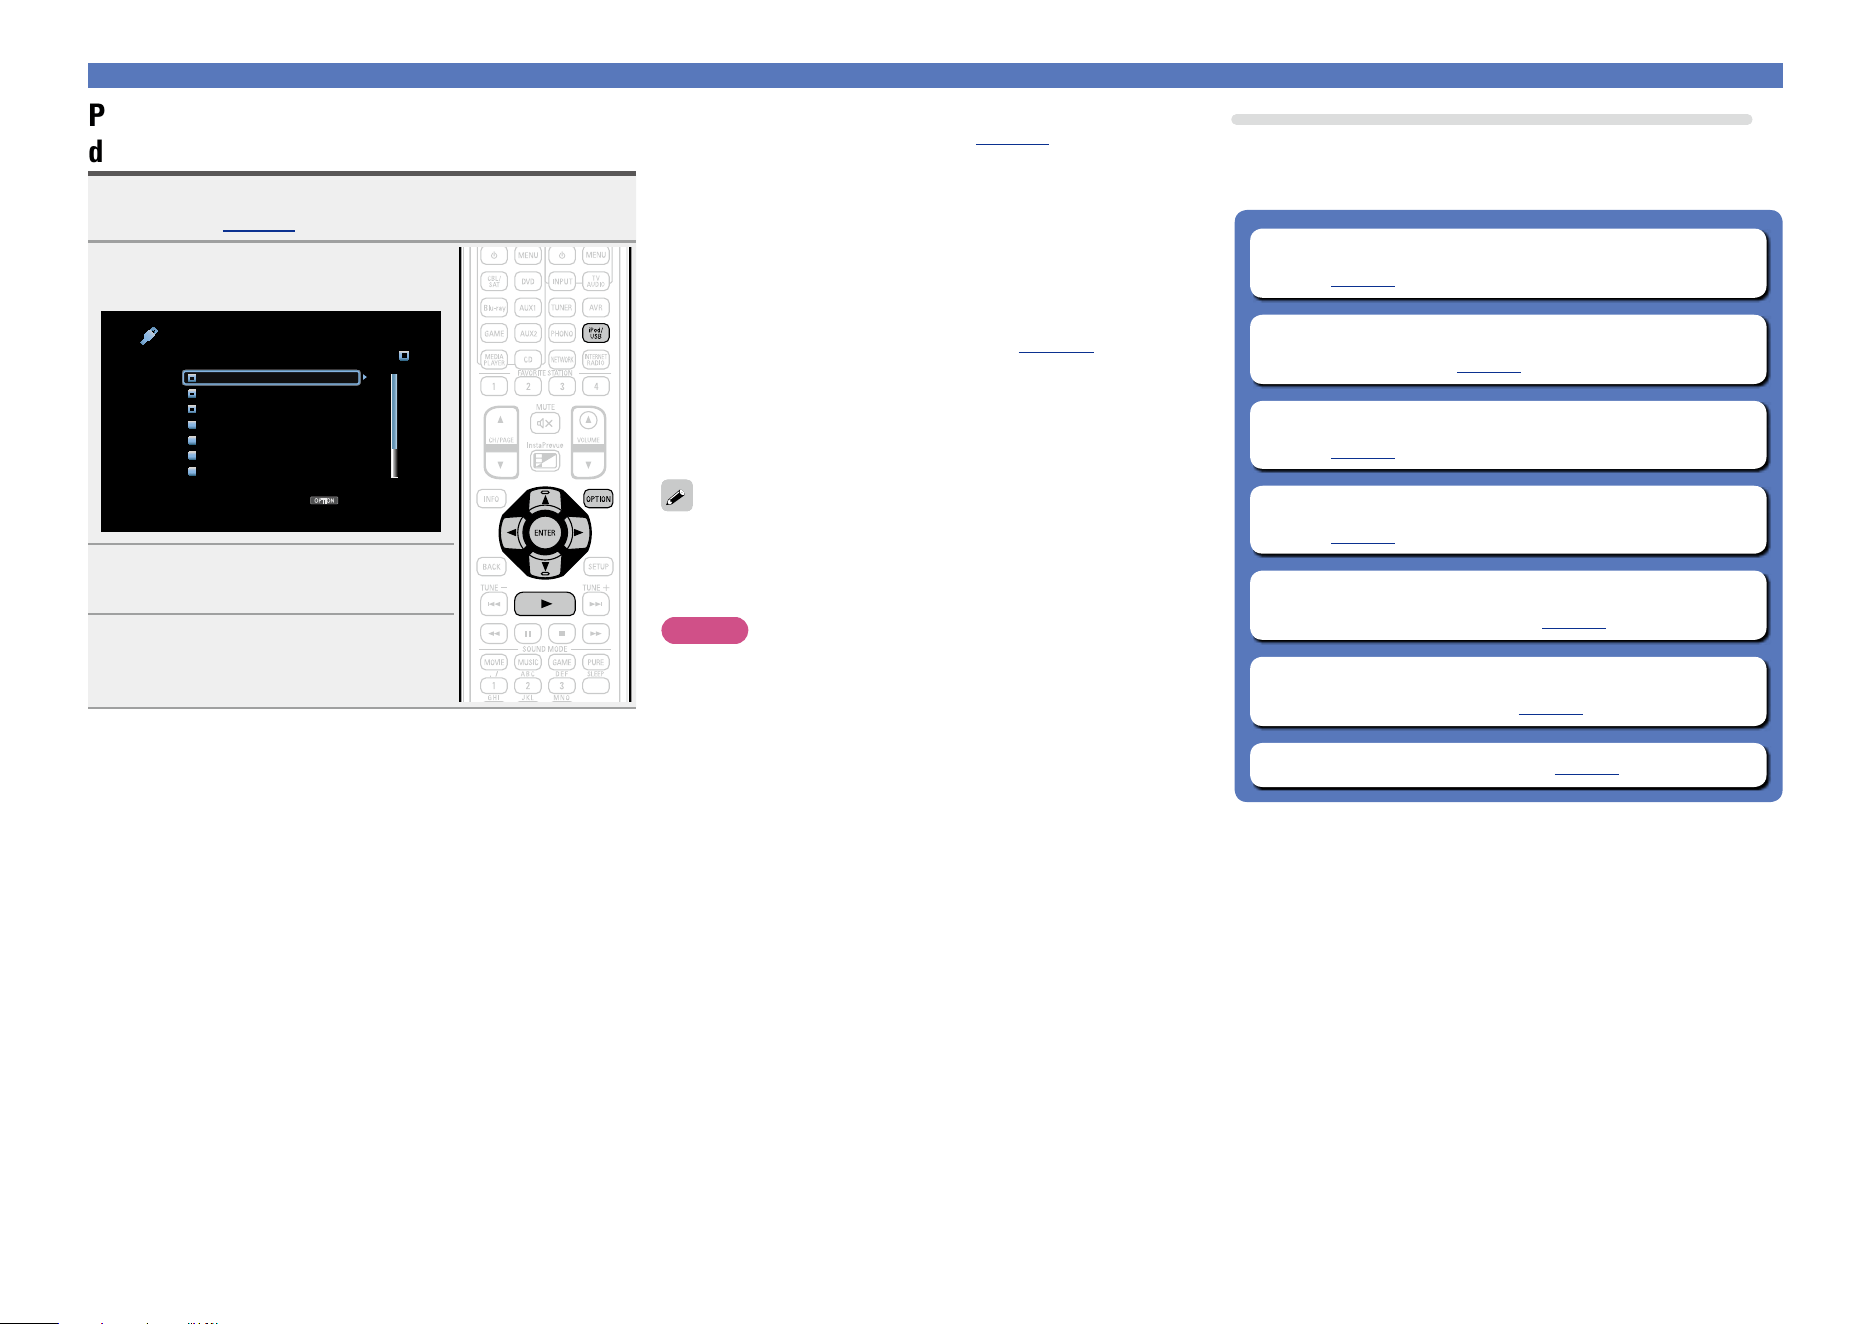
48
Playing files stored on USB memory
devices
1
Connect the USB memory device to the iPod/USB
port (vpage 23).
2
Press iPod/USB to switch the
input source to “iPod/USB”.
D&M1
D&M2
D&M3
Music1
Music2
Music3
Music4
OPTION
USB [1/9]
Option
3
Use ui to select the search item
or folder, then press ENTER or p.
4
Use ui to select the le, then
press ENTER, p or 1.
Playback starts.
Playing a USB memory device
n Adjusting the sound quality (Restorer)
Make this setting at “Restorer” (vpage124) in the menu.
You can use the “Restorer” function to restore to a state close
to the audio before compression while correcting the bass feel to
enjoy a richer playback experience. The default setting is “Mode
3 (Low)”.
n Going back to the previous screen
Press o or BACK.
n Changing the screen display duration
Make this setting at “Now Playing” (vpage133) in the menu.
The default setting is “Always On”.
When “Auto Off” is set, the on-screen display is turned off 30
seconds after an operation.
Press uio p while the display is off to return to the original
screen.
•When an MP3 music file includes album art data, the album art can
be displayed while playing the file.
•If the USB memory device is divided into multiple partitions, only the
first partition is played back.
NOTE
•Note that DENON will accept no responsibility whatsoever for any
problems arising with the data on a USB memory device when using
this unit in conjunction with the USB memory device.
•USB memory devices will not work via a USB hub.
•DENON does not guarantee that all USB memory devices will
operate or be supplied power. When using a USB portable hard disk
that can draw power from an AC adapter, we recommend using the
AC adapter.
•It is not possible to connect and use a computer via the iPod/USB
port of this unit using a USB cable.
Operations available through the OPTION button
Press the OPTION button to display a menu of functions that can be
used on the TV screen. Select the function you want to use from this
menu. You can easily find and use the desired function.
n Setting the USB port to use (USB Select)
(vpage76)
n Searching content with keywords
(Text Search) (vpage76)
n Performing repeat playback (Repeat)
(vpage77)
n Performing random playback (Random)
(vpage77)
n Playing back music and a favorite picture at the
same time (Slideshow) (vpage79)
n Playing back still images in sequential order
(Slideshow Interval) (vpage79)
n All Zone Stereo function (vpage80)
Basic version
Advanced version
Informations
Basic version
DVD
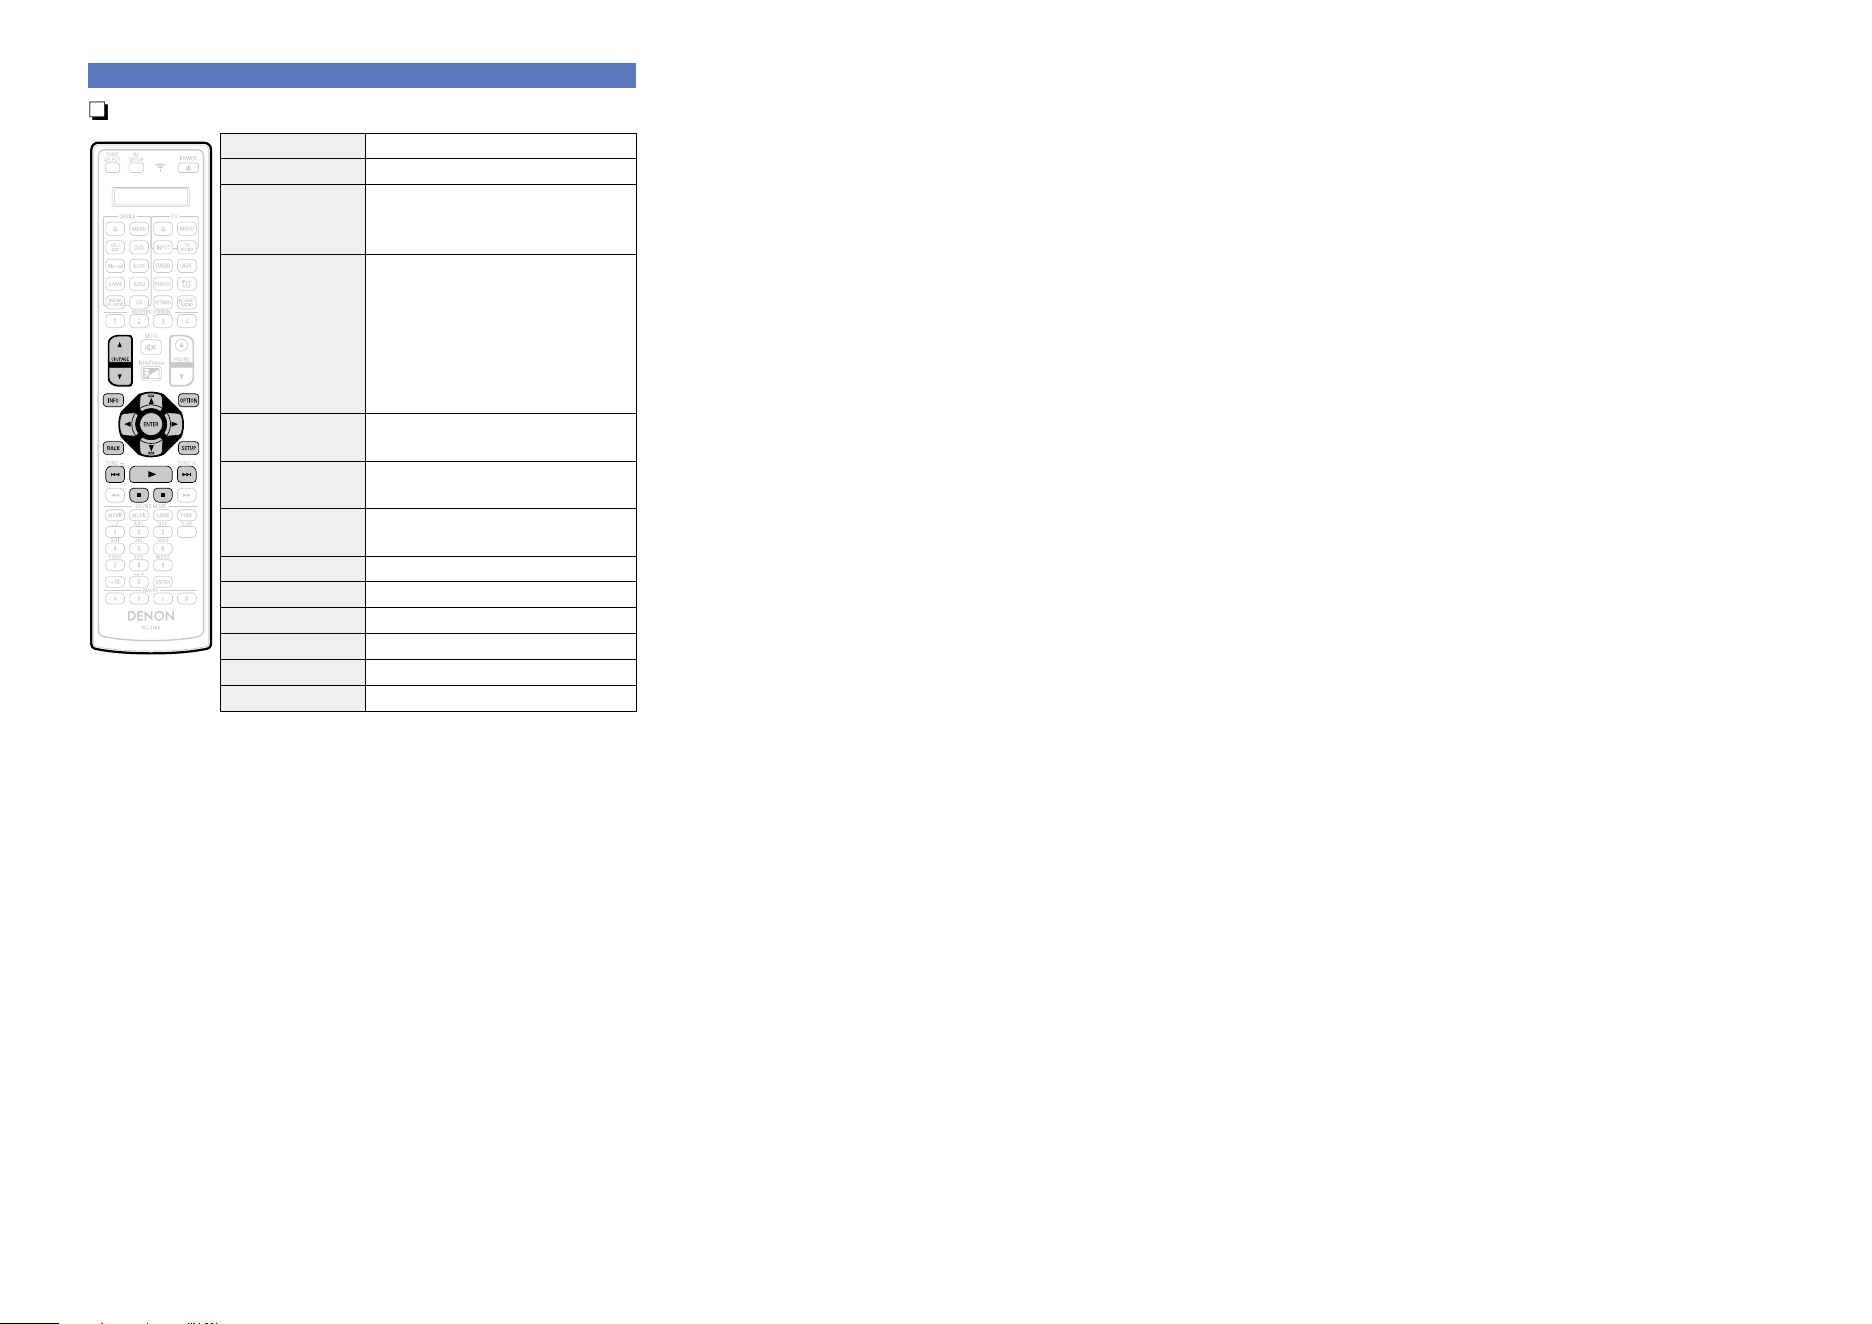
49
Playing a USB memory device
n USB memory device operation buttons
Operation buttons Function
CH/PAGE df
Page search
INFO
Display of information such as the
source name, volume, and sound mode
name
OPTION
USB Select /
Text Search /
Repeat playback /
Random playback /
Slideshow /
Slideshow Interval /
All Zone Stereo
uio p
Cursor operation /
Auto search (cue, ui)
ENTER
(Press and release)
Enter
ENTER
(Press and hold)
Stop
BACK Return
SETUP Setup menu
8 9
Auto search (cue)
1
Playback / Pause
3
Pause
2
Stop
Basic version
Advanced version
Informations
Basic version
DVD
50
Listening to HDRadio stations
For antenna connections, see “Connecting an HDRadio receiver” (vpage27).
Important information
n Using the HDRadio™ receiver
HDRadio stations offer higher sound quality than conventional FM/ AM broadcasts. It is also possible to
receive data services and select broadcasts from among up to eight multicast programs.
HDRadio Technology provides higher quality sound than conventional broadcasts and allows reception
of data services.
•Digital, CD-quality sound. HDRadio Technology enables local radio stations to broadcast a clean digital
signal. AM sounds like today’s FM and FM sounds like a CD.
•Program Service Data: Contributes to the superior user experience of HDRadio Technology. Presents
song name, artist, station IDs, and other relevant data streams.
•Adjacent to traditional main stations are extra local FM channels. These HD2/HD3 Channels provide
new, original music as well as deep cuts into traditional genre.
HDRadio Technology manufactured under license from iBiquity Digital Corporation. U.S. and Foreign
Patents. HD Radio™ and the HD, HD Radio, and “Arc” logos are proprietary trademarks of iBiquity
Digital Corp.
For detailed information on HDRadio Technology, please go to “www.hdradio.com/”.
How to tune in
The modes for receiving FM broadcasts consists of “Auto” mode that automatically searches available
broadcast stations and “Manual” mode that lets you tune in using buttons to change the frequency. The
default setting is “Auto”. You can also use “Direct Tune” to tune in by entering the frequency directly.
In “Auto” mode, you cannot tune in to radio stations if the reception is not good. If this is the case, then
use the “Manual” mode or “Direct Tune” to tune in.
Basic version
Advanced version
Informations
Basic version
DVD
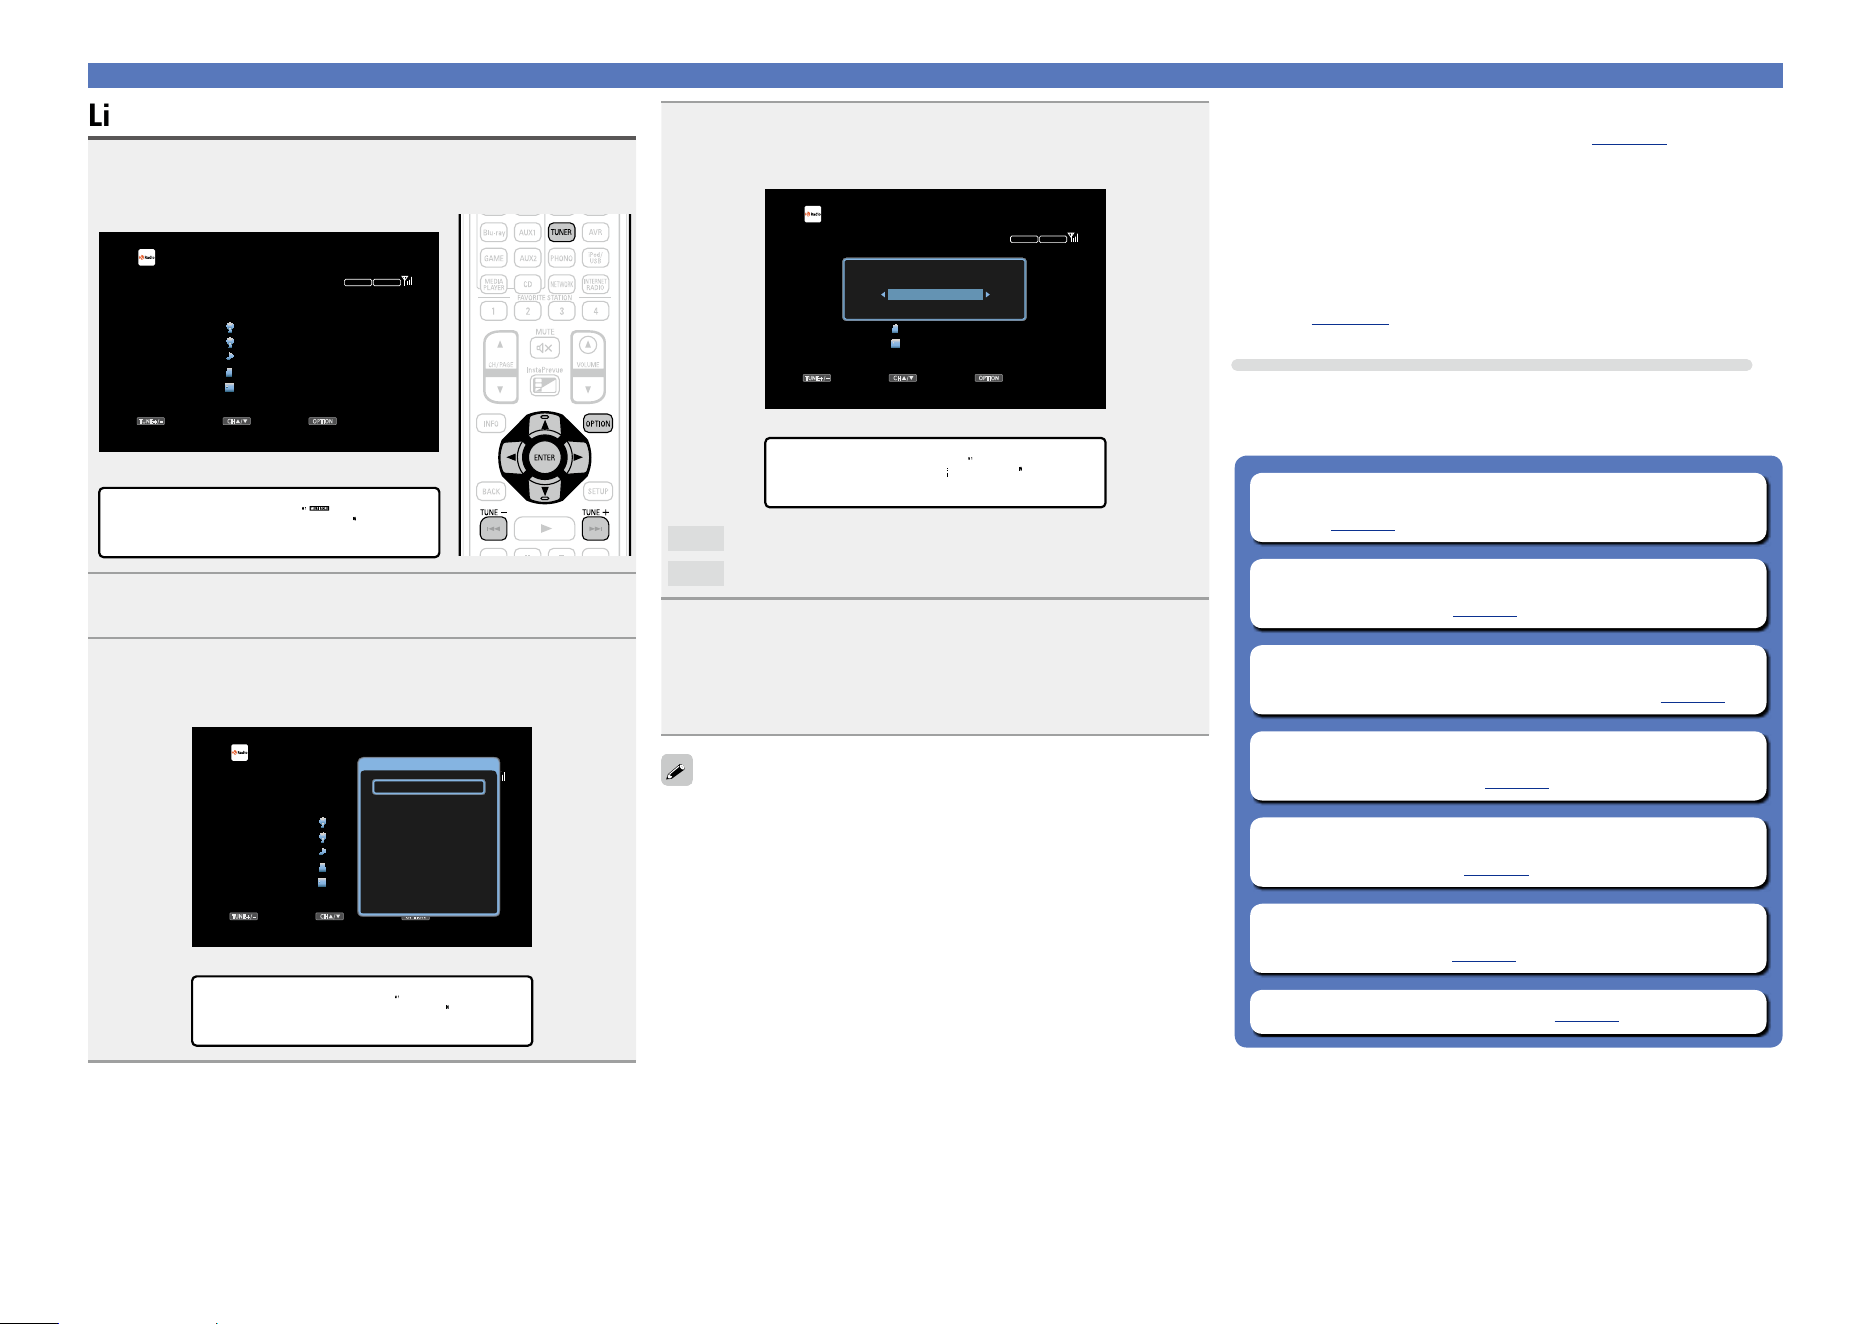
51
Listening to HDRadio stations
Listening to HDRadio stations
1
Press TUNER to switch the input source to
“HD Radio”.
GTV ScreenH
TUNE+/-
STEREO
HD-AUTO
CH / OPTION
HD Radio
CH 1
FM 87.50MHz
Now Playing
Tune Preset Option
GDisplay of this unitH
01 FM 87.50MHz
2
Press OPTION.
The option menu screen is displayed.
3
Use ui to select “FM/AM”, then press ENTER.
The Band screen is displayed.
GTV ScreenH
TUNE+/-
STEREO
HD-AUTO
CH / OPTION
HD Radio
CH 1
FM 87.50MHz
Now Playing
Tune Preset Option
Option
FM/AM
Direct Tune
Preset Memory
Tune Mode
Auto Preset Memory
Preset Name
Preset Skip
All Zone Stereo On
GDisplay of this unitH
*OPTION
FM/AM
4
Use o p to select “FM” or “AM”, then press ENTER.
GTV ScreenH
TUNE+/-
STEREO
HD-AUTO
CH / OPTION
HD Radio
CH 1
FM 87.50MHz
Now Playing
Tune Preset Option
FM/AM
FM
GDisplay of this unitH
FM/AM • FM –
FM
When listening to an FM broadcast.
AM
When listening to an AM broadcast.
5
Press TUNE + or TUNE – to select the station you
want to hear.
Scanning is performed until it finds an available radio station.
When it finds a radio station, it stops the scan automatically
and tunes in.
•If the desired station cannot be tuned in with auto tuning, tune it in
manually.
•When tuning in stations manually, press and hold TUNE + or TUNE
–
to change frequencies continuously.
n Changing the screen display duration
Make this setting at “Now Playing” (vpage133) in the menu.
The default setting is “Always On”.
When “Auto Off” is set, the on-screen display is turned off 30
seconds after an operation.
Press uio p while the display is off to return to the original
screen.
n Adding to the FAVORITE STATION button
(vpage78)
Operations available through the OPTION button
Press the OPTION button to display a menu of functions that can be
used on the TV screen. Select the function you want to use from this
menu. You can easily find and use the desired function.
n Changing the tuning mode (Tune Mode)
(vpage52)
n Tuning in by entering the radio frequency
(Direct Tune) (vpage53)
n Tuning in to radio stations and presetting them
automatically (Auto Preset Memory) (vpage54)
n Presetting the current broadcast station
(Preset Memory) (vpage55)
n Specify a name for the preset broadcast station
(Preset Name) (vpage56)
n Skipping preset broadcast stations
(Preset Skip) (vpage57)
n All Zone Stereo function (vpage80)
Basic version
Advanced version
Informations
Basic version
v See overleaf
DVD
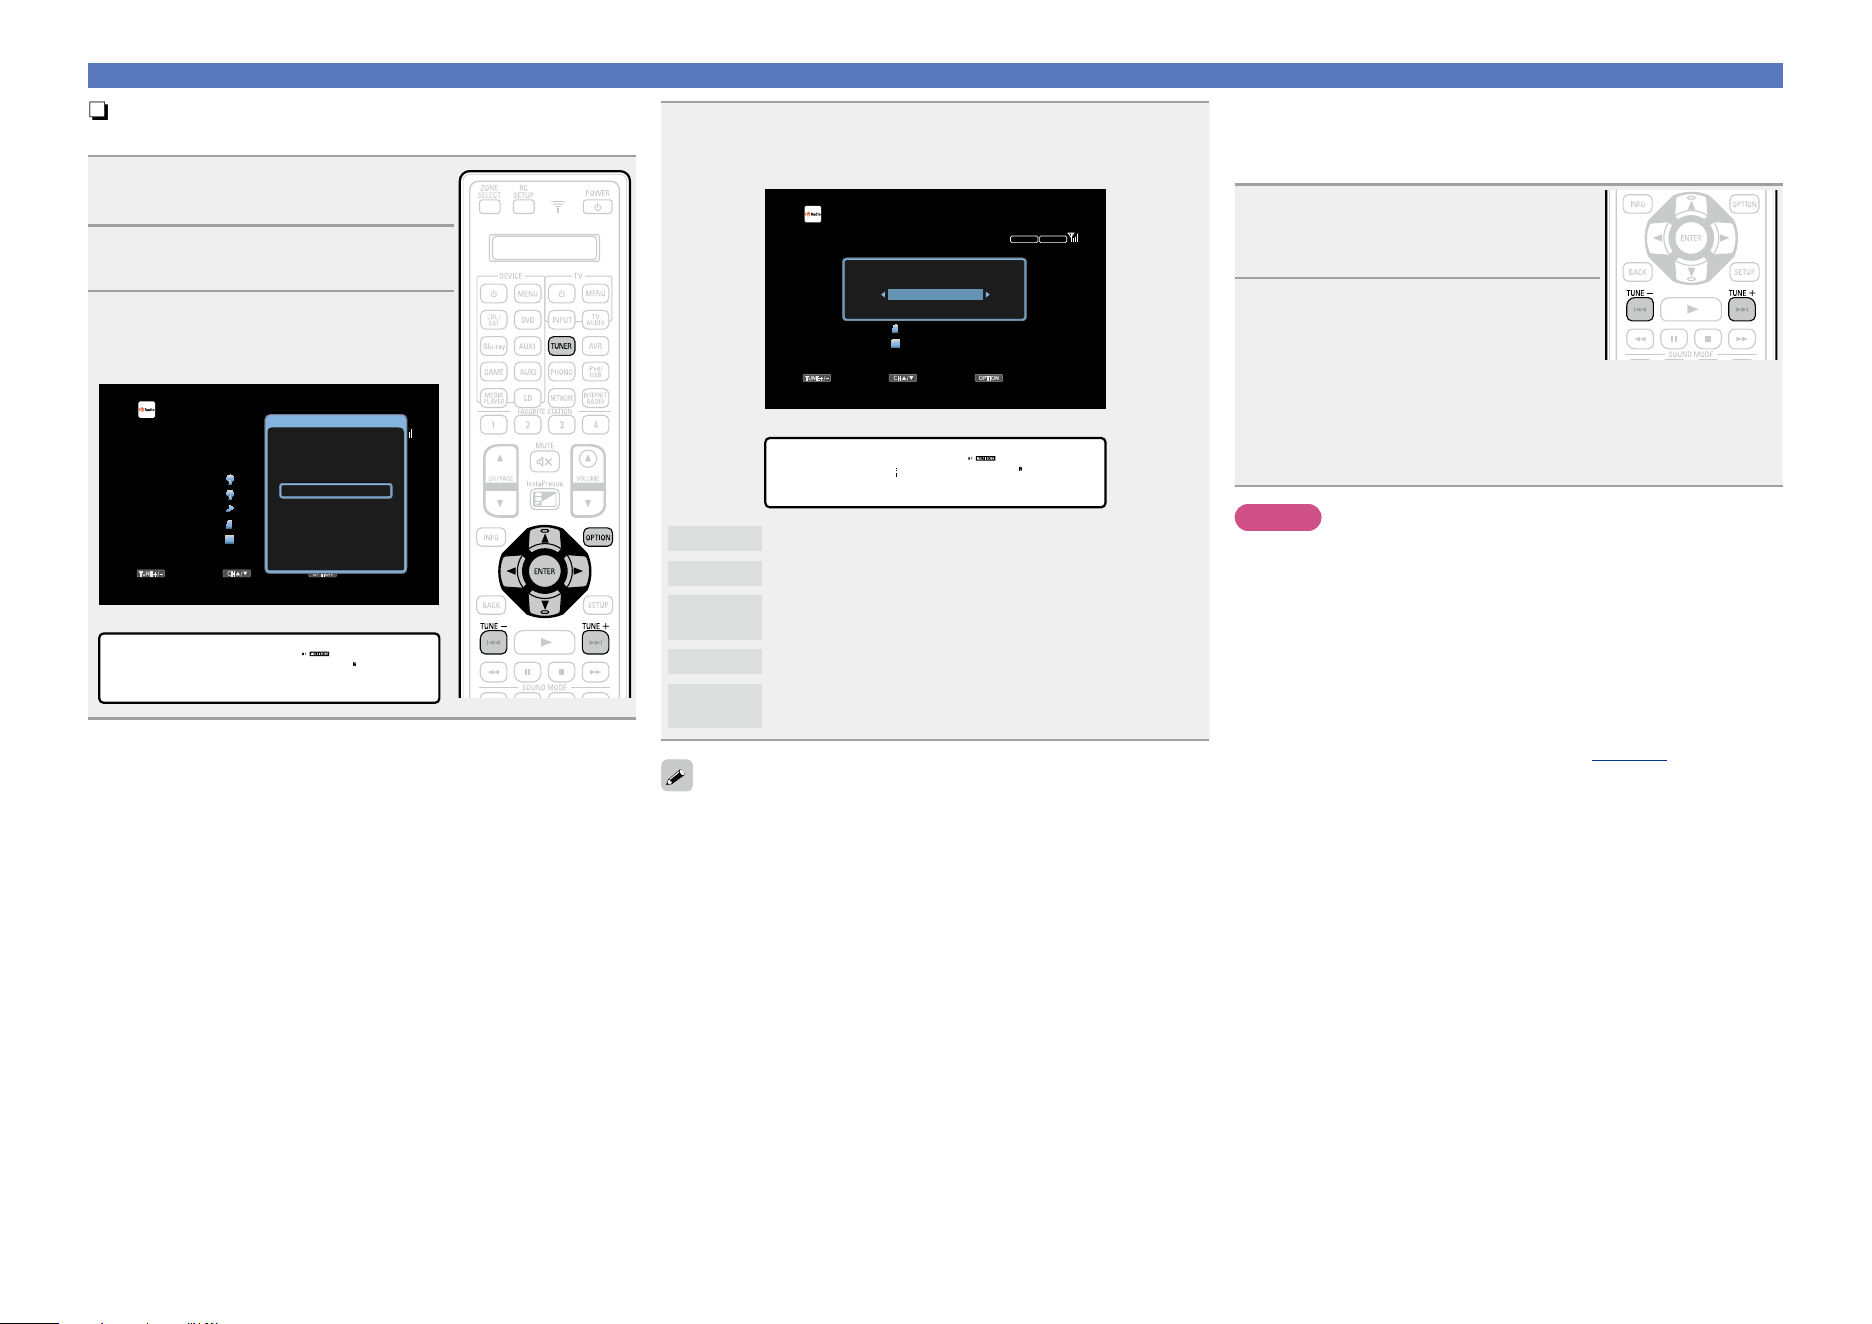
52
Listening to HDRadio stations
n Changing the tuning mode (Tune Mode)
You can change the mode for tuning into FM/AM broadcasts.
1
Press TUNER to switch the input
source to “HD Radio”.
2
Press OPTION.
The option menu screen is displayed.
3
Use ui to select “Tune Mode”,
then press ENTER.
GTV ScreenH
TUNE+/-
STEREO
HD-AUTO
CH / OPTION
HD Radio
CH 1
FM 87.50MHz
Now Playing
Tune Preset Option
Option
FM/AM
Direct Tune
Preset Memory
Tune Mode
Auto Preset Memory
Preset Name
Preset Skip
All Zone Stereo On
GDisplay of this unitH
*OPTION
Tune Mode
4
Use o p to select tuning mode, then press ENTER.
GTV ScreenH
TUNE+/-
STEREO
HD-AUTO
CH / OPTION
HD Radio
CH 1
FM 87.50MHz
Now Playing
Tune Preset Option
Tune Mode
Auto
GDisplay of this unitH
Mode
• Auto –
Auto
Automatically tune to the station.
HD-Auto
Automatically tune to the HDRadio station.
Analog-
Auto
Automatically tune to an analog station and analog
HDRadio station.
Manual
Manually tune to the station.
Analog-
Manual
Manually tune to an analog station and analog HDRadio
station.
When tuning in stations manually, press and hold TUNE + or TUNE– to
change frequencies continuously.
n Selecting audio programs
HDRadio Technology enables stations to broadcast multiple Audio
Program and data services on HD2 / HD3 / HD4 channels.
1
Select the tuning mode
(“HD-Auto”, “Auto” or
“Manual”).
2
Press TUNE + or TUNE – to tune
in the desired Multicast channel.
•If the station you are tuning in has multiple audio programs,“HD1”is
indicated on the display.
If it only has one audio program, “HD” is indicated.
•When the unit receives multicast channels, the multicast program
number (HD2) is displayed to the right of the station name.
NOTE
•This function is not available for AM HDRadio stations because they
cannot broadcast multicast channels.
•If digital audio data cannot be received after the station is selected,
or if the station signal is weak, the unit may not be able to receive
the multicast channels.
•If the station signal is weak, the digital audio of the multicast channel
may cut out.
n Changing the screen display duration
Make this setting at “Now Playing” (vpage133) in the menu.
The default setting is “Always On”.
When “Auto Off” is set, the on-screen display is turned off 30
seconds after an operation.
Press uio p while the display is off to return to the original
screen.
Basic version
Advanced version
Informations
Basic version
DVD
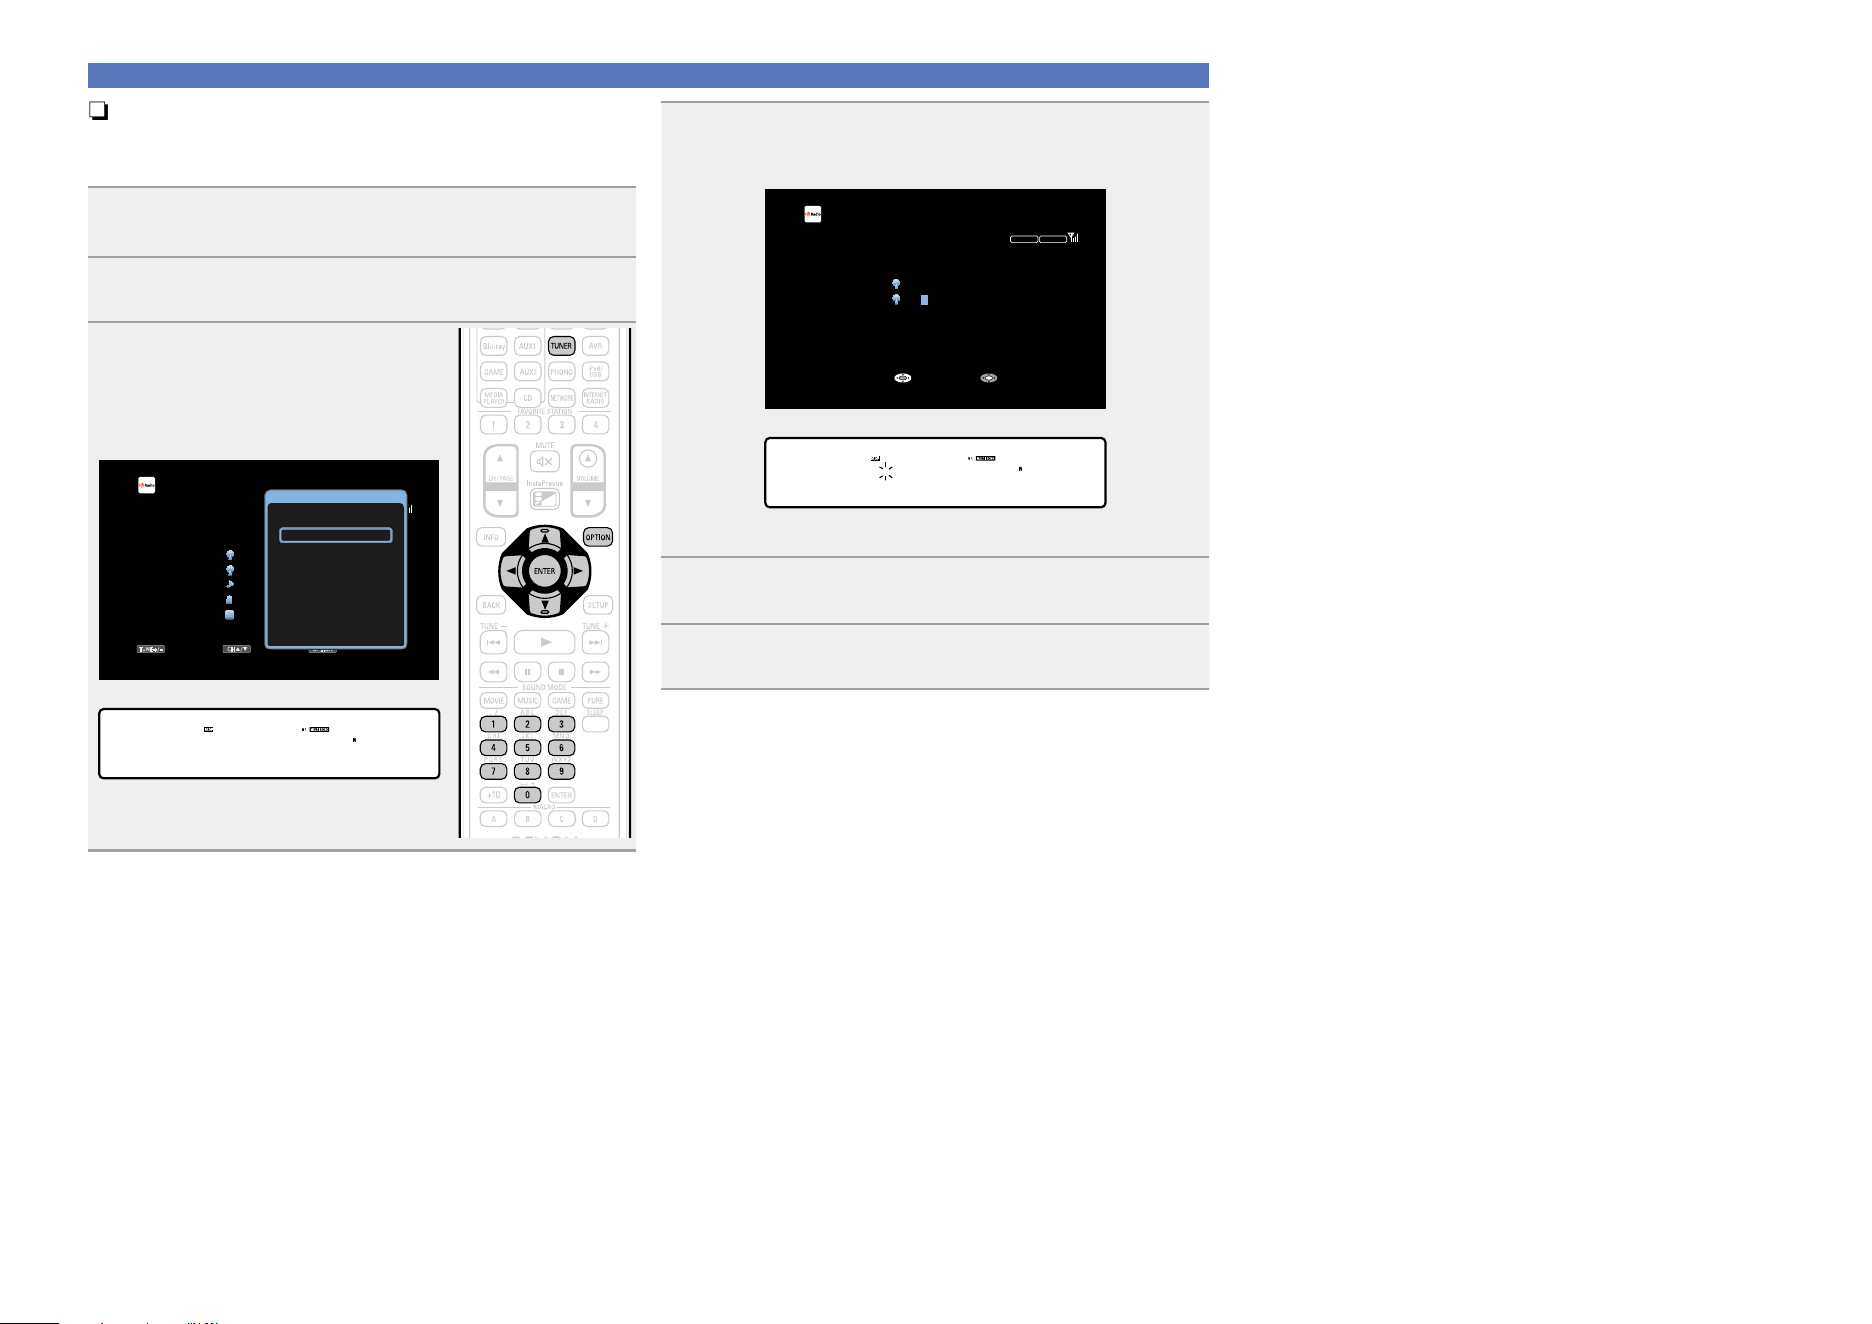
53
Listening to HDRadio stations
n Tuning in by entering the radio frequency
(Direct Tune)
You can enter the receiving frequency directly to tune in.
1
Press TUNER to switch the input source to
“HD Radio”.
2
Press OPTION.
The option menu screen is displayed.
3
Use ui to select “Direct Tune”,
then press ENTER.
The direct tuner screen is displayed and
“–” in the display flashes.
GTV ScreenH
TUNE+/-
STEREO
HD-AUTO
CH / OPTION
HD Radio
CH 1
FM 87.50MHz
Now Playing
Tune Preset Option
Option
FM/AM
Direct Tune
Preset Memory
Tune Mode
Auto Preset Memory
Preset Name
Preset Skip
All Zone Stereo On
GDisplay of this unitH
*OPTION
Direct Tune
4
Use ui or 0 – 9 to select a number and press p.
The screen that lets you enter the frequency is displayed.
GTV ScreenH
STEREO
HD-AUTO
FM ---.-MHz
DIRECT TUNE
Input Enter
HD Radio
Now Playing
GDisplay of this unitH
FM ---.- MHz
DIRECT TUNE
•If o is pressed, the immediately preceding input is cancelled.
5
Repeat step 4 and enter the frequency of the radio
station you want to hear.
6
When setting is completed, press ENTER.
The preset frequency is tuned in.
Basic version
Advanced version
Informations
Basic version
DVD
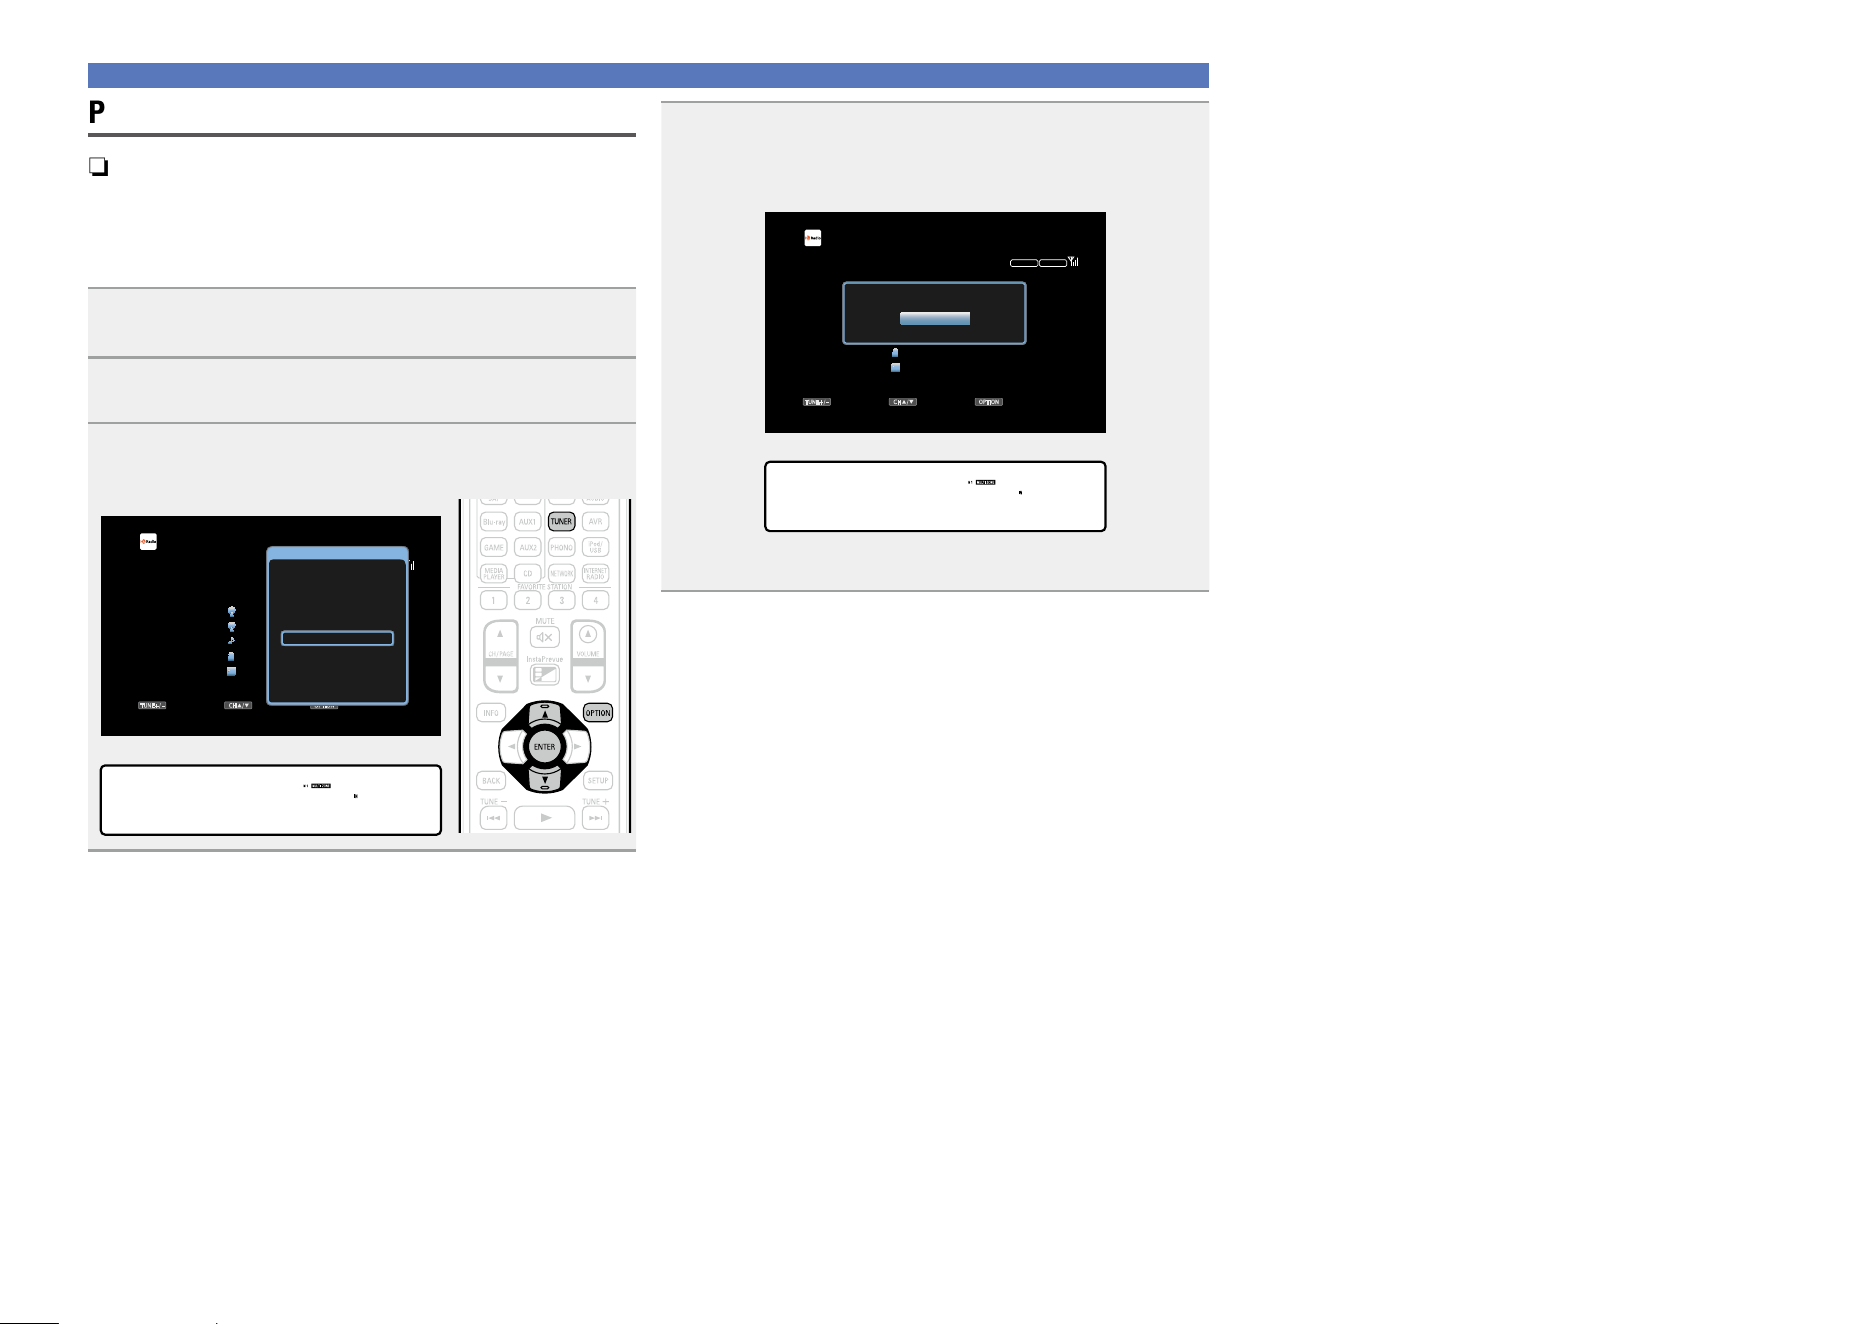
54
Presetting broadcast stations
n Tuning in to radio stations and presetting them
automatically (Auto Preset Memory)
Up to 56 stations can be preset.
If “Auto Preset Memory” is performed after performing “Preset
Memory”, the “Preset Memory” settings will be overwritten.
1
Press TUNER to switch the input source to
“HD Radio”.
2
Press OPTION.
The option menu screen is displayed.
3
Use ui to select “Auto Preset Memory”, then press
ENTER.
GTV ScreenH
TUNE+/-
STEREO
HD-AUTO
CH / OPTION
HD Radio
CH 1
FM 87.50MHz
Now Playing
Tune Preset Option
Option
FM/AM
Direct Tune
Preset Memory
Tune Mode
Auto Preset Memory
Preset Name
Preset Skip
All Zone Stereo On
GDisplay of this unitH
*OPTION
Auto Preset
Listening to HDRadio stations
4
Press ENTER.
The unit starts to tune in to radio stations automatically and
preset them.
GTV ScreenH
TUNE+/-
STEREO
HD-AUTO
CH / OPTION
HD Radio
CH 1
FM 87.50MHz
Now Playing
Tune Preset Option
Auto Preset Memory
Start
GDisplay of this unitH
Auto Preset
Start
•When presetting is completed, “Completed” is displayed for about
5 seconds and the option menu screen turns off.
Basic version
Advanced version
Informations
Basic version
v See overleaf
DVD
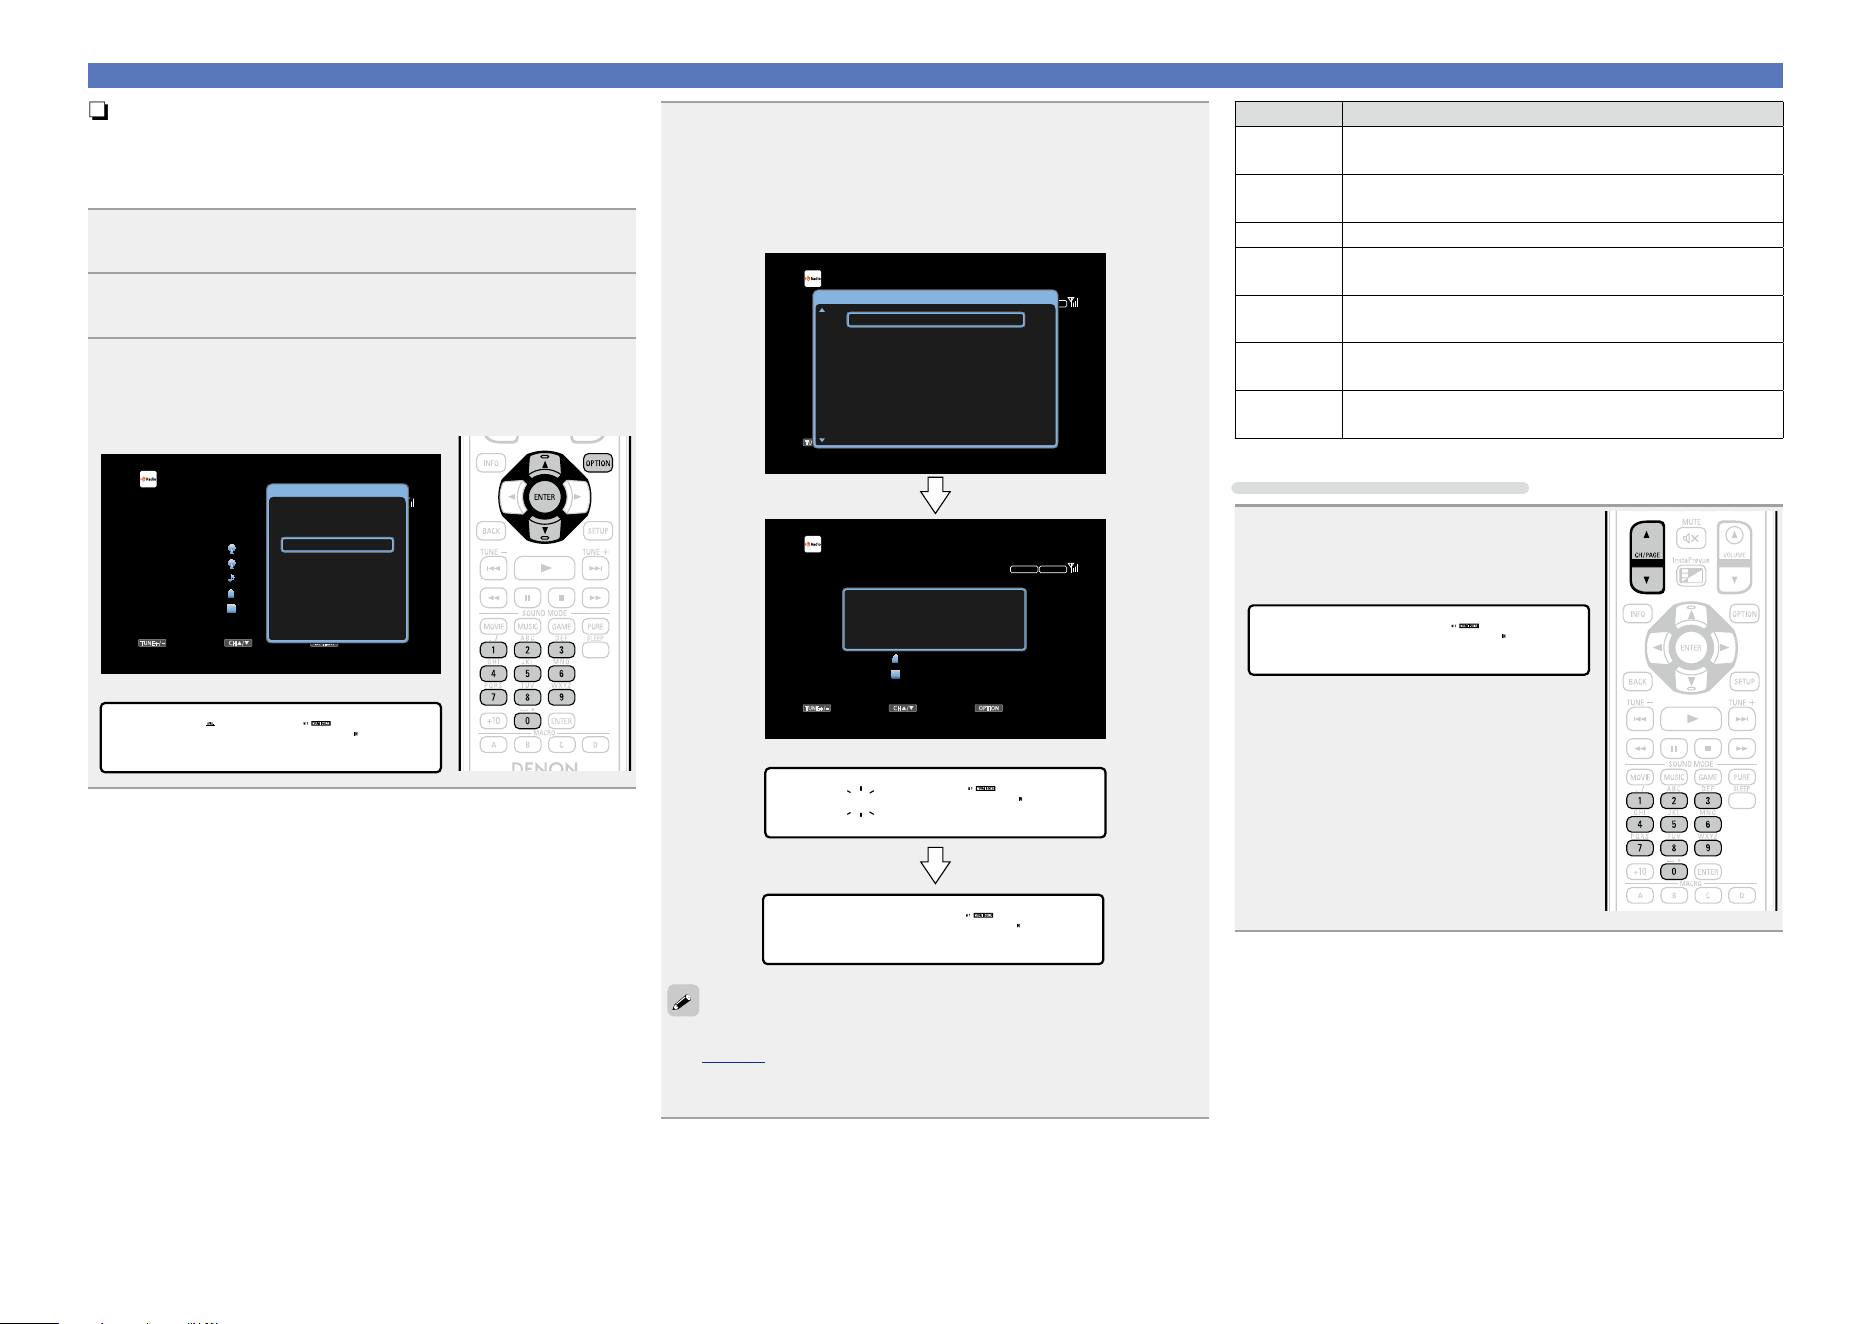
55
Listening to HDRadio stations
n Presetting the current broadcast station
(Preset Memory)
Your favorite broadcast stations can be preset so that you can tune
them in easily. Up to 56 stations can be preset.
1
Tune in the broadcast station you want to preset.
2
Press OPTION.
The option menu screen is displayed.
3
Use ui to select “Preset Memory”, then press
ENTER.
The list of already preset channels is displayed.
GTV ScreenH
TUNE+/-
STEREO
HD-AUTO
CH / OPTION
HD Radio
CH 1
FM 97.90MHz
Song Title
Artist Name
Program Type
ST.Name HD1
Now Playing
Tune Preset Option
Option
FM/AM
Direct Tune
Preset Memory
Tune Mode
Auto Preset Memory
Preset Name
Preset Skip
All Zone Stereo On
GDisplay of this unitH
*OPTION
Preset Memory
4
Use ui or 0 – 9 to select the channel you want to
preset, then press ENTER.
The current broadcast station that is preset.
•To preset other stations, repeat steps 1 to 4.
GTV ScreenH
TUNE+/-
STEREO
HD-AUTO
CH / OPTION
HD Radio
CH 1
FM 87.50MHz
Now Playing
Tune Preset Option
Preset stored at CH 1
TUNE+/-
STEREO
HD-AUTO
CH / OPTION
HD Radio
CH 1
FM 87.50MHz
Now Playing
Tune Preset Option
1 FM 87.50MHz
Preset Memory
2 FM 87.90MHz
3 HD2 FM 89.10MHz
4 FM 93.30MHz
5 HD1 FM 97.90MHz
6 FM 98.10MHz
7 FM 98.90MHz
8 FM100.10MHz
GDisplay of this unitH
01 FM 87.50MHz
ST.Name HD1
01 ST.Name HD1
Stored
The channel numbers of broadcast stations set as “Preset Skip”
(vpage57) are grayed out, but these stations can be preset.
When grayed out channel numbers are preset, these are highlighted
and the “Preset Skip” setting changes to “On”.
Channel Default Settings
1 – 8
87.50 / 87.90 / 89.10 / 93.30 / 97.90 / 98.10 / 98.90 /
100.10 MHz
9 – 16
101.90 / 102.70 / 107.90 / 90.10 / 90.10 / 90.10 /
90.10 / 90.10 MHz
17 – 24 530 / 600 / 930 / 1000 / 1120/ 1210 / 1400 / 1710 kHz
25 – 32
90.10 / 90.10 / 90.10 / 90.10 / 90.10 / 90.10 / 90.10 /
90.10 MHz
33 – 40
90.10 / 90.10 / 90.10 / 90.10 / 90.10 / 90.10 / 90.10 /
90.10 MHz
41 – 48
90.10 / 90.10 / 90.10 / 90.10 / 90.10 / 90.10 / 90.10 /
90.10 MHz
49 – 56
90.10 / 90.10 / 90.10 / 90.10 / 90.10 / 90.10 / 90.10 /
90.10 MHz
Listening to preset stations
Use CH/PAGE df or 0 – 9 to select
the desired preset channel.
GDisplay of this unitH
01 FM 87.50MHz
Basic version
Advanced version
Informations
Basic version
DVD
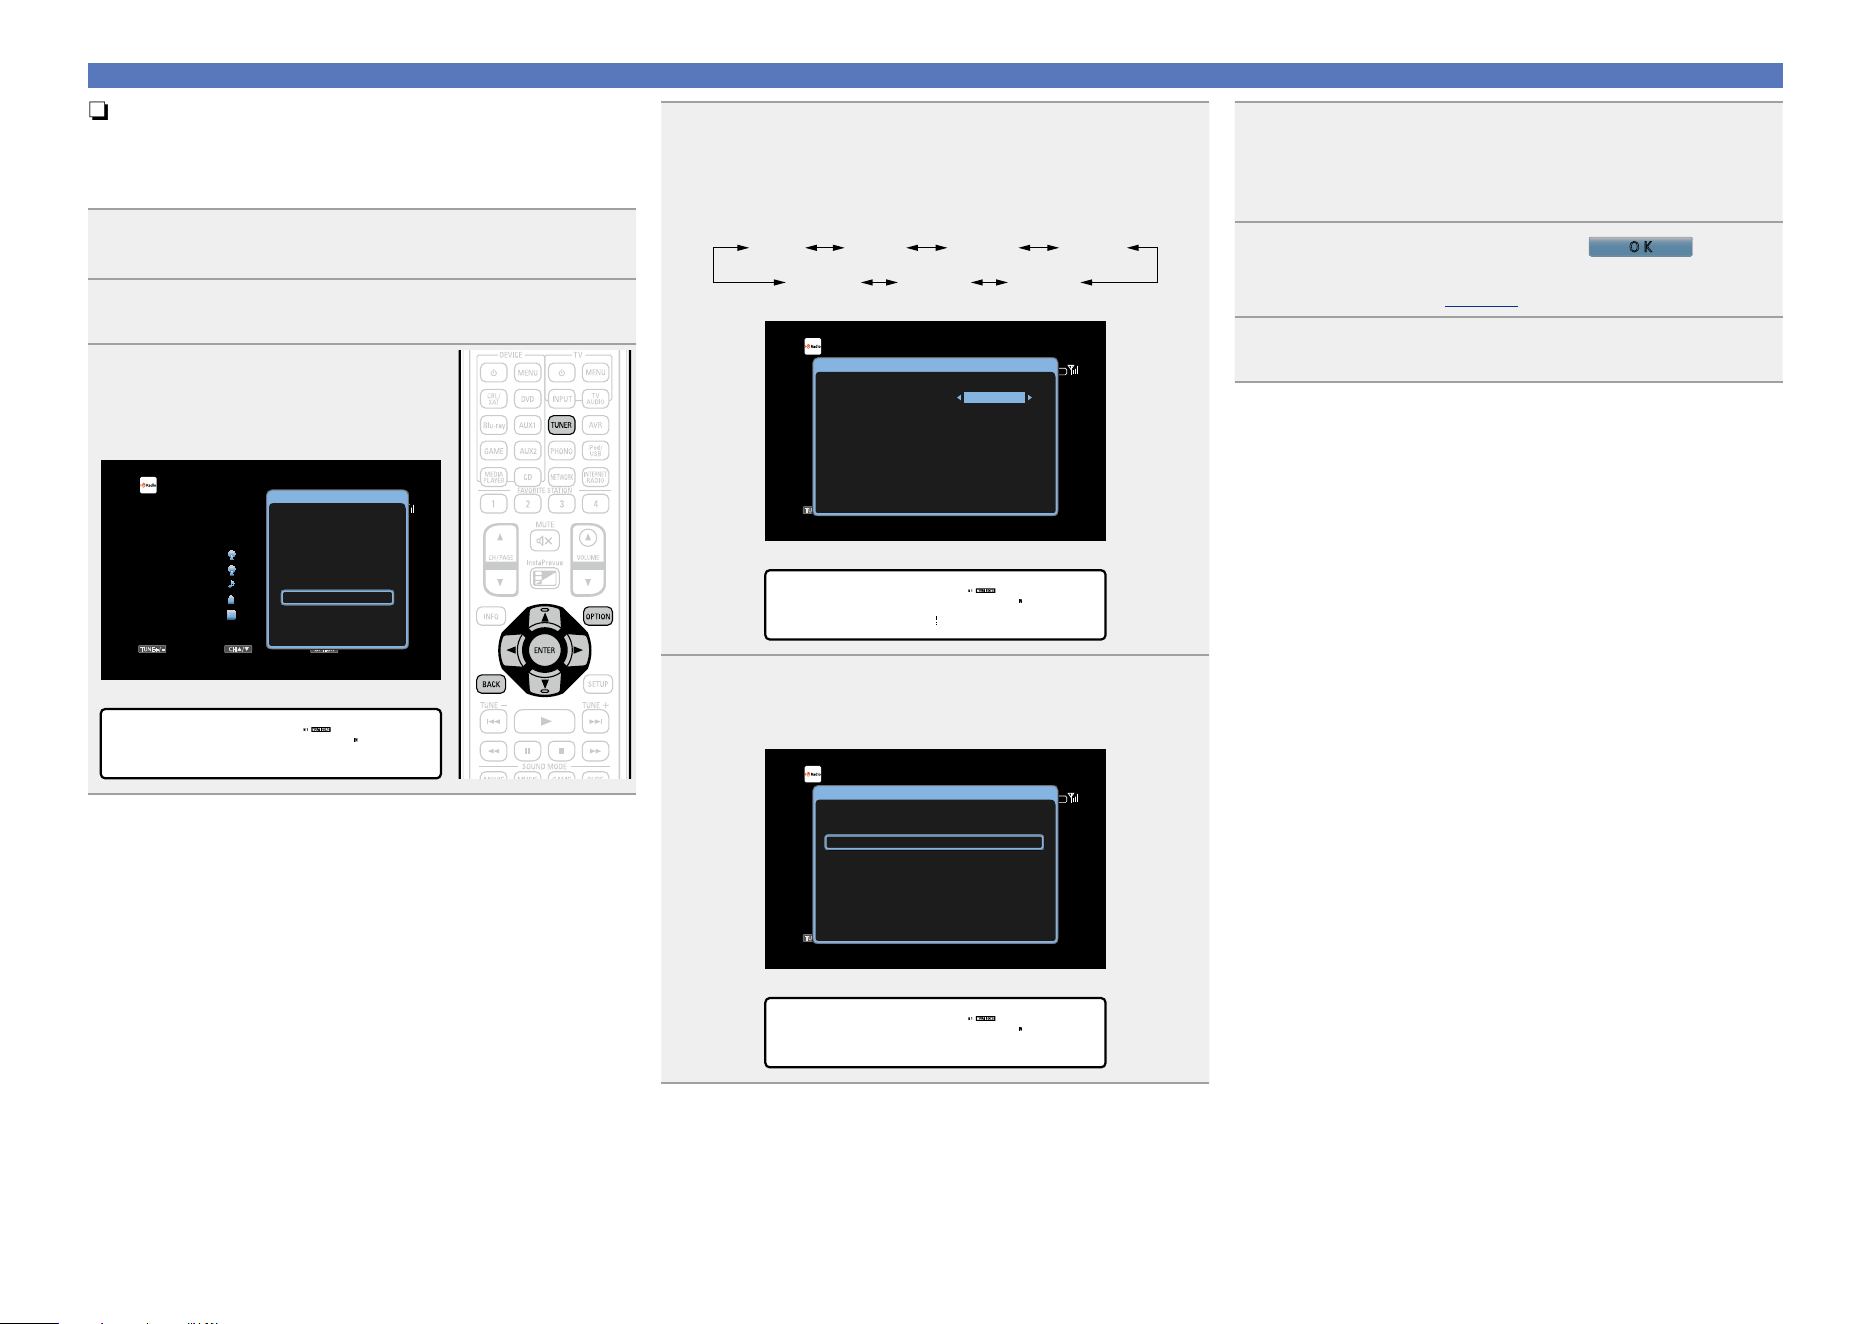
56
n Specify a name for the preset broadcast station
(Preset Name)
You can set the name to the preset broadcast station or change it.
Up to eight characters can be input.
1
Press TUNER to switch the input source to
“HD Radio”.
2
Press OPTION.
The option menu screen is displayed.
3
Use ui to select “Preset Name”,
then press ENTER.
The Preset Name screen is displayed.
GTV ScreenH
TUNE+/-
STEREO
HD-AUTO
CH / OPTION
HD Radio
CH 1
FM 87.50MHz
Now Playing
Tune Preset Option
Option
FM/AM
Direct Tune
Preset Memory
Tune Mode
Auto Preset Memory
Preset Name
Preset Skip
All Zone Stereo On
GDisplay of this unitH
*OPTION
Preset Name
Listening to HDRadio stations
4
Use o p to select the group of the broadcast station
you want to name then press ENTER.
The screen that lets you edit the preset name is displayed.
•Each time
o p is pressed, the setting is changed as shown below.
1 – 8 9 – 16 25 – 3217 – 24
41 – 4849 – 56 33 – 40
GTV ScreenH
TUNE+/-
STEREO
HD-AUTO
CH / OPTION
HD Radio
CH 1
FM 87.50MHz
Now Playing
Tune Preset Option
Preset Name
1 FM 87.50MHz
Preset Group 1-8
2 FM 87.90MHz
3 FM 89.10MHz
4 FM 93.30MHz
5 FM 97.90MHz
6 FM 98.10MHz
7 FM 98.90MHz
8 FM 100.10MHz
GDisplay of this unitH
NAME [ 1- 8]
Group • 1- 8–
5
Use ui to select the broadcast station you want to
name, then press ENTER.
GTV ScreenH
TUNE+/-
STEREO
HD-AUTO
CH / OPTION
HD Radio
CH 1
FM 87.50MHz
Now Playing
Tune Preset Option
Preset Name
1 FM 87.50MHz
Preset Group 1-8
ABCDEFG
2 FM 87.90MHz
3 FM 89.10MHz
4 FM 93.30MHz
5 FM 97.90MHz
6 FM 98.10MHz
7 FM 98.90MHz
8 FM 100.10MHz
GDisplay of this unitH
NAME [ 1- 8]
1 FM 87.50MHz
6
Use ui to select a name label, then press ENTER.
The screen that lets you edit the preset name is displayed.
•If you select “Set Defaults”, then the unit returns to displaying the
frequency.
7
Enter the characters, then press
O K
.
•For character input, see page118.
8
Press BACK twice.
The display returns to the playback screen.
Basic version
Advanced version
Informations
Basic version
DVD
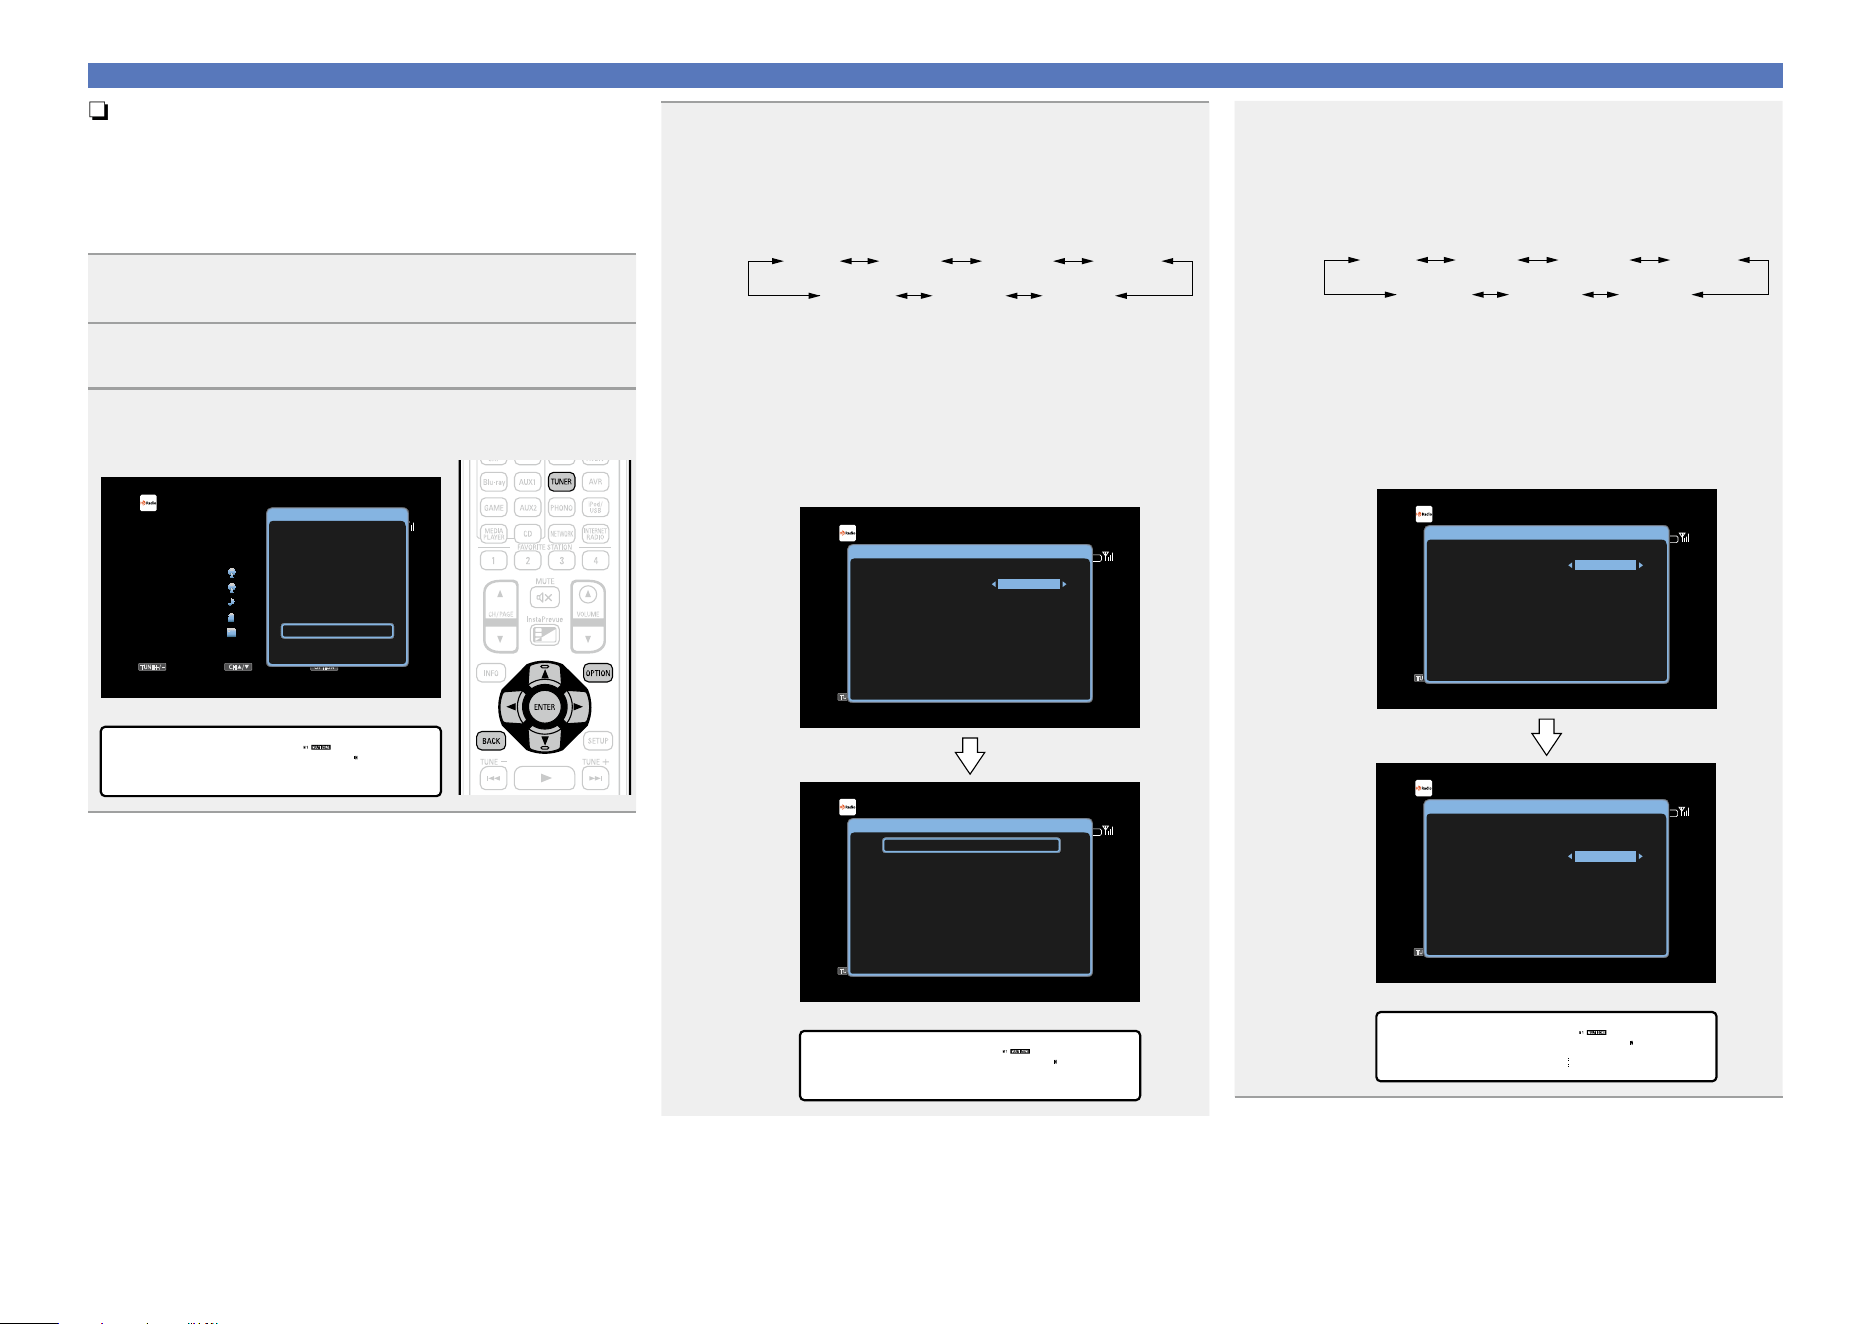
57
Listening to HDRadio stations
n Skipping preset broadcast stations
(Preset Skip)
You can set in advance, the stations you do not want to be
displayed when tuning in, by groups or by stations.
The preset skip setting is useful when tuning in, because only your
favorite stations are displayed.
1
Press TUNER to switch the input source to
“HD Radio”.
2
Press OPTION.
The option menu screen is displayed.
3
Use ui to select “Preset Skip”, then press ENTER.
The Preset Skip screen is displayed.
GTV ScreenH
TUNE+/-
STEREO
HD-AUTO
CH / OPTION
HD Radio
CH 1
FM 87.50MHz
Now Playing
Tune Preset Option
Option
FM/AM
Direct Tune
Preset Memory
Tune Mode
Auto Preset Memory
Preset Name
Preset Skip
All Zone Stereo On
GDisplay of this unitH
*OPTION
Preset Skip
4-1
GTo set the stations you want to skip by groupsH
q Use o p to select the group of broadcast
stations you want to skip.
•Each time o p is pressed, the setting is changed as
shown below.
1 – 8 9 – 16 25 – 3217 – 24
41 – 4849 – 56 33 – 40
w Press u to select “Set z – z to Skip”, then
press ENTER.
All broadcast stations in the group “z – z” you selected
are not displayed.
(z are the selected group numbers)
e Press BACK.
GTV ScreenH
TUNE+/-
STEREO
HD-AUTO
CH / OPTION
HD Radio
CH 1
FM 87.50MHz
Now Playing
Tune Preset Option
Preset Skip
1 FM 87.50MHz On
Preset Group
Set No.1-8 to Skip
1-8
2 FM 87.90MHz On
3 FM 89.10MHz On
4 FM 93.30MHz On
5 FM 97.90MHz On
6 FM 98.10MHz On
7 FM 98.90MHz On
8 FM 100.10MHz On
TUNE+/-
STEREO
HD-AUTO
CH / OPTION
HD Radio
CH 1
FM 87.50MHz
Now Playing
Tune Preset Option
Preset Skip
1 FM 87.50MHz On
Preset Group
Set No.1-8 to Skip
1-8
2 FM 87.90MHz On
3 FM 89.10MHz On
4 FM 93.30MHz On
5 FM 97.90MHz On
6 FM 98.10MHz On
7 FM 98.90MHz On
8 FM 100.10MHz On
GDisplay of this unitH
SKIP [ 1- 8]
Set 1- 8to Skip
4-2
GTo set the stations you want to skip by stationsH
q Use o p to select the group of broadcast
stations you want to skip.
•Each time o p is pressed, the setting is changed as
shown below.
1 – 8 9 – 16 25 – 3217 – 24
41 – 4849 – 56 33 – 40
w Use ui to select the broadcast station you
want to skip.
e Use o p to select “Skip”.
The station you selected is not displayed.
r Press BACK.
GTV ScreenH
TUNE+/-
STEREO
HD-AUTO
CH / OPTION
HD Radio
CH 1
FM 87.50MHz
Now Playing
Tune Preset Option
Preset Skip
1 FM 87.50MHz On
Preset Group
Set No.1-8 to Skip
1-8
2 FM 87.90MHz On
3 FM 89.10MHz On
4 FM 93.30MHz On
5 FM 97.90MHz On
6 FM 98.10MHz On
7 FM 98.90MHz On
8 FM 100.10MHz On
TUNE+/-
STEREO
HD-AUTO
CH / OPTION
HD Radio
CH 1
FM 87.50MHz
Now Playing
Tune Preset Option
Preset Skip
1 FM 87.50MHz Skip
Preset Group
Set No.1-8 to Skip
1-8
2 FM 87.90MHz On
3 FM 89.10MHz On
4 FM 93.30MHz On
5 FM 97.90MHz On
6 FM 98.10MHz On
7 FM 98.90MHz On
8 FM 100.10MHz On
GDisplay of this unitH
SKIP [ 1- 8]
1 87.50M •Skp–
Basic version
Advanced version
Informations
Basic version
DVD
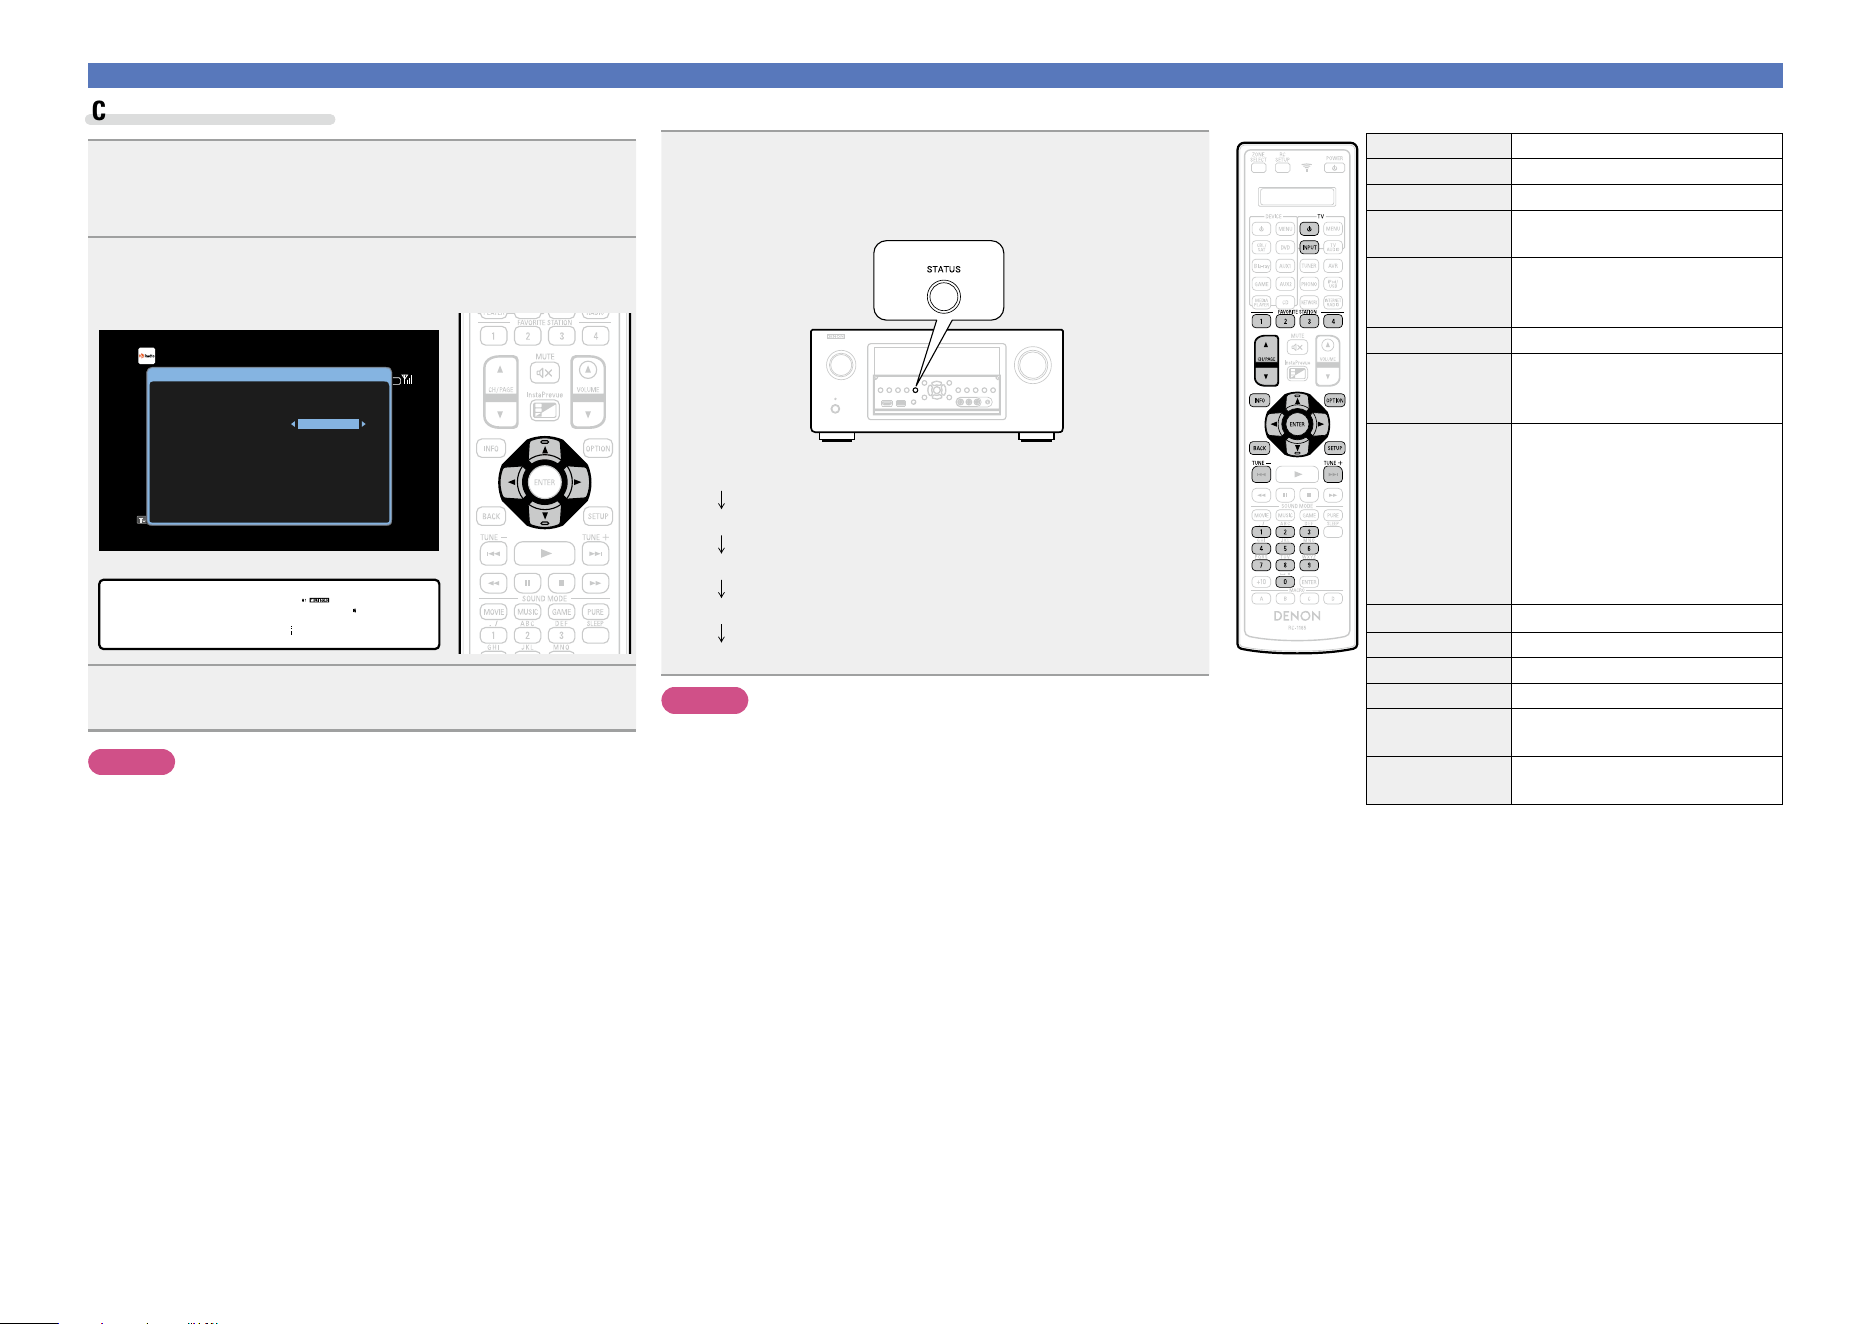
58
Listening to HDRadio stations
Cancelling preset skip
1
While the Preset Skip screen is displayed, use o p
to select a group containing a broadcast station to
cancel the skip for.
2
Use ui to select a broadcast station to cancel the
skip for.
GTV ScreenH
TUNE+/-
STEREO
HD-AUTO
CH / OPTION
HD Radio
CH 1
FM 87.50MHz
Now Playing
Tune Preset Option
Preset Skip
1 FM 87.50MHz On
Preset Group
Set No.1-8 to Skip
1-8
2 FM 87.90MHz On
3 FM 89.10MHz On
4 FM 93.30MHz On
5 FM 97.90MHz On
6 FM 98.10MHz On
7 FM 98.90MHz On
8 FM 100.10MHz On
GDisplay of this unitH
SKIP [ 1- 8]
1 87.50M •On –
3
Use o p to select “On”.
The skip is cancelled.
NOTE
You cannot cancel the skip for each group.
n Check the HDRadio reception information
Press STATUS on the main unit while an HD Radio
broadcast is being received.
The current reception information is shown on the display.
q Normal
w Frequency / Signal strength
e Station name / Program and Program type
r Title name / Artist name
t Album name / Genre name
NOTE
If the station signal weakens while receiving a digital broadcast (while
“HD” and text is displayed), the mode automatically switches to the
analog reception mode (the reception frequency is displayed).
Because of this, the “HD” and text may flicker if the station signal
level is weak and unstable.
n Tuner (HDRadio reception) operation buttons
Operation buttons Function
TV X
TV power on/standby
TV INPUT Switch TV input
FAVORITE
STATION 1 – 4
Call up favorites
FAVORITE
STATION 1 – 4
(Press and hold)
Add to the favorites list
CH/PAGE df
Preset channel selection
INFO
Display of information such as the
source name, volume, and sound mode
name
OPTION
FM/AM switching
Direct frequency tuning /
Preset Memory /
Switch tuning modes /
Auto Preset Memory /
Preset Name /
Preset Skip /
All Zone Stereo
uio p
Cursor operation
ENTER Enter
BACK Return
SETUP Setup menu
TUNE +, –
Tuning (up/down)
Multicast switching
0 – 9
Preset channel selection (1 – 8) /
Direct frequency tuning (0 – 9)
Basic version
Advanced version
Informations
Basic version
DVD
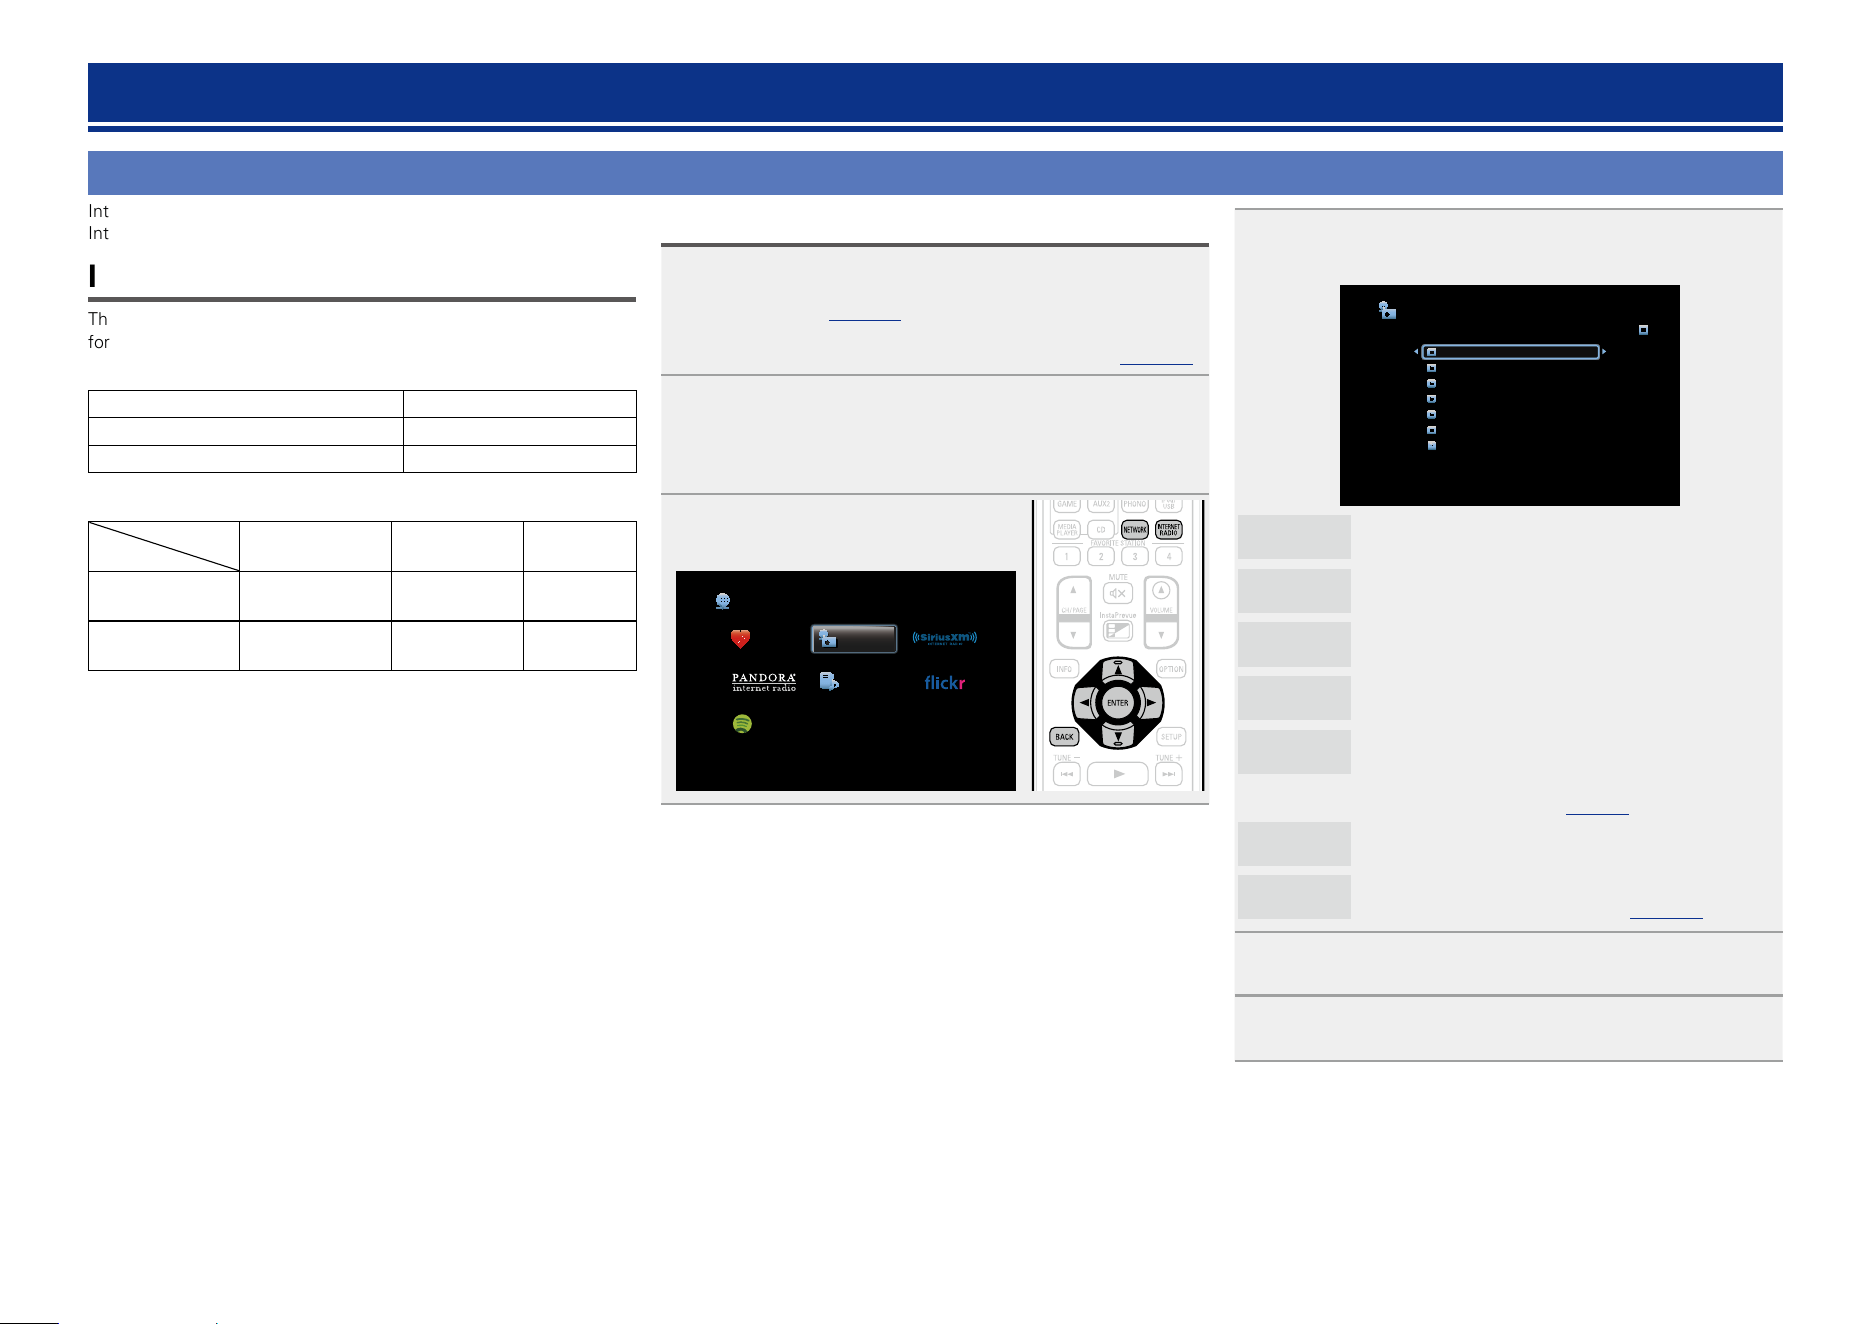
59
Listening to Internet Radio
Internet Radio refers to radio broadcasts distributed over the Internet.
Internet Radio stations from around the world can be received.
Important information
The broad cast station types and specifications supported by this unit
for playback are as follows.
GPlayable broadcast station typesH
Supported file types Internet Radio
WMA (Windows Media Audio)
P
MP3 (MPEG-1 Audio Layer-3)
P
GPlayable broadcast station specificationsH
Sampling
frequency
Bit rate Extension
WMA (Windows
Media Audio)
32/44.1/48 kHz 48 – 192 kbps .wma
MP3 (MPEG-1
Audio Layer-3)
32/44.1/48 kHz 32 – 320 kbps .mp3
Listening to Internet Radio
1
Prepare for playback.
q Check the network environment, then turn on this unit’s
power (vpage 31 “Connecting to a home network
(LAN)”).
w If settings are required, make the “Settings” (vpage148).
2
Press NETWORK.
•You can also press INTERNET RADIO to select the input source
“Internet Radio” directly.
3
Use uio p to select “Internet
Radio”, then press ENTER.
Favorites Internet Radio
Media Server
Spotify
Network
4
Use ui to select the item you want to play, then
press ENTER or p.
Internet Radio [1/7]
zzzzz
Search Stations
Search Podcasts
Recommended Stations
radiodenon.com
Recently Played
Search by Keyword
zzzzz
(Country name)
Displays typical Internet Radio stations your country.
Search
Stations
Displays all Internet Radio stations that this unit can
tune in to.
Search
Podcasts
Displays Internet Radio stations in the podcasts that
this unit can tune in to.
Recommended
Stations
Displays recommended Internet Radio stations.
radiodenon.
com
Displays Internet Radio stations added to favorites in
vTuner. For instructions on how to add to favorites
in vTuner, see “Using vTuner to add Internet Radio
stations to favorites” (vpage61).
Recently
Played
Displays recently played Internet Radio stations. Up
to 20 stations stored in “Recently Played”.
Search by
Keyword
Displays Internet Radio stations searched by
keyword. For character input, see page118.
5
Repeat step 4 until the station list is displayed.
The station list is displayed.
6
Use ui to select the station, then press ENTER or p.
Playback starts once buffering reaches “100%”.
Network contents
Basic version
Advanced version
Informations
Basic version
v See overleaf
DVD
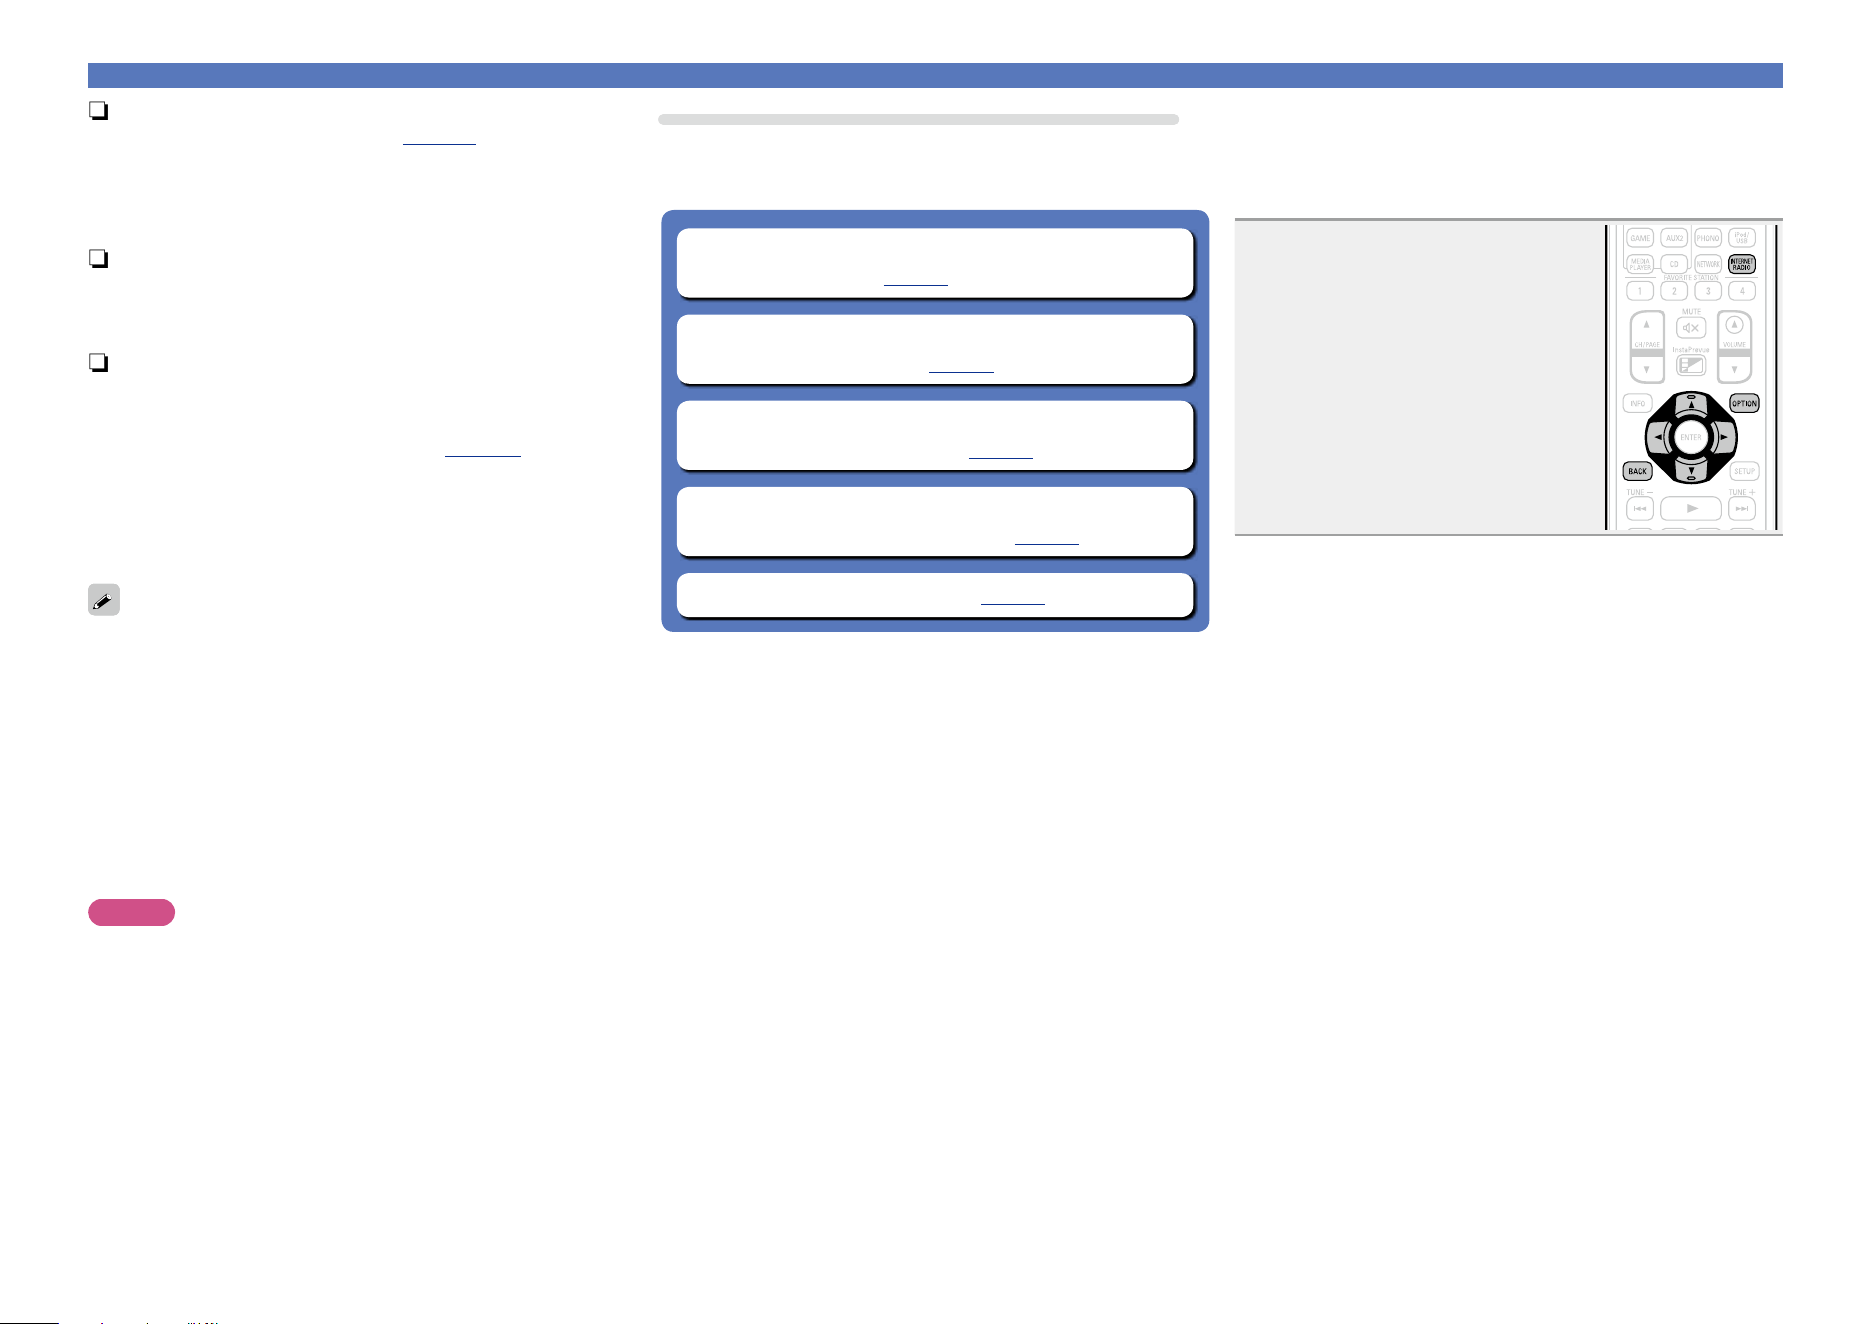
60
Listening to Internet Radio
n Adjusting the sound quality (Restorer)
Make this setting at “Restorer” (vpage124) in the menu.
You can use the “Restorer” function to restore to a state close
to the audio before compression while correcting the bass feel to
enjoy a richer playback experience. The default setting is “Mode
3 (Low)”.
n Switching the screen display
Press STATUS on the main unit.
The display switches between track title and radio station name
etc. each time the button is pressed.
n Going back to the previous screen
Press o or BACK.
n Changing the screen display duration
Make this setting at “Now Playing” (vpage133) in the menu.
The default setting is “Always On”.
When “Auto Off” is set, the on-screen display is turned off 30
seconds after an operation.
Press uio p while the display is off to return to the original
screen.
•There are many Internet Radio stations on the Internet, and the
quality of the programs they broadcast as well as the bit rate of the
tracks varies widely.
Generally, the higher the bit rate, the higher the sound quality, but
depending on the communication lines and server traffic, the music
or audio signals being streamed may be interrupted. Inversely, lower
bit rates mean a lower sound quality but less tendency for the sound
to be interrupted.
•“Radio station server full” or “Connection down” is displayed if the
station is busy or not broadcasting.
•On this unit, folder and file names can be displayed as titles. Any
characters that cannot be displayed are replaced with “.” (period).
NOTE
The radio station database service may be suspended without notice.
Operations available through the OPTION button
Press the OPTION button to display a menu of functions that can be
used on the TV screen. Select the function you want to use from this
menu. You can easily find and use the desired function.
n Searching content with keywords
(Text Search) (vpage76)
n Add to favorites from the Option menu
(Save to Favorites) (vpage78)
n Playing back music and a favorite picture at the
same time (Slideshow) (vpage79)
n Adjusting the picture quality for your viewing
environment (Picture Mode) (vpage80)
n All Zone Stereo function (vpage80)
n Playing the last played Internet Radio station
This unit memorizes the last played Internet Radio station. If you
press INTERNET RADIO to switch to the Internet Radio function
from another input source, the last Internet Radio station you
listened to is played.
Press INTERNET RADIO.
The source switches to “Internet Radio” and
the last played radio station plays.
Basic version
Advanced version
Informations
Basic version
DVD
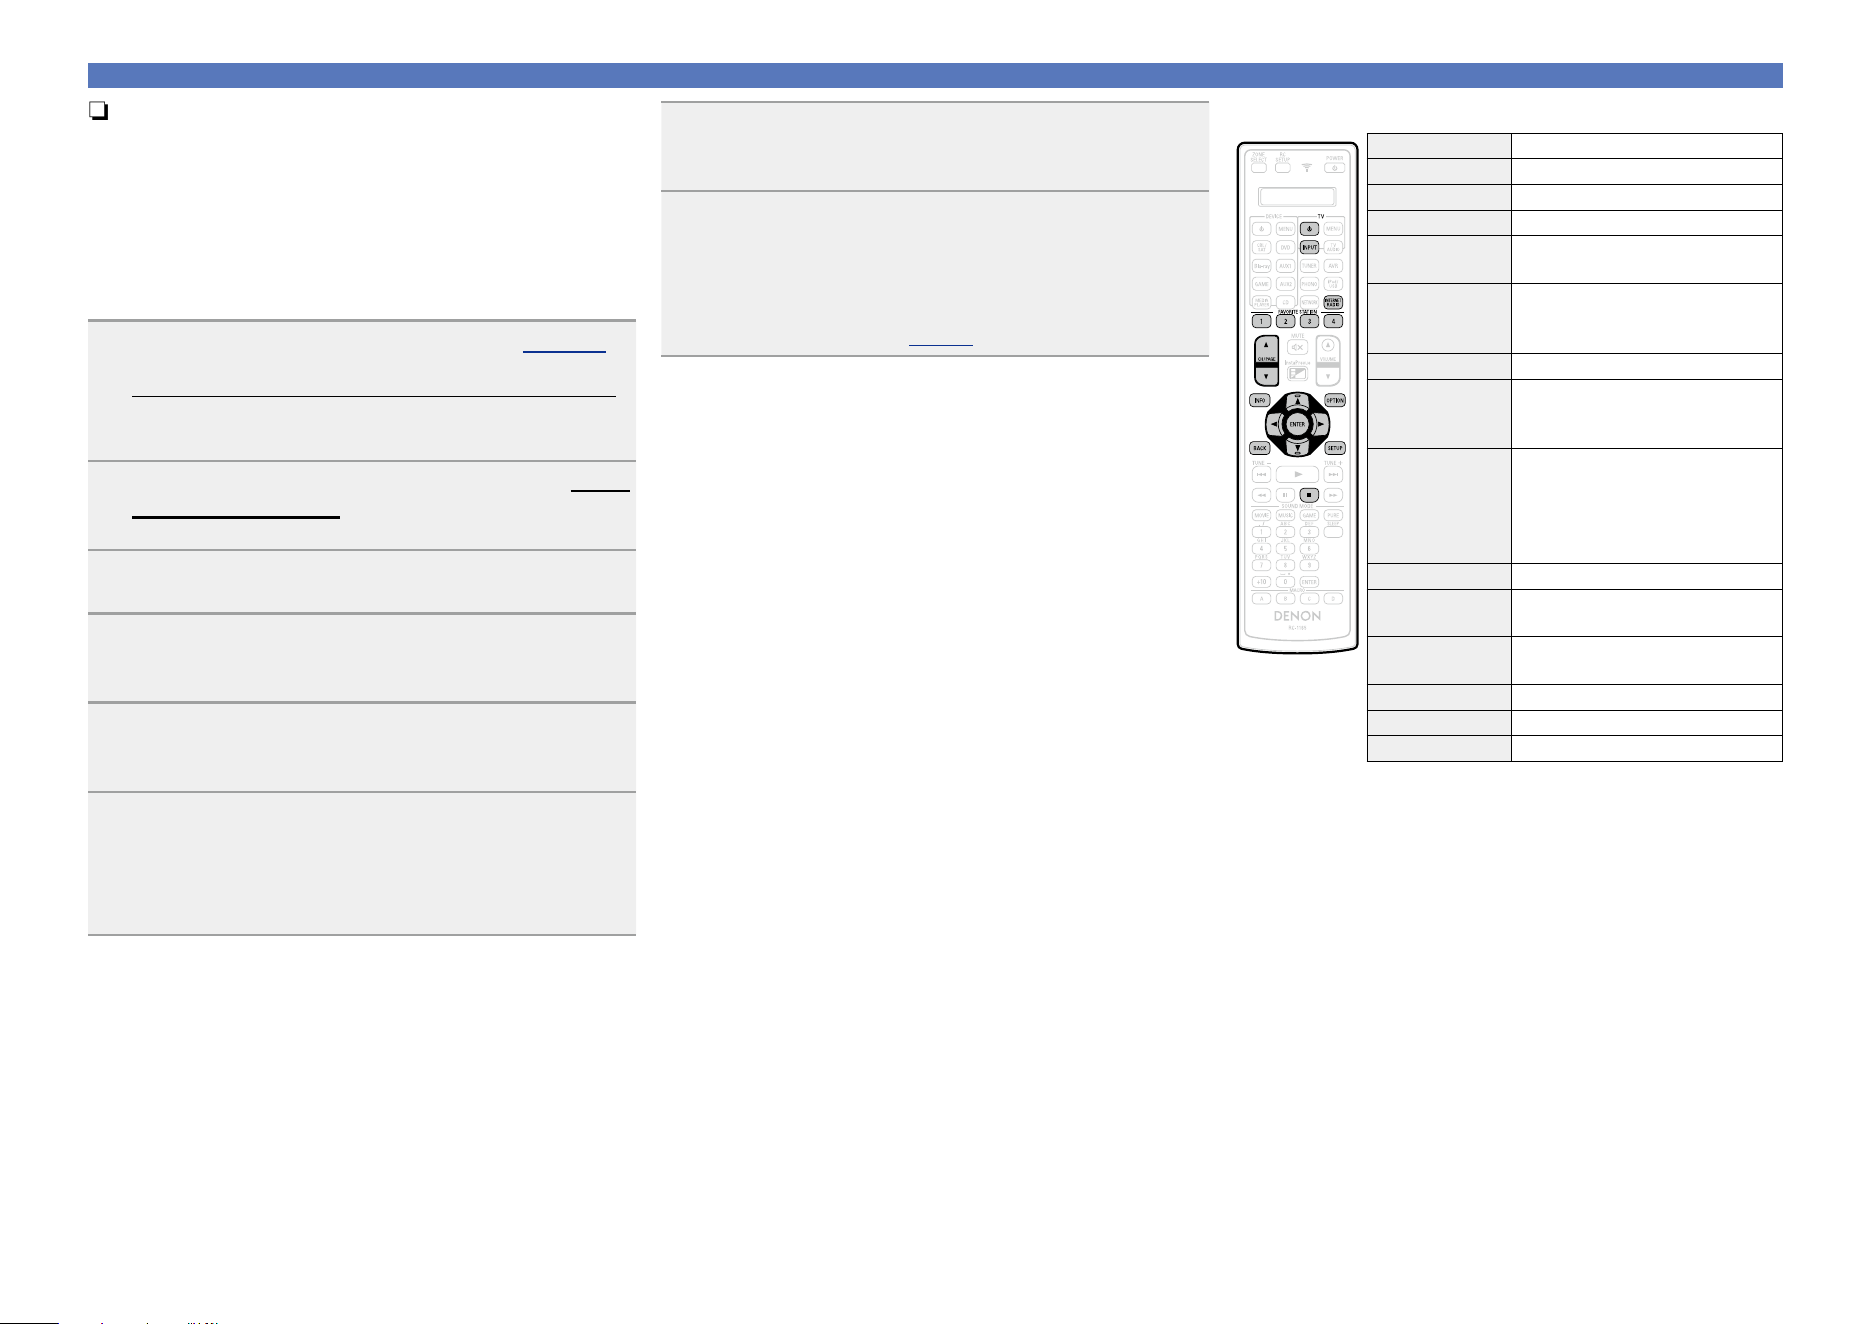
61
Listening to Internet Radio
n Using vTuner to add Internet Radio stations to
favorites
There are many Internet Radio stations in the world, and this unit
can tune into these stations. But finding the radio station you want
to hear may be difficult, because there are too many stations. If
this is the case, then please use vTuner, an Internet Radio station
search website specifically designed for this unit. You can use
your PC to search Internet Radio stations and add them as your
favorites. This unit can play radio stations added to vTuner.
1
Check the MAC address of this unit (vpage 147).
The screen that lets you edit the preset name is displayed.
MAC address:
•The MAC address is necessary when you create an account for
vTuner.
2
Use your PC to access the vTuner website (http://
www.radiodenon.com).
The vTuner login screen is displayed.
3
Enter the MAC address of this unit, then click “Go”.
The account creation screen is displayed.
4
Enter your E-mail address and a password of your
choice.
The account is registered and you can now log in.
5
Enter your account information (E-mail address and
password) and log in.
The top menu of vTuner is displayed.
6
Select the search criteria (genre, region, language,
etc.) of your choice.
The list of radio stations matching the criteria is displayed.
•You can also enter a keyword to search for a station you want to
hear.
7
Select the radio station of your choice from the list,
and then click the Add to Favorites icon.
The screen that lets you create a favorite group is displayed.
8
Enter the name of the favorite group, then click
“Go”.
A new favorite group that includes the selected radio station is
created.
•Internet Radio stations added to favorites in vTuner can be played
from “radiodenon.com” (vpage59) with this unit.
n Internet Radio operation buttons
Operation buttons Function
TV X
TV power on/standby
TV INPUT Switch TV input
INTERNET RADIO Last played Internet Radio station
FAVORITE
STATION 1 – 4
Call up favorites
FAVORITE
STATION 1 – 4
(Press and hold)
Add to the favorites list
CH/PAGE df
Page search
INFO
Display of information such as the
source name, volume, and sound mode
name
OPTION
Text Search /
Save to Favorites /
Slideshow /
Picture Mode /
All Zone Stereo
uio p
Cursor operation
ENTER
(Press and release)
Enter
ENTER
(Press and hold)
Stop
BACK Return
SETUP Setup menu
2
Stop
Basic version
Advanced version
Informations
Basic version
DVD
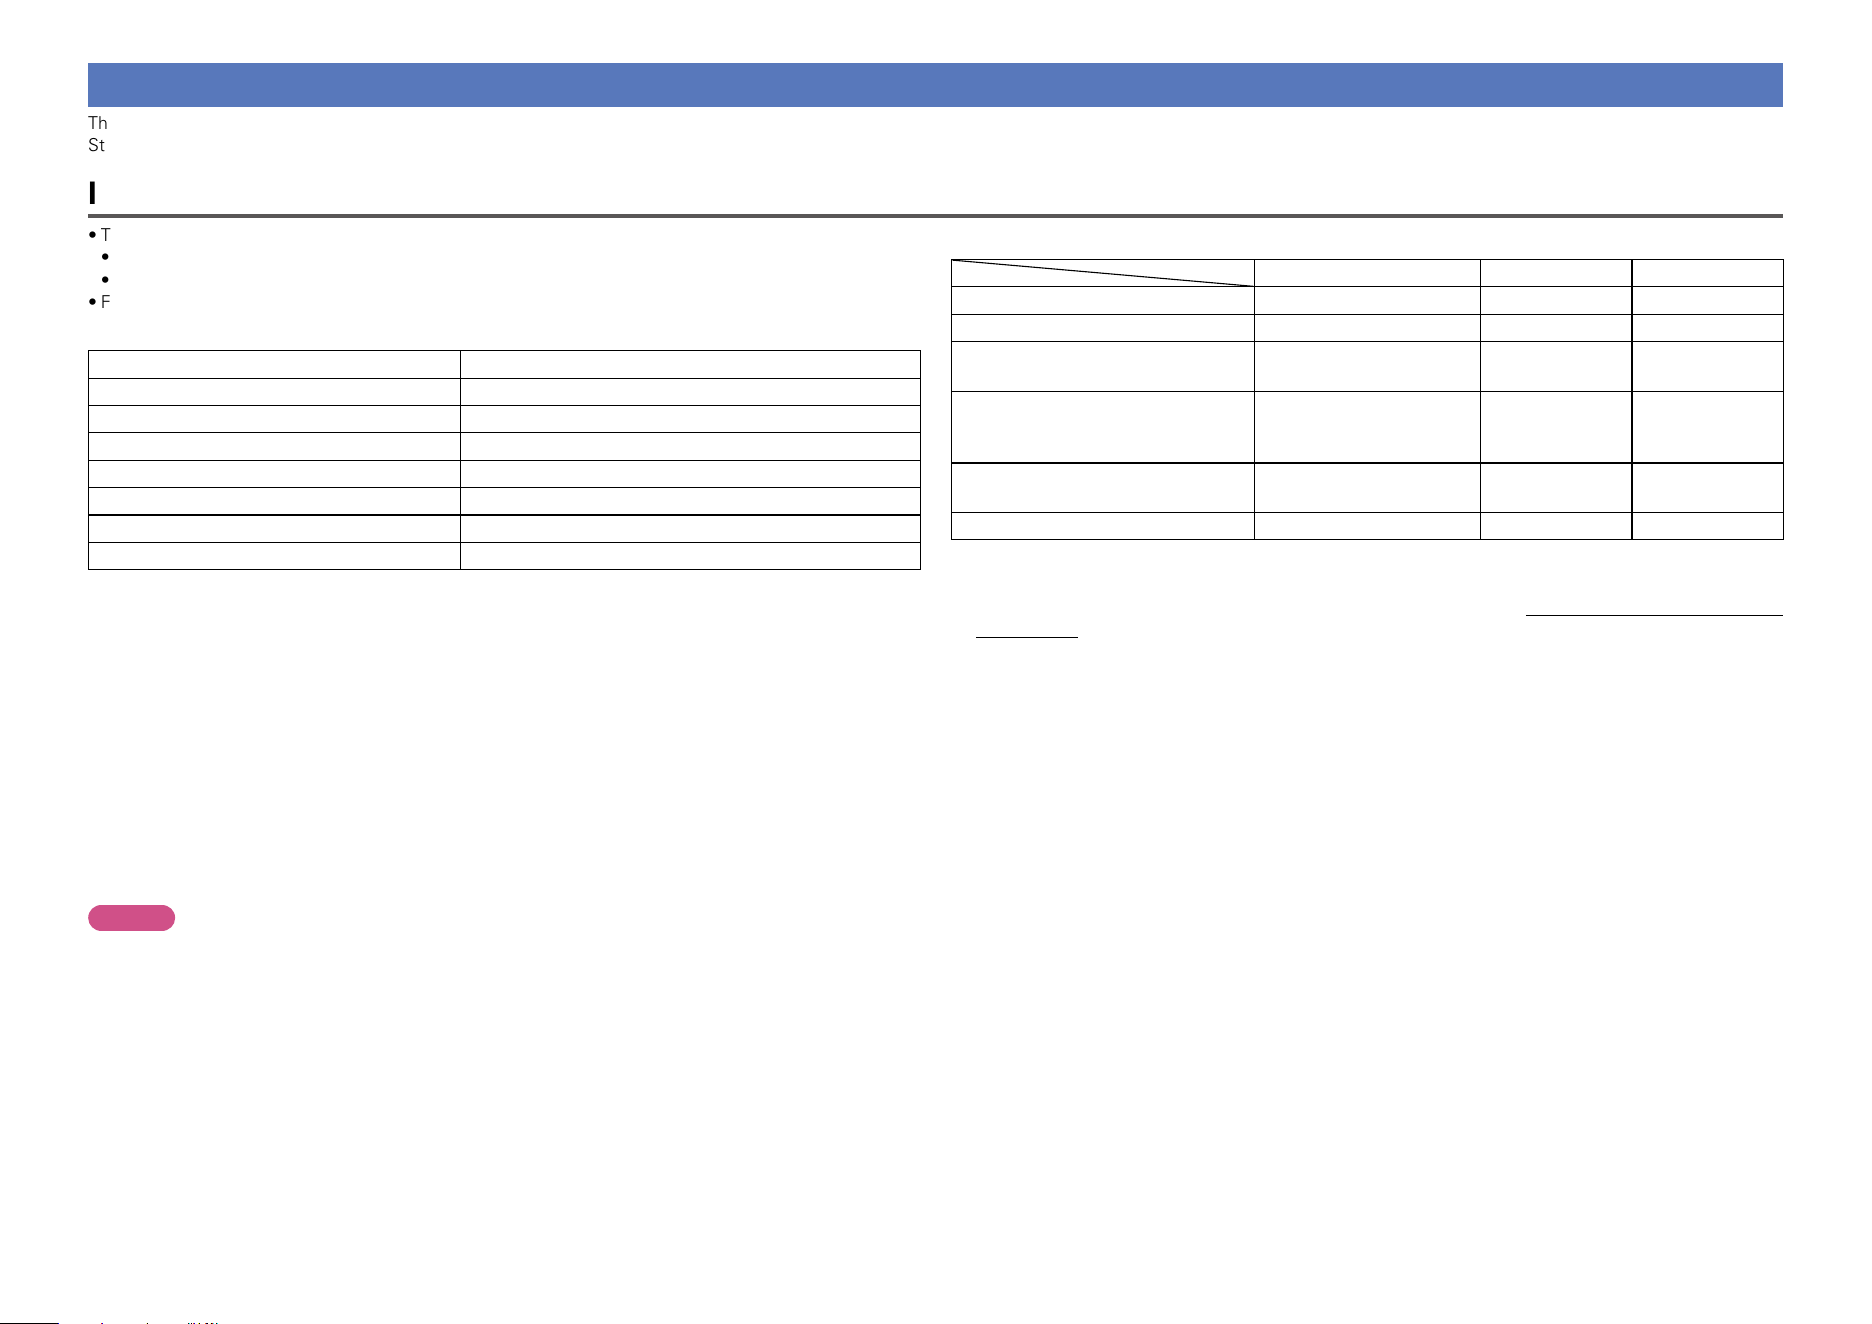
62
Playing back files stored on a PC and NAS
This unit can play back music files and playlists (m3u, wpl) stored on a PC and on Network Attached
Storage (NAS) that supports DLNA.
Important information
•The network audio playback function of this unit connects to the server using technologies shown below.
•Windows Media Player Network Sharing Service
•Windows Media DRM10
•File types that this unit can play back and specifications are shown below.
GSupported file typesH
Supported file types Media Server
z1
WMA (Windows Media Audio)
P
MP3 (MPEG-1 Audio Layer-3)
P
WAV
P
MPEG-4 AAC
P
z2
FLAC (Free Lossless Audio Codec)
P
JPEG
P
ALAC (Apple Lossless Audio Codec)
P
A server or server software compatible with distribution in the corresponding formats is required to play
music files via a network.
z1 Media Server
•This unit is compatible with MP3 ID3-Tag (Ver.2) standard.
•This unit can show the artwork that was embedded by using MP3 ID3-Tag Ver.2.3 or 2.4.
•This unit is compatible with WMA META tags.
•If the image size (pixels) of an album artwork exceeds 500 × 500 (WMA/MP3/WAV/FLAC) or 349 ×
349 (MPEG-4 AAC), then music may not be played back properly.
•WAV format Quantization bit length: 16 or 24 bits.
•FLAC format Quantization bit length: 16 or 24 bits.
z2 Only files that are not protected by copyright can be played on this unit.
Content downloaded from pay sites on the Internet are copyright protected. Also, files encoded in
WMA format when ripped from a CD, etc. on a computer may be copyright protected, depending on
the computer’s settings.
NOTE
File types that this unit does not support are not displayed.
GSpecifications of supported filesH
Sampling frequency Bit rate Extension
WMA (Windows Media Audio) 32/44.1/48 kHz 48 – 192 kbps .wma
MP3 (MPEG-1 Audio Layer-3) 32/44.1/48 kHz 32 – 320 kbps .mp3
WAV
32/44.1/48/88.2/96/
176.4/192 kHz
– .wav
MPEG-4 AAC 32/44.1/48 kHz 16 – 320 kbps
.aac/
.m4a/
.mp4
FLAC (Free Lossless Audio Codec)
32/44.1/48/88.2/96/
176.4/192 kHz
– .flac
ALAC (Apple Lossless Audio Codec)
z
32/44.1/48/88.2/96 kHz – .m4a
z Copyright [2012] [D&M Holdings. Inc.]
Licensed under the Apache License, Version 2.0 (the “License”); you may not use this file except in
compliance with the License. You may obtain a copy of the License at http://www.apache.org/licenses/
LICENSE-2.0
Basic version
Advanced version
Informations
Basic version
DVD
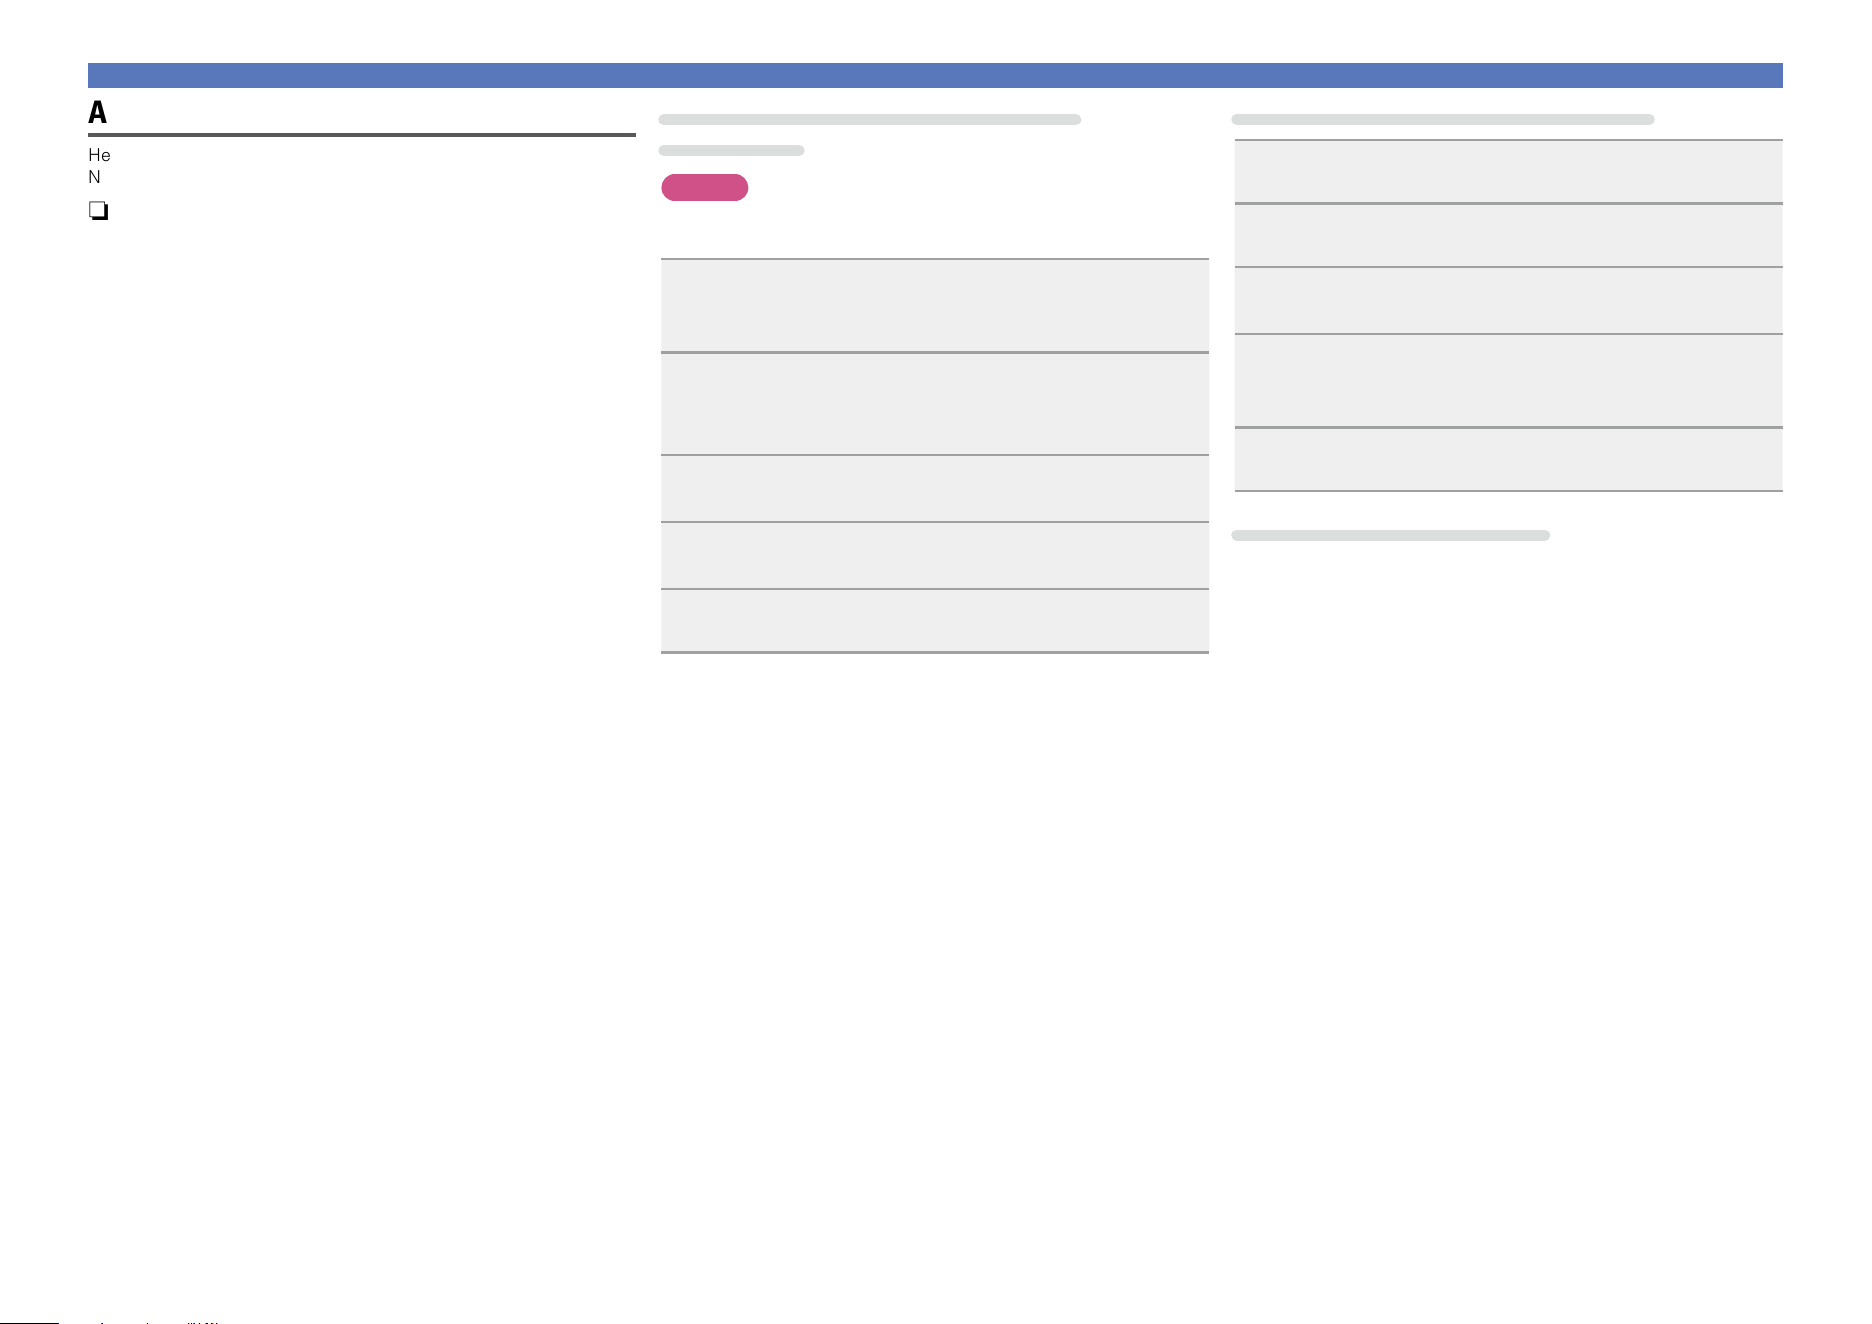
63
Playing back files stored on a PC and NAS
Applying media sharing settings
Here, we apply the settings to share music files stored on a PC and
NAS on the network.
n Sharing media stored in PC
If you are using a Media Server, be sure to apply this setting first.
When using Windows Media Player 12
(Windows 7)
NOTE
Perform this procedure after changing the control panel display to
“Category”.
1
In the PC’s “Control Panel”, select “Network
and Internet” - “Choose homegroup and sharing
options”.
2
Select the “Stream my pictures, music, and videos
to all devices on my home network” check box and
select “Choose media streaming options”.
3
Select “Allowed” in the drop-down list for “AVR-
4520CI”.
4
Select “Allowed” in the drop-down list for “Media
programs on this PC and remote connections...”.
5
Click “OK” to nish.
When using Windows Media Player 11
1
Start up Windows Media Player 11 on the PC.
2
Select “Media Sharing” in the “Library”.
3
Click the “Share my media” check box, select “AVR-
4520CI”, and then click “Allow”.
4
As you did in step 3, select the icon of the device
(other PCs and mobile devices) you want to use as a
media controller, and then click “Allow”.
5
Click “OK” to nish.
Sharing media stored in NAS
Change settings on the NAS to allow this unit and other devices (PCs
and mobile devices) used as media controllers to access the NAS. For
details, see the owner’s manual that came with the NAS.
Basic version
Advanced version
Informations
Basic version
DVD
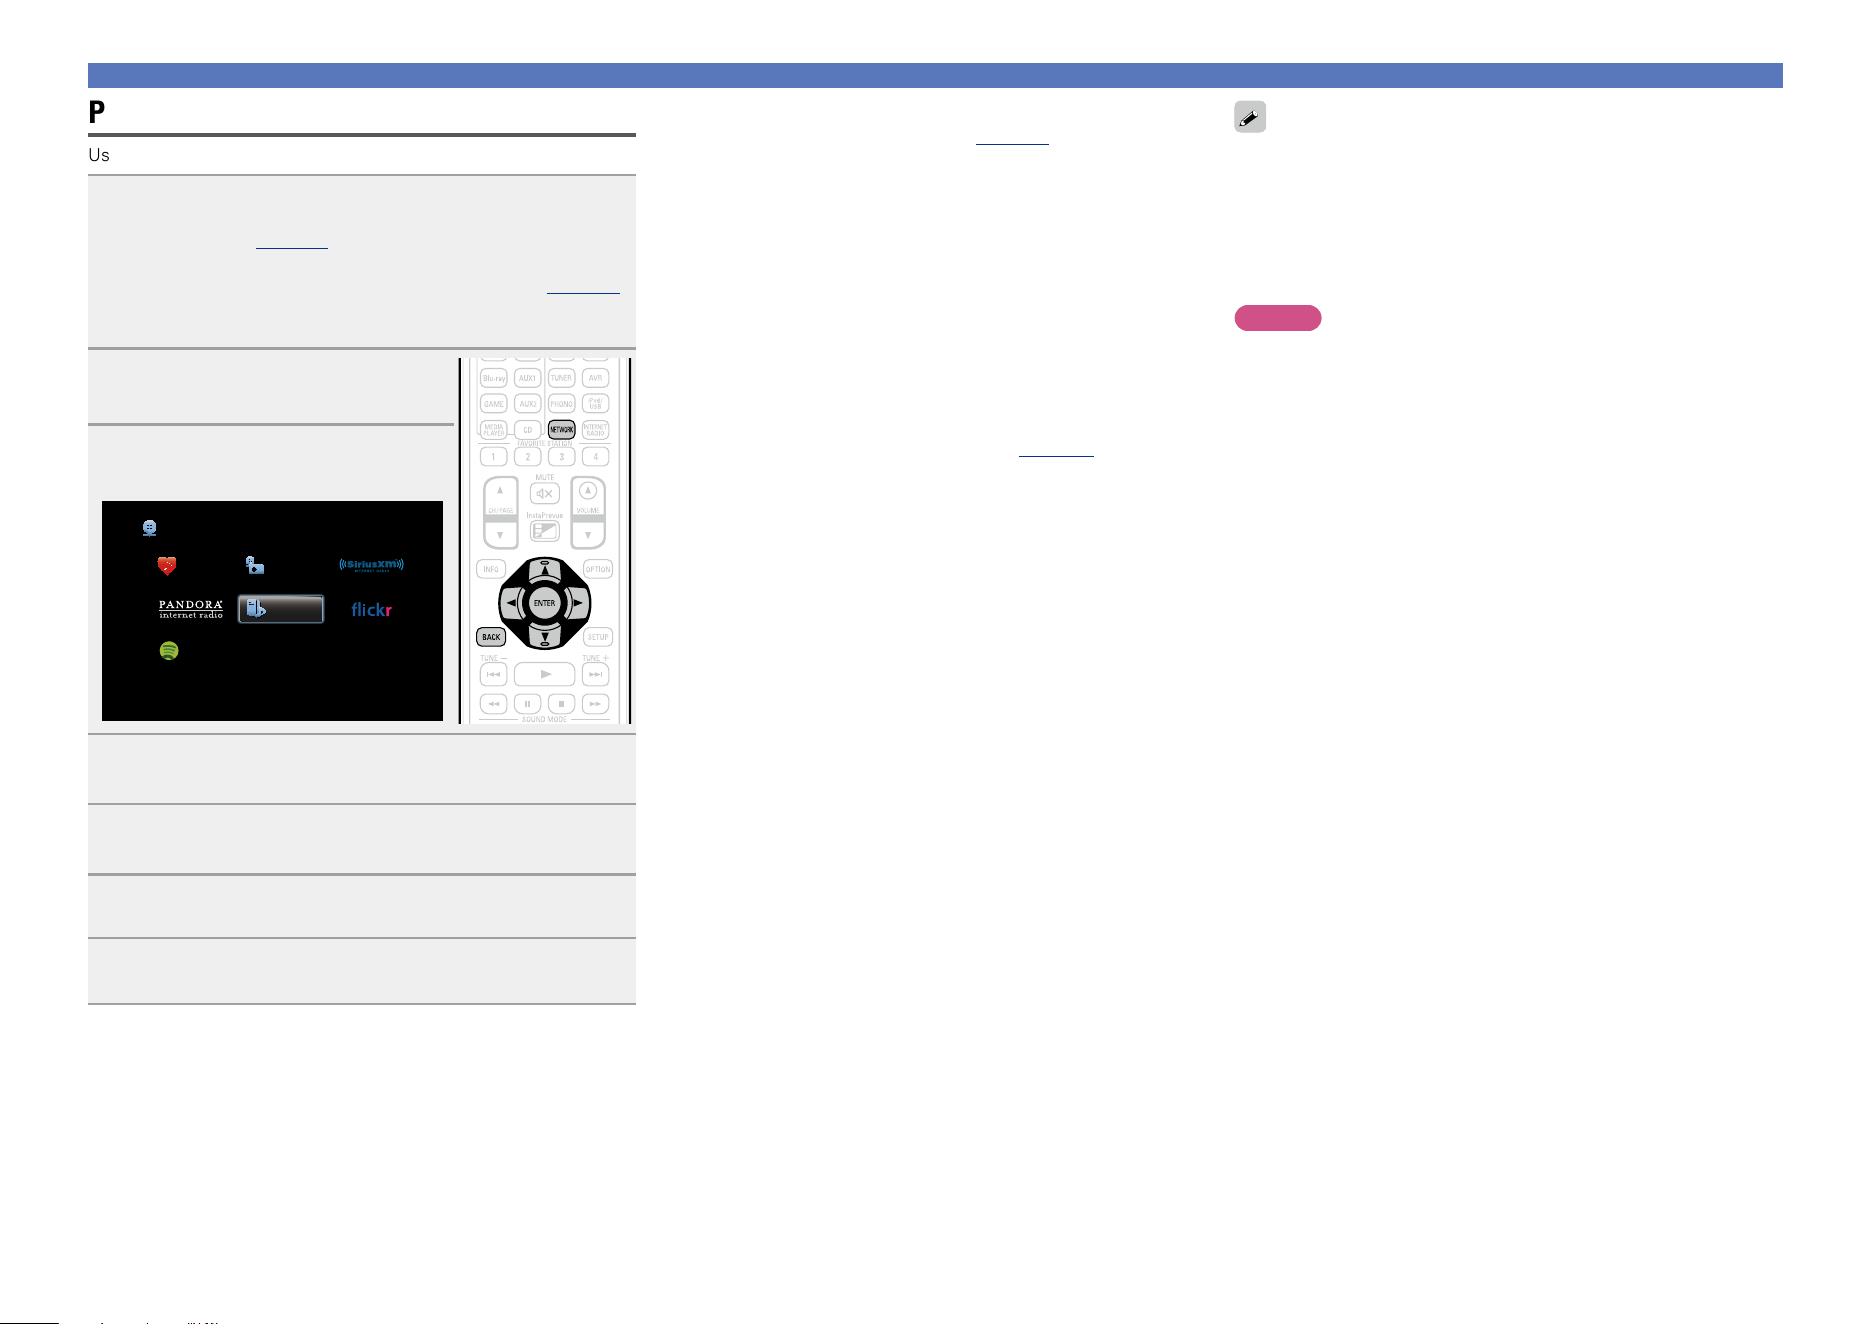
64
Playing back files stored on a PC and NAS
Playing back files stored on a PC and NAS
Use this procedure to play music files, image files or playlists.
1
Prepare for playback.
q Check the network environment, then turn on this unit’s
power (vpage 31 “Connecting to a home network
(LAN)”).
w If settings are required, make the “Settings” (vpage148).
e Prepare the computer (vComputer’s operating
instructions).
2
Press NETWORK.
3
Use uio p to select “Media
Server”, then press ENTER.
Favorites Internet Radio
Media Server
Spotify
Network
4
Use ui to select the server including the le to be
played, then press ENTER or p.
5
Use ui to select the search item or folder, then
press ENTER or p.
6
Repeat step 4 until the le is displayed.
7
Use ui to select the le, then press ENTER or p.
Playback starts once buffering reaches “100%”.
n Adjusting the sound quality (Restorer)
Make this setting at “Restorer” (vpage124) in the menu.
You can use the “Restorer” function to restore to a state close
to the audio before compression while correcting the bass feel to
enjoy a richer playback experience. The default setting is “Mode
3 (Low)”.
n Switching the screen display
Press STATUS on the main unit.
The display switches between track title, artist name, and album
title each time the button is pressed.
n Going back to the previous screen
Press o or BACK.
n Changing the screen display duration
Make this setting at “Now Playing” (vpage133) in the menu.
The default setting is “Always On”.
When “Auto Off” is set, the on-screen display is turned off 30
seconds after an operation.
Press uio p while the display is off to return to the original
screen.
•When a WMA (Windows Media Audio), MP3 or MPEG-4 AAC file
includes album art data, the album art can be displayed while the
music files are playing.
•If you use Ver.11 or later of Windows Media Player, the album art for
WMA files can be displayed.
•WMA Lossless files can be played when using a server supporting
transcoding, such as Windows Media Player Ver.11 or later.
NOTE
•Depending on the size of the still picture (JPEG) file, some time may
be required for the file to be displayed.
•The order in which the tracks/files are displayed depends on
the server specifications. If the tracks/files are not displayed in
alphabetical order due to the server specifications, searching by the
first letter may not work properly.
Basic version
Advanced version
Informations
Basic version
DVD
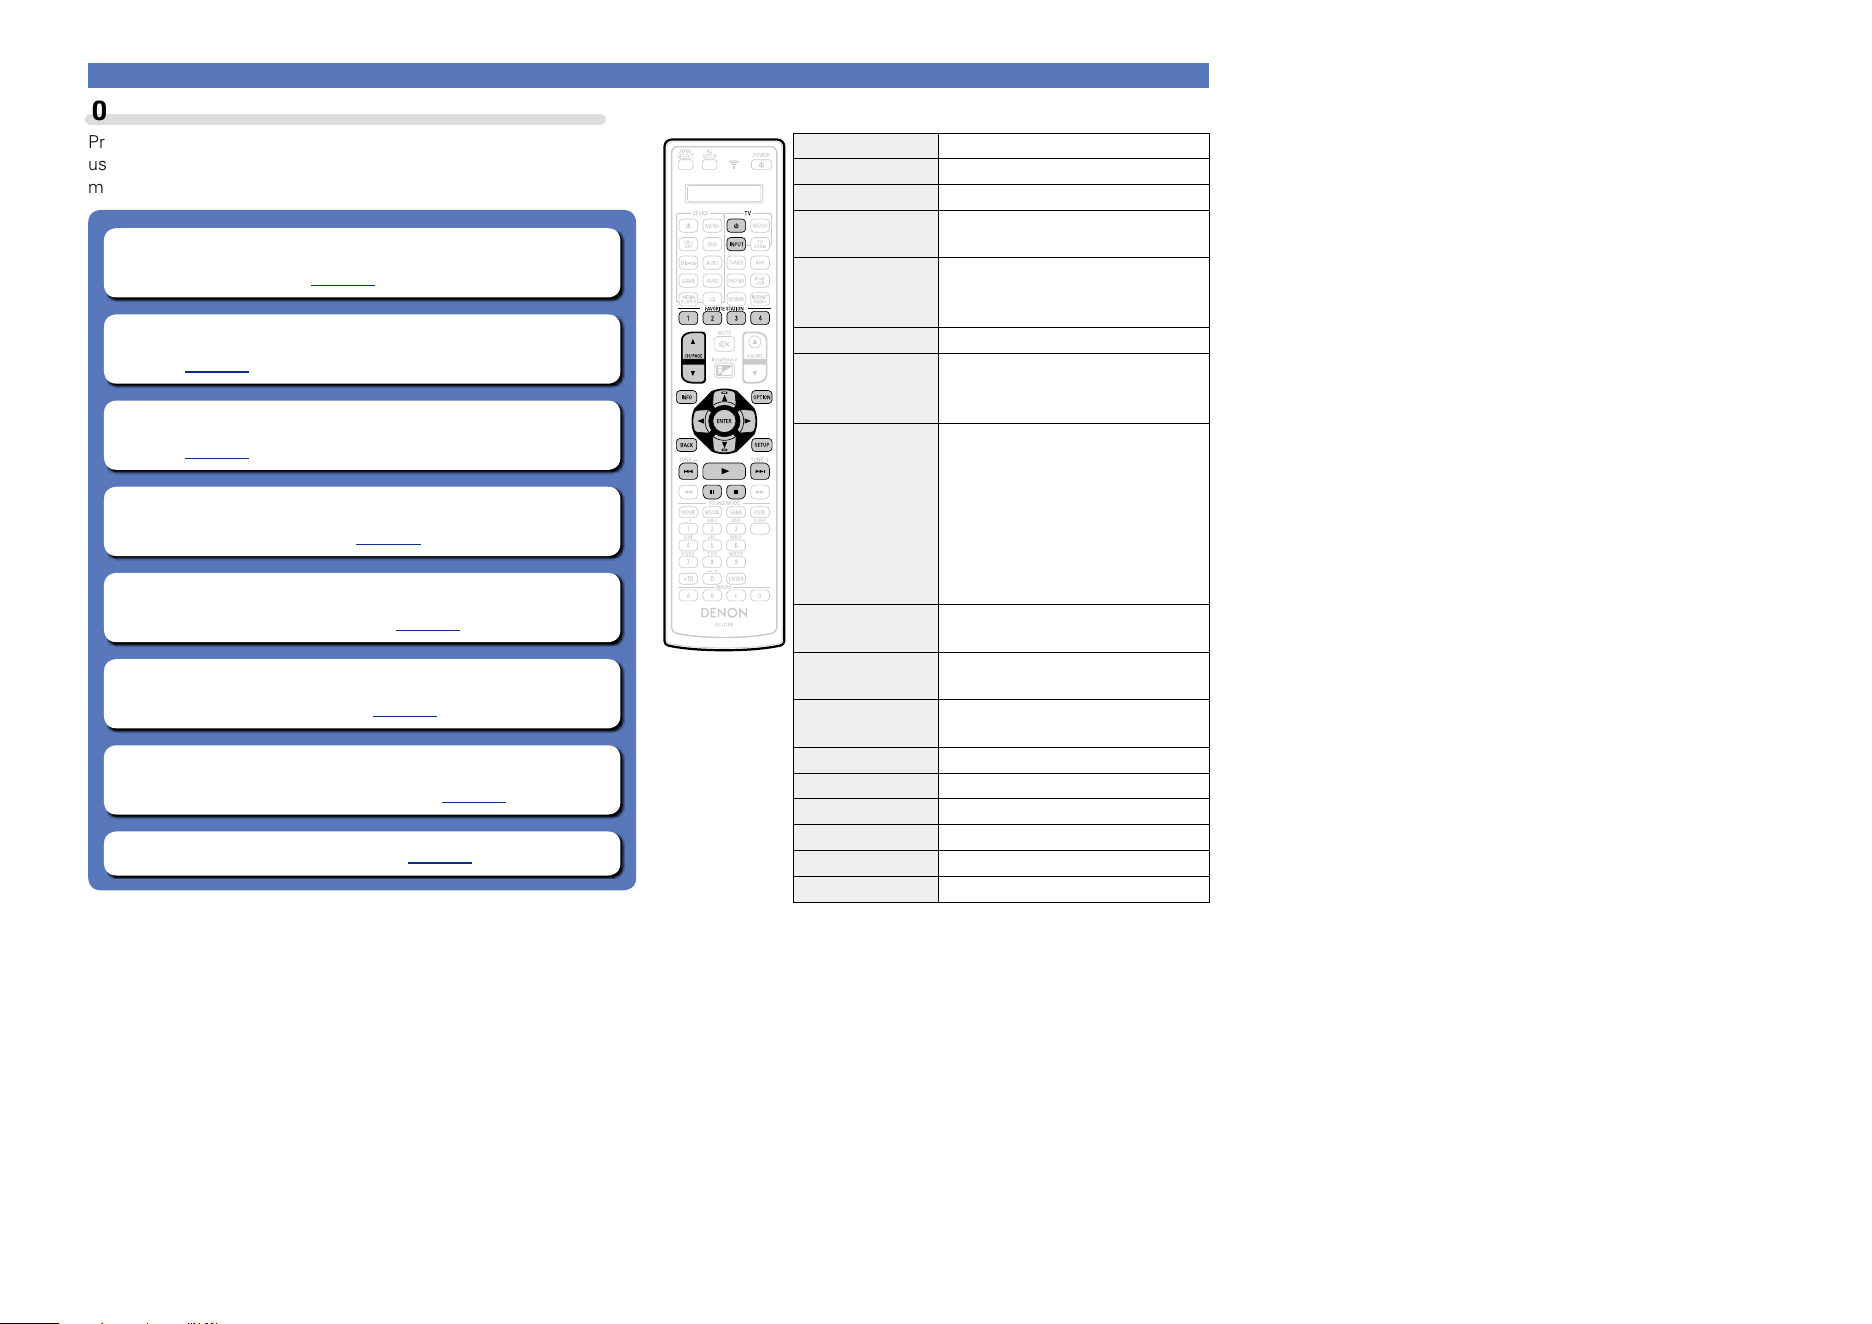
65
Playing back files stored on a PC and NAS
Operations available through the OPTION button
Press the OPTION button to display a menu of functions that can be
used on the TV screen. Select the function you want to use from this
menu. You can easily find and use the desired function.
n Searching content with keywords
(Text Search) (vpage76)
n Performing repeat playback (Repeat)
(vpage77)
n Performing random playback (Random)
(vpage77)
n Add to favorites from the Option menu
(Save to Favorites) (vpage78)
n Playing back music and a favorite picture at the
same time (Slideshow) (vpage79)
n Playing back still images in sequential order
(Slideshow Interval) (vpage79)
n Adjusting the picture quality for your viewing
environment (Picture Mode) (vpage80)
n All Zone Stereo function (vpage80)
n Media Server operation buttons
Operation buttons Function
TV X
TV power on/standby
TV INPUT Switch TV input
FAVORITE
STATION 1 – 4
Add/call up favorites
FAVORITE
STATION 1 – 4
(Press and hold)
Add to the favorites list
CH/PAGE df
Page search
INFO
Display of information such as the
source name, volume, and sound mode
name
OPTION
Text Search /
Repeat playback /
Random playback /
Save to Favorites /
Slideshow /
Slideshow Interval /
Picture Mode /
All Zone Stereo
uio p
Cursor operation /
Auto search (cue, ui)
ENTER
(Press and release)
Enter
ENTER
(Press and hold)
Stop
BACK Return
SETUP Setup menu
8 9
Auto search (cue)
1
Playback / Pause
3
Pause
2
Stop
Basic version
Advanced version
Informations
Basic version
DVD

66
Using online services
This unit supports playback of the online services shown below.
n About Flickr (vpage67)
Flickr is an online photograph sharing service that started in 2004. You can use the this unit to view
photographs that have been made public by Flickr users. You do not need an account to use Flickr.
To view photographs that you recorded yourself, you need an account in order to upload these
photographs to the Flickr server. For details, see the Flickr homepage.
http://www.flickr.com/
n About Pandora
®
(vpage69)
Pandora is an automated music recommendation and Internet Radio service created by the Music
Genome Project.
To listen to Pandora you will need a free Pandora account. If you do not have a Pandora account, you
can create one at www.pandora.com or from the Pandora smartphone application.
It is necessary to associate this machine with a Pandora account by visiting
http://www.pandora.com/denon from your PC.
n About SiriusXM (vpage72)
Enjoy anywhere access to the unparalleled content of SiriusXM.
Whether on your computer, smartphone, tablet, Lynx Portable Enjoy anywhere access to the
unparalleled content of SiriusXM.
Whether on your computer, smartphone, tablet, Lynx Portable Radio, or compatible Internet-connected
device, you don’t need to be in your vehicle to enjoy SiriusXM.
For details, see the SiriusXM homepage.
http://www.siriusxm.com
n About Spotify (vpage74)
Introduce your DENON to a whole new world of music. With Spotify, you can enjoy instant access to
millions of songs.
A Spotify Premium subscription is required.
For details, see the Spotify homepage.
http://www.spotify.com
Basic version
Advanced version
Informations
Basic version
DVD
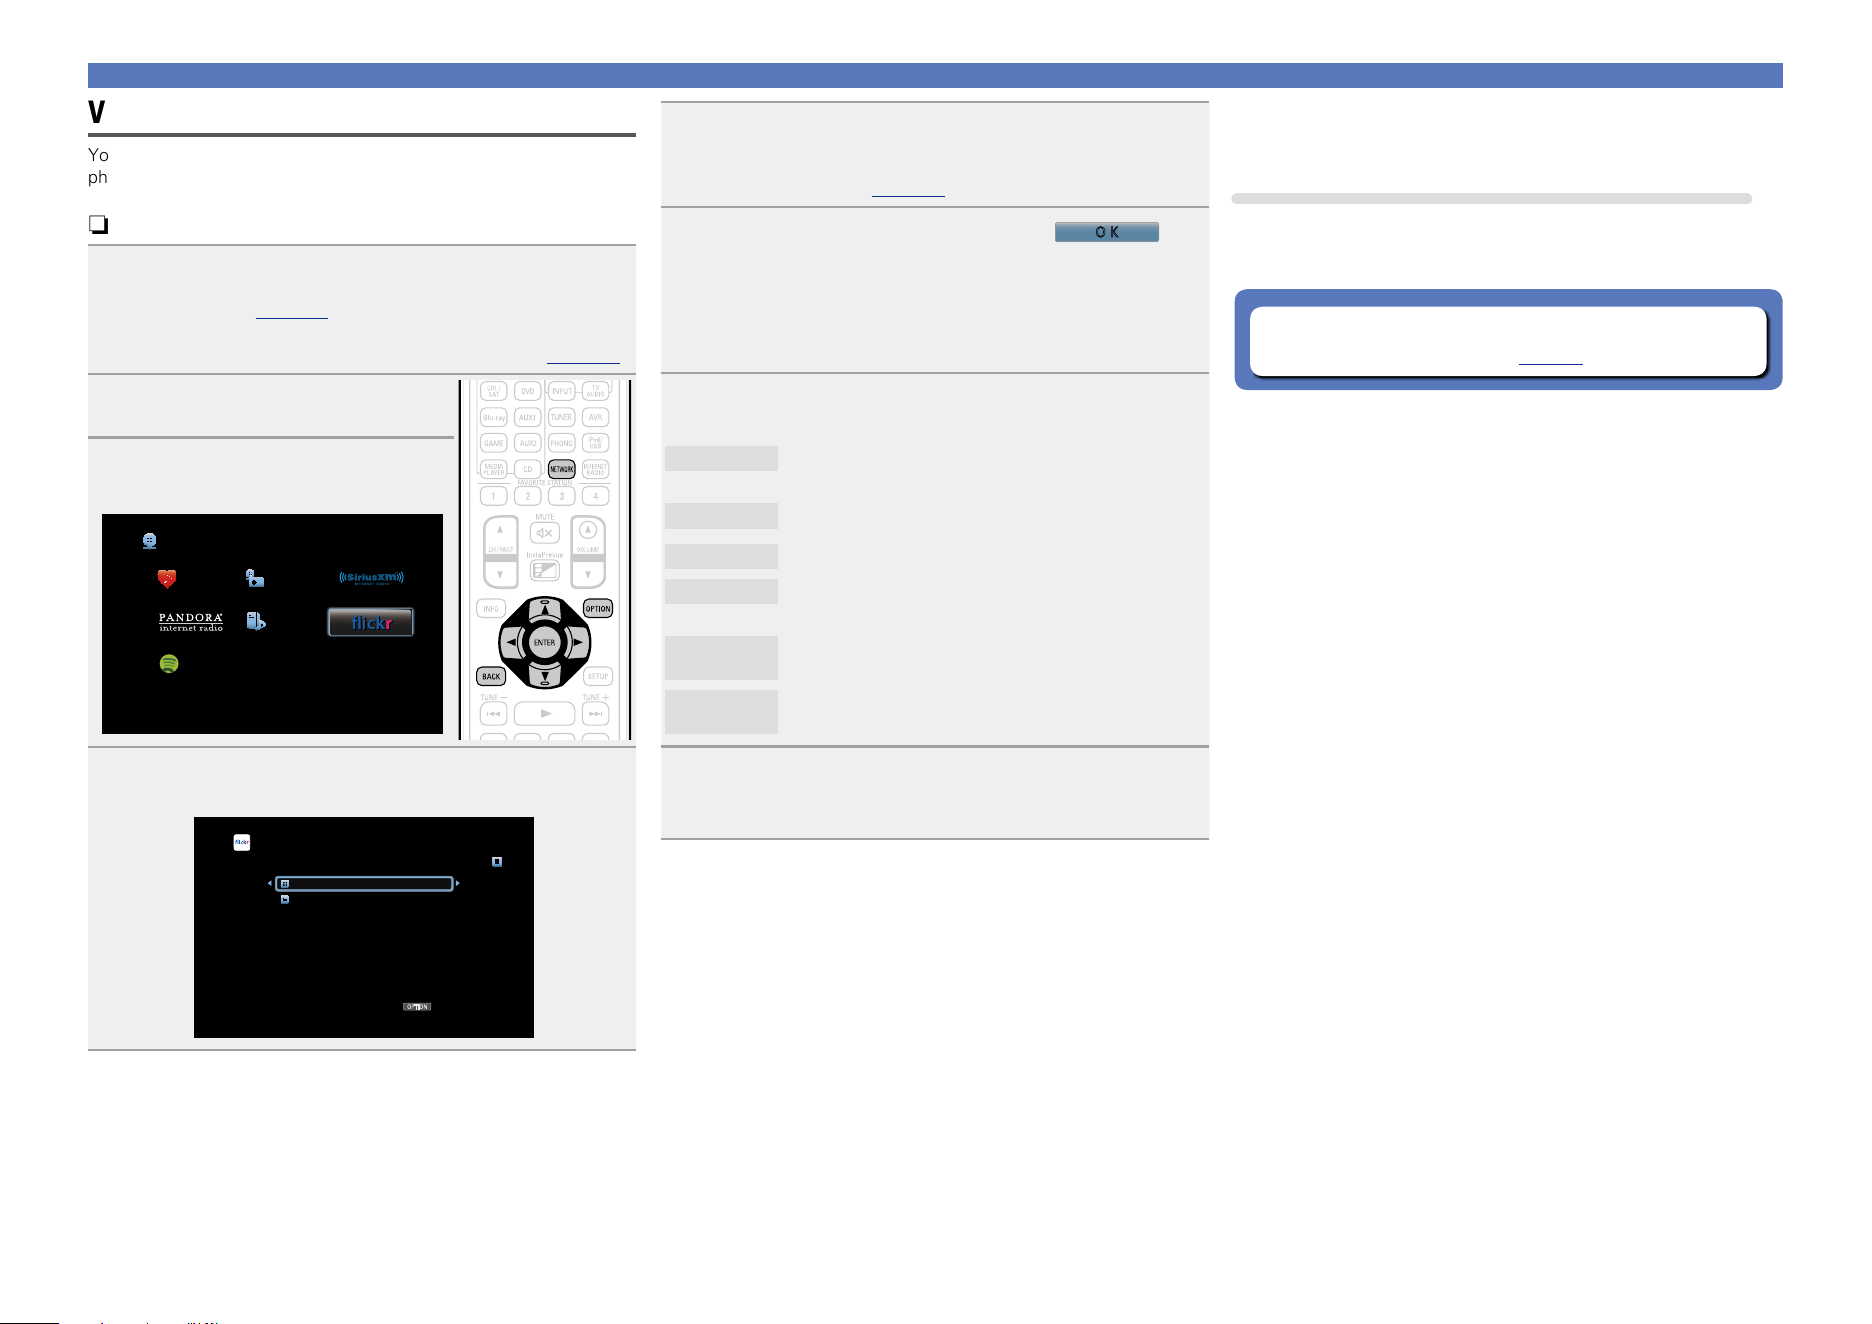
67
Using online services
Viewing photographs on the Flickr site
You can view photographs shared by particular users, or all of the
photographs shared on Flickr.
n Viewing photographs shared by particular users
1
Prepare for playback.
q Check the network environment, then turn on this unit’s
power (vpage 31 “Connecting to a home network
(LAN)”).
w If settings are required, make the “Settings” (vpage148).
2
Press NETWORK.
3
Use uio p to select “Flickr”,
then press ENTER.
Favorites Internet Radio
Media Server
Spotify
Network
4
Use ui to select “Add Flickr Contact”, then press
ENTER or p.
OPTION
Flickr [1/2]
Add Flickr Contact
All Content
Option
5
In “Contact”, add the screen name (user name you
want to view) you want to add.
•For character input, see page118.
6
After inputting the “Contact”, press
O K
.
The screen name is added to “Contact”, and the screen name
you entered in Step 5 is displayed on the top screen of Flickr.
•If you enter a screen name that does not exist, “The Flickr Contact
you entered could not be found” is displayed. Check and enter the
correct screen name.
7
Use ui to select the folder, and then press ENTER
or p.
Favorites
Displays the favorite photographs of the specified
user.
Photostream
Displays a list of shared photographs.
PhotoSets
Displays the folder (photograph album) list.
Contacts
Displays the screen name used by the specified user
in Contacts.
Remove this
Contact
Deletes a user from Flickr Contact.
Add this
Contact
Adds a user from Flickr Contact.
8
Use ui to select the le, and then press ENTER or
p.
The selected file is displayed.
n Going back to the previous screen
Press o or BACK.
Operations available through the OPTION button
Press the OPTION button to display a menu of functions that can be
used on the TV screen. Select the function you want to use from this
menu. You can easily find and use the desired function.
n Playing back still images in sequential order
(Slideshow Interval) (vpage79)
Basic version
Advanced version
Informations
Basic version
DVD
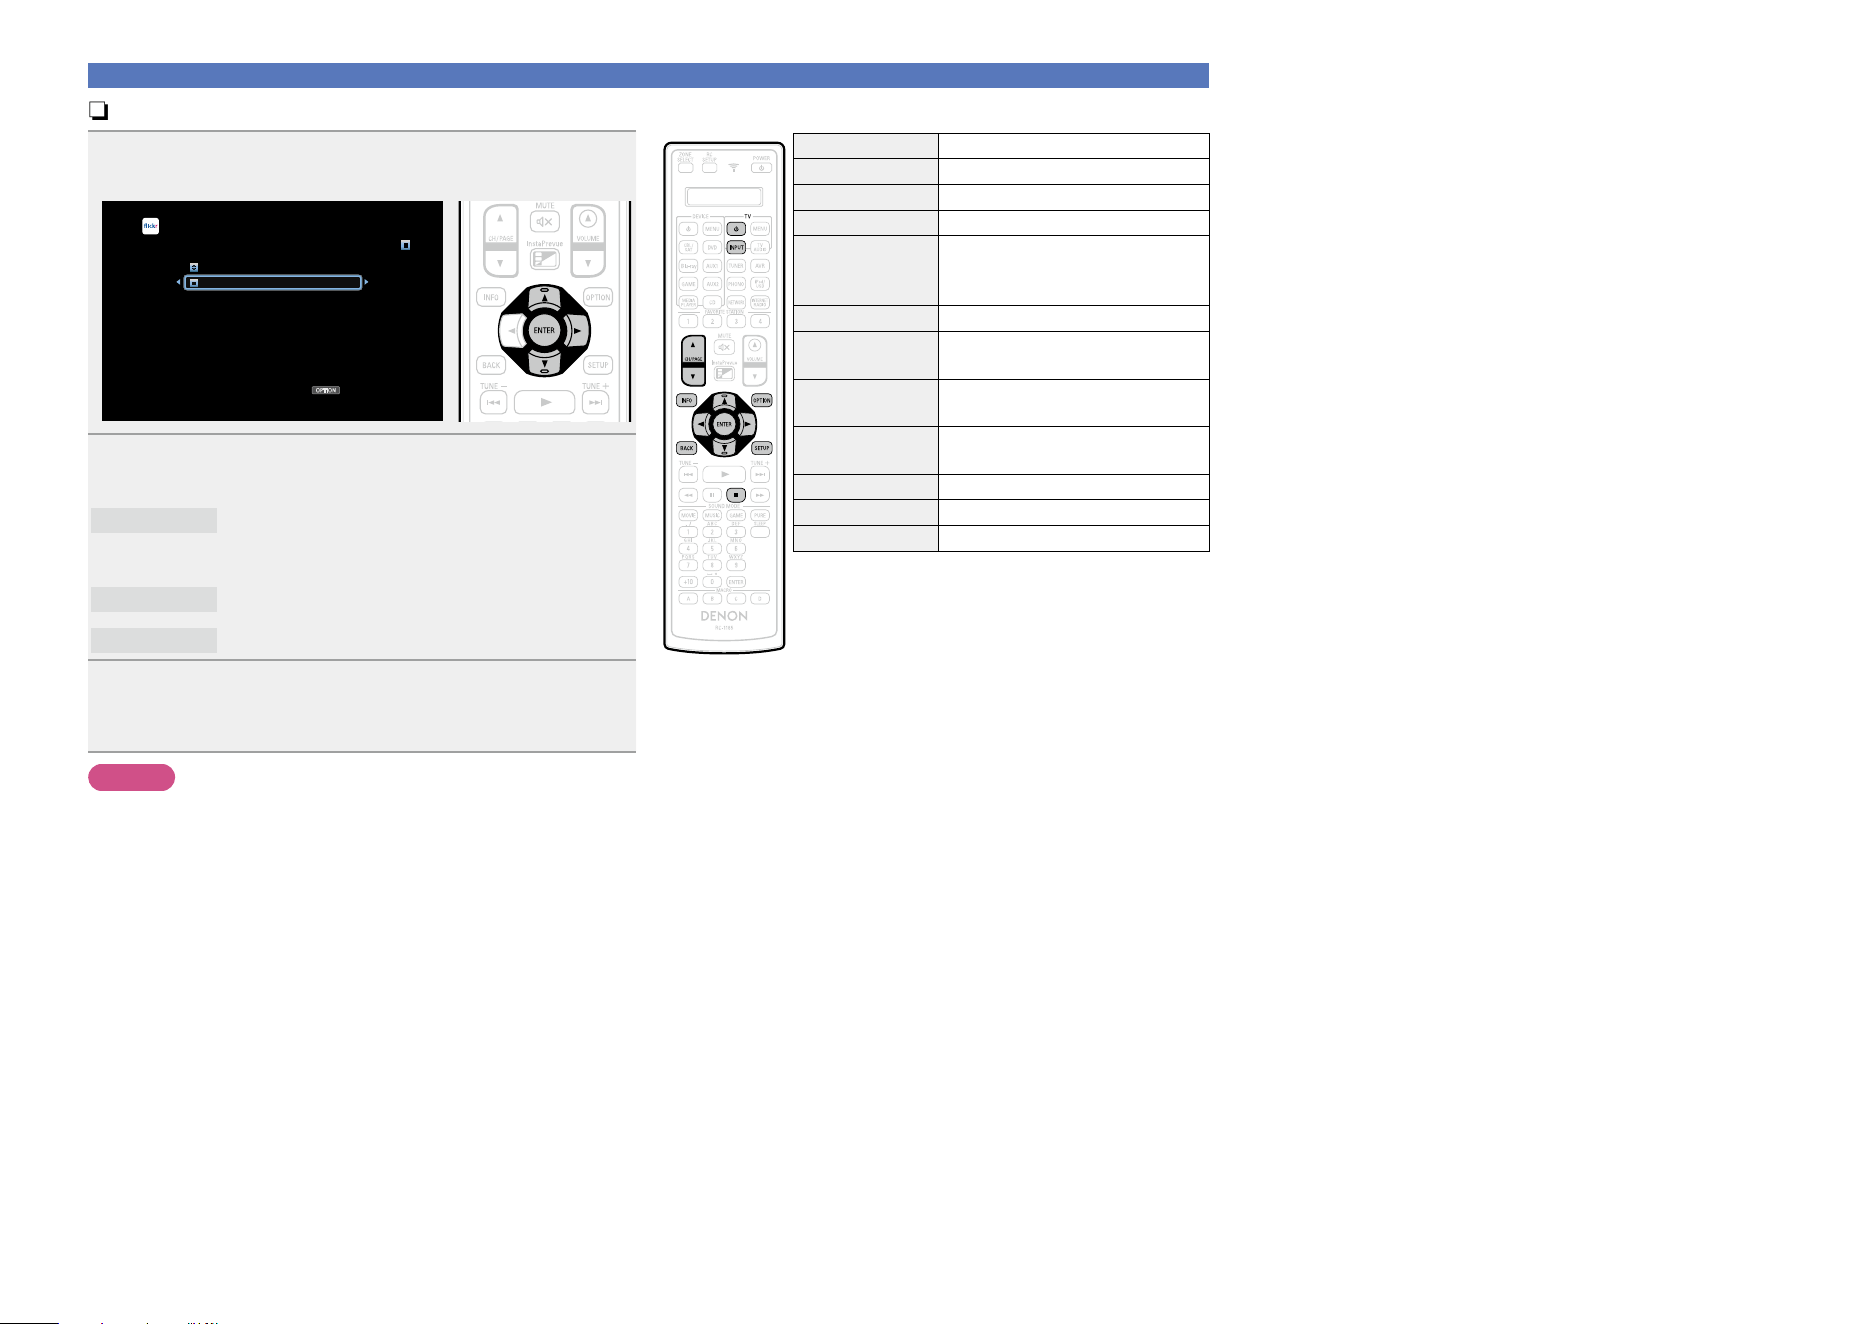
68
Using online services
n Viewing all photographs on Flickr
1
Use ui to select “All Content”, then press ENTER
or p.
OPTION
Flickr [1/2]
Add Flickr Contact
All Content
Option
2
Use ui to select the folder, and then press ENTER
or p.
Interestingness
Displays photographs that are popular from the
number of user comments or number of times they
are added as favorites.
Recent
Displays the most recently added photographs.
Search by text
Search for photographs by keyword.
3
Use ui to select the le, and then press ENTER or
p.
The selected file is displayed.
NOTE
Depending on the file format, some photographs cannot be viewed.
n Flickr operation buttons
Operation buttons Function
TV X
TV power on/standby
TV INPUT Switch TV input
CH/PAGE df
Page search
INFO
Display of information such as the
source name, volume, and sound mode
name
OPTION Slideshow Interval
uio p
Cursor operation /
Auto search (cue, ui)
ENTER
(Press and release)
Enter
ENTER
(Press and hold)
Stop
BACK Return
SETUP Setup menu
2
Stop
Basic version
Advanced version
Informations
Basic version
DVD
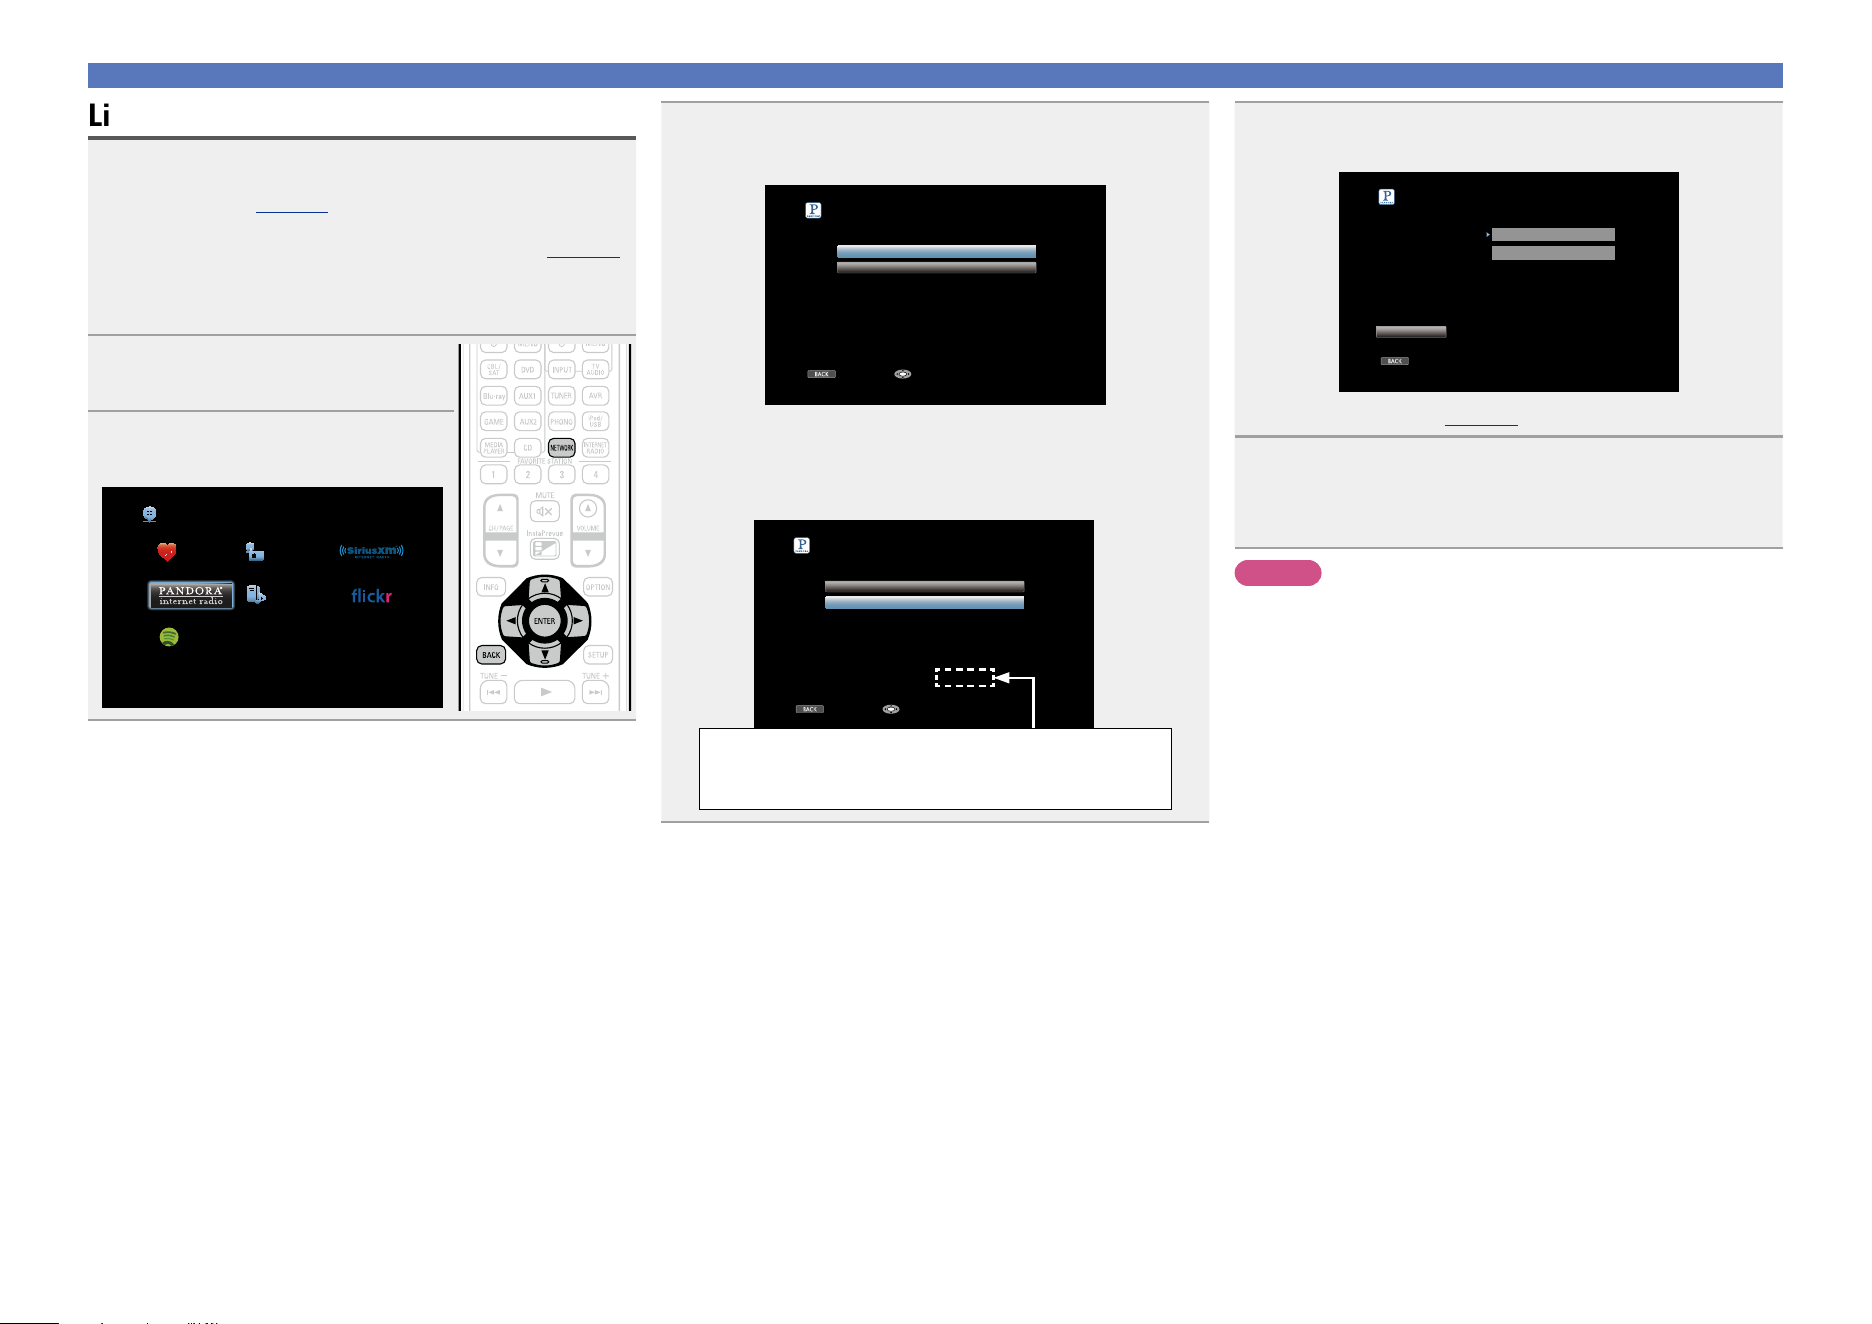
69
Using online services
Listening to Pandora
®
1
Prepare for playback.
q Check the network environment, then turn on this unit’s
power (vpage 31 “Connecting to a home network
(LAN)”).
w If settings are required, make the “Settings” (vpage148).
e Complete step 4 and obtain a Pandora account.
•If you already have a Pandora account, you do not need to
obtain a new account. Use your existing Pandora account.
2
Press NETWORK.
3
Use uio p to select “Pandora”,
then press ENTER.
Favorites Internet Radio
Media Server
Spotify
Network
4
If you have a Pandora account, use ui to select “I
have a Pandora account”, then press ENTER or p.
BACK
Pandora Account
I have a Pandora account
I am new to Pandora
Cancel Enter
•If you do not have a Pandora account, press i to select “I am
new to Pandora”. The URL of Pandora and activation code are
displayed. Access the Pandora web page from your PC and register
the displayed activation code and account information. Then press
ENTER.
BACK
Pandora
I have a Pandora account
Please go to
http://www.pandora.com/denon and follow
the instructions there to create a new account.
Your activation code is : zzzzzz
I am new to Pandora
Cancel Continue
This is an identification code required to register your
purchased product to the Pandora service.
This code is used to obtain your account.
5
Input “Email address” and “Password”.
BACK
Pandora Account
Email address
Password
OK
Enter Email address
Exit
•For character input, see page118.
6
After inputting the “Email address” and “Password”,
select “OK”, then press ENTER.
If the “Email address” and “Password” match, the top menu
for Pandora is displayed.
NOTE
Press BACK to cancel the input. When “Cancel input?” is displayed,
select “Yes”, then press ENTER.
Basic version
Advanced version
Informations
Basic version
DVD
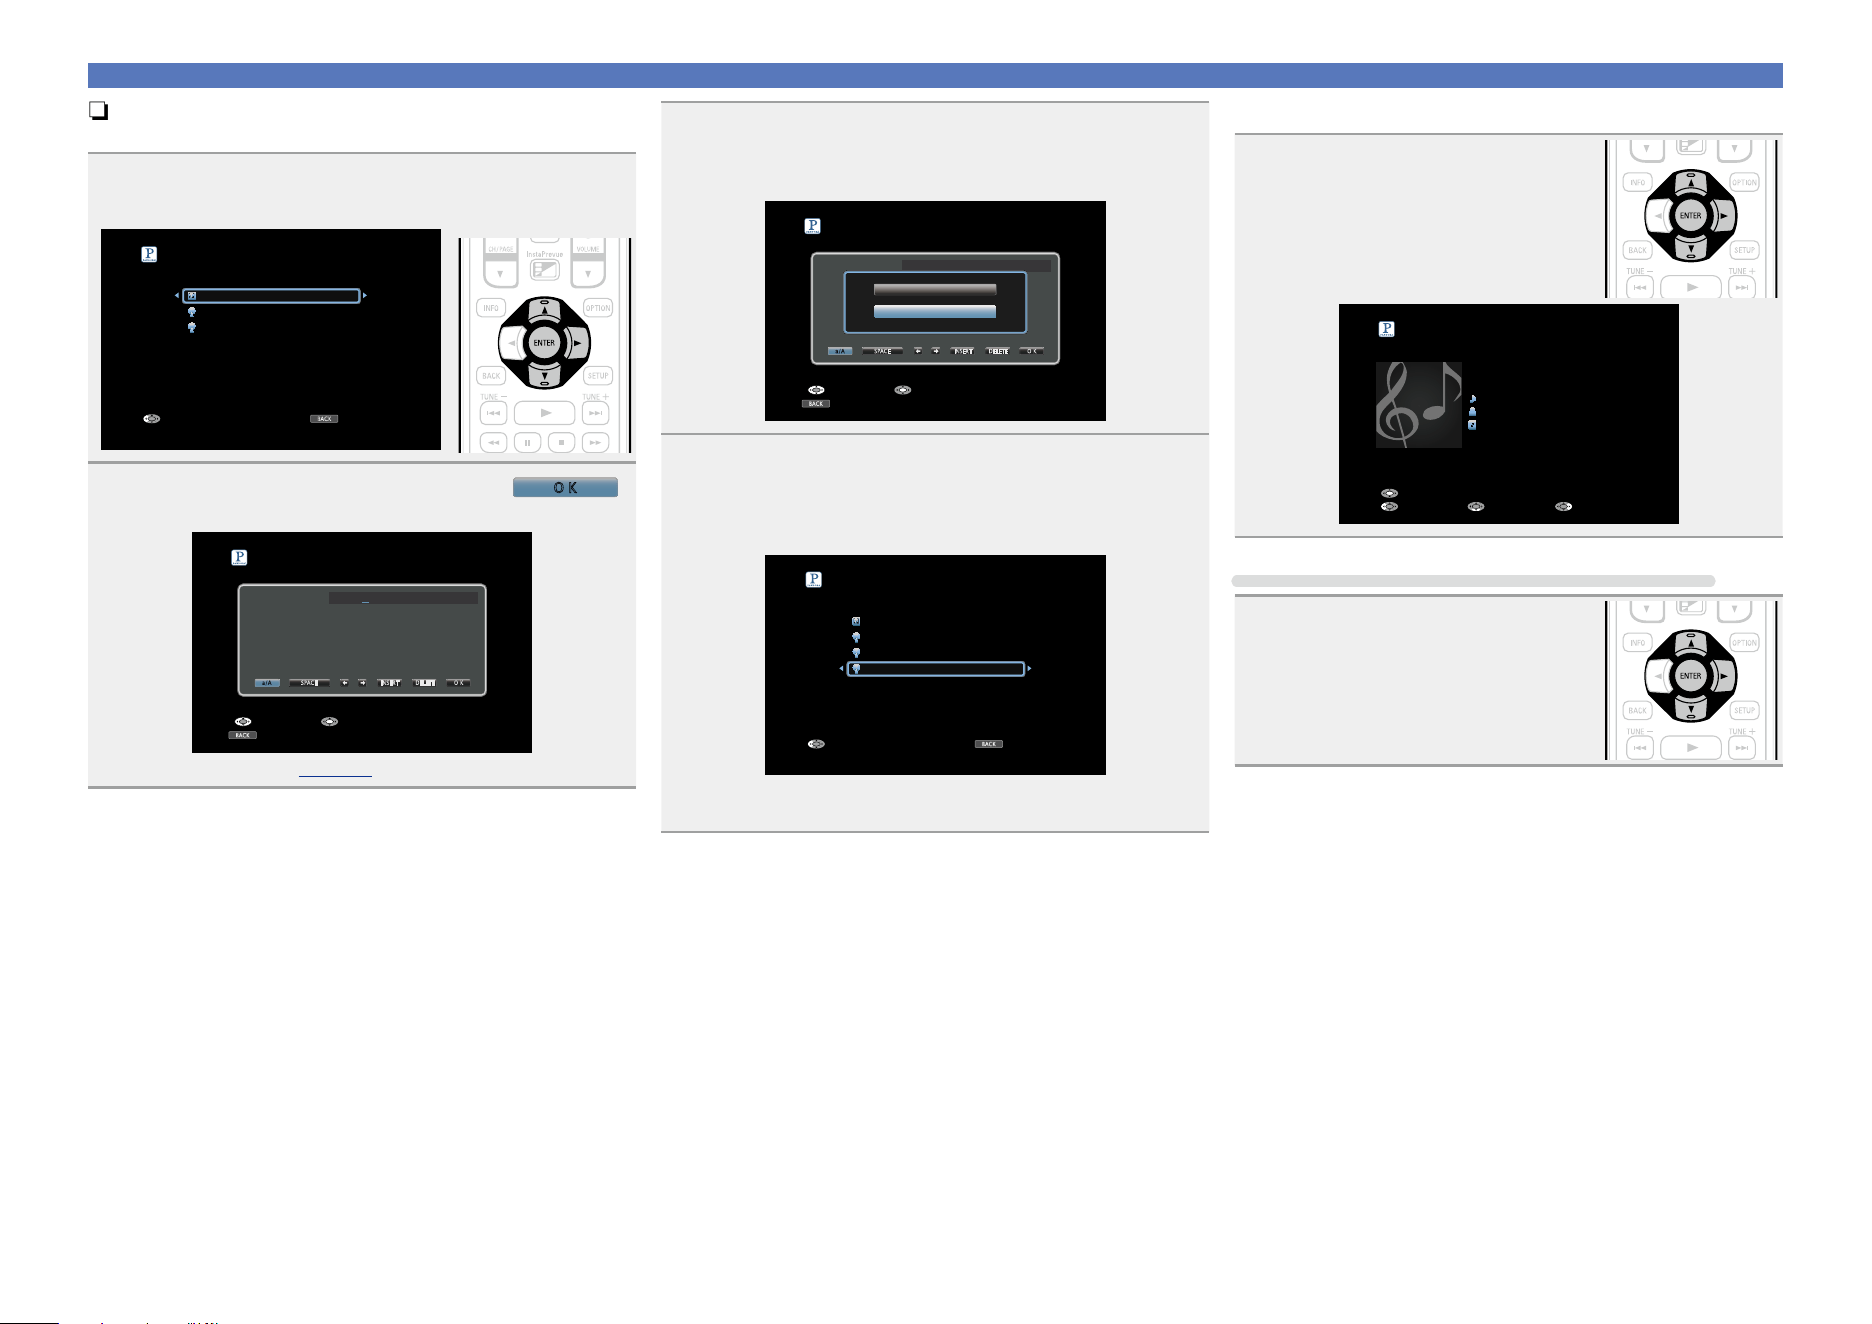
70
Using online services
n Creating a new station
You can create up to 100 radio stations.
1
Use ui to select “New Station”, then press ENTER
or p.
BACK
My Station [1/3]
Sign outExit
New Station
Quick Mix
D&M1 Radio
2
Input a track or artist name, then press
O K
.
BACK
New Station
InputSelect
Cancel
Track or Artist
A
N
0
$
B
O
1
%
C
P
2
&
D
Q
3
‘
E
R
4
(
F
S
5
)
G
T
6
*
H
U
7
+
I
V
8
,
J
W
9
;
K
X
!
<
L
Y
“
=
M
Z
#
>
D&M2
a/A SPACE INSERT DELETE O K
•For character input, see page118.
3
Use ui to select “Search by Artist” or “Search by
Track”, then press ENTER.
You can search and display a list by track or artist.
BACK
New Station
InputSelect
Cancel
Track or Artist
A
N
0
$
B
O
1
%
C
P
2
&
D
Q
3
‘
E
R
4
(
F
S
5
)
G
T
6
*
H
U
7
+
I
V
8
,
J
W
9
;
K
X
!
<
L
Y
“
=
M
Z
#
>
D&M2
a/A SPACE INSERT DELETE O K
Search by Artist
Search by Track
4
Press ui, select a le (e.g. D&M2) from the list, and
press ENTER or p.
“Radio” is added to the end of a filename, and your new station
is created (e.g. D&M2 Radio).
BACK
My Station [4/4]
Sign outExit
New Station
Quick Mix
D&M1 Radio
D&M2 Radio
•Your new station will play music with similar qualities to the artist
or track you entered.
n Listening to an existing station
Use ui and select the radio station
(“D&M2 Radio”) that you want to
listen to, and press ENTER or p.
D&M2 Radio
Title
Now Playing
Artist
Album
00:06 100%
Pause
Next MENUBack
Listening to created radio stations at random
Use ui to select “Quick Mix”, then
press ENTER or p.
Created radio stations are selected at
random, and tracks are streamed.
Basic version
Advanced version
Informations
Basic version
DVD
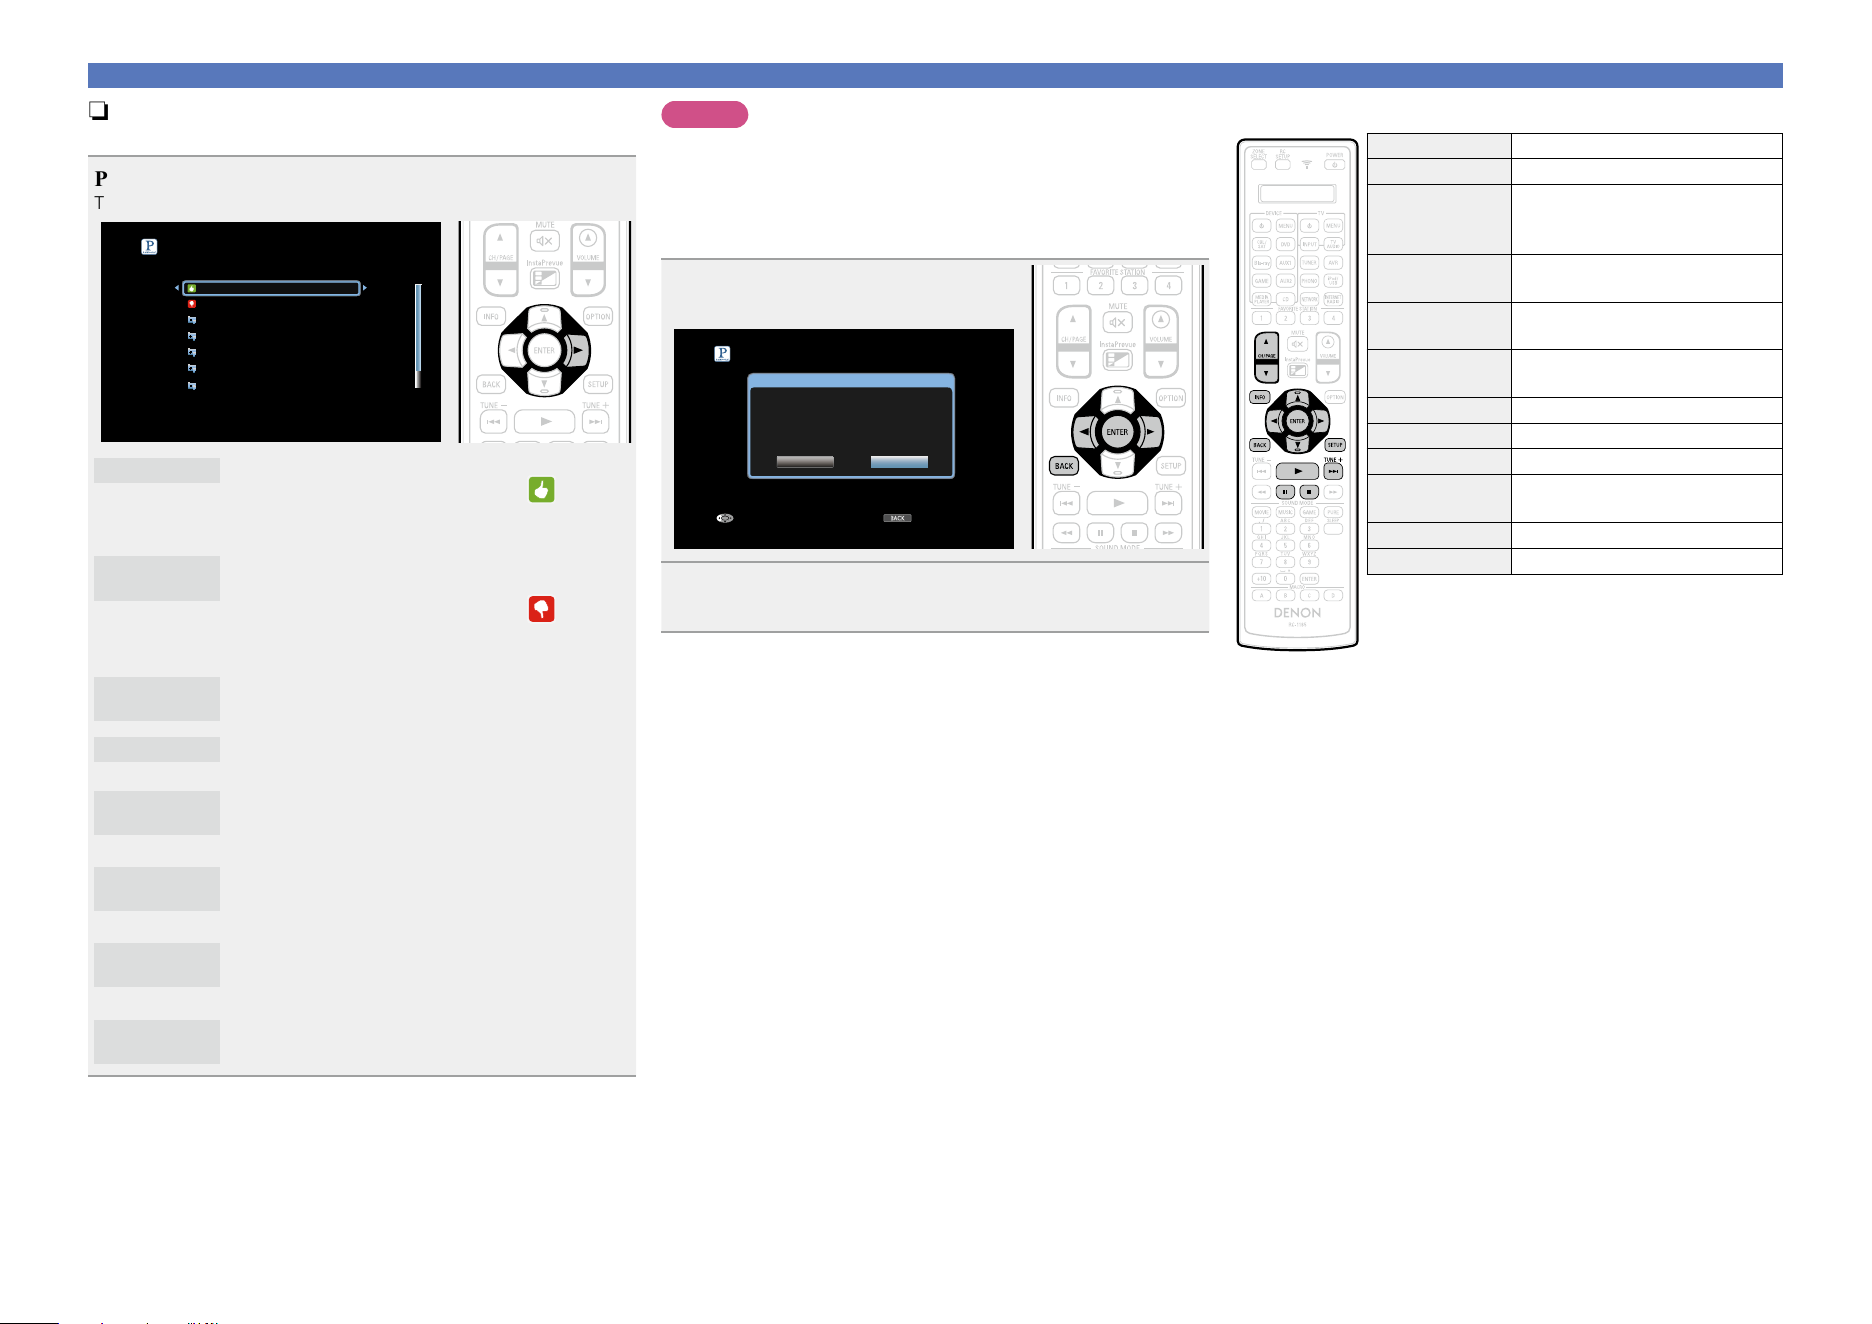
71
Using online services
n Giving Feedback and Managing Stations
You can personalize your stations by providing feedback.
Press p while a track is playing.
The Pandora menu screen is displayed.
Menu [1/8]
I like this track
I don’t like this track
Why is this track playing?
Create station
Bookmark this artist
Bookmark this track
I’m tired of this track
I like this track
•Press when you like the track that is being played.
•It will return to the Play Screen. And
(Thumbs
up) icon is displayed. (The icon is not displayed on
the next track.)
I don’t like
this track
•Press when you don’t like the track that is being
played.
•It will return to the Play Screen. And (Thumbs
down) icon is displayed. (The icon is not displayed
on the next track.)
Why is this
track playing?
•Displays the reason why Pandora selected this
track.
Create station
•Creates a Station for the Track or Artist being
played.
Bookmark
this artist
•Bookmarks the artist currently being played.
•You can check on a computer or iPhone etc.
•For details, see the Pandora web page.
Bookmark
this track
•Bookmarks the track currently being played.
•You can check on a computer or iPhone etc.
•For details, see the Pandora web page.
I’m tired of
this track
•Press when you don’t like the track that is being
played.
•The track will not be played for 1 month.
Delete this
station
•Press when you want to delete the station that is
being played.
NOTE
•You can Skip up to 6 Tracks that are being played back within 1 hour.
•You can create up to 100 Stations (radio stations).
n Sign out
Disassociate this unit from your Pandora account.
1
While the Pandora top menu is
displayed, press BACK.
BACK
My Station [1/3]
Sign outExit
New Station
Quick Mix
D&M1 Radio
Are you sure you want to sign out
Yes
No
2
When the popup menu appears, use o p to select
“Yes”, then press ENTER.
n Pandora operation buttons
Operation buttons Function
CH/PAGE df
Page search
INFO
Display of information such as the
source name, volume, and sound mode
name
uio p
Cursor operation /
Auto search (cue, i)
ENTER
(Press and release)
Enter
ENTER
(Press and hold)
Stop
BACK Return
SETUP Setup menu
1
Playback
9
Skips the current track,
subject to skip limit
3
Pause
2
Stop
Basic version
Advanced version
Informations
Basic version
DVD
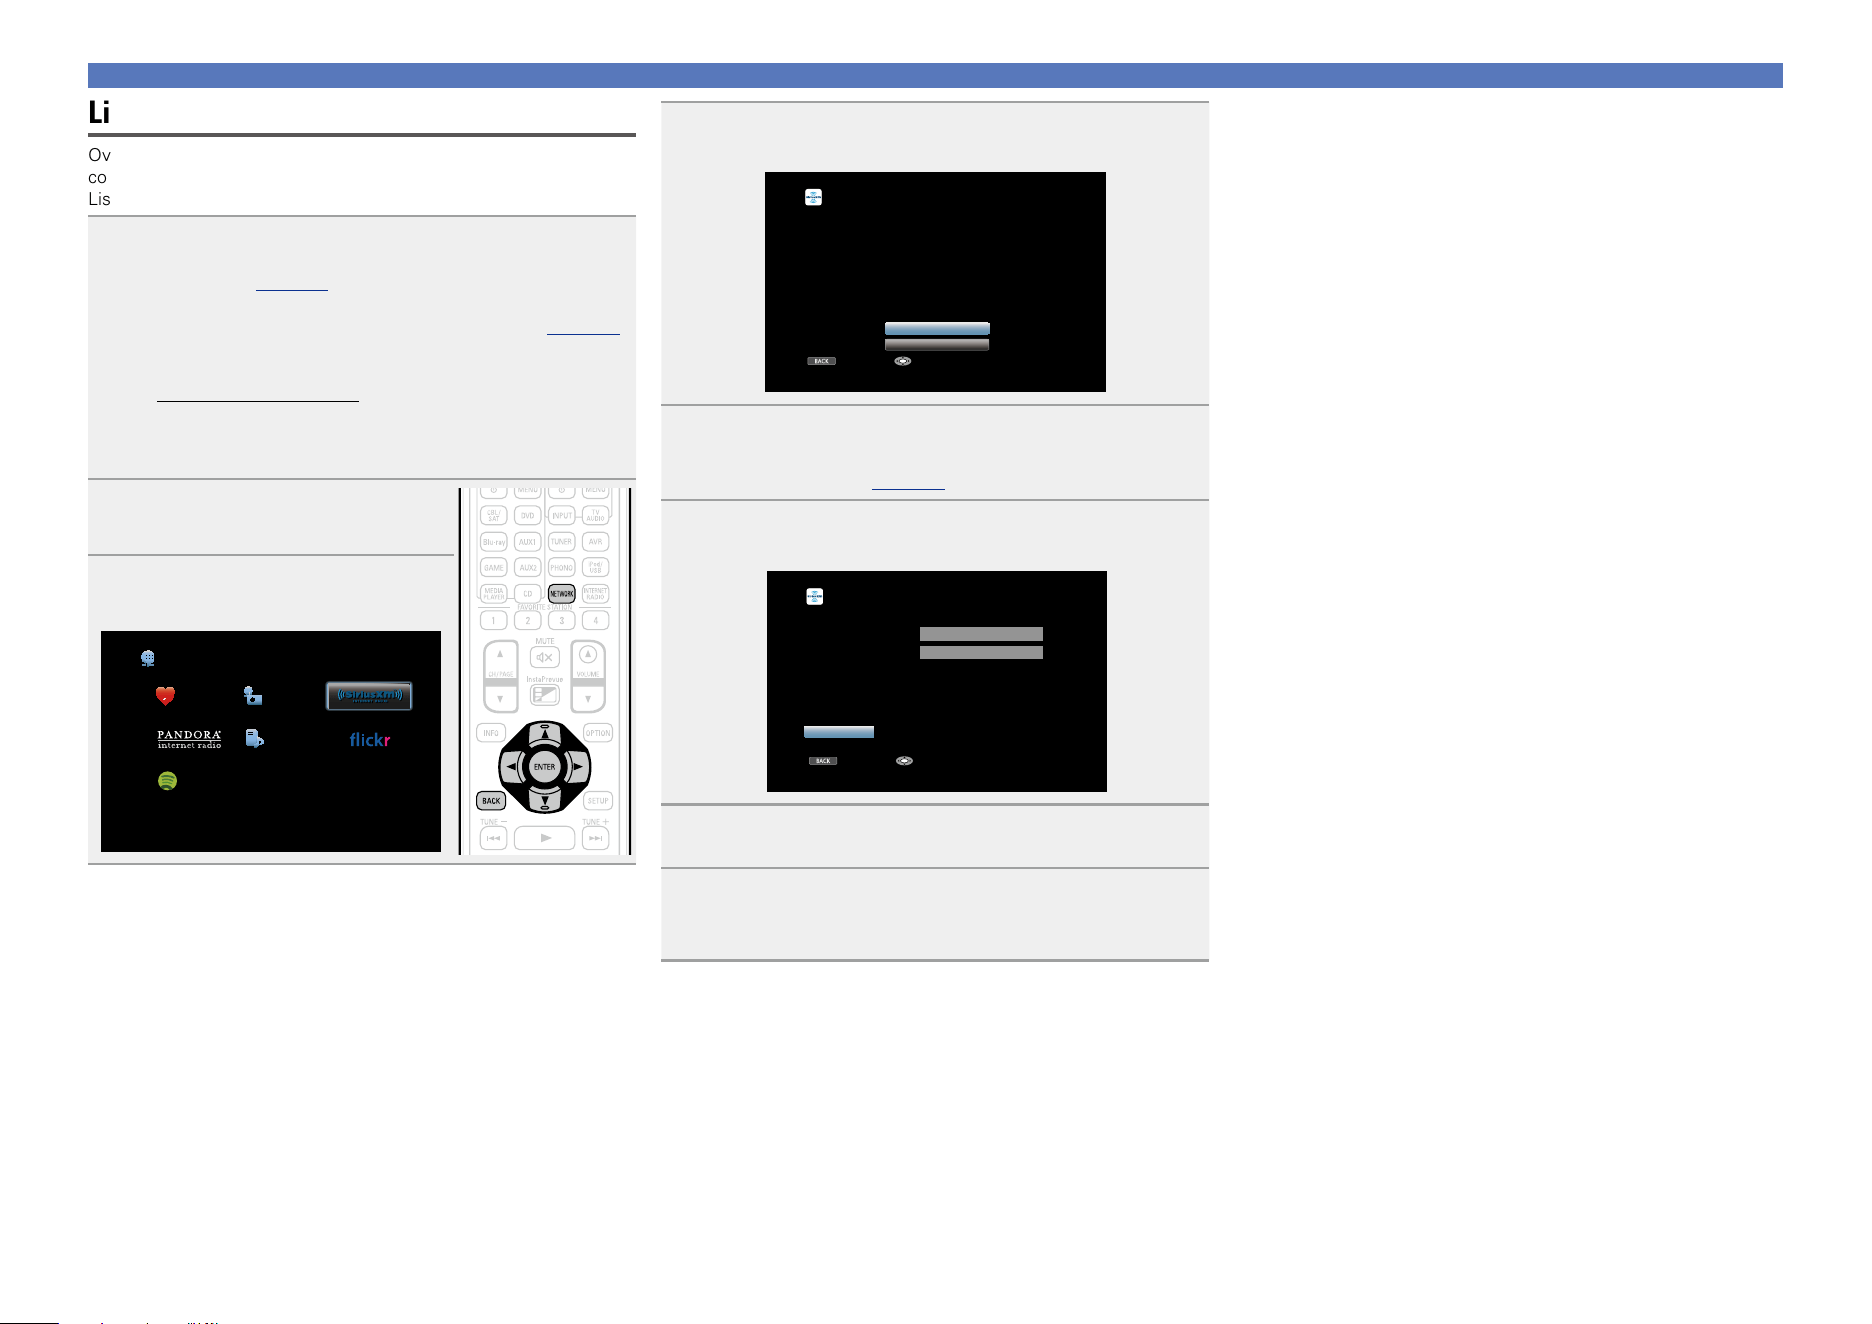
72
Using online services
Listening to SiriusXM Internet Radio
Over 120 channels of the SiriusXM programming you love, including
commercial-free music plus sports, talk, news and entertainment.
Listen anywhere on your computer or smartphone.
1
Prepare for playback.
q Check the network environment, then turn on this unit’s
power (vpage 31 “Connecting to a home network
(LAN)”).
w If settings are required, make the “Settings” (vpage148).
e Access the following website from your PC and obtain a
SiriusXM account.
http://www.siriusxm.com
•If you already have a SiriusXM account, you do not need to
obtain a new account. Select “Sign in” in step 4, and enter
your existing SiriusXM account.
2
Press NETWORK.
3
Use uio p to select
“SiriusXM”, then press ENTER.
Favorites Internet Radio
Media Server
Spotify
Network
4
Select “Sign in”, then press ENTER.
BACK
SiriusXM Sign in
Sign in
Start Trial
Please set your SiriusXM username and password.
You can go to www.siriusxm.com to sign up
for an account. Or,select “Start Trial” below
to start the one-time free trial.
Cancel Enter
5
Input the “Username” and “Password”.
•For character input, see page118.
6
Select the “Sign in”, and then press ENTER.
The top menu of SiriusXM is displayed.
BACK
SiriusXM Sign in
Username
Password
zzzzz
zzzzz
Sign in
Exit Enter
7
Use ui to select the genre, then press ENTER or p.
8
Use ui to select the le, and then press ENTER or
p.
The selected file is displayed.
n Going back to the previous screen
Press o or BACK.
Basic version
Advanced version
Informations
Basic version
DVD
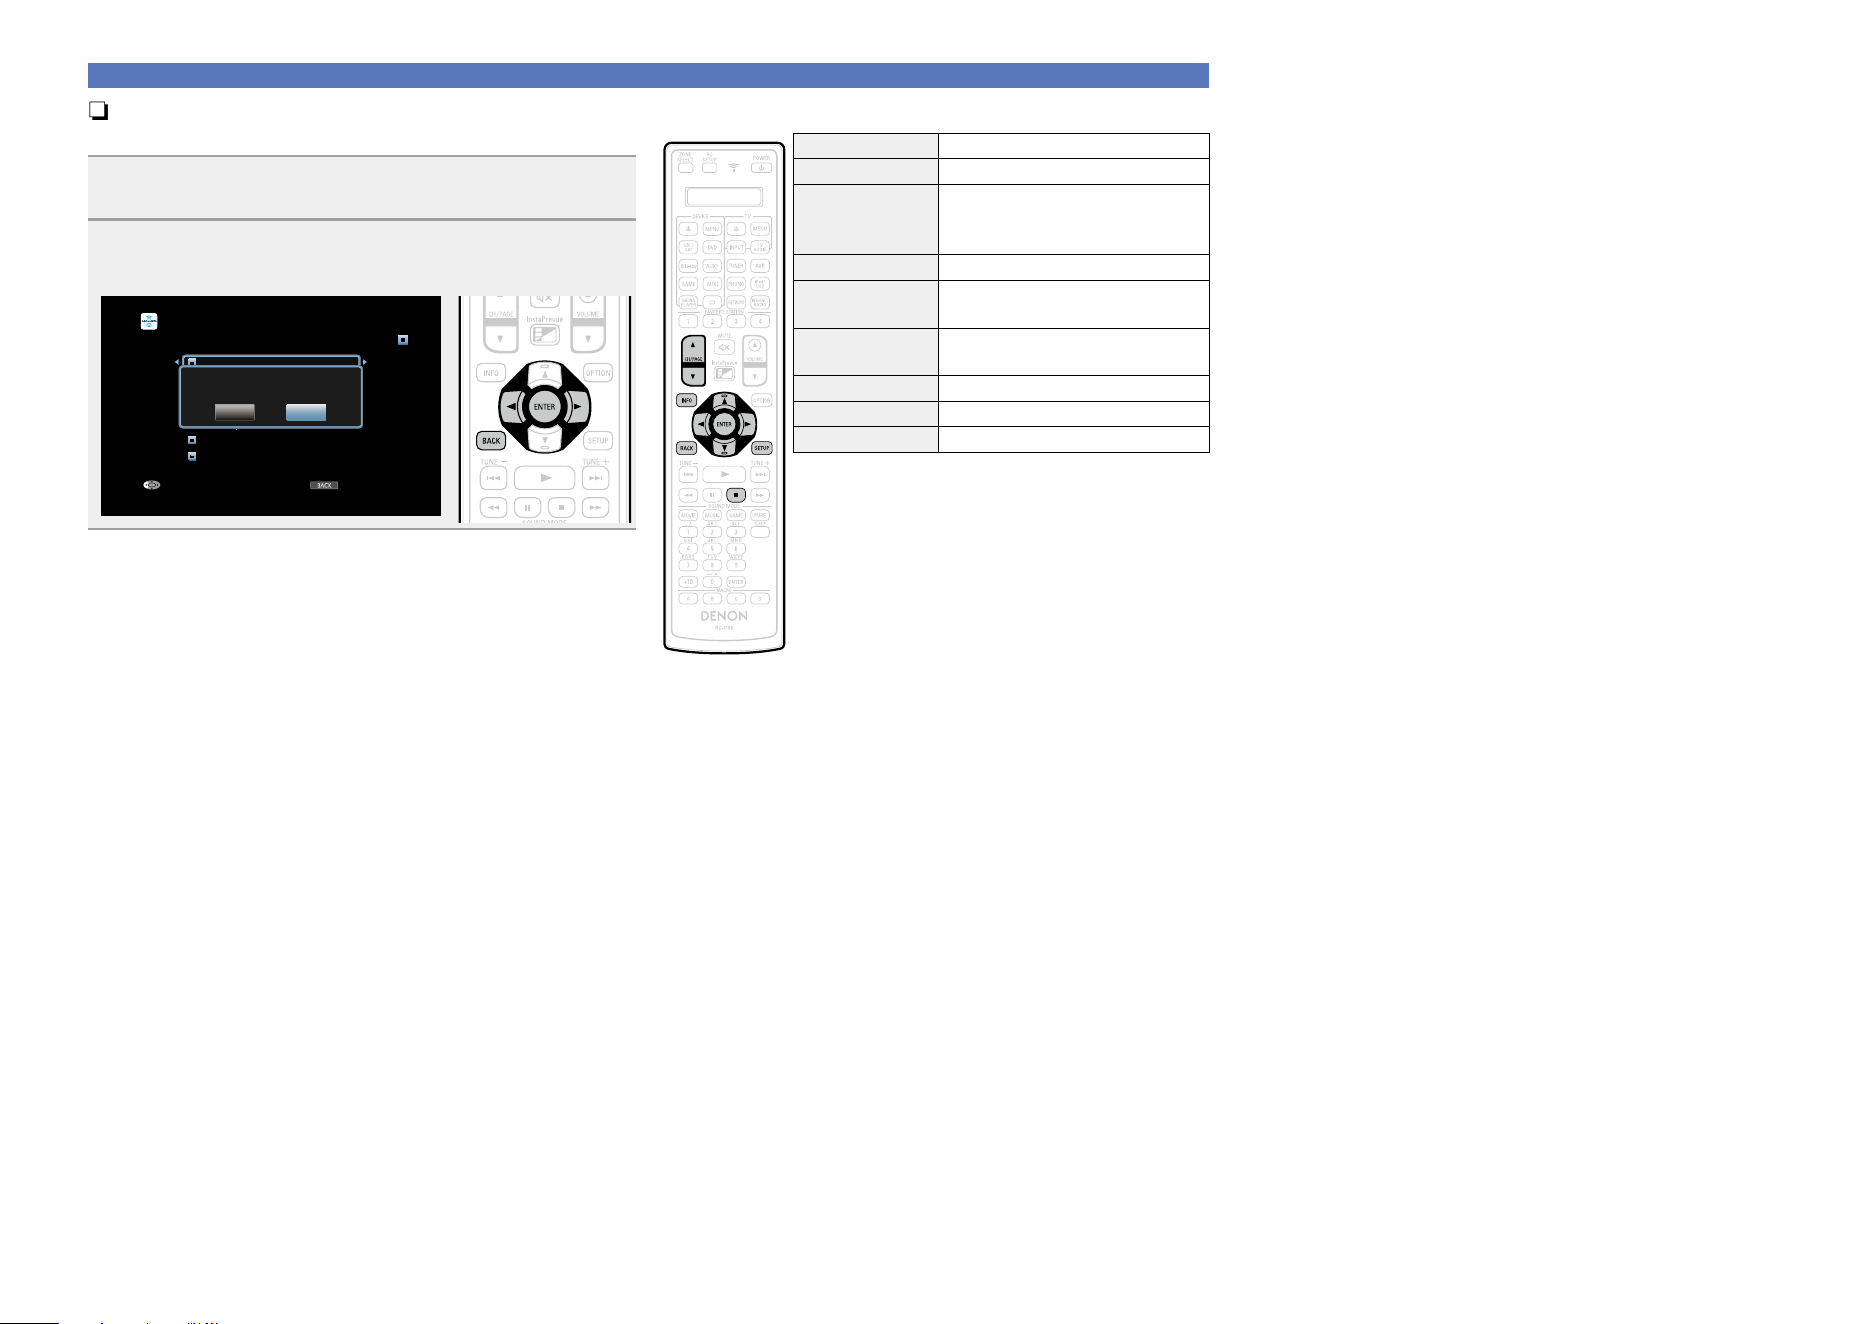
73
Using online services
n Sign out
Disassociate this unit from your SiriusXM account.
1
While the SiriusXM top menu is displayed, press
BACK.
2
When the popup menu appears, use o p to select
“Yes”, then press ENTER.
BACK
SiriusXM [1/20]
Pop
Rock
Dance/Electronic
Hip-Hop/R&B
Country
Christian
Jazz/Standards
Sign OutExit
Are you sure you want to sign out?
Yes No
n SiriusXM operation buttons
Operation buttons Function
CH/PAGE df
Page search
INFO
Display of information such as the
source name, volume, and sound mode
name
uio p
Cursor operation
ENTER
(Press and release)
Enter
ENTER
(Press and hold)
Stop
BACK Return
SETUP Setup menu
2
Stop
Basic version
Advanced version
Informations
Basic version
DVD
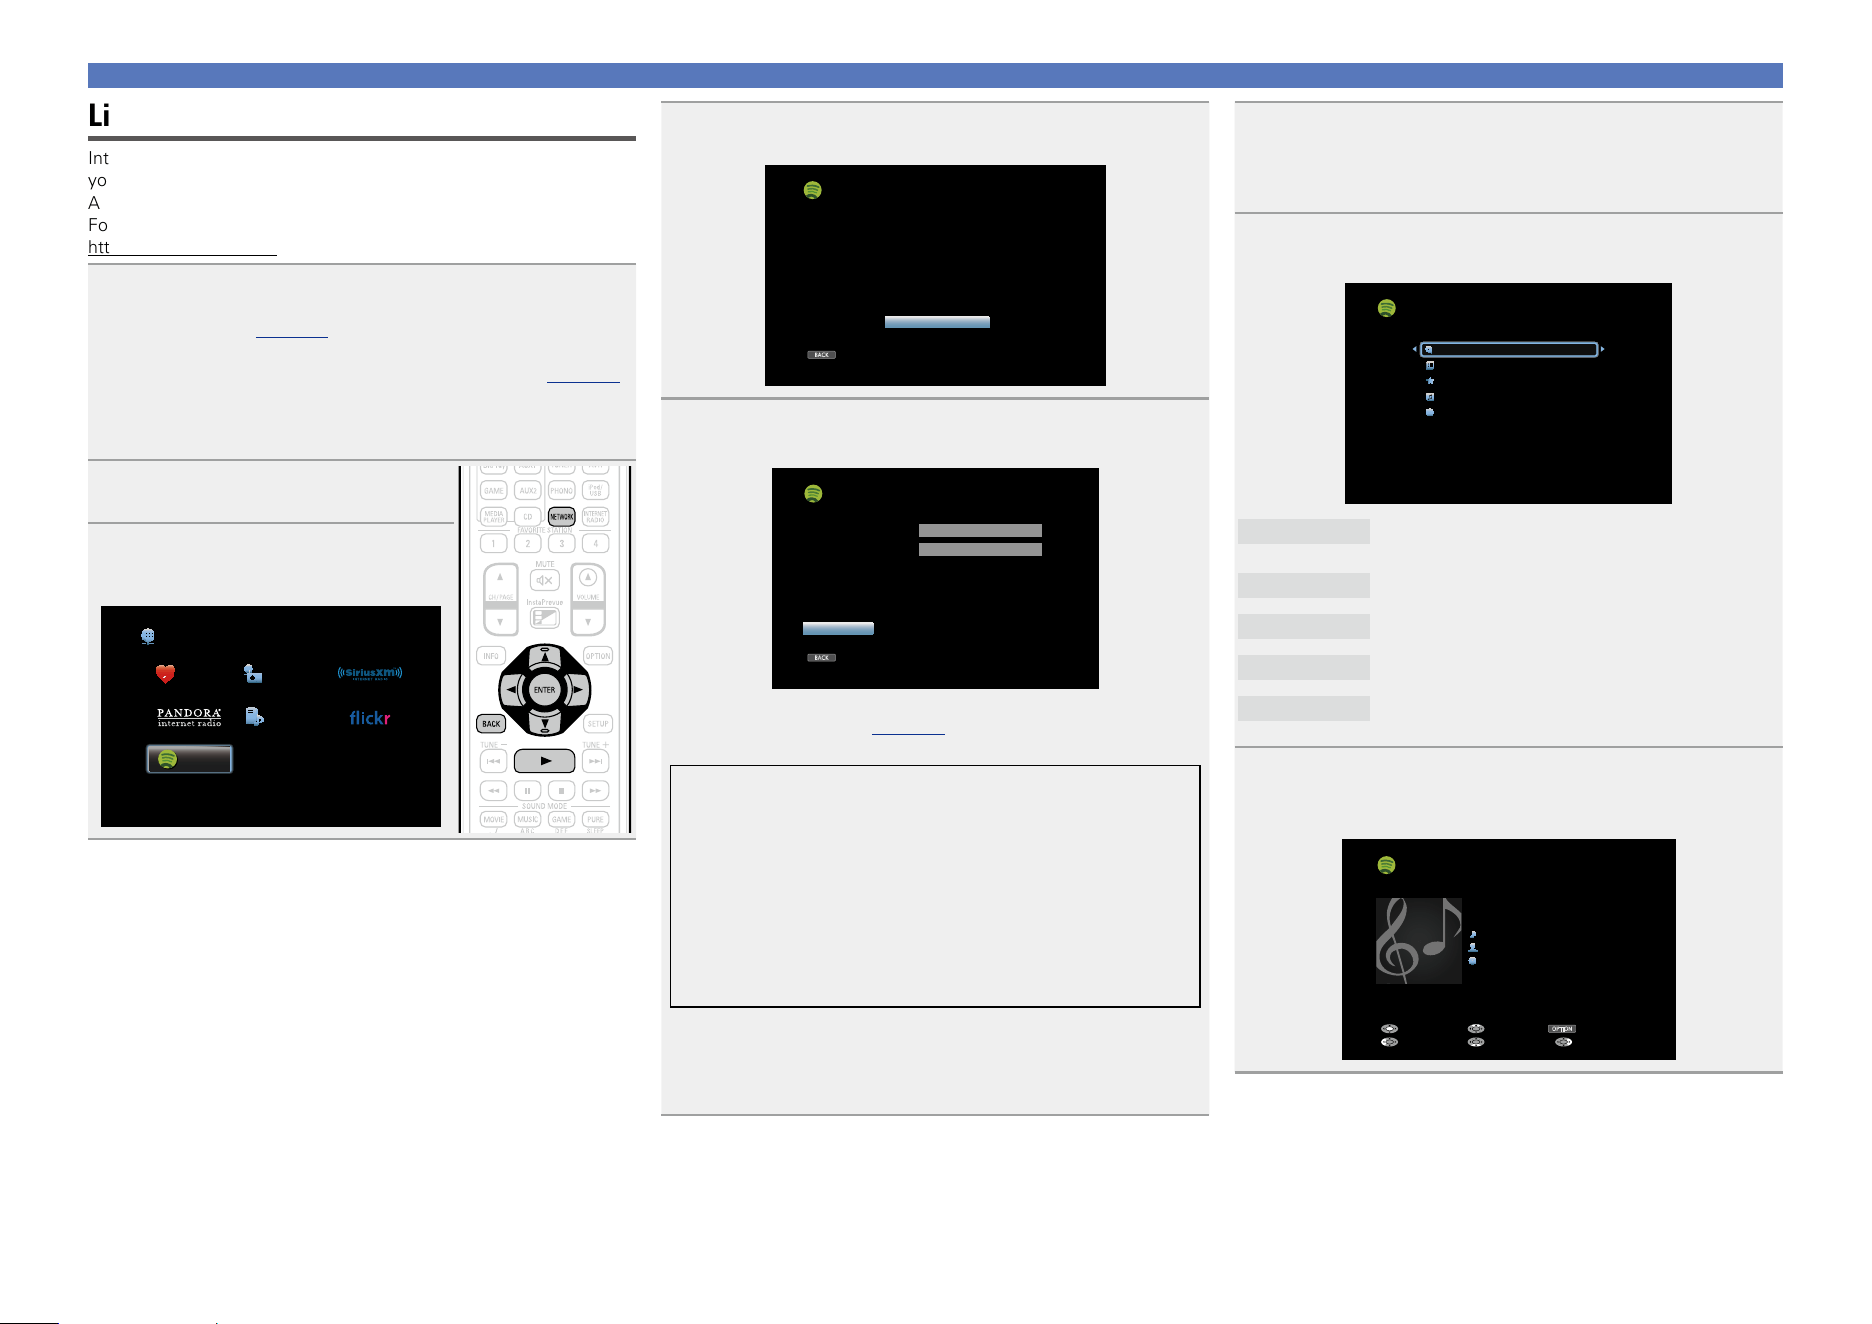
74
Using online services
Listening to Spotify
Introduce your DENON to a whole new world of music. With Spotify,
you can enjoy instant access to millions of songs.
A Spotify Premium subscription is required.
For details, see the Spotify homepage.
http://www.spotify.com
1
Prepare for playback.
q Check the network environment, then turn on this unit’s
power (vpage 31 “Connecting to a home network
(LAN)”).
w If settings are required, make the “Settings” (vpage148).
e Complete step 5 and obtain a Spotify account.
•If you already have a Spotify account, you do not need to
obtain a new account. Use your existing Spotify account.
2
Press NETWORK.
3
Use uio p to select “Spotify”,
then press ENTER.
Favorites Internet Radio
Media Server
Spotify
Network
4
If you have a Spotify account, then press ENTER.
BACK
Spotify
Get Started
Introduce your Denon to a whole new world of music.
With Spotify, you can enjoy instant access to
millions of songs. A Spotify Premium subscription is
required. Just subscribe at spotify.com
Exit
5
Use ui p to enter your username and password.
BACK
Username
Password
zzzzz
zzzzz
Log In
Exit
Spotify Log In
•The password should be no longer than 99 characters.
For character input, see page118.
•The types of characters that can be input are as shown below.
GUpper case characters/Numbers/SymbolsH
ABCDEFGHIJKLMNOPQRSTUVWXYZ
ÄÀÁÂÃÅÆÇÐÈÉÊËÌÍÎÏÑÖÒÓÔÕØÜÙÚÛÝÞ
0123456789
! “ # $ % & ’ ( ) z + , ; < = >
GLower case characters/Numbers/SymbolsH
abcdefghijklmnopqrstuvwxyz
äàáâãåæçðèéêëìíîïñöòóôõøüùúûýþÿß
0123456789
. @ - _ / : ˜ ? [ \ ] ^ ’ { | }
•When you use
ui while you type in, you can change uppercase
characters to lowercase and vice versa.
•Press BACK to cancel the input. When “Cancel input?” is displayed,
select “Yes”, then press ENTER.
6
After inputting the username and password, select
“Log In”, then press ENTER.
If the username and password match, the top menu for Spotify
is displayed.
7
Use ui to select menu and then press ENTER.
[1/5]
Search
What’s New
Starred
Playlists
Accounts
Spotify
Search
Searches for tracks, artists and albums by entering
keywords.
What’s New
Displays the list of the latest albums.
Starred
Displays the list of the starred tracks.
Playlists
Displays the playlists for Spotify.
Accounts
Manages accounts (Log out, Add new user, Switch
to user).
8
Use ui to select a station, and press ENTER or 1 to
start playback.
Playback starts and the following screen appears.
OPTION
Spotify
Title
Now Playing
Artist
Album
00:06
Pause
Next MENUBack
Previous Option
Basic version
Advanced version
Informations
Basic version
v See overleaf
DVD
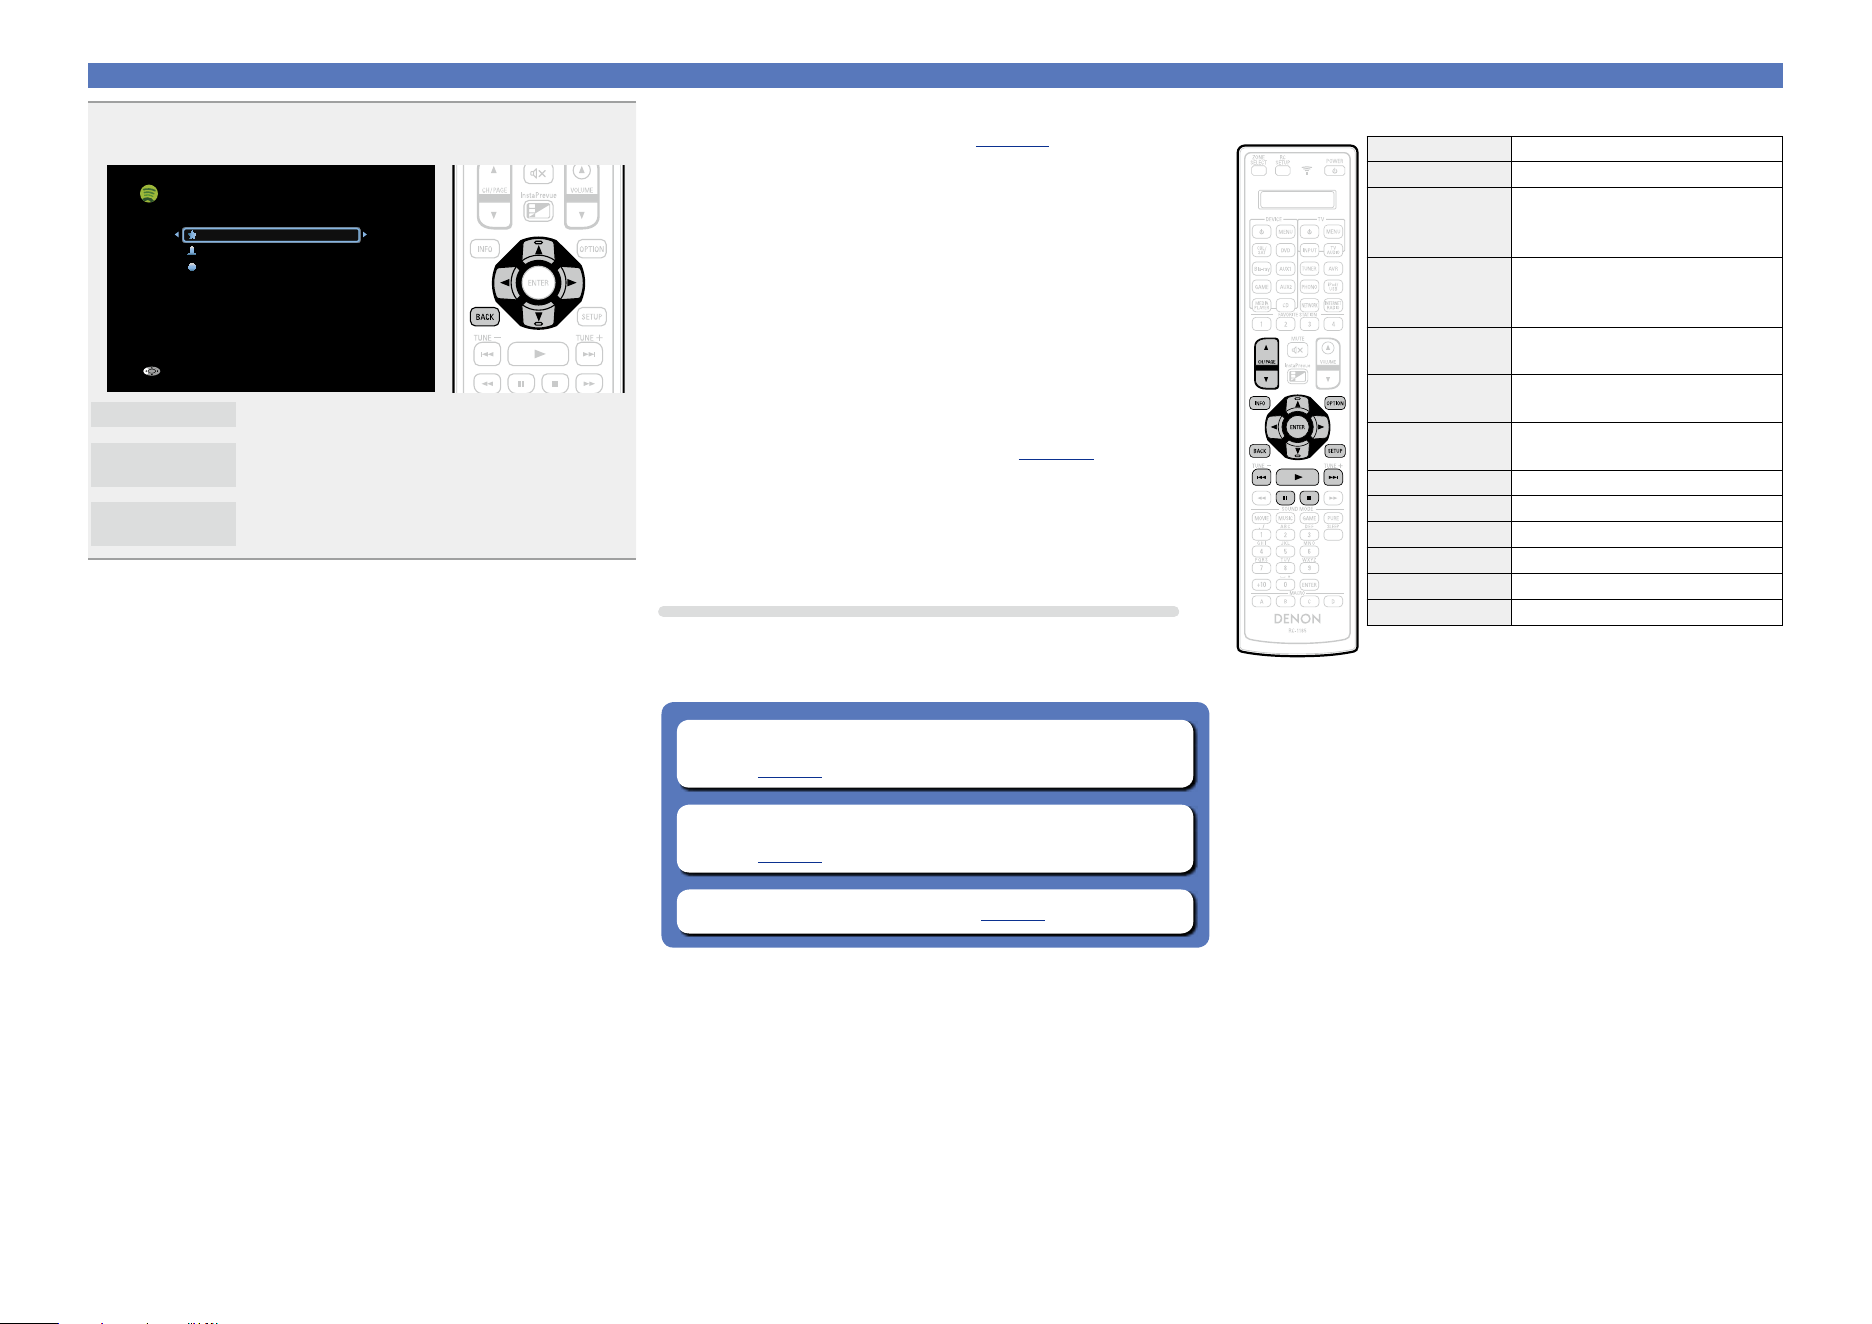
75
Using online services
9
Menu items on playback screen.
[1/3]
Star this track
Browse albums by “Artist name”
Browse tracks on “Album name”
Track-Artist
Back
Star this track
Adds a star to the selected track.
Browse albums
by “Artist name”
Displays the list of albums by the artist of the
track that is being played back.
Browse tracks on
“Album name”
Displays the list of tracks on the album that is
being played back.
n Adjusting the sound quality (Restorer)
Make this setting at “Restorer” (vpage124) in the menu.
You can use the “Restorer” function to restore to a state close
to the audio before compression while correcting the bass feel to
enjoy a richer playback experience. The default setting is “Mode
3 (Low)”.
n Switching the screen display
Press STATUS on the main unit.
The display switches between track title, artist name, and album
title each time the button is pressed.
n Going back to the previous screen
Press o or BACK.
n Changing the screen display duration
Make this setting at “Now Playing” (vpage133) in the menu.
The default setting is “Always On”.
When “Auto Off” is set, the on-screen display is turned off 30
seconds after an operation.
Press uio p while the display is off to return to the original
screen.
Operations available through the OPTION button
Press the OPTION button to display a menu of functions that can be
used on the TV screen. Select the function you want to use from this
menu. You can easily find and use the desired function.
n Performing repeat playback (Repeat)
(vpage77)
n Performing random playback (Random)
(vpage77)
n All Zone Stereo function (vpage80)
n Spotify operation buttons
Operation buttons Function
CH/PAGE df
Page search
INFO
Display of information such as the
source name, volume, and sound mode
name
OPTION
Repeat playback /
Random playback /
All Zone Stereo
uio p
Cursor operation /
Auto search (cue, ui)
ENTER
(Press and release)
Enter
ENTER
(Press and hold)
Stop
BACK Return
SETUP Setup menu
8 9
Auto search (cue)
1
Playback
3
Pause
2
Stop
Basic version
Advanced version
Informations
Basic version
DVD
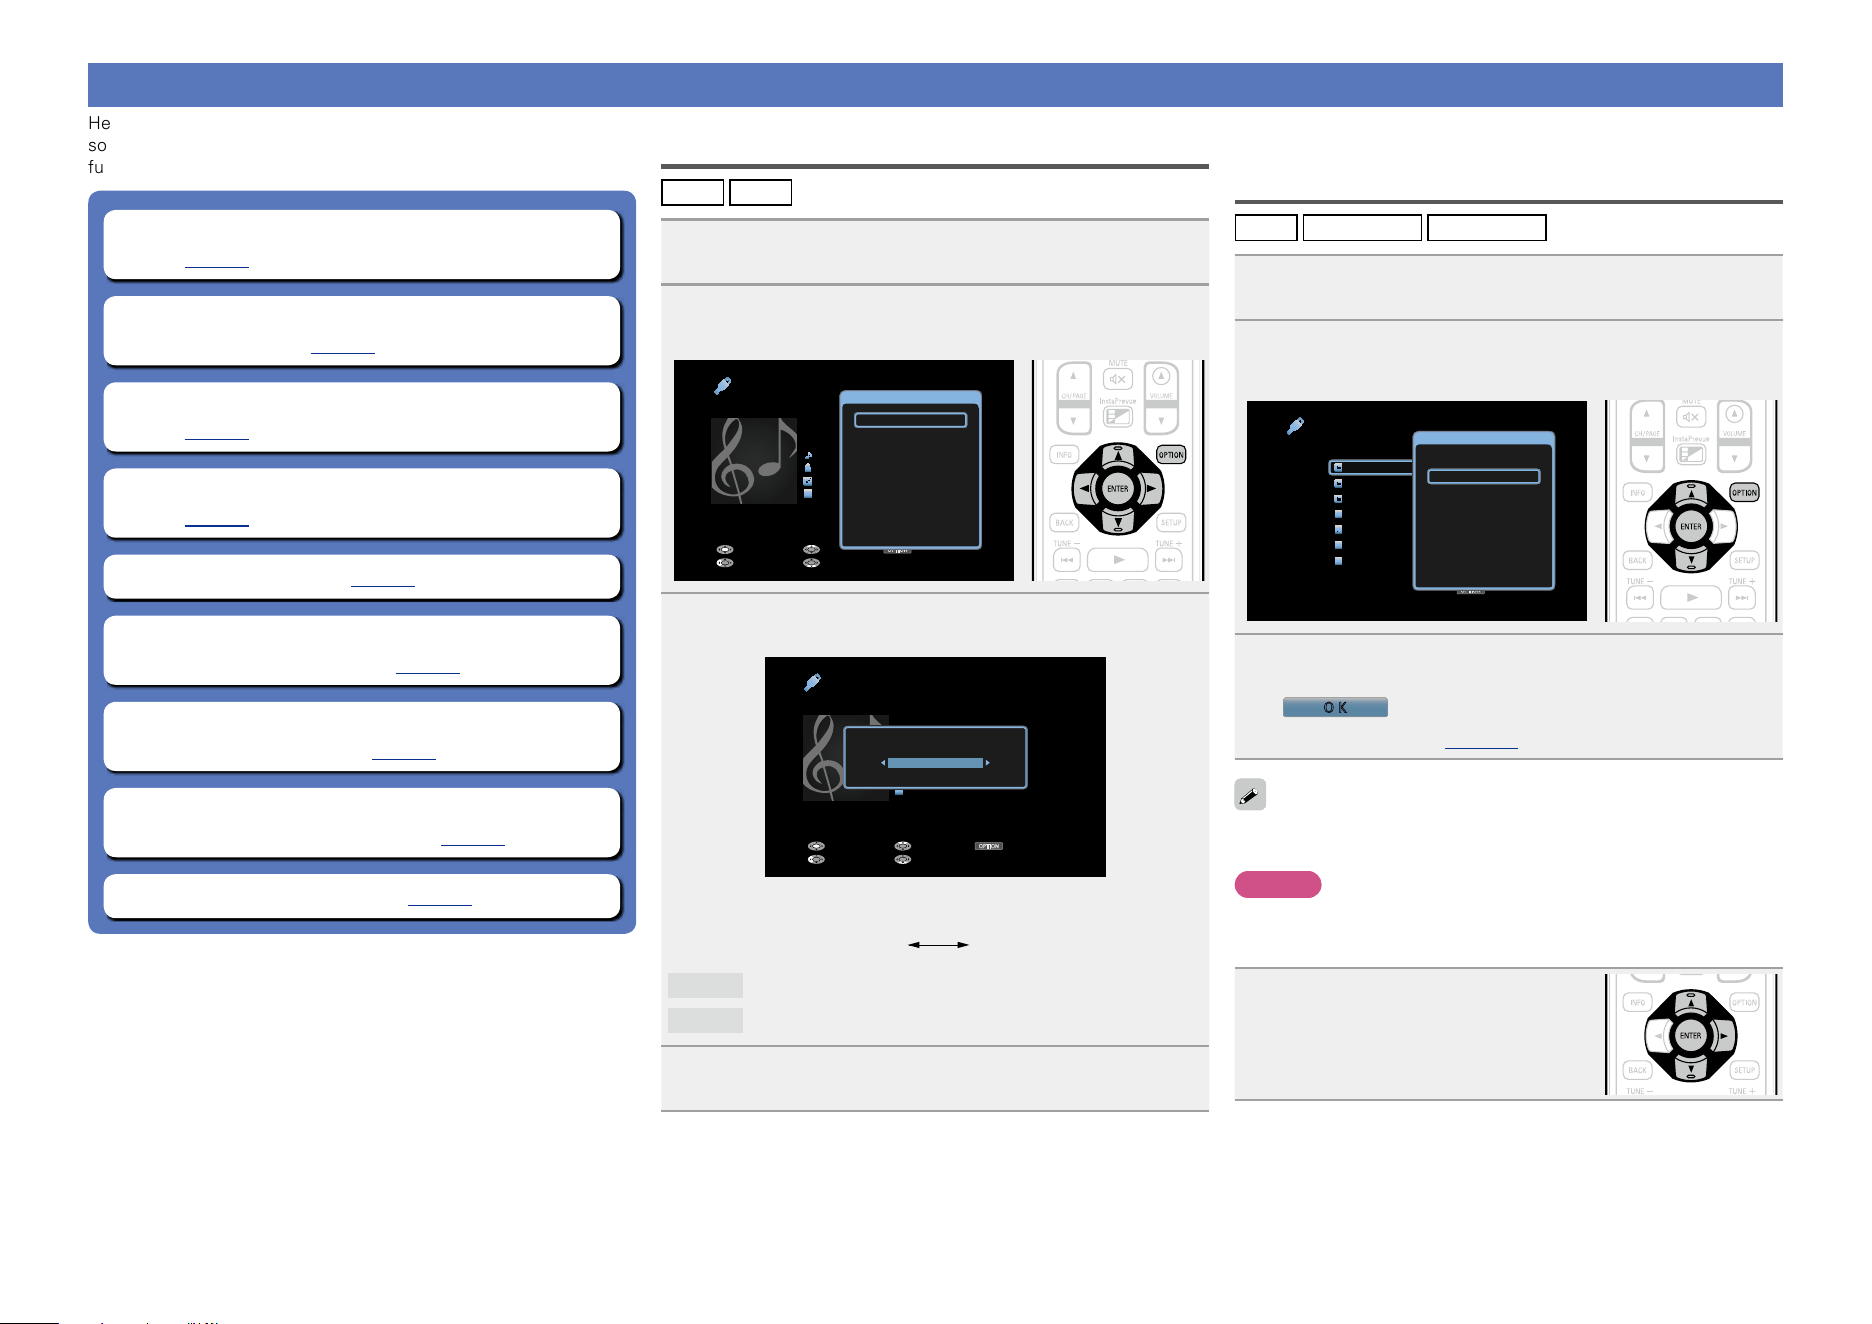
76
Convenient functions
Here, we explain how to use convenient functions for NETWORK
sources and USB sources. The source names under the titles of each
function’s description are sources that allow use of these functions.
n Setting the USB port to use (USB Select)
(vpage76)
n Searching content with keywords
(Text Search) (vpage76)
n Performing repeat playback (Repeat)
(vpage77)
n Performing random playback (Random)
(vpage77)
n Favorites function (vpage78)
n Playing back music and a favorite picture at the
same time (Slideshow) (vpage79)
n Playing back still images in sequential order
(Slideshow Interval) (vpage79)
n Adjusting the picture quality for your viewing
environment (Picture Mode) (vpage80)
n All Zone Stereo function (vpage80)
Setting the USB port to use (USB Select)
iPod
USB
1
Press OPTION.
The option menu screen is displayed.
2
Use ui to select “USB Select”, then press ENTER.
OPTION
USB
Title
Now Playing
Artist
Album
00:06 100%
Previous OptionPause
NextBack
MP3 128kbps
Option
USB Select
Repeat
Random
Slideshow
Picture Mode
All Zone Stereo On
3
Use o p to select the USB port to use.
OPTION
USB
Title
Now Playing
Artist
Album
00:06 100%
Previous OptionPause
NextBack
MP3 128kbps
USB Select
Front
•Each time o p is pressed, the setting is changed as shown below.
Front Rear
Front
Uses the USB port on the front panel.
Rear
Uses the USB port on the rear panel.
4
Press ENTER.
The display returns to the playback screen.
Searching content with keywords
(Text Search)
USB
Internet Radio
Media Server
1
While content is playing, press OPTION.
The option menu screen is displayed.
2
Use ui to select “Text Search”, then press ENTER.
The keyboard input screen is displayed.
OPTION
USB [1/9]
D&M1
D&M2
D&M3
Music1
Music2
Music3
Music4
Option
Option
USB Select
Text Search
Repeat
Random
Slideshow Interval
Picture Mode
All Zone Stereo On
3
Enter the rst character of the Internet Radio
station or le you want to search for, and then press
O K
.
•For character input, see page118.
“Text Search” searches for Internet Radio stations or files that start
with the entered first character from the displayed list.
NOTE
“Text Search” may not work for some lists.
n Playing back a search result content
Use ui to select the content you
want to play, and then press ENTER
or p.
Playback starts.
Basic version
Advanced version
Informations
Basic version
DVD
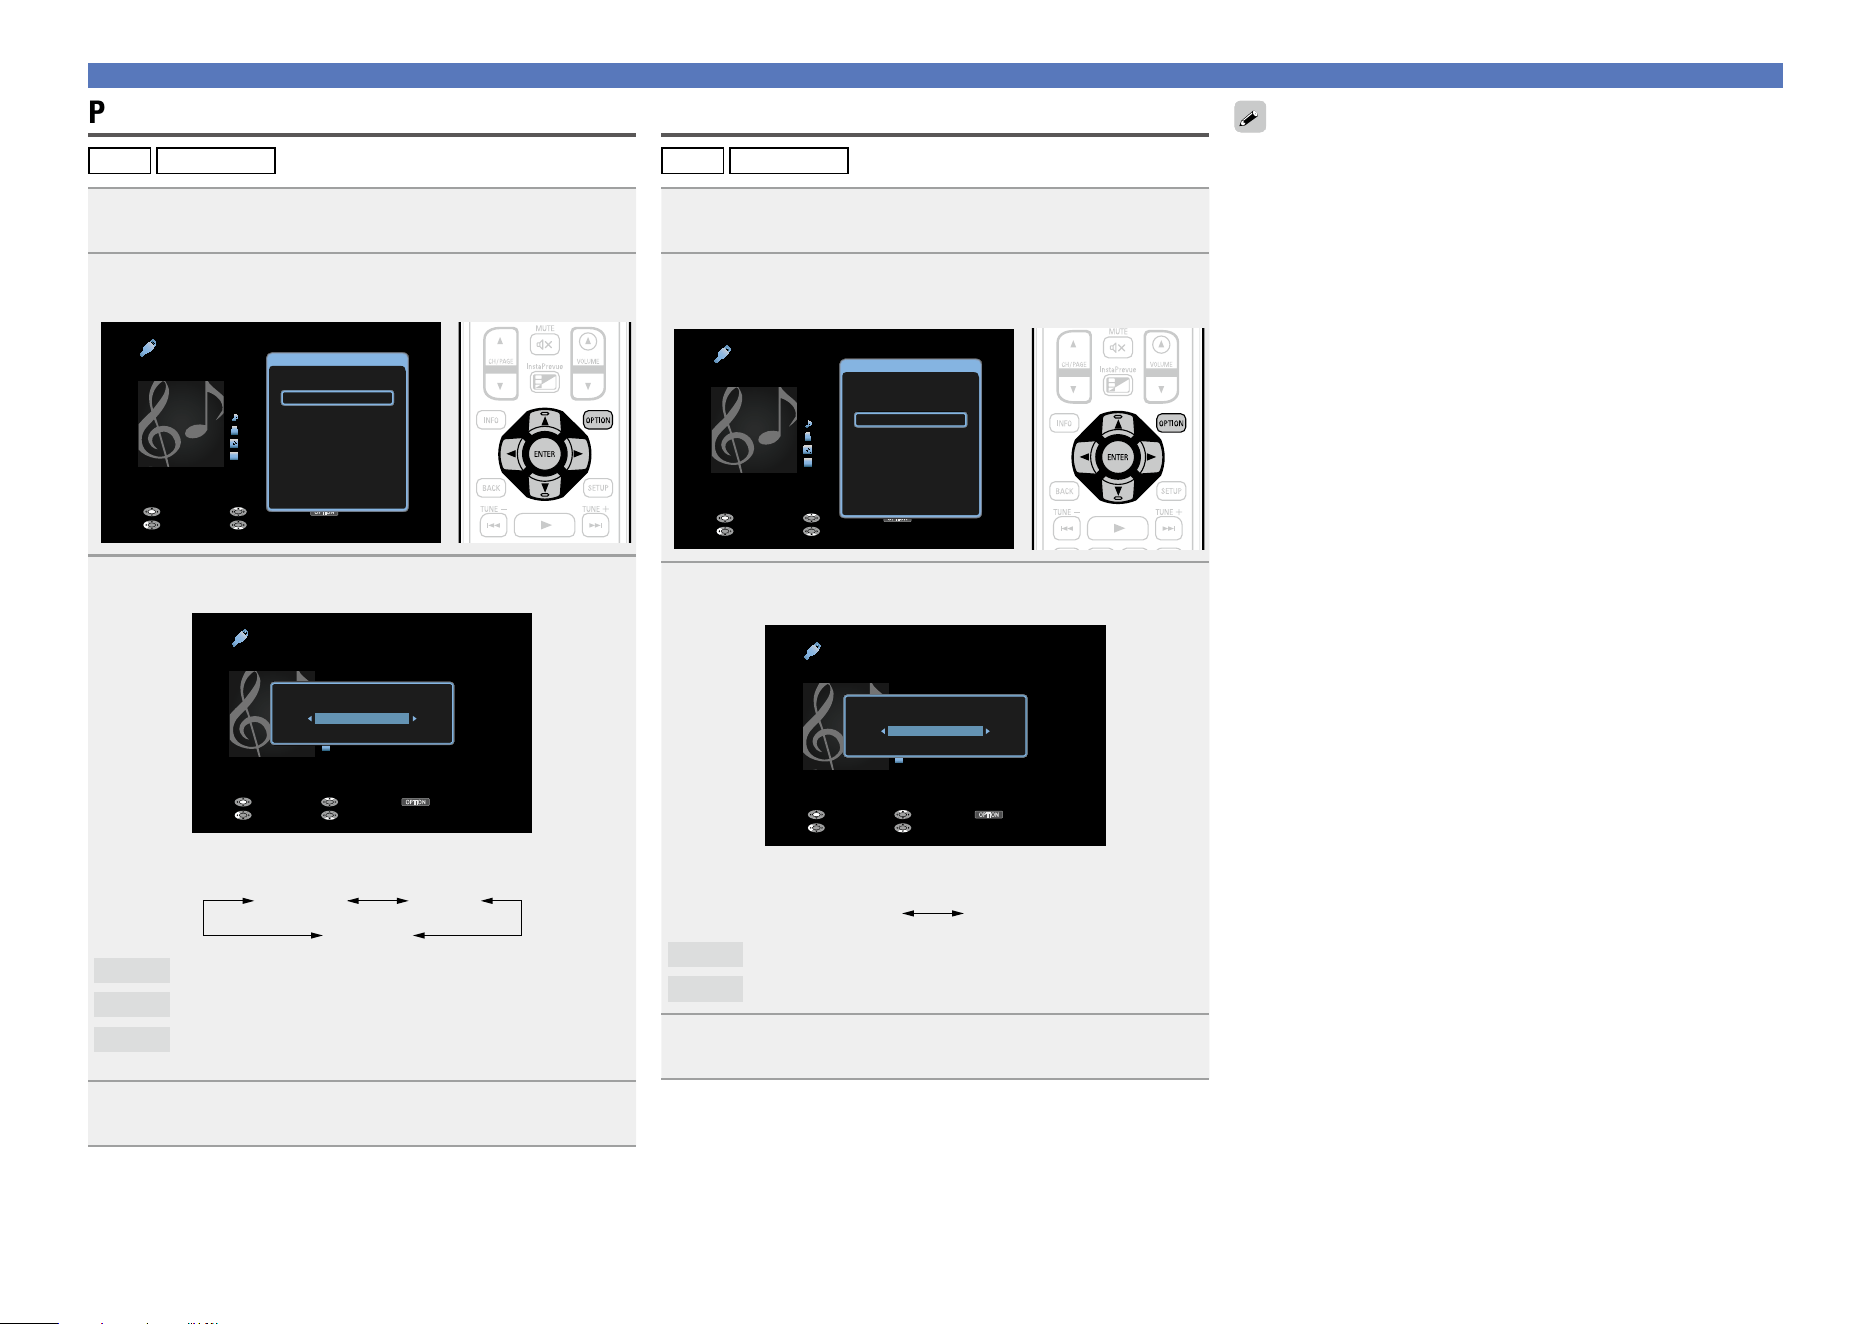
77
Convenient functions
Performing repeat playback (Repeat)
USB
Media Server
1
While content is playing, press OPTION.
The option menu screen is displayed.
2
Use ui to select “Repeat”, then press ENTER.
OPTION
USB
Title
Now Playing
Artist
Album
00:06 100%
Previous OptionPause
NextBack
MP3 128kbps
Option
USB Select
Repeat
Random
Slideshow
Picture Mode
All Zone Stereo On
3
Use o p to select repeat playback mode.
OPTION
USB
Title
Now Playing
Artist
Album
00:06 100%
Previous OptionPause
NextBack
MP3 128kbps
Repeat
Off
•Each time o p is pressed, the setting is changed as shown below.
Off One
All
Off
Repeat playback mode is canceled.
One
A file being played is played repeatedly.
All
All files in the folder currently being played are played
repeatedly.
4
Press ENTER.
The display returns to the playback screen.
Performing random playback (Random)
USB
Media Server
1
While content is playing, press OPTION.
The option menu screen is displayed.
2
Use ui to select “Random”, then press ENTER.
OPTION
USB
Title
Now Playing
Artist
Album
00:06 100%
Previous OptionPause
NextBack
MP3 128kbps
Option
USB Select
Repeat
Random
Slideshow
Picture Mode
All Zone Stereo On
3
Use o p to select random playback mode.
OPTION
USB
Title
Now Playing
Artist
Album
00:06 100%
Previous OptionPause
NextBack
MP3 128kbps
Random
Off
•Each time o p is pressed, the setting is changed as shown below.
Off On
Off
Disable random playback.
On
Enable random playback.
4
Press ENTER.
The display returns to the playback screen.
The random playback randomly selects a track to play back from all
tracks every time a track ends. Therefore, the same track may be
played back consecutively.
Basic version
Advanced version
Informations
Basic version
DVD
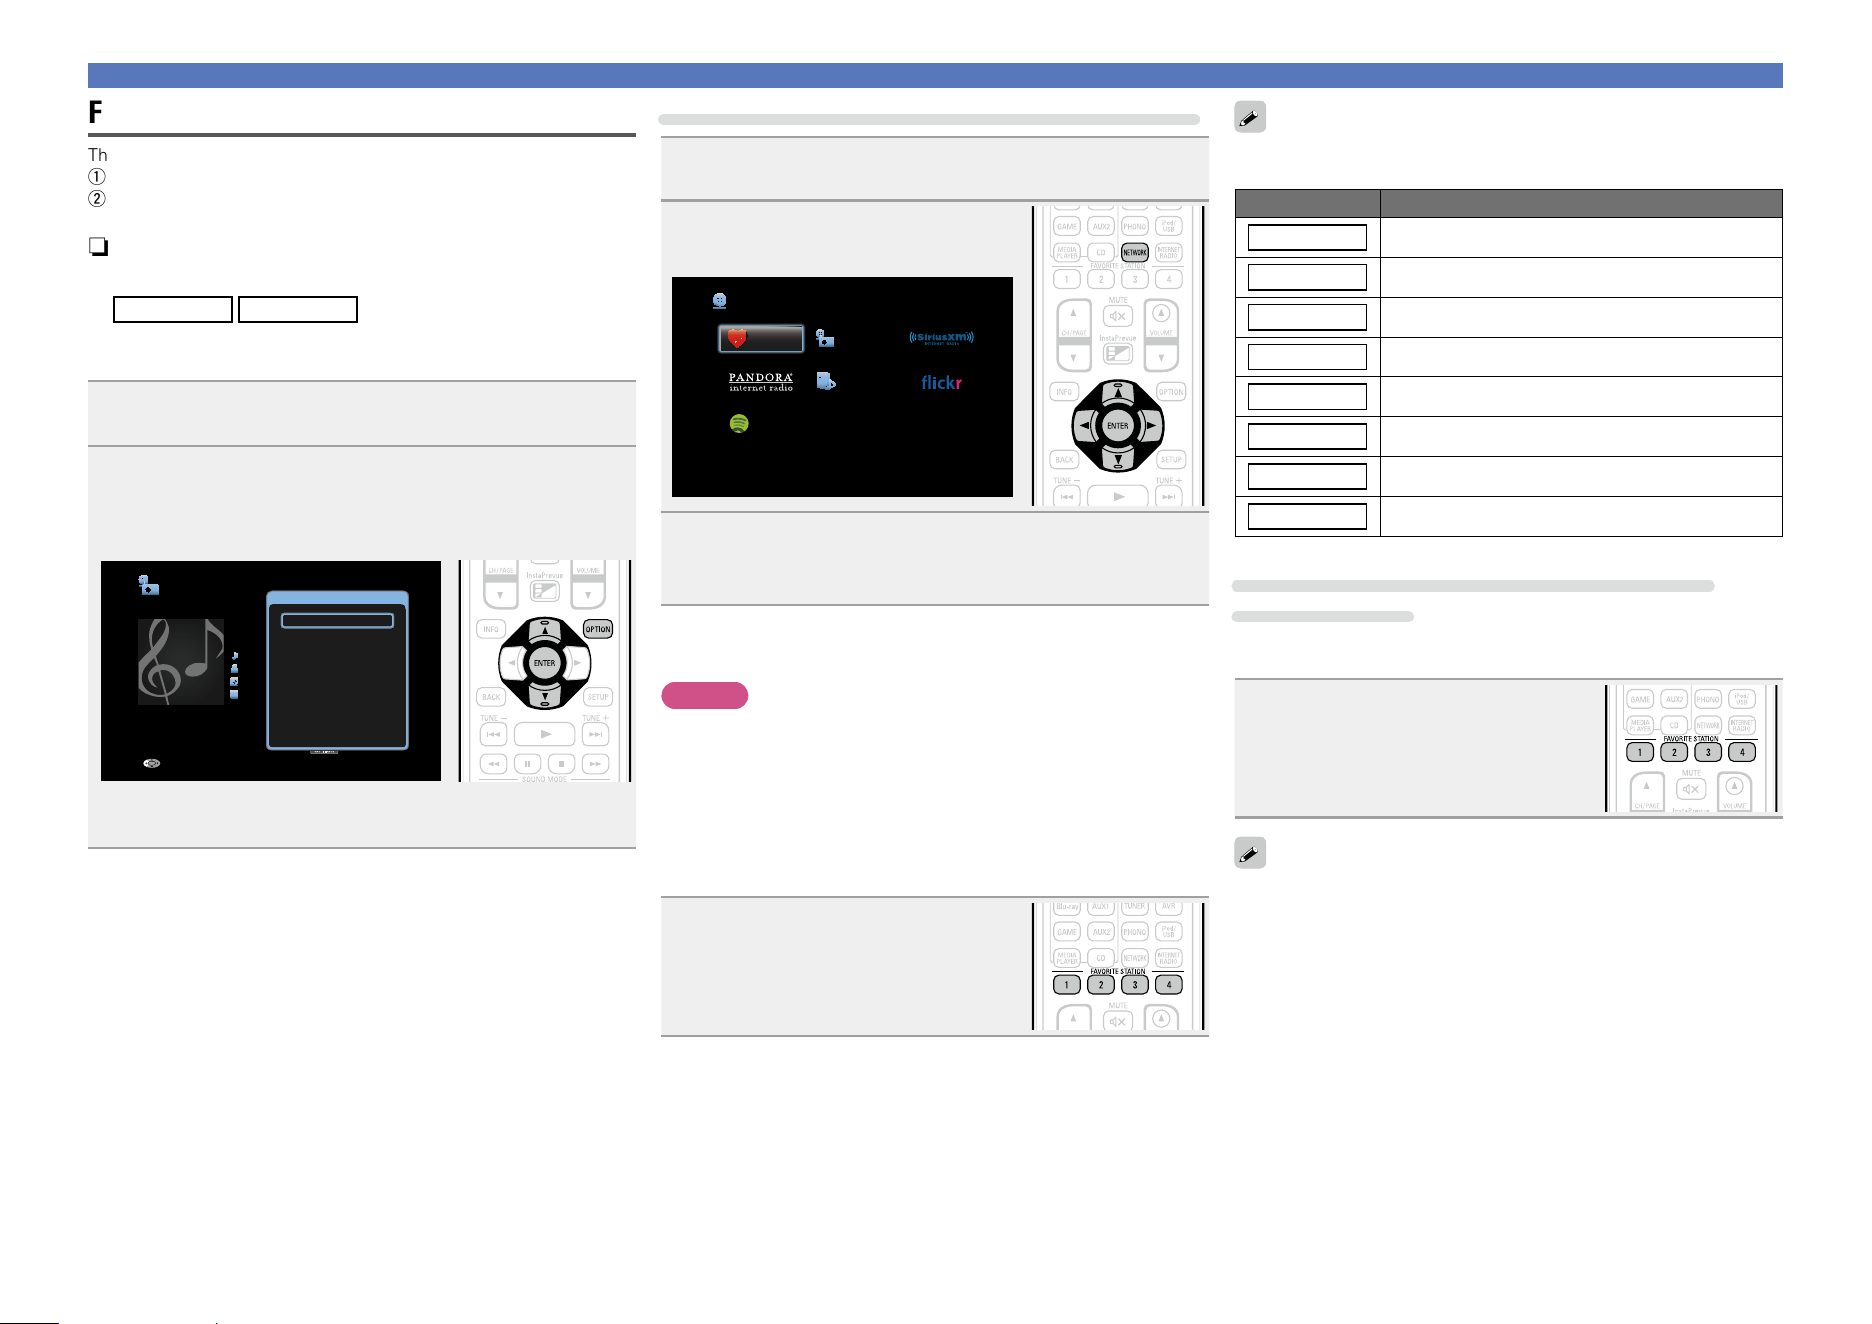
78
Convenient functions
Favorites function
There are two ways to add content to favorites:
q Add to favorites from the Option menu
w Add to the FAVORITE STATION button
n Add to favorites from the Option menu
(Save to Favorites)
Internet Radio
Media Server
You can add up to 100 items as favorites for all sources (Internet
Radio and Media Server).
1
While content is playing, press OPTION.
The option menu screen is displayed.
2
Use ui to select “Save to Favorites”, then press
ENTER.
“Favorite added” is displayed, and the current content is added
to favorites.
OPTION
Internet Radio
Title
Now Playing
Artist
Album
00:06 100%
MP3 128kbps
Back
Option
Option
Save to Favorites
Slideshow
Picture Mode
All Zone Stereo On
•The display returns to the playback screen when the procedure is
completed.
Playing back content added in “Save to Favorites”
1
Press NETWORK.
2
Use uio p to select “Favorites”,
then press ENTER.
Favorites Internet Radio
Media Server
Spotify
Network
3
Use ui to select the content you want to play, and
then press ENTER or p.
Playback starts.
n Adding to the FAVORITE STATION button
You can add up to four types of content.
NOTE
•Please note that if you add new content to a number that already
contains content, the older content is deleted.
•The following operations update the database on the Media Server,
which may make the added music files unplayable.
•When you quit the Media Server and then restart it.
•When music files are deleted or added on the Media Server.
•When using an ESCIENT server, place “ESCIENT” before the server
name.
While content is playing, press and
hold one of the FAVORITE STATION
1 – 4
buttons for more than 3 seconds.
The content is added to the button you
pressed.
Contents that can be added to the FAVORITE STATION button differ
depending on the input source.
Input source Contents that can be added
FM
Radio station
Internet Radio
Top list of content / Internet Radio station
Media Server
Top list of content / Track
Flickr
Top list of content
Pandora
Top list of content
SiriusXM
Top list of content
Spotify
Top list of content
Favorites
Top list of content
Playing back content added to the FAVORITE
STATION button
You can easily call up content by pressing the FAVORITE STATION
button.
Press one of the FAVORITE STATION
1 – 4
buttons that you added content
to.
Playback starts.
•When the FAVORITE STATION 1 – 4 buttons is pressed, the AVR-
operation mode starts automatically.
•Internet Radio stations are already registered to the FAVORITE
STATION 1 – 4
buttons. However, you may not be able to play the
stations due to restrictions imposed by the radio stations.
Basic version
Advanced version
Informations
Basic version
v See overleaf
DVD
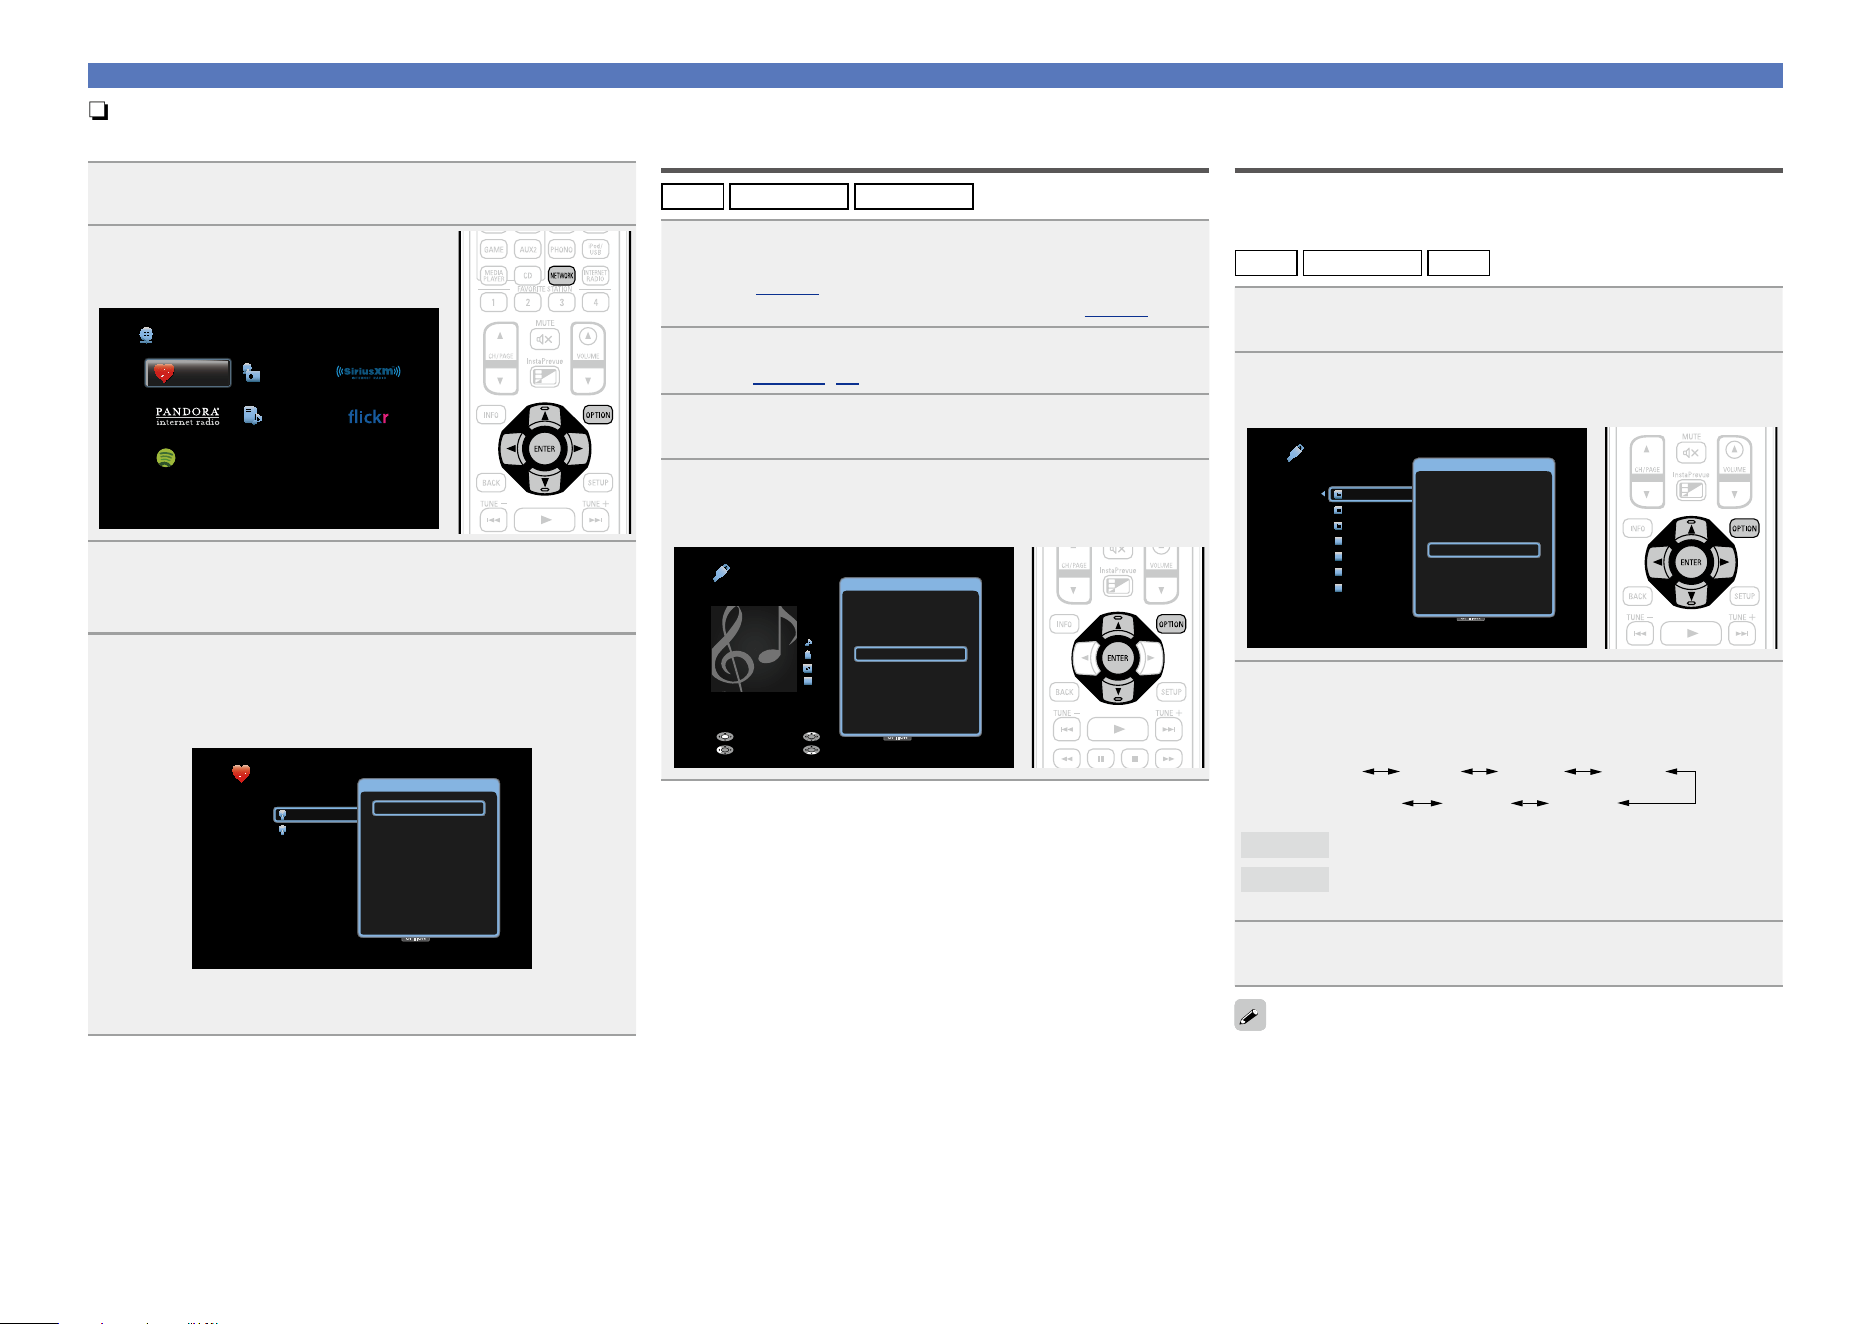
79
Convenient functions
n Deleting content added to favorites
(Remove from Favorites)
1
Press NETWORK.
2
Use uio p to select “Favorites”,
then press ENTER.
Favorites Internet Radio
Media Server
Spotify
Network
3
Use ui to select the content you want to delete from
favorites, then press OPTION.
The option menu screen is displayed.
4
Use ui to select “Remove from Favorites”, then
press ENTER.
“Favorite removed” is displayed, and the selected content is
deleted from favorites.
OPTION
Favorites
Option
Radio Algerienne Chaine 1
FM West 84.2
Option
Remove from Favorites
Picture Mode
All Zone Stereo On
•The display returns to the original screen when the procedure is
completed.
Playing back music and a favorite picture
at the same time (Slideshow)
USB
Internet Radio
Media Server
1
Play back a still picture.
•Playing back still pictures stored on USB memory devices
(vpage48).
•Playing back still pictures stored on Flickr (vpage67).
2
Play back a music le or Internet Radio station
(vpage 59, 64).
3
Press OPTION.
The option menu screen is displayed.
4
Use ui to select “Slideshow”, then press ENTER.
The option menu disappears, and the picture you were viewing
is shown on the screen.
OPTION
USB
Title
Now Playing
Artist
Album
00:06 100%
Previous OptionPause
NextBack
MP3 128kbps
Option
USB Select
Repeat
Random
Slideshow
Picture Mode
All Zone Stereo On
Playing back still images in sequential
order (Slideshow Interval)
You can play back still image (JPEG) files stored on a USB memory
device or Media Server and pictures on Flickr website as a slide show.
The display time can also be set.
USB
Media Server
Flickr
1
Play back an image and press OPTION.
The option menu screen is displayed.
2
Use ui to select “Slideshow Interval”, then press
ENTER.
OPTION
USB [1/9]
D&M1
D&M2
D&M3
Music1
Music2
Music3
Music4
Option
USB Select
Option
Text Search
Repeat
Random
Slideshow Interval
Picture Mode
All Zone Stereo On
3
Use o p to set the display time.
•Each time o p is pressed, the setting is changed as shown below.
Off 5s 10s 15s
20s60s 30s
Off
The slide show is not played back.
5s – 60s
Set the time for displaying a single image when playing
back images in the slide show.
4
Press ENTER.
The slide show is displayed on the screen.
This unit plays back image (JPEG) files in the orientation in which they
are stored in the folder.
Basic version
Advanced version
Informations
Basic version
DVD
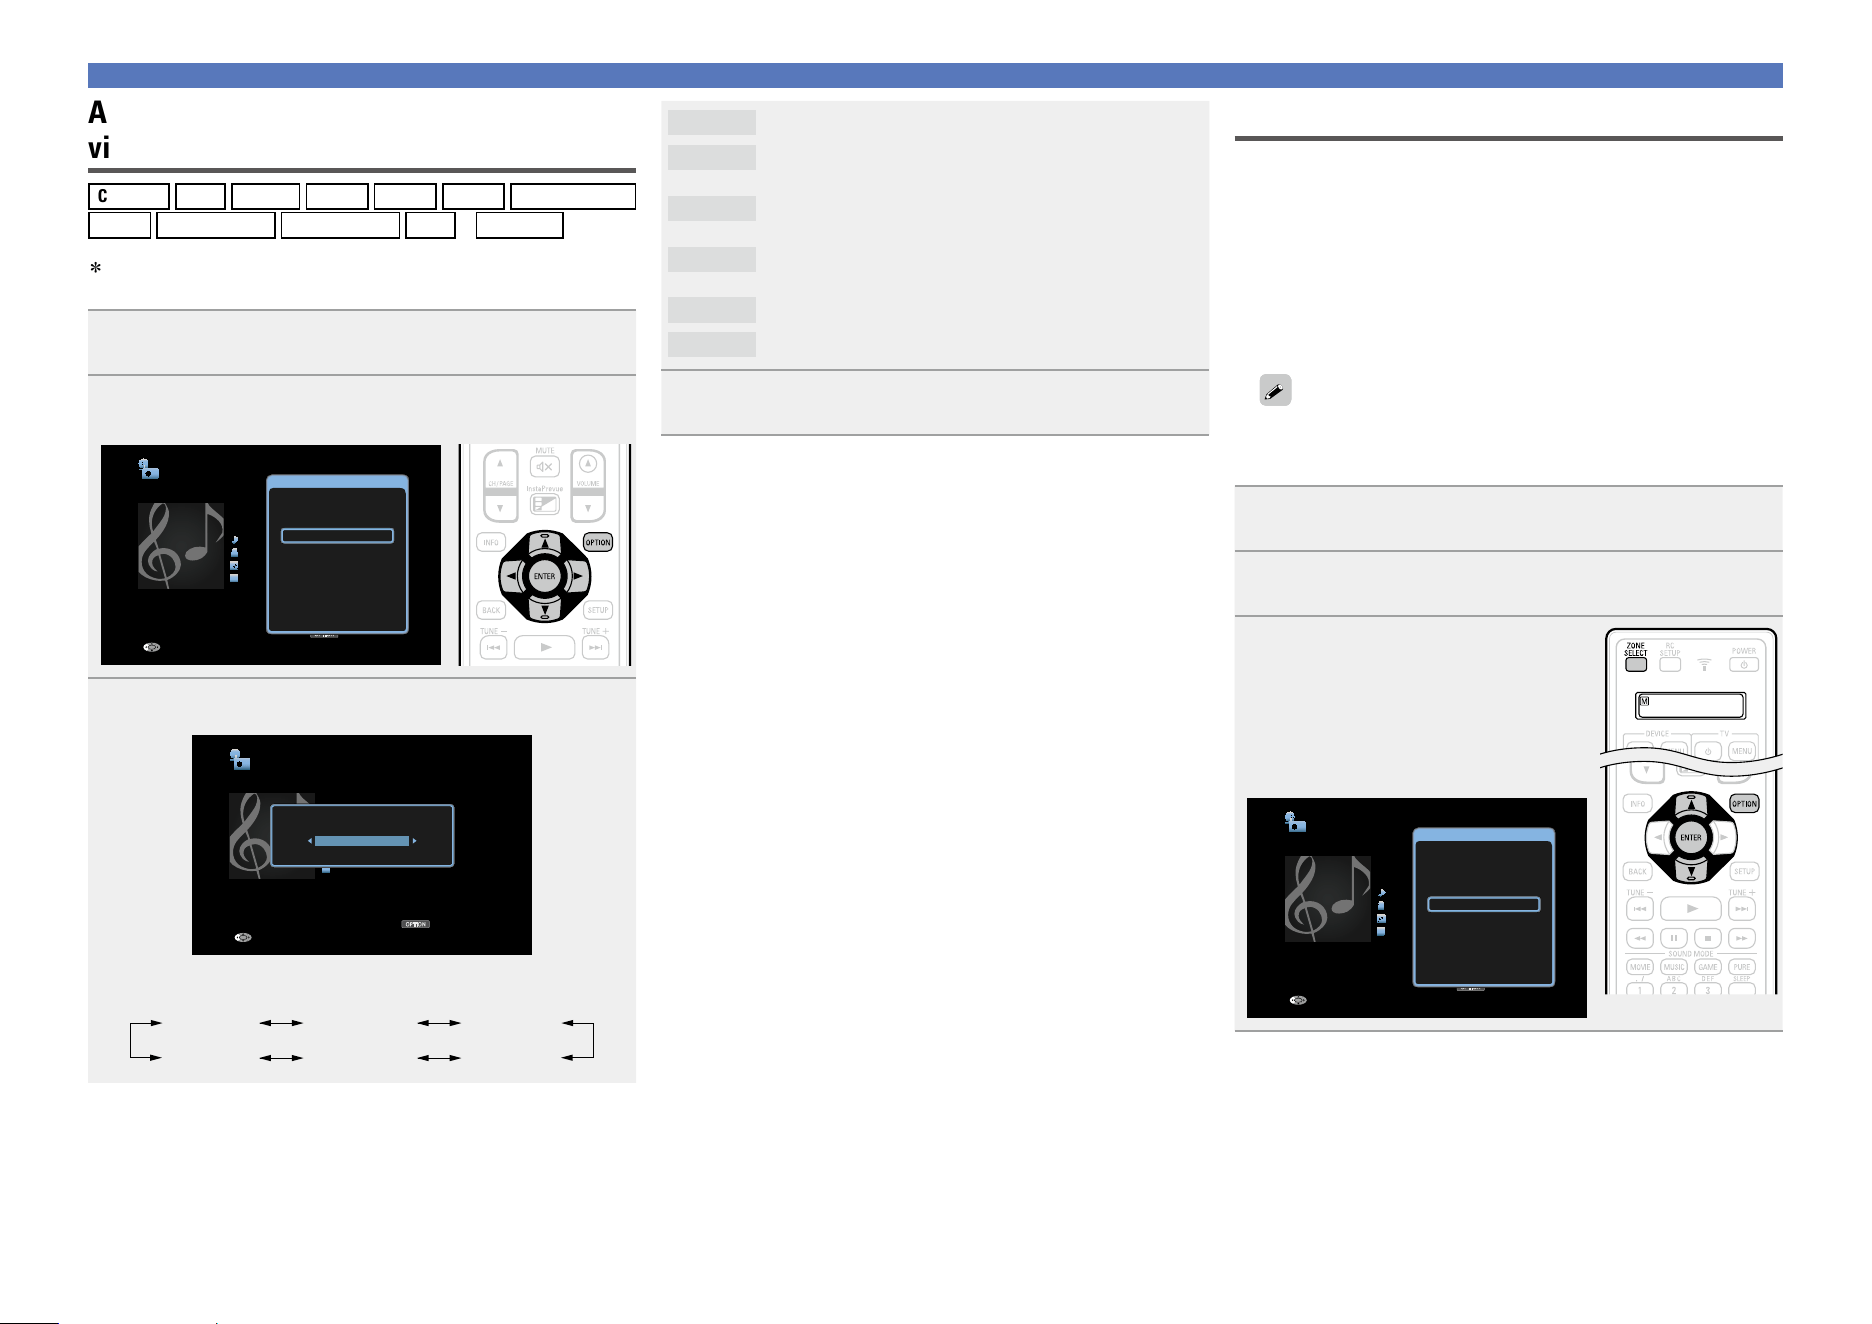
80
Convenient functions
Off
No picture quality adjustment is done with this unit.
Standard
The standard mode suited for most living room viewing
environments.
Movie
A mode suited for watching movies in a dark room such
as a theater room.
Vivid
A mode that makes graphic images for games, etc.
brighter and more vivid.
Streaming
A mode suited for low bit rate video sources.
Custom
Adjusts the picture quality manually.
4
Press ENTER.
The display returns to the playback screen.
All Zone Stereo function
You can play back music in multi-zones (ZONE2/ZONE3) simultaneously
that is played back in MAIN ZONE.
It is useful when you want to enjoy the same music at the same time
in multiple rooms during home party or when you want to play back
the same BGM in the entire house.
n Using the All Zone Stereo function
(All Zone Stereo On)
The All Zone Stereo function can be set for any source.
Before setting this function, you need to turn on the multi-zones
(ZONE2/ZONE3) for which you want to use the All Zone Stereo
function.
1
Press ZONE SELECT to switch the zone mode.
The J indicator lights.
2
Press OPTION.
The option menu screen is displayed.
3
Use ui to select “All Zone
Stereo On”, then press ENTER.
The input source for the multi-zones
(ZONE2/ZONE3) is switched to the
same as the one for MAIN ZONE, and
playback in the All Zone Stereo mode
starts.
OPTION
Internet Radio
Title
Now Playing
Artist
Album
00:06 100%
MP3 128kbps
Back
Option
Option
Save to Favorites
Slideshow
Picture Mode
All Zone Stereo On
Adjusting the picture quality for your
viewing environment (Picture Mode)
CBL/SAT
DVD
Blu-ray
GAME
AUX1
AUX2
MEDIA PLAYER
USB
Internet Radio
Media Server
CD
z
TV AUDIO
z
z You can set the picture mode when an HDMI, component video or
video connector is assigned.
1
While content is playing, press OPTION.
The option menu screen is displayed.
2
Use ui to select “Picture Mode”, then press ENTER.
OPTION
Internet Radio
Title
Now Playing
Artist
Album
00:06 100%
MP3 128kbps
Back
Option
Option
Save to Favorites
Slideshow
Picture Mode
All Zone Stereo On
3
Use o p to select picture mode.
OPTION
Internet Radio
Title
Now Playing
Artist
Album
00:06 100%
MP3 128kbps
Back
Option
Picture Mode
Standard
•Each time o p is pressed, the setting is changed as shown below.
Off MovieStandard
Custom VividStreaming
Basic version
Advanced version
Informations
Basic version
v See overleaf
DVD
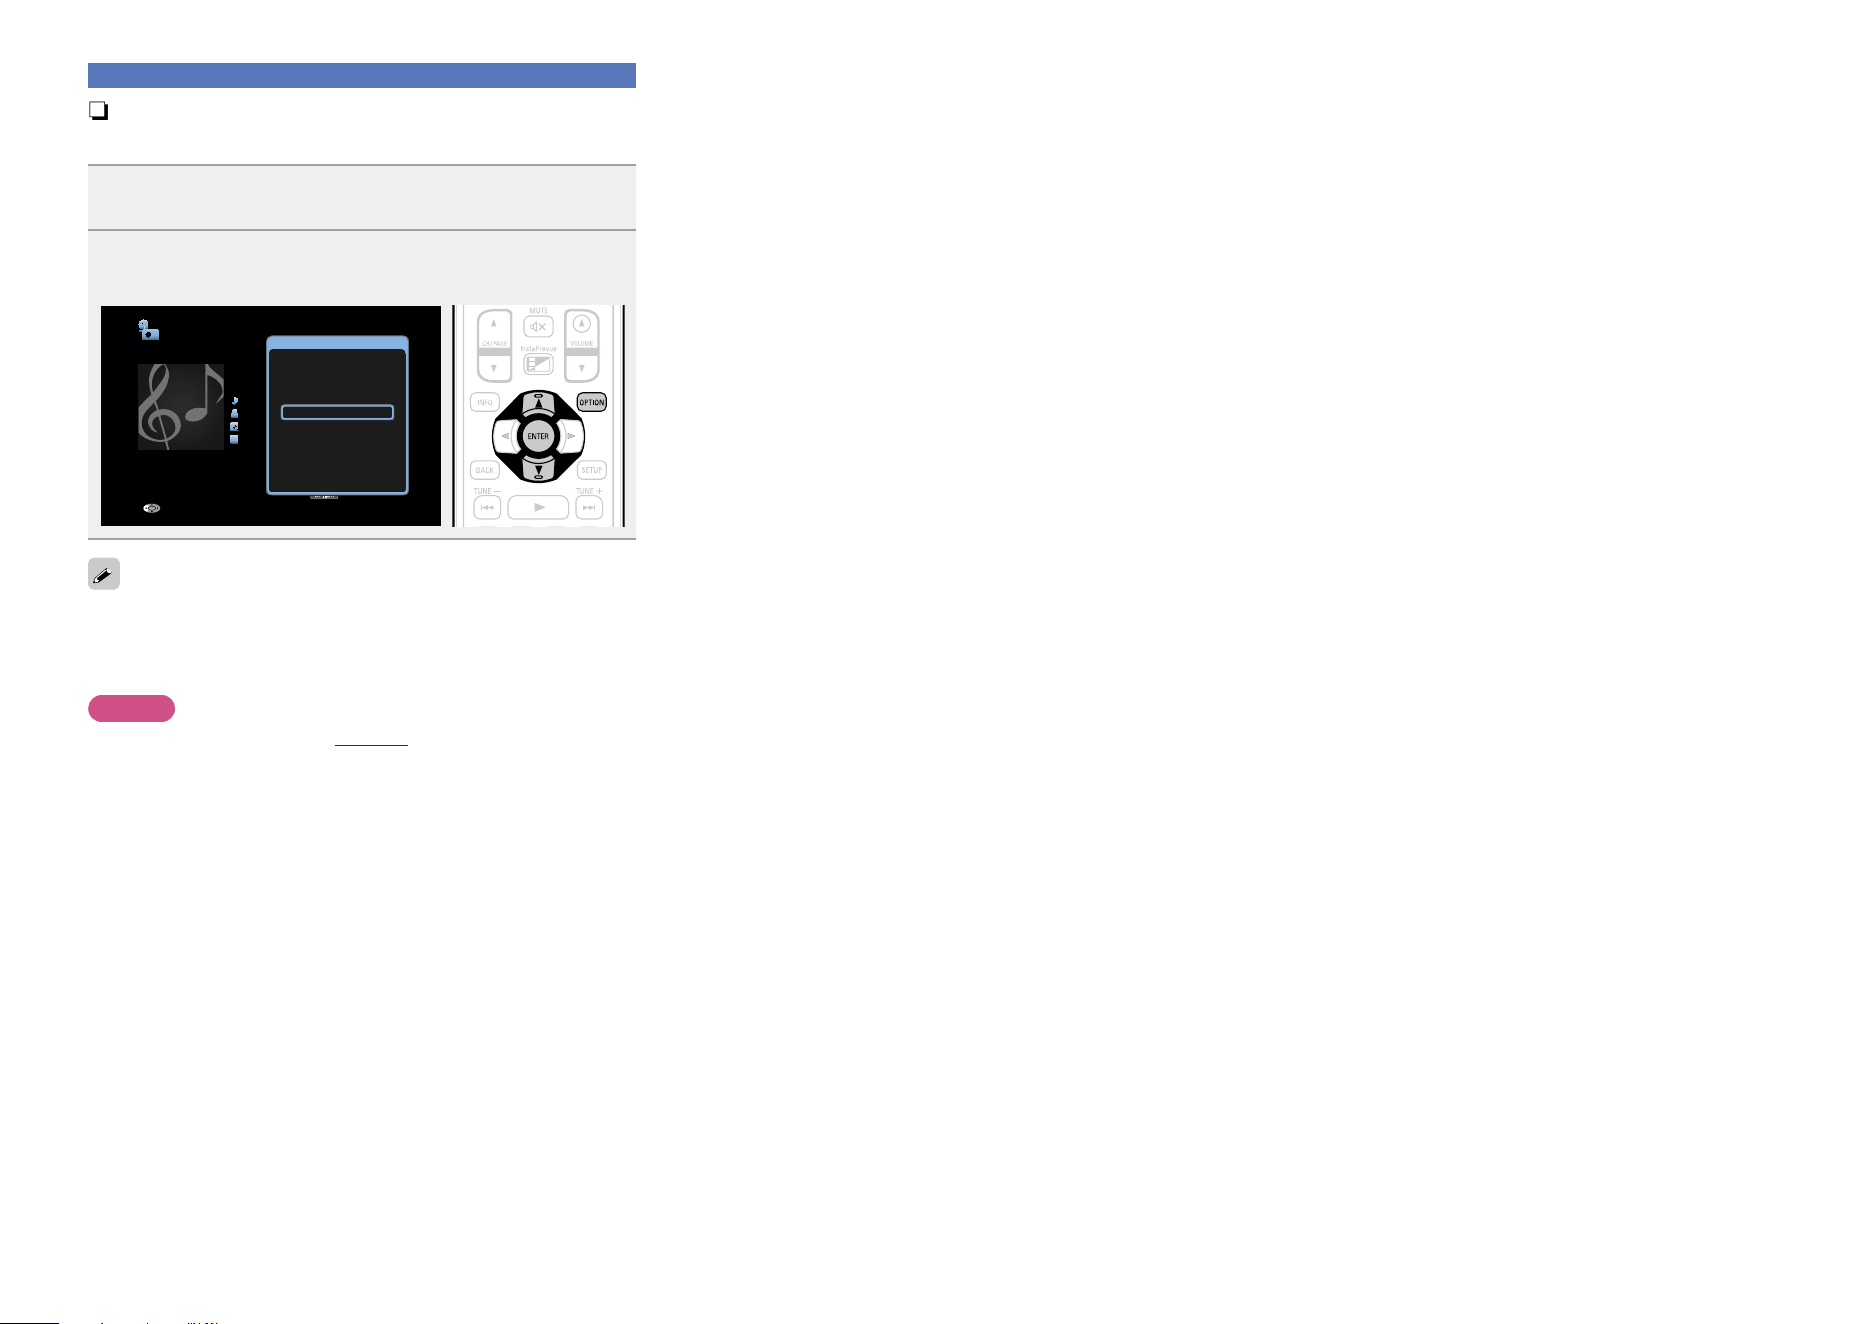
81
Convenient functions
n Stopping the All Zone Stereo function
(All Zone Stereo Off)
1
During playback in All Zone Stereo, press OPTION.
The option menu screen is displayed.
2
Use ui to select “All Zone Stereo Off”, then press
ENTER.
OPTION
Internet Radio
Title
Now Playing
Artist
Album
00:06 100%
MP3 128kbps
Back
Option
Option
Save to Favorites
Slideshow
Picture Mode
All Zone Stereo Off
The All Zone Stereo function is also stopped when you:
•Turn MAIN ZONE off.
•Change the input source for MAIN ZONE.
•Change the sound mode.
NOTE
When “HDMI Audio Out” (vpage129) is set to “TV”, the All Zone
Stereo function is not available.
Basic version
Advanced version
Informations
Basic version
DVD
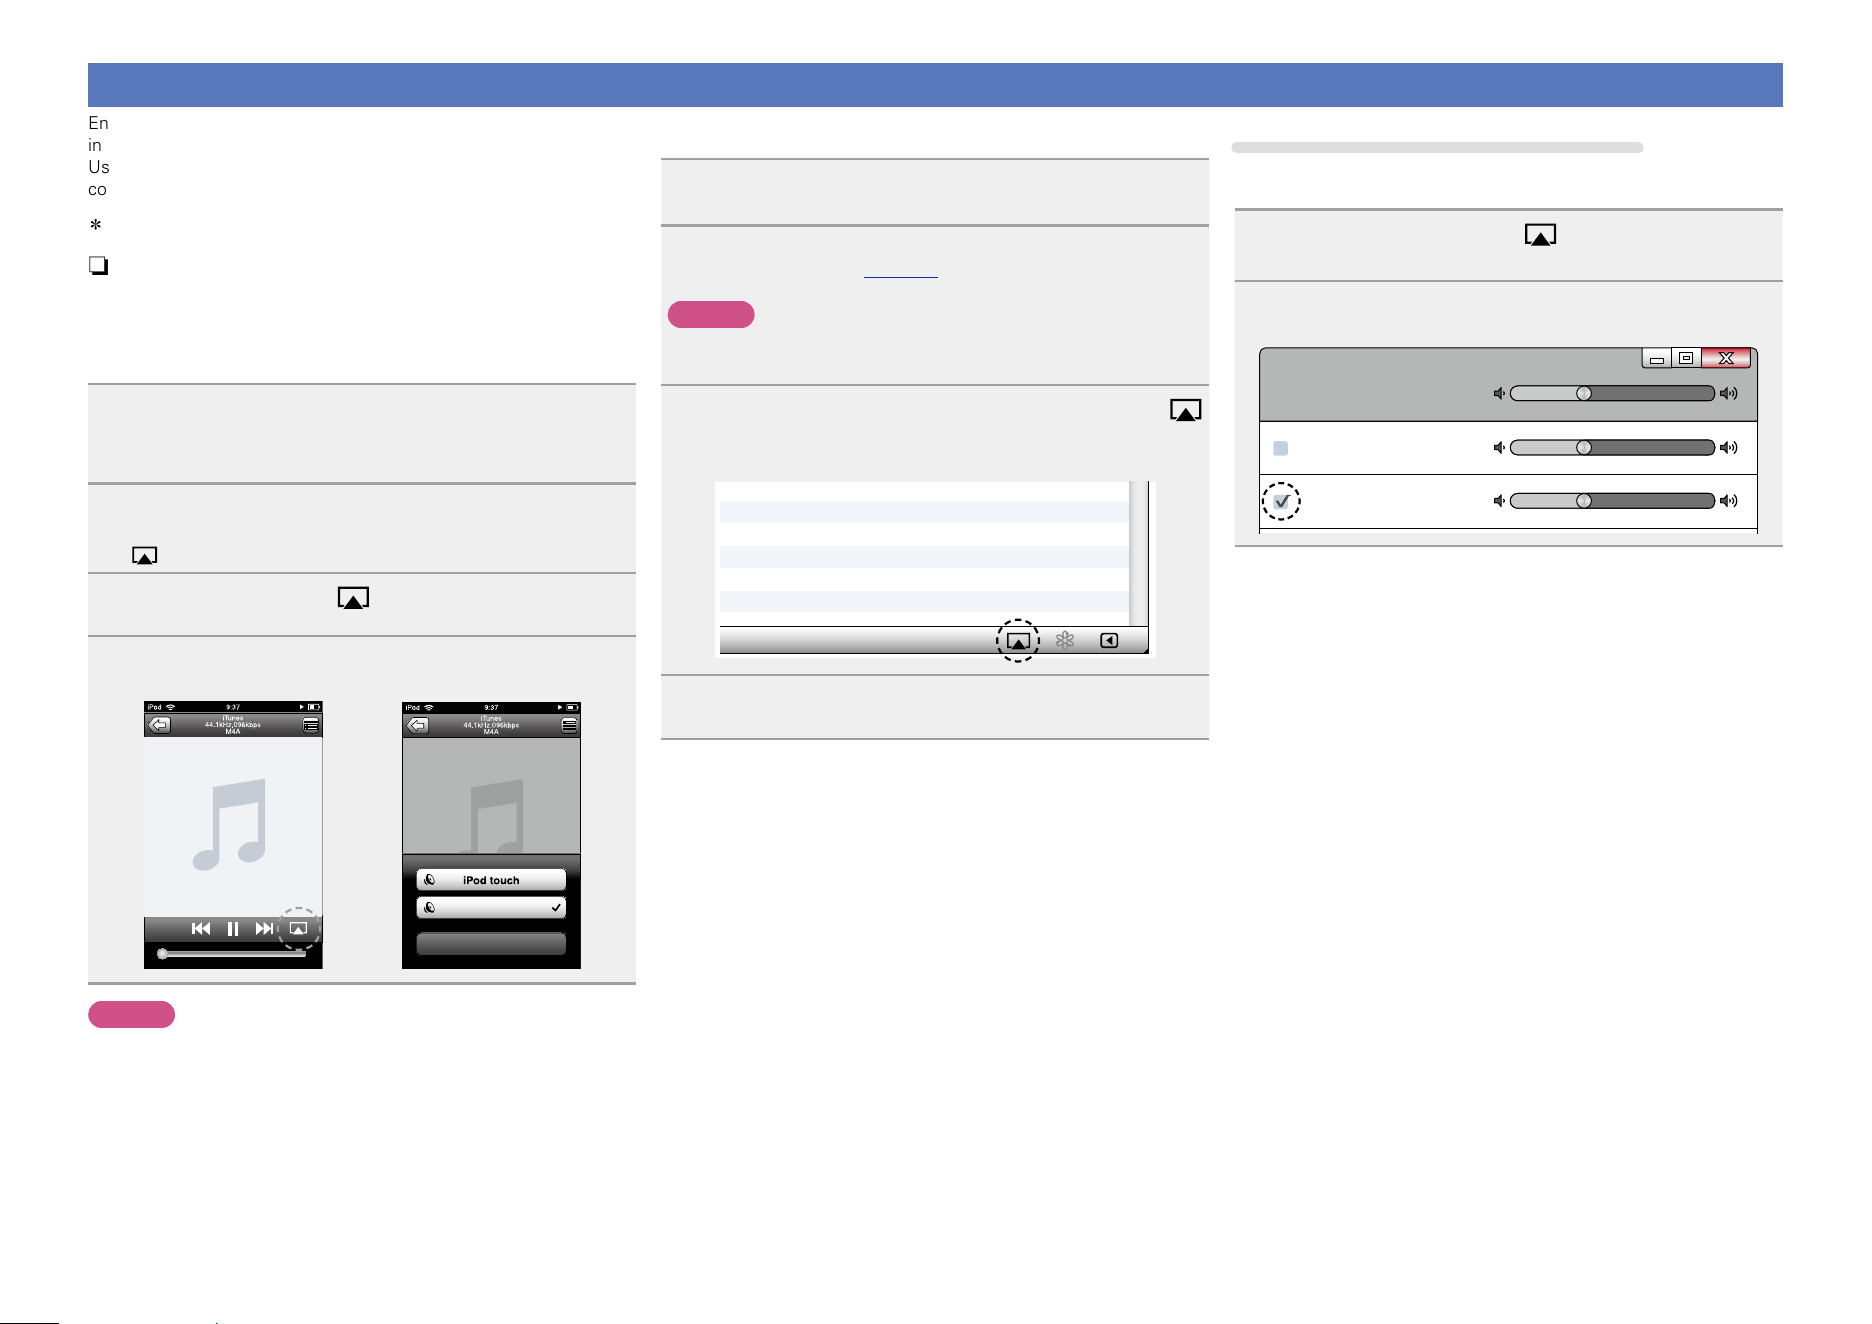
82
AirPlay function
Enjoy music from your iTunes library with high quality sound anywhere
in your home.
Use the Apple Remote App
z
for iPhone, iPod touch and iPad to
control iTunes from any room in your home.
z Available as a free download from the App Store.
n Streaming music stored in iPhone, iPod touch,
or iPad directly to the unit
If you update your “iPhone/iPod touch/iPad” to iOS 4.2.1 or later,
you can stream music stored in your “iPhone/iPod touch/iPad”
directly to this unit.
1
Make the Wi-Fi settings for iPhone, iPod touch, or
iPad.
•For details, see your device’s manual.
2
Startup iPhone, iPod touch, or iPad music or iPod
app.
is displayed on the iPhone, iPod touch or iPad screen.
3
Tap the AirPlay icon .
4
Select the speaker you want to use.
Cancel
DENON AVR-4520CI
NOTE
In playback using the AirPlay function, the sound is output at the
iPhone, iPod touch, iPad or iTunes volume setting level.
You should turn down the iPhone, iPod touch, iPad or iTunes volume
prior to playback and then adjust it to a suitable level.
n Playing iTunes music with this unit
1
Install iTunes 10, or later, on a Mac or Windows PC
that is connected to the same network as this unit.
2
Turn this unit ON.
Set “Network” (vpage147) to “Always On” for this unit.
NOTE
When “Network” is set to “Always On”, the unit consumes more
standby power.
3
Launch iTunes and click the AirPlay icon
displayed in the lower right of the window and select
this unit from the list.
4
Choose a song and click play in iTunes.
The music will stream to this unit.
Selecting multiple speakers (devices)
It is possible to play iTunes songs on your home’s AirPlay compatible
speakers (devices) other than those of this unit.
1
Click the AirPlay icon and select “Multiple
Speakers” from the list.
2
Check the speakers you want to use.
Master Volume
Multiple Speakers
My Computer
This Computer
DENON AVR-4520CI
AirPlay Device
Basic version
Advanced version
Informations
Basic version
v See overleaf
DVD
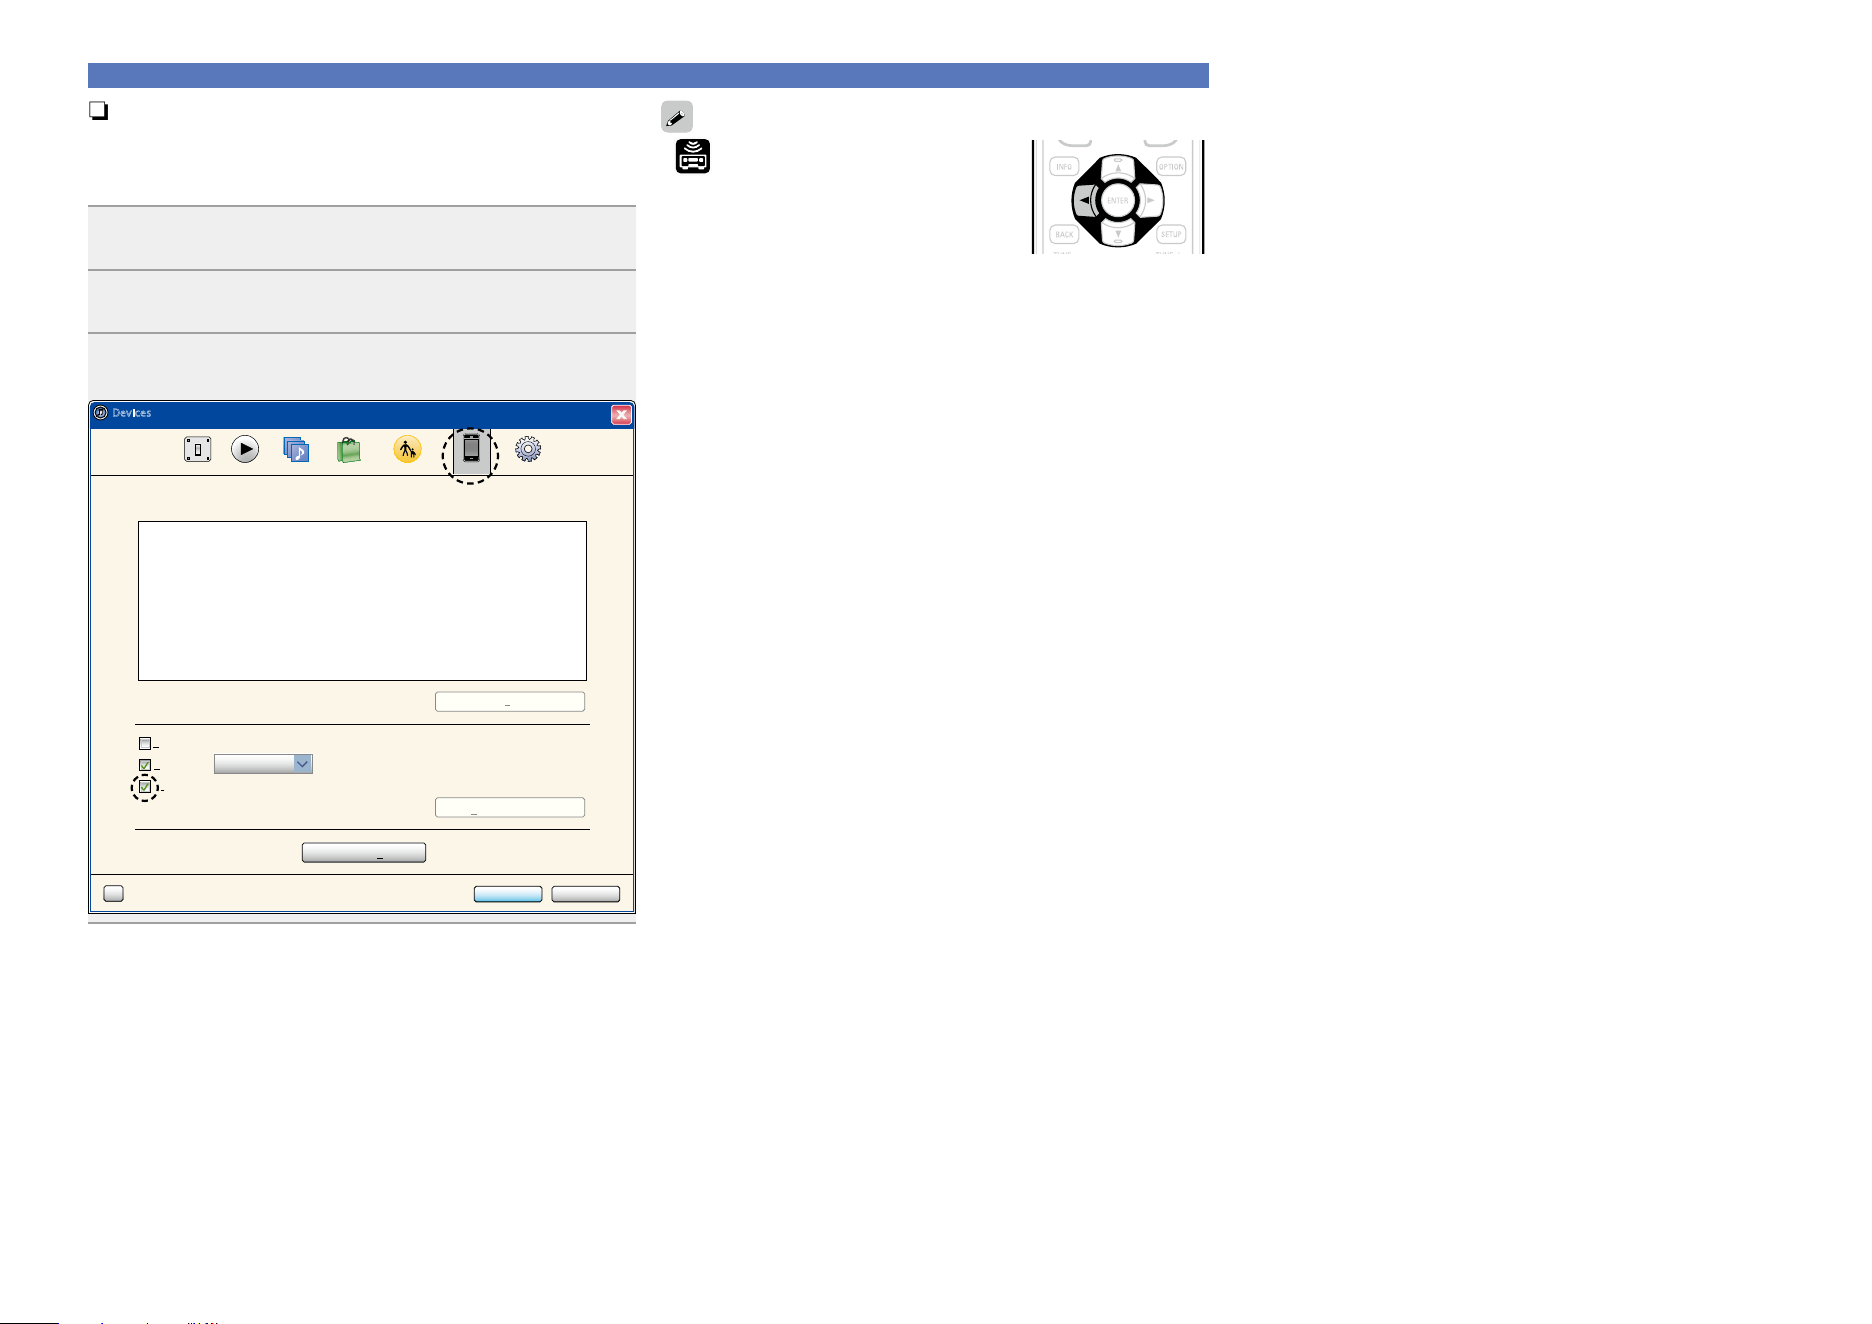
83
AirPlay function
n Perform iTunes playback operations with the
remote control unit of this unit
With this unit’s remote control unit, you can perform iTunes song
play, pause, and auto search (cue) operations.
1
Select “Edit” – “Preferences...” on the menu.
2
Select “Devices” in the iTunes setting window.
3
Check “Allow iTunes control from remote speakers”,
and then click “OK”.
OK Cancel
?
Devices
General Playback Sharing Store Parental Advanced
iTunes is not paired with any Remotes
more than 5%Warn when
Delete Backup ...
Device backups:
Forget All Remotes
Reset Sync History
of the data on this computer will be changed
Prevent iPods, iPhones, and iPads from syncing automatically
Allow iTunes control from remote speakers
Devices
• is displayed on the menu screen while
AirPlay is being operated.
•Source input will be switched to
“NETWORK” when AirPlay playback is
started.
•You can stop AirPlay playback by pressing the o or choosing other
input source.
•To see song and artist names together, press STATUS on the main
unit.
•For information about how to use iTunes, also see the Help for
iTunes.
•The screen may differ depending on the OS and software versions.
Basic version
Advanced version
Informations
Basic version
DVD

84
Selecting a listening mode (Sound Mode)
This unit allows you to enjoy various kinds of surround and stereo
playbacks.
Multi-channel audio formats are adopted by many of the contents
including Blu-ray disc and DVD as well as digital broadcasting and
Internet-delivered movies and music.
This unit supports playback of almost all of these multi-channel audio
formats. It also supports surround playback of audio formats other
than multi-channel audio such as 2-channel stereo audio.
This unit automatically generates a list of all the playable sound
modes based on the input audio format and the current speaker setup
configuration and displays the list on the screen. Therefore, you can
select a correct surround playback mode even if you are not familiar
with sound mode selection. Try out various surround playback modes
and enjoy surround playback in your favorite mode.
GExampleH When MOVIE is pressed and held
MOVIE SOUND
STEREO
DOLBY PLIIx CINEMA
DTS NEO:X CINEMA
MULTI CH STEREO
MONO MOVIE
VIRTUAL
This unit provides not only sound modes that conform to the formats
recorded in discs such as Dolby and DTS but also extended types of
modes that match your speaker configuration including front height
speakers and surround back speakers and “original listening modes”
that create atmosphere of ROCK ARENA and JAZZ CLUB, etc.
The displayed sound modes include the 2-channel stereo playback
mode.
For audio formats recorded in a disc, see the disc jacket.
Selecting a listening mode
1
Play the selected device (vpage 42 – 74).
2
Press and hold MOVIE, MUSIC or
GAME to select a listening mode.
This unit automatically generates and
displays a list of selectable sound
modes.
•Each time MOVIE, MUSIC or GAME is
pressed, the listening mode is switched.
Switches to the listening mode
suitable for enjoying movies and TV
programs.
Switches to the listening mode
suitable for enjoying music.
Switches to the listening mode
suitable for enjoying games.
•Pressing
MOVIE, MUSIC or GAME displays a list of the listening
modes that can be selected. Each time you press MOVIE, MUSIC
or GAME, the listening mode changes.
•While the list is displayed, you can also use ui to select a
listening mode.
•The MOVIE, MUSIC, or GAME button memorizes the last sound
mode selected for its button. Pressing MOVIE, MUSIC, or GAME
recalls the same sound mode as the one selected at the previous
playback.
•If the content played back does not support the previously selected
sound mode, the most standard sound mode for the content is
automatically selected.
Direct/DSD Direct playback
Sound recorded in source is played as is.
1
Play the selected device
(vpage 42 – 74).
2
Press PURE to select “DIRECT” or “DSD DIRECT”.
Direct playback begins.
“DSD DIRECT” is shown on the display when playing DSD signals in
the DIRECT mode.
Pure direct playback
This mode is for playback in higher sound quality than in “DIRECT”
mode. Turn the display of the amplifier off to stop the analogue video
circuit. This suppresses the source of noise that affects sound quality.
1
Play the selected device
(vpage 42 – 74).
2
Press PURE to select “PURE DIRECT”.
The display goes dark, and pure direct playback begins.
In DIRECT/DSD DIRECT and PURE DIRECT listening mode, the
following items cannot be adjusted.
•Tone (vpage123) •Restorer (vpage124)
•MultEQ
®
XT 32 (vpage125) •Dynamic EQ (vpage125)
•Dynamic Volume (vpage126)
NOTE
•Video signals are only output when HDMI signals are played in the
PURE DIRECT mode.
•When in the PURE DIRECT mode, the menu screen is not displayed.
•When in the PURE DIRECT mode, the display turns off and appears
as if there is no electricity.
Basic version
Advanced version
Informations
Basic version
DVD

85
Selecting a listening mode
n Listening mode
•The following listening modes can be selected using the MOVIE, MUSIC, GAME, and PURE buttons.
•Adjust the sound field effect with the menu “Surround Parameter” (vpage121) to enjoy your favorite sound mode.
Operation
button
Input signal Listening mode
2-channel
z1
STEREO
DOLBY PLgx Cinema
z2
/
DOLBY PLgx Cinema A-DSX
z4
DOLBY PLg Cinema
z2
/
DOLBY PLg Cinema A-DSX
z4
DOLBY PLgz Height
z2
DTS NEO:X Cinema
z2
z5
MULTI CH STEREO
WIDE SCREEN
MONO MOVIE
VIRTUAL
Multi-channel
z3
STEREO
Dolby Digital
DOLBY DIGITAL /
DOLBY DIGITAL A-DSX
z4
DOLBY DIGITAL EX
DOLBY DIGITAL + PLgx Cinema
DOLBY DIGITAL + PLgz
DOLBY DIGITAL + NEO:X Cinema
Dolby TrueHD
DOLBY TrueHD /
DOLBY TrueHD A-DSX
z4
DOLBY TrueHD + EX
DOLBY TrueHD + PLgx Cinema
DOLBY TrueHD + PLgz
DOLBY TrueHD + NEO:X Cinema
Dolby Digital
Plus
DOLBY DIGITAL Plus /
DOLBY DIGITAL Plus A-DSX
z4
DOLBY DIGITAL Plus + EX
DOLBY DIGITAL Plus + PLgx Cinema
DOLBY DIGITAL Plus + PLgz
DOLBY DIGITAL Plus + NEO:X
Cinema
DTS
DTS SURROUND /
DTS SURROUND A-DSX
z4
DTS ES DSCRT 6.1
DTS ES MTRX 6.1
DTS 96/24
DTS + PLgx Cinema
DTS + PLgz
DTS + NEO:X Cinema
Operation
button
Input signal Listening mode
DTS-HD /
DTS Express
DTS-HD HI RES /
DTS-HD HI RES A-DSX
z4
DTS-HD MSTR /
DTS-HD MSTR A-DSX
z4
DTS Express /
DTS Express A-DSX
z4
DTS-HD + PLgx Cinema
DTS-HD + PLgz
DTS-HD + NEO:X Cinema
PCM/DSD
multi-channel
MULTI CH IN /
MULTI CH IN A-DSX
z4
MULTI CH IN 7.1
MULTI IN + Dolby EX
MULTI IN + PLgx Cinema
MULTI IN + PLgz
MULTI IN + NEO:X Cinema
z5
Multi-channel
z3
MULTI CH STEREO
WIDE SCREEN
MONO MOVIE
VIRTUAL
z1 2-channel also includes analog input.
z2 This mode plays back 2-channel source in 5.1, 7.1, 9.1 or
11.1-channel playback. It cannot be selected when headphones
are used, or when only front speakers are used.
z3 Some listening modes cannot be selected, depending on the
audio format or number of channels of the input signal. For
details, see “Types of input signals, and corresponding sound
modes” (vpage187).
z4 These modes add a new channel to the 5.1 channel surround
using Audyssey DSX
®
processing (vpage126).
When “Heights” is selected in “Audyssey DSX
®
” (vpage126),
a front height channel is added in playback. When “Wides” is
selected, a front wide channel is added in playback. When
“Wides/Heights” is selected, a front wide channel and a front
height channel are added in playback.
z5 This mode cannot be selected when DSD signals are input.
Basic version
Advanced version
Informations
Basic version
v See overleaf
DVD
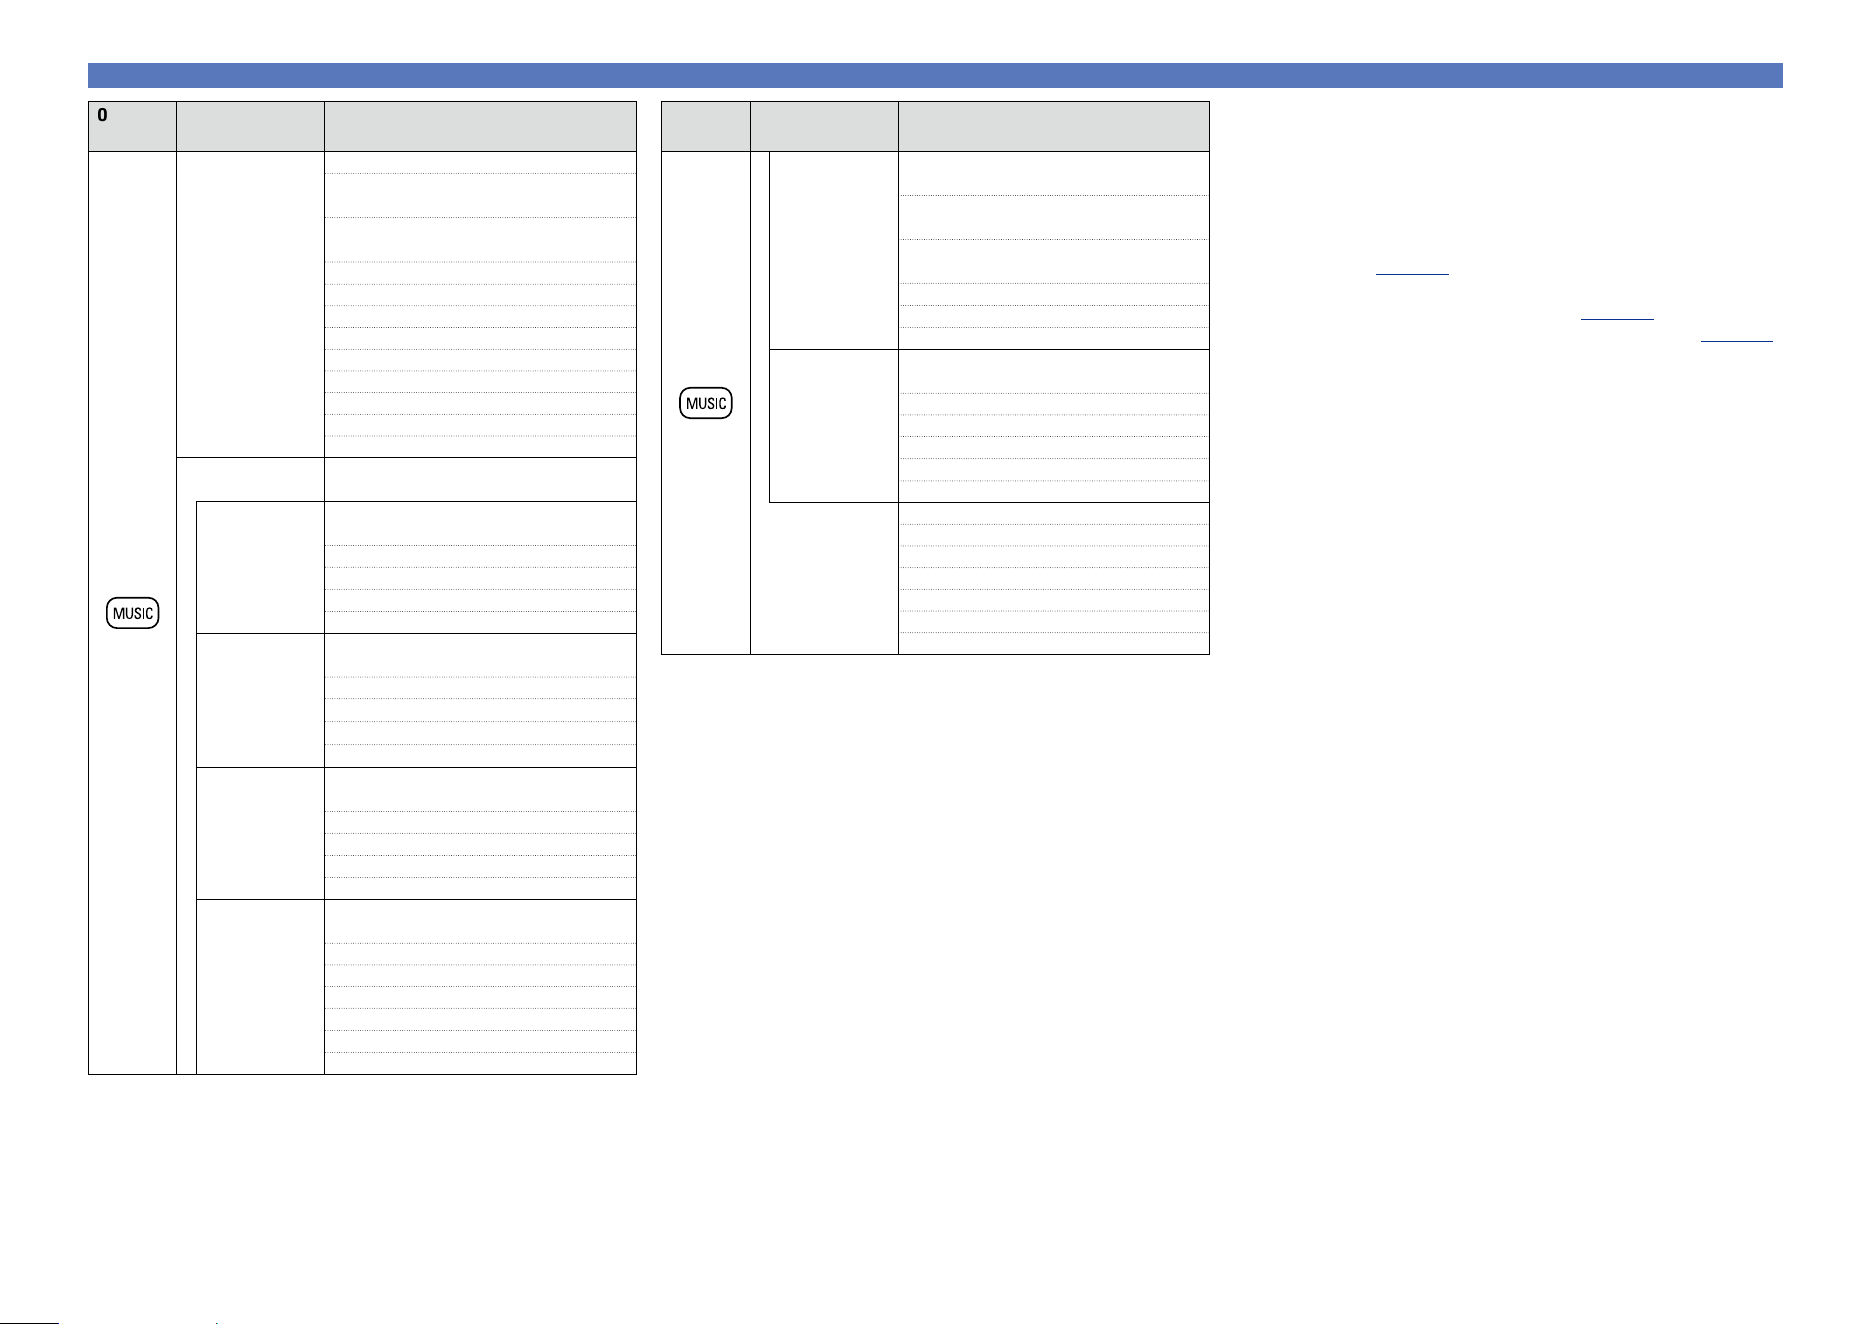
86
Selecting a listening mode
Operation
button
Input signal Listening mode
DTS-HD /
DTS Express
DTS-HD HI RES /
DTS-HD HI RES A-DSX
z4
DTS-HD MSTR /
DTS-HD MSTR A-DSX
z4
DTS Express /
DTS Express A-DSX
z4
DTS-HD + PLgx Music
DTS-HD + PLgz
DTS-HD + NEO:X Music
PCM/DSD
multi-channel
MULTI CH IN /
MULTI CH IN A-DSX
z4
MULTI CH IN 7.1
MULTI IN + Dolby EX
MULTI IN + PLgx Music
MULTI IN + PLgz
MULTI IN + NEO:X Music
z5
Multi-channel
z3
MULTI CH STEREO
SUPER STADIUM
ROCK ARENA
JAZZ CLUB
CLASSIC CONCERT
MATRIX
VIRTUAL
Operation
button
Input signal Listening mode
2-channel
z1
STEREO
DOLBY PLgx Music
z2
/
DOLBY PLgx Music A-DSX
z4
DOLBY PLg Music
z2
/
DOLBY PLg Music A-DSX
z4
DOLBY PLgz Height
z2
DTS NEO:X Music
z2
z5
MULTI CH STEREO
SUPER STADIUM
ROCK ARENA
JAZZ CLUB
CLASSIC CONCERT
MATRIX
VIRTUAL
Multi-channel
z3
STEREO
Dolby Digital
DOLBY DIGITAL /
DOLBY DIGITAL A-DSX
z4
DOLBY DIGITAL EX
DOLBY DIGITAL + PLgx Music
DOLBY DIGITAL + PLgz
DOLBY DIGITAL + NEO:X Music
Dolby TrueHD
DOLBY TrueHD /
DOLBY TrueHD A-DSX
z4
DOLBY TrueHD + EX
DOLBY TrueHD + PLgx Music
DOLBY TrueHD + PLgz
DOLBY TrueHD + NEO:X Music
Dolby Digital
Plus
DOLBY DIGITAL Plus /
DOLBY DIGITAL Plus A-DSX
z4
DOLBY DIGITAL Plus + EX
DOLBY DIGITAL Plus + PLgx Music
DOLBY DIGITAL Plus + PLgz
DOLBY DIGITAL Plus + NEO:X Music
DTS
DTS SURROUND /
DTS SURROUND A-DSX
z4
DTS ES DSCRT 6.1
DTS ES MTRX 6.1
DTS 96/24
DTS + PLgx Music
DTS + PLgz
DTS + NEO:X Music
z1 2-channel also includes analog input.
z2 This mode plays back 2-channel source in 5.1, 7.1, 9.1 or
11.1-channel playback. It cannot be selected when headphones
are used, or when only front speakers are used.
z3 Some listening modes cannot be selected, depending on the
audio format or number of channels of the input signal. For
details, see “Types of input signals, and corresponding sound
modes” (vpage187).
z4 These modes add a new channel to the 5.1 channel surround
using Audyssey DSX
®
processing (vpage126).
When “Heights” is selected in “Audyssey DSX
®
” (vpage126),
a front height channel is added in playback. When “Wides” is
selected, a front wide channel is added in playback. When
“Wides/Heights” is selected, a front wide channel and a front
height channel are added in playback.
z5 This mode cannot be selected when DSD signals are input.
Basic version
Advanced version
Informations
Basic version
v See overleaf
DVD
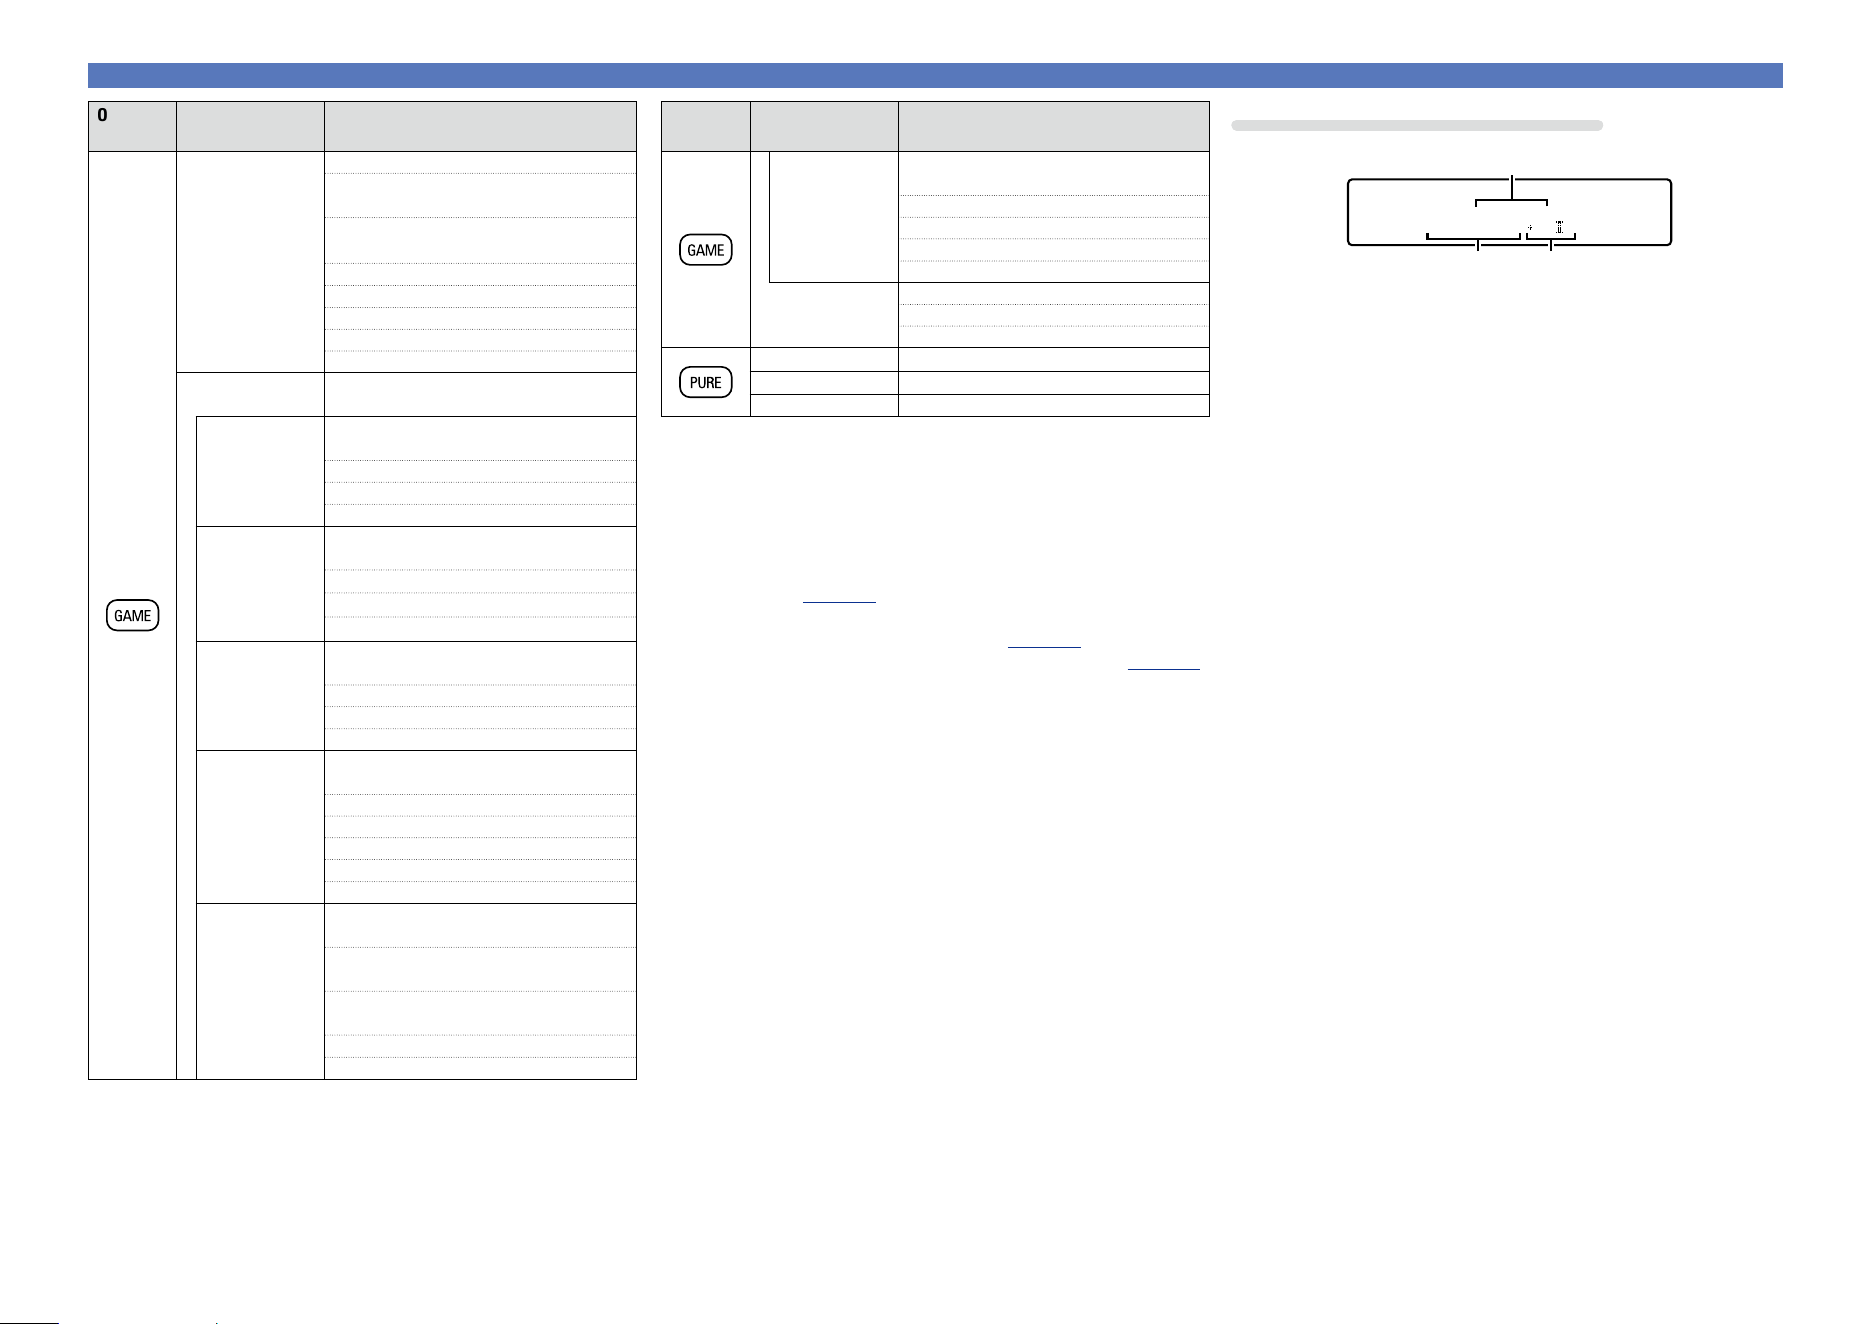
87
Selecting a listening mode
Operation
button
Input signal Listening mode
PCM/DSD
multi-channel
MULTI CH IN /
MULTI CH IN A-DSX
z4
MULTI CH IN 7.1
MULTI IN + Dolby EX
MULTI IN + PLgz
MULTI IN + NEO:X Game
z5
Multi-channel
z3
MULTI CH STEREO
VIDEO GAME
VIRTUAL
All PURE DIRECT
Except DSD DIRECT
DSD DSD DIRECT
z1 2-channel also includes analog input.
z2 This mode plays back 2-channel source in 5.1, 7.1, 9.1 or
11.1-channel playback. It cannot be selected when headphones
are used, or when only front speakers are used.
z3 Some listening modes cannot be selected, depending on the
audio format or number of channels of the input signal. For
details, see “Types of input signals, and corresponding sound
modes” (vpage187).
z4 These modes add a new channel to the 5.1 channel surround
using Audyssey DSX
®
processing (vpage126).
When “Heights” is selected in “Audyssey DSX
®
” (vpage126),
a front height channel is added in playback. When “Wides” is
selected, a front wide channel is added in playback. When
“Wides/Heights” is selected, a front wide channel and a front
height channel are added in playback.
z5 This mode cannot be selected when DSD signals are input.
Operation
button
Input signal Listening mode
2-channel
z1
STEREO
DOLBY PLgx Game
z2
/
DOLBY PLgx Game A-DSX
z4
DOLBY PLg Game
z2
/
DOLBY PLg Game A-DSX
z4
DOLBY PLgz Height
z2
DTS NEO:X Game
z2
z5
MULTI CH STEREO
VIDEO GAME
VIRTUAL
Multi-channel
z3
STEREO
Dolby Digital
DOLBY DIGITAL /
DOLBY DIGITAL A-DSX
z4
DOLBY DIGITAL EX
DOLBY DIGITAL + PLgz
DOLBY DIGITAL + NEO:X
Dolby TrueHD
DOLBY TrueHD /
DOLBY TrueHD A-DSX
z4
DOLBY TrueHD + EX
DOLBY TrueHD + PLgz
DOLBY TrueHD + NEO:X Game
Dolby Digital
Plus
DOLBY DIGITAL Plus /
DOLBY DIGITAL Plus A-DSX
z4
DOLBY DIGITAL Plus + EX
DOLBY DIGITAL Plus + PLgz
DOLBY DIGITAL Plus + NEO:X Game
DTS
DTS SURROUND /
DTS SURROUND A-DSX
z4
DTS ES DSCRT 6.1
DTS ES MTRX 6.1
DTS 96/24
DTS + PLgz
DTS + NEO:X Game
DTS-HD /
DTS Express
DTS-HD HI RES /
DTS-HD HI RES A-DSX
z4
DTS-HD MSTR /
DTS-HD MSTR A-DSX
z4
DTS Express /
DTS Express A-DSX
z4
DTS-HD + PLgz
DTS-HD + NEO:X Game
Views on the TV screen or display
DOLBY D + PL z
Blu-ray
q
e
w
q Shows a decoder to be used.
•A DOLBY DIGITAL Plus decoder is displayed as “DOLBY D +”.
w Shows a decoder that creates sound output from the surround
back speakers.
•“+ PLgz” indicates the front height sound from front height
speakers.
e Shows the name of the input source being played back.
Basic version
Advanced version
Informations
Basic version
v See overleaf
DVD
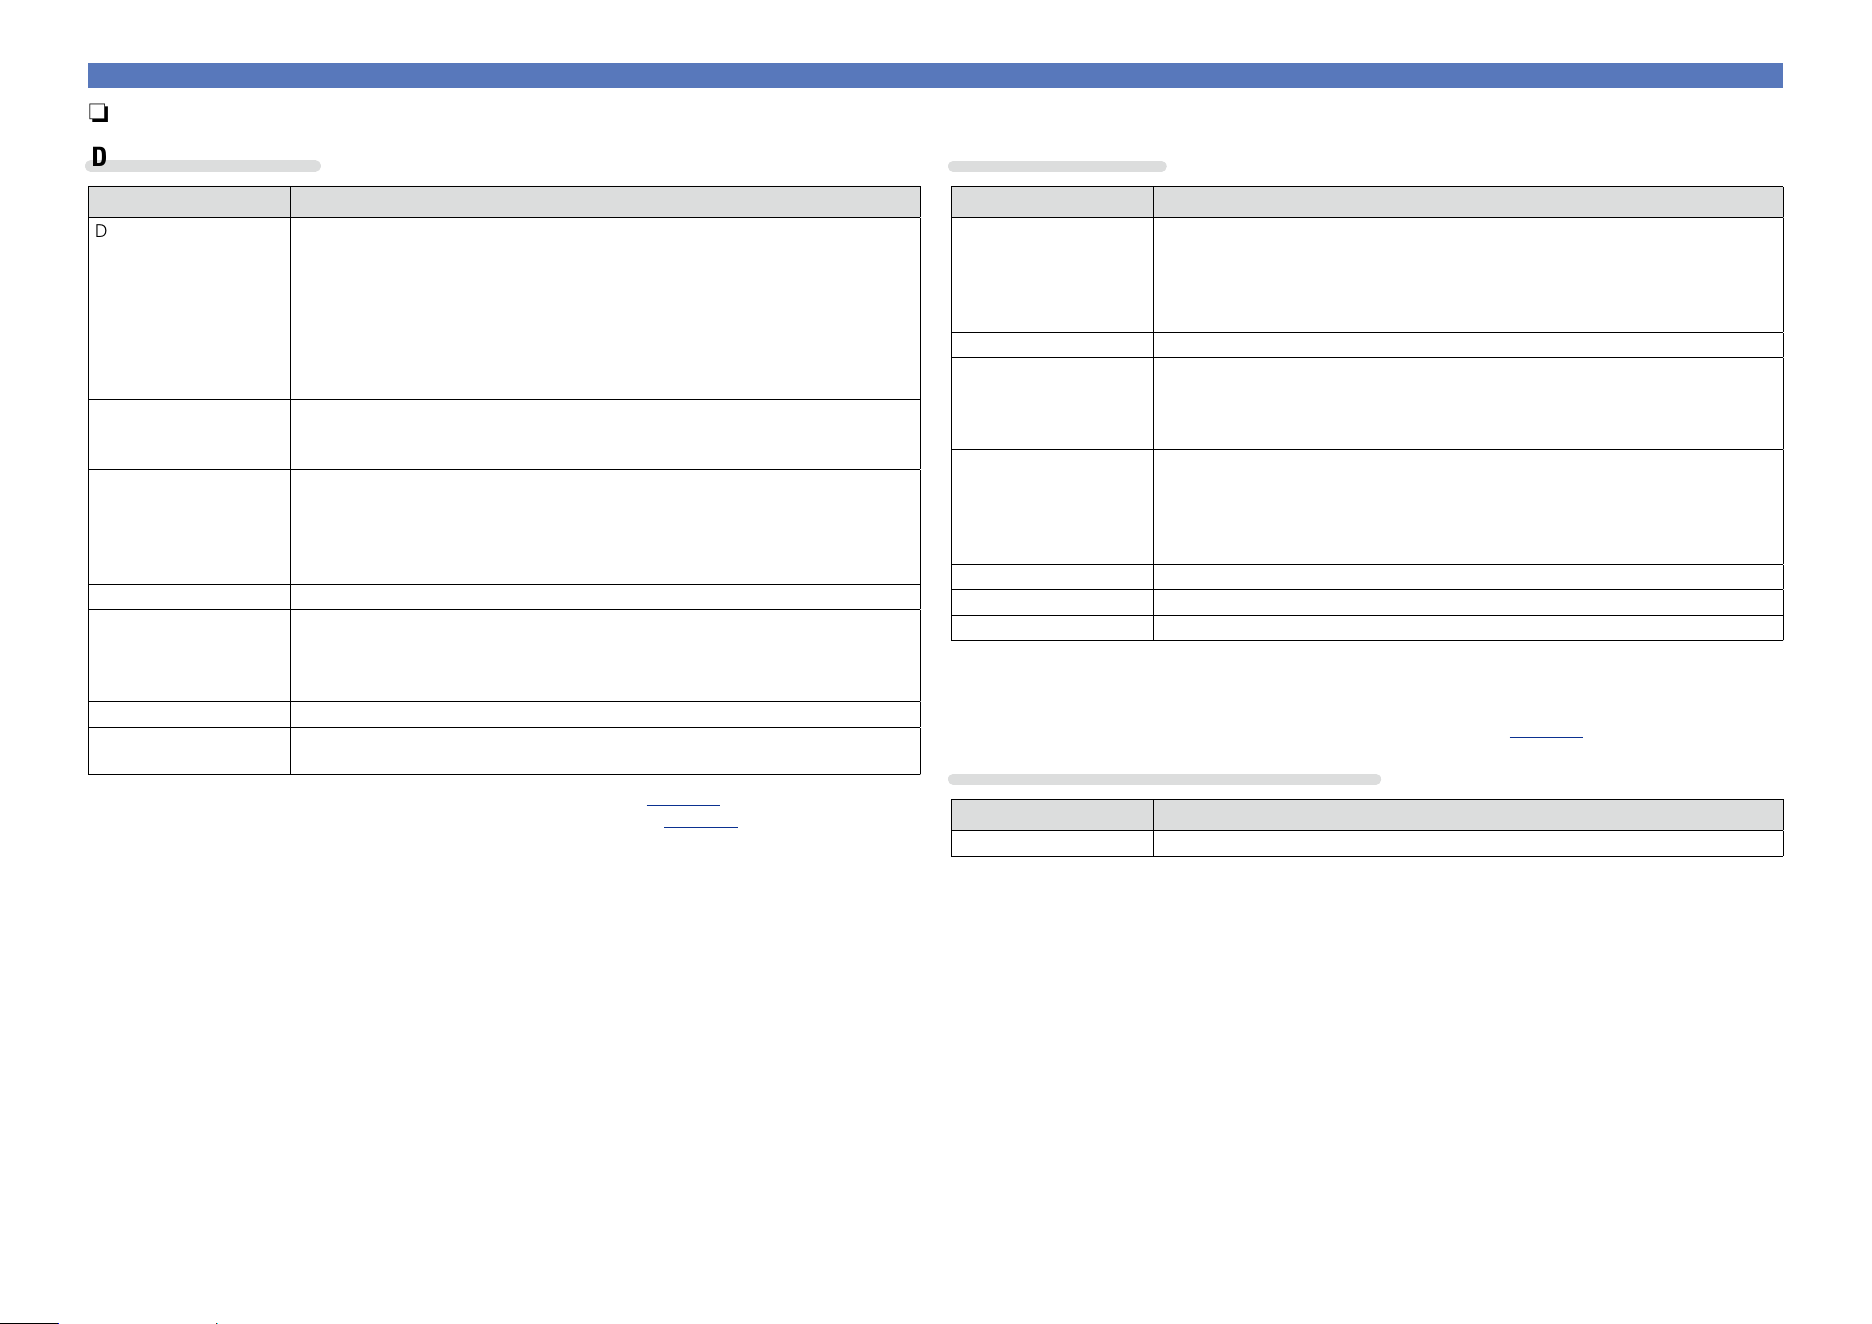
88
Selecting a listening mode
n Description of listening mode types
Dolby listening mode
Listening mode type Description
DOLBY PLgx
z1
This mode can be selected when a Dolby Pro Logic gx decoder is used to
play back 2-channel source in 6.1/7.1-channel surround sound including the
surround back channel.
By adding the surround back channel, a stronger surround feeling is obtained
compared to Dolby Pro Logic g.
There are three playback modes: “Cinema” mode that is optimized for movie
playback, “Music” mode that is optimized for music playback, and “Game”
mode that is optimized for game play.
DOLBY PLg This mode can be selected when a Dolby Pro Logic g decoder is used to play
back 2-channel source in 5.1-channel surround sound with a natural, realistic
feel.
DOLBY PLgz
z2
This mode can be selected when a Dolby Pro Logic gz decoder is used to play
back 2-channel source in 7.1-channel surround sound with added front height
channel.
By adding a front height channel, the vertical expression is emphasized,
improving the three-dimensionality of the sound.
DOLBY DIGITAL This mode can be selected when playing sources recorded with Dolby Digital.
DOLBY DIGITAL EX
z1
Using a Dolby Digital EX decoder, this mode plays Dolby Digital source in
6.1/7.1 channel surround sound with added surround back channel.
By adding a surround back channel, spacial expressiveness and sound
localization are enhanced.
DOLBY TrueHD This mode can be selected when playing sources recorded in Dolby TrueHD.
DOLBY DIGITAL Plus This mode can be selected when playing sources recorded with Dolby Digital
Plus.
z1 This can be selected when “Speaker Config.” – “Surr.Back” (vpage142) is not set to “None”.
z2 This can be selected when “Speaker Config.” – “Front Height” (vpage142) is not set to “None”.
DTS listening mode
Listening mode type Description
DTS NEO:X
z1
This matrix decoding technology uses the DTS NEO:X decoder to playback
2-channel source or 5.1/6.1/7.1 channel surround sources as a maximum of
11.1 channel surround sound.
There are 3 modes: “Music” suited for playing music, “Cinema” suited for
playing movies, and “Game” which is optimized for playing games.
DTS SURROUND This mode can be selected when playing sources recorded in DTS.
DTS ES DSCRT6.1
z2
This mode is suitable for playing discs recorded in DTS-ES. The surround back
channel added using the discrete method is played as an independent channel.
Since all channels are independent, the 360-degree spacial expressiveness and
sound localization are enhanced.
DTS ES MTRX6.1
z3
This mode is suitable for playing discs recorded in DTS-ES.
The surround back channel added to the surround-left and surround-right
channels by a matrix encoder at software recording time is decoded by this
unit’s matrix decoder and played from each channel (surround left, surround
right, surround back).
DTS 96/24 This mode can be selected when playing sources recorded in DTS 96/24.
DTS-HD This mode can be selected when playing sources recorded in DTS-HD.
DTS Express This mode can be selected when playing sources recorded in DTS Express.
z1 This mode cannot be selected when DSD signals are input.
z2 This mode can be selected when only one surround back speaker is used and no front height speaker
or front wide speaker is used.
z3 This can be selected when “Speaker Config.” – “Surr.Back” (vpage142) is not set to “None”.
PCM/DSD multi-channel listening mode
Listening mode type Description
MULTI CH IN This mode can be selected when playing multi-channel PCM/DSD sources .
Basic version
Advanced version
Informations
Basic version
v See overleaf
DVD
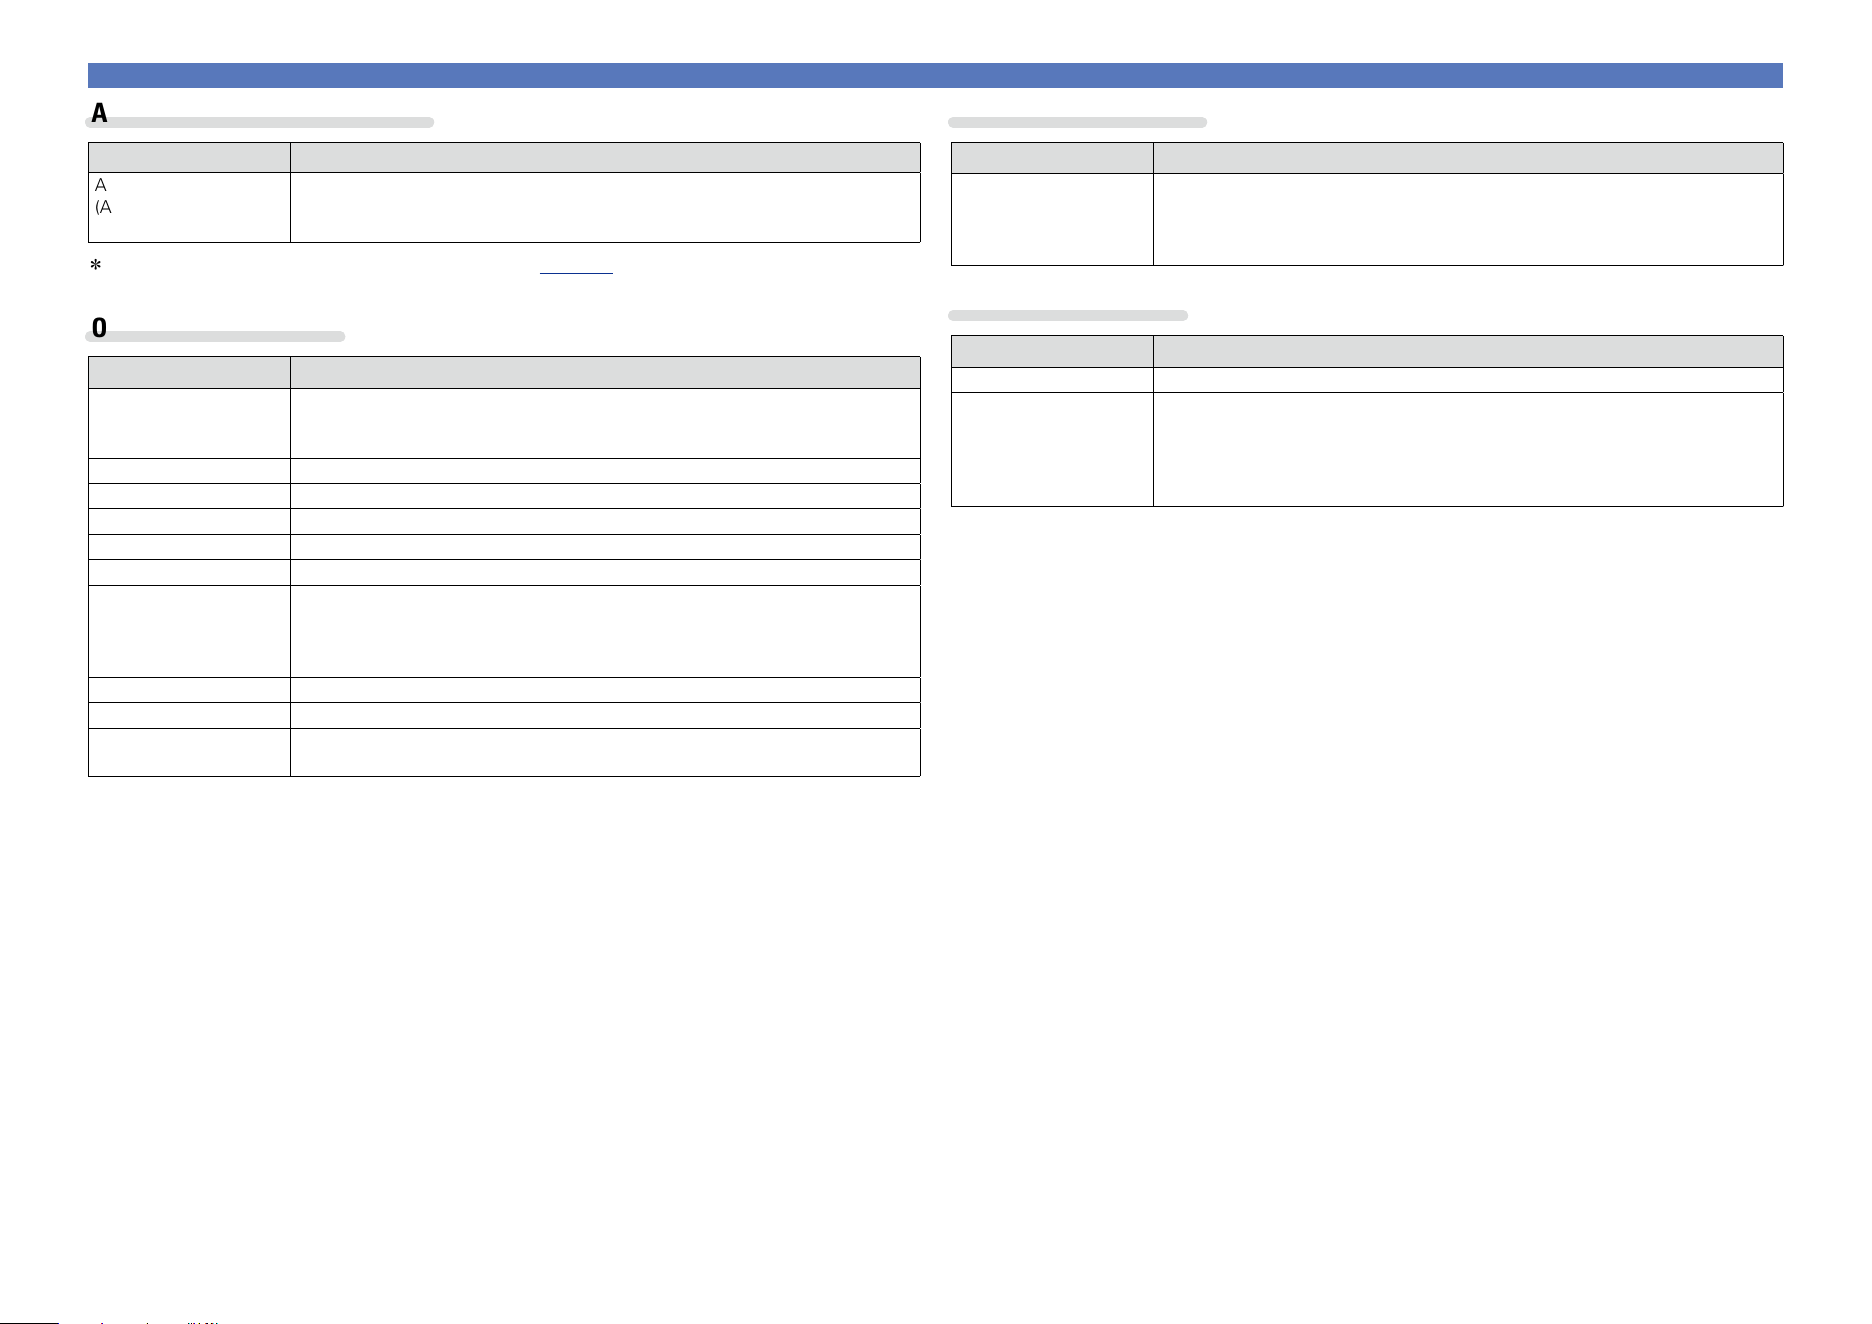
89
Selecting a listening mode
Audyssey DSX
®
listening mode
Listening mode type Description
Audyssey DSX
®
(A-DSX)
z
This mode creates playback for the new channels (front wide or front height) in
5.1-channel systems. By adding front wide or front high channels, the surround
sound effects sound more three dimensional and realistic.
z This mode is displayed when “Audyssey DSX
®
” (vpage126) is set to “Wides/Heights”, “Heights”
or “Wides”.
Original listening mode
Listening mode type Description
MULTI CH STEREO This mode is for enjoying stereo sound from all speakers.
The same sound as that from the front speakers (L/R) is played back at the
same level from the surround speakers (L/R) and surround back speakers (L/R).
WIDE SCREEN This mode is for enjoying the atmosphere of viewing a movie on a large screen.
SUPER STADIUM This mode is suited for viewing sports programs.
ROCK ARENA This mode is for enjoying the atmosphere of a live concert in an arena.
JAZZ CLUB This mode is for enjoying the atmosphere of a live concert in a jazz club.
CLASSIC CONCERT This mode is for appreciating classical concert programs.
MONO MOVIE This mode is for playing monaural movie sources with surround sound.
When playing sources recorded in monaural in the “MONO MOVIE” mode,
the sound will be off balance with a single channel (left or right), so input to
both channels.
VIDEO GAME This mode is suited for achieving surround sound with video games.
MATRIX This mode lets you add a spacious feel to stereo music sources.
VIRTUAL This mode is for enjoying surround effects using only the front speakers or
headphones.
STEREO listening mode
Listening mode type Description
STEREO This is the mode for playing in stereo. The tone can be adjusted.
•Sound is output from the front left and right speakers and subwoofer.
•If multichannel signals are input, they are mixed down to 2-channel audio and
are played.
Direct listening mode
Listening mode type Description
DIRECT/DSD DIRECT Sound recorded in source is played as is.
PURE DIRECT This mode is for playback in higher sound quality than in DIRECT mode.
This suppresses the source of noise that affects sound quality.
The following circuits that affect sound quality are set to off.
•Main unit’s display circuit (The display is turned off.)
•Analog video input/output circuit
Basic version
Advanced version
Informations
Basic version
DVD

Advanced
version
90
F Installation/connection/setup of speakers (Advanced) vpage91
F Playback (Advanced operation) vpage102
F Playback in ZONE2/ZONE3/ZONE4 (Separate room) vpage111
F How to make detailed settings vpage114
F Operating external devices with the remote control vpage157
Advanced version
Here, we explain functions and operations that let you make better use of this unit.
Basic version
Advanced version
Informations
Advanced version
DVD
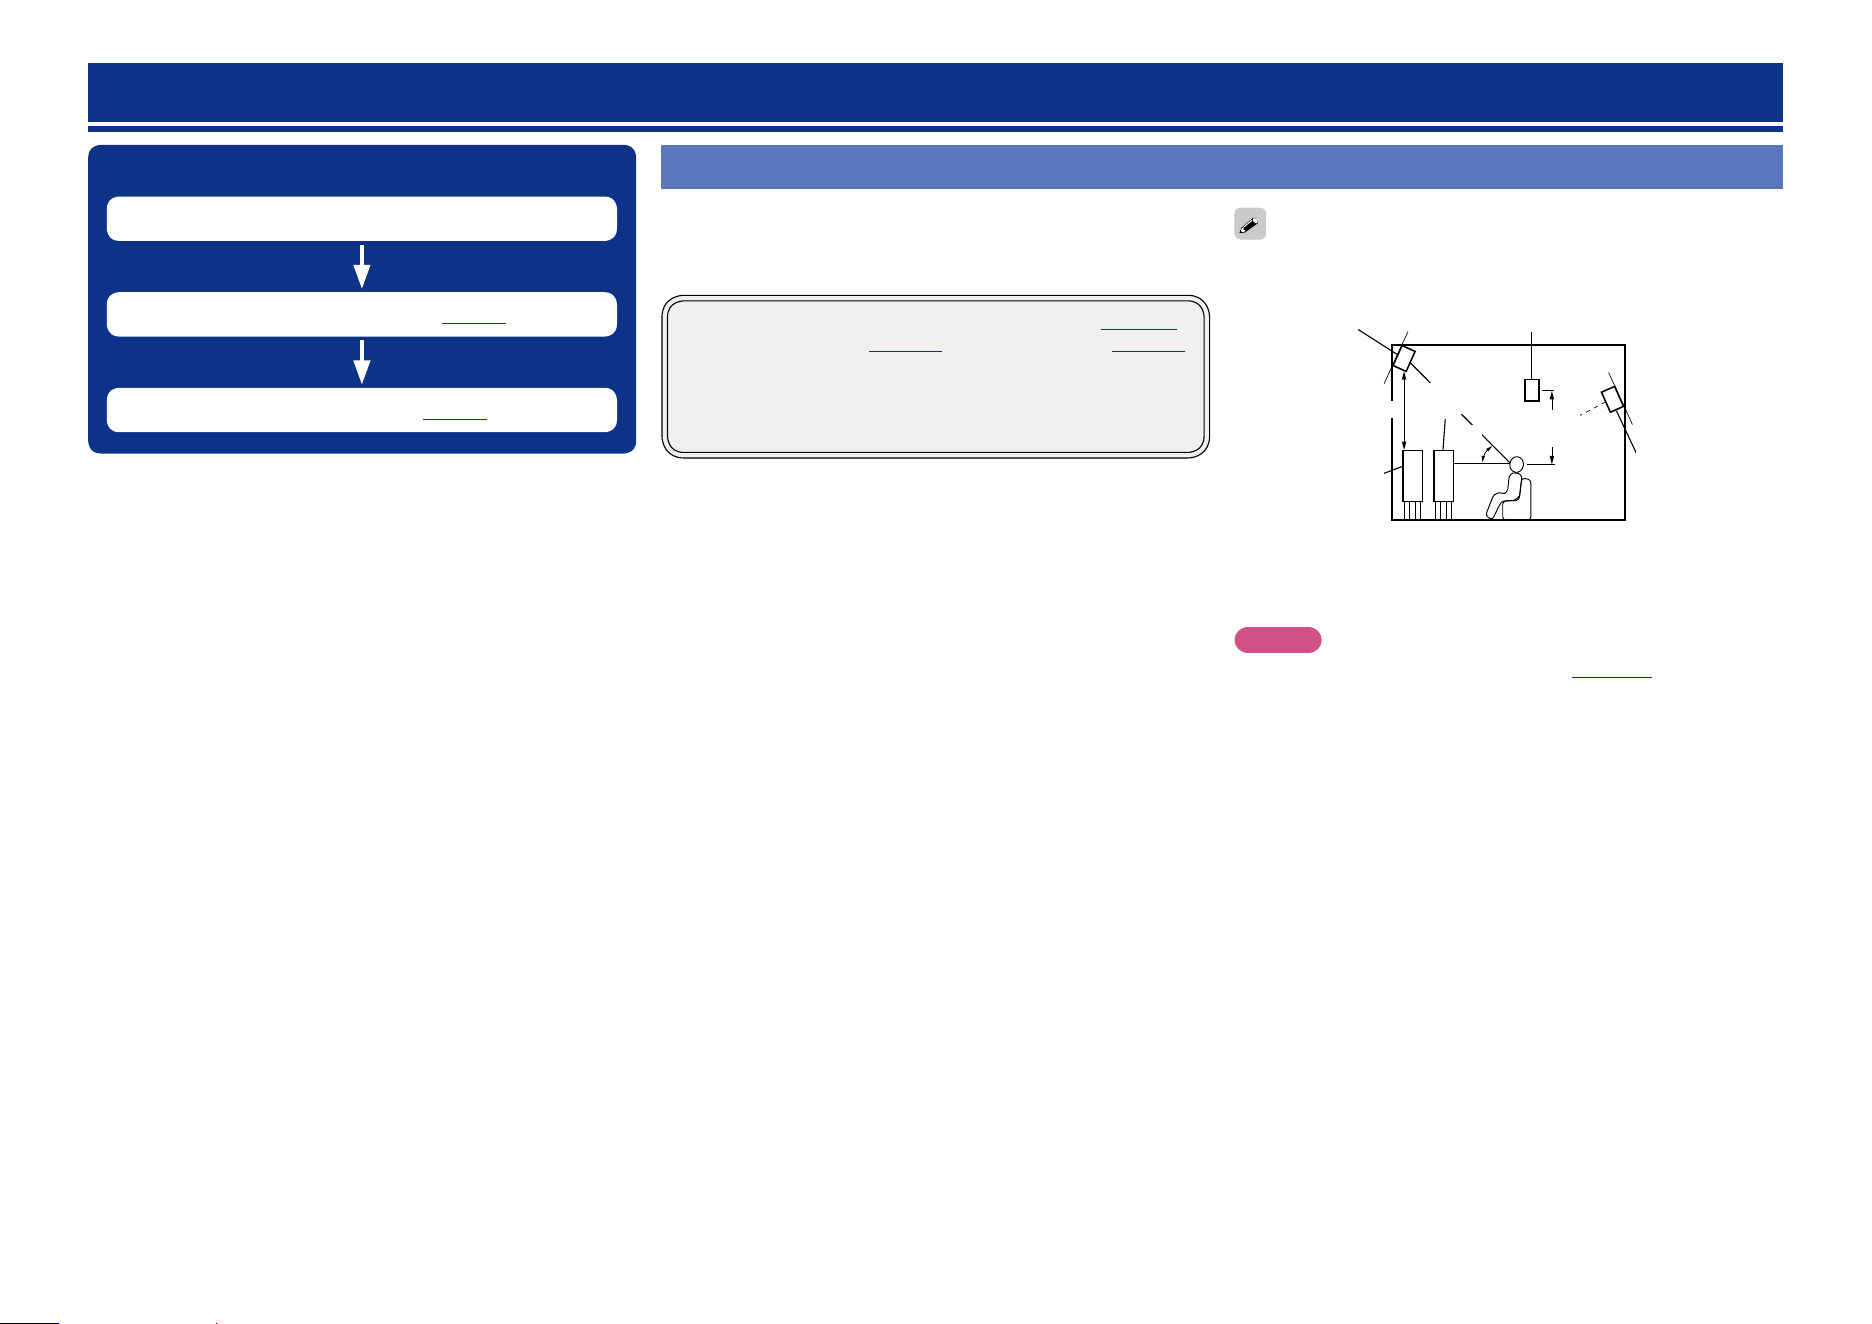
91
Procedure for speaker settings
Speaker installation
Speaker connection (vpage93)
Set up speakers (vpage99)
Speaker installation
•Determine the speaker system depending on the number of speakers
you are using and install each speaker and subwoofer in the room.
Here, we explain how to install the speakers using a typical example.
•The speaker impedance should be from 6 to 16 Ω.
This unit is compatible with Audyssey DSX
®
(vpage 193),
Dolby Pro Logic gz (vpage194) and DTS Neo:X (vpage194)
which offers an even wider and deeper surround sensation.
When using Audyssey DSX
®
, install front wide speakers or front
height speakers.
When using Dolby Pro Logic gz, install front height speakers.
Use the illustration below as a guide for how high each speaker should
be installed. The height does not need to be exactly the same.
z1
z2
45˚
Surround
speaker
2 – 3 ft/
60 – 90 cm
GViewed from the sideH
Front height
speaker
•Point slightly
downwards
At least
3.3 ft/1 m
Surround back
speaker
•Point slightly
downwards
Front
speaker
Front wide
speaker
z1 Recommended for Dolby Pro Logic gz
z2 Recommended for Audyssey DSX
®
NOTE
Depending on the “Amp Assign” (vpage 141) setting, audio
cannot be output simultaneously from the surround back, front height,
and front wide speakers.
Installation/connection/setup of speakers (Advanced)
Basic version
Advanced version
Informations
Advanced version
v See overleaf
DVD
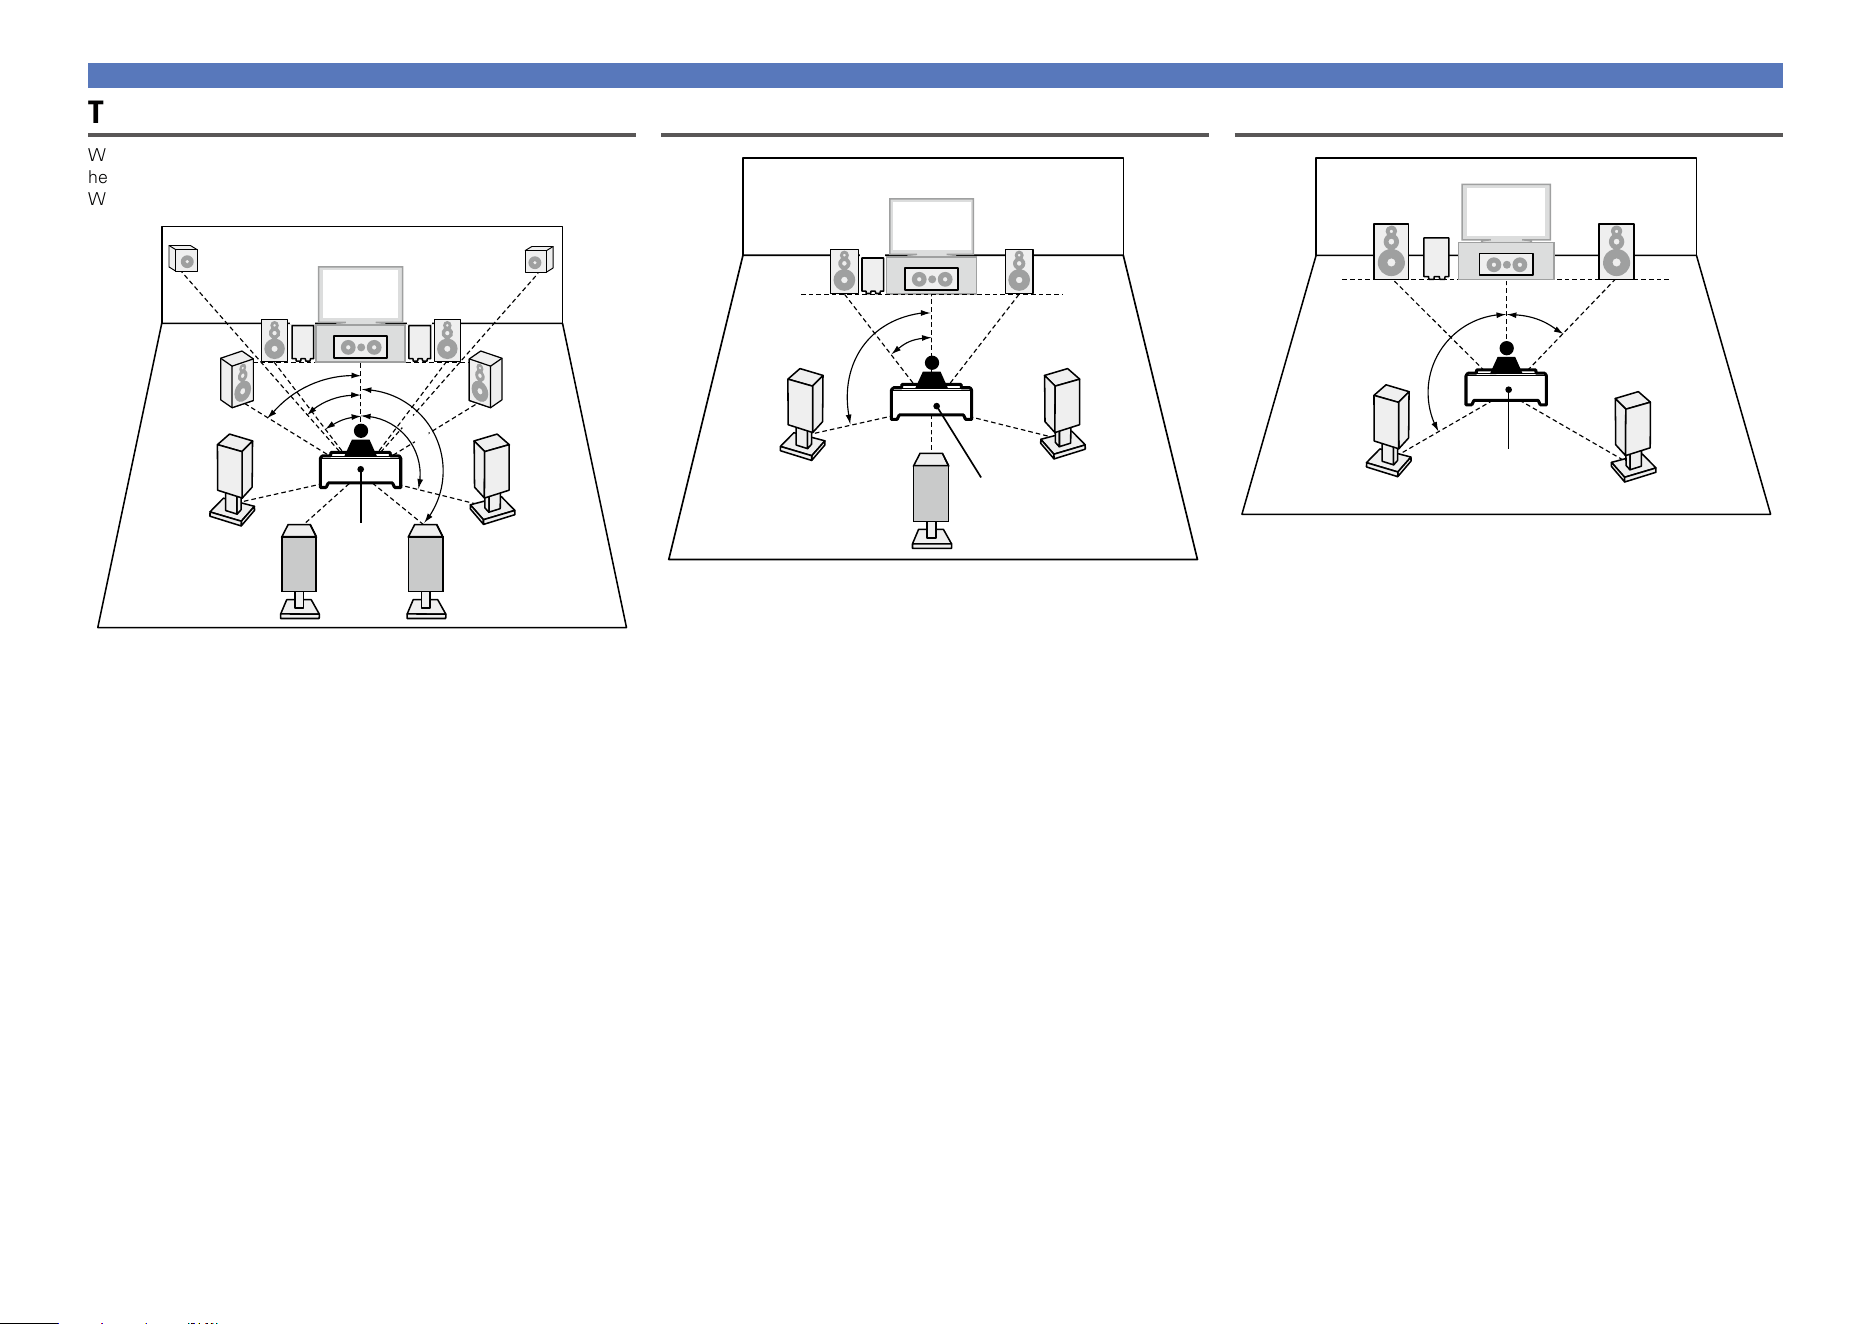
92
Speaker installation
Typical speaker layout
When using Audyssey DSX
®
, install front wide speakers or front
height speakers.
When using Dolby Pro Logic gz, install front height speakers.
FHRFHL
FL
FR
SL
SR
FWL
FWR
SW
1
SW
2
C
SBL SBR
z1
z2
z3
z5
z4
Listening
position
z1 22˚ – 30˚ z2 22˚ – 45˚ z3 55˚ – 60˚
z4 90˚ – 110˚ z5 135˚ – 150˚
GSpeaker abbreviationsH
FL Front speaker (L) SBL Surround back speaker (L)
FR Front speaker (R) SBR Surround back speaker (R)
C Center speaker FHL Front height speaker (L)
SW Subwoofer FHR Front height speaker (R)
SL Surround speaker (L) FWL Front wide speaker (L)
SR Surround speaker (R) FWR Front wide speaker (R)
SB Surround back speaker
When 6.1ch speakers are installed
FL FR
C
SB
SL
SR
SW
z1
z2
Listening position
z1 22˚ – 30˚ z2 90˚ – 110˚
When 5.1ch speakers are installed
FL FR
SW
C
SL
SR
z1
z2
Listening position
z1 22˚ – 30˚ z2 120˚
Basic version
Advanced version
Informations
Advanced version
DVD
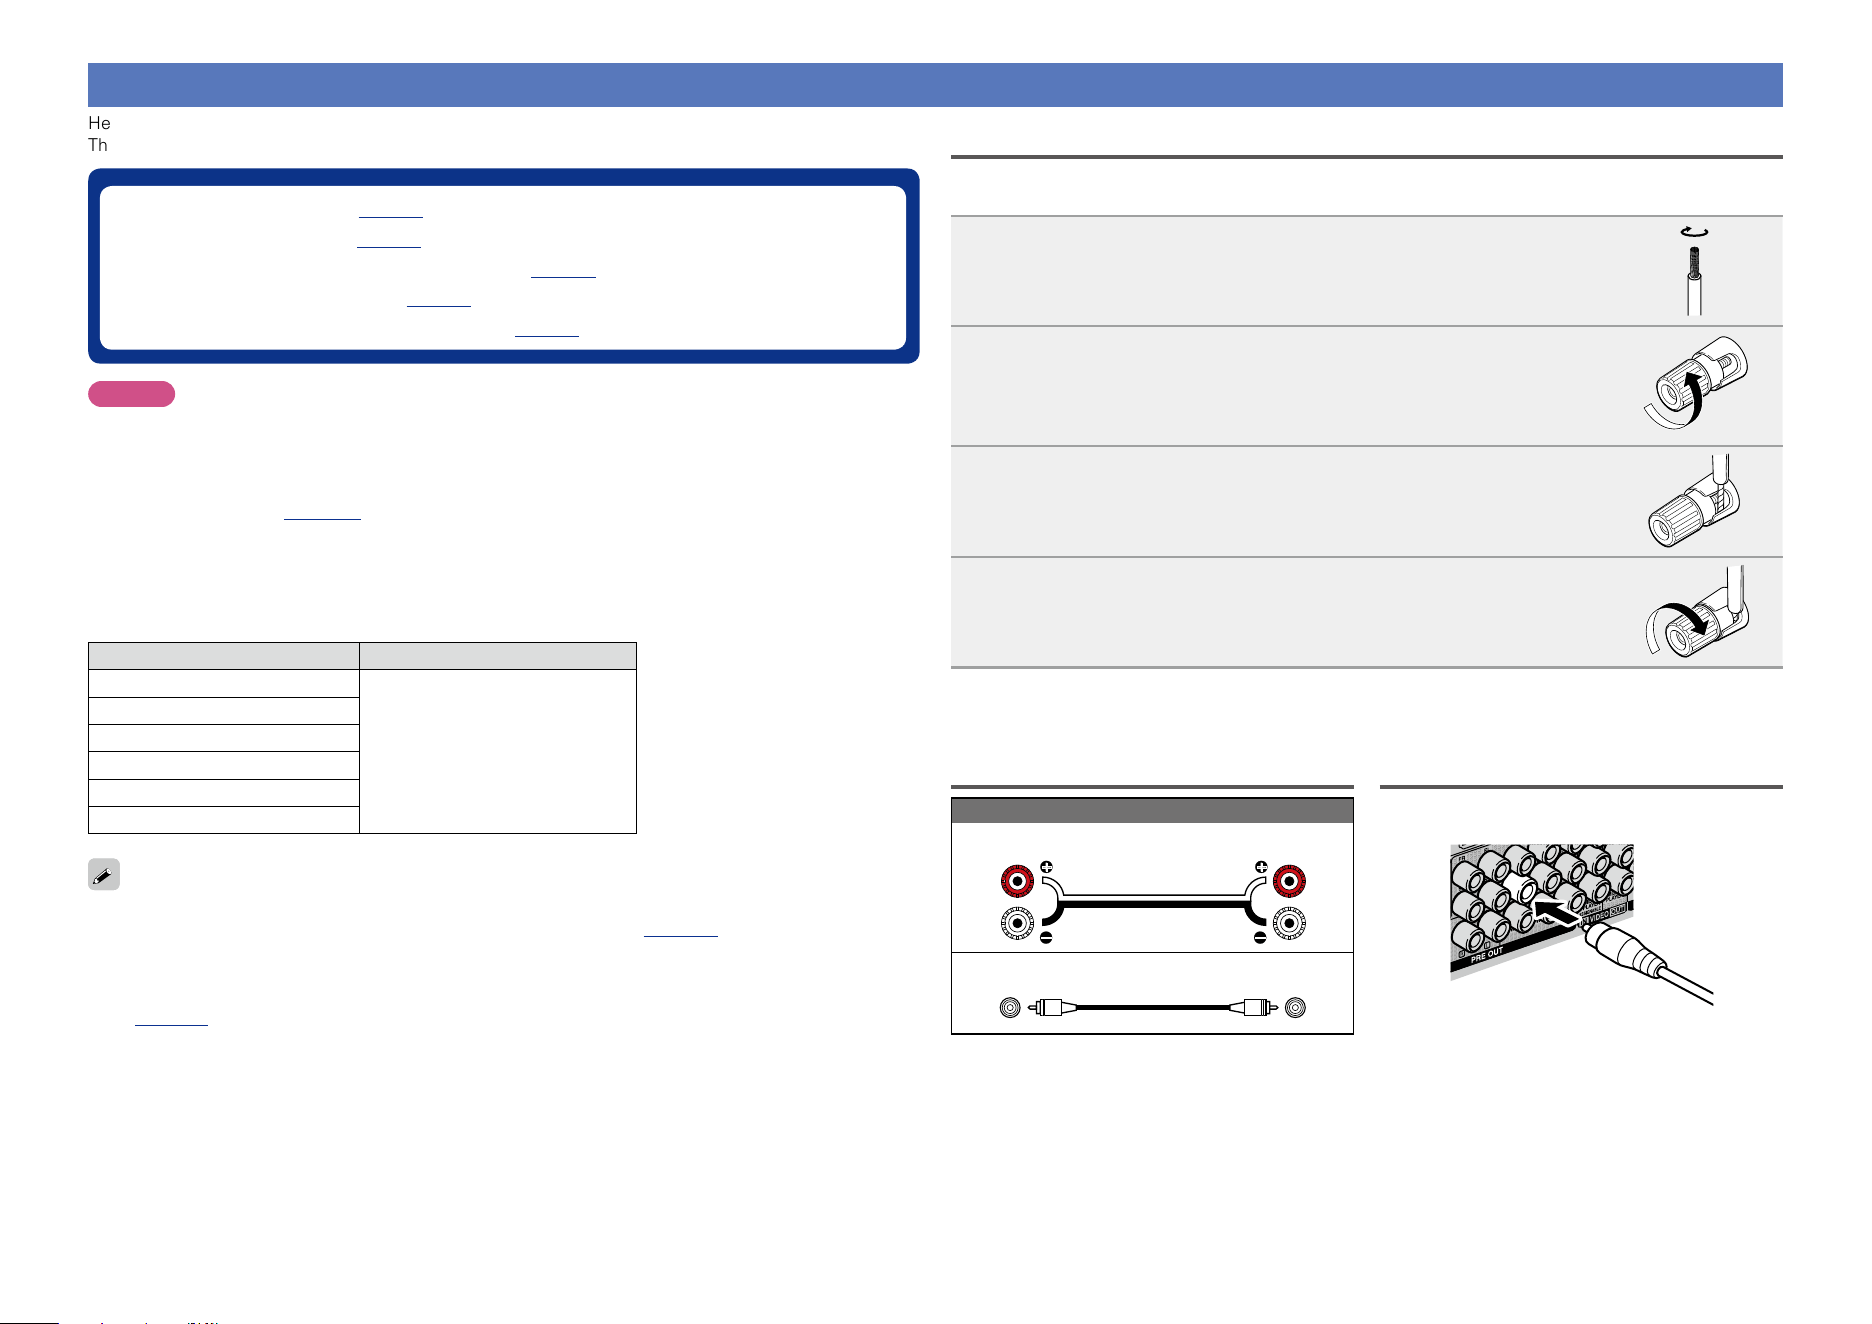
93
Speaker connection
Here, we connect the speakers in the room to this unit.
This section explains how to connect them using a typical example.
n Normal connection (vpage94)
n Bi-amp connection (vpage95)
n Multi-channel + 2-channel connection (vpage96)
n 11.1-channel connection (vpage97)
n External power amplifier connection (vpage98)
NOTE
•Disconnect this unit’s power plug from the power outlet before connecting the speakers. Also,
turn off the subwoofer.
•Connect so that the speaker cable core wires do not protrude from the speaker terminal. The
protection circuit may be activated if the core wires touch the rear panel or if the + and – sides
touch each other (vpage195 “Protection Circuit”).
•Never touch the speaker terminals while the power supply is connected. Doing so could result
in electric shock. When the “Setup Assistant” is running, follow the instructions in the “Setup
Assistant” screen for making connections. (Power is not supplied to the speaker terminals while
the “Setup Assistant” is running.)
•Use speakers with the speaker impedances shown below.
Speaker terminals Speaker impedance
FRONT
4 – 16 Ω
CENTER
SURROUND
SURROUND BACK
FRONT HEIGHT
FRONT WIDE
•Use speakers where one speaker has an impedance of 4 to 16 Ω. When using a speaker with impedance
of 4 Ω or 6 Ω, make sure to set the “Impedance” in the menu (vpage145) to “6 Ω/ohms” or “4 Ω/
ohms”.
•On this unit, you can change how the power amplifiers within this unit are used according to your
environment. For details see “Relationship between the Amp Assign mode settings and audio output”
(vpage177).
Connecting the speaker cables
Carefully check the left (L) and right (R) channels and + (red) and – (black) polarities on the speakers being
connected to this unit, and be sure to interconnect the channels and polarities correctly.
1
Peel off about 0.03 ft/10 mm of sheathing from the tip of the
speaker cable, then either twist the core wire tightly or terminate
it.
2
Turn the speaker terminal counterclockwise to loosen it.
3
Insert the speaker cable’s core wire to the hilt into the speaker
terminal.
4
Turn the speaker terminal clockwise to tighten it.
Cables used for connections
Audio cable (sold separately)
Speaker cable
Subwoofer cable
Connecting the subwoofer
Use a subwoofer cable to connect the subwoofer.
Basic version
Advanced version
Informations
Advanced version
DVD
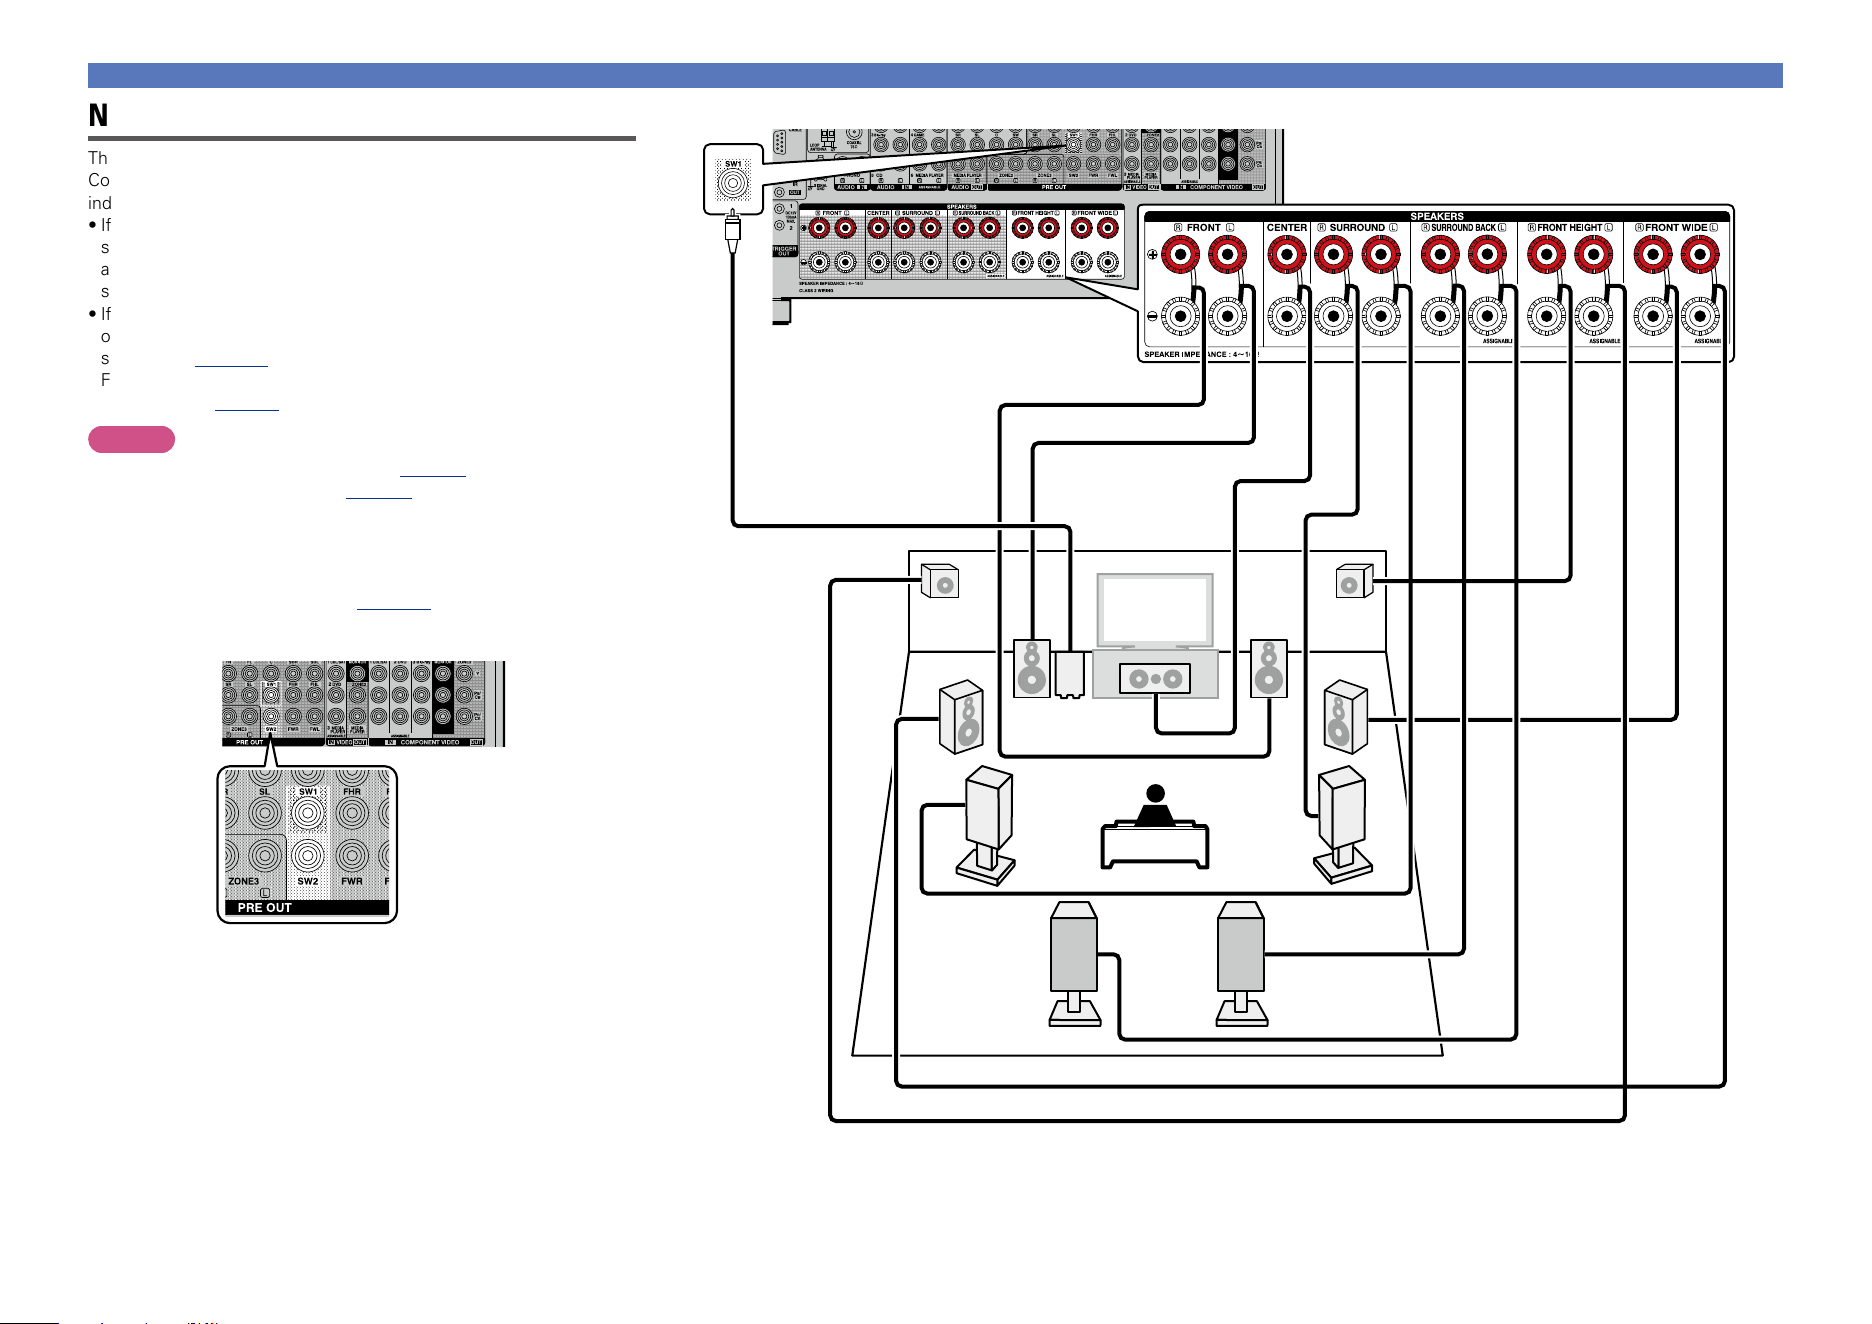
94
Speaker connection
Normal connection
The diagram on the right shows a typical connection method.
Connect your speakers so that they correspond to the speaker names
indicated on the rear panel.
•If you connect the surround back, front height, and front wide
speakers before you start playback, the audio is played back by
automatically switching the speakers in accordance with the
surround mode or input signals.
•If using only one surround back speaker, connect to the “L” side
of the SURROUND BACK terminal. Also use the “Speaker Config.”
setting (vpage142) to set “Surr.Back” to “1spkr”.
For speaker settings in this case, see “When 6.1ch speakers are
installed” (vpage92).
NOTE
•For speaker cable connections, see page93.
•For speaker impedance , see page93.
n For connecting two subwoofers
Two subwoofers can be connected to this unit.
To use two subwoofers, set “Subwoofer” to “2 spkrs” using the
“Speaker Config.” setting (vpage142).
The level and distance can be set separately for Subwoofer 1 and
Subwoofer 2.
FL
FR
C
SL
SR
SW
FWR
FWL
FHRFHL
SBL SBR
Basic version
Advanced version
Informations
Advanced version
DVD
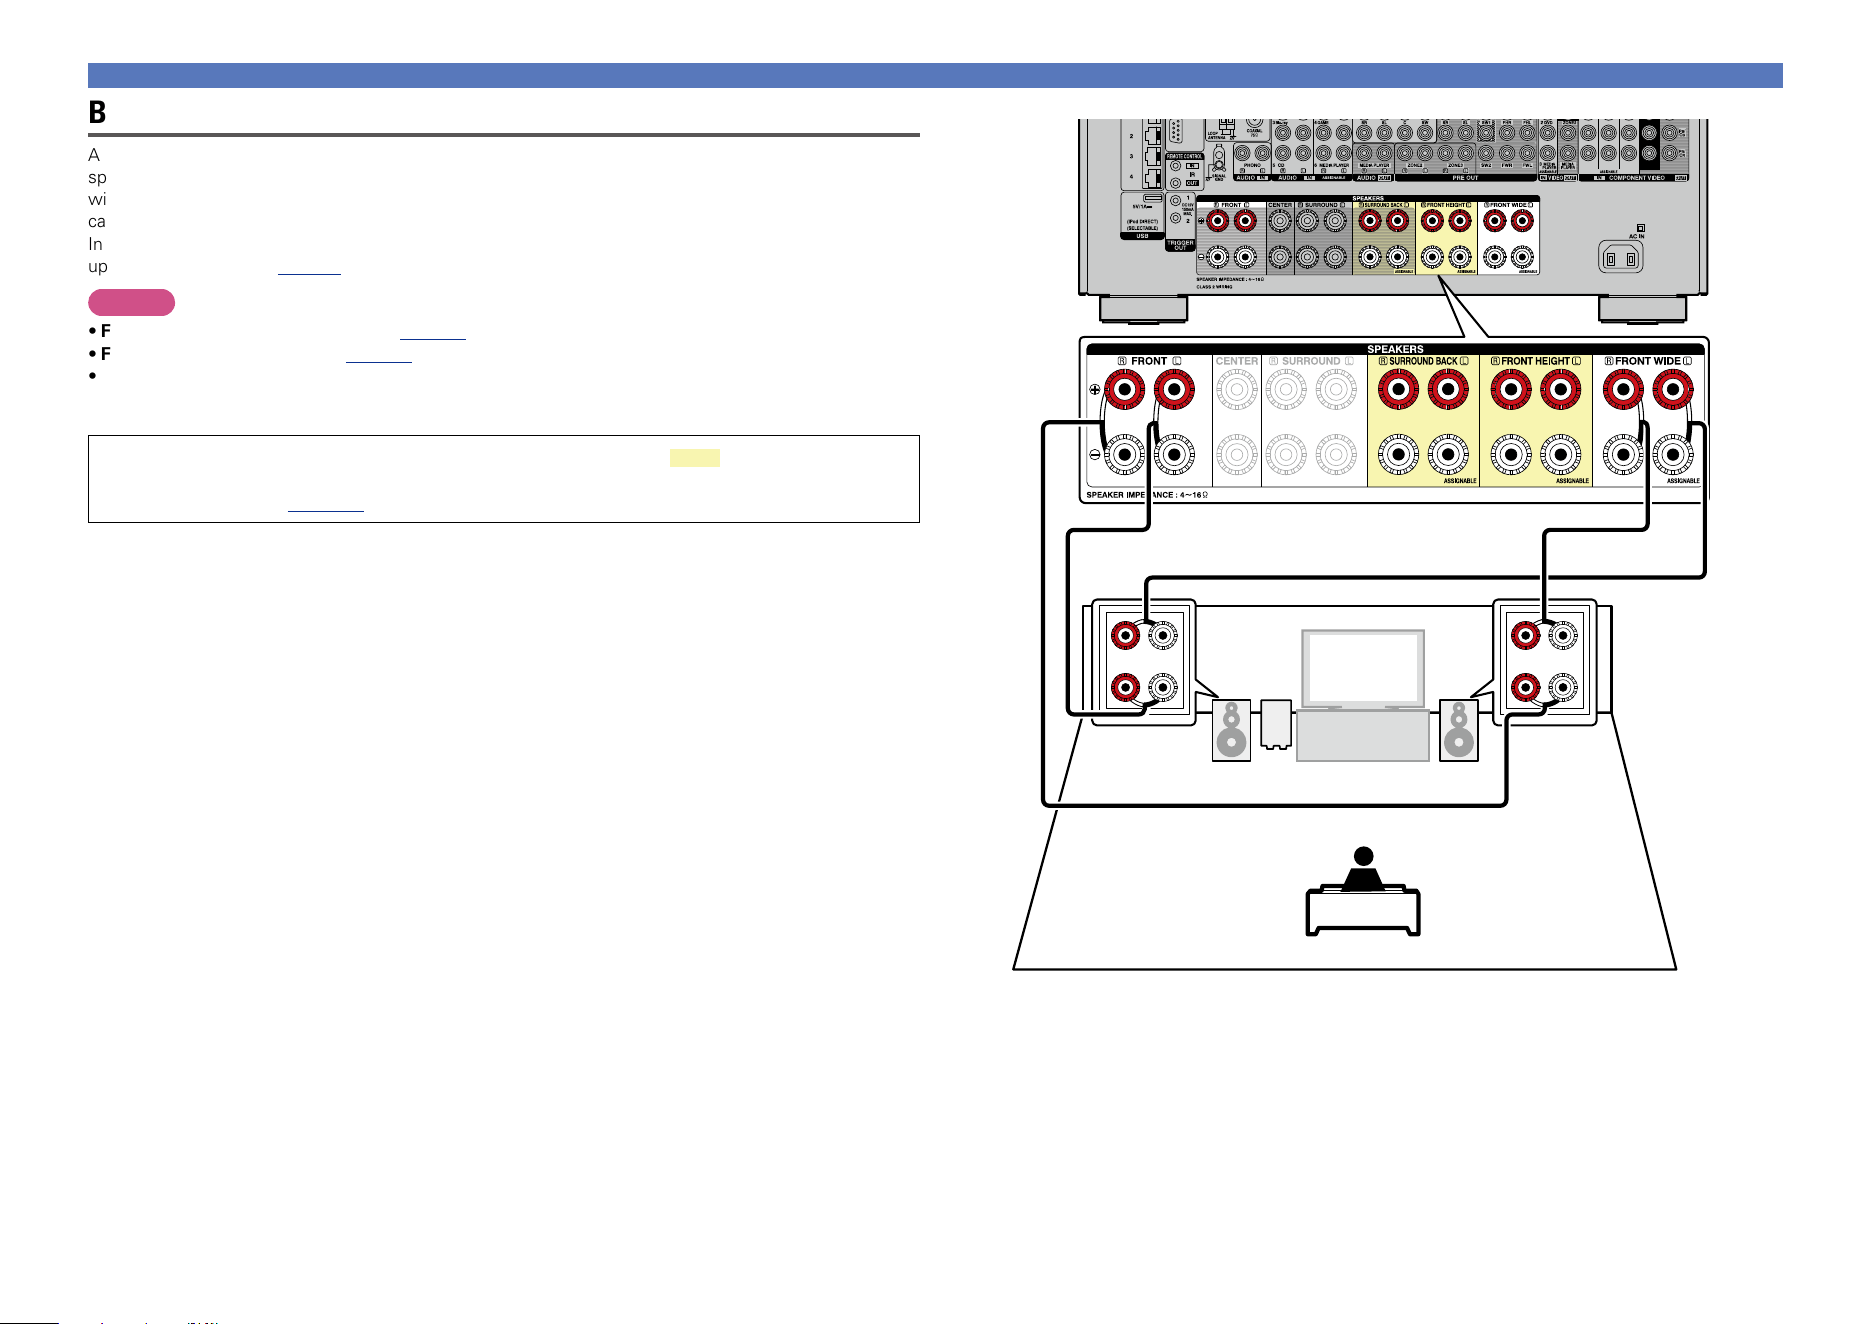
95
FL FR
SW
(R) (L)
wqwq
Bi-amp connection
A bi-amp connection is to connect separate amplifiers to the tweeter terminals and woofer terminals of
speakers compatible with the bi-amp function. This prevents the back electromotive force (returned force
without output) of the woofer sent to the tweeter, which affects the sound quality of the tweeter, and you
can enjoy playback with higher-quality sound.
In this case, set “Assign Mode” to “7.1ch(Bi-Amp)” or “5.1ch(Bi-Amp) + ZONE2” in steps 3 to 5 for “Set
up “Amp Assign”” (vpage99).
NOTE
•For speaker cable connections, see page93.
•For speaker impedance , see page93.
•When making bi-amp connections, be sure to remove the short-circuiting plate or wire between the
speaker’s woofer and tweeter terminals.
When using a front wide speaker, you can use the connectors on the part in the connection
diagram to make a bi-amplifier connection. To make connections for these connectors, set
“Main Speakers” (vpage100).
Speaker connection
Basic version
Advanced version
Informations
Advanced version
DVD
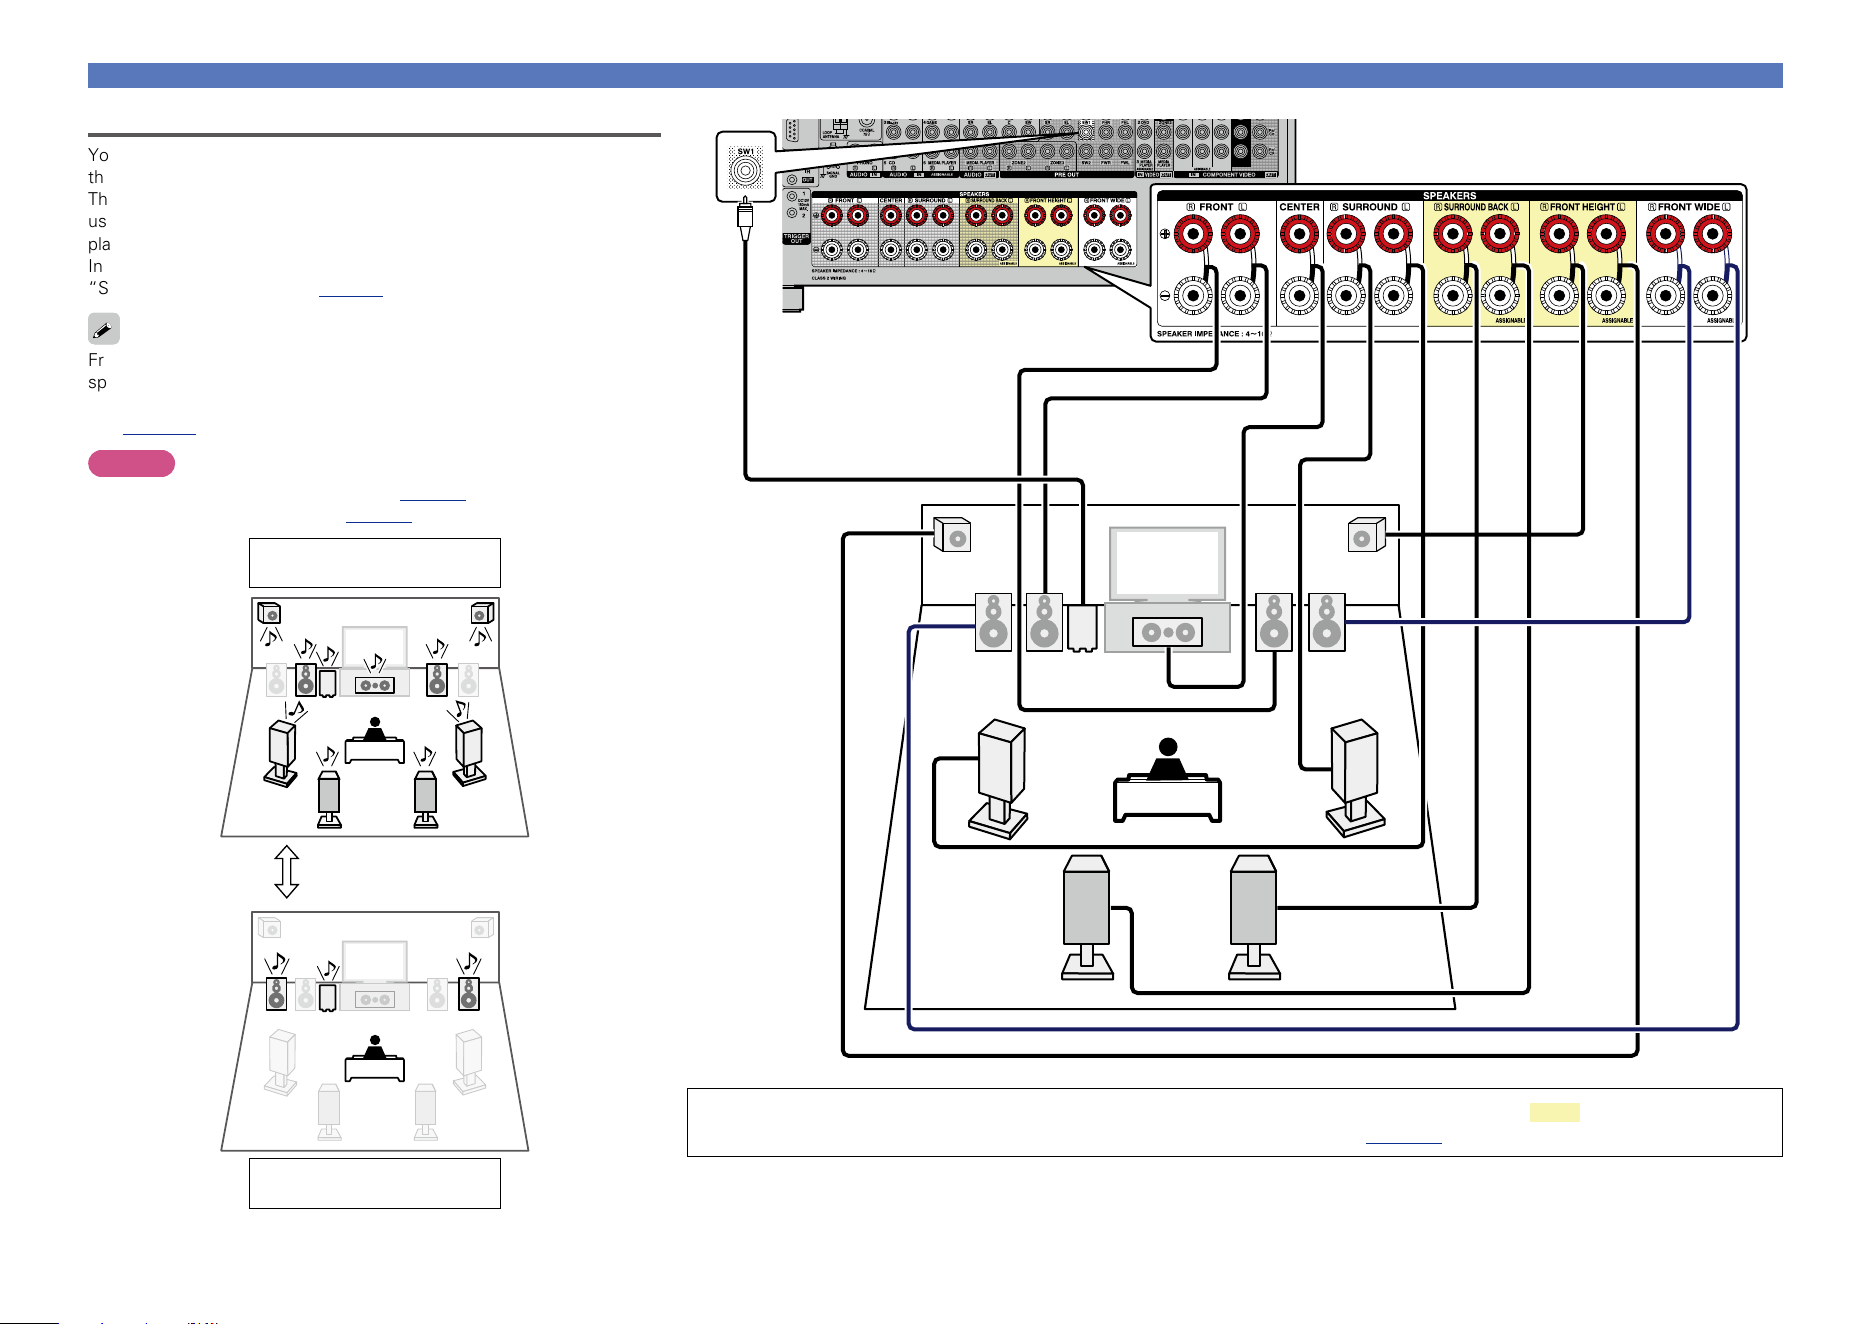
96
Speaker connection
Multi-channel + 2-channel connection
You can connect the other front speakers for 2-channel playback using
the DIRECT mode or STEREO mode.
The speakers used exclusively for multichannel playback and the speakers
used exclusively for 2-channel playback are automatically switched for
playback in accordance with the surround mode.
In this case, set “Assign Mode” to “9.1ch/2ch Front” in steps 3 to 5 for
“Set up “Amp Assign”” (vpage99).
Front speakers can be used separately, depending on the speaker’s
specifications or playback source such as front speakers (FL/FR) for
multichannel playback and front speakers (FL’/FR’) for 2-channel playback
(vpage145 “Front Speaker”).
NOTE
•For speaker cable connections, see page93.
•For speaker impedance , see page93.
Multi channel playback
(Surround mode)
2-channel playback
(Direct/Stereo mode)
Switching
FLFL’
FR
FR’
C
SL
SR
SW
FHRFHL
SBL SBR
When using a front wide speaker, you can connect a second front speaker to the connectors on the part in the connection
diagram. To make connections for these connectors, set “Main Speakers” (vpage100).
Basic version
Advanced version
Informations
Advanced version
DVD
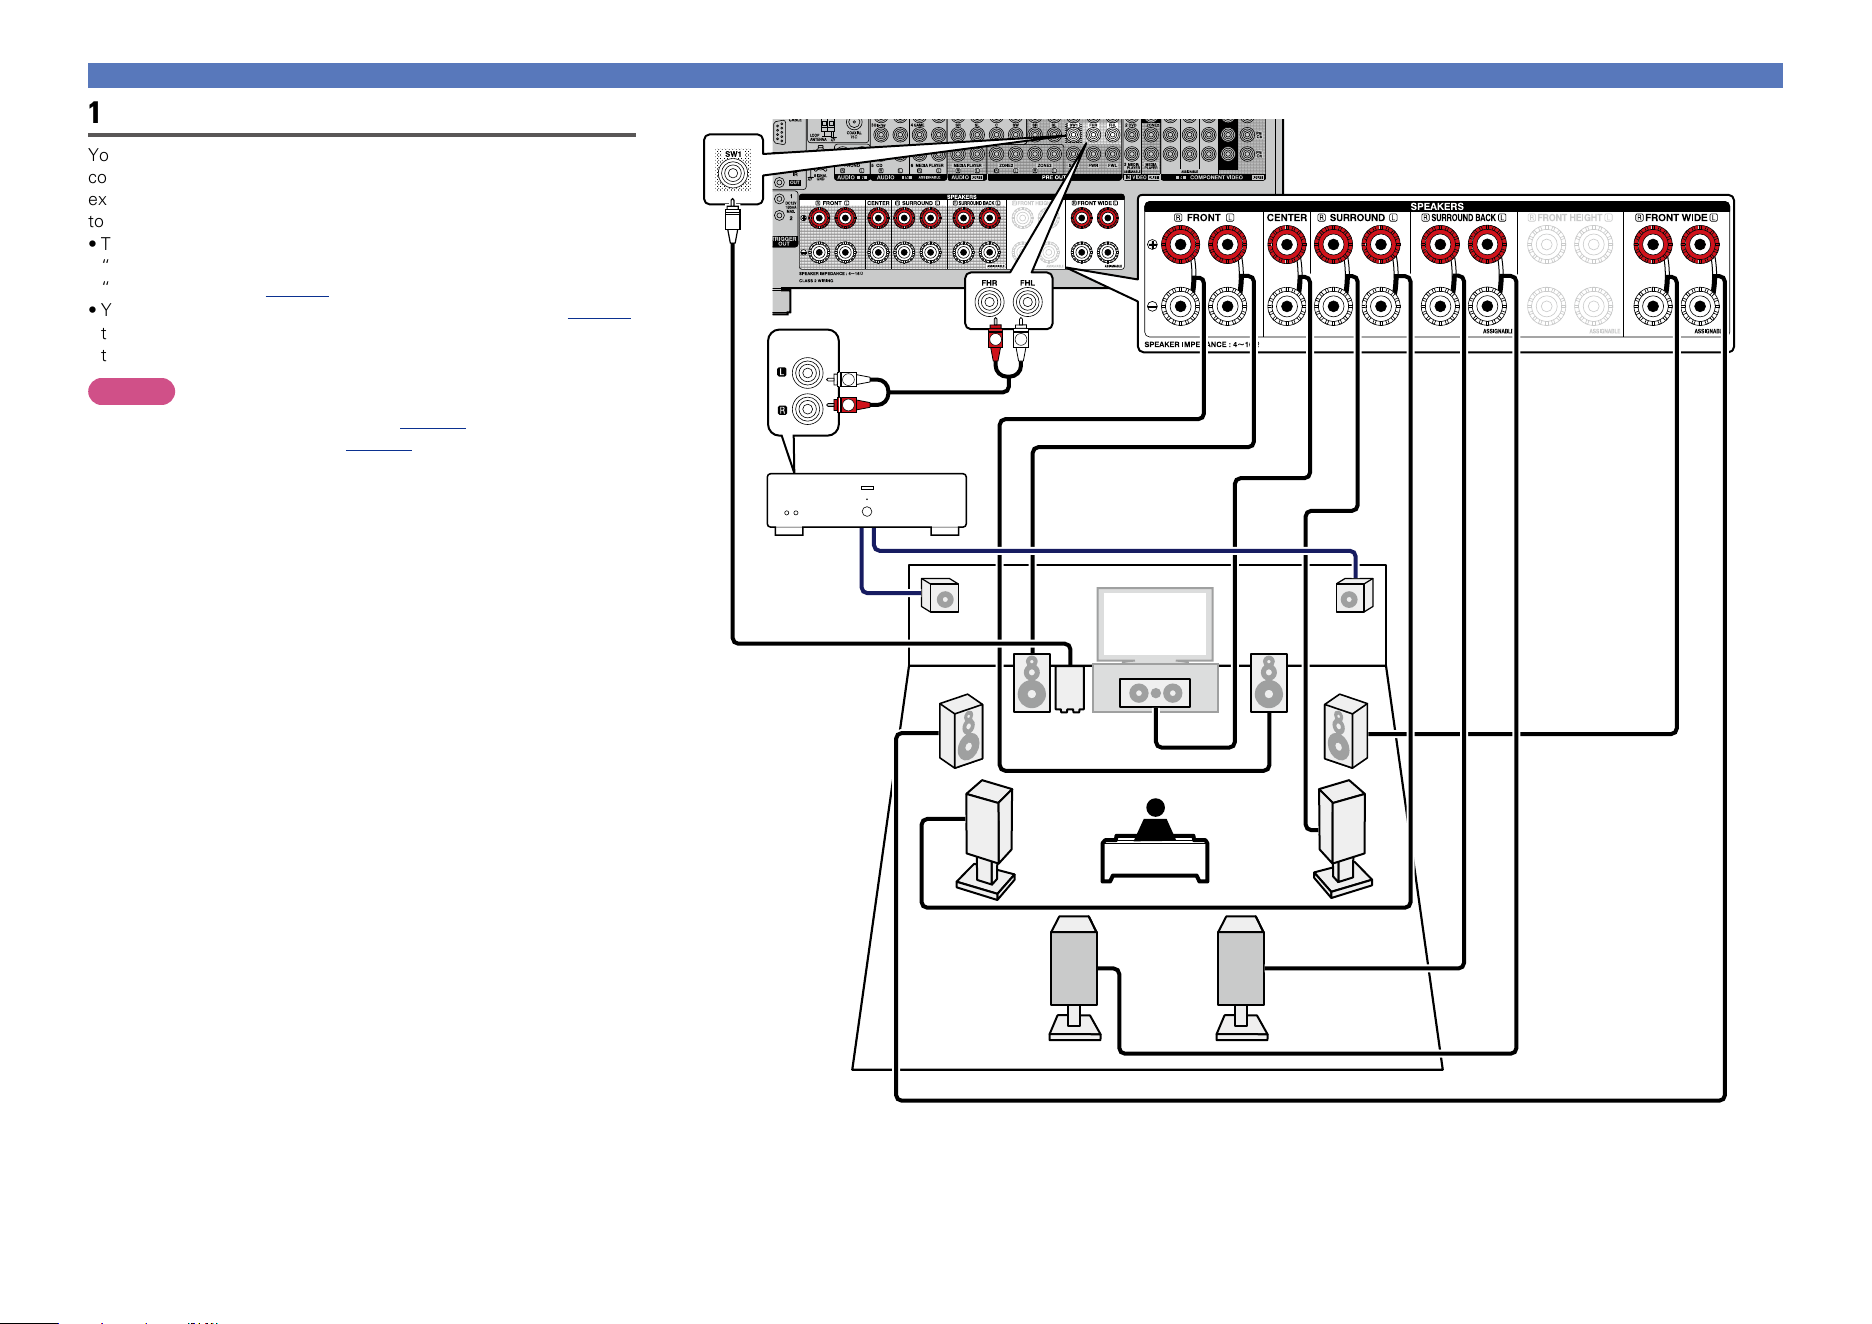
97
Speaker connection
FL
FR
C
SL
SR
SW
FWR
FWL
FHRFHL
SBL SBR
AUX IN
R
L
R
L
Power amplifier
11.1-channel connection
You can perform playback using up to 11.1 channels using a
combination of the built-in power amplifier for 9-channel and an
external power amplifier for 2-channel. Connect the external amplifier
to the PRE OUT connector.
•To perform 11.1-channel playback, select “Amp Assign” and set
“Assign Mode” to “Discrete 11.1ch” using steps 3 and 5 of “Set up
“Amp Assign”” (vpage99).
•You can also follow step 7 in “Set up “Amp Assign”” (vpage99)
to change the PRE OUT connector connected to the power amplifier
to the front channel.
NOTE
•For speaker cable connections, see page93.
•For speaker impedance , see page93.
Basic version
Advanced version
Informations
Advanced version
DVD
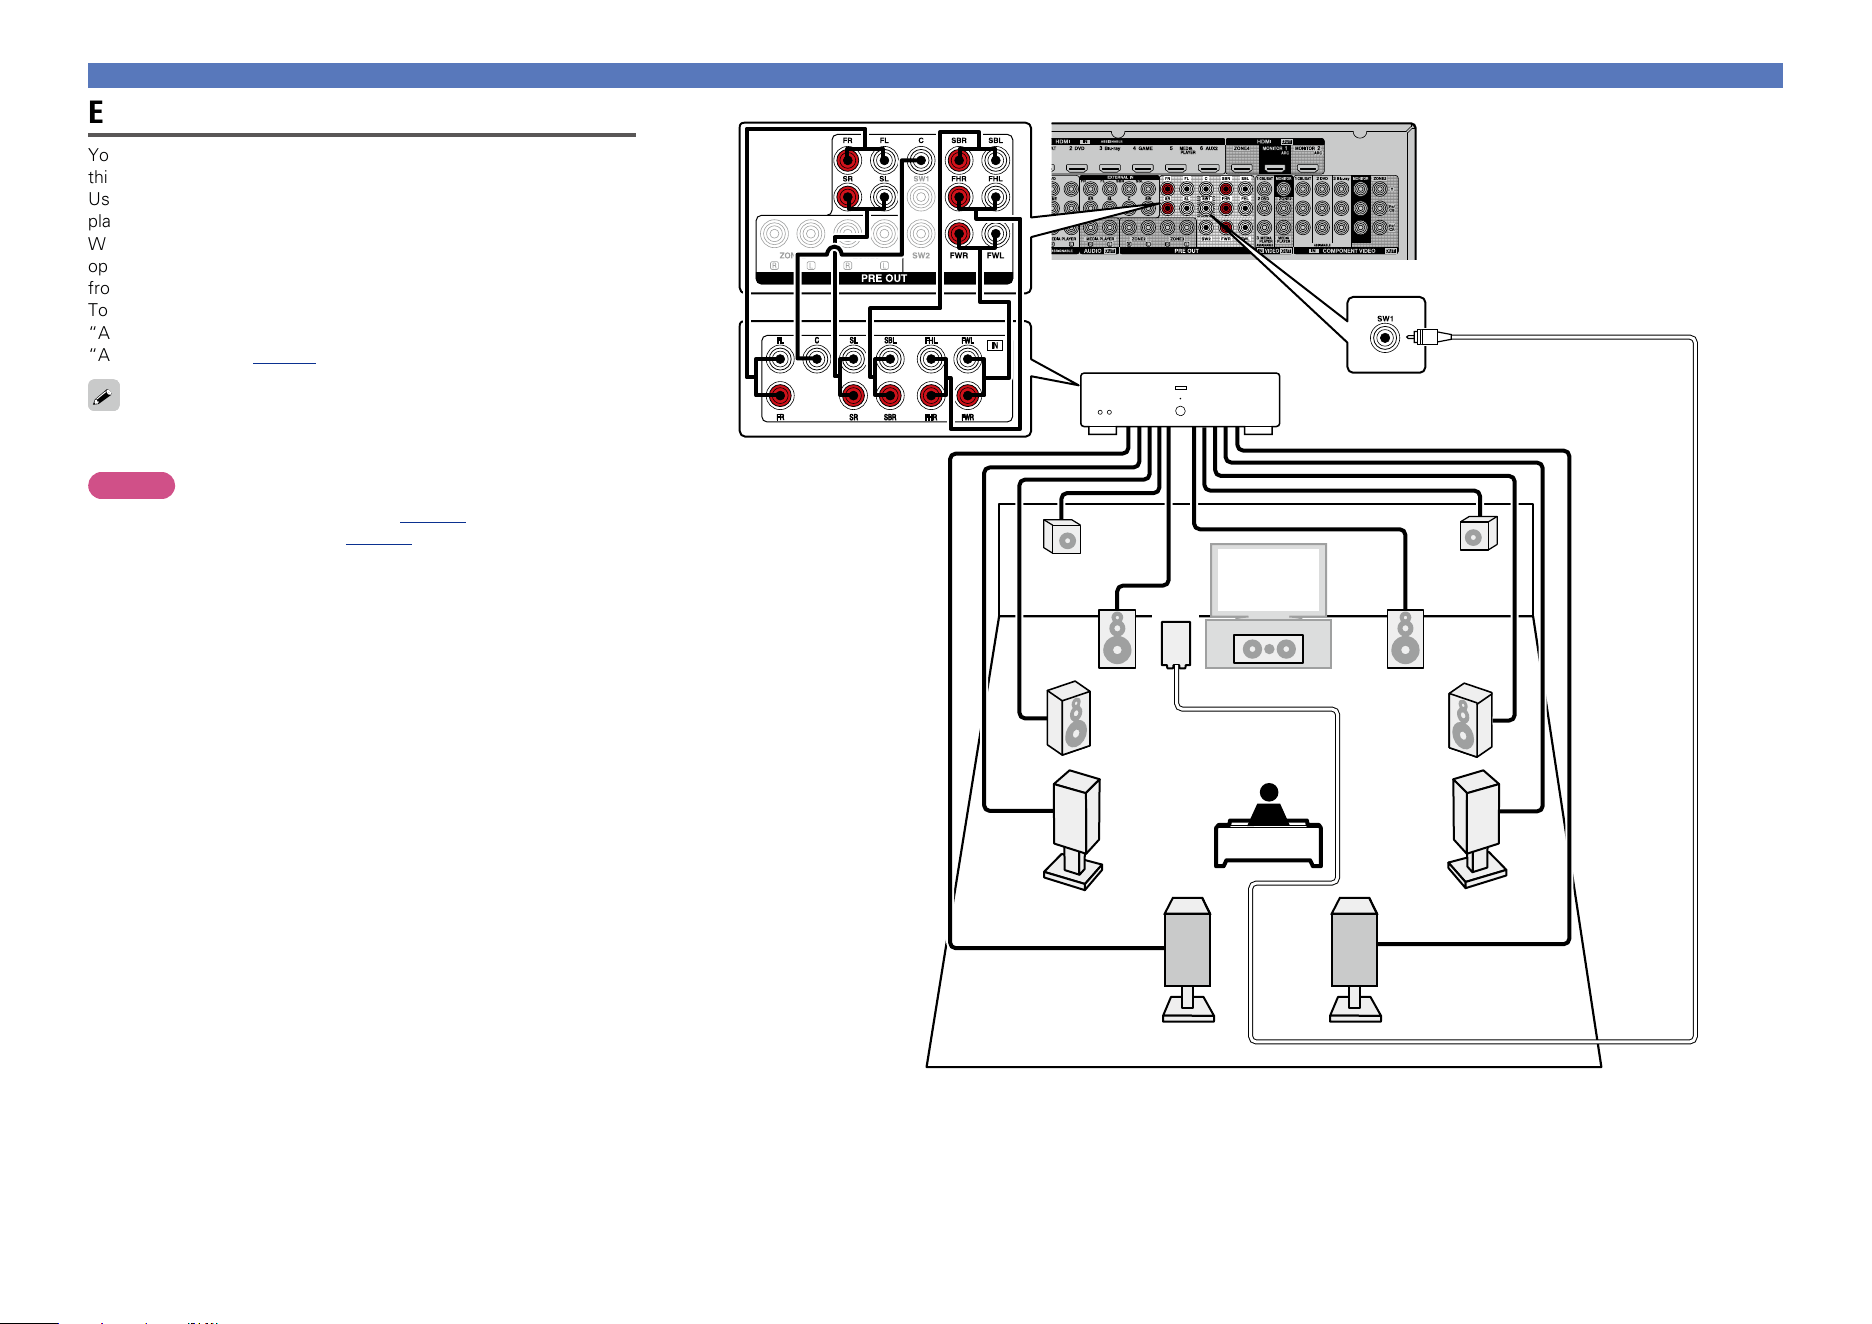
98
Speaker connection
FL
FR
C
SBL SBR
SL
SR
FWR
FWL
FHR
FHL
SW
Power amplifier
External power amplifier connection
You can connect all speakers to an external power amplifier and use
this unit as a preamplifier.
Using this unit as a preamplifier, you can perform up to 11.1-channel
playback.
When the preamplifier mode is used, the built-in power amplifier
operation of this unit is stopped, and interference to the preamplifier
from the power amplifier can be reduced.
To use this unit as a preamplifier, select “Amp Assign” and set
“Assign Mode” to “Pre Amplifier” using steps 3 and 5 of “Set up
“Amp Assign”” (vpage99).
For connecting power amplifier and speaker systems, refer to the
instruction manual supplied with the power amplifier to be used.
NOTE
•For speaker cable connections, see page93.
•For speaker impedance , see page93.
Basic version
Advanced version
Informations
Advanced version
DVD
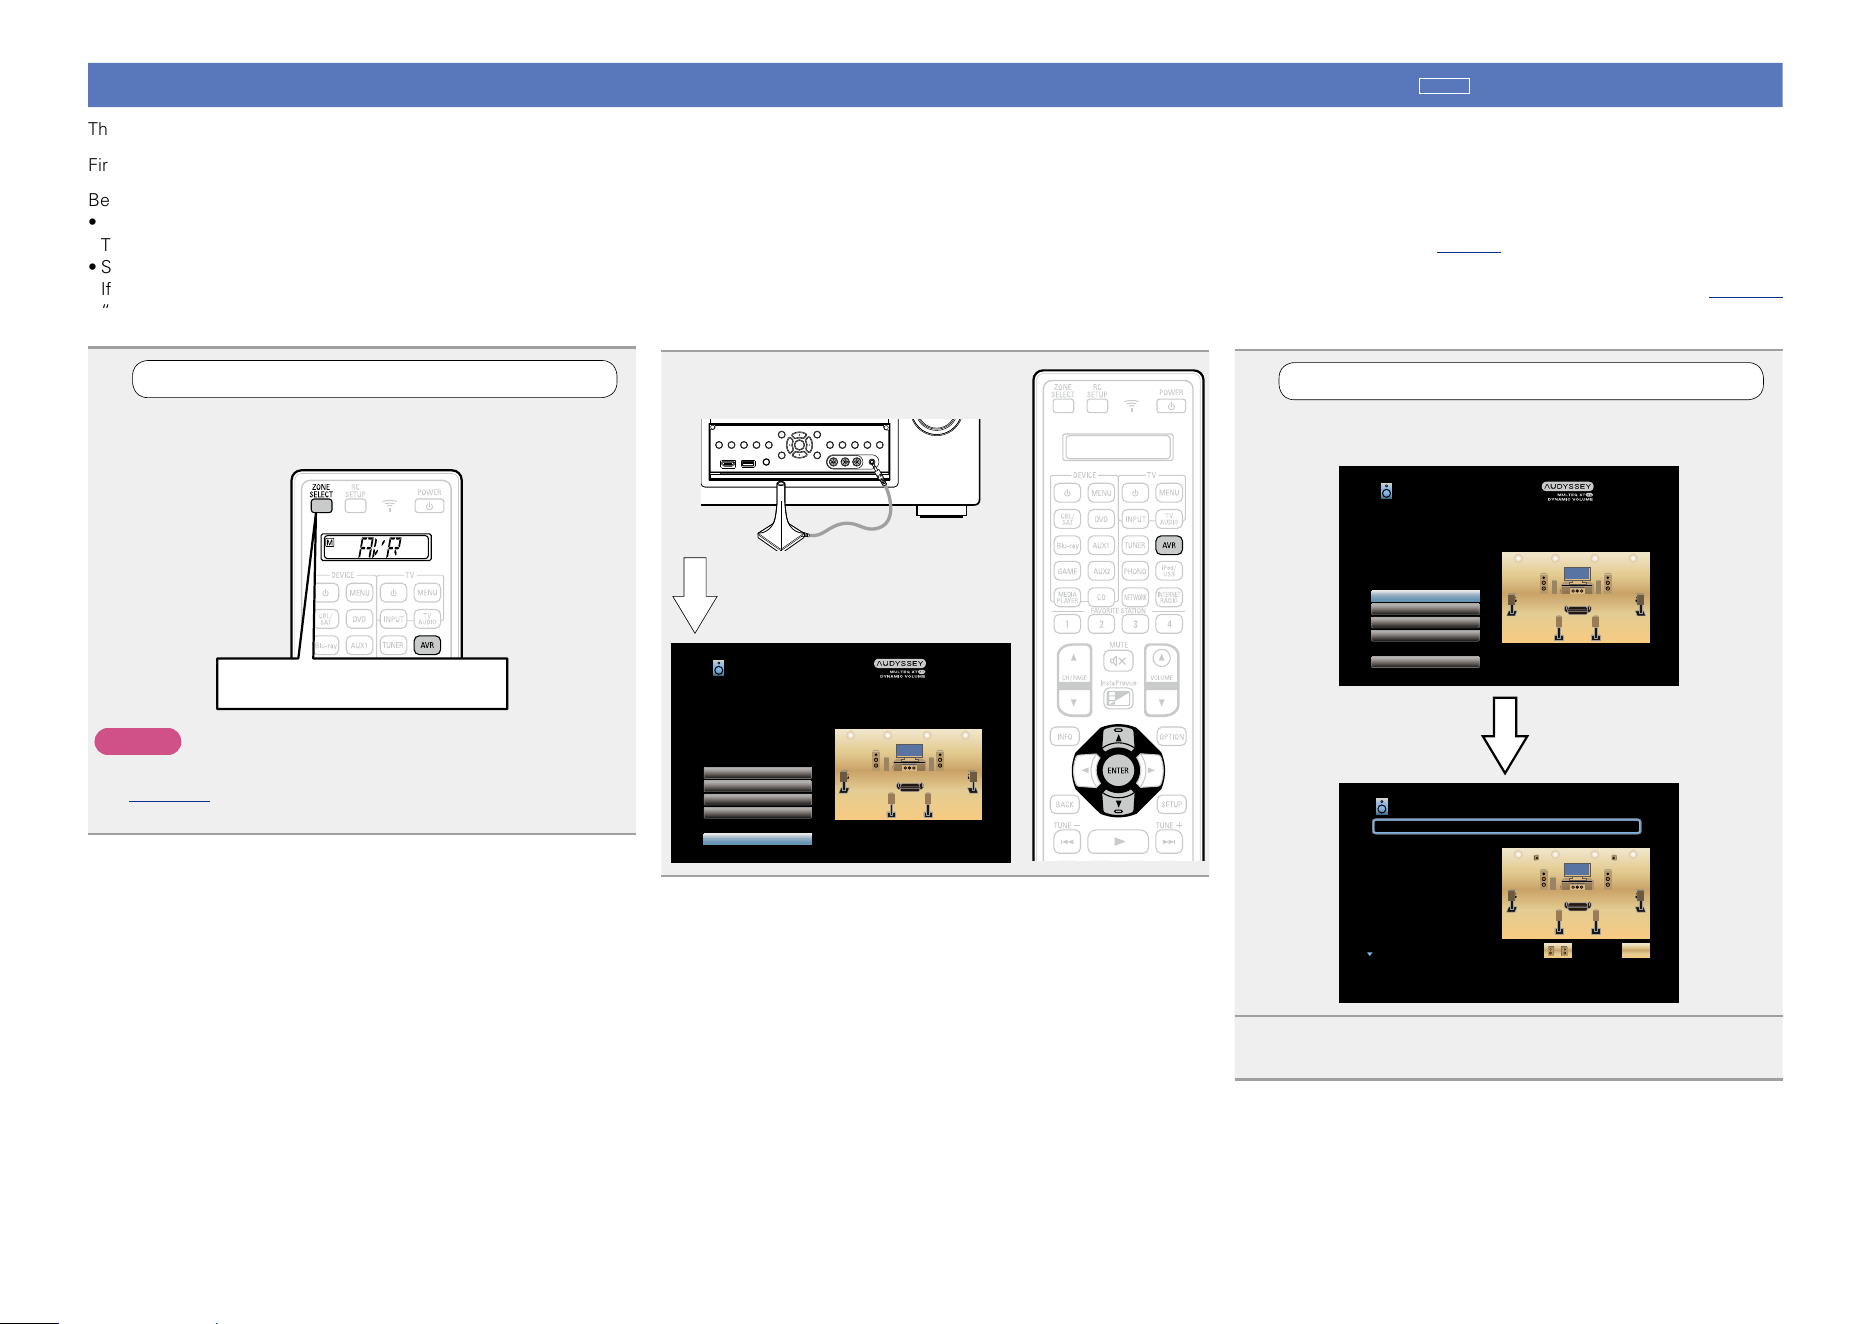
99
1
Set up the zone mode
Press ZONE SELECT to switch the zone mode.
The J indicator lights.
Press ZONE SELECT
NOTE
When using a remote control with preset codes registered
(vpage 160), press AVR to set the remote control to the AVR-
operation mode before operation.
2
Connect the setup microphone.
Audyssey Setup
Channel Select
Amp Assign
Check Results
Restore...
Start
Your AV receiver can automatically measure the acoustics of
your room then optimize your speakers using the included
microphone.
Set the following items
if necessary.
When the setup microphone is
connected, the following screen is
displayed.
Set up speakers
around items indicate the settings.
This section describes detailed settings for Audyssey
®
Setup.
First install and connect the speakers to this unit.
Before Audyssey
®
Setup measurement, the settings shown below can be made.
•Changing the amplifier assignment (Amp Assign)
The signal output from the SURROUND BACK, FRONT HEIGHT and FRONT WIDE speaker terminal of this unit can be switched to match your speaker environment (vpage99 “Set up “Amp Assign””).
•Setting the channels to be used (Channel Select)
If channels that are not to be used are set in advance, measurement for the set channels is skipped, and measuring time can be reduced. You can also change the number of surround back speakers (vpage101
“Set up “Channel Select””).
3
Set up “Amp Assign”
Use ui to select “Amp Assign”, and then press
ENTER.
Amp Assign [1/2]
Assign Mode
Main Speakers
Front
Center
Surround
Surr. Back
Front Height
Front Wide
ZONE2
ZONE3
Speaker
Speaker
Speaker
Auto Spkr
Auto Spkr
Not Used
Speaker
Pre-amp out
7.1ch + ZONE2
S.Back/F.Height
ZONE2: ZONE3:
Selects how to use the internal amplifiers
Audyssey Setup
Channel Select
Amp Assign
Check Results
Restore...
Start
Your AV receiver can automatically measure the acoustics of
your room then optimize your speakers using the included
microphone.
Set the following items
if necessary.
4
Select “Assign Mode”, and then press ENTER.
Basic version
Advanced version
Informations
Advanced version
v See overleaf
DVD
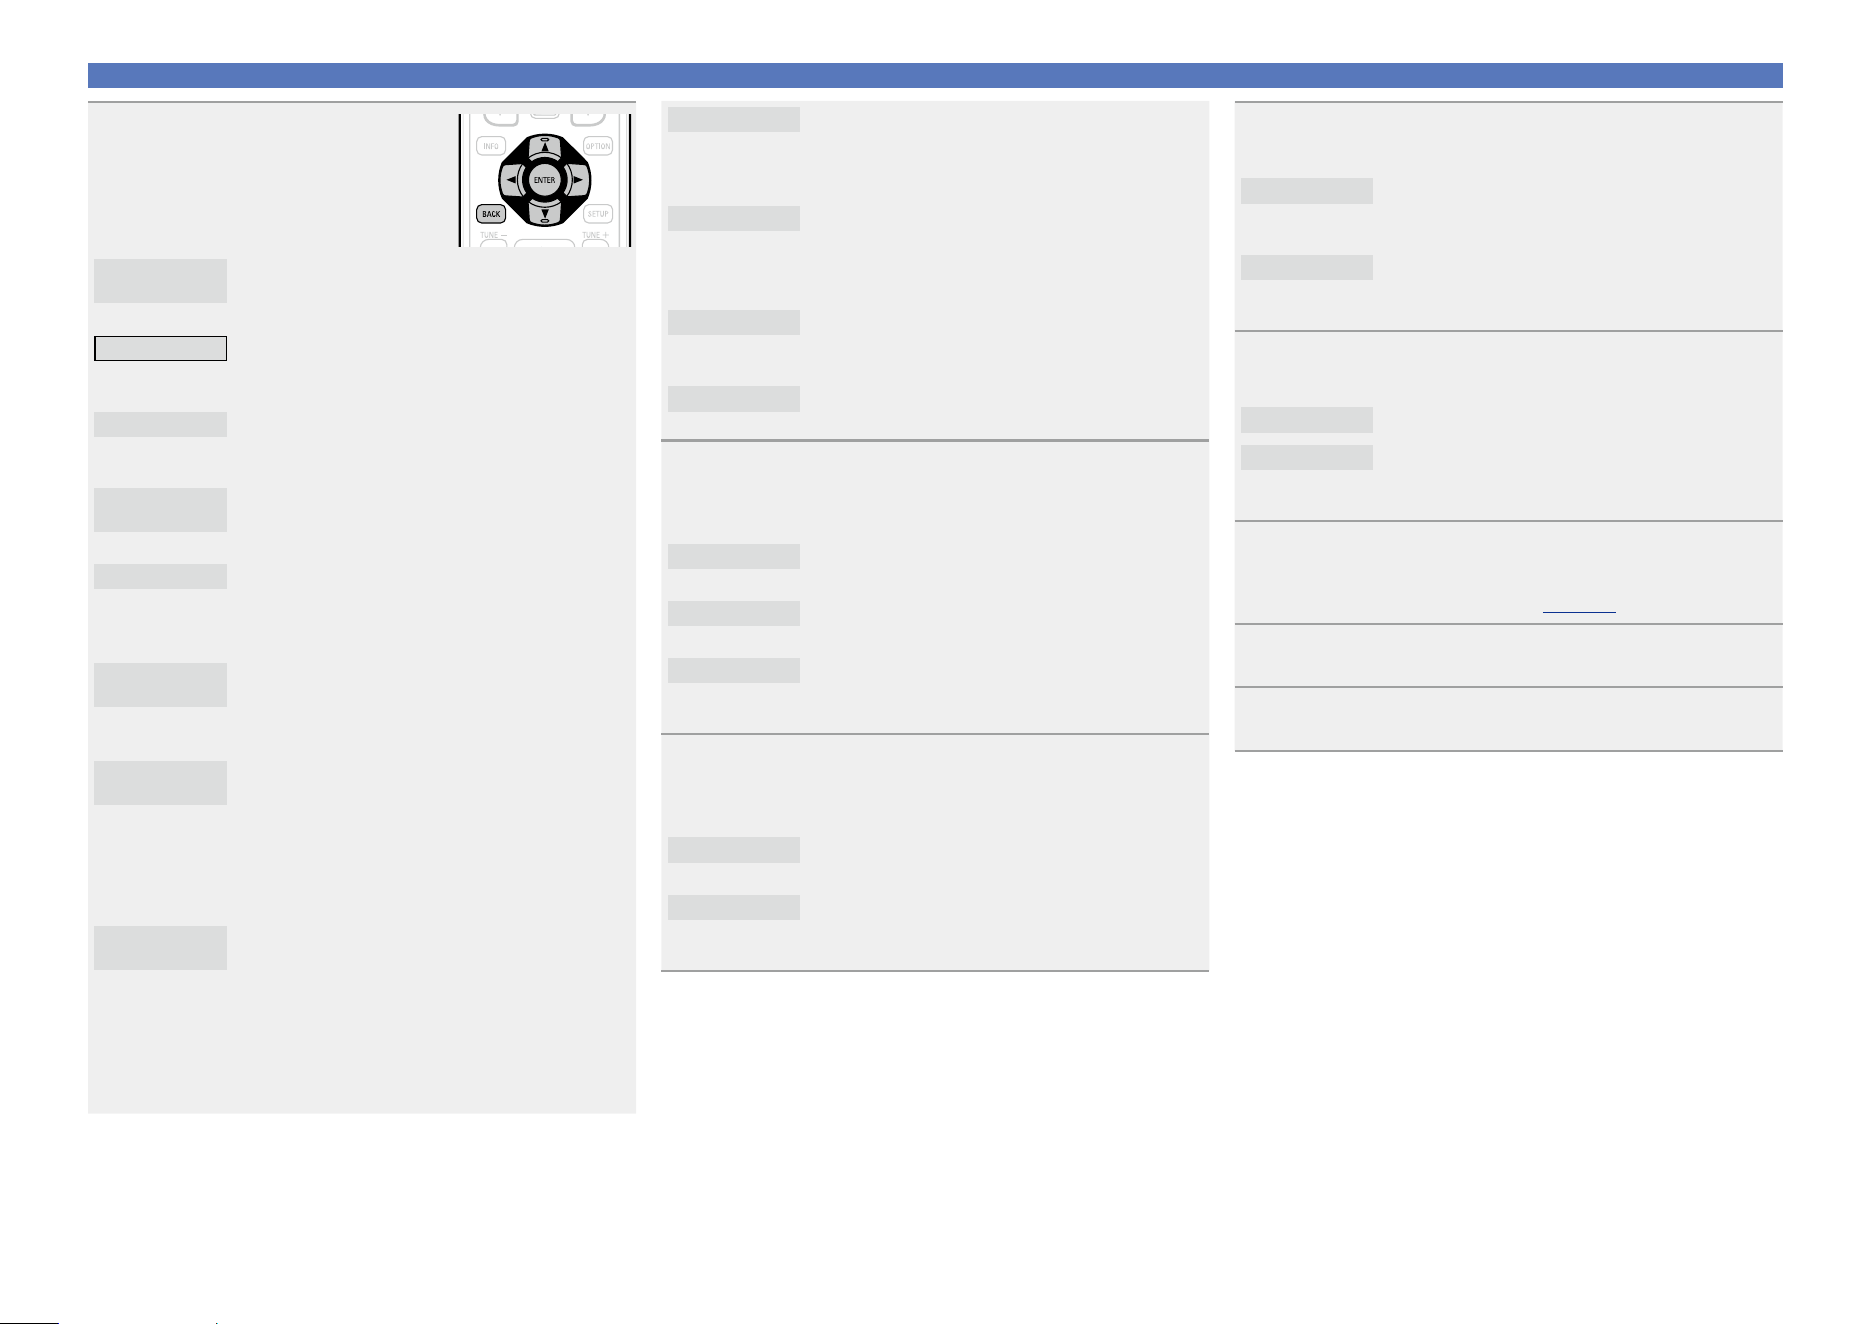
100
Set up speakers
7.1ch + Front B
Assigns power amplifiers within this unit as
follows: 7.1ch for MAIN ZONE and 2ch for the
second front speaker connection. In this case, go
to step 6.
Discrete 11.1ch
Assigns 9.1ch for power amplifiers within this unit
and 2ch (front/front height) for the external power
amplifier connection. Up to 11.1ch playback is
available. In this case, go to step 7.
Pre Amplifier
Connects all speakers by using an external power
amplifier and uses this unit as a preamplifier. In
this case, go to step 8.
Custom
Assigns power amplifiers within this unit as you
prefer. In this case, go to step 10.
6
Use ui to select “Main Speakers” and use o p
to select the speakers that output audio in MAIN
ZONE.
S.Back/F.Height
Outputs audio from the surround back and front
height speakers.
S.Back/F.Wide
Outputs audio from the surround back and front
wide speakers.
F.Height/F.Wide
Outputs audio from the front height and front
wide speakers. When the setting is completed,
go to step 11.
7
Use ui to select “Main Pre-amps” and use o p
to select the PRE OUT connectors that connect the
external power amplier.
Front
Connects the front channel PRE OUT connectors
to the external power amplifier.
Front Height
Connects the front height channel PRE OUT
connectors to the external power amplifier. When
the setting is completed, go to step 11.
8
Use ui to select “Pre-amp Assign” and use o p to
select how to use the PRE OUT connectors.
All
Select this to use the PRE OUT connectors
without using power amplifiers within this unit
and use this unit as a preamplifier.
Custom
Sets whether to use each channel as a preamplifier
or use speakers. When the setting is completed,
go to step 9.
9
Use ui to select a channel to set and use o p to
make the setting.
Speaker
Select this to use speakers.
Pre-amp out
Select this to output audio only from the PRE OUT
connectors. When the setting is completed, go to
step 11.
10
Use ui to select a speaker and use o p to set audio
output from each speaker connector as you prefer.
•For details, see “Assign Mode” (vpage141).
11
Press ENTER.
12
Press o or BACK to exit the “Amp Assign” setting.
5
Use o p to select the
conguration of the connected
speakers, and then press
ENTER.
9.1ch
(SB/FH/FW)
Assigns all power amplifiers within this unit for
MAIN ZONE. Up to 9.1ch playback is available. In
this case, go to step 6.
7.1ch + ZONE2
Assigns power amplifiers within this unit as
follows: 7.1ch for MAIN ZONE and 2ch for
ZONE2. In this case, go to step 6.
5.1ch + ZONE2/3
Assigns power amplifiers within this unit as
follows: 5.1ch for MAIN ZONE and 2ch for ZONE2
and ZONE3 each. In this case, go to step 11.
7.1ch +
ZONE2/3-MONO
Assigns power amplifiers within this unit as
follows: 7.1ch for MAIN ZONE and 1ch for ZONE2
and ZONE3 each. In this case, go to step 6.
7.1ch(Bi-Amp)
Assigns power amplifiers within this unit as
follows: 7.1ch for MAIN ZONE and 2ch for the
front speaker bi-amplifier connection. In this case,
go to step 6.
5.1ch(Bi-Amp) +
ZONE2
Assigns power amplifiers within this unit as
follows: 5.1ch for MAIN ZONE, 2ch for the front
speaker bi-amplifier connection, and 2ch for
ZONE2. In this case, go to step 11.
9.1ch/
2ch Front
Assigns all power amplifiers within this unit for
MAIN ZONE. Up to 9.1ch playback is available.
You can also use a front speaker that is different
from the one used during multi-channel playback
for playback by switching the internal power
amplifier during 2ch playback. In this case, go to
step 6.
7.1ch/2ch
Front(Bi-Amp)
Assigns power amplifiers within this unit as
follows: 7.1ch for the MAIN ZONE multi-channel
playback. You can also use a front speaker that is
different from the one used during multi-channel
playback for playback under the bi-amplifier
connection by switching the internal power
amplifier during 2ch playback. In this case, go to
step 11.
Basic version
Advanced version
Informations
Advanced version
v See overleaf
DVD
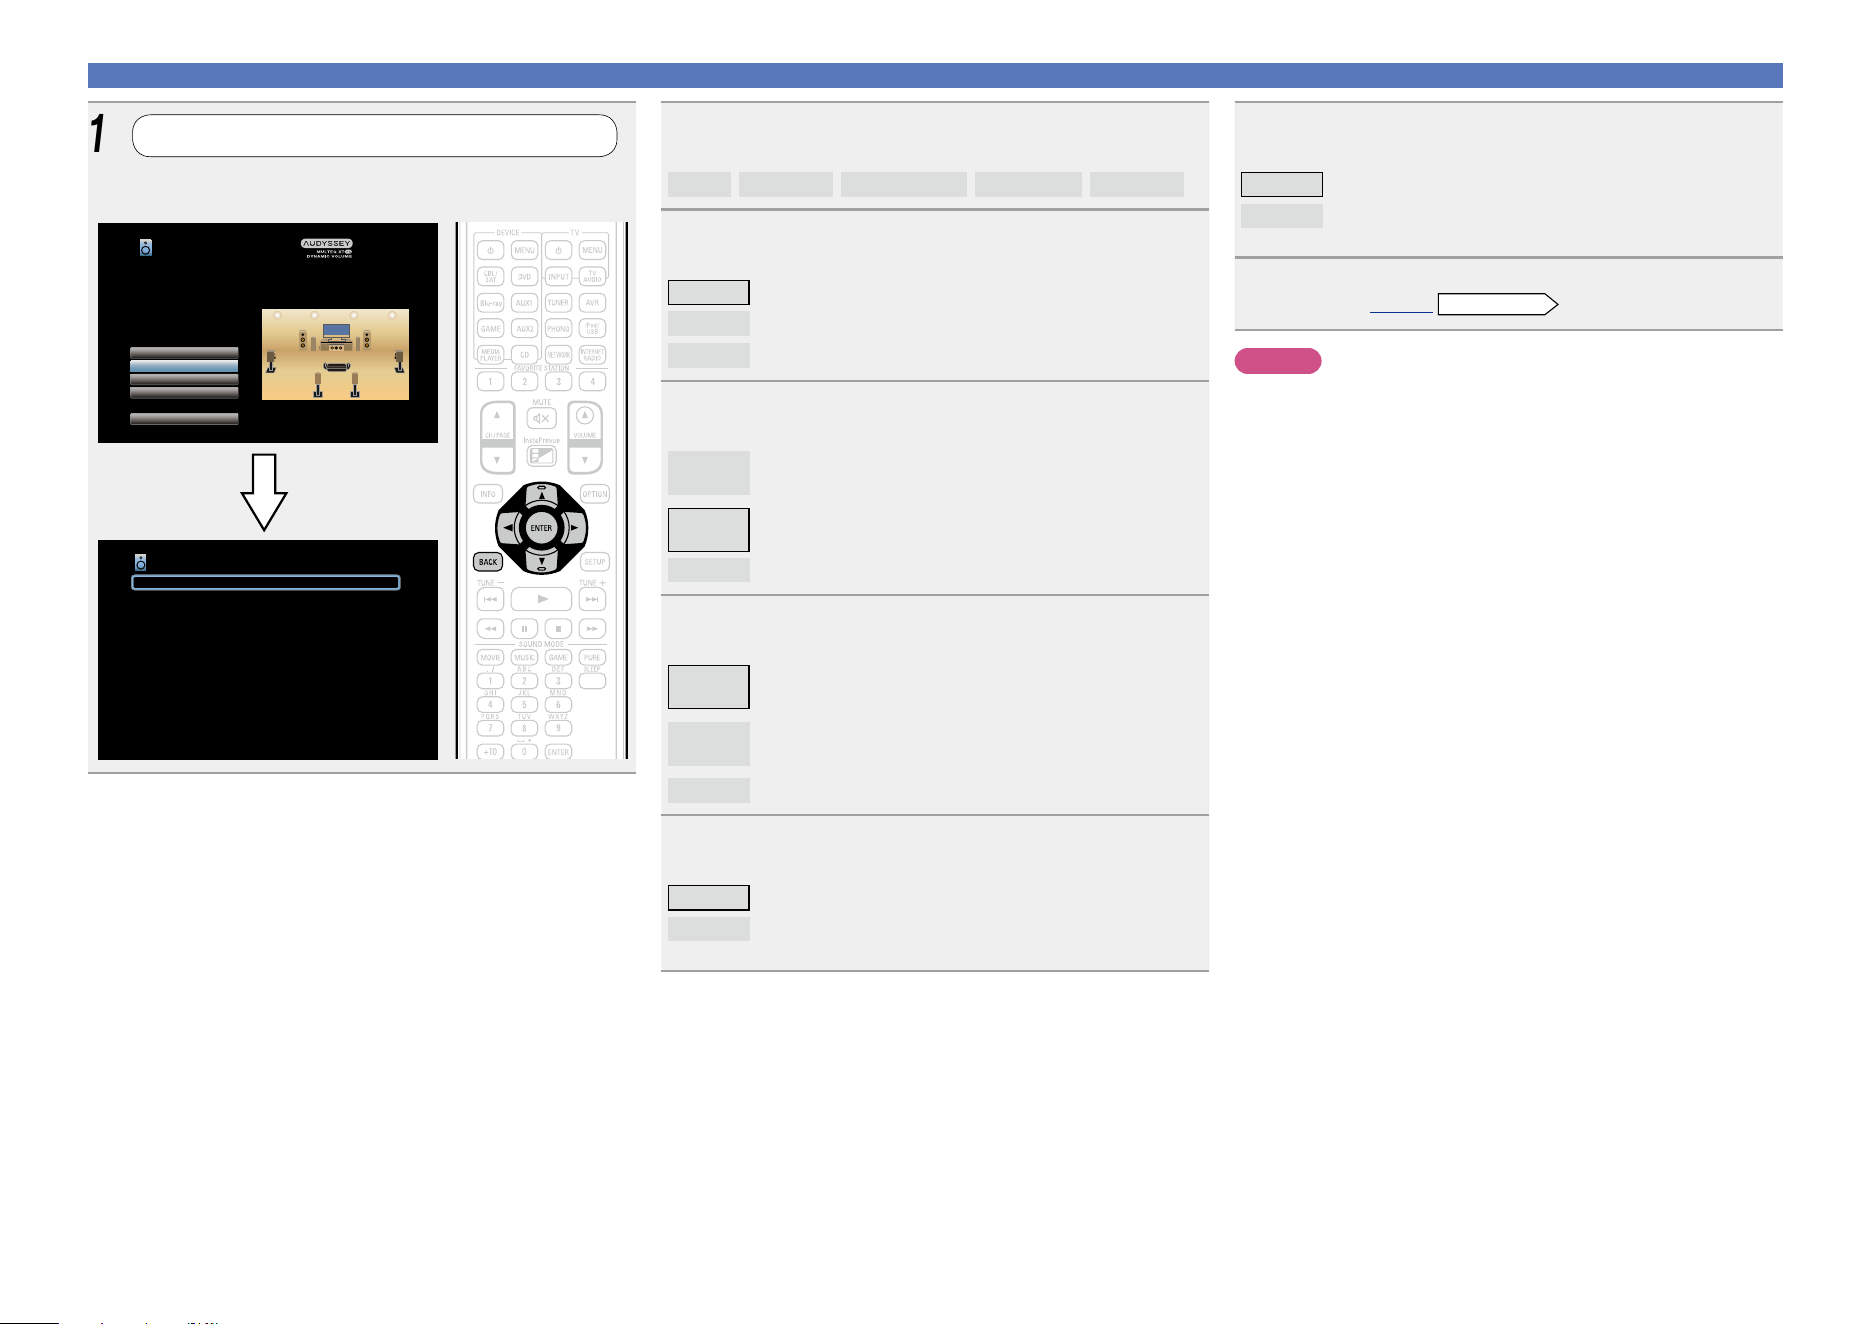
101
Set up speakers
14
Use ui to select a channel, and then press ENTER.
Front
/
Subwoofer
/
Surround Back
/
Front Height
/
Front Wide
15
Use o p to select a front speaker, and then press
ENTER.
A Select this to use front speaker A.
B
Select this to use front speaker B.
A+B
Select this to use front speakers A and B simultaneously.
16
Use o p to set whether or not a subwoofer channel is
measured, and then press ENTER.
Measure
(2 spkrs)
Set for measuring two subwoofers (Audyssey Sub EQ
HT™).
Measure
(1 spkr)
Set for measuring a subwoofer.
Skip
Set for no measuring of a subwoofer.
17
Use o p to set whether or not a surround back
channel is measured, and then press ENTER.
Measure
(2 spkrs)
Set for measuring two surround back speakers.
Measure
(1 spkr)
Set for measuring a surround back speaker.
Skip
Set for no measuring of a surround back speaker.
18
Use o p to set whether or not a front height channel
is measured, and then press ENTER.
Measure Set to measure the front height speakers.
Skip
Set when you do not want to measure the front height
speakers.
19
Use o p to set whether or not a front wide channel is
measured, and then press ENTER.
Measure Set to measure the front wide speakers.
Skip
Set when you do not want to measure the front wide
speakers.
20
Press o or BACK.
Proceed to page35
Preparation
step 5.
NOTE
After performing Audyssey
®
Setup, do not change the speaker
connections or subwoofer volume. In event of a change, perform
Audyssey
®
Setup again.
13
Set up “Channel Select”
Use ui to select “Channel Select”, and then press
ENTER.
Channel Select
Subwoofer
Surround Back
Front Height
Measure(1spkr)
Measure(2spkrs)
Measure
Audyssey Setup
Channel Select
Amp Assign
Check Results
Restore...
Start
Your AV receiver can automatically measure the acoustics of
your room then optimize your speakers using the included
microphone.
Set the following items
if necessary.
Basic version
Advanced version
Informations
Advanced version
DVD
102
Setup (vpage33)
Playback (Basic operation) (vpage41)
Selecting a listening mode (Sound Mode)
(vpage84)
n HDMI control function (vpage102)
n InstaPrevue function (vpage104)
n Sleep timer function (vpage105)
n Quick select function (vpage106)
n REC OUT mode (vpage107)
n Web control function (vpage108)
n Various memory functions (vpage110)
Playback (Advanced operation)
HDMI control function
If you connect the unit and an HDMI control function compatible TV or
player with an HDMI cable and then enable the HDMI control function
setting on each device, the devices will be able to control each other.
n Operations possible by HDMI control
•This unit power off can be linked to the TV power off step.
•You can switch audio output devices with a TV operation.
When you set “Output audio from amp” in the TV audio output
setup operation, you can switch the amp power on.
•You can adjust this unit volume in the TV volume adjustment
operation.
•You can switch this unit input sources through linkage to TV
input switching.
•When playing the player, this unit input source switches to the
source for that player.
•If you switch the input source of the unit to “TV AUDIO”, you
can play TV audio with this unit (vpage 10 “About ARC
(Audio Return Channel) function”).
•When “HDMI Control” (vpage 130) in the menu is set to
“On”, signals input to the HDMI input connector are output to
the television or other device connected to the HDMI output
connector, even if the power of this unit is in standby (pass-
through function).
To use this unit to play the audio of a TV that does not support the ARC
function, connect the TV with an optical-digital or analog connection
(vpage10).
n Setting procedure
1
Set the HDMI output connector corresponding with
the HDMI control function.
Set “HDMI Control” (vpage130) to “On”.
2
Turn the power on for all the devices connected by
HDMI cable.
3
Set the HDMI control function for all devices
connected by HDMI cable.
•Please consult the operating instructions for the connected devices
to check the settings.
•Carry out steps 2 and 3 should any of the devices be unplugged.
4
Switch the television input to the HDMI input
connected to this unit.
5
Switch this unit input to the HDMI input source and
check if the picture from the player is ok.
6
When you turn the TV’s power to standby, check
that the power of this unit also goes to standby.
Basic version
Advanced version
Informations
Advanced version
v See overleaf
DVD

103
HDMI control function
If the HDMI control function does not operate properly, check the
following points.
•Is the TV or player compatible with the HDMI control function?
•Is “HDMI Control” (vpage130) set to “On”?
•Is “Power Off Control” (vpage131) set to “All” or “Video”?
•Is “Control Monitor” (vpage 130) set for the monitor output
connected to television?
•Is “Control Monitor” (vpage 130) set to the TV that uses the
HDMI control function when this unit is connected to two TVs that
support HDMI connectors?
•Are the HDMI control function settings of all devices correct?
NOTE
•When “HDMI Control” is set to “On”, it consumes more standby
power.
•The HDMI control function controls operations of a TV that is
compatible with the HDMI control function. Make sure that the TV
and HDMI are connected when you perform HDMI control.
•Some functions may not operate depending on the connected TV
or player. Check the owner’s manual of each device for details
beforehand.
•When “Power Off Control” on the menu is set to “Off”
(vpage131), this unit is not set to standby even if the connected
device is in the standby mode.
•When connection changes are implemented, such as adding
connections to HDMI devices, linked operations may be initialized.
In this case, you will need to reconfigure the settings.
•When “HDMI Control” is set to “On”, it is not possible to assign an
HDMI connector to “TV AUDIO” at “Input Assign” (vpage135).
•Should any of the operations below be performed, the interlocking
function may be reset, in which case, repeat steps 2 and 3.
•“Input Assign” – “HDMI” (vpage135) setting has changed.
•“Video Output” (vpage130) setting is changed.
•There is a change to the connection between the devices and the
HDMI, or an increase in devices.
•The HDMI ZONE4 function is compatible with the HDMI control
function.
•The ARC function, Power Off Control function, and Volume Control
function is not compatible with the HDMI ZONE4 control function.
•When the HDMI ZONE4 function is used with “HDMI Control” in
the menu set to “On”, the HDMI ZONE4 control function may not
fully work.
•When the power in ZONE4 is on with “HDMI Control” (vpage130)
set to “On” and “Control Monitor” set to “Monitor 1” or “Monitor
2” (vpage 130), the following operations occur (Some example
behaviors are listed below.).
•When the power of the TV used for MAIN ZONE is off and the
player selected for ZONE4 starts playback, the TV used for MAIN
ZONE is turned on. In this case, the input source selected for MAIN
ZONE changes to the input source selected for ZONE4.
•When playing back a TV used for MAIN ZONE and ZONE4 with
an HDMI connection, turning off the TV used for MAIN ZONE also
turns off this unit and the player.
•When a same input source is selected for MAIN ZONE and ZONE4,
stopping playback of the player on the TV stops the playback on the
player and the video being played back in ZONE4 as well.
•When the power in ZONE4 is on with “HDMI Control” (vpage130)
set to “On” and “Control Monitor” set to “ZONE4” (vpage130),
the following operations occur.
•When the power of the TV used for ZONE4 is off and the player
selected for MAIN ZONE starts playback, the TV used for ZONE4
is turned on. In this case, the input source selected for ZONE4
changes to the input source selected for MAIN ZONE.
•When playing back a TV used for ZONE4 and MAIN ZONE with an
HDMI connection, turning off the TV used for ZONE4 also turns
off the player.
•When a same input source is selected for ZONE4 and MAIN ZONE,
stopping playback of the player on the TV stops the playback on
the player and the video being played back in MAIN ZONE as well.
Basic version
Advanced version
Informations
Advanced version
DVD
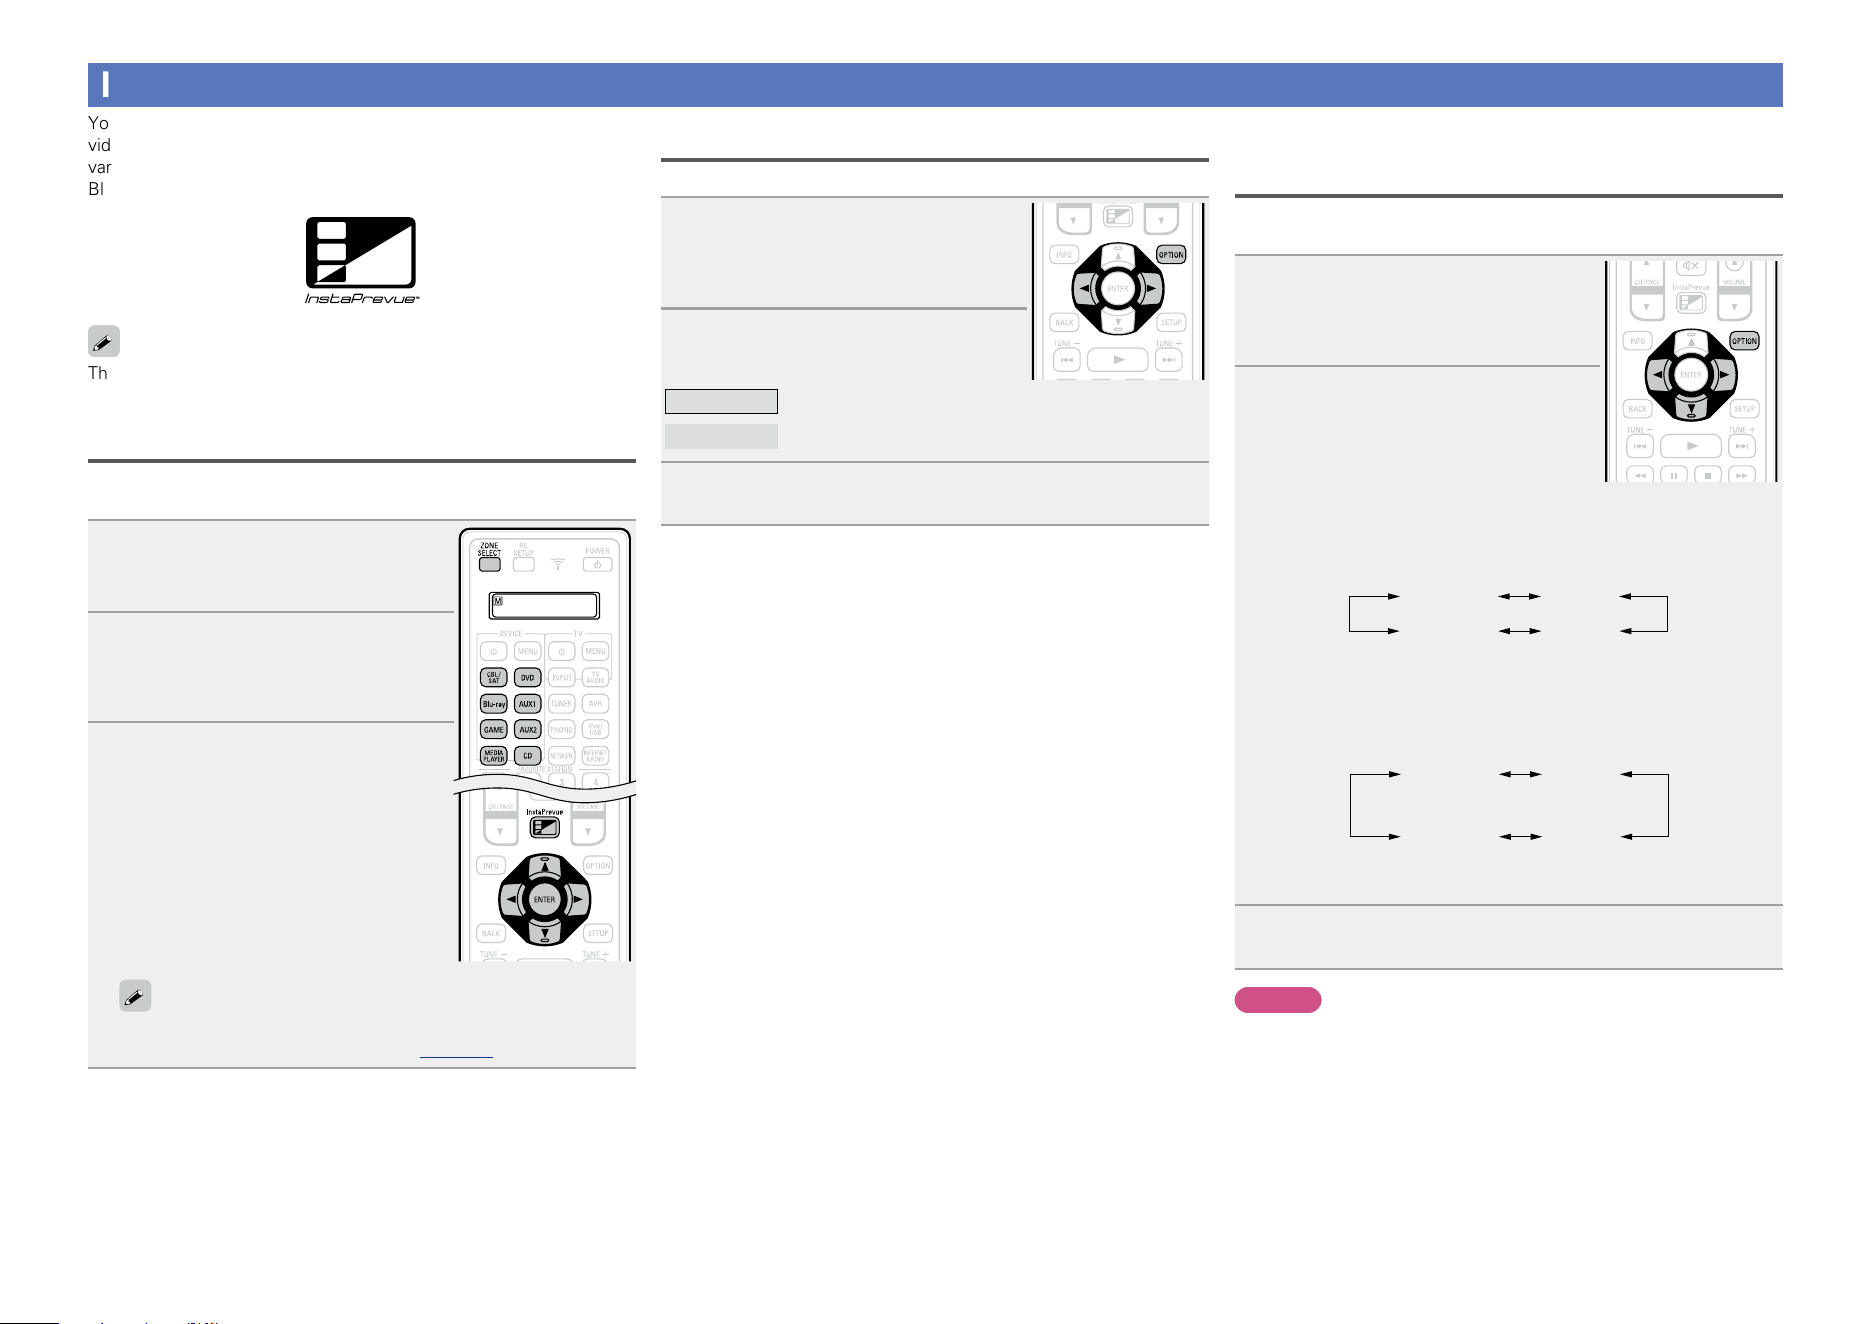
104
InstaPrevue function
You can display sub screens on the main screen to preview playback
video of the HDMI input connected to this unit. You can also display
various video inputs in a single screen to switch input sources such as
Blu-ray, DVD, and GAME while viewing them on sub screens.
The InstaPrevue function is compatible with the HDMI1 – 6
connectors. It is not supported for the HDMI7 / MHL connectors.
Switching input sources
Switch to the desired input source on this unit while viewing sub
screens.
1
Press ZONE SELECT to switch
the zone mode.
The J indicator lights.
2
Press InstaPrevue.
The main screen (current input video)
and sub screens (other input video) are
displayed.
3
Use uio p to select the
desired input source from the
sub screen, and press ENTER.
n To operate devices with the remote
control unit of this unit after
selecting the input source:
While sub screens are displayed, press an
input source select button to select the
desired input source.
Before you can perform this operation, you must register preset
codes for the remote control unit (vpage157).
Setting how to display sub screens
You can select to display five sub screens or only one sub screen.
1
While sub screens are displayed,
press OPTION.
The InstaPrevue setting screen is
displayed.
2
Press o p in “HDMI Input” to
select how to display sub screens.
All
Displays five sub screens.
One at time
Displays only one sub screen.
3
Press OPTION to enter the setting.
Changing the display location of sub
screens
You can change the display location of sub screens to a desired
location.
1
While sub screens are displayed,
press OPTION.
The InstaPrevue setting screen is
displayed.
2
Press i to select “Location” and
use o p to select the location
where you want to display sub
screens.
•The locations where sub screens can be displayed differ according
to the “HDMI Input” setting.
n When “HDMI Input” is set to “All”
Bottom To p
LeftRight
•The default setting is “Bottom”.
n When “HDMI Input” is set to “One at time”
Bottom
Left
Top
Left
Top
Right
Bottom
Right
•The default setting is “Bottom Left”.
3
Press OPTION to enter the setting.
NOTE
•The InstaPrevue function is available when HDMI signals are input
to the main screen. However, it is not available while computer’s
resolution (e.g. VGA) or 3D video contents is being played back.
•The InstaPrevue function is not available for the ZONE4 HDMI
monitor output. It is also not available when the power in ZONE4
is on.
Basic version
Advanced version
Informations
Advanced version
DVD
105
Sleep timer function
•You can have the power automatically switched to standby once a
set time has elapsed. This is convenient for viewing and listening
while going to sleep.
•The sleep timer function can be set for each zone (vpage 113
“Sleep timer function”). (The MAIN ZONE setting method is
explained here.)
1
Press ZONE SELECT to switch
the zone mode.
The J indicator lights.
2
Press SLEEP and display the time you want to set.
The indicator on the display lights.
•The time switches as shown below each time
SLEEP is pressed.
Off 10 min 20 30 40 50
6080 7090100
110
120
To confirm the countdown time before putting the
unit to sleep
Press SLEEP.
“Sleep : zmin” appears on the display.
z Countdown time
To cancel the sleep timer
Press SLEEP to set “Off”.
The indicator on the display turns off.
•The sleep timer setting is canceled if this unit’s power is set to
standby.
•The sleep timer function can be set separately for the different zones
(vpage113 “Sleep timer function”).
NOTE
The sleep timer function cannot turn off the power of devices
connected to this unit. To turn off the power of those connected
devices, set up sleep timers on the connected devices themselves.
Basic version
Advanced version
Informations
Advanced version
DVD
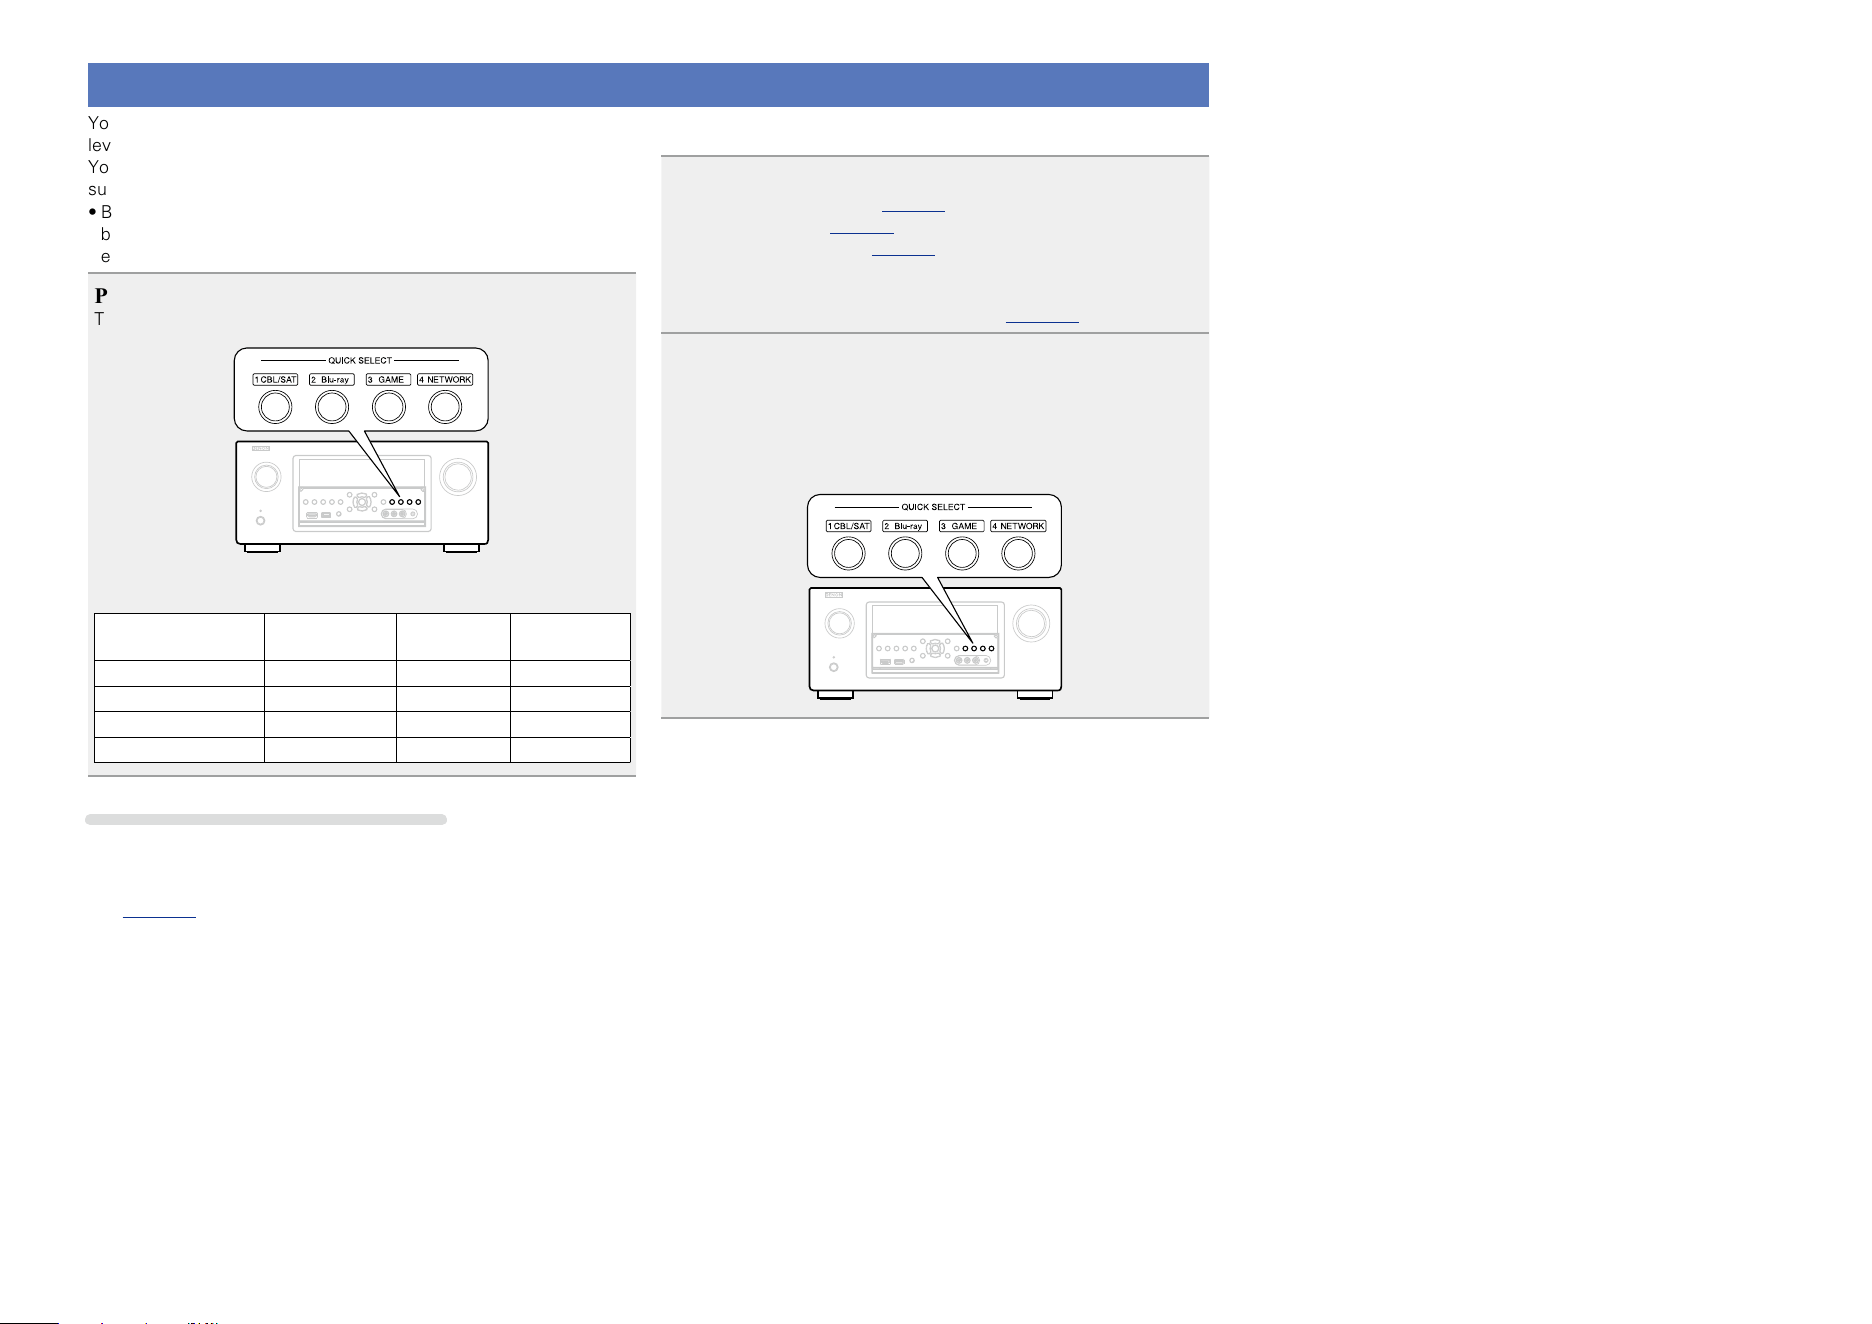
106
Quick select function
You can save settings such as the input source selection, volume
level, and sound mode at the QUICK SELECT 1 – 4 buttons.
You can simply press one of the set QUICK SELECT buttons for
subsequent playback to switch to various saved settings all at once.
•By saving frequently used settings at the QUICK SELECT 1 – 4
buttons, you will always be able to easily call up the same playback
environment.
Press QUICK SELECT.
The Quick Select settings for the button you pressed are called up.
•The default settings of each Quick Select function are as shown
below.
Button Input source Volume
Sound
Mode
QUICK SELECT 1 CBL/SAT 40 STEREO
QUICK SELECT 2 Blu-ray 40 STEREO
QUICK SELECT 3 GAME 40 STEREO
QUICK SELECT 4 NETWORK 40 STEREO
Changing the Quick Select Name
On this unit, you can change the Quick Select Name displayed on the
menu to the name that you prefer.
For the name change method, see “Quick Select Names”
(vpage152).
n Changing the settings
1
Set the items below to the settings you want to save.
q Input source
z
(vpage41)
w Volume (vpage42)
e Sound Mode (vpage84)
r Audyssey
(Audyssey MultEQ
®
XT 32, Audyssey Dynamic EQ
®
,
Audyssey Dynamic Volume
®
) (vpage125)
2
Press and hold the desired QUICK SELECT until
“Quickz Memory” appears on the display.
The current settings will be memorized.
z The number for the
QUICK SELECT button you pressed is
displayed.
Basic version
Advanced version
Informations
Advanced version
DVD
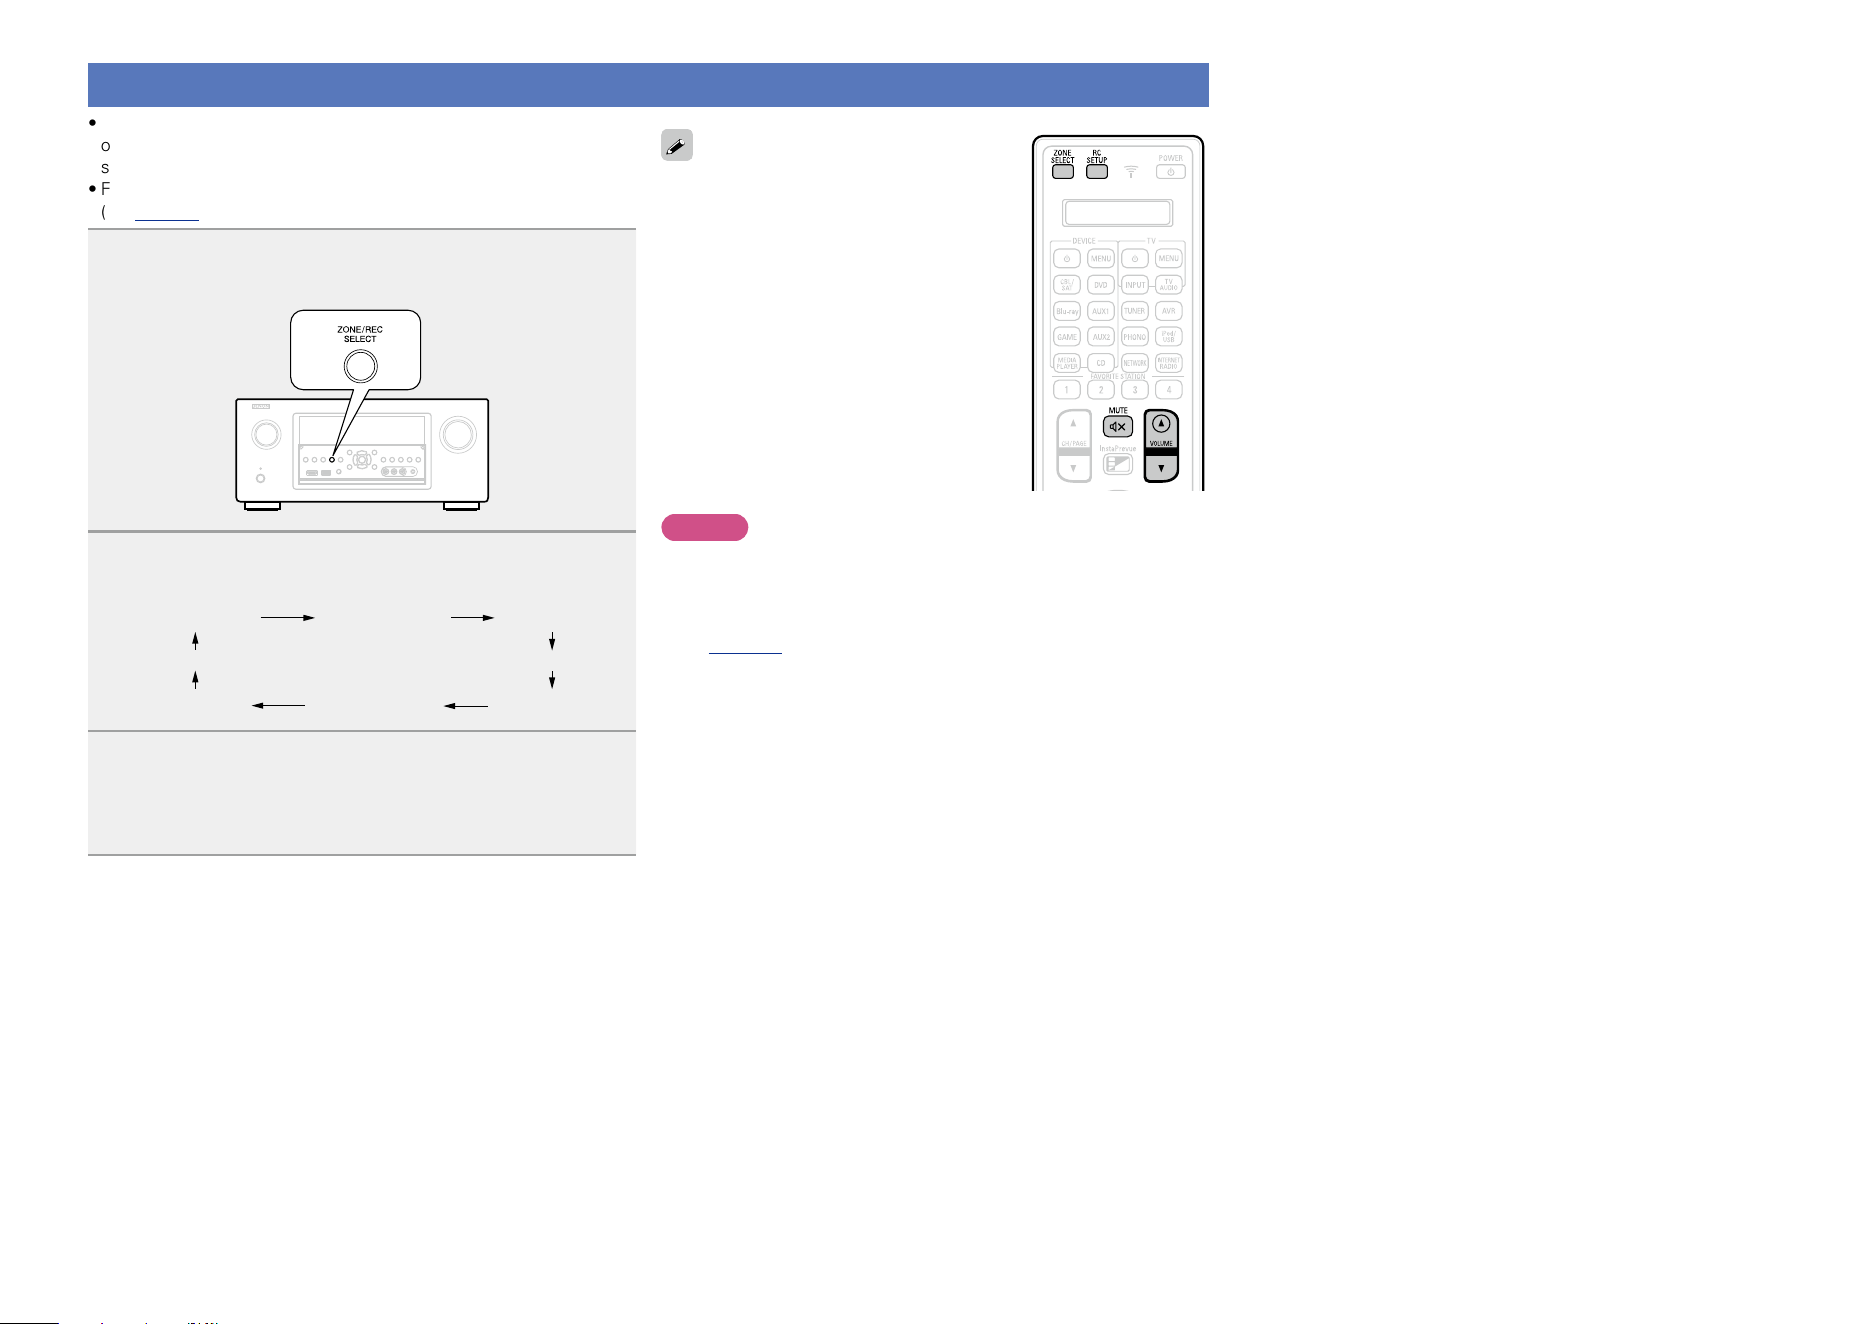
107
REC OUT mode
•When using the audio/video recording connectors (MEDIA PLAYER
outputs), you can record the audio or video from a different program
source while listening to the currently played track.
•For the connection method, see “Connecting a media player”
(vpage22).
1
Press ZONE/REC SELECT until “RECOUT Source”
is displayed.
2
Press ZONE/REC SELECT to choose the input source
to be recorded.
ZONE2 Source ZONE2 CBL/SAT ZONE2 DVD
····
····
RECOUT DVD RECOUT CBL/SAT RECOUT Source
3
Start recording.
•For operating instructions, refer to the respective device’s
operating instructions.
•To cancel, press ZONE/REC SELECT until
“ZONE2 Source” is displayed.
•Make a test recording before starting the
actual recording.
•Sources selected with the REC OUT mode
are output from ZONE2 as well.
•The operable buttons on the remote control
unit in REC OUT mode while it is in the
operating mode for ZONE2 are as follows:
•ZONE SELECT button
•MUTE button (:)
•VOLUME button (df)
NOTE
•Recordings you make are for your personal enjoyment and should
not be used for other purposes without permission of the copyright
holder.
•Input sources for which “Hide” is selected at “Hide Sources”
(vpage137) cannot be selected.
•To record video signals through this unit, use the video cable for
connection between this unit and the player.
•Make an analog connection for audio signals.
Basic version
Advanced version
Informations
Advanced version
DVD
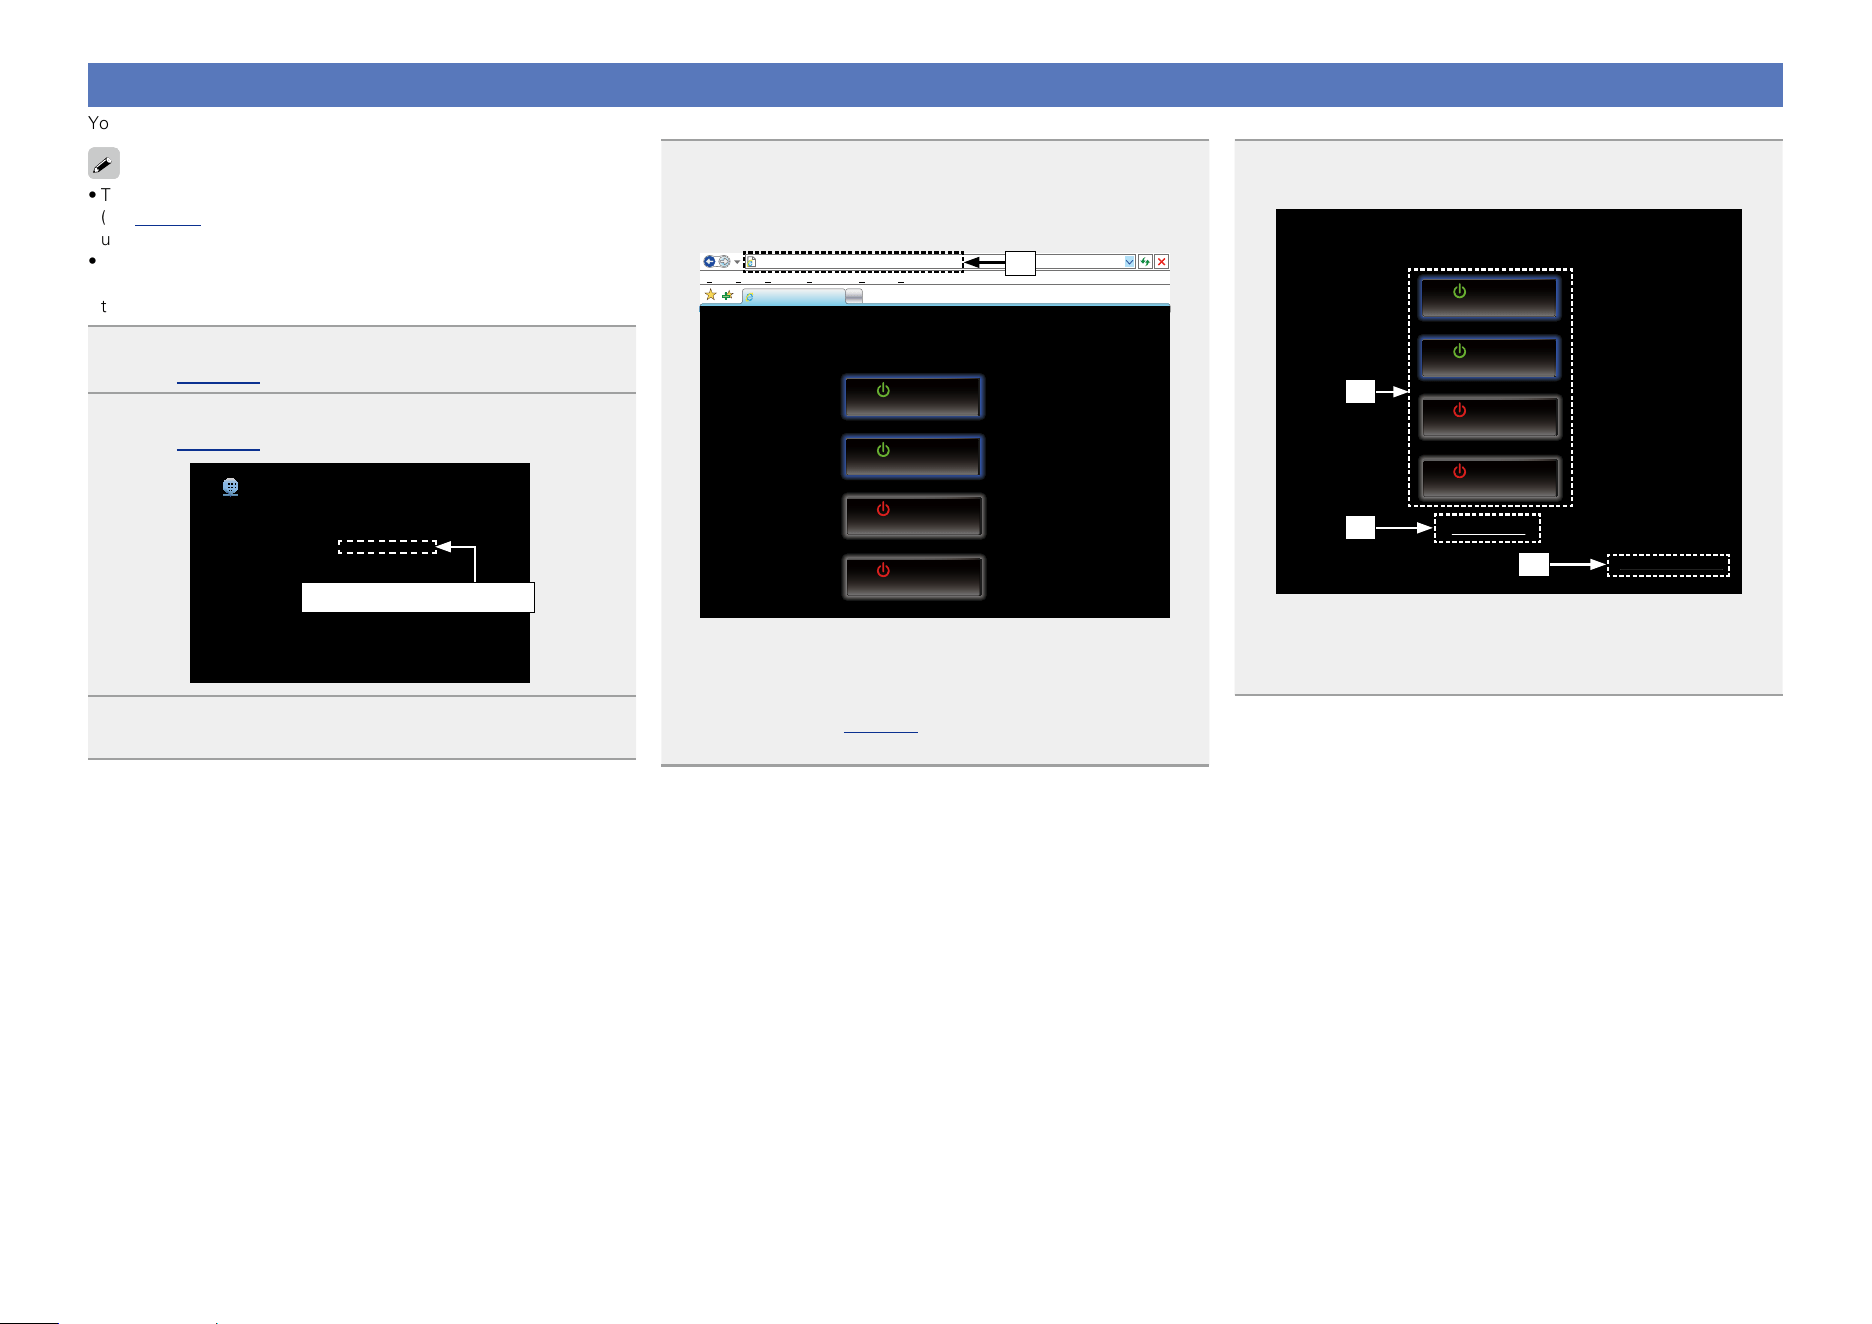
108
Web control function
You can control this unit from a web control screen on a web browser.
•This unit and the PC need to be connected to the network properly
(vpage 31 “Connecting to a home network (LAN)”) in order to
use the web control function.
•Depending on the settings of your security-related software, you
may not be able to access this unit from your PC. If this is the case,
then change the settings of the security-related software.
1
Switch the “Network” setting to “Always On”
(vpage 147).
2
Check the IP address of this unit with “Information”
(vpage 147).
Network/Information
Friendly name
DHCP
IP Address
MAC Address
Displays the current network name of the AVR
DENON AVR-4520CI
On
192.168.100.19
0005cd000000
Checking the IP address.
3
Start up the web browser.
4
Enter the IP address of this unit in browser’s address
box.
For example, if the IP address of this unit is “192.168.100.19”,
enter “http://192.168.100.19/”.
http://192.168.100.19/index.asp
INDEX
File
Edit View Tools HelpFavorites
DENON AVR-4520CI
Web Controller
MAIN ZONE
40.0
CBL/SAT
Setup Menu
ZONE2
ZONE3
20
Blu-ray
CBL/SAT
Web Controller Config.
Setup Menu
ZONE4
GAME
q
q Entering the IP address.
•By adding this unit’s IP address to the browser’s bookmark, you
can display the web control screen using the bookmark function
the next time you use the browser. If you are using a DHCP server
and “Network” (vpage147) is set to “Off In Standby”, turning
the power on/off changes the IP address.
5
When the top menu is displayed, click on the menu
item you want to operate.
http://192.168.100.19/index.asp
INDEX
File
Edit View Tools HelpFavorites
DENON AVR-4520CI
Web Controller
MAIN ZONE
40.0
CBL/SAT
Setup Menu
ZONE2
ZONE3
20
Blu-ray
CBL/SAT
Web Controller Config.
Setup Menu
ZONE4
GAME
w
e
r
w Click when you select the zone to operate. (vGExample 1H)
e Click when you operate the setup menu. (vGExample 2H)
r Click to change the Web control screen setting. (vGExample
3H)
Basic version
Advanced version
Informations
Advanced version
v See overleaf
DVD
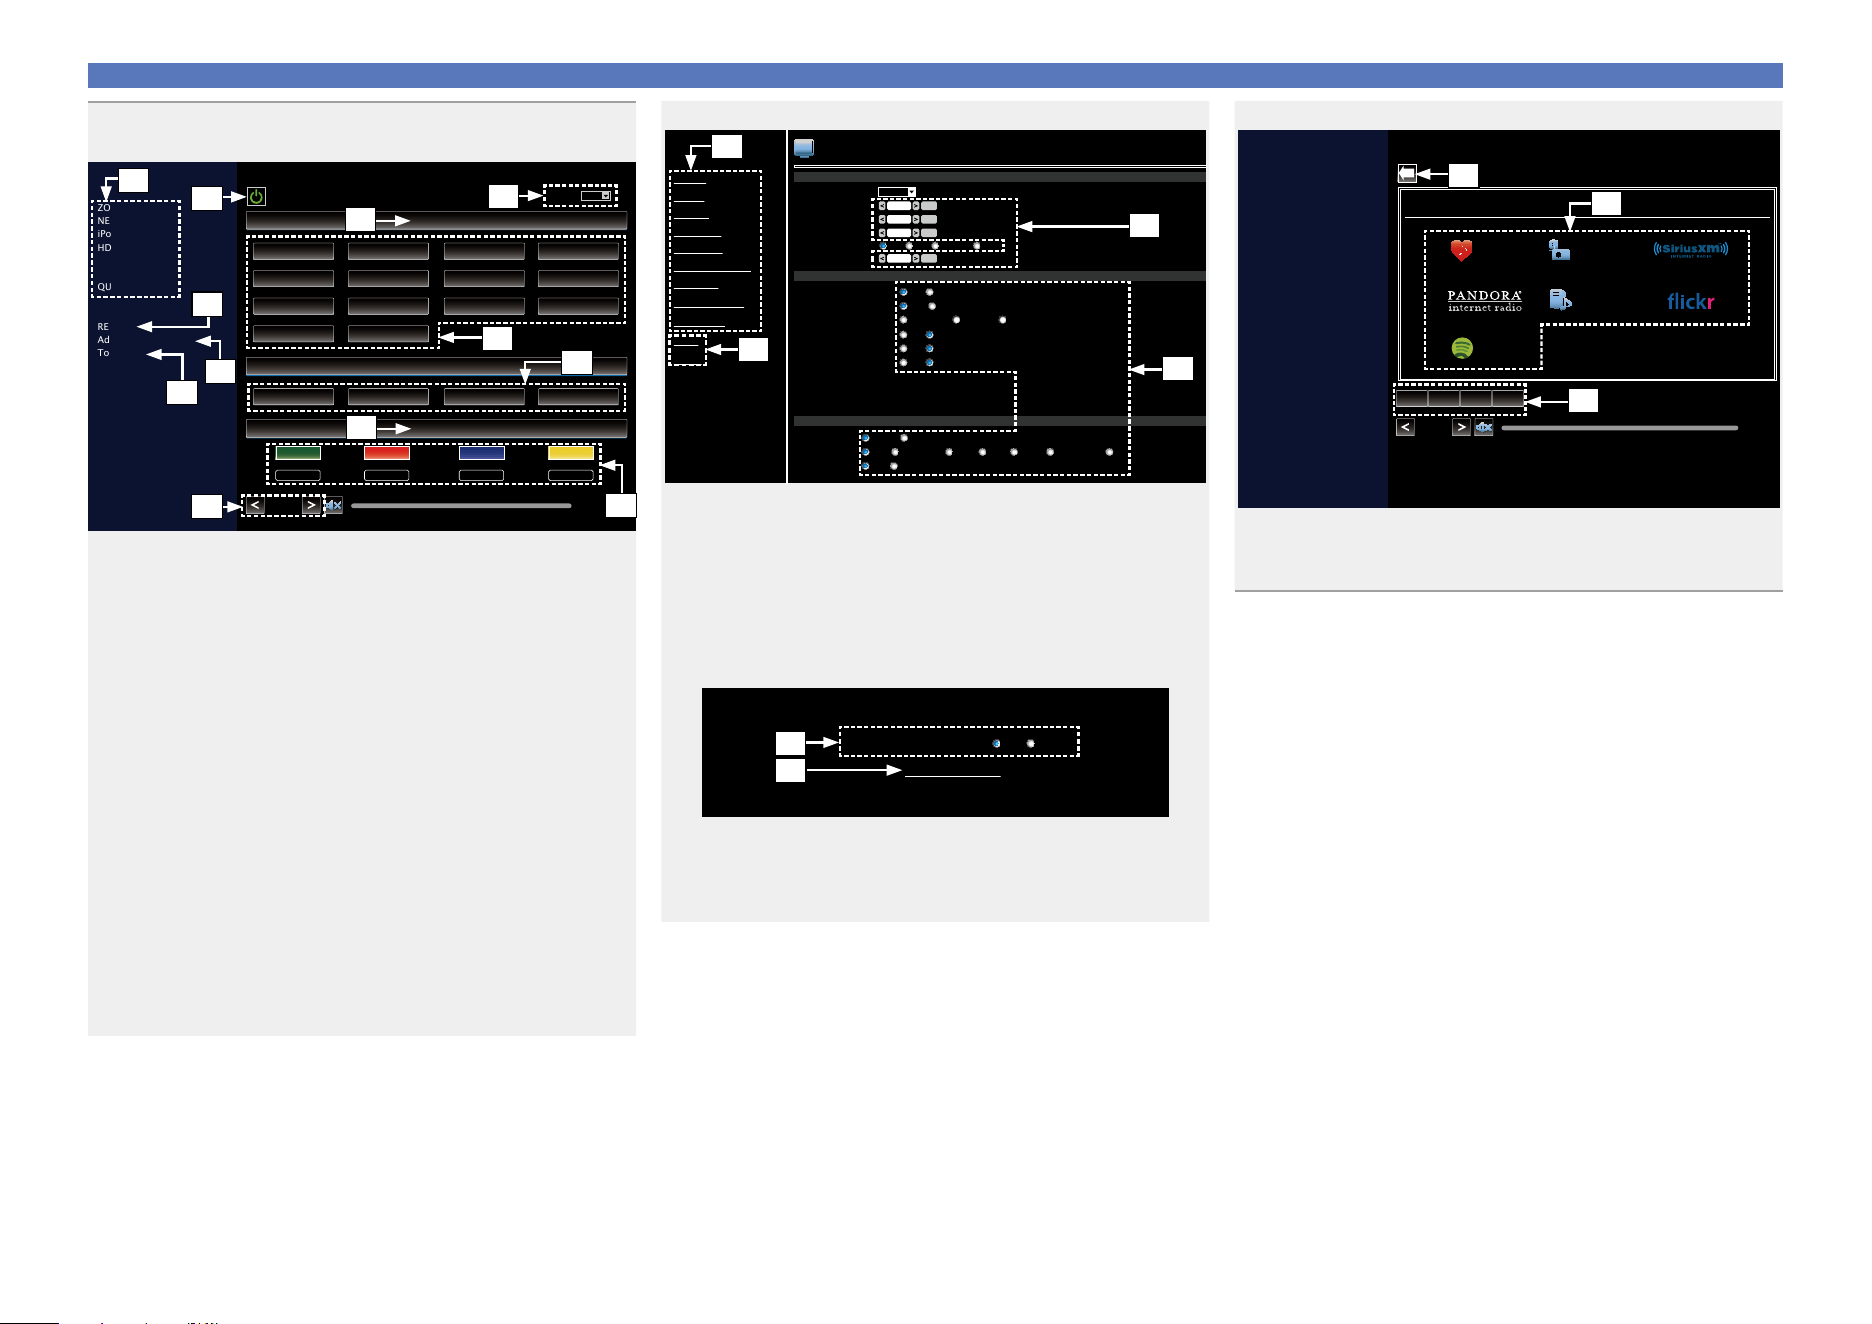
109
Web control function
6
Operate.
GExample 1H MAIN ZONE control screen
ZONE CONTROL
NETWORK
iPod/USB
HD Radio
QUICK SELECT
RELOAD
Add To Your Favorite
Top Menu
MAIN ZONE
SLEEP
40.0
DENON AVR-4520CI
CBL/SAT
FAVORITE STATION
STEREO
CBL/SAT
DVD
GAME
AUX-1
AUX-2 MEDIA PLAYER
HD Radio
CD
PHONO
NETWORK
iPod/USB
Blu-ray
TV AUDIO
Internet Radio
1
2
3 4
MOVIE
DIRECT STEREO
STANDARD SIMULATION
MUSIC GAME PURE
u
t
i
y
Q0
Q1
Q2
Q5
Q3
Q4
Q6
o
t Click the menu item from which you want to make settings.
The display on the right becomes the individual setting screens.
(vGExample 4H)
y Click when you perform a power operation of the unit.
u Click when you update to the latest information.
Normally, there is a change to the latest information each time
you operate. When operating from the main unit, click this or else
the screen will not be updated.
i Click to add a setting to “Favorites” in your browser.
We recommend registering the setting screens for the different
zones in the browser’s favorites so as not to accidentally perform
menu operations for zones you do not intend to operate.
o Click to return to the top menu.
Displayed when setting “Top Menu Link Setup” to “ON” in
GExample 3H
Q0 To adjust the main volume, click “<”, “>”, or the volume display.
Q1 Click “v” to set the sleep timer function.
Q2 Displays the name of the selected input source.
Q3 Click a button to change the input source.
Q4 Register your favorite content.
Q5 Displays the sound mode.
Q6 The sound mode switches you click the button.
GExample 2H Setup menu screen
VIDEO
AUDIO
PICTURE ADJUST
HDMI SETUP
OUTPUT SETTINGS
VIDEO
INPUTS
SPEAKERS
NETWORK
USER ACCOUNT
GENERAL
INFORMATION
FIRMWARE
SAVE
LOAD
Picture Mode
Contrast
Saturation
Hue
Enhancer
Custom
0
Set
0
Set
0
Set
0
Set
Auto Lip Sync
ON
*****
*****
OFF
Noise Reduction
OFF Low Medium High
HDMI Audio Out
AVR TV
i/p Scaler
Analog OFF
Resolution
Auto 480p/576p 1080i 720p 1080p 1080p:24Hz 4K
Aspect Ratio
16:9 4:3
HDMI Control
Video Output
ON OFF
High Pass Through
ON OFF
Vertical Stretch
ON OFF
Auto(Dual) Monitor1 Monitor2
Pass Through Source
Control Monitor
*****
Power Off Control
Q7
W0
Q9
Q8
Q7 Click the menu item from which you want to make settings.
The display on the right becomes the individual setting screens.
Q8 Click “SAVE” when you want to save settings, and click “LOAD”
when you want to call settings.
Q9 Enter figures or click “<” or “>” to make the setting, and then
click “Set”.
W0 Click an item to make a setting.
GExample 3H Web configuration screen
Top Menu Link Setup
ON OFF
Web Controller Config.
Back Top Menu
W1
W2
W1 Click “ON” when performing Top Menu Link Setup.
When set up, return to the top menu from each operation screen.
(Default setting : “OFF”)
W2 Click this item to return to the top menu.
GExample 4H Network audio operating screen
ZONE CONTROL
NETWORK
iPod/USB
HD Radio
QUICK SELECT
RELOAD
40.0
NETWORK (MAIN ZONE)
Network
8 921/3
Favorites Internet Radio
Media Server
Spotify
W3
W4
W5
W3 Click to return to the previous screen.
W4 Click the content you want to operate.
W5 Use to operate content.
Basic version
Advanced version
Informations
Advanced version
DVD

110
Various memory functions
Personal memory plus function
This function sets the settings (input mode, sound mode, HDMI output mode, MultEQ
®
XT 32, Dynamic
EQ, audio delay etc.) last selected for the individual input sources.
The surround parameters, tone settings and the volumes of the different speakers are stored for the
individual sound modes.
Last function memory
This function stores the settings which were made before going into the standby mode.
When the power is turned back on, the settings are restored.
Basic version
Advanced version
Informations
Advanced version
DVD
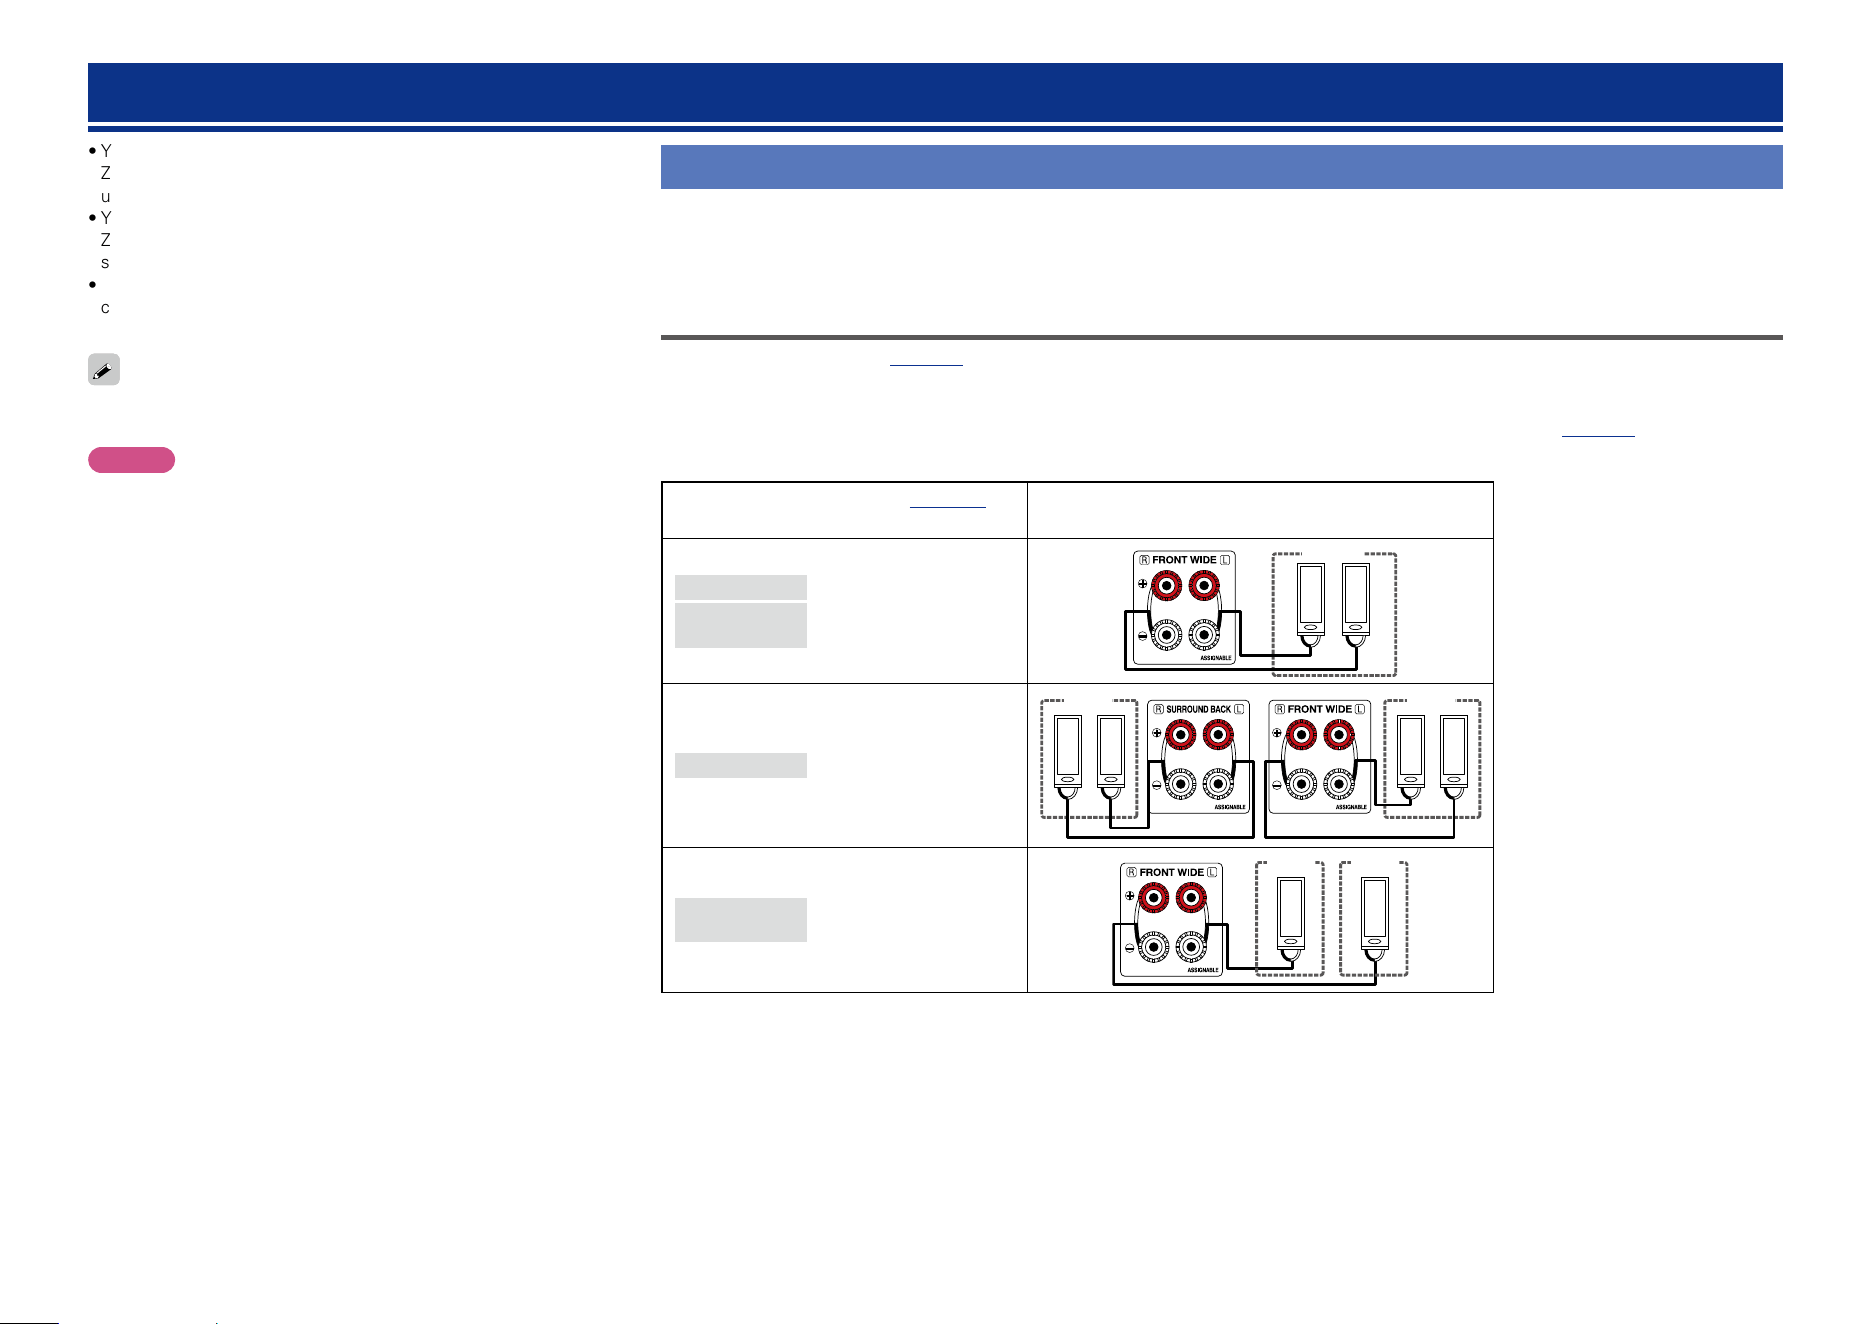
111
Playback in ZONE2/ZONE3/ZONE4 (Separate room)
•You can operate this unit so as to enjoy audio in a room (ZONE2,
ZONE3 and ZONE4) other than the MAIN ZONE (room where the
unit is located).
•You can simultaneously play back the same source in both the MAIN
ZONE, ZONE2, ZONE3 and ZONE4. You can also play back separate
sources in the MAIN ZONE, ZONE2, ZONE3 and ZONE4.
•When a TV is connected to the HDMI ZONE4 OUT connector, you
can play back a video or audio from the device connected to the
HDMI 1 – 6 IN connector in ZONE4 (HDMI ZONE4 function).
The source selected for ZONE2 is also output from the recording
output connectors (MEDIA PLAYER).
NOTE
The following restrictions apply to the HDMI ZONE4 function.
•If you select a same input source for MAIN ZONE and ZONE4, audio
playback may be restricted or video may be interrupted.
•Video may not be output depending on the resolution of the TV used
for MAIN ZONE and ZONE4. In this case, use your player to set the
resolution of the TV.
•When HDMI ZONE4 function is used, you cannot set the following.
•Picture Adjust •i/p Scaler
•Auto Lip Sync •Progressive Mode
•Video Mode •Aspect Ratio
•Video Conversion •Setup menu display
Audio output
It is possible to play 2-channel audio in rooms other than the MAIN ZONE where multi-channel playback is done. Choose one of the methods.
q Zone playback by speaker output
w Zone playback by audio output (PRE OUT)
Use an external amplifier.
q Zone playback by speaker output
•When “Assign Mode” (vpage141) in the menu is set to any of the following, audio is output from speakers in ZONE2 or ZONE3.
•7.1ch + ZONE2 •5.1ch + ZONE2/3
•7.1ch + ZONE2/3-MONO •5.1ch(Bi-Amp) + ZONE2
Also, connectors that ZONE2 or ZONE3 speakers are connected to differ according to the “Main Speakers” (vpage141) setting.
n Connecting and setting the speakers
“Assign Mode” setting (vpage141)
and audio signals output
Connecting the speakers
7.1ch + ZONE2
5.1ch(Bi-Amp) +
ZONE2
Output signal :
Stereo (L / R)
ZONE2
w q w q
(L) (R)
5.1ch + ZONE2/3
Output signal :
Stereo (L / R)
ZONE3
w q w q
(L) (R)
ZONE2
w q w q
(L) (R)
7.1ch +
ZONE2/3-MONO
Output signal :
Monaural
ZONE2
w
ZONE3
w q
Basic version
Advanced version
Informations
Advanced version
v See overleaf
DVD
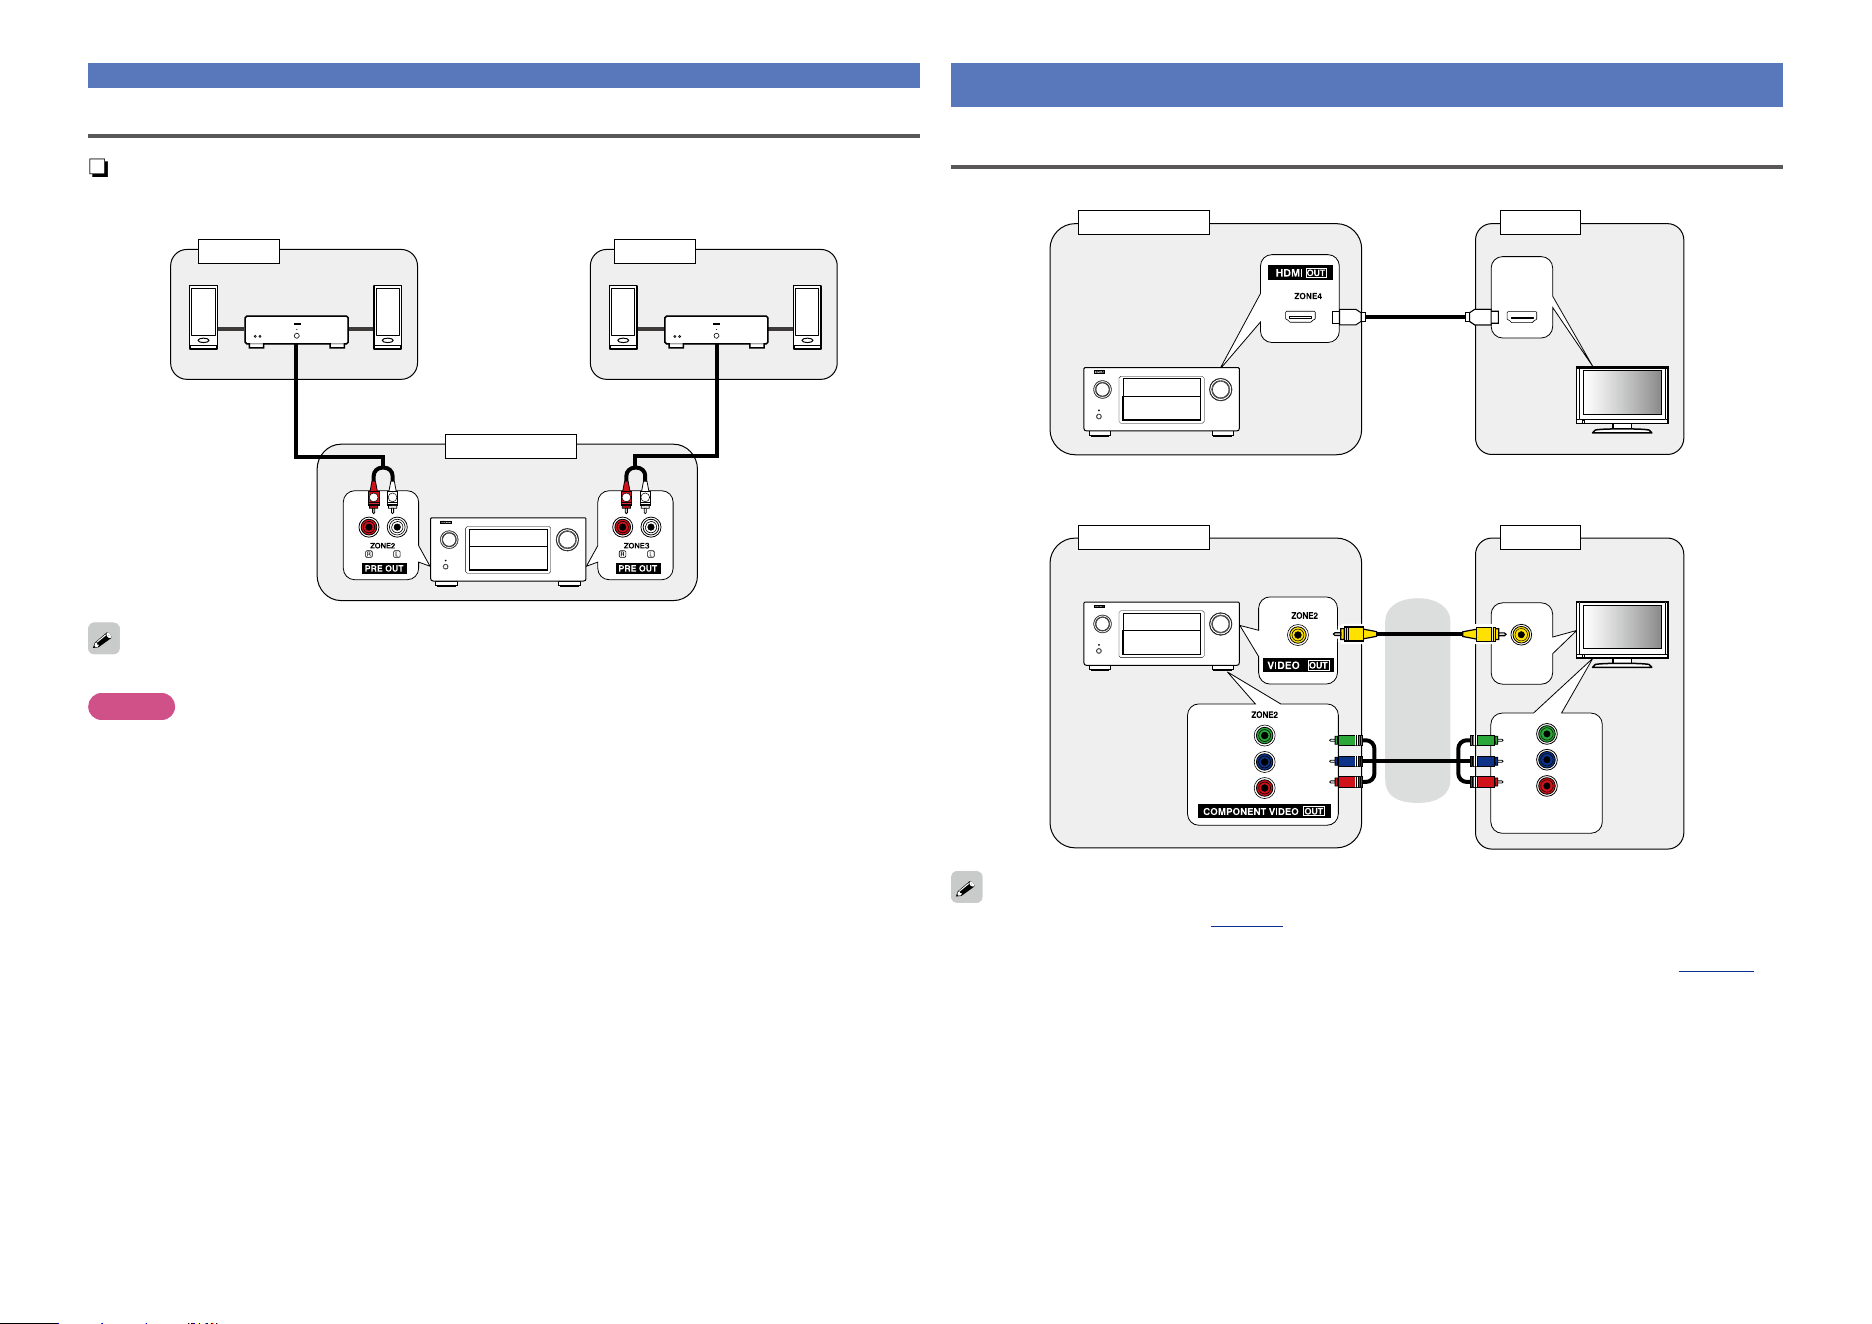
112
Audio output
w Zone playback by audio output (PRE OUT)
n Audio connections (ZONE2, ZONE3)
The audio signals of this unit’s ZONE2 and ZONE3 audio output terminals are output to the ZONE2 and
ZONE3 amplifiers and played on these amplifiers.
AUX IN AUX IN
R
L
R
L
MAIN ZONE
ZONE2 ZONE3
This unit
Power
amplifiers
Power
amplifiers
We recommend using high quality pin-plug cables for audio connections in order to prevent noise.
NOTE
In ZONE2 or ZONE3, the digital audio signals input from the HDMI, COAXIAL or OPTICAL connector
cannot be played back. When playing back in ZONE2 or ZONE3, make an analog connection, network or
iPod/USB.
Video output
Video Connection
The video signals of this unit’s ZONE4 video output connector are played by the ZONE4 TV.
HDMI
IN
MAIN ZONE ZONE4
This unit
TV
The video signals of this unit’s ZONE2 video output connector are played by the ZONE2 TV.
VIDEO
IN
CONPONENT
VIDEO IN
MAIN ZONE ZONE2
This unit
or
TV
•When “Analog Video Out” (vpage132) in the menu is set to “ZONE3”, you can use the COMPONENT
VIDEO OUT and the VIDEO MONITOR OUT connectors in MAIN ZONE for ZONE3.
•To enable the HDMI control for the ZONE4 HDMI monitor, set “Control Monitor” (vpage 130) to
“ZONE4”.
Basic version
Advanced version
Informations
Advanced version
DVD
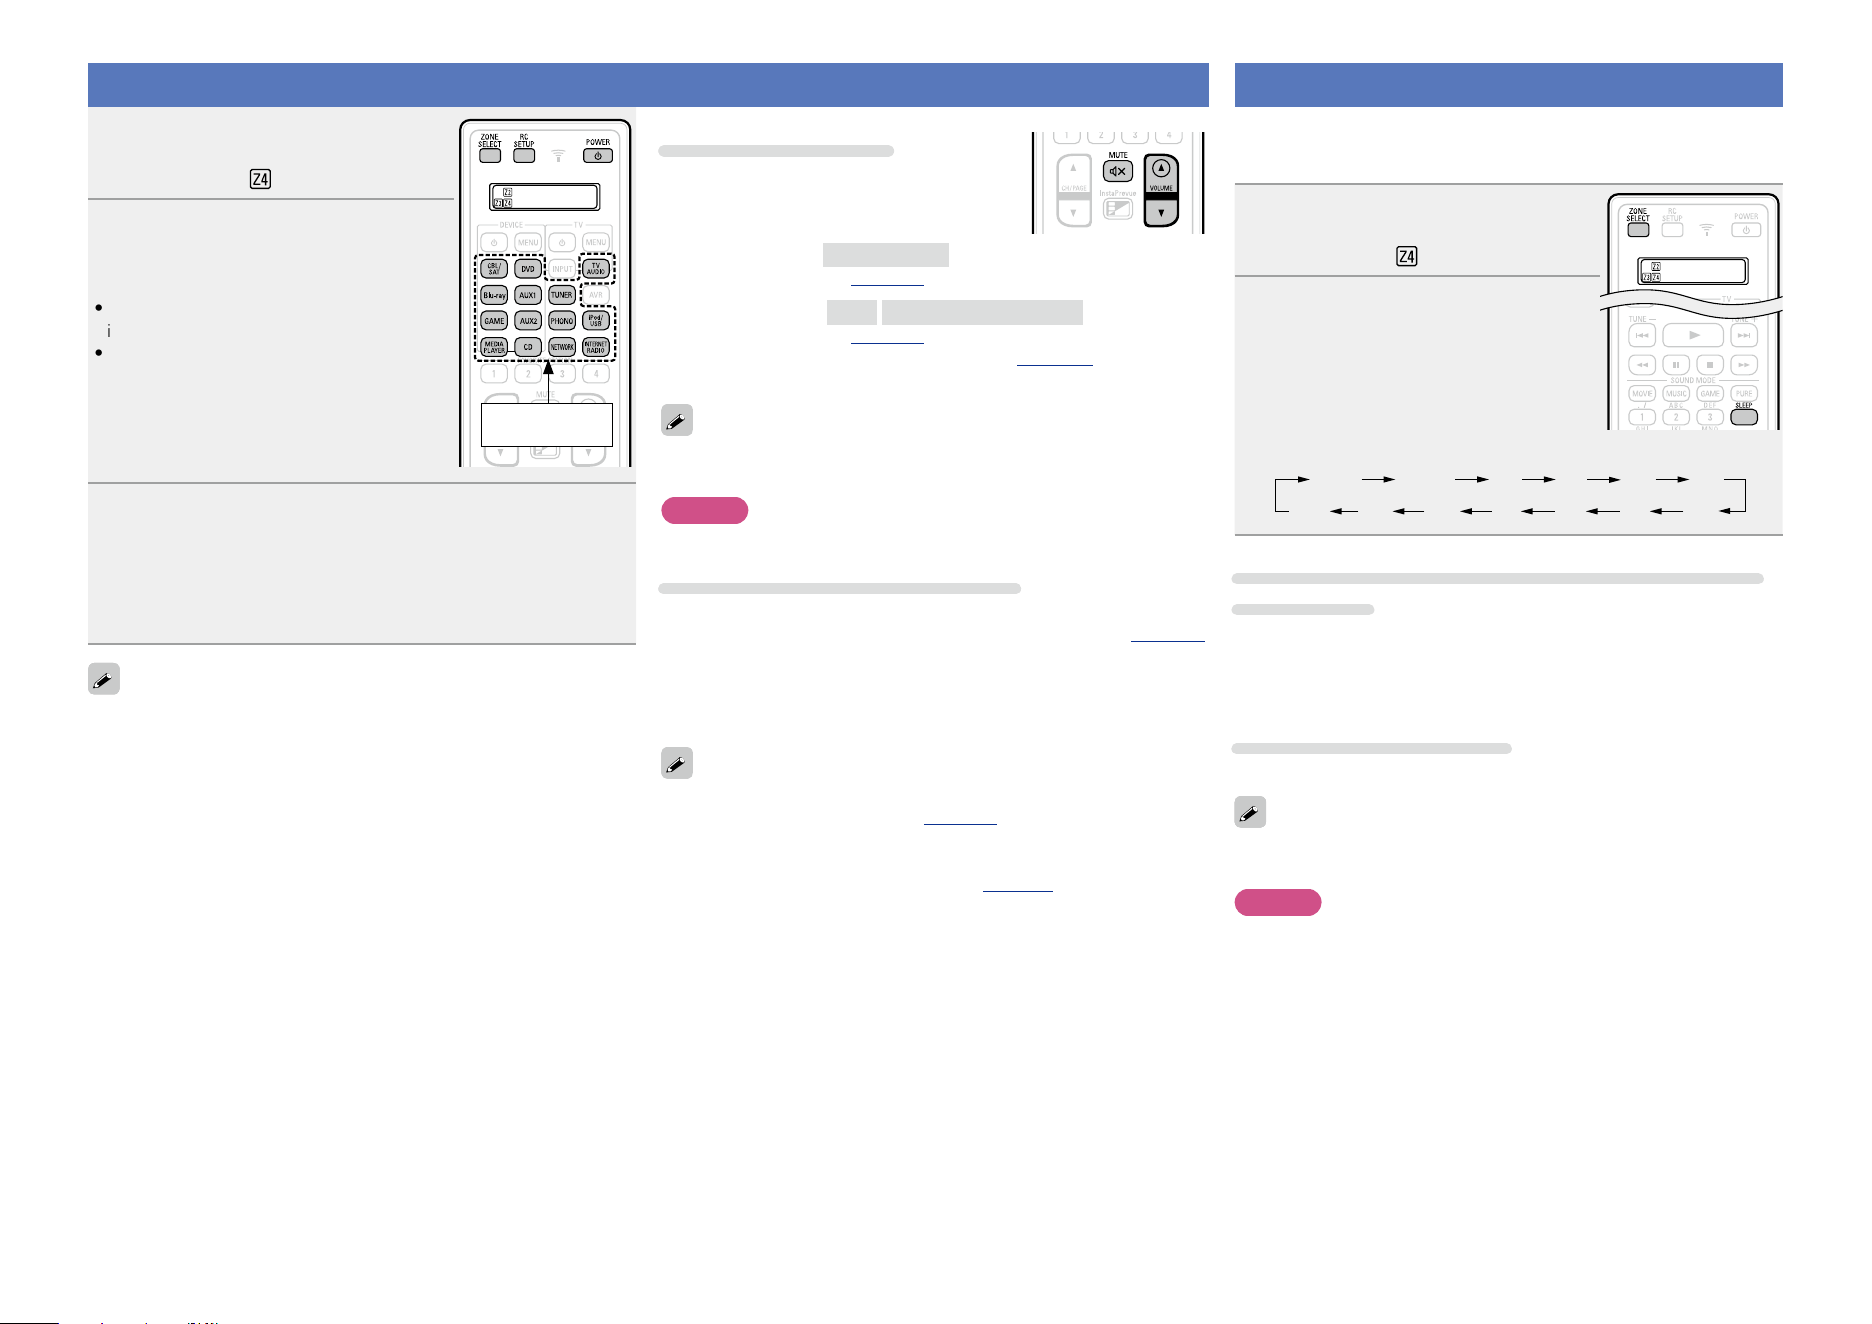
113
Playback
1
Press ZONE SELECT to switch the
zone mode.
The K, L or indicator lights.
Input source
select buttons
2
Press POWER X to turn on the
ZONE2, ZONE3 or ZONE4
power.
•Also press input source select button when
in standby mode, the power turns on.
•When POWER X is pressed, ZONE2,
ZONE3 or ZONE4 turns off.
•Power in ZONE2, ZONE3 or ZONE4 can
be turned on or off by pressing ZONE2 ON/
OFF
, ZONE3 ON/OFF or ZONE4 ON/OFF on
the main unit.
3
Press the input source select button to select the input
source to be played.
The audio and video signal of the selected source is output to
ZONE2, ZONE3 or ZONE4.
•Turn
SOURCE SELECT after pressing ZONE/REC SELECT on the
main unit to select an input source.
When power for both MAIN ZONE and ZONE2 (ZONE3 or ZONE4) is
set to ON, power of the MAIN ZONE only can be turned off. Select
MAIN ZONE in step 1 then press POWER X.
Adjusting the volume
Use VOLUME df to adjust the volume.
GAdjustable rangeH
0 – 40 – 98
(When the “Scale” (vpage124) setting is “0 – 98”)
GAdjustable rangeH
– – –
–79dB – –40dB – 18dB
(When the “Scale” (vpage124) setting is “–79.5dB – 18.0dB”)
•At time of purchase, “Volume Limit” (vpage 151) is set to “70
(–10dB)”.
Turn MASTER VOLUME after pressing ZONE/REC SELECT on the main
unit to adjust the sound volume.
NOTE
For ZONE4, you cannot use VOLUME df to adjust the volume level.
Turning off the sound temporarily
Press MUTE :.
The sound is reduced to the level set at “Mute Level” (vpage151)
in the menu.
•To cancel, either adjust the volume or press MUTE : again.
•The setting can also be cancelled by adjusting the volume or turning
off the ZONE2 or ZONE3 power.
•You can adjust the tone and volume for ZONE2 or ZONE3 in “ZONE2
Setup” or “ZONE3 Setup” (vpage151) in the menu.
•The All Zone Stereo function allows you to simultaneously enjoy in
multi-zones (ZONE2/ZONE3) the music that is played back in MAIN
ZONE during home party, etc. (vpage 80 “All Zone Stereo
function”).
Sleep timer function
•This is convenient for viewing and listening while going to sleep in
ZONE2, ZONE3 or ZONE4.
•The sleep timer function can be set by zone.
1
Press ZONE SELECT to switch the
zone mode.
The K, L or indicator lights.
2
Press SLEEP and display the time
you want to set.
•The time switches as shown below each time SLEEP is pressed.
Off 10 min 20 30 40 50
6080 7090100
110
120
To confirm the countdown time before putting the
unit to sleep
Press SLEEP.
“Z2 Sleep : zmin”, “Z3 Sleep : zmin” or “Z4 Sleep : zmin” appears
on the display.
z Countdown time
To cancel the sleep timer
Press SLEEP to set “Off”.
The sleep timer is also cancelled when this unit is set to the standby
mode or the ZONE2, ZONE3 or ZONE4 power is turned off.
NOTE
The sleep timer function cannot turn off the power of devices
connected to this unit. To turn off the power of those connected
devices, set up sleep timers on the connected devices themselves.
Basic version
Advanced version
Informations
Advanced version
DVD

114
Menu map
For menu operation, connect a TV to this unit and display the menu on the TV screen. For menu operations, see the following page.
By default, this unit has recommended settings defined. You can customize this unit based on your existing system and your preferences.
How to make detailed settings
Setting items Detailed items Description Page
Audio
Dialog Enhancer Adjusts and enhances the frequency band
corresponding to the human voice at the center
channel to make the voice clearer.
121
Subwoofer Level This setting adjusts the volume level for the
subwoofer.
121
Surround Parameter Adjusts surround sound parameters.
121
Tone Adjusts the tonal quality of the sound.
123
Restorer Expands the low and high frequency components
of compressed audio to enable richer audio
playback.
124
Audio Delay Compensates for incorrect timing between video
and audio.
124
Volume Set the MAIN ZONE (room where the unit is
located) volume setting.
124
Audyssey Makes Audyssey MultEQ
®
XT 32, Audyssey
Dynamic EQ
®
, Audyssey Dynamic Volume
®
,
Audyssey LFC™ and Audyssey DSX
®
settings.
125
Graphic EQ Uses the graphic equalizer to adjust the tone of
each speaker.
127
Video
Picture Adjust Adjusts the video quality.
129
HDMI Setup Makes settings for HDMI video/audio output.
129
Output Settings Makes screen-related settings.
131
Analog Video Out Assigns the zone that uses the VIDEO MONITOR
OUT connectors.
132
On Screen Display Select the on-screen display user interface
preferences.
133
TV Format Set the video signal format to be output for the
TV you are using.
133
Setting items Detailed items Description Page
Inputs
Input Assign Changes input connector assignment.
135
Source Rename Changes the display name for this source.
137
Hide Sources Remove from the display input sources that are
not used.
137
Source Level Adjusts the playback level of the audio input.
137
Input Select Sets the audio input mode and decode mode.
138
Video Source Video of another input source is played back
combined with the playing audio.
138
Speakers
Audyssey
®
Setup The acoustic characteristics of the connected
speakers and listening room are measured and
the optimum settings are made automatically.
33,99
Manual Setup Perform when setting the speakers manually
or when changing settings made in Audyssey
®
Setup.
141
Network
Information Display network information.
147
Network Enables network communication in standby
power mode.
147
Friendly Name The Friendly Name is the name of this unit
displayed on the network. You can change the
Friendly Name according to your preferences.
147
Settings Make settings for wired LAN.
148
Diagnostics Used to check the network connection.
149
Maintenance Mode Use when receiving maintenance from a DENON
service engineer or custom installer.
149
Basic version
Advanced version
Informations
Advanced version
v See overleaf
DVD
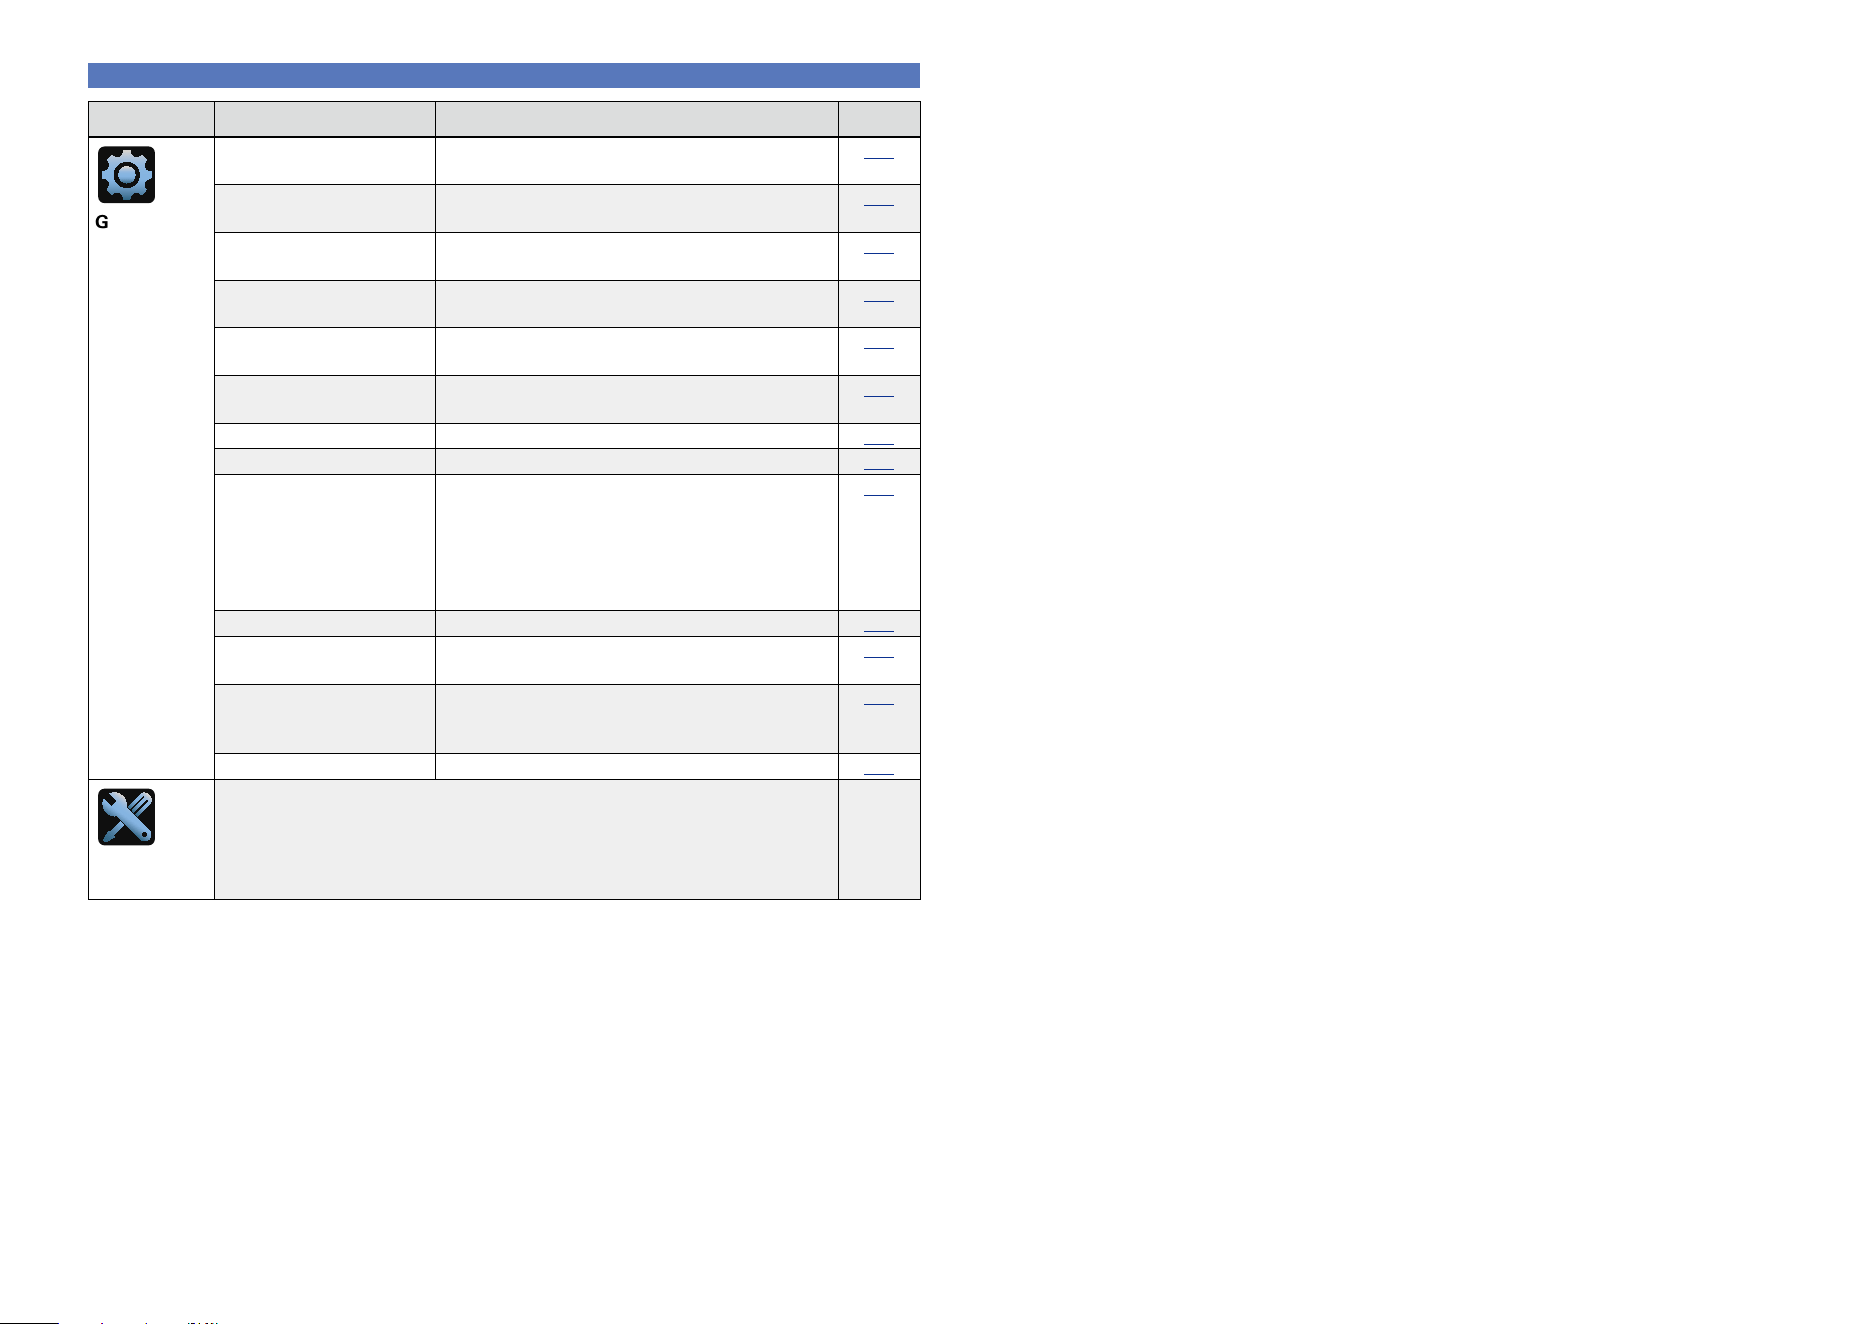
115
Menu map
Setting items Detailed items Description Page
General
Language Sets the language for display the menu on the
TV screen.
151
ZONE2 Setup Makes settings for audio playback in a ZONE2
system.
151
ZONE3 Setup Makes settings for audio playback in a ZONE3
system.
151
Zone Rename Change the display title of each zone to one you
prefer.
152
Quick Select Names Change the “Quick Select” display title to one
you prefer.
152
Remote ID Specifies with remote control code set this AVR
will respond to.
152
Trigger Out 1 Selects when to activate trigger out 1.
152
Trigger Out 2 Selects when to activate trigger out 2.
152
Auto Standby When you do not perform any operation on this
unit with no audio or video input for a specified
time, this unit automatically enters the standby
mode. Before it enters the standby mode, “Auto
Standby” is displayed on the display of this unit
and the menu screen.
153
Front Display Makes settings related to the display on this unit.
153
Information Show information about receiver settings, input
signals, etc.
153
Firmware Set whether or not to check for firmware update,
update the firmware, and display update and
upgrade notifications.
154
Setup Lock Protect settings from inadvertent change.
156
Setup
Assistant
Perform the installation, connection, and setup procedures to prepare the
unit for operation following guidance.
C 7
Basic version
Advanced version
Informations
Advanced version
DVD

116
Examples of menu screen displays
Typical examples are described below.
GExample 1H
Menu selection screen (Top menu)
Audio
Dialog Enhancer
Subwoofer Level
Surround Parameter
Tone
Restorer
Audio Delay
Volume
Audyssey
Graphic EQ
Adjusts the amount of emphasis on the center
channel to make dialog easier to hear
q Currently selected setup item
w List of GUI menu setup items
Use ui to select “Audio”
and then press p.
(Or press ENTER.)
r
e
Setup Menu
Audio
Video
Inputs
Speakers
Network
General
Setup Assistant
q
w
e Selected setup item
r Guide text for the currently selected setup item
GExample 2H
Audyssey
®
Setup screen (with illustration)
Audyssey Setup
Channel Select
Amp Assign
Check Results
Restore...
Start
Your AV receiver can automatically measure the acoustics of
your room then optimize your speakers using the included
microphone.
Set the following items
if necessary.
y
i
u
t Currently selected setup icon
y Operation guidance text
u Illustration
i Selected setup item
t
NOTE
When the menu is operated on a computer’s resolution (e.g. VGA)
or during playback of certain 3D video content, the playback image
switches to the menu screen image.
Basic version
Advanced version
Informations
Advanced version
DVD
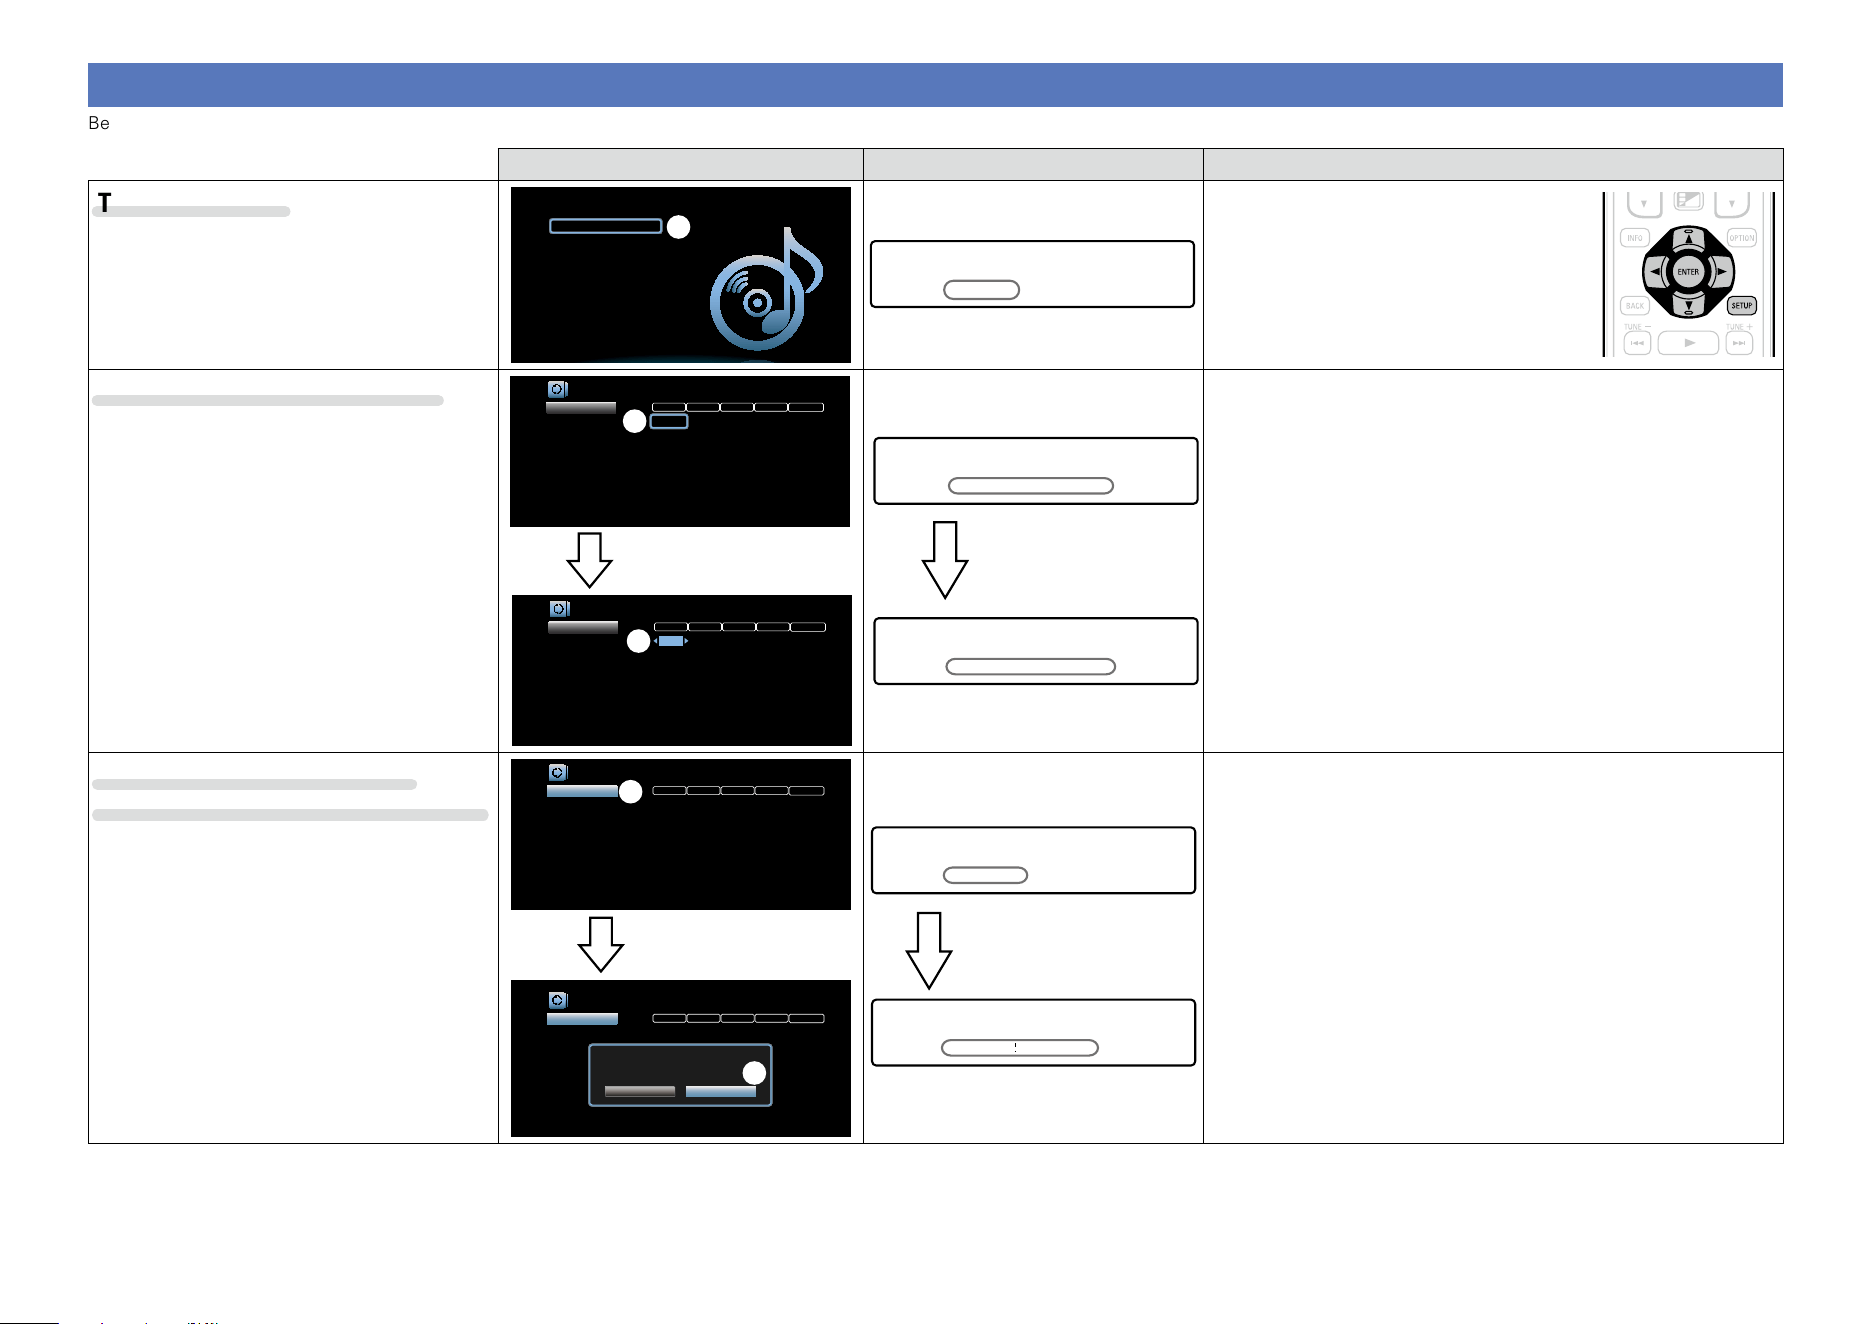
117
Examples of menu and front display
Below we describe typical examples of displays on the TV screen and on the set’s display window.
Menu display Front display Description
Top menu display
Setup Menu
Audio
Video
Inputs
Speakers
Network
General
Setup Assistant
w
*SETUP MENU
Audio
w
q Press SETUP to display the menu screen.
w TV screen: Displays the selected line.
Display: Displays the selected item.
•Use ui to move to the item you want to
set.
Display when changing settings
DIGITAL ANALOGHDMI COMP VIDEO
Inputs/Input Assign
Set Defaults
CBL/SAT
DVD
Blu-ray
GAME
MEDIA PLAYER
TV AUDIO
AUX1
AUX2
CD
1
2
3
4
5
-
Front
6
-
1
2
3
4
6
-
Front
-
5
1
2
3
-
-
-
-
-
-
1
2
-
-
3
-
Front
-
-
COAX1
COAX2
D.LINK
-
-
OPT1
-
-
OPT2
Changes HDMI input assignments
q
DIGITAL ANALOGHDMI COMP VIDEO
Inputs/Input Assign
Set Defaults
CBL/SAT
DVD
Blu-ray
GAME
MEDIA PLAYER
TV AUDIO
AUX1
AUX2
CD
1
2
3
4
5
-
Front
6
-
1
2
3
4
6
-
Front
-
5
1
2
3
-
-
-
-
-
-
1
2
-
-
3
-
Front
-
-
COAX1
COAX2
D.LINK
-
-
OPT1
-
-
OPT2
Changes HDMI input assignments
w
Press ENTER.
*INPUT ASSIGN
CBL/SAT [HDMI1 ]
q
*INPUT ASSIGN
CBL/SAT •HDMI1 –
e
Press ENTER.
q TV screen: Displays the selected line.
Display: Displays the selected item.
•Use
ui to move to the item you want to set.
w Press ENTER to set to the mode in which the setting can be made.
e 0 1 is displayed at the sides of items whose setting can be
changed. Use o p to change to the desired setting.
Display when returning to the
settings in effect at time of purchase
DIGITAL ANALOGHDMI COMP VIDEO
Inputs/Input Assign
Set Defaults
CBL/SAT
DVD
Blu-ray
GAME
MEDIA PLAYER
TV AUDIO
AUX1
AUX2
CD
1
2
3
4
5
---
Front
6
-
1
2
3
4
6
---
Front
-
5
1
2
3
-
-
-
-
-
-
1
2
-
-
3
-
Front
-
-
COAX1
COAX2
D.LINK
---
---
OPT1
-
-
OPT2
Resets all surround parameters to the factory defaults
Reset to the default values?
Reset Cancel
w
Press ENTER.
DIGITAL ANALOGHDMI COMP VIDEO
Inputs/Input Assign
Set Defaults
CBL/SAT
DVD
Blu-ray
GAME
MEDIA PLAYER
TV AUDIO
AUX1
AUX2
CD
1
2
3
4
5
-
Front
6
-
1
2
3
4
6
-
Front
-
5
1
2
3
-
-
-
-
-
-
1
2
-
-
3
-
Front
-
-
COAX1
COAX2
D.LINK
-
-
OPT1
-
-
OPT2
Resets all surround parameters to the factory defaults
q
*INPUT ASSIGN
Reset? •Cancel
w
*INPUT ASSIGN
Default
q
Press ENTER.
q Press
u to select “Set Defaults” or “Default”, then press ENTER.
w Press o to select “Reset”, then press ENTER.
Basic version
Advanced version
Informations
Advanced version
DVD
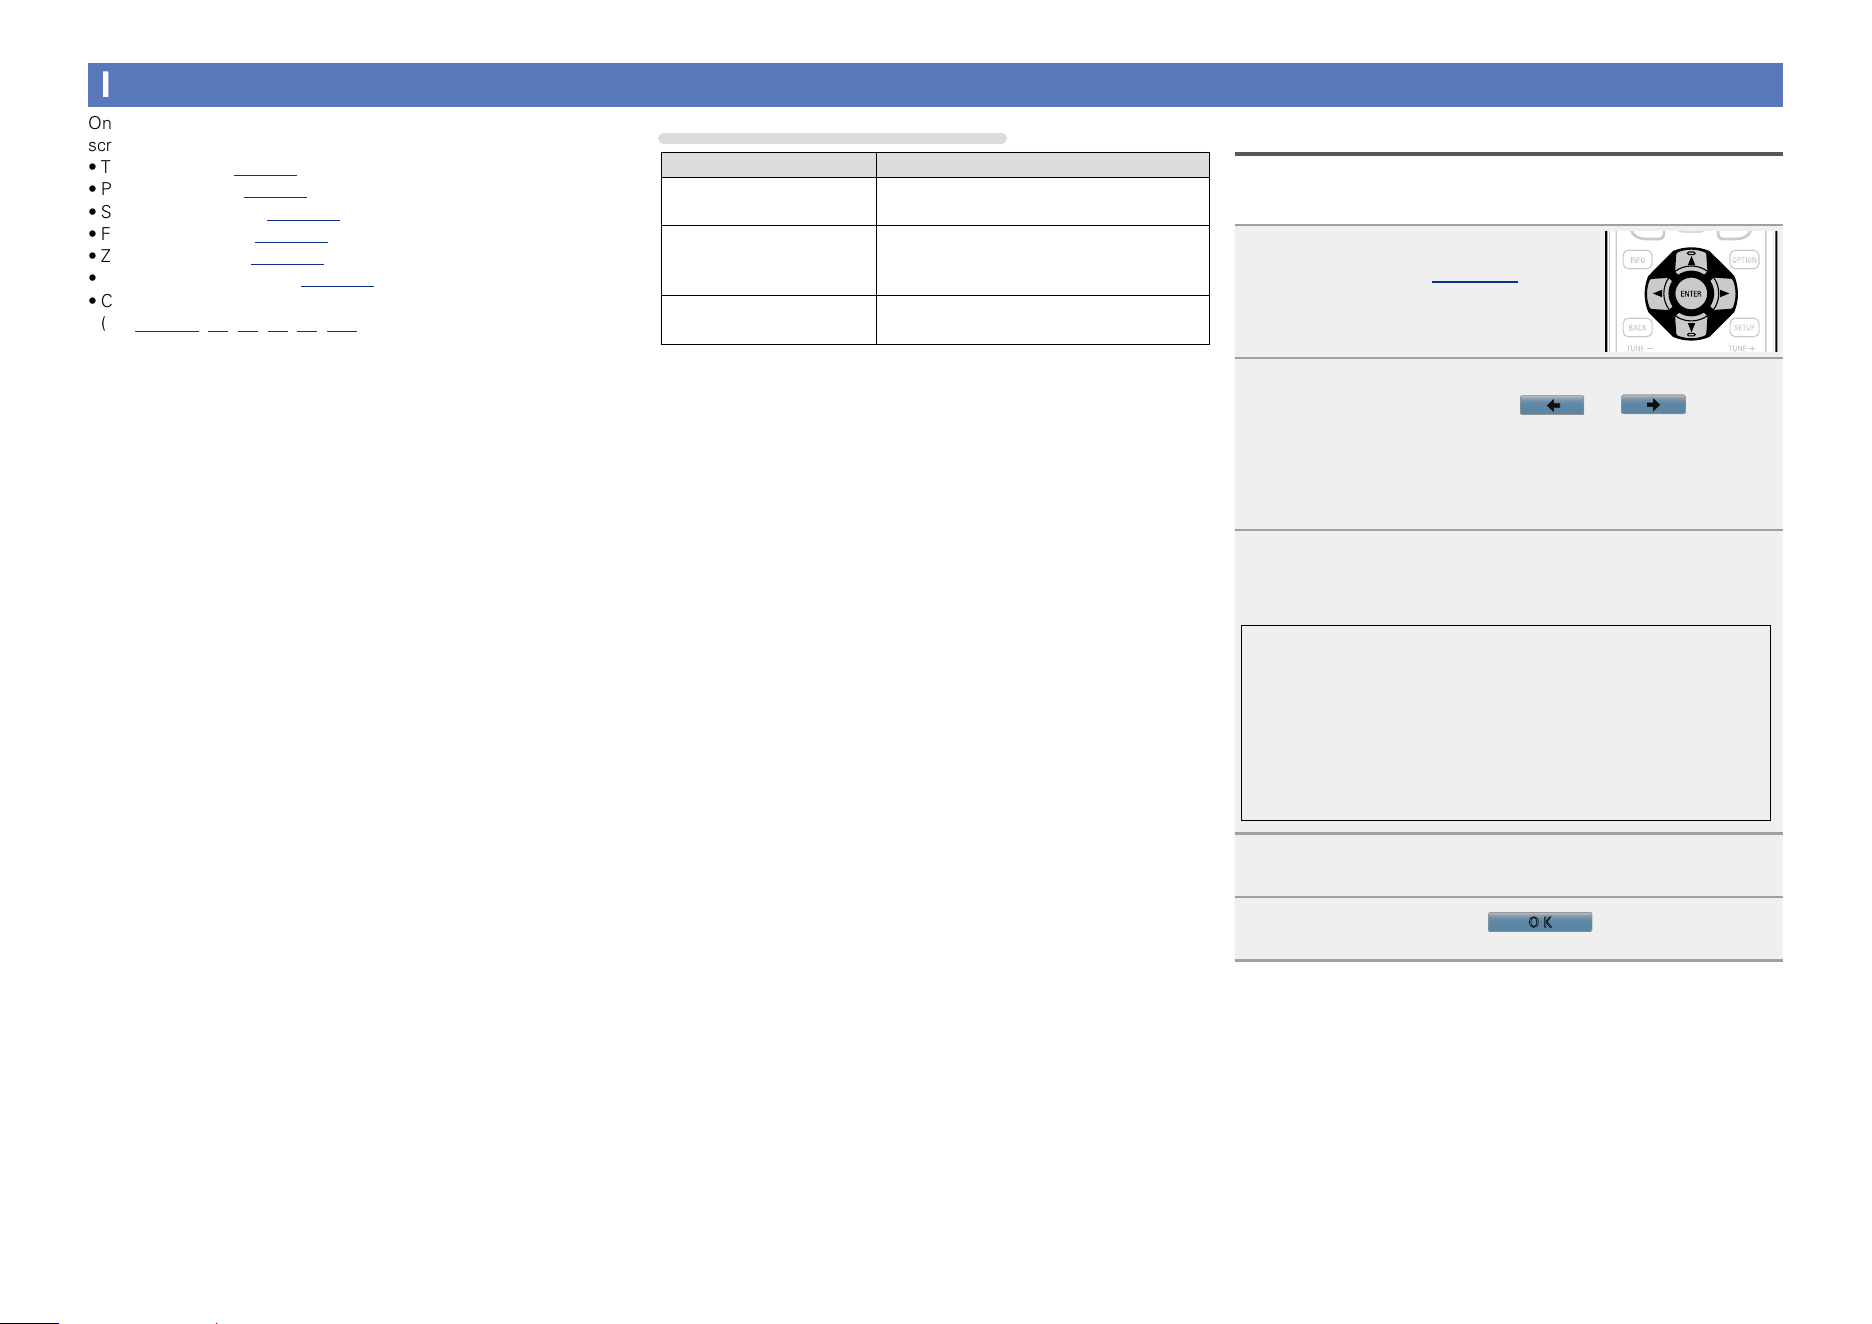
118
Inputting characters
On this unit, you can change the name displayed on the following
screens to the names that you prefer.
•Text Search (vpage76)
•Preset Name (vpage56)
•Source Rename (vpage137)
•Friendly Name (vpage147)
•Zone Rename (vpage152)
•Quick Select Names (vpage152)
•Character input for the network functions
(vpage59, 67, 69, 72, 74, 148)
Method for inputting characters
Method Operations
Using the keyboard
screen
•Select a character on the TV screen to
input characters.
Using the number
buttons
(10 Key input screen)
•Multiple characters are assigned to
a button, and each time the button is
pressed, a character is switched.
Using the cursor buttons
(10 Key input screen)
•Use
uio p and ENTER to input
characters.
Keyboard screen
Select a character on the TV screen to input characters.
n Input method
1
Display the screen for inputting
characters (vpage 114 “Menu
map”).
2
Select a character to be changed.
q Use uio p to select or .
w Press ENTER to place the cursor at the character
to be changed.
Each time ENTER is pressed, the cursor moves by one
character.
3
Select a character to be input with uio p then
press ENTER.
•The types of characters that can be input are as shown below.
GUpper case characters/Numbers/SymbolsH
ABCDEFGHIJKLMNOPQRSTUVWXYZ
0123456789
! “ # $ % & ’ ( ) z + , ; < = >
GLower case characters/Numbers/SymbolsH
abcdefghijklmnopqrstuvwxyz
0123456789
. @ - _ / : ˜ ? [ \ ] ^ ’ { | }
4
Repeat steps 2 and 3 to change the name.
5
Use uio p to select
O K
, then press ENTER.
Basic version
Advanced version
Informations
Advanced version
v See overleaf
DVD
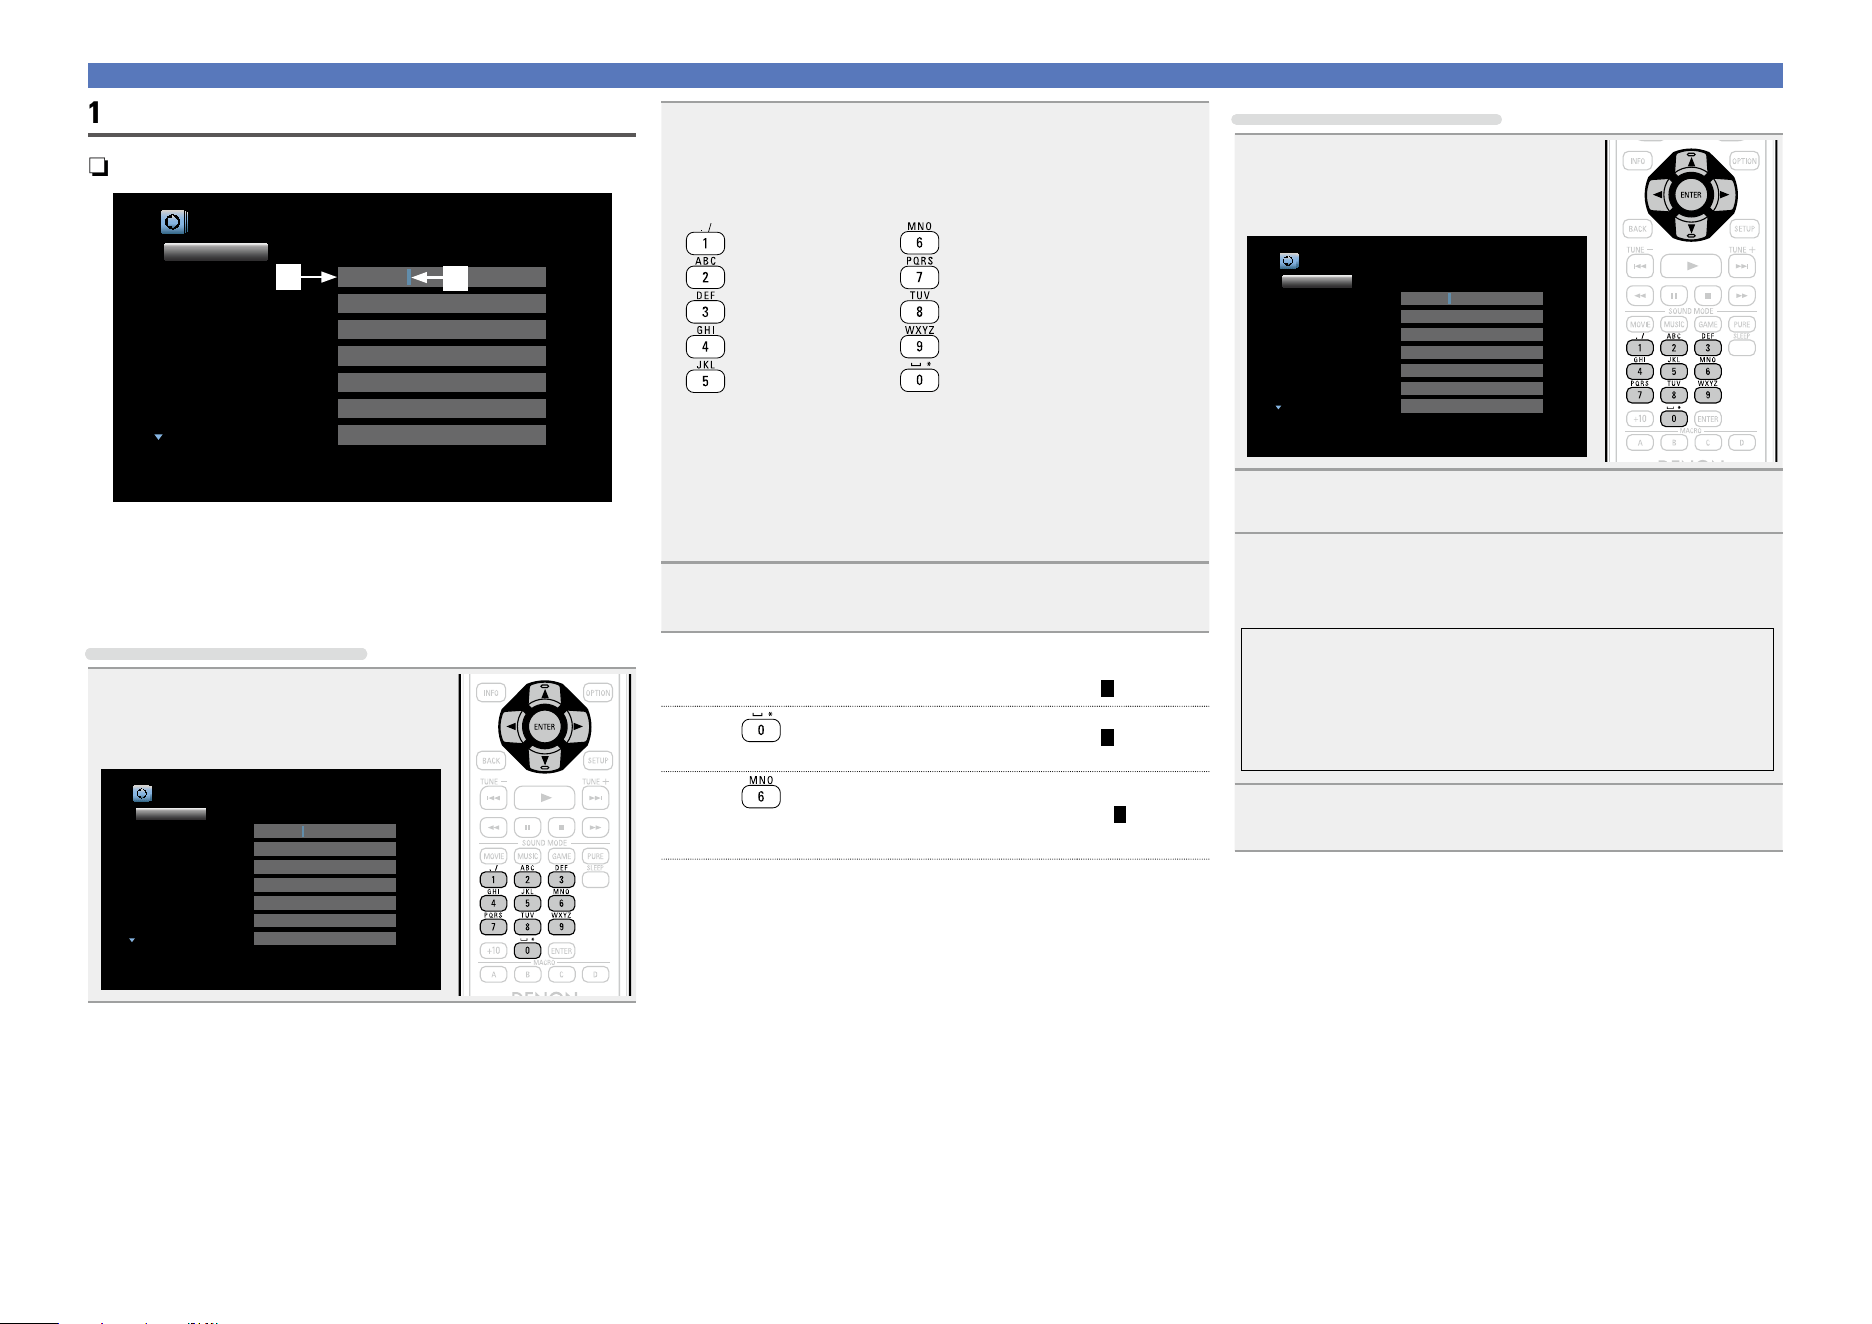
119
Inputting characters
10 Key input screen
n Display of a 10 Key input screen
Inputs/Source Rename [1/2]
Changes the display name for this source
Set Defaults
CBL/SAT
DVD
Blu-ray
GAME
MEDIA PLAYER
TV AUDIO
AUX1
CBL/SAT
DVD
Blu-ray
GAME
MEDIA PLAYER
TV AUDIO
AUX1
w
q
q Character input section
w Cursor
n Input method
Using the number buttons
1
When the keyboard screen is
displayed, press 0 – 9.
The 10 key input screen is displayed.
Inputs/Source Rename [1/2]
Changes the display name for this source
Set Defaults
CBL/SAT
DVD
Blu-ray
GAME
MEDIA PLAYER
TV AUDIO
AUX1
CBL/SAT
DVD
Blu-ray
GAME
MEDIA PLAYER
TV AUDIO
AUX1
2
Place the cursor at the character to be changed with
o p and press the number button (0 – 9) until the
desired character is displayed.
•The types of characters that can be input are as shown below.
1 . @ - _ / : ˜ M N O m n o 6
A B C a b c 2 P Q R S p q r s 7
D E F d e f 3 T U V t u v 8
G H I g h i 4 W X Y Z w x y z 9
J K L j k l 5
0 (Space) ! “ # $ % & ‘ ( ) z + ,
; < = > ? [ \ ] ^ ` { | }
•For entering the characters assigned to one number button
continuously, press
p to move the cursor to the right after entering
a character then enter the next character.
•For entering characters assigned to separate buttons, press the
number button continuously. The cursor automatically moves to
the next position, and the entered character is registered.
3
Repeat step 2 to change the name then press ENTER
to register it.
Example: For changing the input source from “DVD” to “D&M”
q Place the cursor at “V”.
DVD
w Press
eight times.
D&D
“V” changes to “&”.
e Press
.
D&M
“&” is automatically registered, and “D” changes
to “M”.
r Press
ENTER to register the input source name.
Using the cursor buttons
1
When the keyboard screen is
displayed, press 0 – 9.
Inputs/Source Rename [1/2]
Changes the display name for this source
Set Defaults
CBL/SAT
DVD
Blu-ray
GAME
MEDIA PLAYER
TV AUDIO
AUX1
CBL/SAT
DVD
Blu-ray
GAME
MEDIA PLAYER
TV AUDIO
AUX1
2
Use o p to set the cursor to the character.
3
Use ui to change the character.
•The types of characters that can be input are as shown below.
GUpper case charactersH
ABCDEFGHIJKLMNOPQRSTUVWXYZ
GLower case charactersH
abcdefghijklmnopqrstuvwxyz
GSymbolsH ! “ # $ % & ‘ ( ) z + , - . / : ; < = > ? @ [ \ ] ^ _ ` { | } ˜
GNumbersH
0123456789 (Space)
4
Repeat steps 2 and 3 to change the name then press
ENTER to register it.
Basic version
Advanced version
Informations
Advanced version
DVD
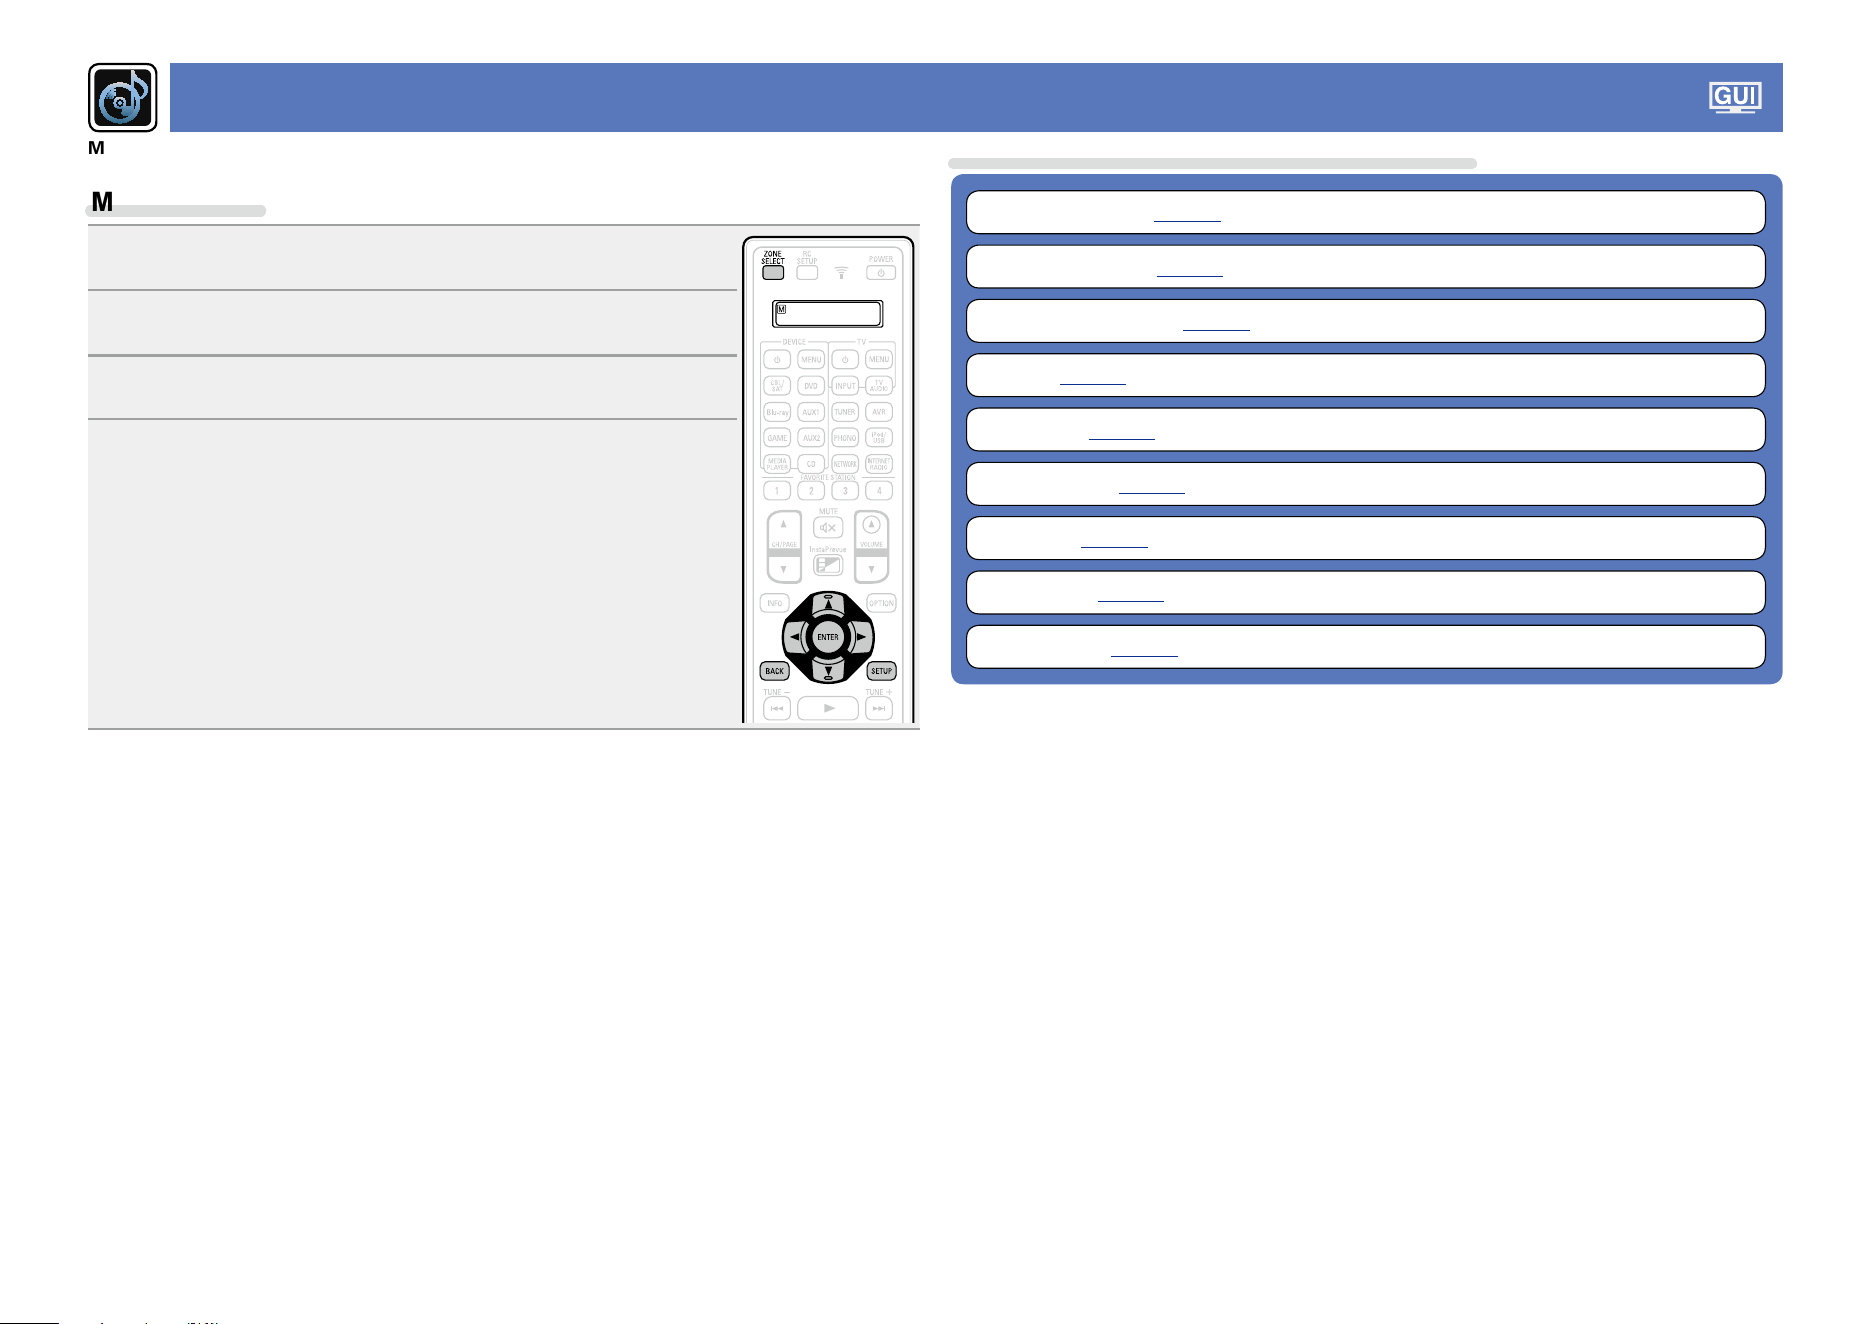
120
Audio
Make audio-related settings.
Menu operation
1
Press ZONE SELECT to switch the zone mode.
The J indicator lights.
2
Press SETUP.
The menu is displayed on the TV screen.
3
Use ui to select the menu to be set or operated.
4
Press ENTER or p to enter the setting.
•To return to the previous item, press o or BACK.
•Exiting the Menu, press SETUP while the menu is displayed.
The menu display disappears.
Items that can be set with the “Audio” procedure
Dialog Enhancer (vpage121)
Subwoofer Level (vpage121)
Surround Parameter (vpage121)
Tone (vpage123)
Restorer (vpage124)
Audio Delay (vpage124)
Volume (vpage124)
Audyssey (vpage125)
Graphic EQ (vpage127)
Basic version
Advanced version
Informations
Advanced version
DVD
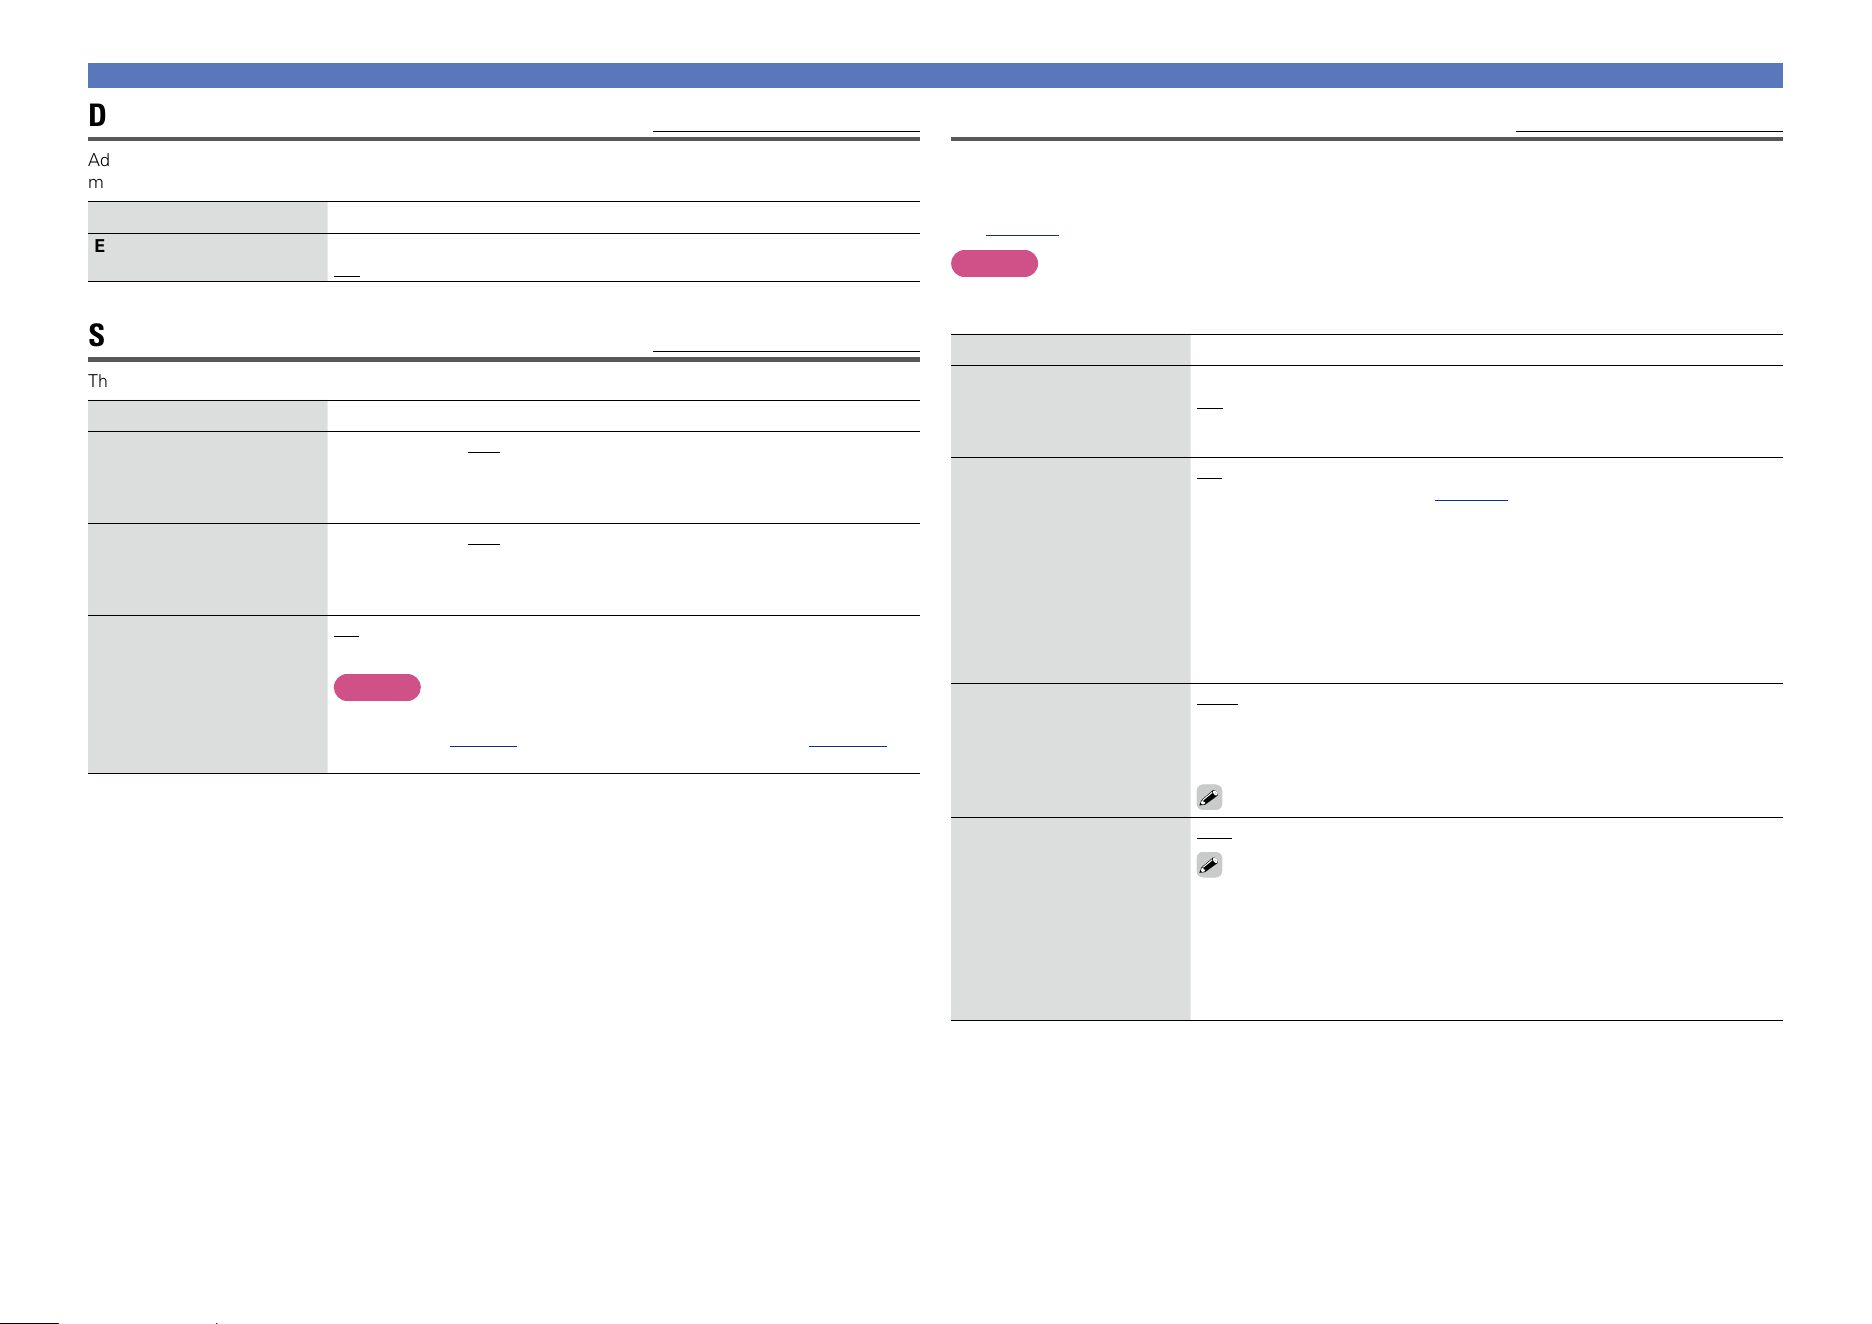
121
Surround Parameter
Default settings are underlined.
You can adjust the surround audio sound field effects to match your preferences.
The items (parameters) that can be adjusted depend on the signal being input and the currently set
sound mode. For details on the adjustable parameters, see “Sound modes and surround parameters”
(vpage184).
NOTE
•Some setting items cannot be set while playback is stopped. Make the settings during playback.
•When the sound mode is “PURE DIRECT”, you cannot set the surround parameters.
Setting items Setting details
Cinema EQ
Softens the treble range
of movie soundtracks for
better understanding.
On : “Cinema EQ” is used.
Off : “Cinema EQ” is not used.
Loudness Management
This can be set in the
Dolby TrueHD mode.
This sets whether to
output as specified in
“Dynamic Compression”
or output directly without
compressing the dynamic
range of audio recorded in
the disc.
On : Outputs using the settings made in “Dynamic Compression” and
“Dialogue normalization” (vpage153) are enabled.
Off : “Dynamic Compression” settings and “Dialogue normalization” are
disabled, and the signals on the disk are output as is.
Dynamic Compression
Compress dynamic range
(difference between loud
and soft sounds).
Auto : Automatic dynamic range compression on/off control according to
source.
Low / Medium / High : These set the compression level.
Off : Dynamic range compression always off.
You can set “Auto” only for the Dolby TrueHD source.
Bass Sync
For contents recorded in
multi-channel such as Blu-
ray discs, the recorded low
frequency effects (LFE) may
be out of synch and delayed.
This function corrects such
a delay of low frequency
effects (LFE).
0ms – 16ms
How low frequency effects (LFE) are delayed differ according to the
disc. Set this to the desired value.
Dialog Enhancer
Default settings are underlined.
Adjusts and enhances the frequency band corresponding to the human voice at the center channel to
make the voice clearer.
Setting items Setting details
Enhancer
Low / Medium / High : Enhances the human voice.
Off : Does not enhance the human voice.
Subwoofer Level
Default settings are underlined.
This setting adjusts the volume level for the subwoofer.
Setting items Setting details
Subwoofer 1 Level
This setting adjusts the
volume level for the
subwoofer 1.
–12dB – +12dB (0dB)
Subwoofer 2 Level
This setting adjusts the
volume level for the
subwoofer 2.
–12dB – +12dB (0dB)
Subwoofer
Turn subwoofer output on
and off.
On : The subwoofer is used.
Off : The subwoofer is not used.
NOTE
This can be set when the sound mode is “DIRECT” and “PURE
DIRECT” (vpage 84) and the “Subwoofer Mode” (vpage 144) is
“LFE+Main”.
Audio
Basic version
Advanced version
Informations
Advanced version
v See overleaf
DVD
122
Setting items Setting details
Center Width
Distributes the dialogue
output from the center
channel to left and right
channels and widens the
sound image in the front.
You can set this when the
sound mode is Dolby PLgx
in the “Music” mode.
0 – 7 (3)
The smaller the value, the more dialogue is concentrated on the center
channel. The larger the value, the more dialogue is distributed to front
left and right channels, and the more the sound image widens in the
front.
Delay Time
Adjust the audio delay time
against video to extend the
sound field image. You can
set this when the sound
mode is “MATRIX”.
0ms – 300ms (30ms)
Effect Level
Adjust the sound effect
level. You can set this when
the sound mode is original
listening mode.
1 – 15 (10)
Set to a lower level if the positioning and sense of phase of the
surround signals seems unnatural.
Room Size
Determine size of acoustic
environment. You can set
this when the sound mode
is original listening mode.
Small : Simulate acoustics of a small room.
Medium small : Simulate acoustics of a medium-small room.
Medium : Simulate acoustics of a medium room.
Medium large : Simulate acoustics of a medium-large room.
Large : Simulate acoustics of a large room.
NOTE
“Room Size” does not indicate the size of the room in which sources are
played.
Audio
Setting items Setting details
Low Frequency Effects
Adjust the low-frequency
effects level (LFE).
n When “Input Mode” (vpage138) is set other than to “EXTERNAL IN”
–10dB – 0dB
n When “Input Mode” (vpage138) is set to “EXTERNAL IN”
0dB / 5dB / 10dB / 15dB
For proper playback of the different sources, we recommend setting
to the values below.
•Dolby Digital sources : 0dB
•DTS movie sources : 0dB
•DTS music sources : –10dB
Center Gain
Distributes the dialogue
output from the center
channel to the front left and
right channels and widens
the sound image in the
front. You can set this when
the sound mode is set to
DTS NEO:X.
0.0 – 1.0
Panorama
Assign front L/R signal also
to surround channels for
wider sound. You can set
this when the sound mode
is Dolby PLg in the “Music”
mode.
On : Set.
Off : Do not set.
Dimension
Shift sound image center
to front or rear to adjust
playback balance. You can
set this when the sound
mode is Dolby PLg in the
“Music” mode.
0 – 6 (3)
As you set a smaller number, the surround sound field shifts backward;
as you set a larger number, the surround sound field shifts forward.
Basic version
Advanced version
Informations
Advanced version
v See overleaf
DVD
123
Tone
Default settings are underlined.
Adjust the tonal quality of the sound.
Setting items Setting details
Tone Control
Set the tone control function
to “On” and “Off”.
On : Allow tone adjustment (bass, treble).
Off : Playback without tone adjustment.
“Tone Control” can be set when “Dynamic EQ” (vpage125) is set
to “Off”.
NOTE
•“Tone Control” settings are not reflected to ZONE2 and ZONE3.
•The tone cannot be adjusted in the “DIRECT” and “PURE DIRECT”
mode.
Bass
Adjust bass.
–6dB – +6dB (0dB)
“Bass” can be set when the menu “Tone Control” setting is “On”.
Treble
Adjust treble.
–6dB – +6dB (0dB)
“Treble” can be set when the menu “Tone Control” setting is “On”.
Audio
Setting items Setting details
Height Gain
Control the front height
channel volume.
Low : Reduce the front height channel volume.
Normal : Front height channel sound is output with standard sound
volume.
High : Increase the front height channel volume.
NOTE
“Height Gain” is displayed for the following settings.
•When the “Speaker Config.” – “Front Height” setting (vpage142) is
set other than to “None”.
•When sound mode is “PLgz” or the PLgz decoder is used.
Speaker Select
Makes settings for the
speakers outputting sound.
n When “Assign Mode” (vpage 141) is set to “7.1ch + ZONE2”, “7.1ch +
ZONE2/3-MONO” and “7.1ch(Bi-Amp)”
Surround Back : Sound is output from the surround back speakers.
Height : Sound is output from the front height speakers.
Wide : Sound is output from the front wide speakers.
n When “Assign Mode” (vpage141) is set to “9.1ch(SB/FH/FW)”
Back/Height : Sound is output from the surround back and front height
speakers.
Back/Wide : Sound is output from the surround back and front wide
speakers.
Height/Wide : Sound is output from the front height and front wide
speakers.
NOTE
Only speakers that are set to something other than “None” in “Speaker
Config.” (vpage142) can be selected.
Set Defaults
The “Surround Parameter”
settings are returned to the
default settings.
Reset : Reset to the defaults.
Cancel : Do not reset to the defaults.
When you select “Set Defaults” and press
ENTER, the “Reset all surround parameters
to the factory defaults?” prompt is displayed.
Select either “Reset” or “Cancel”, and press
ENTER.
Basic version
Advanced version
Informations
Advanced version
DVD
124
Audio
Restorer
Compressed audio formats such as MP3, WMA (Windows Media Audio) and MPEG-4 AAC reduce the
amount of data by eliminating signal components that are hard for the human ear to hear. The “Restorer”
function generates the signals eliminated upon compression, restoring the sound to conditions near those
of the original sound before compression. It also corrects the sense of volume of the bass to obtain richer
sound with compressed audio signals.
Setting items Setting details
Mode
Set the mode for
“Restorer”.
Mode 1 (High) : Optimized mode for compressed sources with very weak
highs (64 kbps and under).
Mode 2 (Middle) : Apply suitable bass and treble boost for all compressed
sources (96 kbps and under).
Mode 3 (Low) : Optimized mode for compressed sources with normal
highs (96 kbps and over).
Off : Do not use “Restorer”.
•This item can be set with analog signals or PCM signal (Sample Rate =
44.1/48 kHz) is input.
•“Restorer” settings are stored for each input source.
•This item default setting for “NETWORK” and “iPod/USB” is “Mode 3
(Low)”. All others are set to “Off”.
•This cannot be set when the sound mode is set to “DIRECT” or “PURE
DIRECT”.
Audio Delay
Default settings are underlined.
While viewing video, manually adjust the time to delay audio output.
Setting details
0ms – 200ms
•This item can be set within the range of 0 to 100 ms when “Auto Lip Sync” (vpage129) is set to
“On” and when a TV compatible with Auto Lip Sync is connected.
•Store “Audio Delay” for each input source.
•Audio Delay for game mode can be set when “Video Mode” (vpage 131) is set to “Auto” or
“Game”.
Volume
Default settings are underlined.
Set the MAIN ZONE (room where the unit is located) volume setting.
Setting items Setting details
Scale
Set how volume is
displayed.
0 – 98 : Display in the range 0 (Min) to 98.
–79.5dB – 18.0dB : Display ---dB (Min), in the range –79.5 dB to 18.0 dB.
•The “Scale” setting is applied also to the “Limit” and “Power On Level”
display method.
•The “Scale” setting applies to all zones.
Limit
Make a setting for
maximum volume.
60 (–20dB) / 70 (–10dB) / 80 (0dB)
Off : Do not set a maximum volume.
Power On Level
Define the volume setting
that is active when the
power is turned on.
Last : Use the memorized setting from the last session.
Mute : Always use the muting on condition when power is turned on.
1 – 98 (–79dB – 18dB) : The volume is adjusted to the set level.
Mute Level
Set the amount of
attenuation when muting
is on.
Full : The sound is muted entirely.
–40dB : The sound is attenuated by 40 dB down.
–20dB : The sound is attenuated by 20 dB down.
Basic version
Advanced version
Informations
Advanced version
DVD
125
Audio
Audyssey
Default settings are underlined.
Set Audyssey MultEQ
®
XT 32, Audyssey Dynamic EQ
®
, Audyssey Dynamic Volume
®
, Audyssey LFC™
and Audyssey DSX
®
. These can be selected after Audyssey
®
Setup has been performed. For additional
information on Audyssey technology, please see page193.
NOTE
•If you have not performed Audyssey
®
Setup, or if you change the speaker settings after performing
Audyssey
®
Setup, you may not be able to select Dynamic EQ/Dynamic Volume.
In this case, either perform Audyssey
®
Setup over again or perform “Restore...” (vpage 40) to
return to the settings after Audyssey
®
Setup was run.
•When HD Audio for which the sampling frequency exceeds 96 kHz is played back, the “Audyssey”
cannot be set.
Setting items Setting details
MultEQ
®
XT 32
MultEQ
®
XT 32
compensates for both
time and frequency
characteristics of the
listening area based
on Audyssey
®
Setup
measurement results.
Selection is done from three
types of compensation
curves. We recommend the
“Audyssey” setting.
MultEQ
®
XT 32 is the
prerequisite function for
Dynamic EQ, Dynamic
Volume and Audyssey
LFC™.
Audyssey : Optimize the frequency response of all speakers.
Audyssey Byp.L/R : Optimize frequency response of speakers except
front L and R speakers.
Audyssey Flat : Optimize frequency response of all speakers to flat
response.
Graphic EQ : Apply frequency response set with “Graphic EQ”
(vpage127).
Off : Turn “MultEQ
®
XT 32” equalizer off.
•“Audyssey”, “Audyssey Byp. L/R” and “Audyssey Flat” can be
selected after Audyssey
®
Setup has been performed. “Audyssey”
is automatically selected after performing Audyssey
®
Setup. When
“Audyssey”, “Audyssey Byp. L/R” or “Audyssey Flat” is selected,
illuminates.
•After running Audyssey
®
Setup, if the Speaker Configuration, Distance,
Channel Level, and Crossover Frequency have changed without
increasing the number of speakers measured, only illuminates.
NOTE
When using headphones, “MultEQ
®
XT 32” is automatically set to “Off”.
“MultEQ
®
XT 32”, “Dynamic EQ” and “Dynamic Volume” settings are stored for each input source.
Setting items Setting details
Dynamic EQ
Solve the problem of
deteriorating sound quality
as volume is decreased
by taking into account
human perception and
room acoustics. Works with
MultEQ
®
XT 32.
On : Use Dynamic EQ.
Off : Do not use Dynamic EQ.
is displayed when set to “On”.
NOTE
When the menu “Dynamic EQ” setting is “On”, it is not possible to do
“Tone Control” (vpage123) adjustment.
Reference Level Offset
Audyssey Dynamic EQ
®
is
referenced to the standard
film mix level. It makes
adjustments to maintain
the reference response
and surround envelopment
when the volume is turned
down from 0 dB. However,
film reference level is not
always used in music or
other non-film content.
Dynamic EQ Reference
Level Offset provides three
offsets from the film level
reference (5 dB, 10 dB, and
15 dB) that can be selected
when the mix level of the
content is not within the
standard. Recommended
setting levels are shown at
right.
0dB (Film Ref) : This is the default setting and should be used when
listening to movies.
5dB : Select this setting for content that has a very wide dynamic range,
such as classical music.
10dB : Select this setting for jazz or other music that has a wider dynamic
range. This setting should also be selected for TV content as that is usually
mixed at 10 dB below film reference.
15dB : Select this setting for pop/rock music or other program material
that is mixed at very high listening levels and has a compressed dynamic
range.
Setting is enabled when “Dynamic EQ” is “On” (vpage125).
Basic version
Advanced version
Informations
Advanced version
v See overleaf
DVD
126
Audio
Setting items Setting details
Dynamic Volume
Solve the problem of large
variations in volume level
between TV, movies and
other content (between
quiet passages and
loud passages, etc.) by
automatically adjusting to
the user’s preferred volume
setting.
Heavy : Most adjustment to softest and loudest sounds.
Medium : Medium adjustment to loudest and softest sound.
Light : Least adjustment to loudest and softest sounds.
Off : Do not use “Dynamic Volume”.
• is displayed when set to “Heavy”, “Medium” or “Light”.
•If “Dynamic Volume” is set to “Yes” in “Audyssey
®
Setup”
(vpage37), the setting is automatically changed to “Medium”.
Audyssey LFC™
Adjusts the low frequency
band to prevent bass
and vibration from being
conveyed to neighboring
rooms.
On : Use “Audyssey LFC™”.
Off : Do not use “Audyssey LFC™”.
“Audyssey LFC™” cannot be set up if “Audyssey
®
Setup” is not
completed.
About Audyssey LFC™ (Low Frequency Containment)
Audyssey LFC™ solves the problem of low frequency sounds
disturbing people in neighboring rooms or apartments. Audyssey
LFC™ dynamically monitors the audio content and removes the low
frequencies that pass through walls, floors and ceilings. It then applies
psychoacoustic processing to restore the perception of low bass for
listeners in the room. The result is great sound that no longer disturbs
the neighbors.
Containment Amount
Adjusts the amount of low
frequency containment. Use
higher settings if you have
close neighbors.
1 – 7 (4)
Audyssey DSX
®
Provides more immersive
surround sound by adding
the new channels.
Wides/Heights : Turns on Audyssey DSX
®
processing for wide and
height expansion.
Wides : Turn on Audyssey DSX
®
processing for wide expansion.
Heights : Turn on Audyssey DSX
®
processing for height expansion.
Off : Do not set Audyssey DSX
®
.
NOTE
“Audyssey DSX
®
” cannot be configured if the HD Audio source being
played includes Front height and Front wide channels. In this case, the
respective channels are played back using the input signals.
Setting items Setting details
Stage Width
Adjust sound stage width
when using front wide
speakers.
–10 – +10 (0)
Stage Height
Adjust sound stage height
when using front height
speakers.
–10 – +10 (0)
•“Audyssey DSX
®
” can be set when you are using front height speakers
or front wide speakers.
•“Audyssey DSX
®
” is only valid when using a center speaker.
•“Audyssey DSX
®
” is valid when surround mode is DOLBY listening
mode or DTS listening mode other than PLgz Height.
About Audyssey Dynamic Surround Expansion (A-DSX)
Audyssey DSX
®
is a scalable system that adds new speakers to improve
surround impression. Starting with a 5.1 system Audyssey DSX
®
first
adds Wide channels for the biggest impact on envelopment. Research
in human hearing has proven that information from the Wide channels
is much more critical in the presentation of a realistic soundstage than
the Back Surround channels found in traditional 7.1 systems. Audyssey
DSX
®
then creates a pair of Height channels to reproduce the next
most important acoustical and perceptual cues. In addition to these
new Wide and Height channels, Audyssey DSX
®
applies Surround
Envelopment Processing to enhance the blend between the front and
surround channels.
Basic version
Advanced version
Informations
Advanced version
DVD
127
Audio
Graphic EQ
Default settings are underlined.
Use the graphic equalizer to adjust the tone of each speaker.
“Graphic EQ” can be set when “MultEQ
®
XT 32” setting (vpage125) is “Graphic EQ”.
Setting items Setting details
Speaker Selection
Select whether to adjust
tones for individual speakers
or for all speakers.
All : Adjust the tone of all speakers together.
Left/Right : Adjust the tone of left and right speakers together.
Each : Adjust the tone of each speaker.
Adjust EQ
Adjust tones for each
frequency band. Adjust
the speaker selected in
“Speaker Selection”.
q Select the speaker.
w Select the adjustment frequency band.
63Hz / 125Hz / 250Hz / 500Hz / 1kHz / 2kHz / 4kHz / 8kHz / 16kHz
•Select the speakers you want to adjust when “Left/Right” or “Each”
is selected.
e Adjust the level.
–20.0dB – +6.0dB (0.0dB)
Curve Copy
Copy “Audyssey Flat”
(vpage125) curve from
MultEQ
®
XT 32.
Yes : Copy.
No : Do not copy.
•“Curve Copy” is displayed after Audyssey
®
Setup has been performed.
•When you select “Curve Copy” and press ENTER, the “Copy “Audyssey
Flat”?” prompt is displayed. Select either “Yes” or “No”, and press
ENTER.
Set Defaults
The “Graphic EQ” settings
are returned to the default
settings.
Reset : Reset to the defaults.
Cancel : Do not reset to the defaults.
When you select “Set Defaults” and press
ENTER, the “Reset to the default values?”
prompt is displayed. Select either “Reset” or
“Cancel”, and press ENTER.
Basic version
Advanced version
Informations
Advanced version
DVD
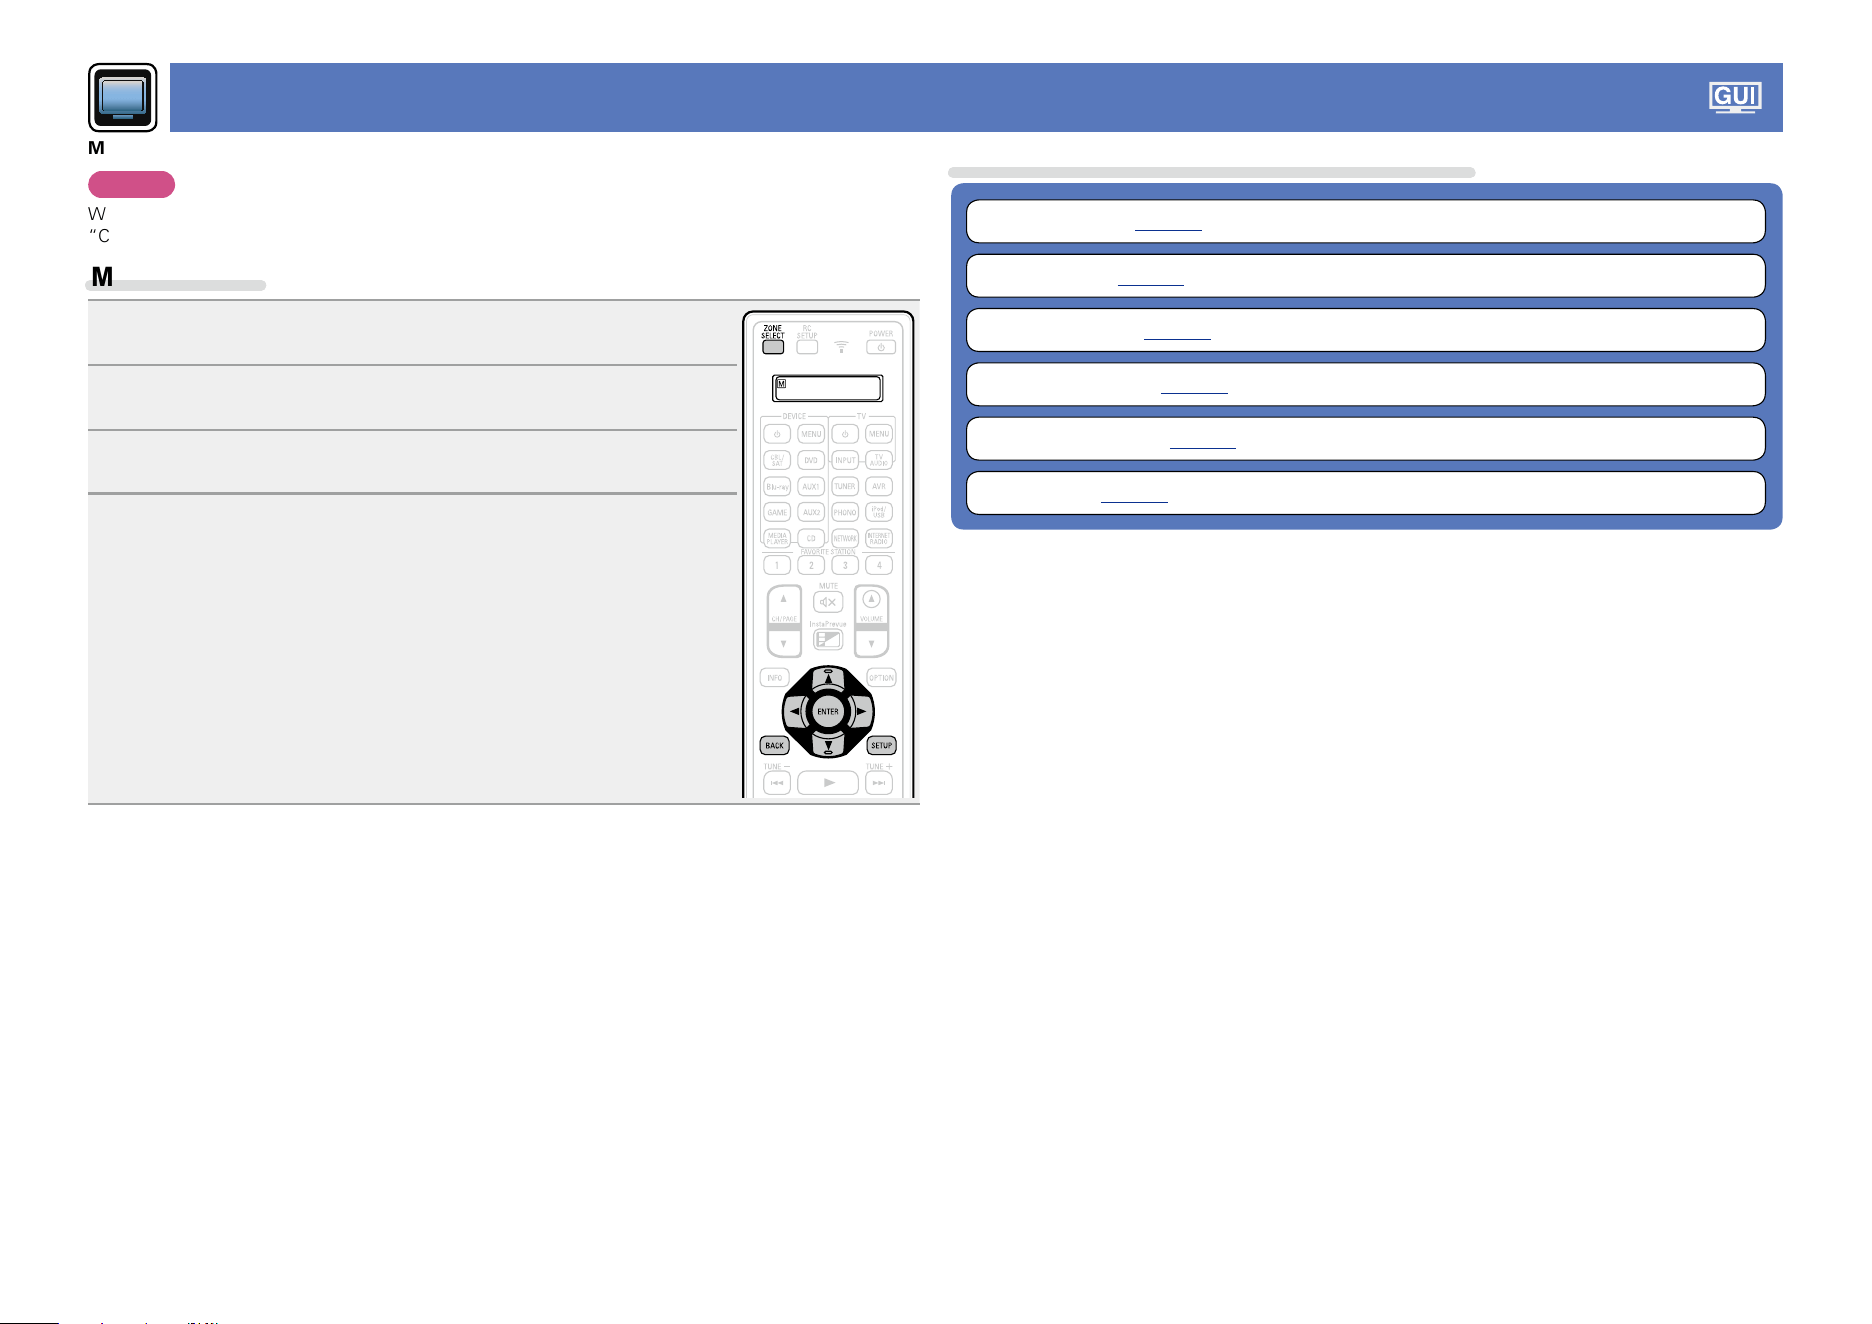
128
Video
Make video-related settings.
NOTE
When HDMI ZONE4 function is used, these settings are not available (except for “HDMI Control” and
“Control Monitor”).
Menu operation
1
Press ZONE SELECT to switch the zone mode.
The J indicator lights.
2
Press SETUP.
The menu is displayed on the TV screen.
3
Use ui to select the menu to be set or operated.
4
Press ENTER or p to enter the setting.
•To return to the previous item, press o or BACK.
•Exiting the Menu, press SETUP while the menu is displayed.
The menu display disappears.
Items that can be set with the “Video” procedure
Picture Adjust (vpage129)
HDMI Setup (vpage129)
Output Settings (vpage131)
Analog Video Out (vpage132)
On Screen Display (vpage133)
TV Format (vpage133)
Basic version
Advanced version
Informations
Advanced version
DVD
129
Video
Picture Adjust
Default settings are underlined.
Picture quality can be adjusted.
We recommend leaving the settings unchanged from the default settings. First adjust the display image
quality on your TV, and use this menu only when you want to make fine adjustments.
•This item can be set when the input source is
CBL/SAT
DVD
Blu-ray
GAME
AUX1
AUX2
MEDIA PLAYER
iPod/USB
NETWORK
.
•With input sources other than the ones above, this item can be set when “Video Select” is selected. In
this case, the original input source settings are called out.
•Can be set when the “Video Conversion” setting (vpage131) is “On”.
•“TV AUDIO” or “CD” can be set when “HDMI”, “COMP” or “VIDEO” (vpage135, 136) has been
assigned.
Setting items Setting details
Picture Mode
Select the desired picture
mode according to the video
signals and your viewing
environment.
Standard : The standard mode suited for most living room viewing
environments.
Movie : A mode suited for watching movies in a dark room such as a
theater room.
Vivid : A mode that makes graphic images for games, etc. brighter and
more vivid.
Streaming : A mode suited for low bit rate video sources.
Custom : Adjusts the picture quality manually.
Off : No picture quality adjustment is done with this unit.
•You can also press OPTION to make these settings from “Picture Mode”
(vpage80) in the option menu.
•The default settings are as follows.
•For “Network” and “iPod/USB” input sources : Streaming
•For input sources other than “Network” and “iPod/USB” : Off
Contrast
Adjust picture contrast.
–6 – +6 (0)
“Contrast” can be set when “Picture mode” is set to “Custom”.
Brightness
Adjust picture brightness.
0 – +12
“Brightness” can be set when “Picture mode” is set to “Custom”.
Saturation
Adjust picture chroma level
(saturation).
–6 – +6 (0)
“Saturation” can be set when “Picture mode” is set to “Custom”.
Hue
Adjust green and red
balance.
–6 – +6 (0)
“Hue” can be set when “Picture mode” is set to “Custom”.
Setting items Setting details
Noise Reduction
Reduce overall video noise.
Low / Medium / High / Off
“Noise Reduction” can be set when “Picture mode” is set to
“Custom”.
Enhancer
Emphasize picture contours.
0 – +12
“Enhancer” can be set when “Picture mode” is set to “Custom”.
•“Picture Adjust” can not be set when 4K signals are input.
•When TVs are simultaneously connected to HDMI MONITOR OUT 1, HDMI MONITOR OUT 2,
COMPONENT VIDEO OUT and VIDEO MONITOR OUT connector for inputting video or component
video signals, the “Picture Mode” – “Streaming”, “Noise Reduction” and “Enhancer” settings are only
valid for the TV that is connected via HDMI.
HDMI Setup
Default settings are underlined.
Make settings for HDMI video/audio output.
Setting items Setting details
Auto Lip Sync
Make automatic
compensation for timing
shift in audio and video
output.
On : Compensated.
Off : Not compensated.
HDMI Audio Out
Select HDMI audio output
device.
AVR : Play back through speakers connected to the unit.
TV : Play back through TV connected to the unit.
•The audio signal input from the HDMI input connector can be output as
an output signal from the HDMI output connector by setting the HDMI
audio output destination to TV.
Audio signals input via the Analog/Coaxial/Optical/EXTERNAL.IN input
connectors cannot be output from the HDMI output connector.
•When the HDMI control function is activated, priority is given to the TV
audio setting (vpage102 “HDMI control function”).
Basic version
Advanced version
Informations
Advanced version
v See overleaf
DVD

130
Video
Setting items Setting details
Video Output
Make settings for HDMI
monitor output.
Auto(Dual) : The presence of a TV connected to the HDMI MONITOR 1
or HDMI MONITOR 2 connector is detected automatically, and that TV
connection is used.
Monitor 1 : A TV connected to the HDMI MONITOR 1 connector is always
used. Video is not output from the TV connected to the HDMI MONITOR
2 connector.
Monitor 2 : A TV connected to the HDMI MONITOR 2 connector is always
used. Video is not output from the TV connected to the HDMI MONITOR
1 connector.
•If both the HDMI MONITOR 1 and HDMI MONITOR 2 connectors are
connected and “Resolution” (vpage132) is set to “Auto”, the signals
are output with a resolution compatible with both TV.
•With “Resolution” (vpage 132) not set to “Auto”, check whether
the TV you are using is compatible with the resolution under “Video” –
“HDMI Monitor 1” or “HDMI Monitor 2” (vpage153).
NOTE
Depending on the monitor you have connected, the display may not
be correct when you set to “Auto(Dual)”. In such a case, set to either
“Monitor 1” or “Monitor 2”.
Vertical Stretch
Sets whether video signals
are vertically stretched or
not.
On : Stretches video signals vertically.
Off : Does not stretch video signals vertically.
“Vertical Stretch” can be set when “i/p Scaler” is set to anything
other than “Off”.
HDMI Pass Through
Selects how the AVR will
pass HDMI signals to the
HDMI output in standby
power mode.
On : Passes the selected HDMI input through the AV receiver’s HDMI
output when the AV receiver is in standby power mode.
Off : No HDMI signals are passed through the AV receiver’s HDMI output
in standby power mode.
NOTE
When “HDMI Pass Through” is set to “On”, it consumes more
standby power. If you are not using this unit for an extended period, it
is recommended that you unplug the power cord from the power outlet.
Setting items Setting details
HDMI Control
You can link operations with
devices connected to HDMI
and compatible with HDMI
Control.
On : Use HDMI control function.
Off : Do not use HDMI control function.
•When a device that is not compatible with the HDMI control function is
connected, set “HDMI Control” to “Off”.
•Please consult the operating instructions for each connected device to
check the settings.
•Refer to “HDMI control function” (vpage 102) for more information
about the HDMI control function.
NOTE
•When “HDMI Control” is set to “On”, it consumes more standby
power. If you are not using this unit for an extended period, it is
recommended that you unplug the power cord from the power outlet.
•The HDMI control function controls operations of a TV that is compatible
with the HDMI control function. Make sure that the TV and HDMI are
connected when you perform HDMI control.
•If the “HDMI Control” settings have been changed, always reset the
power to connected devices after the change.
Pass Through Source
The AVR will “pass
through” the sources
HDMI video signal when in
standby.
Last : Choose this option to “pass through” the last used HDMI input
video source.
CBL/SAT / DVD / Blu-ray / GAME / AUX1 / AUX2 / MEDIA PLAYER / CD /
TV AUDIO : Choose one of these HDMI sources to be passed through
when the AVR is in standby.
“Pass Through Source” can be set when “HDMI Control” is set to
“On” or “HDMI Pass Through” is set to “On”.
Control Monitor
Selects the HDMI monitor
for which you want to
enable the HDMI control
function.
Monitor 1 : Uses the HDMI Monitor 1 for HDMI control.
Monitor 2 : Uses the HDMI Monitor 2 for HDMI control.
ZONE4 : Uses the HDMI monitor in ZONE4 for HDMI control.
•“Control Monitor” can be set when “HDMI Control” is set to “On”.
•The ARC function only works for either the HDMI Monitor 1 or HDMI
Monitor 2 connector that is specified in “Control Monitor”.
Basic version
Advanced version
Informations
Advanced version
v See overleaf
DVD
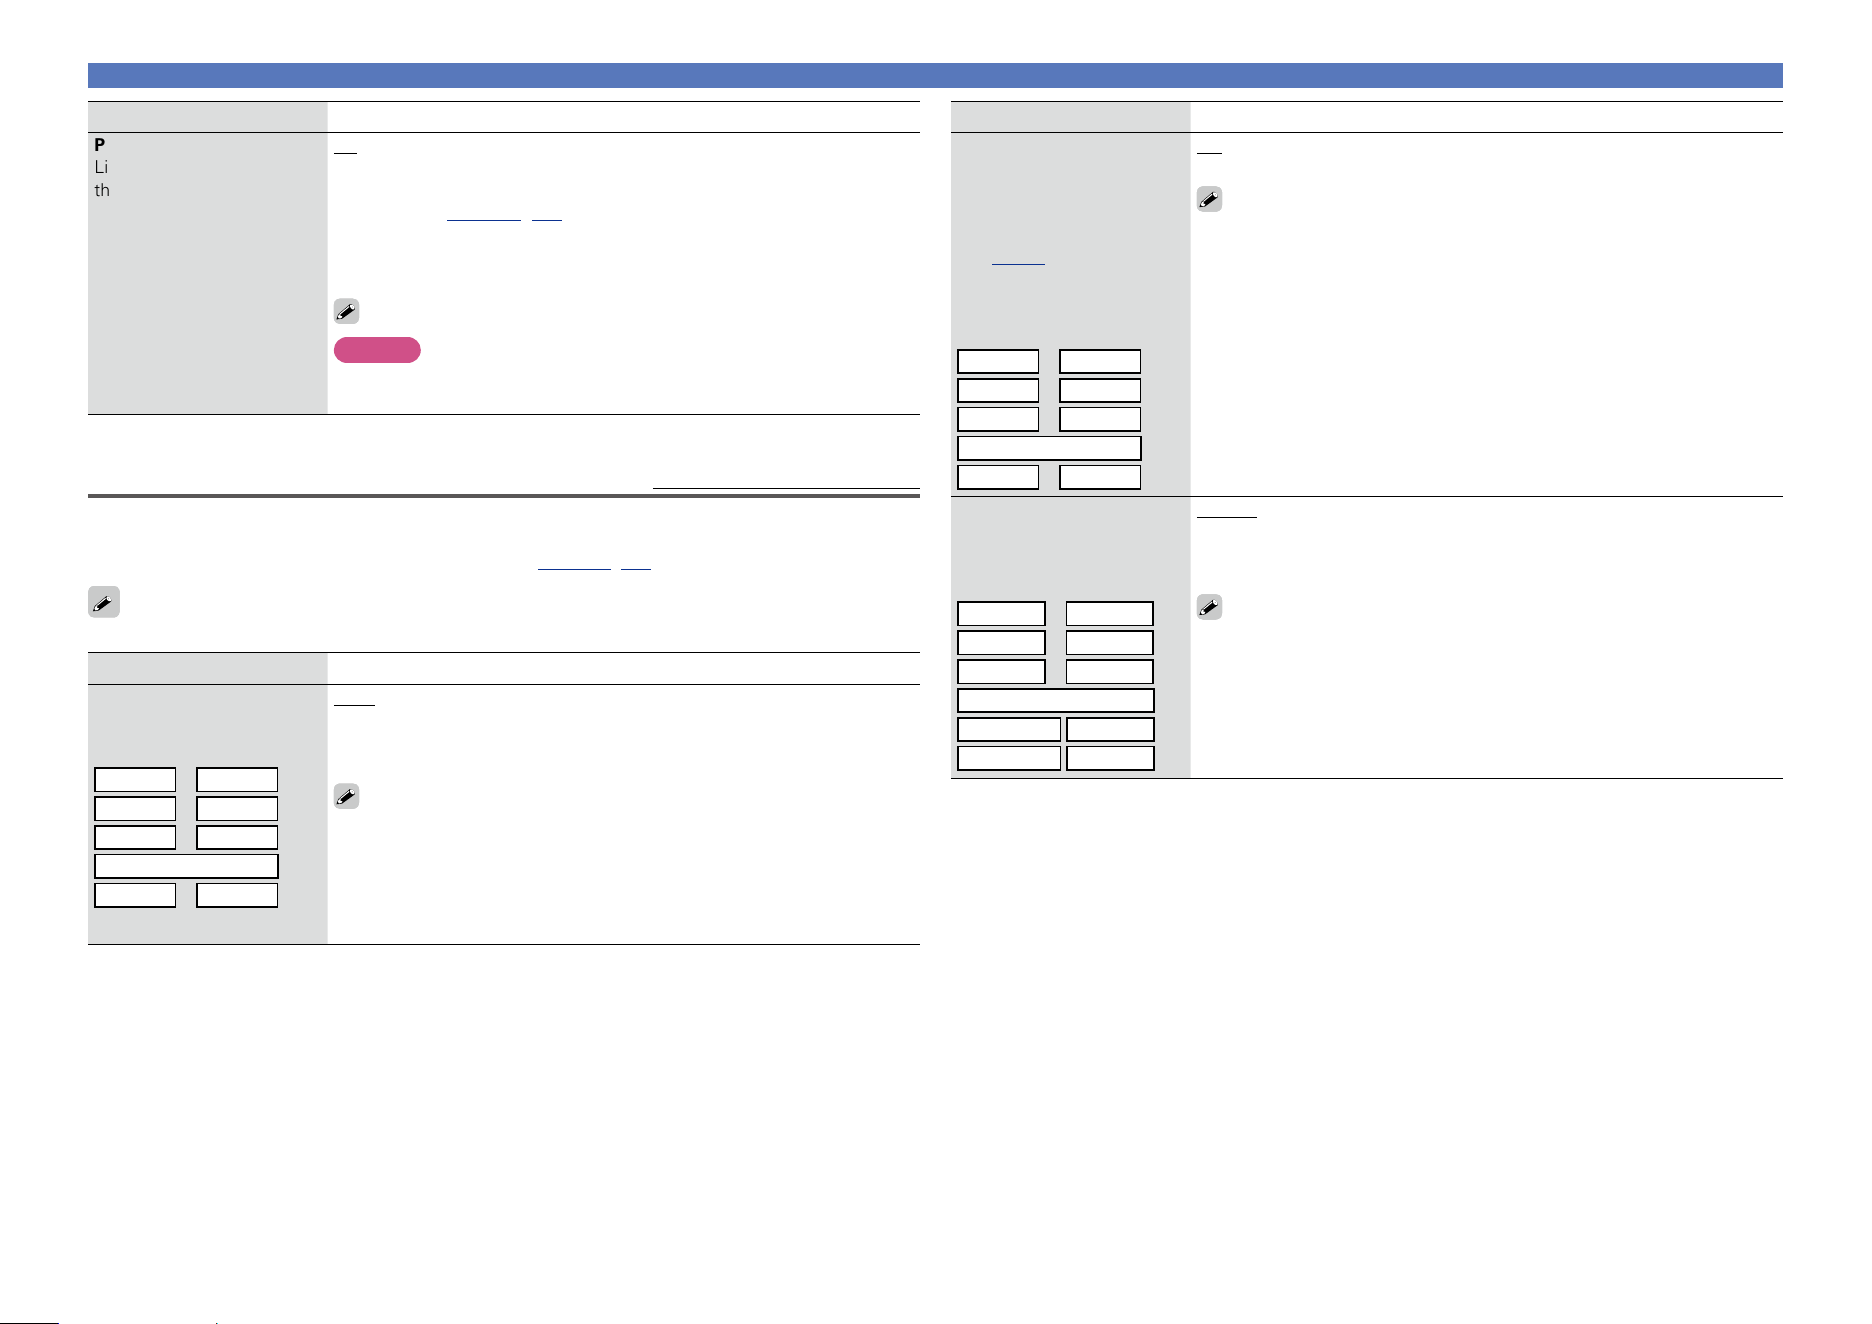
131
Video
Setting items Setting details
Power Off Control
Links the power standby of
this unit to external devices.
All : If power to a connected TV is turned off independently of the input
source, power to this unit is automatically set to standby.
Video : When the TV is turned off with one of “HDMI”, “COMP” or
“VIDEO” (vpage135, 136) assigned for the CBL/SAT / DVD / Blu-ray /
GAME / AUX1 / AUX2 / MEDIA PLAYER / CD / TV AUDIO input source on
this unit, power to this unit is automatically set to standby.
Off : This unit does not link with power to a TV.
“Power Off Control” can be set when “HDMI Control” is set to “On”.
NOTE
“Power Off Control” cannot be set when “Control Monitor” is set to
“ZONE4”.
Output Settings
Default settings are underlined.
Makes screen-related settings.
z “CBL/SAT”, “DVD”, “Blu-ray”, “GAME”, “AUX1”, “AUX2”, “MEDIA PLAYER”, “CD” or “TV AUDIO”
can be set when “HDMI”, “COMP” or “VIDEO” (vpage135, 136) has been assigned.
“Output Settings” can not be set when 4K signals are input.
Setting items Setting details
Video Mode
Make settings for video
processing.
CBL/SAT
z
DVD
z
Blu-ray
z
GAME
z
AUX1
z
AUX2
z
MEDIA PLAYER
z
CD
z
TV AUDIO
z
Auto : Process video automatically based on the HDMI content
information.
Game : Always process video for game content.
Movie : Always process video for movie content.
•If “Video Mode” is set to “Auto”, the mode is switched according to the
input contents.
•If a source is played in both MAIN ZONE (audio and video) and ZONE2
(audio only) modes in the same room, audio in MAIN ZONE and ZONE2
modes may sound out of synchronization, but this is not malfunction. In
this case, setting to “Game” mode may improve audio synchronization.
Setting items Setting details
Video Conversion
The input video signal is
converted automatically
in conjunction with
the connected TV
(vpage7 “Converting
input video signals for
output (Video conversion
function)”).
CBL/SAT
z
DVD
z
Blu-ray
z
GAME
z
AUX1
z
AUX2
z
MEDIA PLAYER
z
CD
z
TV AUDIO
z
On : The input video signal is converted.
Off : The input video signal is not converted.
•When a non-standard video signal from a game machine or some other
source is input, the video conversion function might not operate. In this
case set “Video Conversion” to “Off”.
•When “Video Conversion” is set to “Off”, the video conversion function
does not work. In this case, connect this unit and TV with the same type
of cable.
i/p Scaler
Convert the input source
resolution to the resolution
set.
CBL/SAT
z
DVD
z
Blu-ray
z
GAME
z
AUX1
z
AUX2
z
MEDIA PLAYER
z
iPod/USB
CD
z
NETWORK
TV AUDIO
z
Analog : Use i/p scaler function for analog video signal.
Analog & HDMI : Use i/p scaler function for analog and HDMI video signal.
HDMI : Use i/p scaler function for HDMI video signal.
Off : Do not use i/p scaler function.
•“Analog & HDMI” can be set for input sources for which an HDMI input
connector is assigned.
•Which items can be set depend on the input source assigned to each
input connector.
•This function is not effective when the input signal is “x.v.Color”, 3D,
sYCC 601 color, Adobe RGB color, Adobe YCC 601 color or computer
resolution.
Basic version
Advanced version
Informations
Advanced version
v See overleaf
DVD
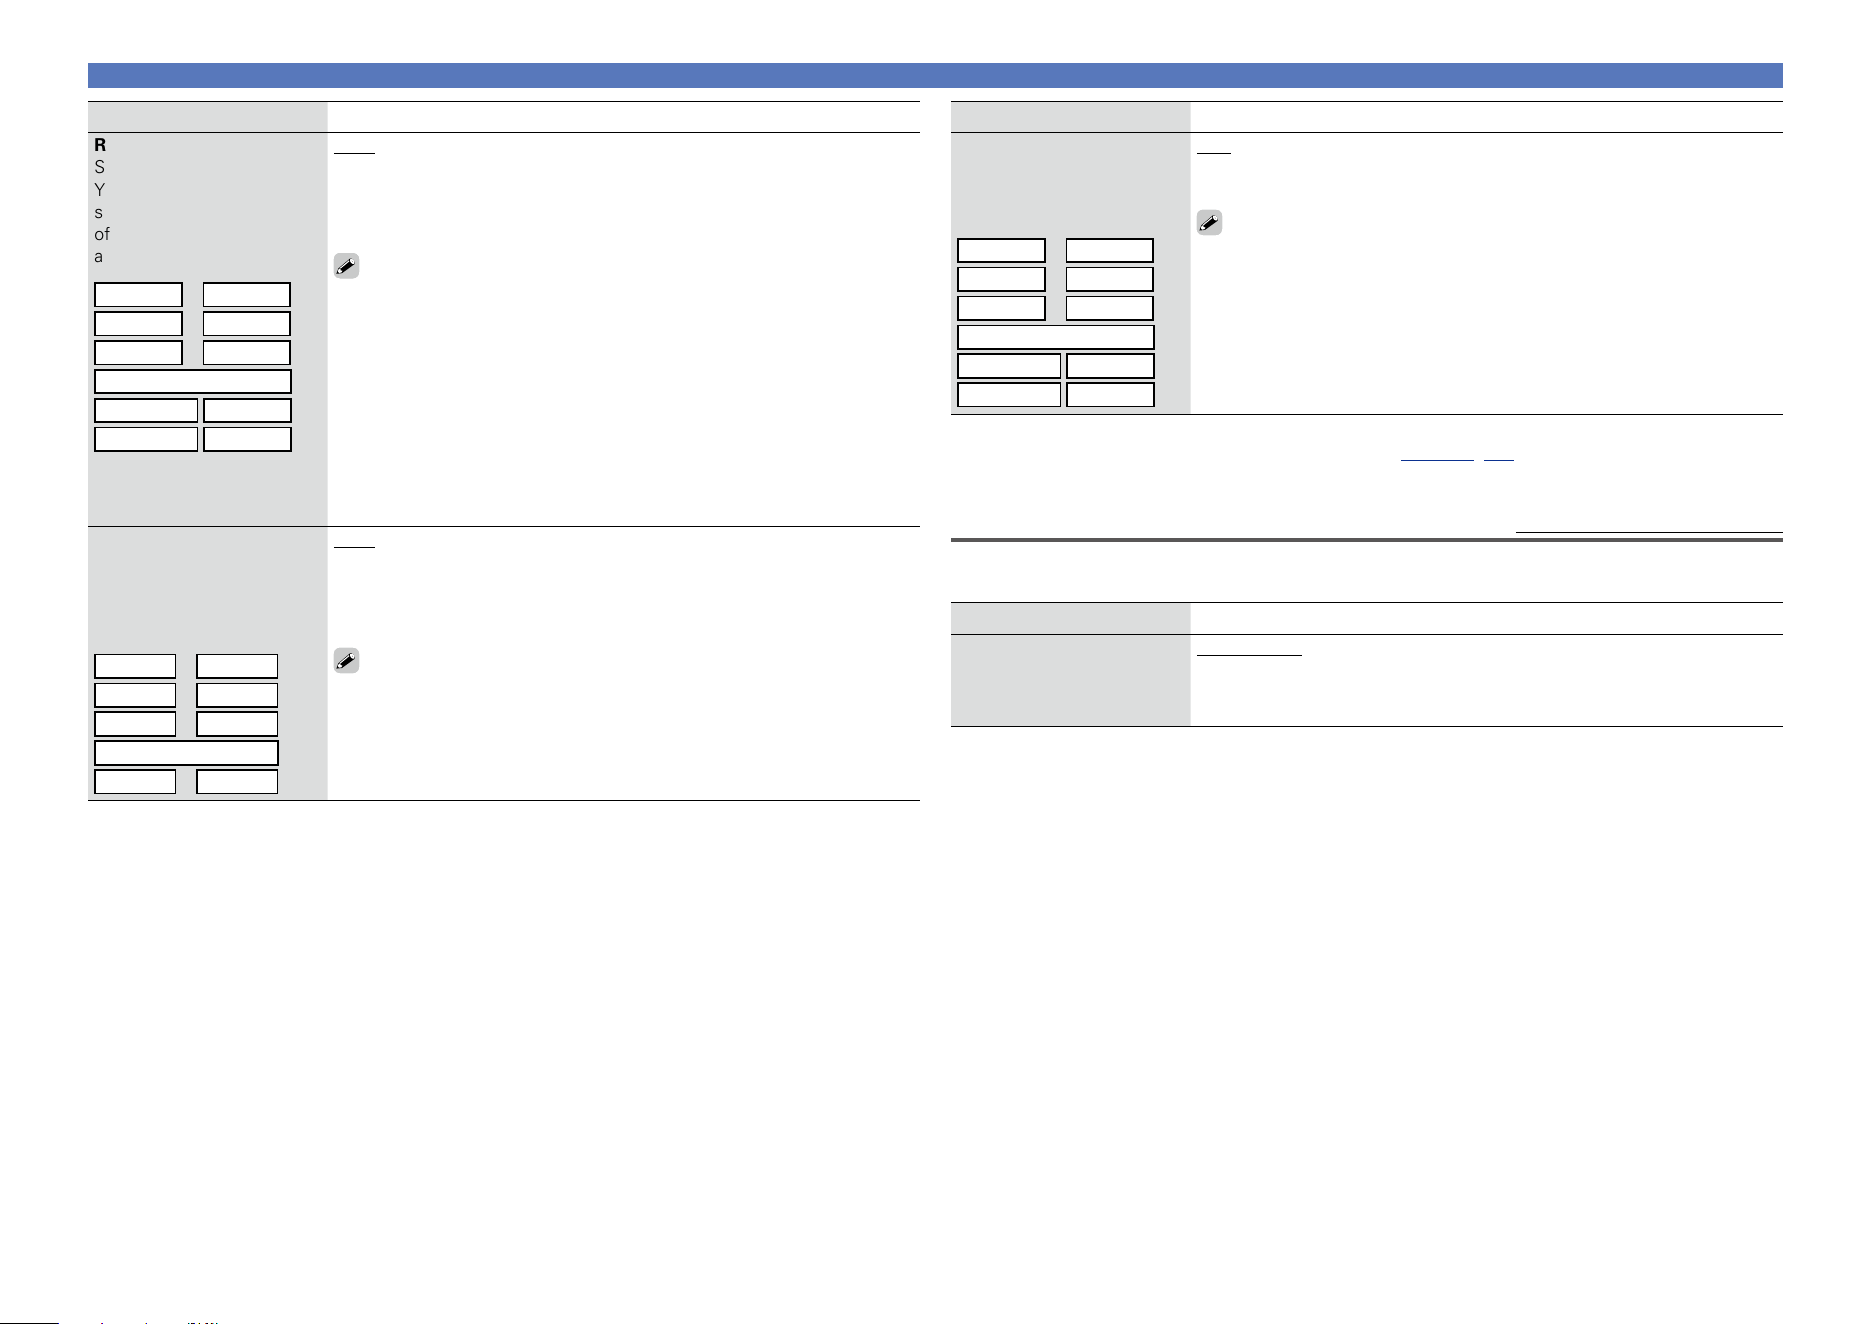
132
Video
Setting items Setting details
Resolution
Set the output resolution.
You can set “Resolution”
separately for HDMI output
of the analog video input
and HDMI input.
CBL/SAT
z
DVD
z
Blu-ray
z
GAME
z
AUX1
z
AUX2
z
MEDIA PLAYER
z
iPod/USB
CD
z
NETWORK
TV AUDIO
z
Auto : The number of pixels the TV connected to the HDMI MONITOR
OUT connector supports is detected automatically and the appropriate
output resolution is set.
480p/576p / 1080i / 720p / 1080p / 1080p:24Hz / 4K : Set the output
resolution.
•This item can be set when “i/p Scaler” is set to anything other than
“Off”.
•When “i/p Scaler” is set to “Analog & HDMI”, the resolution of both the
analog video input signal and HDMI input signal can be set.
•To watch 1080p/24Hz pictures, use a TV that supports 1080p/24Hz video
signals.
•When set to “1080p:24Hz”, you can enjoy film-like pictures for film
sources (in 24 Hz). For video sources and mixed sources, we recommend
setting the resolution to “1080p”.
•It is not possible to convert a 50 Hz signal into 1080p/24Hz. It is output
at a resolution of 1080p/50Hz.
Progressive Mode
Set an appropriate
progressive conversion
mode for the source video
signal.
CBL/SAT
z
DVD
z
Blu-ray
z
GAME
z
AUX1
z
AUX2
z
MEDIA PLAYER
z
CD
z
TV AUDIO
z
Auto : The video signal is automatically detected and the appropriate
mode is set.
Video : Select mode suitable for video playback.
Video and Film : Select mode suitable for video and 30-frame film
material playback.
This item can be set when “i/p Scaler” is set to anything other than
“Off”.
Setting items Setting details
Aspect Ratio
Set the aspect ratio for the
video signals output to the
HDMI.
CBL/SAT
z
DVD
z
Blu-ray
z
GAME
z
AUX1
z
AUX2
z
MEDIA PLAYER
z
iPod/USB
CD
z
NETWORK
TV AUDIO
z
16:9 : Output at 16:9 aspect ratio.
4:3 : Output at 4:3 aspect ratio with black bars on the sides of a 16:9 TV
screen (except for 480p/576p output).
“Aspect Ratio” can be set when “i/p Scaler” is set to anything other
than “Off”.
z “CBL/SAT”, “DVD”, “Blu-ray”, “GAME”, “AUX1”, “AUX2”, “MEDIA PLAYER”, “CD” or “TV AUDIO”
can be set when “HDMI”, “COMP” or “VIDEO” (vpage135, 136) has been assigned.
Analog Video Out
Default settings are underlined.
Assigns the zone that uses the COMPONENT VIDEO MONITOR OUT and the VIDEO MONITOR OUT
connectors.
Setting items Setting details
ZONE
MAIN ZONE : Uses the COMPONENT VIDEO MONITOR OUT and the
VIDEO MONITOR OUT connectors for MAIN ZONE.
ZONE3 : Uses the COMPONENT VIDEO MONITOR OUT and the VIDEO
MONITOR OUT connectors for ZONE3.
Basic version
Advanced version
Informations
Advanced version
DVD
133
Video
On Screen Display
Default settings are underlined.
Select the on-screen display user interface preferences.
Setting items Setting details
Volume
Sets where to display the
master volume level.
Bottom : Display at the bottom.
Top : Display at the top.
Off : Turn display off.
When the master volume display is hard to see when superimposed
on movie subtitles, set to “Top”.
Info
Displays status of operation
temporarily when the sound
mode is changed, or input
source is switched. You
can set whether or not to
show each of these status
displays.
On : Turn display on.
Off : Turn display off.
Now Playing
Sets how long each menu
is displayed when the input
source is “NETWORK”,
“iPod/USB”, or “HDRadio”.
Always On : Show display continuously.
Auto Off : Show display for 30 seconds after operation.
TV Format
Default settings are underlined.
Set the video signal format to be output for the TV you are using.
Setting items Setting details
Format
NTSC : Select NTSC output.
PAL : Select PAL output.
“Format” can also be set by the following procedure. However, the menu
screen is not displayed.
1. Press and hold the main unit’s o p for at least 3 seconds.
“zVideo Format < NTSC >” appears on the display.
2. Use the main unit’s o p and set the video signal format.
3. Press the main unit’s ENTER to complete the setting.
NOTE
When a format other than the video format of the connected TV is set, the
picture will not be displayed properly.
Basic version
Advanced version
Informations
Advanced version
DVD
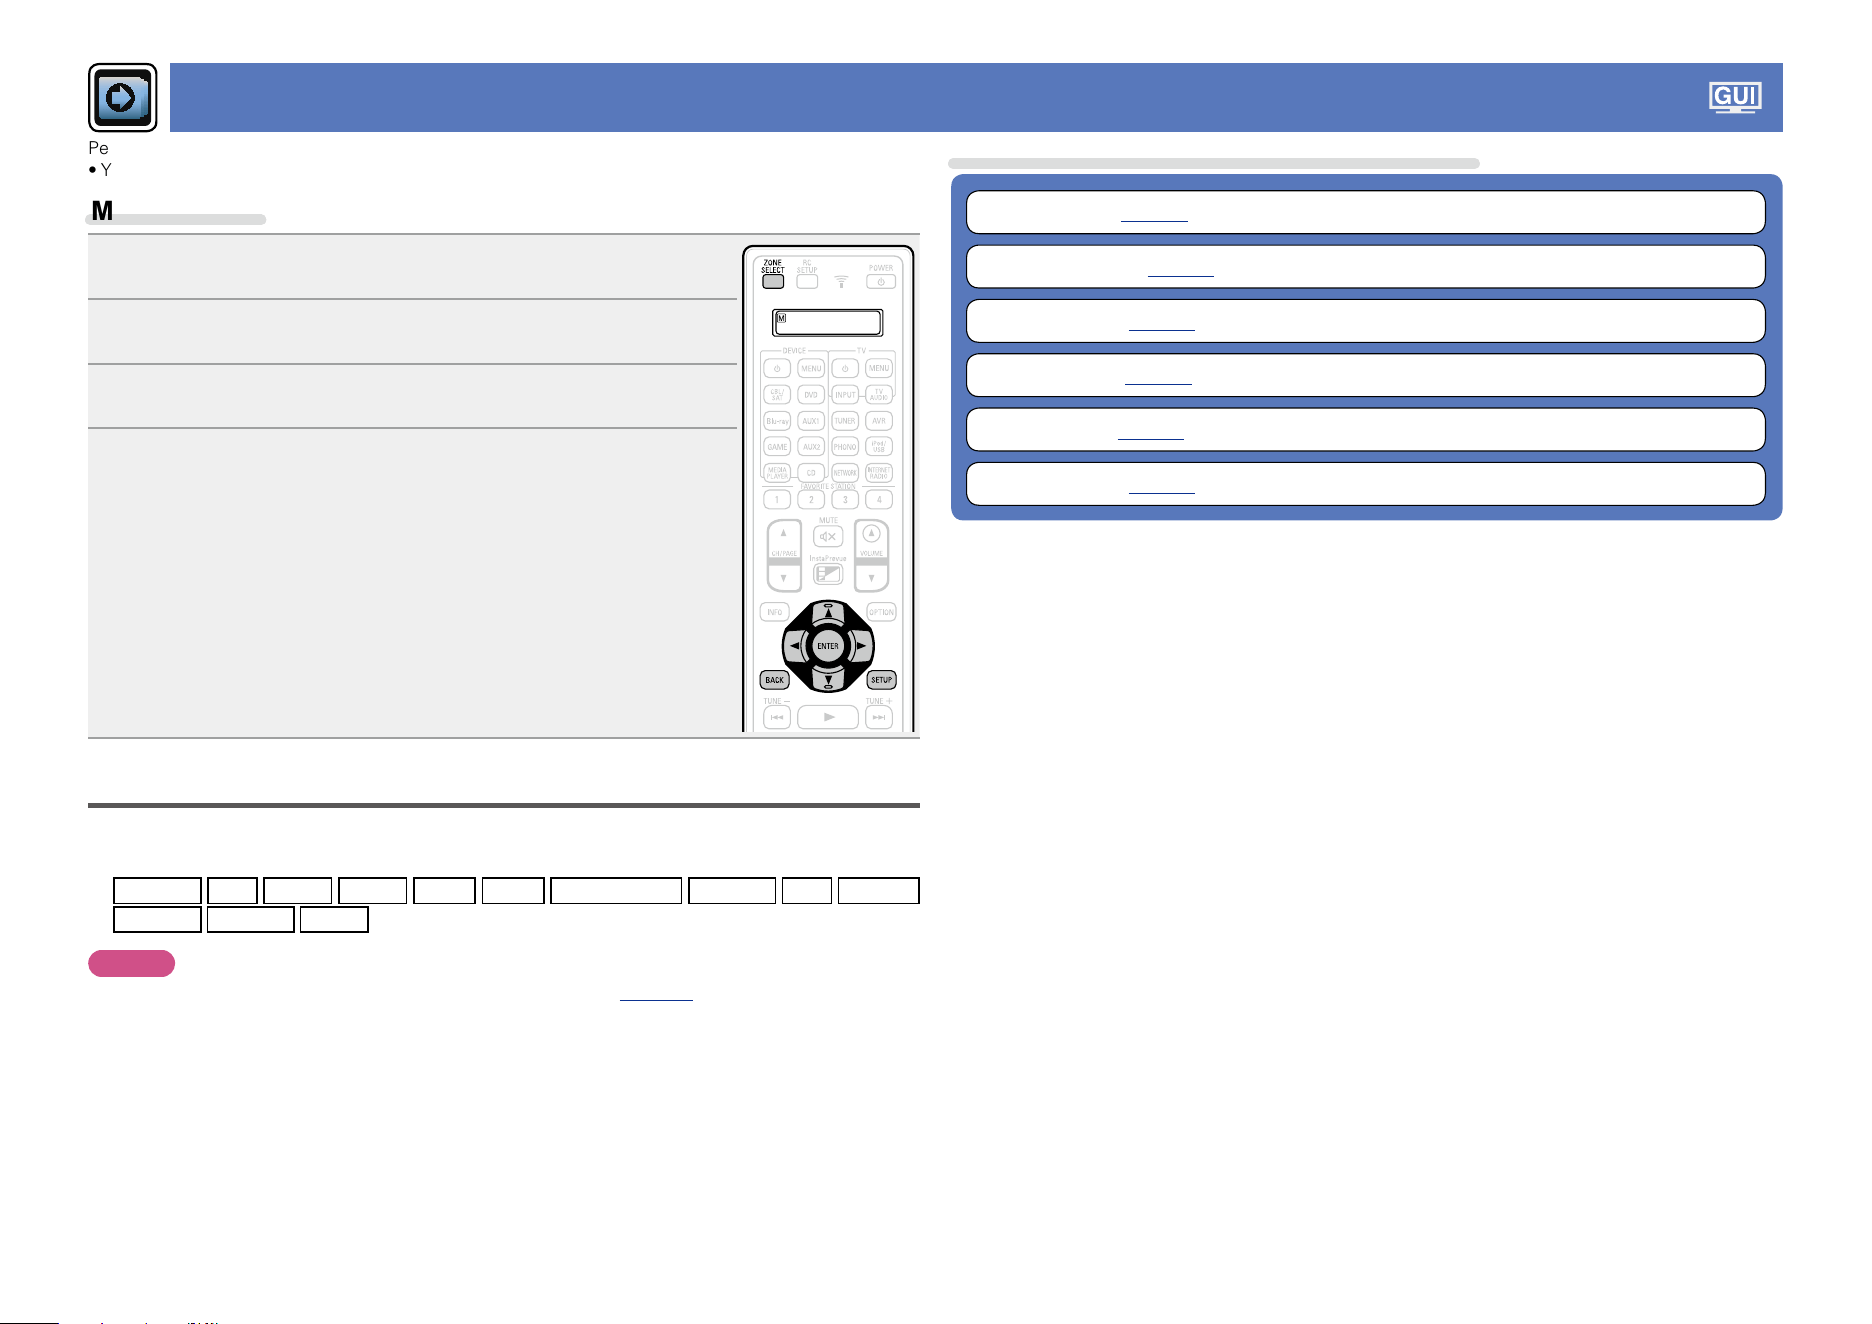
134
Inputs
Perform settings related to input source playback.
•You do not have to change the settings to use the unit. Make settings when needed.
Menu operation
1
Press ZONE SELECT to switch the zone mode.
The J indicator lights.
2
Press SETUP.
The menu is displayed on the TV screen.
3
Use ui to select the menu to be set or operated.
4
Press ENTER or p to enter the setting.
•To return to the previous item, press o or BACK.
•Exiting the Menu, press SETUP while the menu is displayed.
The menu display disappears.
Important information
n About the display of input sources
In this section, the configurable input sources for each item are shown as follows.
CBL/SAT
DVD
Blu-ray
GAME
AUX1
AUX2
MEDIA PLAYER
iPod/USB
CD
HD Radio
NETWORK
TV AUDIO
PHONO
NOTE
Input sources that have been set to “Hide” at “Hide Sources” (vpage137) cannot be selected.
Items that can be set with the “Inputs” procedure
Input Assign (vpage135)
Source Rename (vpage137)
Hide Sources (vpage137)
Source Level (vpage137)
Input Select (vpage138)
Video Source (vpage138)
Basic version
Advanced version
Informations
Advanced version
DVD
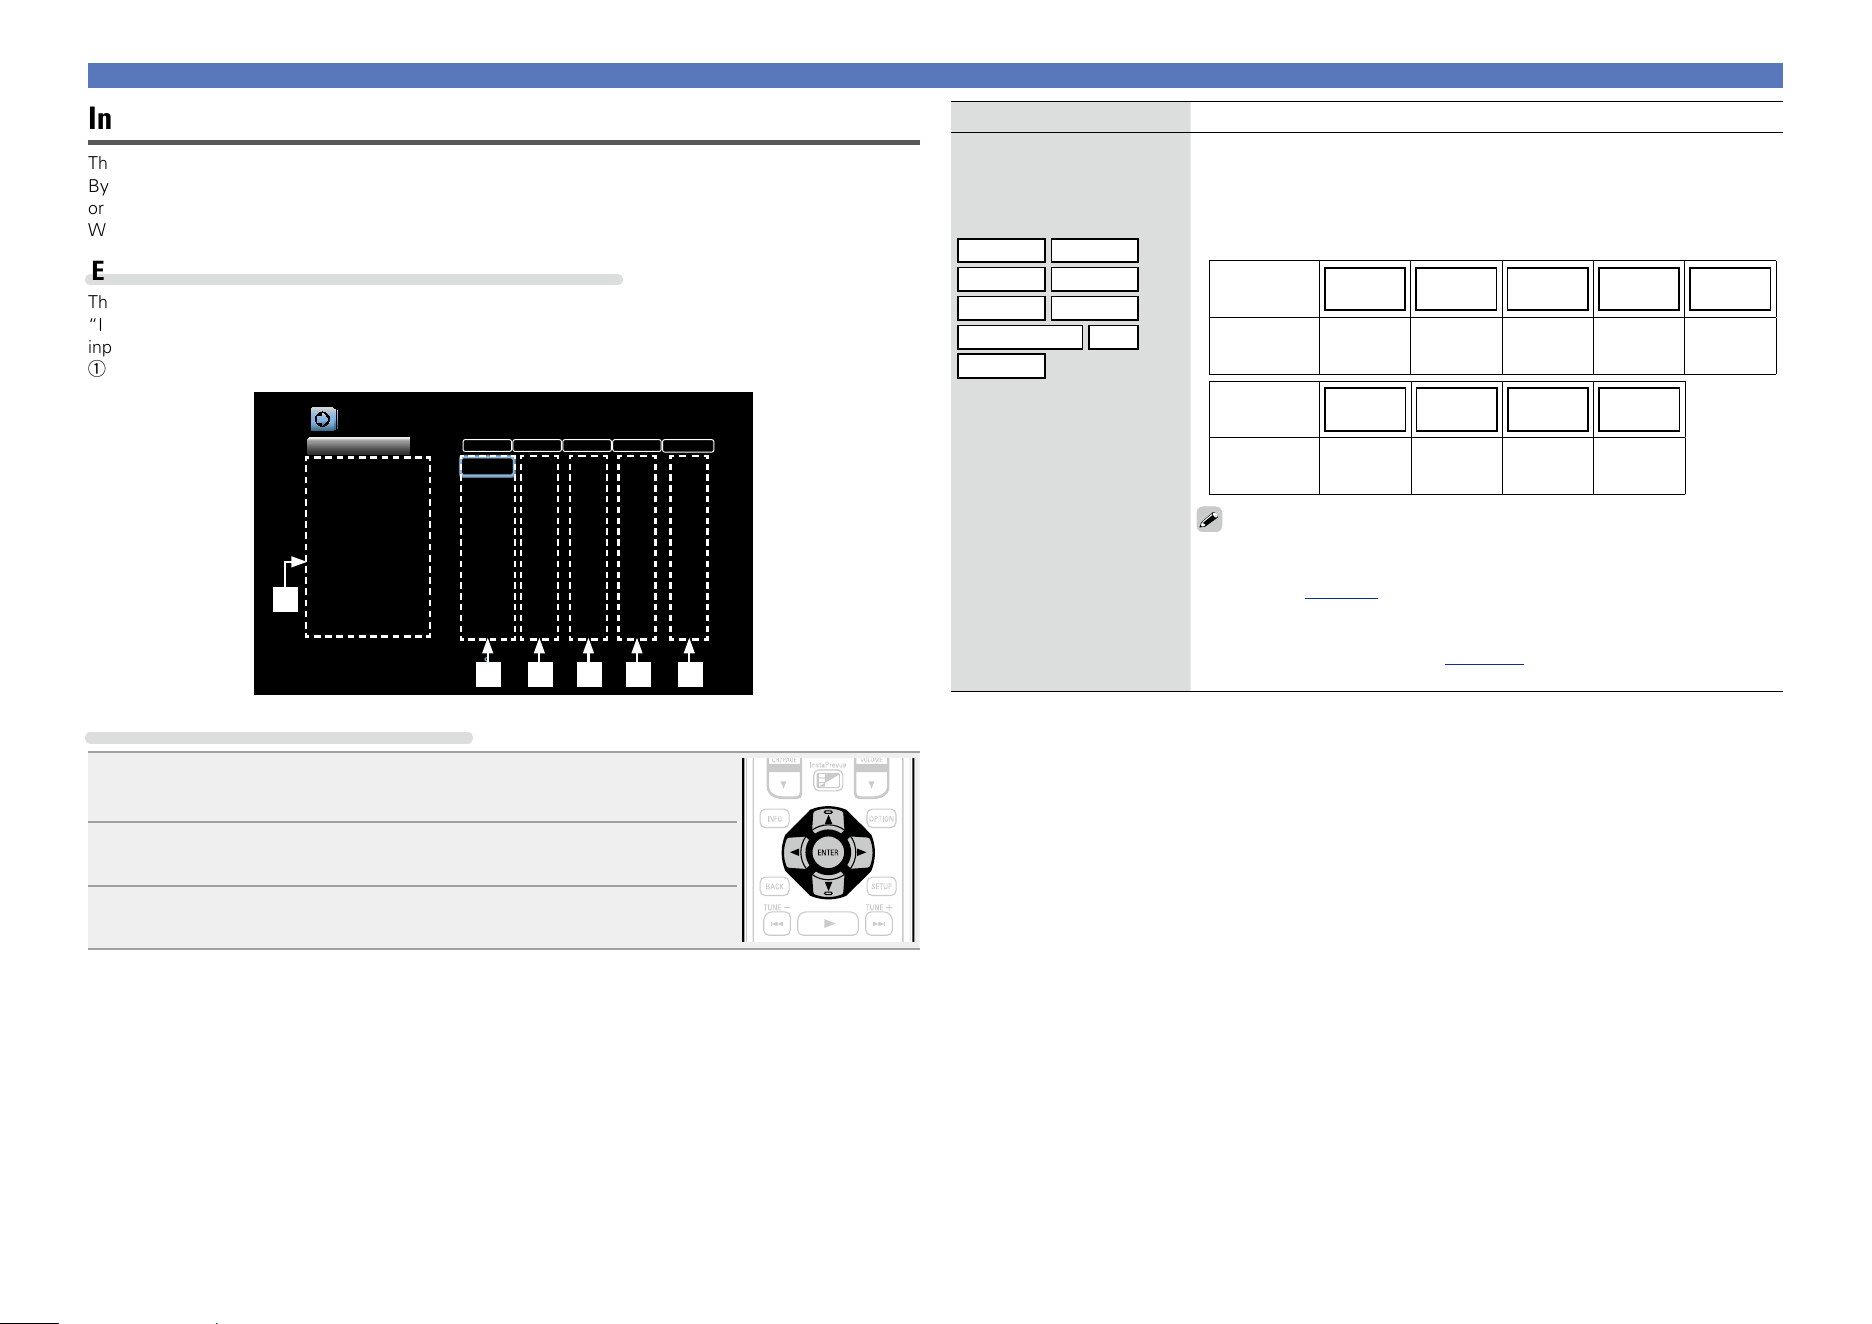
135
Setting items Setting details
HDMI
Set this to change the HDMI
input connectors assigned
to the input sources.
CBL/SAT
DVD
Blu-ray
GAME
AUX1
AUX2
MEDIA PLAYER
CD
TV AUDIO
1 / 2 / 3 / 4 / 5 / 6 / Front : Assign an HDMI input connector to the selected
input source.
– : Do not assign an HDMI input connector to the selected input source.
•At time of purchase, the settings of the different input sources are as
shown below.
Input
source
CBL/SAT DVD Blu-ray GAME AUX1
Default
setting
1 2 3 4 Front
Input
source
AUX2
MEDIA
PLAYER
CD TV AUDIO
Default
setting
6 5 – –
•To play the video signal assigned at “HDMI” combined with the audio
signal assigned at “Input Assign” – “DIGITAL”, select “Digital” at “Input
Mode” (vpage138).
•Audio signals input from analog and digital connectors cannot be output
to a TV that is connected via HDMI.
•When “HDMI Control” (vpage 130) is set to “On”, HDMI input
connector cannot be assigned to “TV AUDIO”.
Inputs
Input Assign
This unit has certain input sources such as “CBL/SAT” assigned to audio and video connectors by default.
By making the default connections, you can simply press an input source select button to play back audio
or video from the connected device with ease.
When making connections other than the default settings, you must change settings in this section.
Examples of “Input Assign” menu screen displays
This screen appears when the “Inputs” – “each input source” – “Input Assign” menu is selected. Use the
“Input Assign” menu to change the w HDMI input connectors, e Digital input connectors, r Analog
input connectors, t Component input connectors, and y Video input connectors that are assigned to the
q input sources in default settings.
DIGITAL ANALOGHDMI COMP VIDEO
Inputs/Input Assign
Set Defaults
CBL/SAT
DVD
Blu-ray
GAME
MEDIA PLAYER
TV AUDIO
AUX1
AUX2
CD
1
2
3
4
5
-
Front
6
-
1
2
3
4
6
-
Front
-
5
1
2
3
-
-
-
-
-
-
1
2
-
-
3
-
Front
-
-
COAX1
COAX2
D.LINK
-
-
OPT1
-
-
OPT2
Changes HDMI input assignments
ytrew
q
Input assignments menu operations
1
Use uio p to move the cursor to the item you want to set, and
then press ENTER.
2
Use o p to select the input connector to be assigned.
3
Press ENTER to register the setting.
Basic version
Advanced version
Informations
Advanced version
v See overleaf
DVD
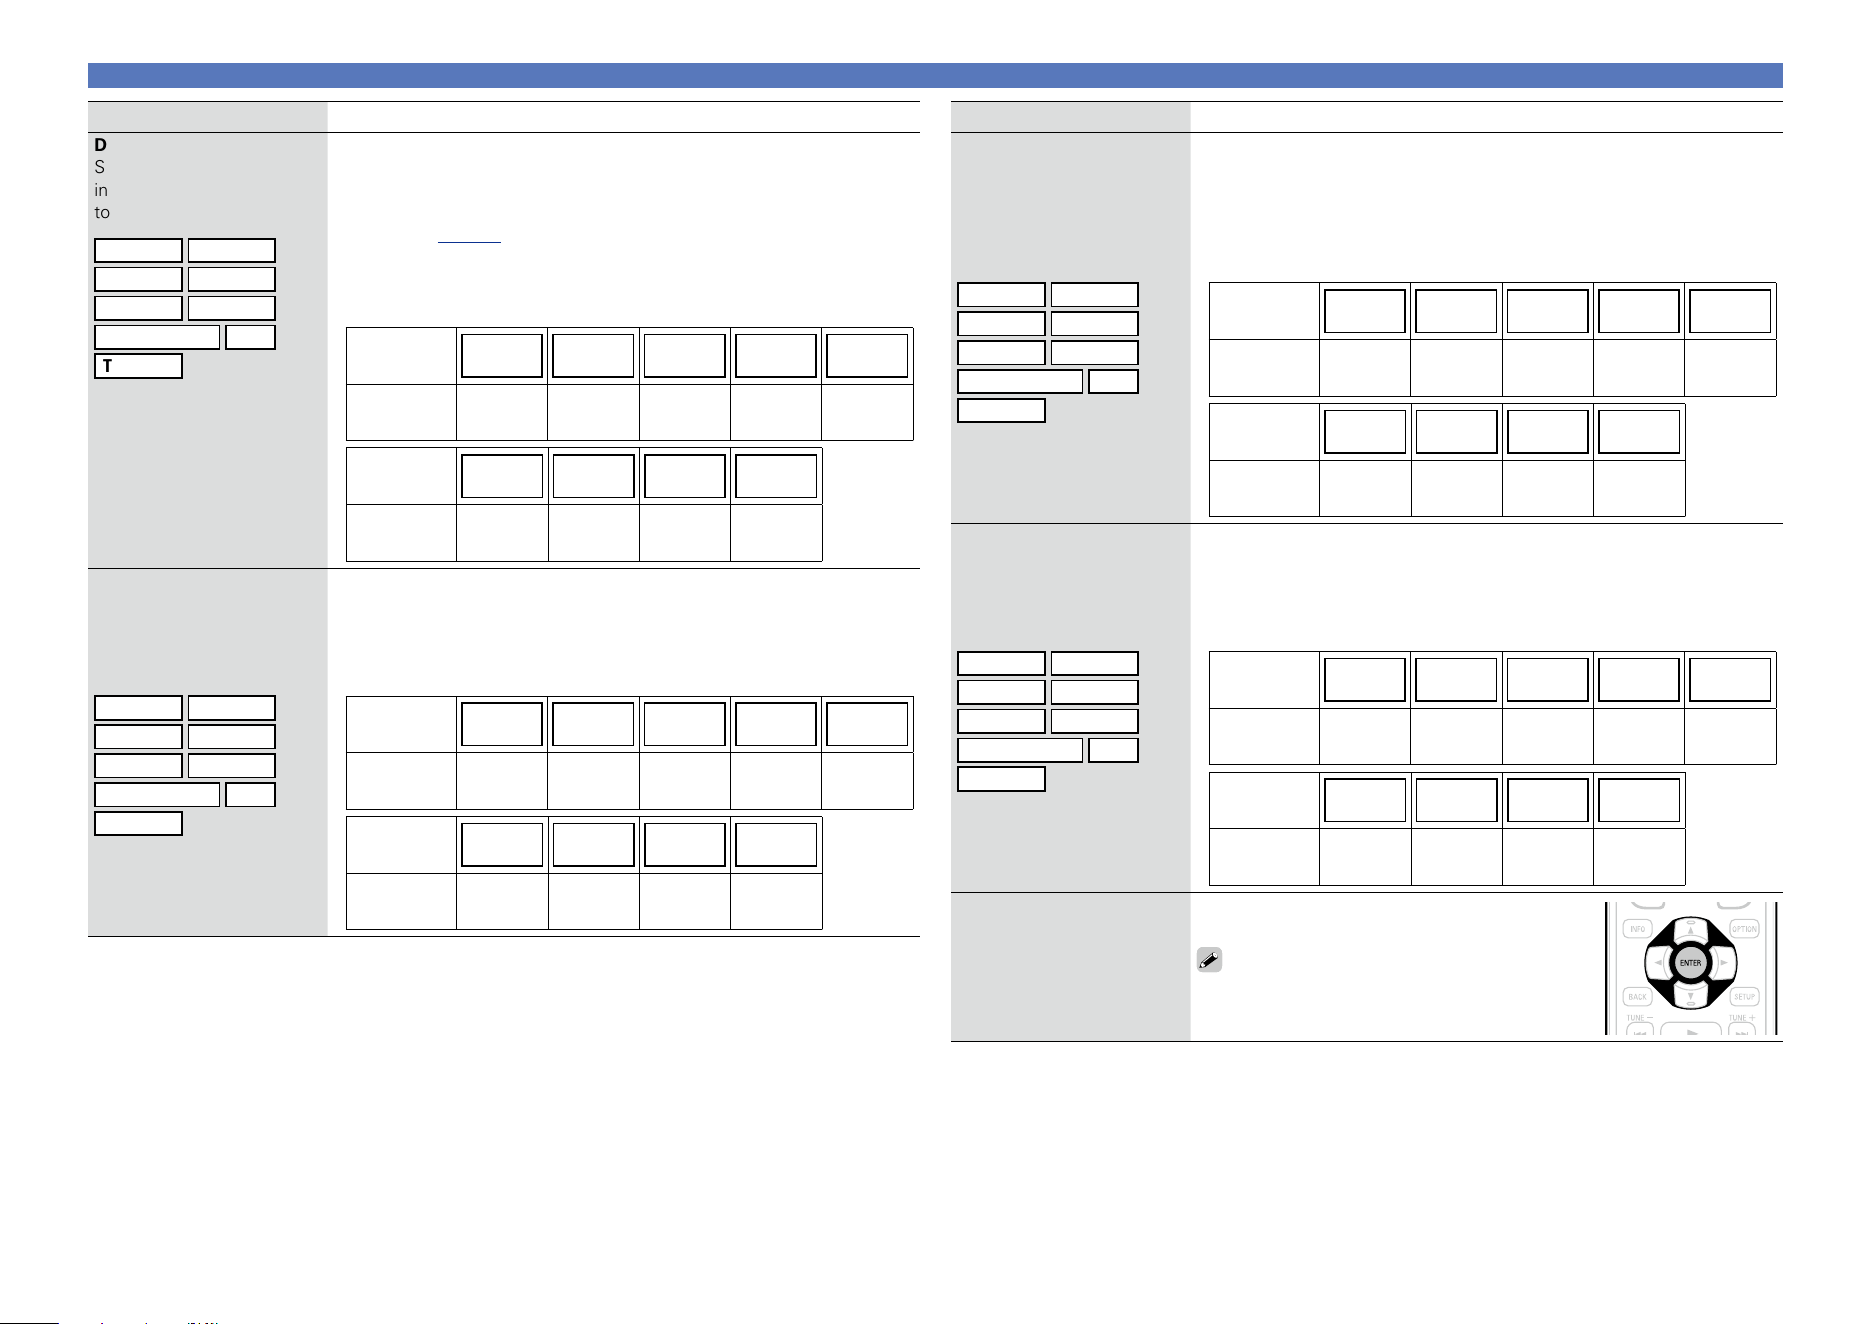
136
Setting items Setting details
DIGITAL
Set this to change the digital
input connectors assigned
to the input sources.
CBL/SAT
DVD
Blu-ray
GAME
AUX1
AUX2
MEDIA PLAYER
CD
TV AUDIO
COAX 1 / COAX 2 / OPT 1 / OPT 2 : Assign a digital input connector to the
selected input source.
D.LINK : Assign the Denon Link HD connector when the Denon Link HD
connection is established to a player compatible with the Denon Link HD
function (vpage13).
– : Do not assign a digital input connector to the selected input source.
•At time of purchase, the settings of the different input sources are as
shown below.
Input
source
CBL/SAT DVD Blu-ray GAME AUX1
Default
setting
COAX 1 COAX 2 D.LINK – –
Input
source
AUX2
MEDIA
PLAYER
CD TV AUDIO
Default
setting
– – OPT 2 OPT 1
ANALOG
Set this to change the
analog audio input
connectors assigned to the
input sources.
CBL/SAT
DVD
Blu-ray
GAME
AUX1
AUX2
MEDIA PLAYER
CD
TV AUDIO
1 / 2 / 3 / 4 / 5 / 6 / Front : Assign a analog input connector to the selected
input source.
– : Do not assign a analog input connector to the selected input source.
•At time of purchase, the settings of the different input sources are as
shown below.
Input
source
CBL/SAT DVD Blu-ray GAME AUX1
Default
setting
1 2 3 4 Front
Input
source
AUX2
MEDIA
PLAYER
CD TV AUDIO
Default
setting
– 6 5 –
Inputs
Setting items Setting details
COMP
(Component video)
Set this to change the
component video input
connectors assigned to the
input sources.
CBL/SAT
DVD
Blu-ray
GAME
AUX1
AUX2
MEDIA PLAYER
CD
TV AUDIO
1 / 2 / 3 : Assign the component video input connector to the selected
input source.
– : Do not assign a component video input connector to the selected input
source.
•At time of purchase, the settings of the different input sources are as
shown below.
Input
source
CBL/SAT DVD Blu-ray GAME AUX1
Default
setting
1 2 3 – –
Input
source
AUX2
MEDIA
PLAYER
CD TV AUDIO
Default
setting
– – – –
VIDEO
Set this to change the
composite video input
connectors assigned to the
input sources.
CBL/SAT
DVD
Blu-ray
GAME
AUX1
AUX2
MEDIA PLAYER
CD
TV AUDIO
1 / 2 / 3 / Front : Assign the video input connector to the selected input
source.
– : Do not assign a video input connector to the selected input source.
•At time of purchase, the settings of the different input sources are as
shown below.
Input
source
CBL/SAT DVD Blu-ray GAME AUX1
Default
setting
1 2 – – Front
Input
source
AUX2
MEDIA
PLAYER
CD TV AUDIO
Default
setting
– 3 – –
Set Defaults
The “Input Assign” settings
are returned to the default
settings.
Reset : Reset to the defaults.
Cancel : Do not reset to the defaults.
If you select “Set Defaults” and press ENTER,
the message “Reset to the default values?”
is displayed. Select “Reset” or “Cancel”, and
then press ENTER.
Basic version
Advanced version
Informations
Advanced version
DVD
137
Inputs
Source Rename
Change the display name of the selected input source.
This is convenient when the input source name of your device and the input source name of this unit are
different. You can change the name to suit your needs. When the renaming is completed, the name is
displayed on this unit’s display and on the menu screen.
Setting details
CBL/SAT / DVD / Blu-ray / GAME / AUX1 / AUX2 / MEDIA PLAYER / CD / TV AUDIO / PHONO :
Change the display name of the selected input source.
•Up to 12 characters can be input.
•For character input, see page118.
Set Defaults : The “Source Rename” settings are returned to the default
settings.
•Reset : Reset to the defaults.
•Cancel : Do not reset to the defaults.
If you select “Set Defaults” and press ENTER, the message “Reset all
source names to the factory defaults?” is displayed. Select “Reset” or
“Cancel”, and then press ENTER.
Hide Sources
Default settings are underlined.
Remove from the display input sources that are not used.
Setting details
CBL/SAT / DVD / Blu-ray / GAME / AUX1 / AUX2 / MEDIA PLAYER / iPod/USB / CD / HDRadio /
Favorites / Internet Radio / Pandora / SiriusXM / Spotify / Flickr / TV AUDIO / PHONO : Select input
source that is not used.
•Show : Use this source.
•Hide : Do not use this source.
NOTE
•Input sources being used in the various zones cannot be deleted.
•Input sources set to “Hide” cannot be selected using the input source select button.
Source Level
Default settings are underlined.
•This function corrects the playback level of the selected input source’s audio input.
•Make this setting if there are differences in the input volume levels between the different sources.
Setting items Setting details
Source Level
iPod/USB
HD Radio
NETWORK
–12dB – +12dB (0dB)
Analog Inputs
CBL/SAT
DVD
Blu-ray
GAME
AUX1
AUX2
MEDIA PLAYER
CD
TV AUDIO
PHONO
–12dB – +12dB (0dB)
The analog input level can be adjusted independently for input sources
for which “ANALOG” is assigned at “Input Assign” (vpage136).
Digital Inputs
CBL/SAT
DVD
Blu-ray
GAME
AUX1
AUX2
MEDIA PLAYER
CD
TV AUDIO
–12dB – +12dB (0dB)
The digital input level can be adjusted independently for input sources
for which “DIGITAL” is assigned at “Input Assign” (vpage136).
Basic version
Advanced version
Informations
Advanced version
DVD
138
Inputs
Input Select
Default settings are underlined.
Set the audio input mode and decode mode of each input source.
The input modes available for selection may vary depending on the input source.
Setting items Setting details
Input Mode
Set the audio input modes
for the different input
sources.
It is normally recommended
to set the audio input mode
to “Auto”.
Auto : Automatically detect input signal and perform playback.
HDMI : Play only signals from HDMI input.
Digital : Play only signals from digital input.
Analog : Play only signals from analog input.
EXTERNAL IN : Play only signals from EXTERNAL IN input.
•“Digital” can be set for input sources for which “DIGITAL” is assigned
at “Input Assign” (vpage136).
•“AUX2” or “TV AUDIO” can be selected only when “Analog” is assigned
to the input source.
•When digital signals are properly input, the indicator lights on
the display. If the indicator does not light, check “Input Assign”
(vpage136) and the connections.
•If “HDMI Control” is set to “On” and a TV compatible with the ARC is
connected via the HDMI MONITOR connectors, the input mode whose
input source is “TV AUDIO” is fixed to ARC.
Decode Mode
Set the audio decode mode
for input source.
CBL/SAT
DVD
Blu-ray
GAME
AUX1
AUX2
MEDIA PLAYER
CD
TV AUDIO
Auto : Detect type of digital input signal and decode and play automatically.
PCM : Decode and play only PCM input signals.
DTS : Decode and play only DTS input signals.
•This item can be set for input sources for which “DIGITAL” is assigned
at “Input Assign” (vpage136).
•Normally set this mode to “Auto”. Set “PCM” and “DTS” when
inputting the corresponding input signal.
Video Source
Default settings are underlined.
Video of another input source is played back combined with the playing audio.
Setting items Setting details
Video Select
Default : Play the picture and sound of the input source.
CBL/SAT / DVD / Blu-ray / GAME / AUX1 / AUX2 / MEDIA PLAYER / CD /
TV AUDIO : Select video input source to view. The video of the selected
input source is played along with the audio currently being played. This can
be set for individual input sources.
“CBL/SAT”, “DVD”, “Blu-ray”, “GAME”, “AUX1”, “AUX2”, “MEDIA
PLAYER”, “CD” or “TV AUDIO” can be selected only when “COMP”
or “VIDEO” is assigned to the input source.
NOTE
•It is not possible to select HDMI input signals.
•Input sources for which “Hide” is selected at “Hide Sources”
(vpage137) cannot be selected.
Basic version
Advanced version
Informations
Advanced version
DVD
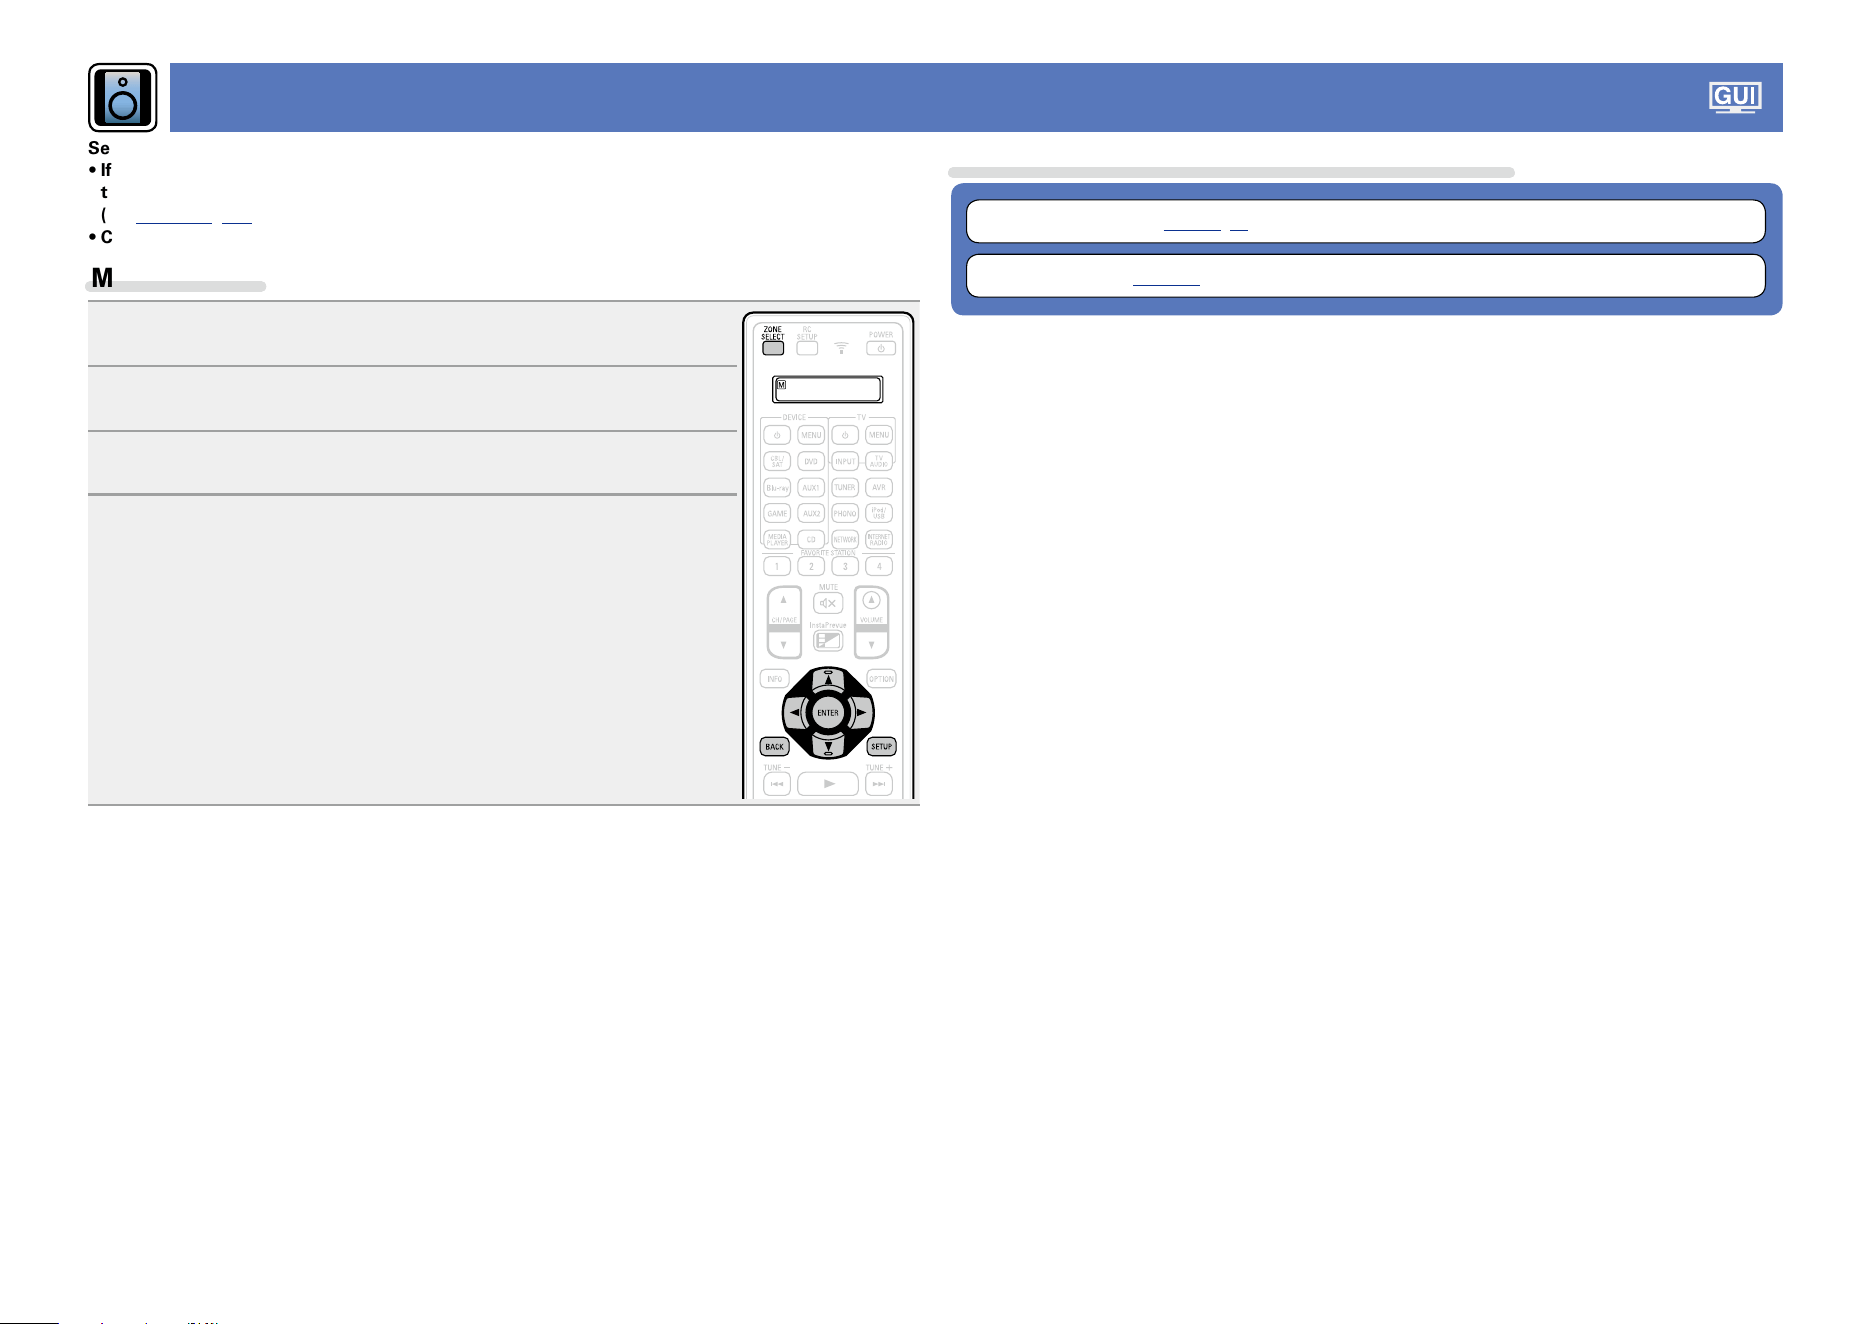
139
Speakers
Set when changing Audyssey
®
Setup settings.
•If you change the speaker settings after performing Audyssey
®
Setup, it will not be possible
to set Audyssey MultEQ
®
XT 32, Audyssey Dynamic EQ
®
and Audyssey Dynamic Volume
®
(vpage125, 126).
•Can be used without changing the settings. Please set if necessary.
Menu operation
1
Press ZONE SELECT to switch the zone mode.
The J indicator lights.
2
Press SETUP.
The menu is displayed on the TV screen.
3
Use ui to select the menu to be set or operated.
4
Press ENTER or p to enter the setting.
•To return to the previous item, press o or BACK.
•Exiting the Menu, press SETUP while the menu is displayed.
The menu display disappears.
Items that can be set with the “Speakers” procedure
Audyssey
®
Setup (vpage33, 99)
Manual Setup (vpage141)
Basic version
Advanced version
Informations
Advanced version
DVD
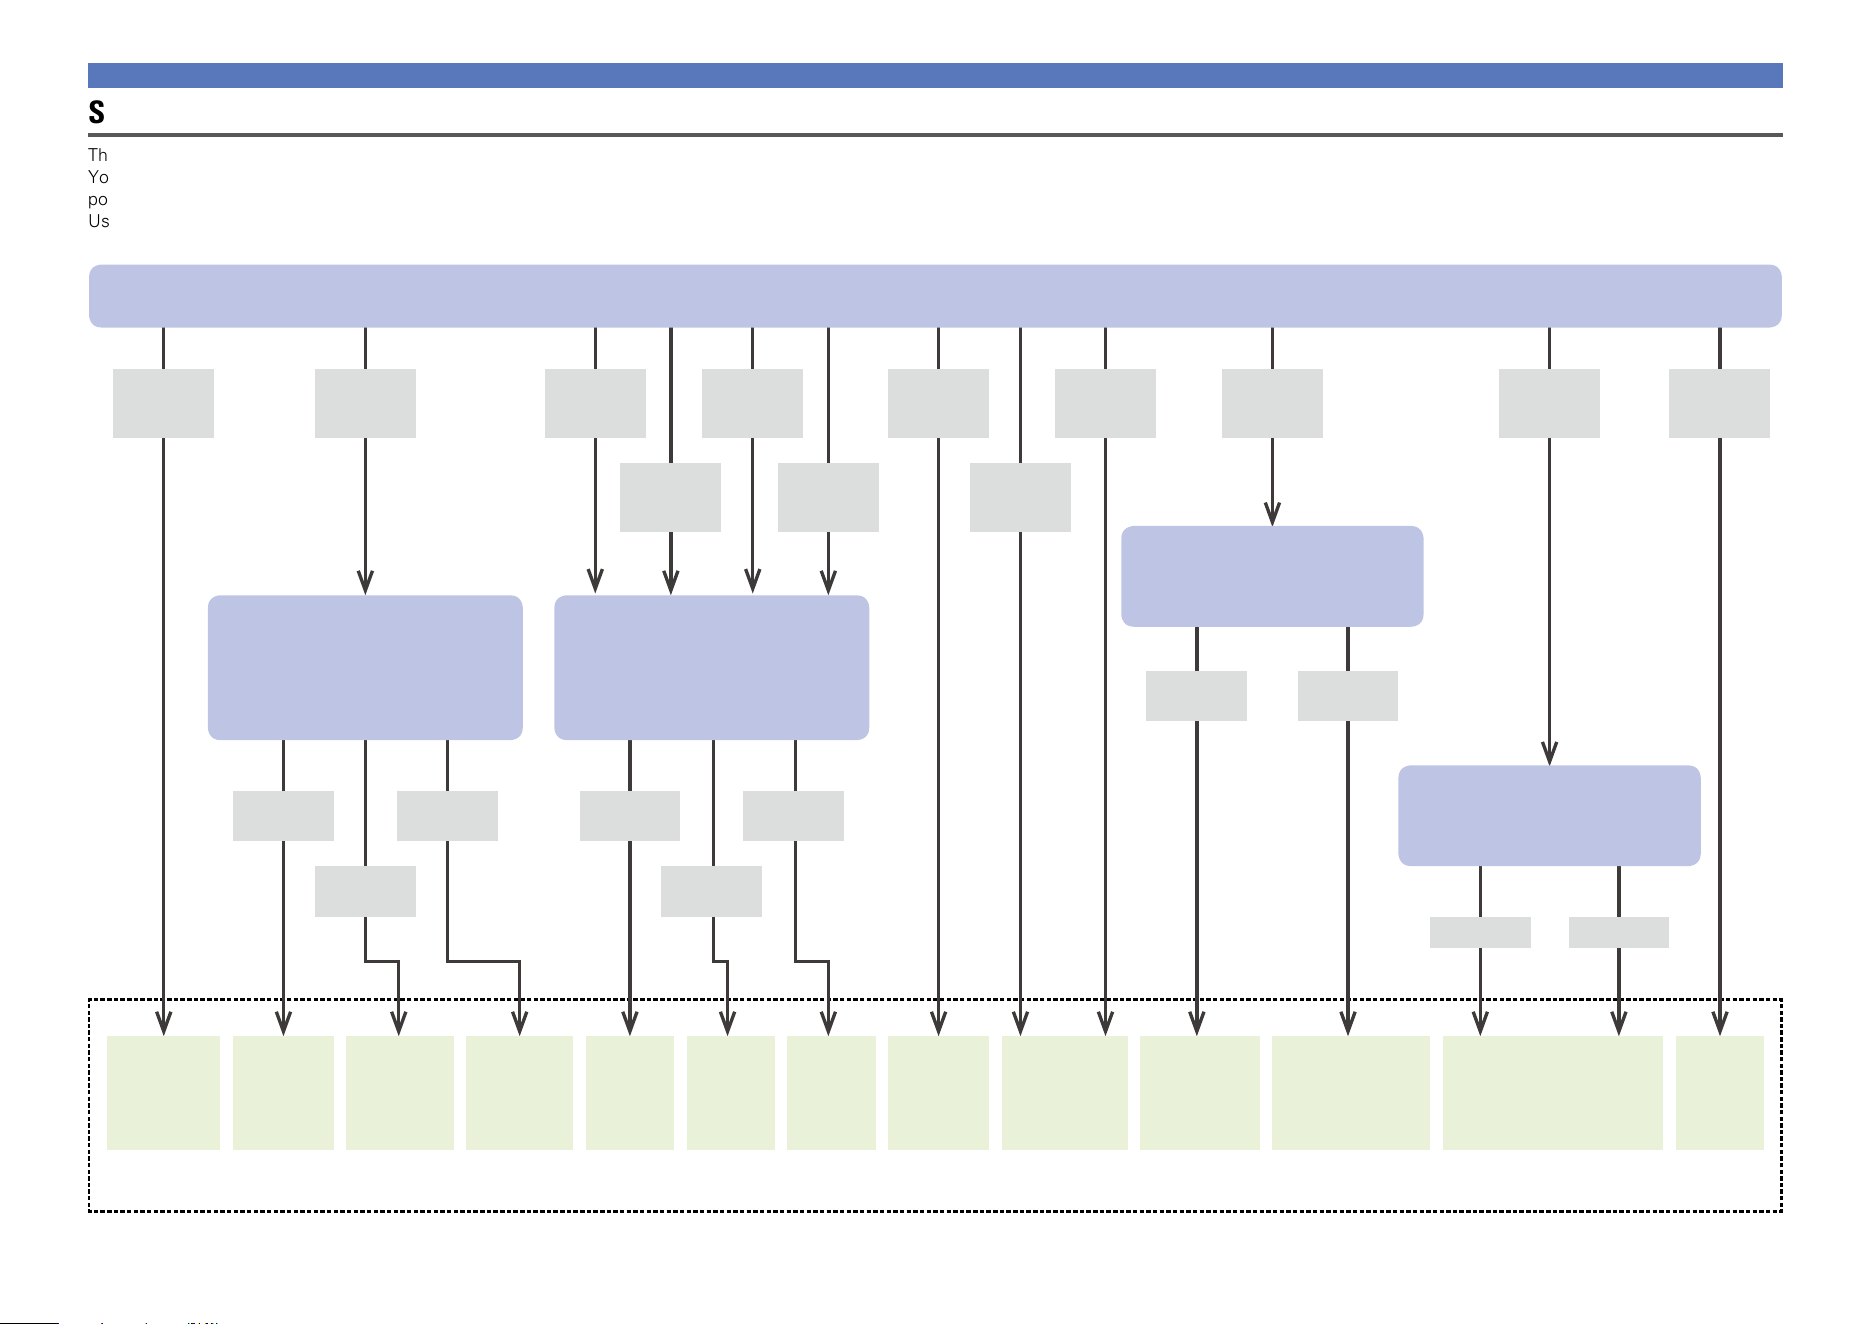
140
Maximum number of channels that can be used for the MAIN ZONE audio.
9.1ch
(SB/FH/FW)
9.1ch/2ch
Front
7.1ch +
ZONE2
7.1ch
(Bi-Amp)
7.1ch +
ZONE2/3-
MONO
7.1ch +
Front B
7.1ch/2ch
Front
(Bi-Amp)
5.1ch +
ZONE2/3
5.1ch
(Bi-Amp) +
ZONE2
Discrete
11.1ch
Custom
Pre
Amplifier
S.Back/
F.Height
S.Back/
F.Height
S.Back/
F.Wide
S.Back/
F.Wide
F.Height/
FWide
F.Height/
FWide
Front
Front
Height
All Custom
“Assign Mode” Settings
Select the method for using a power amplifier in accordance with your speaker system.
“Main Speakers” Settings
Select the speaker terminal from which to
output the signals assigned to the power
amplifiers for MAIN ZONE.
“Main Speakers” Settings
Select the speaker terminal from which to
output the signals assigned to the power
amplifiers for MAIN ZONE.
“Main Pre-amps” Settings
Select a channel that uses the PRE OUT
connector.
“Pre-amp Assign” Settings
Select how to set the Channel used as PRE
OUT.
9.1ch
(5.1+SB+FH)
(5.1+SB+FW)
(5.1+FH+FW)
9.1ch
(5.1+SB+FH)
9.1ch
(5.1+SB+FW)
9.1ch
(5.1+FH+FW)
7.1ch
(5.1+SB)
(5.1+FH)
7.1ch
(5.1+SB)
(5.1+FW)
7.1ch
(5.1+FH)
(5.1+FW)
7.1ch
(5.1+SB)
5.1ch
11.1ch
(9.1 + Front
(PRE OUT))
11.1ch
(9.1 + Front Height
(PRE OUT))
11.1ch
(PRE OUT)
11.1 ch
Speakers
Steps for setting “Amp Assign”
This unit is provided with 12 types of Assign Mode settings.
You can switch the channels assigned to a power amplifier in accordance with your speaker system or perform playback using up to 11.1 channels using a combination of the built-in power amplifier and an external
power amplifier. You can also use this unit as a preamplifier.
Use the following flowchart to set the speaker system of this unit.
Basic version
Advanced version
Informations
Advanced version
DVD
141
Manual Setup
Default settings are underlined.
Perform when setting the speakers manually or when changing settings made in Audyssey
®
Setup.
•If you change the speaker settings after performing Audyssey
®
Setup, it will not be possible to select
Audyssey MultEQ
®
XT 32, Audyssey Dynamic EQ
®
and Audyssey Dynamic Volume
®
(vpage125,
126).
•“Manual Setup” can be used without changing the settings. Please set if necessary.
Setting items Setting details
Amp Assign
Select power amplifier
usage method to match
your speaker system.
For the flow to set “Amp
Assign”, see page140.
Assign Mode : Set the assignment mode.
•9.1ch(SB/FH/FW) : Assigns all power amplifiers within this unit for
MAIN ZONE.
•7.1ch + ZONE2 : Assigns power amplifiers within this unit as follows:
7.1ch for MAIN ZONE and 2ch for ZONE2.
•5.1ch + ZONE2/3 : Assigns power amplifiers within this unit as follows:
5.1ch for MAIN ZONE and 2ch for ZONE2 and ZONE3 each.
•7.1ch + ZONE2/3-MONO : Assigns power amplifiers within this unit
as follows: 7.1ch for MAIN ZONE and 1ch for ZONE2 and ZONE3 each.
•7.1ch(Bi-Amp) : Assigns power amplifiers within this unit as follows:
7.1ch for MAIN ZONE and 2ch for the front speaker bi-amplifier
connection.
•5.1ch(Bi-Amp) + ZONE2 : Assigns power amplifiers within this unit as
follows: 5.1ch for MAIN ZONE, 2ch for the front speaker bi-amplifier
connection, and 2ch for ZONE2.
•9.1ch/2ch Front : Assigns all power amplifiers within this unit for MAIN
ZONE. Up to 9.1ch playback is available. You can also use a front speaker
that is different from the one used during multi-channel playback for
playback by switching the internal power amplifier during 2ch playback.
•7.1ch/2ch Front(Bi-Amp) : Assigns power amplifiers within this unit
as follows: 7.1ch for the MAIN ZONE multi-channel playback. You can
also use a front speaker that is different from the one used during multi-
channel playback for playback under the bi-amplifier connection by
switching the internal power amplifier during 2ch playback.
•7.1ch + Front B : Assigns power amplifiers within this unit as follows:
7.1ch for MAIN ZONE and 2ch for the second front speaker connection.
•Discrete 11.1ch : Assigns 9.1ch for power amplifiers within this unit and
2ch (front/front height) for the external power amplifier connection. Up
to 11.1ch playback is available.
•Pre Amplifier : Connects all speakers by using an external power
amplifier and uses this unit as a preamplifier. Up to 9.1ch playback is
available.
•Custom : Assigns power amplifiers within this unit as you prefer.
Setting items Setting details
Amp Assign
(Continued)
The following setting items are displayed according to the setting specified
for“Assign Mode” (vpage141).
n When “Assign Mode” (vpage 141) is set to “9.1ch(SB/FH/FW)”, “7.1ch
+ ZONE2”, “7.1ch + ZONE2/3-MONO”, “7.1ch(Bi-Amp)”, “9.1ch/2ch Front”,
“7.1ch/2ch Front(Bi-Amp)” or “7.1ch + Front B”
Main Speakers : Selects speakers used in MAIN ZONE.
•S.Back/F.Height : Uses surround back and front height speakers.
•S.Back/F.Wide : Uses surround back and front wide speakers.
•F.Height/F.Wide : Uses front height and front wide speakers.
n When “Assign Mode” (vpage141) is set to “Discrete 11.1ch”
Main Pre-amps : Selects the PRE OUT connector that is connected to
the external power amplifier used in MAIN ZONE.
•Front : Connects the PRE OUT connector for the front speaker.
•Front Height : Connects the PRE OUT connector for the front height
speaker.
n When “Assign Mode” (vpage141) is set to “Pre Amplifier”
Pre-Amp Assign : Selects how to use the PRE OUT connector.
•All : Uses this unit as a preamplifier by using only the PRE OUT
connector without using the power amplifiers within this unit.
•Custom : Sets whether to use each channel as a preamplifier or use
speakers.
Center / Surround / Surr. Back / Front Height / Front Wide
•Speaker : Select to use speakers.
•Pre-amp out : Select to output audio only from the PRE OUT
connectors.
n When “Assign Mode” (vpage141) is set to “Custom”
Output Channel : Selects signals output from the selected speaker
connector.
•Front / Center / Surround / Surround Back / Front Height / Front
Wide / ZONE2 / ZONE3 / ZONE2/3
•None : Does not output audio from the selected speaker.
Speakers
Basic version
Advanced version
Informations
Advanced version
v See overleaf
DVD
142
Setting items Setting details
Speaker Config.
(Continued)
Surr.Back : Set the presence, size and number of surround back speakers.
•Large : Use a large speaker that can adequately play back low
frequencies.
•Small : Use a small speaker that has inadequate playback capacity for
low frequencies.
•None : Select when the surround back speakers are not connected.
•2spkrs : Use two surround back speakers.
•1spkr : Use only one surround back speaker. When you select this
setting, connect the surround back speaker to the left (L) channel.
Front Height : Set the presence and size of the front height speakers.
•Large : Use a large speaker that can adequately play back low
frequencies.
•Small : Use a small speaker that has inadequate playback capacity for
low frequencies.
•None : Select when the front height speakers are not connected.
Front Wide : Set the presence and size of the front wide speakers.
•Large : Use a large speaker that can adequately play back low
frequencies.
•Small : Use a small speaker that has inadequate playback capacity for
low frequencies.
•None : Select when the front height speakers are not connected.
Speakers
Setting items Setting details
Speaker Config.
Indicate speaker presence
and select speaker size
categories based on bass
reproduction capability.
NOTE
Do not use the outward
shape of the speaker to
determine selection of a
“Large” or “Small” speaker.
Instead, use the frequencies
set in “Crossovers”
(vpage144) as the
standard for determining
bass reproduction capability.
Front : Set the front speaker size.
•Large : Use a large speaker that can adequately play back low
frequencies.
•Small : Use a small speaker that has inadequate playback capacity for
low frequencies.
•When “Subwoofer” is set to “None”, “Front” is automatically set to
“Large”.
•When “Front” is set to “Small”, “Center”, “Surround“, “Surr. Back”,
“Front Height” and “Front Wide” can not be set to “Large”.
Center : Set the presence and size of the center speaker.
•Large : Use a large speaker that can adequately play back low
frequencies.
•Small : Use a small speaker that has inadequate playback capacity for
low frequencies.
•None : Select when a center speaker is not connected.
“Large” is not displayed when “Front” is set to “Small”.
Subwoofer : Set the presence of a subwoofer.
•2spkrs : Use two subwoofer.
•1spkr : Use only one subwoofer.
•None : Select when a subwoofer is not connected.
When “Front” is set to “Small”, “Subwoofer” is automatically set to
“1spkr”.
Surround : Set the presence and size of the surround speakers.
•Large : Use a large speaker that can adequately play back low
frequencies.
•Small : Use a small speaker that has inadequate playback capacity for
low frequencies.
•None : Select when the surround speakers are not connected.
•When “Surround” is set to “Large”, “Surr.Back”, “Front Height” and
“Front Wide” can be set to “Large”.
•When “Surround” is set to “None”, “Surr.Back”, “Front Height” and
“Front Wide” are automatically set to “None”.
Basic version
Advanced version
Informations
Advanced version
v See overleaf
DVD
143
Speakers
Setting items Setting details
Distances
Set distance from listening
position to speakers.
Measure beforehand the
distance from the listening
position to each speaker.
Unit : Set the unit of distance.
•Feet / Meters
Step : Set the minimum variable width of the distance.
•1ft / 0.1ft
•0.1m / 0.01m
Set Defaults : The “Distances” settings are returned to the default
settings.
•Reset : Reset to the defaults.
•Cancel : Do not reset to the defaults.
When you select “Set Defaults” and press
ENTER, the “Resets all of the distance
settings to the factory defaults?” prompt is
displayed. Select either “Reset” or “Cancel”,
and press ENTER.
Front L / Front R / F. Height L / F. Height R / F. Wide L / F. Wide R /
Center / Subwoofer 1
z1
/ Subwoofer 2
z1
/ Surround L / Surround R /
Surr.Back L
z2
/ Surr.Back R
z2
: Select speaker for distance setting.
z1 When the “Speaker Config.” – “Subwoofer” setting (vpage142)
is set to “1spkr”, “Subwoofer” is displayed.
z2 When the “Speaker Config.” – “Surr.Back” setting (vpage142)
is set to “1spkr”, “Surr.Back” is displayed.
•0.0ft – 60.0ft / 0.00m – 18.00m : Set the distance.
•The speakers that can be selected differ depending on the “Amp Assign”
(vpage141) and “Speaker Config.” (vpage142) settings.
•Default settings :
Front L / Front R / F. Height L / F. Height R / Front Wide L / Front Wide R /
Center / Subwoofer 1 / Subwoofer 2 : 12.0 ft (3.60 m)
Surround L / Surround R / Surr.Back L / Surr.Back R : 10.0 ft (3.00 m)
•Set the difference in the distance between the speakers to less than
20.0 ft (6.00 m).
NOTE
Speakers set to “None” in “Speaker Config.” (vpage 142) are not
displayed.
Setting items Setting details
Levels
Set the volume of the test
tone to be the same when it
is output from each speaker.
Test Tone Start : Output test tone.
•Front L / F. Height L / Center / F. Height R / Front R / F. Wide R /
Surround R / Surr. Back R
z1
/ Surr. Back L
z1
/ Surround L /
F. Wide L / Subwoofer 1
z2
/ Subwoofer 2
z2
/ Subwoofer 1+2
z3
:
A test tone is output from the selected speaker. While listening to the
test tone, adjust the volume output from the selected speaker.
z1 When the “Speaker Config.” – “Surr.Back” setting (vpage142)
is set to “1spkr”, “Surr.Back” is displayed.
z2 When the “Speaker Config.” – “Subwoofer” setting (vpage142)
is set to “1spkr”, “Subwoofer” is displayed.
z3 When “Subwoofer 1+2” is selected, you can adjust the volume of
Subwoofer 1 and Subwoofer 2 at the same time.
•–12.0dB – +12.0dB (0.0dB) : Adjust the volume.
When “Levels” is adjusted, the adjusted values are set for all the
sound modes.
NOTE
•Speakers set to “None” in the “Speaker Config.” (vpage 142)
settings are not displayed.
•When a headphones jack is inserted in the PHONES jack of this unit, the
“Levels” is not displayed.
Set Defaults : The “Levels” settings are returned to the default settings.
•Reset : Reset to the defaults.
•Cancel : Do not reset to the defaults.
When you select “Set Defaults” and press
ENTER, the “Reset all of the channel level
settings to the factory defaults?” prompt is
displayed. Select either “Reset” or “Cancel”,
and press ENTER.
Basic version
Advanced version
Informations
Advanced version
v See overleaf
DVD
144
Speakers
Setting items Setting details
Crossovers
Set the maximum frequency
of the bass signal output
from each channel to
the subwoofer. Set the
Crossover Frequency to
suit the bass reproduction
capability of the speaker
being used.
Speaker Selection : Selects how to set the crossover frequency. See the
speaker manual for information concerning speaker crossover frequency.
•All : Selects the crossover point of all speakers at the same time.
•Individual : Selects the crossover points for each speaker individually.
The following settings can be set when the “Speaker Selection” setting
is set to“Individual”.
•All / Front / Center / Subwoofer / Surround / Surr.Back / Front Height /
Front Wide : Select speaker for setting of crossover frequency.
•40Hz / 60Hz / 80Hz / 90Hz / 100Hz / 110Hz / 120Hz / 150Hz / 200Hz /
250Hz : Set the crossover frequency.
•“Crossovers” can be set when the “Bass” – “Subwoofer Mode”
(vpage144) setting is “LFE+Main”, or when you have a speaker that
is set to “Small”.
•Always set the crossover frequency to “80Hz”. When using small
speakers, however, we recommend setting the crossover frequency to
a higher frequency.
•For speakers set to “Small”, sound below the crossover frequency
is cut from the sound output. The cut bass sound is output from the
subwoofer or front speakers.
•The speakers that can be set when “Individual” is selected differ
depending on to the “Subwoofer Mode” setting (vpage144).
•When “LFE” is selected, speakers set to “Small” at “Speaker Config.”
can be set. If the speakers are set to “Large”, “Full Band” is displayed
and the setting cannot be made.
•If set to “LFE+Main”, this setting can be made regardless of the
speaker size.
Setting items Setting details
Bass
Set subwoofer and LFE
signal range playback.
Subwoofer Mode : Select low range signals to be reproduced by
subwoofer.
•LFE : The low range signal of the channel set to “Small” speaker size is
added to the LFE signal output from the subwoofer.
•LFE+Main : The low range signal of all channels is added to the LFE
signal output from the subwoofer.
•“Subwoofer Mode” can be set when “Speaker Config.” – “Subwoofer”
(vpage142) is set to other than “None”.
•Play music or a movie source and select the mode offering the strongest
bass.
•Select “LFE+Main” if you want the bass signals to always be produced
from the subwoofer.
NOTE
If “Front” and “Center” for “Speaker Config.” are set to “Large”, and
“Subwoofer Mode” is set to “LFE”, no sound may be output from the
subwoofers, depending on the input signal or selected sound mode.
LPF for LFE : Set LFE signal playback range. Set this when you want to
change the playback frequency of the subwoofer.
•80Hz / 90Hz / 100Hz / 110Hz / 120Hz / 150Hz / 200Hz / 250Hz
Basic version
Advanced version
Informations
Advanced version
v See overleaf
DVD
145
Speakers
Setting items Setting details
Impedance
Set the impedance of
connected speakers.
8Ω/ohms : Select when the impedance per speaker for all the connected
speakers is 8Ω or larger.
6Ω/ohms : Select when the impedance for any of the connected speakers
is between 6Ω and 8Ω.
4Ω/ohms : Select when the impedance for any of the connected speakers
is between 4Ω and 8Ω.
Check the speaker impedance (Ω) shown on the back of your speakers
or in the instruction manual beforehand.
Front Speaker
Set the front speakers to
use for every sound mode.
2ch Playback : The front speakers used in direct play (2 channel), stereo
play and pure direct play (2 channel) are set in advance.
•A : Front speaker A is used.
•B : Front speaker B is used.
•A+B : Both front speakers A and B are used.
Multi ch Playback : The front speakers used in play modes other than
direct play (2 channel), stereo play and pure direct play (2 channel) are set
in advance.
•A : Front speaker A is used.
•B : Front speaker B is used.
•A+B : Both front speakers A and B are used.
This can be set when “Assign Mode” (vpage141) is set to “7.1ch
+ Front B”.
2ch Playback
Select the method for
setting the speakers used
in the 2-channel direct and
stereo playback modes.
Setting : Select the method for setting the speakers used in the 2-channel
direct and stereo playback modes.
•Auto : The settings at “Speakers” (vpage139) are applied.
•Manual : Make separate settings for 2-channel. Make the following
settings:
Front : Set the front speaker size.
•Large : Use a large speaker that can adequately play back low
frequencies.
•Small : Use a small speaker that has inadequate playback capacity for
low frequencies.
If “Speaker Config.” – “Subwoofer” (vpage142) is set to “None”,
the setting is automatically set to “Large”.
Setting items Setting details
2ch Playback
(Continued)
Subwoofer : Set the presence of a subwoofer.
•Yes : Use a subwoofer.
•No : Select when a subwoofer is not connected.
If “Speaker Config.” – “Subwoofer” (vpage142) is set to “None”,
the setting is automatically set to “No”. If the “Front” setting is
“Small”, the setting is automatically “Yes”.
SW Mode : Select low range signals to be reproduced by subwoofer.
•LFE : When the “2ch Playback – “Front” setting is set to “Large”, the
LFE signal alone is output from the subwoofer. Also, when the “2ch
Playback” – “Front” setting is set to “Small”, the front channel low
range signal is added to the LFE signal output from the subwoofer.
•LFE+Main : The front channel low range signal is added to the LFE signal
output from the subwoofer.
This setting can be set made “2ch Playback” – “Subwoofer” is set to
“Yes”.
Crossover : Set the maximum frequency of the bass signal output from
each channel to the subwoofer.
•40Hz / 60Hz / 80Hz / 90Hz / 100Hz / 110Hz / 120Hz / 150Hz / 200Hz /
250Hz
•This setting can be set made “2ch Playback” – “Subwoofer” is set to
“Yes”.
•If the “2ch Playback” – “Front” setting is “Large” and the “SW Mode”
setting is “LFE”, “Full Band” is displayed and the setting cannot be
made.
Distance FL / Distance FR : Select speaker for distance setting.
•0.0ft – 60.0ft (12.0ft) / 0.00m – 18.00m (3.60m) : Set distance from
main listening point to speaker.
Set the difference in the distance between the speakers to less than
20.0 ft (6.00 m).
Level FL / Level FR : Select speaker for level adjustment.
•–12dB – +12dB (0dB) : Adjust the level of each channel.
Basic version
Advanced version
Informations
Advanced version
DVD
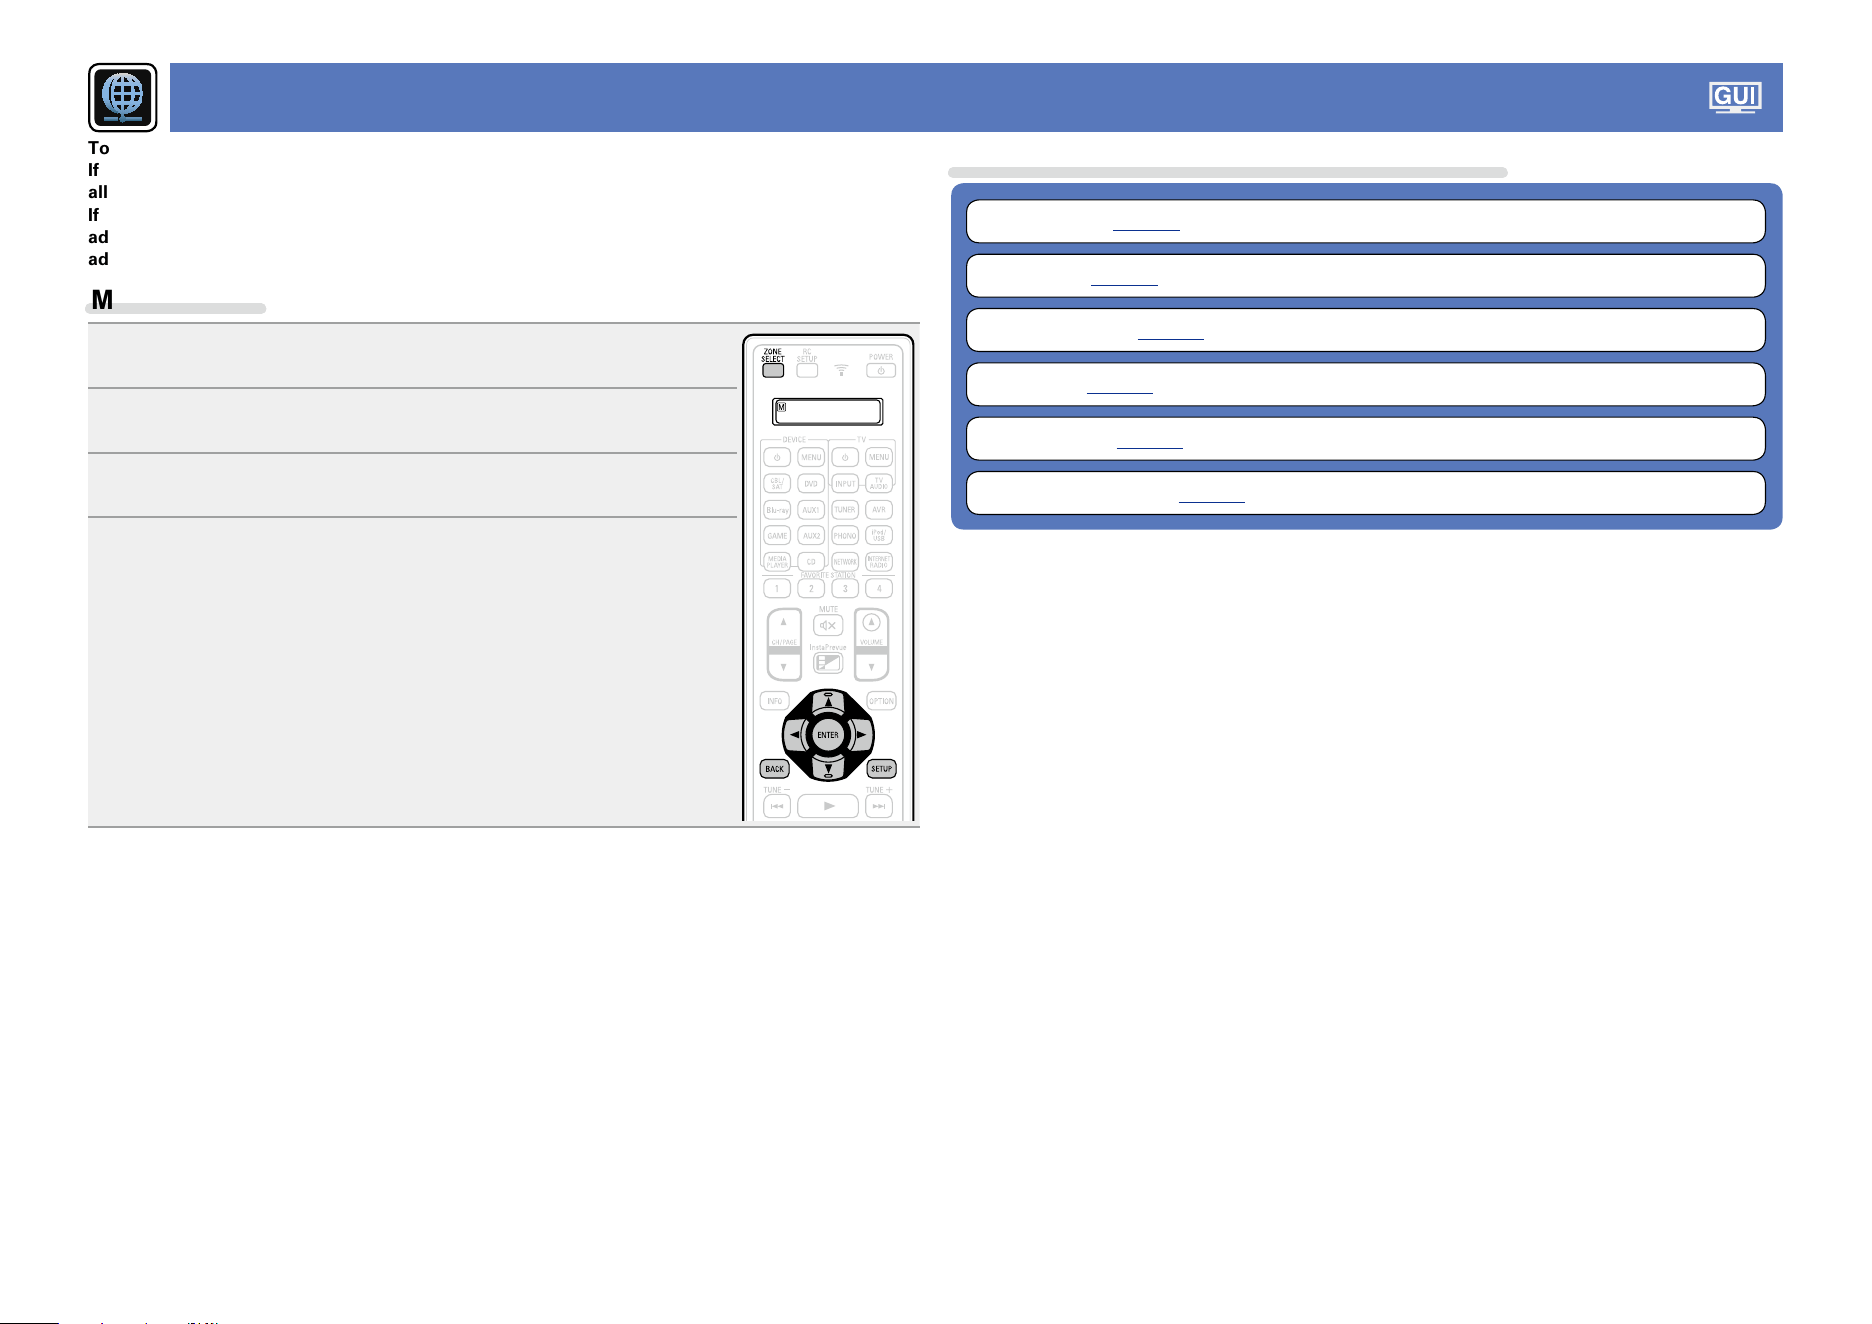
146
Network
To use this unit by connecting it to a home network (LAN), you must configure network settings.
If you set up your home network (LAN) via DHCP, set “DHCP” to “On” (use the default setting). This
allows this unit to use your home network (LAN).
If you assign an IP address for each device, you must use the “IP Address” setting to assign an IP
address to this unit and enter the information about your home network (LAN) such as the gateway
address and subnet mask.
Menu operation
1
Press ZONE SELECT to switch the zone mode.
The J indicator lights.
2
Press SETUP.
The menu is displayed on the TV screen.
3
Use ui to select the menu to be set or operated.
4
Press ENTER or p to enter the setting.
•To return to the previous item, press o or BACK.
•Exiting the Menu, press SETUP while the menu is displayed.
The menu display disappears.
Items that can be set with the “Network” procedure
Information (vpage147)
Network (vpage147)
Friendly Name (vpage147)
Settings (vpage148)
Diagnostics (vpage149)
Maintenance Mode (vpage149)
Basic version
Advanced version
Informations
Advanced version
DVD
147
Information
Display network information.
Setting details
Friendly Name / DHCP On or Off / IP Address / MAC Address
MAC Address is required to make a vTuner account.
Network
Default settings are underlined.
Enables network communication in standby power mode.
Setting details
Off In Standby : Suspend network function during standby.
Always On : Network is on during standby. Main unit operable with a network compatible controller.
•Set to “Always On” when using the web control function.
•With the “Always On” setting, you can use each NETWORK connector as the hub even while power
to this unit is set to standby.
NOTE
When “Network” is set to “Always On”, it consumes more standby power.
Network
Friendly Name
The Friendly Name is the name of this unit displayed on the network. You can change the Friendly Name
according to your preferences.
Setting items Setting details
Edit Name
Edits Friendly Name.
•The default Friendly Name on first use is “DENON AVR-4520CI”.
•Up to 63 characters can be input.
•For character input, see page118.
Set Defaults
Restores Friendly Name,
which you had changed, to
the default setting.
Reset : Reset to the defaults.
Cancel : Do not reset to the defaults.
When you select “Set Defaults” and press
ENTER, the “Reset the friendly name back
to the factory default?” prompt is displayed.
Select either “Reset” or “Cancel”, and press
ENTER.
Basic version
Advanced version
Informations
Advanced version
DVD

148
Network
Settings
Default settings are underlined.
Make settings for wired LAN.
Only set “Settings” when connecting to a network without a DHCP function.
Setting details
Network
Information
Network
Friendly Name
Settings
Diagnostics
Maintenance Mode
Selects how configure the network settings
q
DHCP
-IP Address
-Subnet Mask
Proxy
Save
Cancel
-Address
-Port
-Default Gateway
-Primary DNS
-Secondary DNS
Configure the network settings manually
Off
192.168.000.001
255.255.255.000
255.255.255.000
000.000.000.000
000.000.000.000
Off
000.000.000.000
00000
Network/Settings
e
y
i
t
w
o
Q1
r
u
Q0
q On the menu, select “Network” – “Settings” and press ENTER.
w Use ui to select “DHCP”, then press ENTER.
e Use o p to select “Off”, then press ENTER.
r Use ui to select “IP Address”, then press ENTER.
•IP Address : Set the IP address within the ranges shown below.
The Network Audio function cannot be used if other IP addresses are set.
CLASS A: 10.0.0.1 – 10.255.255.254
CLASS B: 172.16.0.1 – 172.31.255.254
CLASS C: 192.168.0.1 – 192.168.255.254
t Use uio p or 0 – 9 to input the address and press ENTER.
y Use ui to select setting item, then press ENTER.
•Subnet Mask : When connecting an xDSL modem or terminal adapter
directly to this unit, input the subnet mask indicated in the documentation
supplied by your provider. Normally input 255.255.255.0.
•Default Gateway : When connected to a gateway (router), input its IP address.
•Primary DNS, Secondary DNS : If there is only one DNS address indicated in the documentation
supplied by your provider, input it at “Primary DNS”. If two or more DNS are provided by your
provider, enter both “Primary DNS” and “Secondary DNS”.
Setting details
u Use ui to select “Proxy” and press ENTER.
•Proxy : Make this setting when connecting to the Internet via a proxy server.
Make the proxy settings only when you connect to the Internet via a proxy server that is on your
internal network or provided by your provider, etc.
i Use o p to select “On(Address)” or “On(Name)”, and then press ENTER.
On(Address) : Select when inputting by address.
On(Name) : Select when inputting by domain name. Up to 38 characters can be input.
o Press i to select “Address” or “Name”, then press ENTER.
When “Address” is selected in step i : Use uio p or 0 – 9 to enter the proxy server address, and
press ENTER.
When“Name” is selected in step i : Use the software keyboard (vpage118) to enter the domain
name, and select
O K
.
•For character input, see page118.
Q0 Press i to select “Port”, then press ENTER. Use uio p or 0 – 9 to input the proxy server port
number and press ENTER.
Setup is complete.
Q1 Press i to select “Save”, then press ENTER.
The display returns to the original screen.
•If you are using a broadband router (DHCP function), there is no need to make the settings at “IP
Address” and “Proxy”, since the DHCP function is set to “On” in this unit’s default settings.
•If this unit is being used connected to a network without the DHCP function, the network settings
must be made. In this case, some knowledge of networks is required. For details, consult a network
administrator.
•If you cannot connect to the Internet, recheck the connections and settings (vpage31).
•If you do not understand about Internet connection, contact your ISP (Internet Service Provider) or the
store from which you purchased your computer.
•When you want to cancel the setting during IP address input, select “Cancel”, then press ENTER.
Basic version
Advanced version
Informations
Advanced version
DVD
149
Network
Diagnostics
Used to check the network connection.
Setting items Setting details
Physical Connection
Checks the physical LAN
port connection.
OK : Connected.
Error : The LAN cable is not connected. Check the connection.
Router Access
Checks the connection from
this unit to the router.
OK : Accessed.
Error : Failed to communicate with the router. Check the router settings.
Internet Access
Checks whether this unit
has access to the Internet
(WAN).
OK : Connected.
Error : Failed to connect to the Internet. Check the Internet connection
environment or router settings.
Maintenance Mode
Use when receiving maintenance from a DENON service engineer or custom installer.
Setting details
NOTE
Only use this function if so instructed by a DENON serviceperson or installer.
Basic version
Advanced version
Informations
Advanced version
DVD
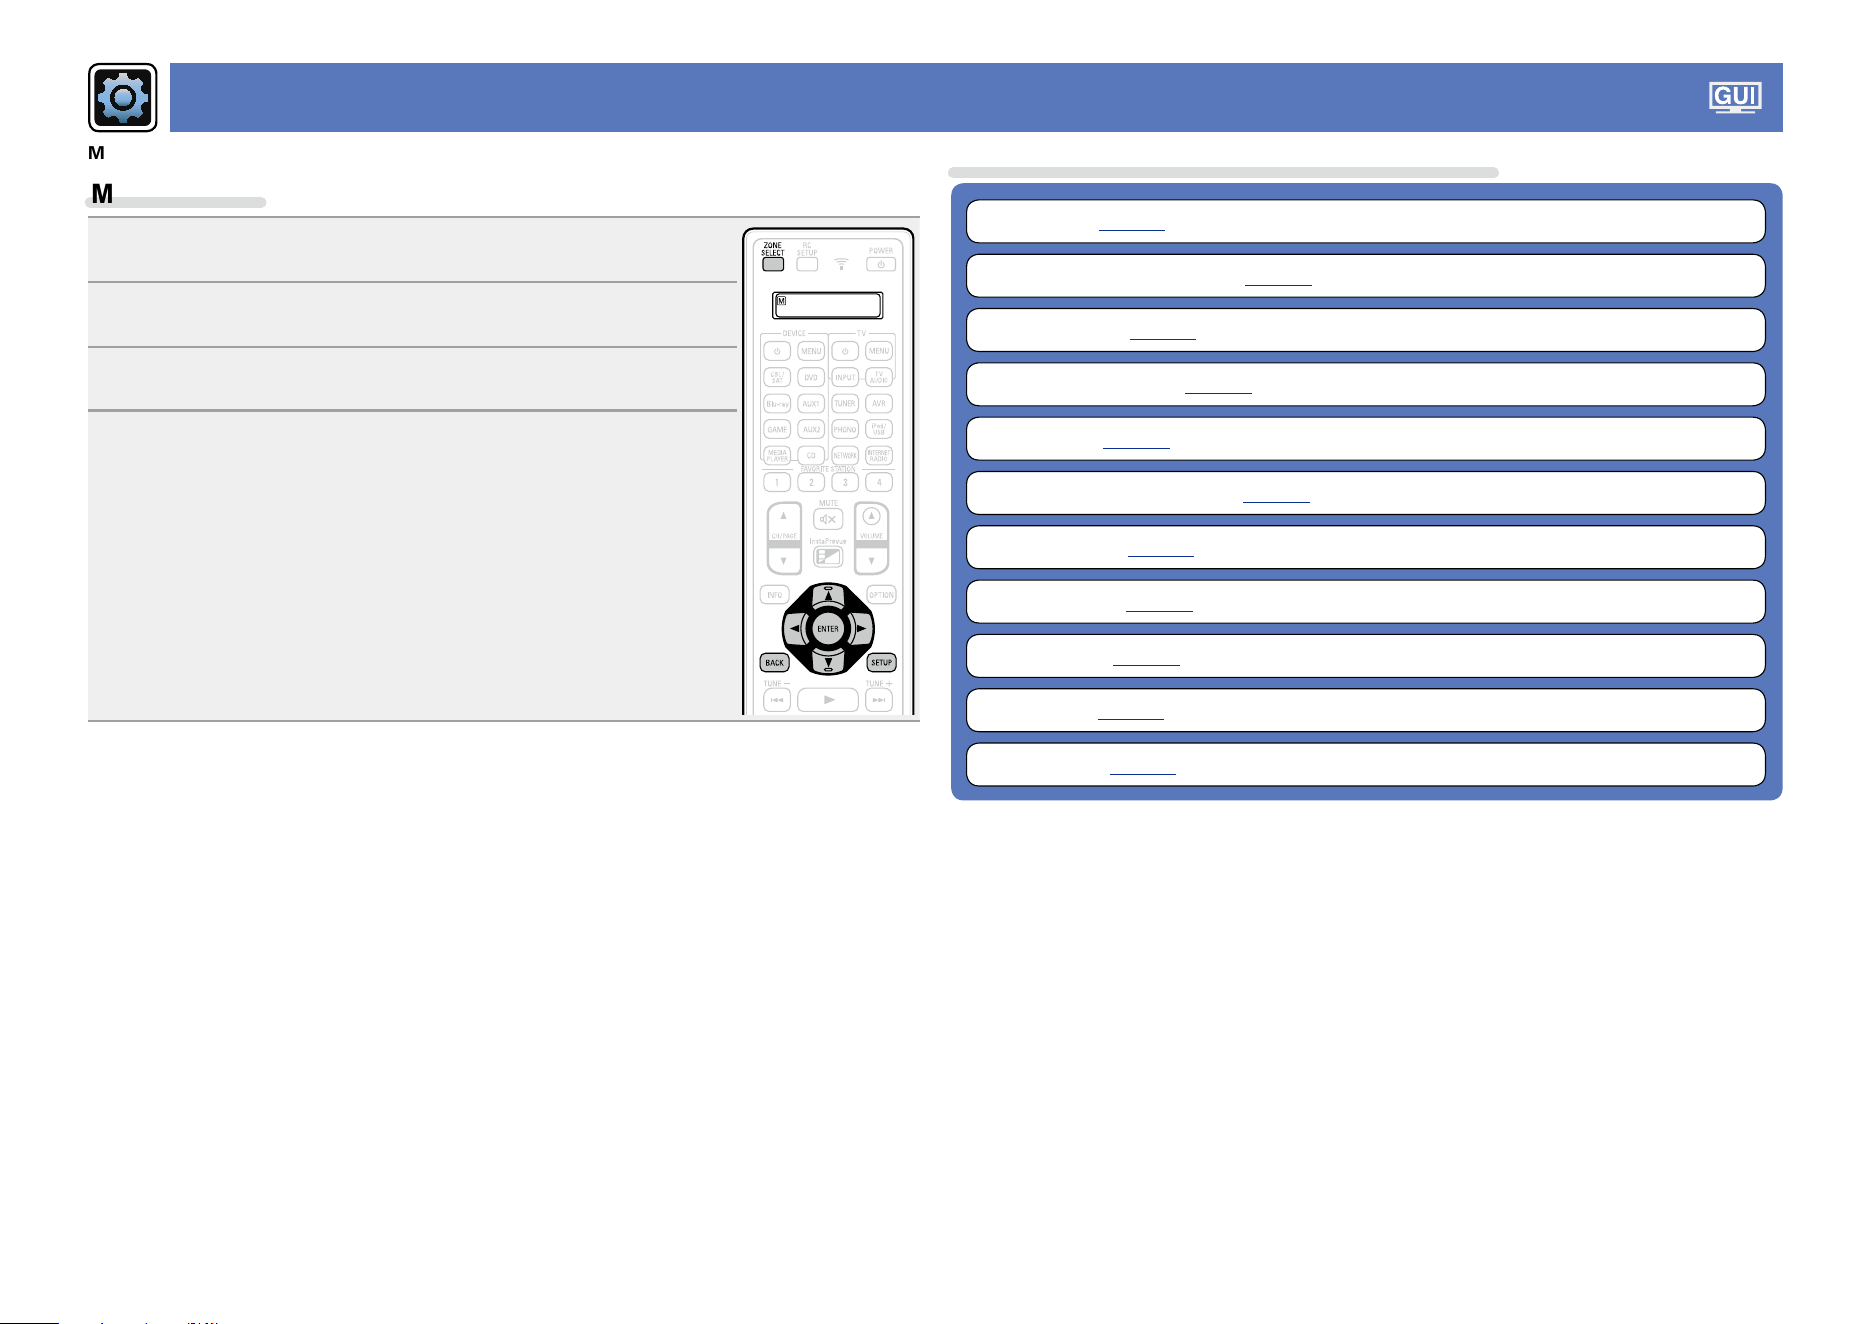
150
General
Make various other settings.
Menu operation
1
Press ZONE SELECT to switch the zone mode.
The J indicator lights.
2
Press SETUP.
The menu is displayed on the TV screen.
3
Use ui to select the menu to be set or operated.
4
Press ENTER or p to enter the setting.
•To return to the previous item, press o or BACK.
•Exiting the Menu, press SETUP while the menu is displayed.
The menu display disappears.
Items that can be set with the “General” procedure
Language (vpage151)
ZONE2 Setup / ZONE3 Setup (vpage151)
Zone Rename (vpage152)
Quick Select Names (vpage152)
Remote ID (vpage152)
Trigger Out 1 / Trigger Out 2 (vpage152)
Auto Standby (vpage153)
Front Display (vpage153)
Information (vpage153)
Firmware (vpage154)
Setup Lock (vpage156)
Basic version
Advanced version
Informations
Advanced version
DVD

151
General
Language
Default settings are underlined.
Set the language for display on the menu screen.
Setting details
English / Français / Español
“Language” can also be set by the following procedure. However, the menu screen is not displayed.
Following the display content to make the setting.
1. Press and hold the main unit’s o p for at least 3 seconds.
“zVideo Format < NTSC >” appears on the display.
2. Press the main unit’s i and set “zGUI Language < ENGLISH >”.
3. Use the main unit’s o p and set the language.
4. Press the main unit’s ENTER to complete the setting.
ZONE2 Setup / ZONE3 Setup
Default settings are underlined.
Set the audio to play back with multi-zone (ZONE2, ZONE3).
Setting items Setting details
Bass
Adjust bass tones.
–10dB – +10dB (0dB)
Treble
Adjust treble tones.
–10dB – +10dB (0dB)
High Pass Filter
Make settings for cutting
the low range to reduce
distortion in the bass.
On : The low range is attenuated.
Off : The low range is not attenuated.
Lch Level
Adjust the left channel
output level.
–12dB – +12dB (0dB)
Rch Level
Adjust the right channel
output level.
–12dB – +12dB (0dB)
Setting items Setting details
Channel
Set the signal output from
multi-zone.
Stereo : Select stereo output.
Mono : Select monaural output.
When “Assign Mode” (vpage 141) is set to “7.1ch + ZONE2/3-
MONO”, the “Channel” setting is automatically set to “Mono”.
Volume Level
Set the volume output level.
Variable : Volume adjustment is enabled by main unit and remote control
unit.
40 (–40dB) : Fix volume at 40 (–40 dB). Set when adjusting volume by
external amplifier.
80 (0dB) : Fix volume at 80 (0 dB). Set when adjusting volume by external
amplifier.
When “Assign Mode” (vpage 141) is set to “7.1ch + ZONE2”,
“5.1ch + ZONE2/3”, “7.1ch + ZONE2/3-MONO” or “5.1ch(Bi-
Amp) + ZONE2”, the “Volume Level” setting is automatically set to
“Variable”.
Volume Limit
Make a setting for
maximum volume.
60 (–20dB) / 70 (–10dB) / 80 (0dB)
Off : Do not set a maximum volume.
This is displayed from –79 dB to 18 dB when “Scale” (vpage124)
is set to “–79.5dB – 18.0dB”.
Power On Volume
Define the volume setting
that is active when the
power is turned on.
Last : Use the memorized setting from the last session.
Mute : Always mute when power is turned on.
1 – 98 (–79dB – 18dB) : The volume is adjusted to the set level.
This is displayed from –79 dB to 18 dB when “Scale” (vpage124)
is set to “–79.5dB – 18.0dB”.
Mute Level
Set the amount of
attenuation when muting
is on.
Full : The sound is muted entirely.
–40dB : The sound is attenuated by 40 dB down.
–20dB : The sound is attenuated by 20 dB down.
Basic version
Advanced version
Informations
Advanced version
DVD

152
Zone Rename
Change the display title of each zone to one you prefer.
Setting details
MAIN ZONE / ZONE2 / ZONE3 / ZONE4
•Up to 10 characters can be input.
•For character input, see page118.
Set Defaults : The input source name is returned to the default setting.
•Reset : Reset to the defaults.
•Cancel : Do not reset to the defaults.
If you select “Set Defaults” and press ENTER, the message “Reset to the
default values?” is displayed. Select “Reset” or “Cancel”, and then press
ENTER.
Quick Select Names
Change the “Quick Select” display title to one you prefer.
Setting details
Quick Select 1 / Quick Select 2 / Quick Select 3 / Quick Select 4
•Up to 16 characters can be input.
•For character input, see page118.
Set Defaults : The input source name is returned to the default setting.
•Reset : Reset to the defaults.
•Cancel : Do not reset to the defaults.
If you select “Set Defaults” and press ENTER, the message “Reset to the
default values?” is displayed. Select “Reset” or “Cancel”, and then press
ENTER.
Remote ID
Set when you operate another DENON AV amplifier with the remote control unit of this unit.
Match the remote control unit you are using with the remote ID of this unit.
Setting details
n How to set the remote ID
1. Press ZONE SELECT to switch the zone mode.
The J indicator lights.
2. Press SETUP.
The menu is displayed on the TV screen.
3. Use ui to select “General” then press ENTER.
4. Use ui to select “Remote ID” then press ENTER.
5. Change the ID for the remote control unit(vpage167).
6. Press ENTER.
The Remote ID for this unit is set to the same ID as the one for the remote
control unit.
Trigger Out 1 / Trigger Out 2
Selects when to activate trigger out.
For details about how to connect the TRIGGER OUT jacks, see “TRIGGER OUT jacks” (vpage30).
Setting details
n When setting for zone (MAIN ZONE / ZONE2 / ZONE3 / ZONE4)
Trigger out is activated through linkage to the power of the zone set to “On”.
n When setting for input source
Activate trigger out when the input source set to “On” is selected.
Active for the zone set to “On” with “When setting for zone”.
n When setting for HDMI monitor
Activate trigger out when the HDMI monitor set to “On” is selected.
Activate trigger out when the HDMI monitor set to “On” is selected. Active when the “MAIN
ZONE” set to “On” with “When setting for zone” is selected, and when the input source set to
“On” with “When setting for input source” is selected.
•On : Activate trigger on this mode.
•– – – : Do not activate trigger on this mode.
General
Basic version
Advanced version
Informations
Advanced version
DVD
153
Auto Standby
Default settings are underlined.
When you do not perform any operation on this unit with no audio or video input for a specified time,
this unit automatically enters the standby mode. Before it enters the standby mode, “Auto Standby” is
displayed on the display of this unit and the menu screen.
Setting details
60min : The unit goes into standby after 60 minutes.
30min : The unit goes into standby after 30 minutes.
Off : The unit does not go into standby automatically.
Front Display
Default settings are underlined.
Makes settings related to the display on this unit.
Setting items Setting details
Dimmer
Adjust the display
brightness of this unit.
Bright : Normal display brightness.
Dim : Reduced display brightness.
Dark : Very low display brightness.
Off : Turns the display off.
Buttons on the main unit can be used for operations.
Each time DIMMER is pressed, the setting is changed as shown
below.
Bright Dim
DarkOff
NOTE
When “Dimmer” is set to “Off”, the display turns off and appears as if
there is no electricity.
Channel Indicators
Sets whether to use the
input signal display or
output signal display for the
channel indication on the
display.
Input : Uses the input signal display for the channel indication on the
display.
Output : Uses the output signal display for the channel indication on the
display.
Information
Show information about receiver settings, input signals, etc.
NOTE
This item is not compatible with the HDMI ZONE4 function.
Items Setting details
Audio
Show information about
audio input signals.
Sound Mode : The currently set surround mode.
Input Signal : The input signal type.
Format : The number of input signal channels (presence of front, surround,
LFE).
Sample Rate : The input signal’s sampling frequency.
Offset : The dialogue normalization correction value.
Flag : This is displayed when inputting signals including a surround back
channel. “MATRIX” is displayed with Dolby Digital EX and DTS-ES Matrix
signals, “DISCRETE” with DTS-ES Discrete signals.
Dialogue normalization function
This function is automatically activated when playing Dolby Digital, Dolby
Digital Plus, Dolby TrueHD, DTS and DTS-HD sources.
It automatically corrects the standard signal level for individual program
sources.
The correction value can be checked using the
STATUS on the main unit.
Dial.Norm
Offset - 4dB
The figure is the corrected value. This cannot be changed.
Video
Show information about
HDMI input/output signals
and HDMI monitors.
HDMI Signal Info.
•Resolution / Color Space / Pixel Depth
HDMI Monitor 1 / HDMI Monitor 2
•Interface / Resolutions
General
Basic version
Advanced version
Informations
Advanced version
DVD
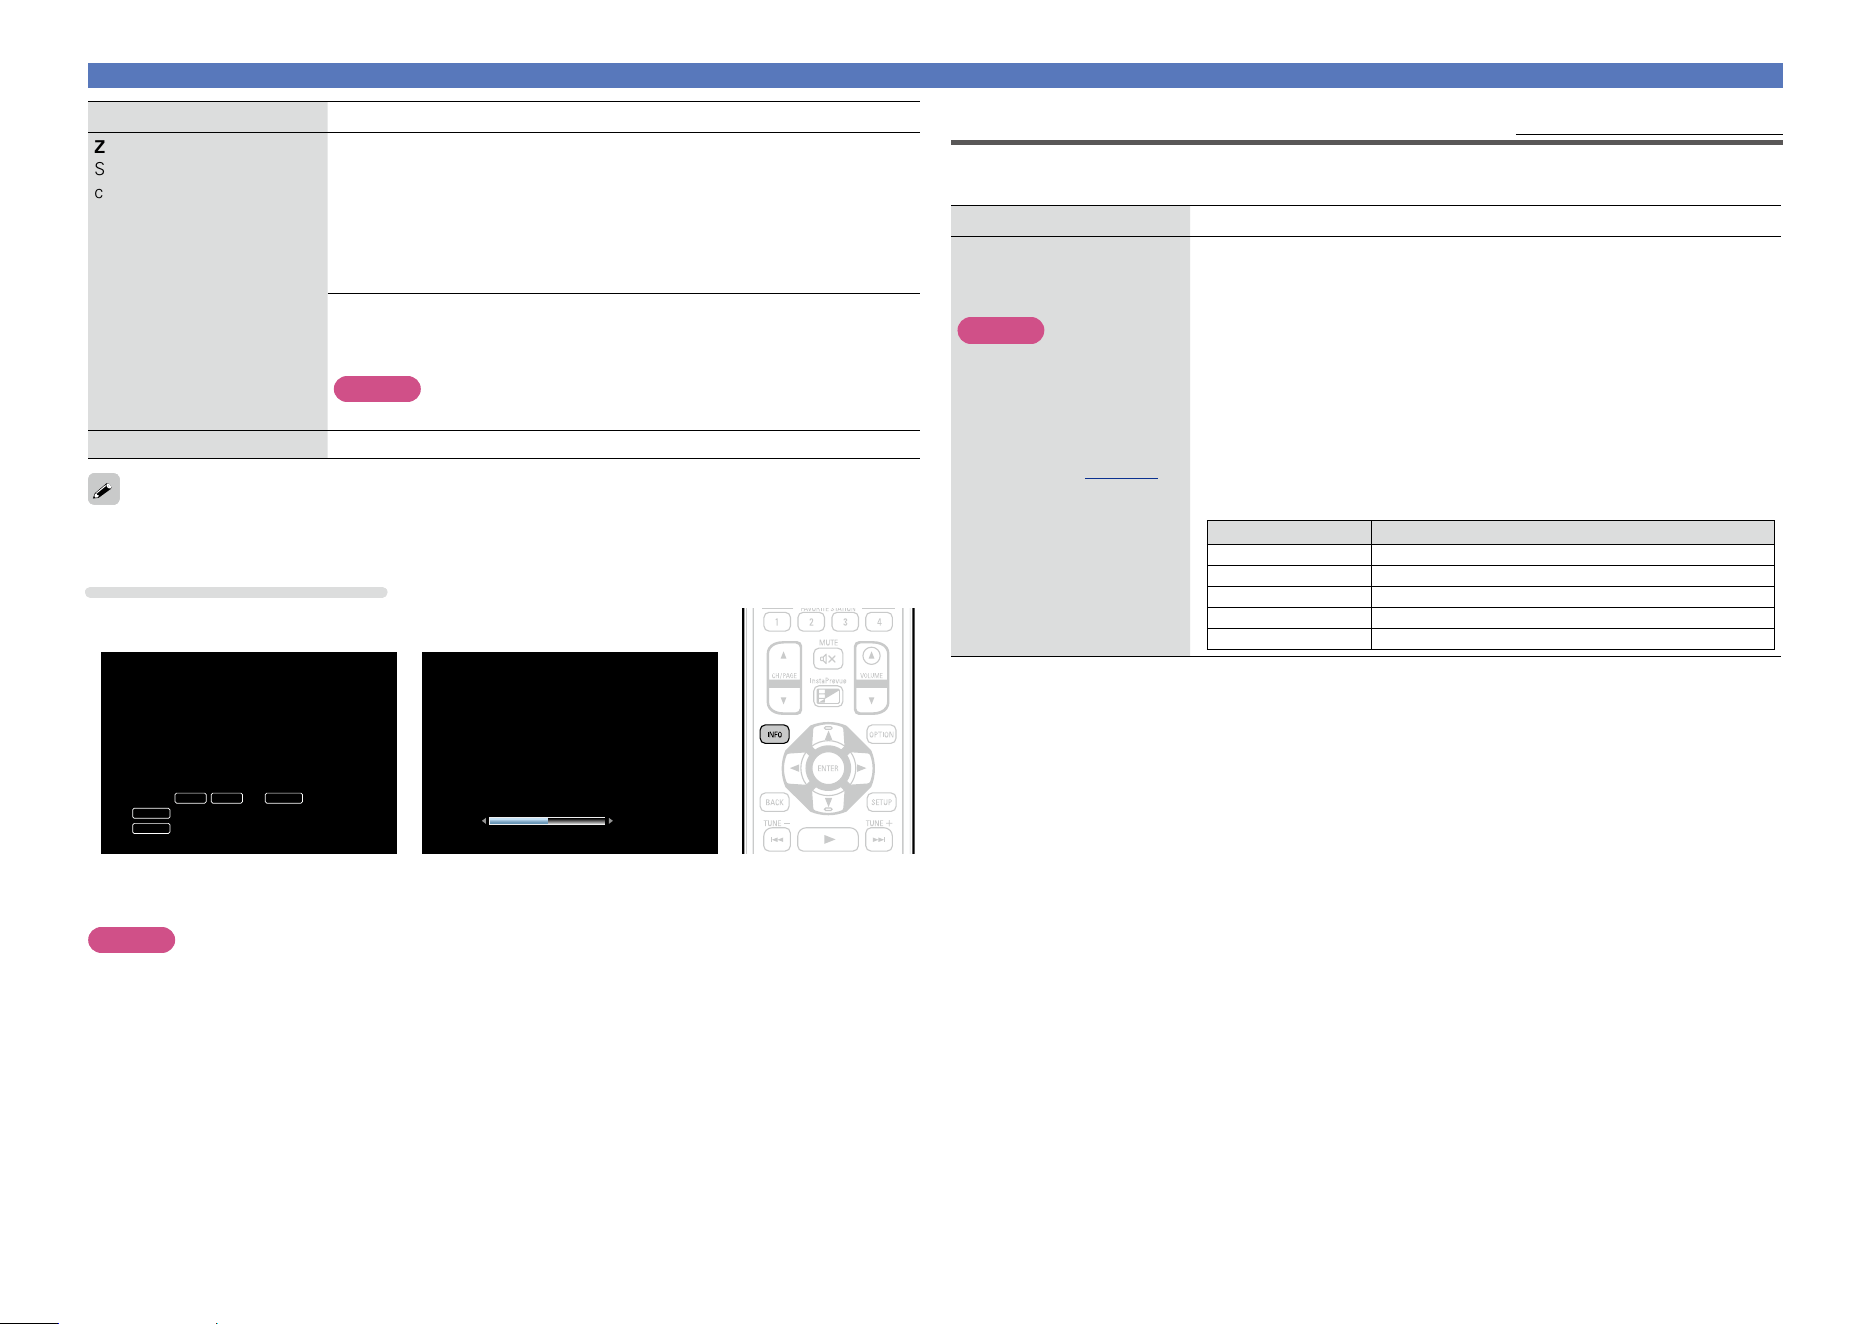
154
General
Items Setting details
ZONE
Show information about
current settings.
MAIN ZONE : This item shows information about settings for MAIN
ZONE. The information displayed differs according to the input source.
•ZONE Name / Select Source / Name / Sound Mode / Input Mode /
Decode Mode / HDMI / Digital / Analog / Component / Video /
Rec Select / Video Select / Video Mode / Content Type / Video
Conversion / i/p Scaler / Resolution / Progressive Mode / Aspect
Ratio etc.
ZONE2/3/4 : This item shows information about settings for ZONE2,
ZONE3 or ZONE4.
•ZONE Name / Power / Select Source / Volume Level
NOTE
For ZONE4, “Volume Level” is not displayed.
Firmware Version : Displays information for the current firmware.
Press INFO to display current source name, volume, sound mode name, and other information at the
bottom of the screen.
Examples of screen display
•Status display screen
When the input source is switched. When the volume is adjusted.
SOURCE
VIDEOAUTO DTS
SOUND
DVD
CBL/SAT
DTS SURROUND
50.0
Status display: The operating status appears briefly on the screen when the input
source is switched or the volume is changed.
NOTE
The status display screen cannot be displayed at a computer’s resolution (e.g. VGA) or while certain 3D
video contents is being played.
Firmware
Default settings are underlined.
Set whether or not to check for firmware update, update the firmware, and display update and upgrade
notifications.
Setting items Setting details
Update
Update the firmware of the
receiver.
NOTE
In cases where it is not
possible to connect to
the network after doing a
firmware update, connect
to the network again using
“Network” (vpage146).
Check for Update : Check for firmware updates. You can also check
approximately how long it will take to complete an update.
Update Start : Execute the update process.
When updating starts, the power indicator becomes red and the menu
screen is shut down. The amount of update time which has elapsed is
displayed.
When updating is complete, the power indicator becomes green and
normal status is resumed.
•If updating fails, the set automatically retries, but if updating is still not
possible, one of the messages shown below is displayed. If the display
reads as shown below, check the settings and network environment,
then update again.
Display Description
Updating fail Updating failed.
Login failed Failure to log into server.
Server is busy Server is busy. Wait a while then try again.
Connection fail Failure in connecting to server.
Download fail Downloading of the firmware has failed.
Basic version
Advanced version
Informations
Advanced version
v See overleaf
DVD
155
General
Setting items Setting details
Notifications
Displays a notification
message on this unit’s
menu screen when the
latest firmware is released
with “Update”.
Display a notification
message on this unit’s
menu screen when
downloadable firmware is
released with “Add New
Feature”.
Update : The notification message is displayed for about 20 seconds when
the power is turned on. Connect to broadband Internet (vpage 31)
when using this function.
•On : Display update message.
•Off : Do not display update message.
•When you press ENTER during display of the
notification message, the “Check for Update”
screen is displayed (Refer to page 154 for
more information on “Update”).
•Press o or BACK to erase the notification
message.
Upgrade : The notification message is displayed for about 20
seconds when the power is turned on. Connect to broadband Internet
(vpage31) when using this function.
•On : Display upgrade message.
•Off : Do not display upgrade message.
•When you press ENTER during display of the notification message, the
“Add New Feature” screen is displayed (Refer to page 155 for more
information on “Add New Feature”).
•Press o or BACK to erase the notification message.
Setting items Setting details
Add New Feature
Display new features that
can be downloaded to
this unit and perform an
upgrade.
NOTE
In cases where it is not
possible to connect to the
network after adding a
new function, connect to
the network again using
“Network” (vpage146).
Upgrade Package : Display the items to be upgraded.
Upgrade Status : Display a list of the additional functions provided by
the upgrade.
Upgrade Start : Execute the upgrade process.
When the upgrade starts, the power indicator becomes red and the menu
screen is shut down. During the upgrade, the amount of upgrade time
which has elapsed is displayed.
When upgrading is complete, the power indicator becomes green and
normal status is resumed.
•If the upgrade is not successful, an error message identical to those in
“Update” will appear on the display. Check the settings and network
environment and then perform the upgrade again.
See the DENON website for details about upgrades.
When the procedure is complete, “Registered” is displayed in this
menu and upgrades can be carried out. If the procedure has not been
carried out, “Not Registered” is displayed.
The ID number shown on this screen is needed when carrying out
the procedure.
The ID number can also be displayed by pressing and holding the main
unit’s u and INFO for at least 3 seconds.
Notes concerning use of “Update” and “Add New Feature”
•In order to use these functions, you must have the correct system requirements and settings for a
broadband Internet connection (vpage31).
•Do not turn off the power until updating or upgrading is completed.
•Even with a broadband connection to the Internet, approximately 1 hour is required for the updating/
upgrading procedure to be completed.
•Once updating/upgrade starts, normal operations on this unit cannot be performed until updating/
upgrading is completed. Furthermore, there may be cases where backup data is reset for the
parameters, etc., set on this unit.
•If the update or upgrade fails, press and hold the X on the main unit for more than 5 seconds, or
remove and re-insert the power cord. “Update retry” appears on the display and update restarts from
the point at which update failed. If the error continues despite this, check the network environment.
•Information regarding the “Update” function and “Add New Feature” will be announced on the DENON
web site each time related plans are defined.
•When usable new firmware is released with “Update” or “Add New Feature”, a notification message
is displayed on the menu screen. When you do not want to be notified, set “Notifications” – “Update”
(vpage155) and “Notifications” – “Upgrade” (vpage155) to “Off”.
Basic version
Advanced version
Informations
Advanced version
DVD

156
General
Setup Lock
Default settings are underlined.
Protect settings from inadvertent change.
Setting items Setting details
Lock
On : Turn protection on.
Off : Turn protection off.
When canceling the setting, set “Lock” to “Off”.
NOTE
When “Lock” is set to “On”, the settings listed below can no longer be
changed. Also, “Setup Locked!” is displayed if you attempt to operate
related settings.
•Setup menu operations
Basic version
Advanced version
Informations
Advanced version
DVD
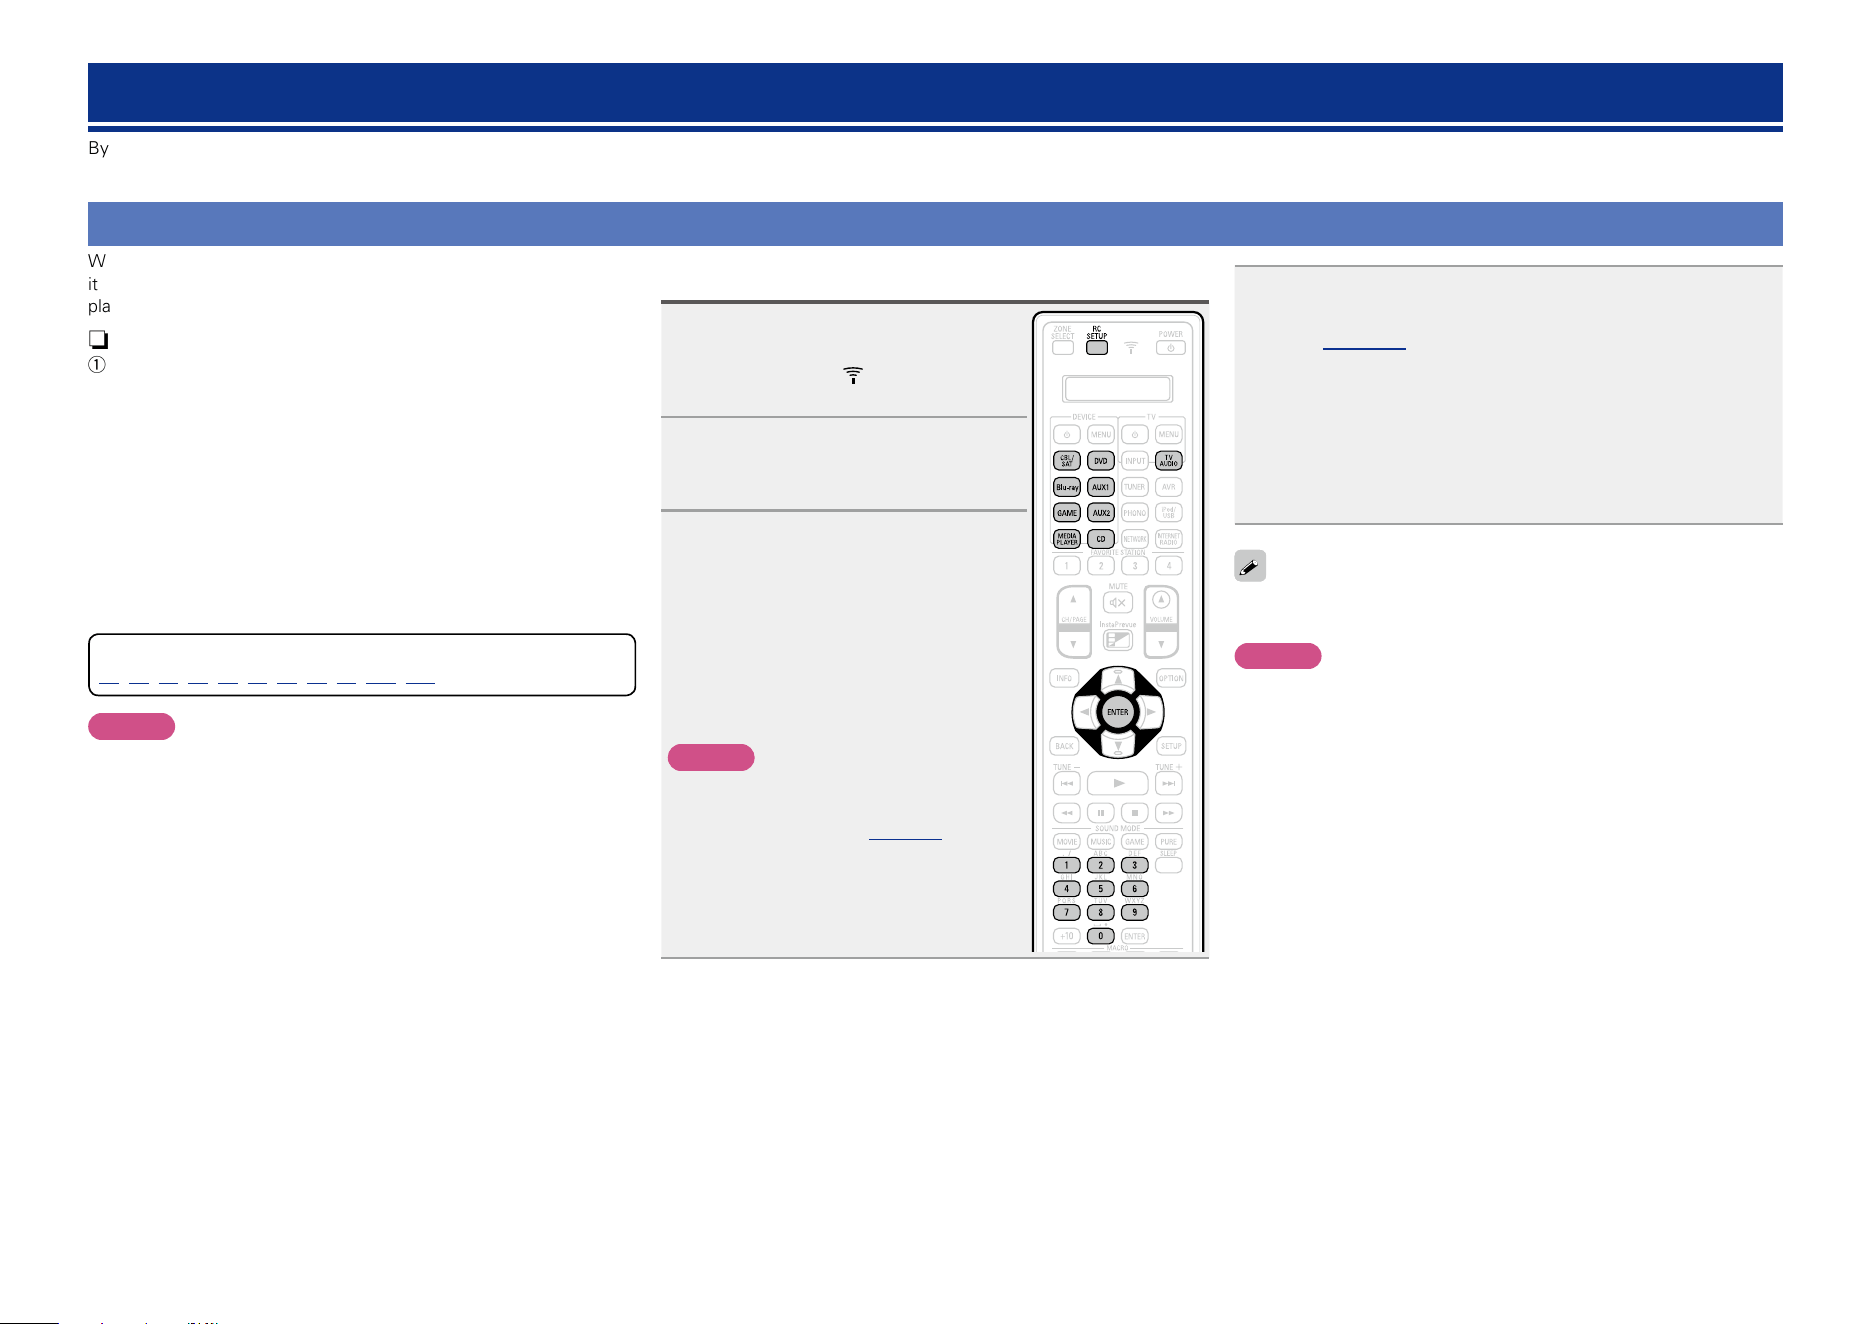
157
Registering preset codes
When preset codes are registered in the included remote control unit,
it can then be used to operate any devices you have, such as DVD
players or TVs made by different manufacturers.
n Buttons used for operating the devices
q DEVICE X
For switching power of each device on or off.
w uio p, ENTER, BACK
For menu operation of each device.
e MENU, INFO, OPTION, SETUP
For displaying the menu of each device.
r 8, 9, 1, 6, 7, 3, 2
t Number button (0 – 9, +10)
y CH/PAGE df
u TV X, TV INPUT
For operating a TV
This button is enabled in any mode.
For details on operation with the remote control unit, see pages
46,49,58,61,65,68,71,73,75,161,162.
NOTE
The preset code cannot be registered to TUNER, PHONO, iPod/USB,
NETWORK and INTERNET RADIO.
Registering preset codes
1
Press and hold RC SETUP for at
least 3 seconds.
“SETUP” and indicator flashes
twice on the remote control unit.
2
When “PRSET” appears on
the remote control unit, press
ENTER.
3
When “DEVIC” appears on the
remote control unit, press the
input source select button of
the AV equipment (CBL/SAT,
Blu-ray, GAME, MEDIA PLAYER,
DVD, AUX1, AUX2 or CD) that
you want to program for the
preset setting.
NOTE
Note that the group numbers that can be
registered are predefined for each input
source select button (vpage158).
Operating external devices with the remote control
By registering preset codes for external devices to the provided remote control, you can operate your TV and playback devices (such as Blu-ray Disc player and DVD player) with the remote control.
4
When “– – – – –” appears on the remote control unit,
press the number buttons 0 – 9 to enter a 5-digit code
(vpage 205 “List of preset codes”).
Press the buttons with an interval less than 30 seconds.
•When the code is registered
! “OK” flashes four times on the remote control unit.
•When the code is not registered correctly
! “FAIL” or “CANCL” flashes four times on the remote control
unit.
Perform from step 1 again.
Some manufacturers use more than one type of remote control code.
Preset codes to change the number and verify correct operation.
NOTE
Depending on the model and year of manufacture of your device,
some buttons may not operate.
Basic version
Advanced version
Informations
Advanced version
DVD
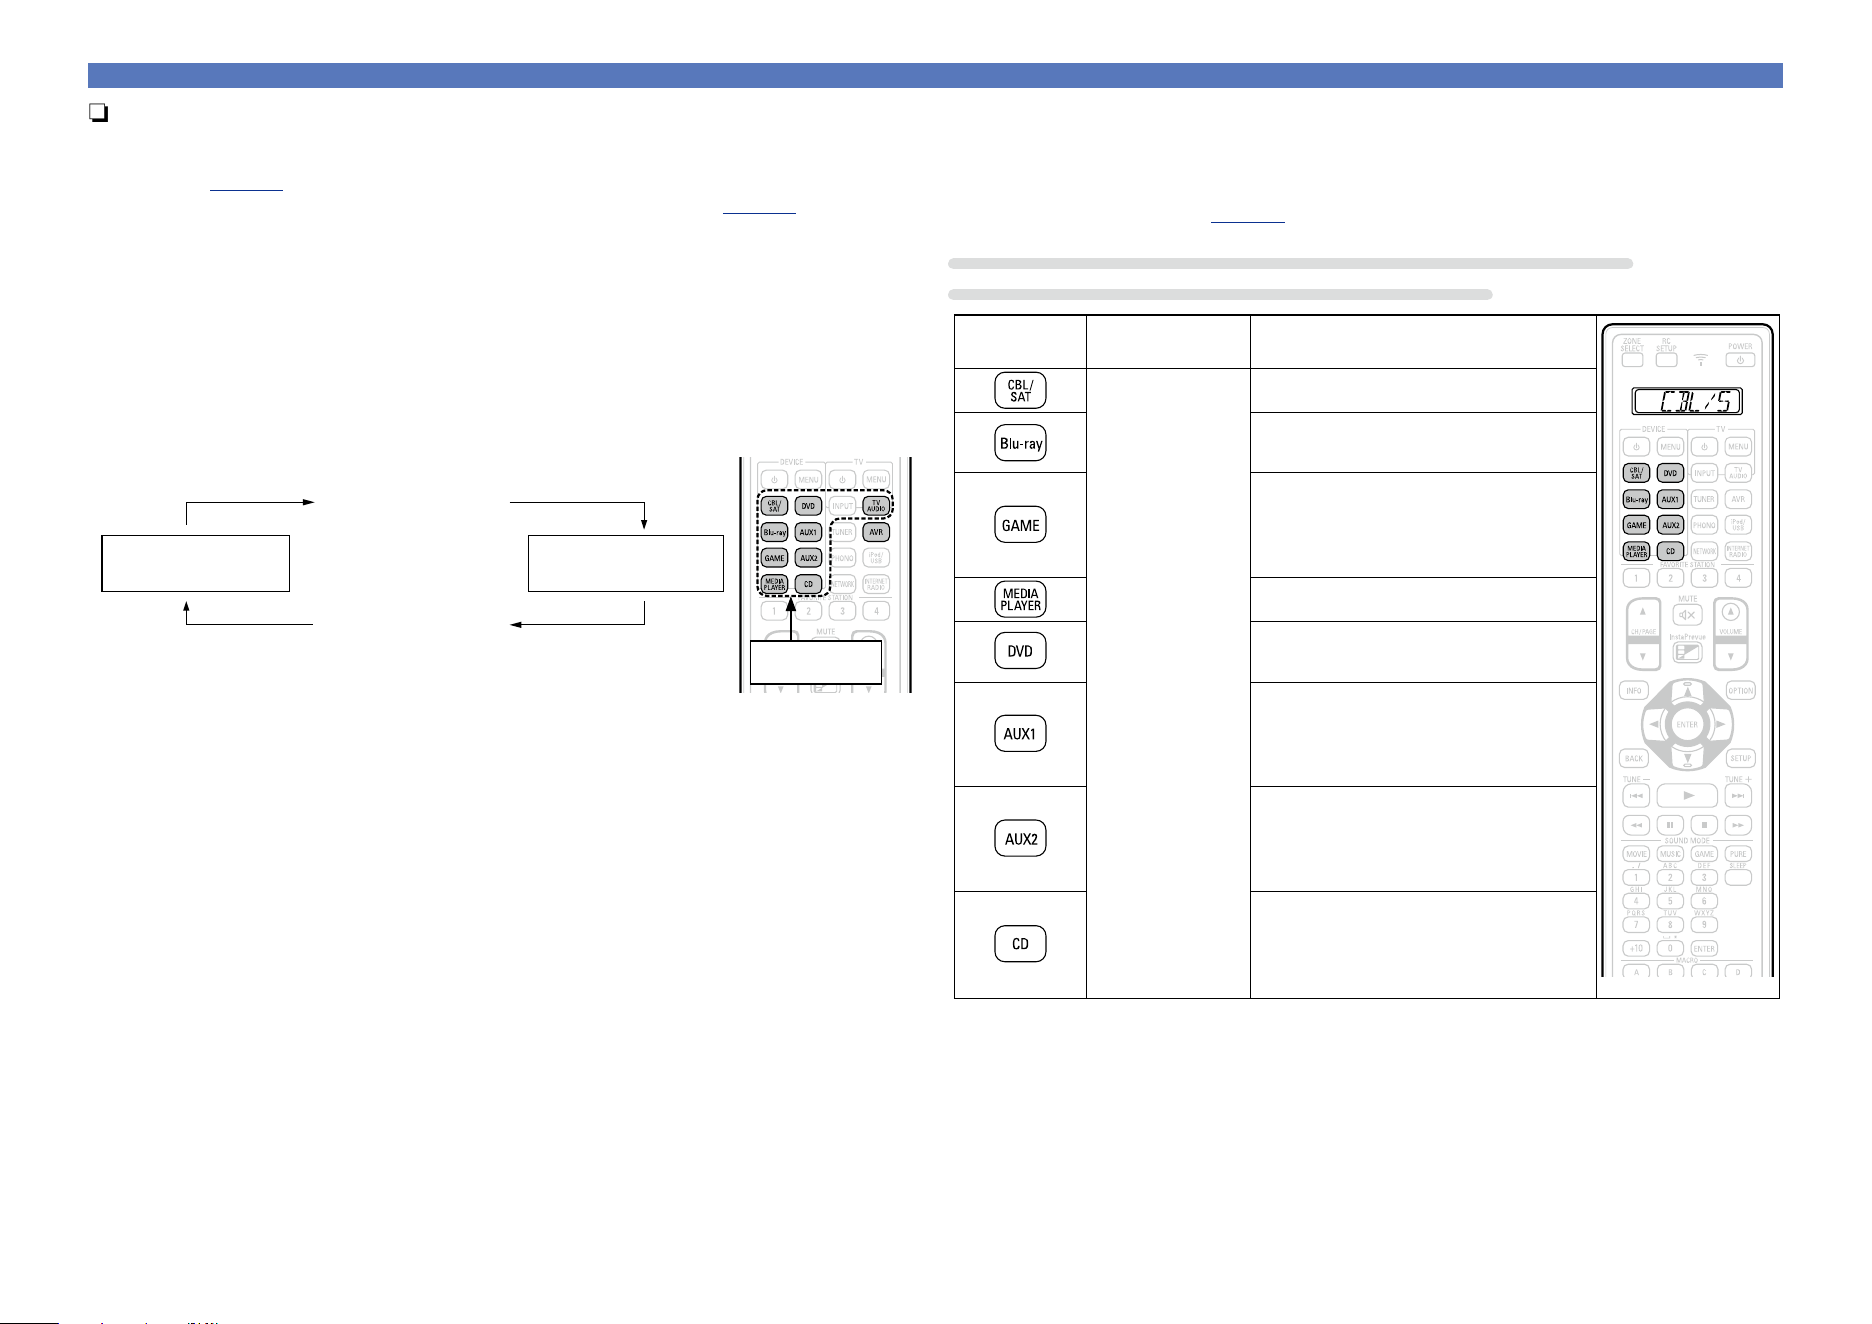
158
Registering preset codes
n Remote control operation modes
By default, the input source select buttons on the remote control perform only the input source select
operation. To operate an external device with this remote control, set the preset code in “List of preset
codes” (vpage205) for the device you want to register to each input source select button.
For how to set preset codes to buttons, see “Registering preset codes” (vpage157).
If you register preset codes on this remote control, the input source select buttons on the remote
control can perform the following two functions.
q The function to switch input sources on this unit (AVR operation mode)
w The function to make this remote control switch to the mode in which you can operate the device
registered to the button (External device operation mode)
n How to switch operation modes
Press the input source
select button.
w External device
operation mode
z2
Press AVR.
q AVR operation
mode
z1
Input source
select buttons
z1 The mode in which you can operate this unit.
z2 If you press one of these buttons , the input source on this unit changes and the remote control
switches to the mode in which you can operate the external device registered to that button.
n Devices that can be registered to input source select buttons on the
remote control
The types of devices that can be registered to each input source select button on this remote control
are assigned as shown in the following table. Register the preset code under the desired device name
in “List of preset codes” (vpage205).
Preset codes that can be registered to CBL/SAT, Blu-ray, GAME,
MEDIA PLAYER, DVD, AUX1, AUX2, and CD buttons
Button
Default preset
mode
Available change to preset
AVR
CBL/SAT group
VCR/PVR group
BD/DVD group
CBL/SAT group
VCR/PVR group
BD/DVD group
Audio group
CBL/SAT group
VCR/PVR group
BD/DVD group
CBL/SAT group
VCR/PVR group
BD/DVD group
Audio group
CBL/SAT group
VCR/PVR group
BD/DVD group
Audio group
Audio group
•When you press an input source select button for which a preset code has been registered, its button
name appears on the display of the remote control unit.
•To unregister the device from a button and reset to the default setting, set the AVR code “73347” to
the button.
Basic version
Advanced version
Informations
Advanced version
DVD

159
Preset codes that can be registered to TV buttons
Button
Default preset
mode
Available change to preset
AVR TV group
•When you press TV AUDIO that has a preset code registered to it, the “TV” indication on the remote
control lights.
To perform menu operations of this unit, press AVR to have the remote control enter the AVR operation
mode.
Registering preset codes
Basic version
Advanced version
Informations
Advanced version
DVD
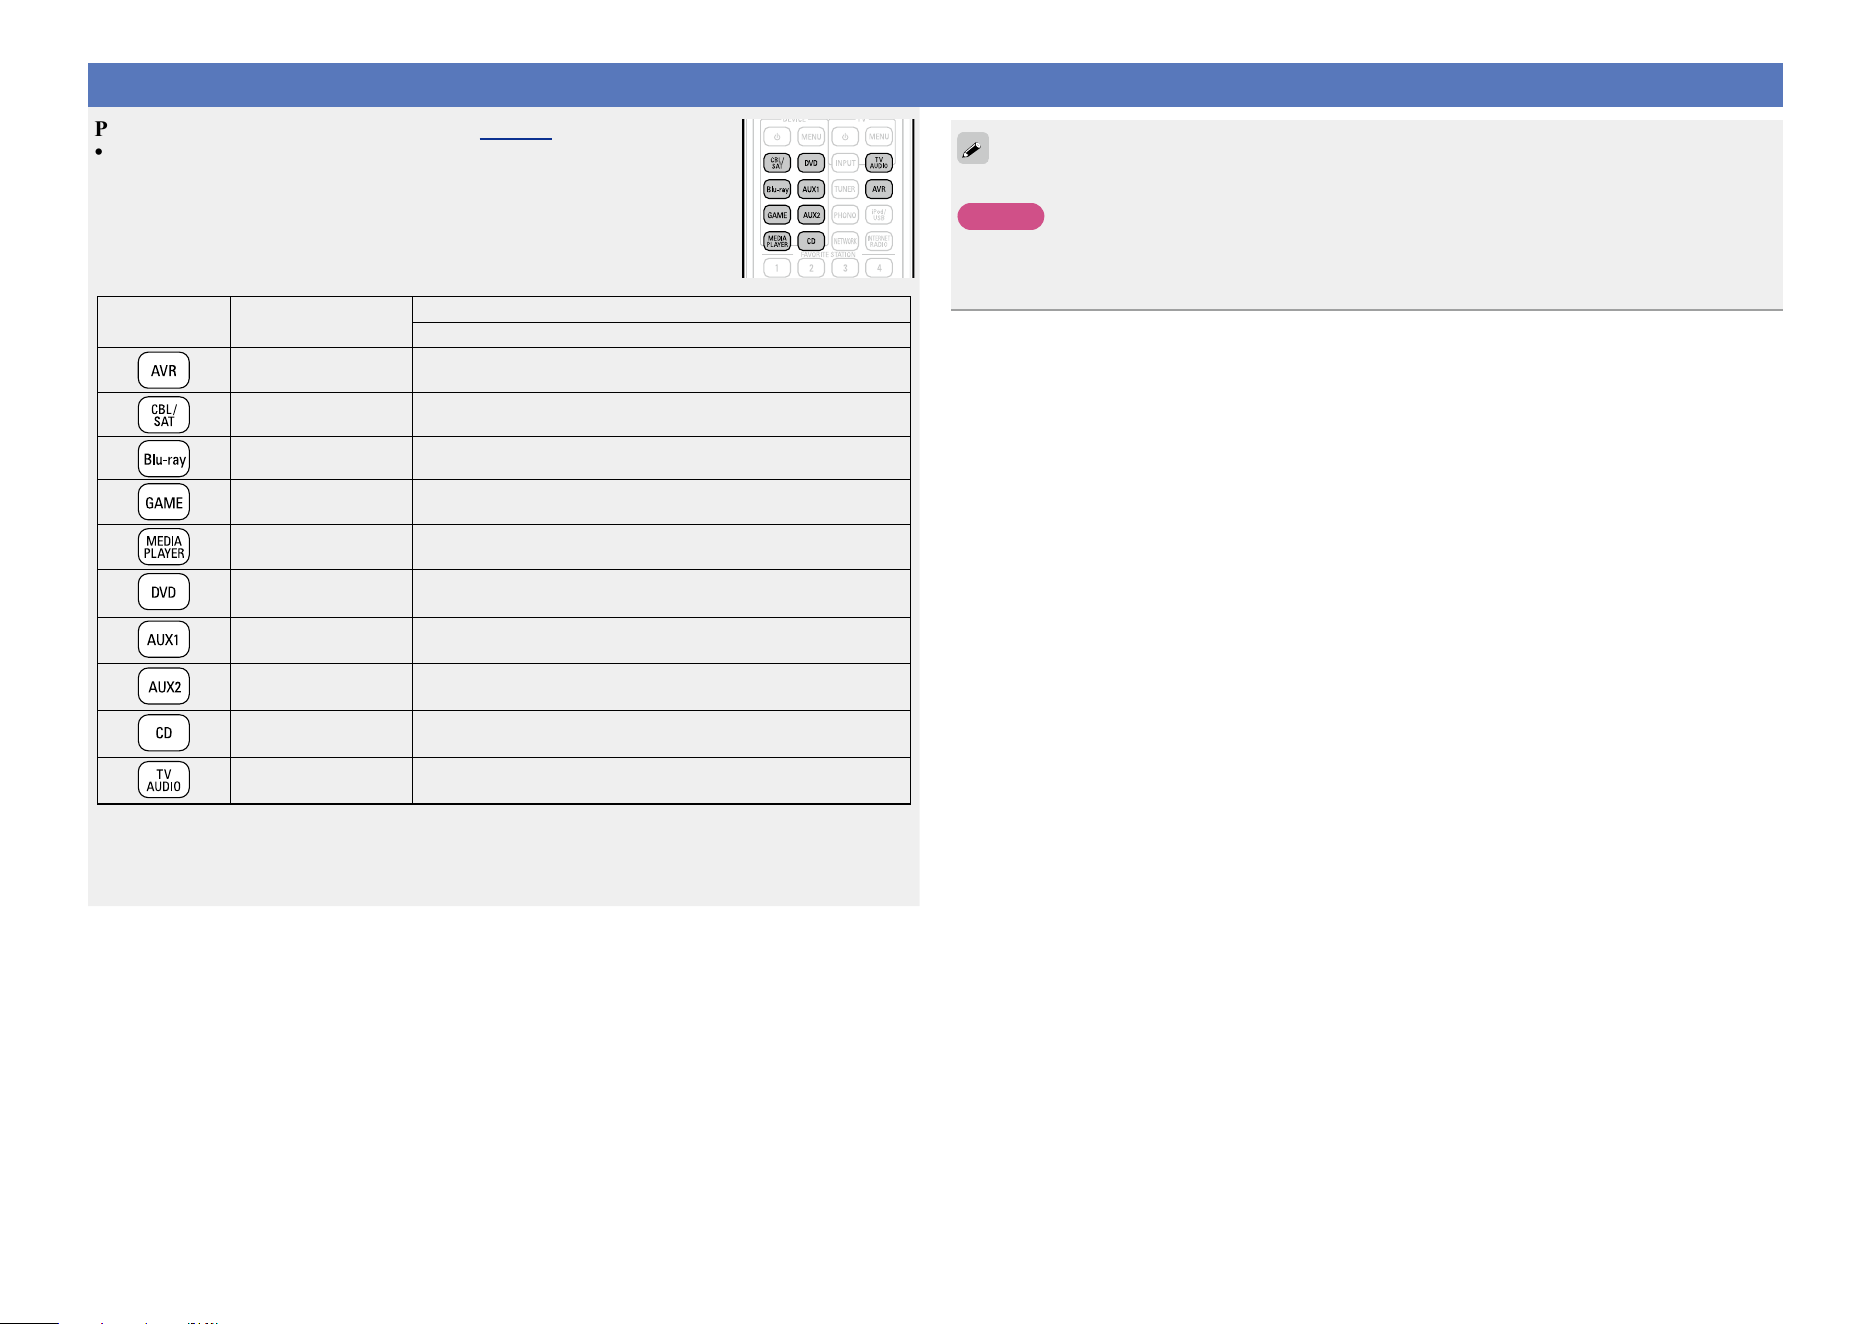
160
Operating external devices
Press the input source select button (vpage 41).
•The operation mode of the remote control unit is switched as shown in the table.
Input source
select button
Input source of this
unit
Operation mode
Devices controllable with the remote control unit
– This unit (AVR-operation)
z2
z1
CBL/SAT
Device registered on the
CBL/SAT button
z1
Blu-ray
Device registered on the
Blu-ray button
z1
GAME
Device registered on the
GAME button
z1
MEDIA PLAYER
Device registered on the
MEDIA PLAYER button
z1
DVD
Device registered on the
DVD button
z1
AUX1
Device registered on the
AUX1 button
z1
AUX2
Device registered on the
AUX2 button
z1
CD
Device registered on the
CD button
z1
TV AUDIO
Device registered on the
TV AUDIO button
z1 If a preset code is registered for this button, the remote control unit of this unit can control another
devices.
z2 With this mode, you can operate: HDRadio, iPod, USB memory device, record player and network
function.
When the FAVORITE STATION and InstaPrevue are pressed, the AVR-operation mode starts automatically.
NOTE
If the mode of the remote control unit is set to other than AVR-operation mode, press AVR to switch the
remote control unit to the AVR-operation mode to perform the following operations:
•For menu operation by pressing SETUP.
Basic version
Advanced version
Informations
Advanced version
DVD
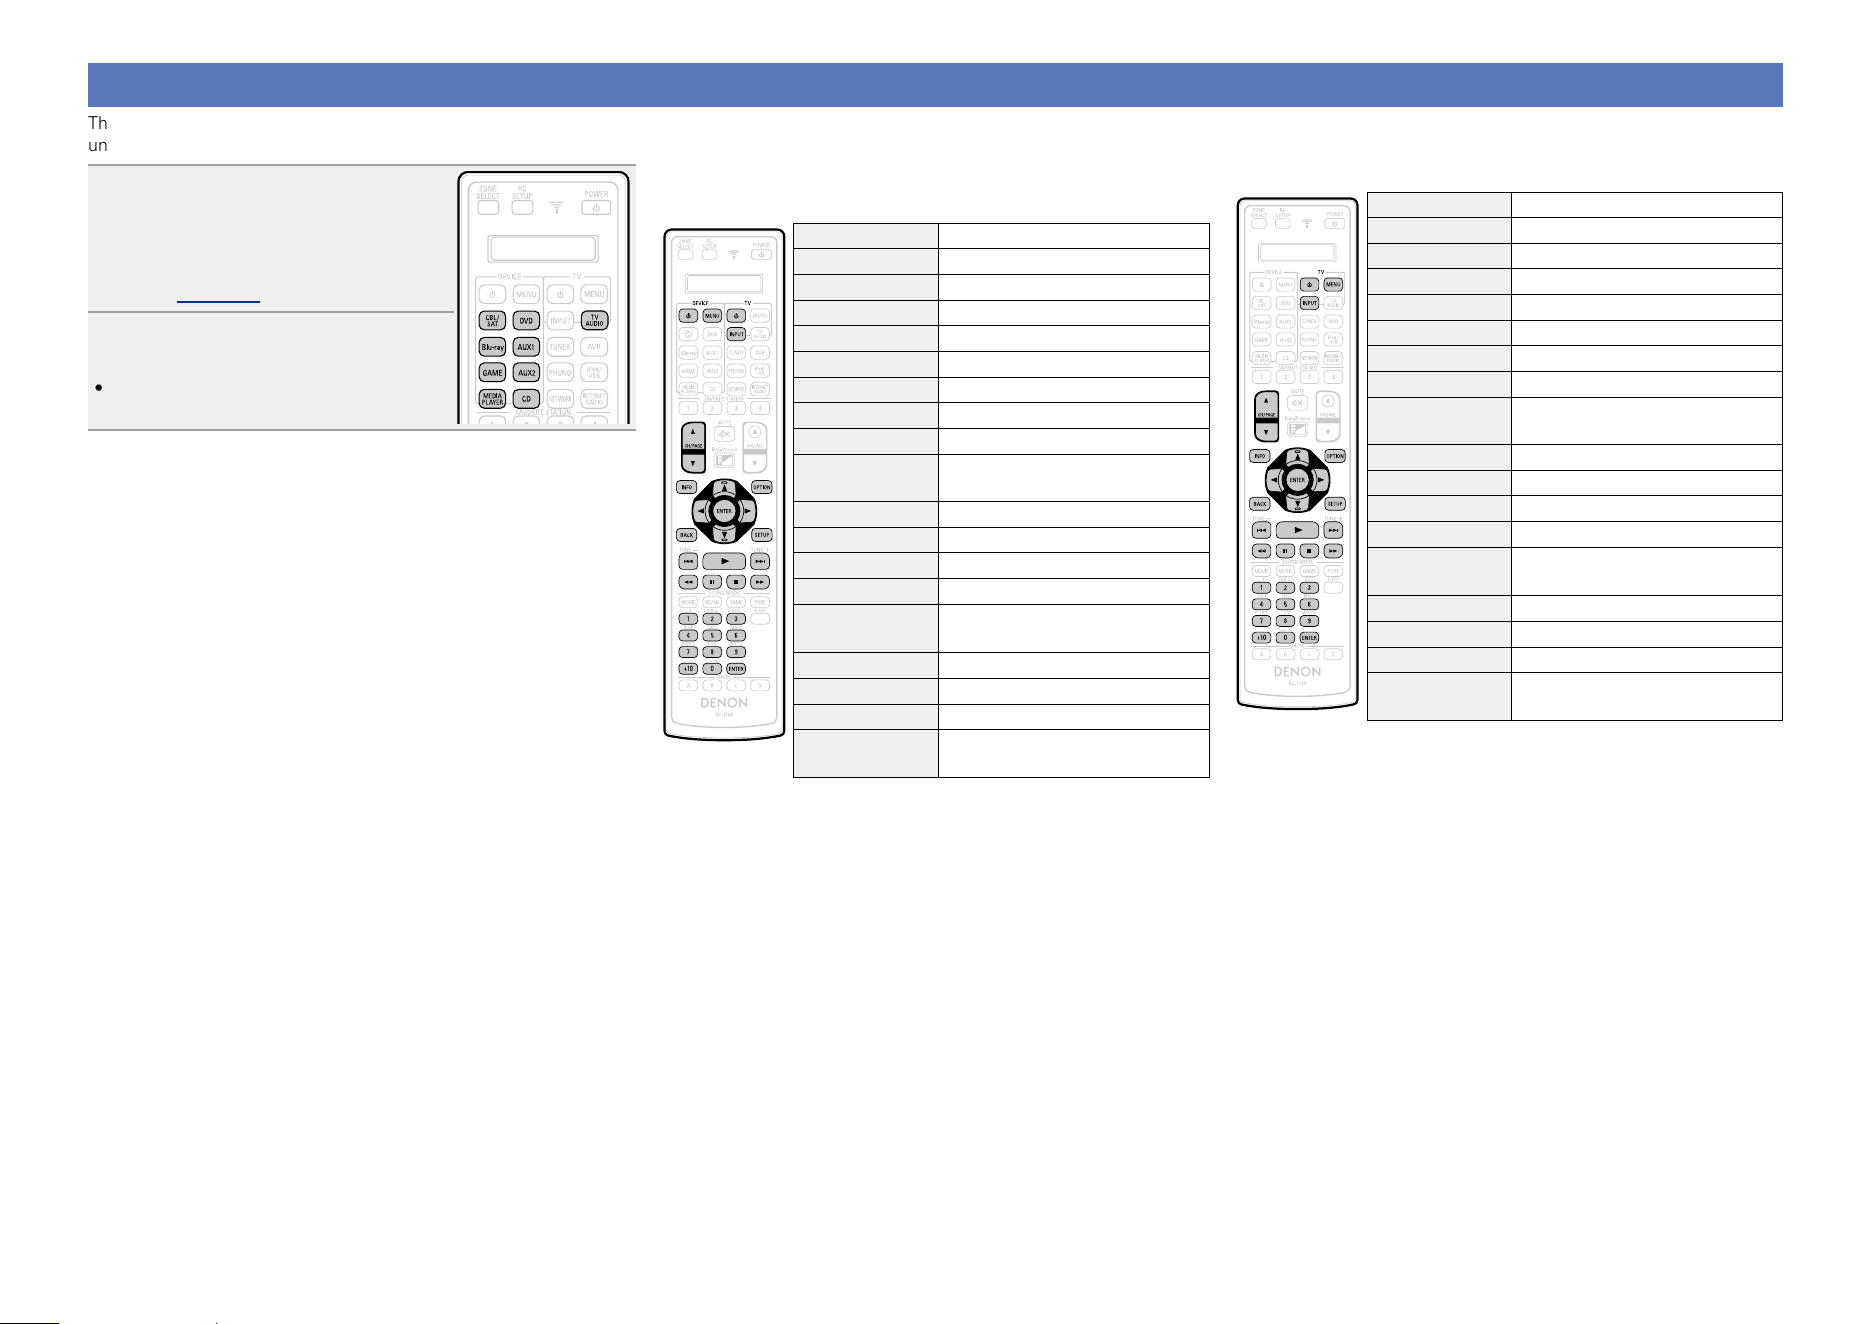
161
Operating devices
The supplied remote control unit can control a device other than this
unit.
1
Press the input source select
button to which the preset
code for the device you want
to operate has been registered
(vpage 160).
2
Operate the device.
•For details, refer to the device’s operating
instructions.
n CBL/SAT group (0zzzz)
(Set top box for satellite (SAT) / cable (CBL) /
Media player / IP TV) operation
Operation buttons Function
DEVICE X Power on/standbyz
DEVICE MENU Menu
TV X
TV power on/standby
TV INPUT Switch TV input
CH/PAGE df
Switch channels (up/down)
INFO Information
OPTION Sub menu, Option
uio p
Cursor operation
ENTER
(Cursor)
Enter
BACK Return
SETUP Home menu
8 9
Auto search (cue)
1
Playback
6 7
Manual search
(fast-reverse/fast-forward)
3
Pause
2
Stop
0 – 9, +10 Channel selection
ENTER
(Number)
3 digit entry
z This may turn some devices on.
n TV group (1zzzz)
(TV) operation
Operation buttons Function
TV X TV power on/standbyz
TV MENU TV menu
TV INPUT Switch TV input
CH/PAGE df
Switch channels (up/down)
INFO Information
OPTION Sub menu
uio p
Cursor operation
ENTER
(Cursor)
Enter
BACK Return
SETUP Setup
8 9
Auto search (cue)
1
Playback
6 7
Manual search
(fast-reverse/fast-forward)
3
Pause
2
Stop
0 – 9, +10 Channel selection
ENTER
(Number)
3 digit entry
z This may turn some devices on.
Basic version
Advanced version
Informations
Advanced version
v See overleaf
DVD
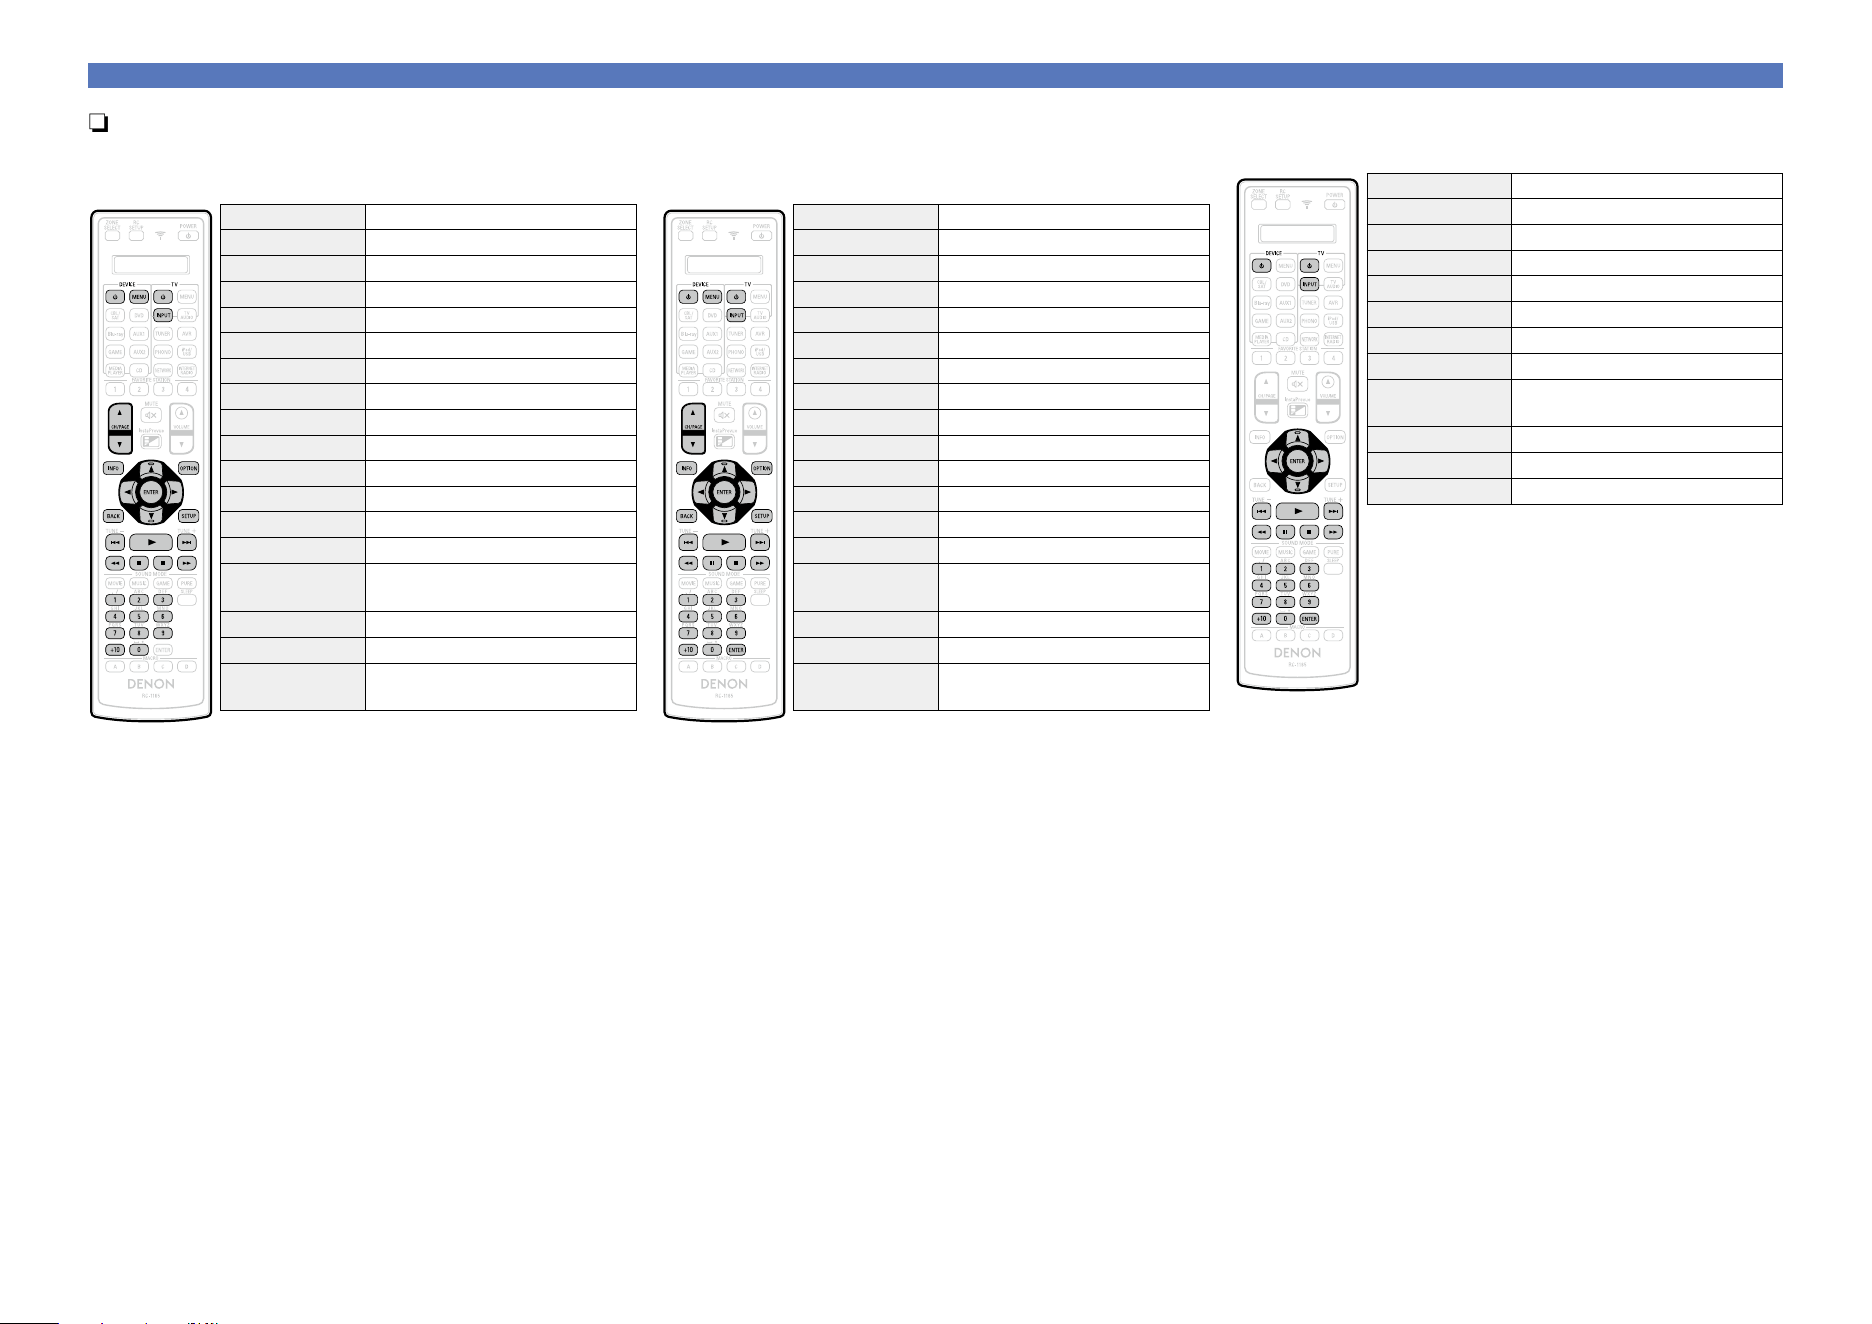
162
Operating devices
n VCR/DVR group (2zzzz)
(DVD recorder (DVR) / Personal video recorder
(PVR) / video cassette recorder (VCR)) operation
Operation buttons Function
DEVICE X Power on/standbyz
DEVICE MENU Menu
TV X
TV power on/standby
TV INPUT Switch TV input
CH/PAGE df
Switch channels (up/down)
INFO Information
OPTION Sub menu, Option
uio p
Cursor operation
ENTER Enter
BACK Return
SETUP Setup
8 9
Auto search (cue)
1
Playback
6 7
Manual search
(fast-reverse/fast-forward)
3
Pause
2
Stop
0 – 9, +10
Select title, chapter or channel
selection
z This may turn some devices on.
n BD/DVD group (3zzzz)
(Blu-ray Disc player / HD-DVD player /
DVD player) operation
Operation buttons Function
DEVICE X Power on/standbyz
DEVICE MENU (Popup) Menu
TV X
TV power on/standby
TV INPUT Switch TV input
CH/PAGE df
Switch channels (up/down)
INFO Information
OPTION Top menu
uio p
Cursor operation
ENTER Enter
BACK Return
SETUP Setup
8 9
Auto search (cue)
1
Playback
6 7
Manual search
(fast-reverse/fast-forward)
3
Pause
2
Stop
0 – 9, +10
Select title, chapter or channel
selection
z This may turn some devices on.
(Only the power-on operation is available for some
DENON model devices as well.)
n Audio group (4zzzz)
(CD player / CD recorder) operation
Operation buttons Function
DEVICE X Power on/standbyz
TV X
TV power on/standby
TV INPUT Switch TV input
uio p
Cursor operation
ENTER Enter
8 9
Auto search (cue)
1
Playback
6 7
Manual search
(fast-reverse/fast-forward)
3
Pause
2
Stop
0 – 9, +10 Track selection
z This may turn some devices on.
(Only the power-on operation is available for some
DENON model devices as well.)
Basic version
Advanced version
Informations
Advanced version
DVD
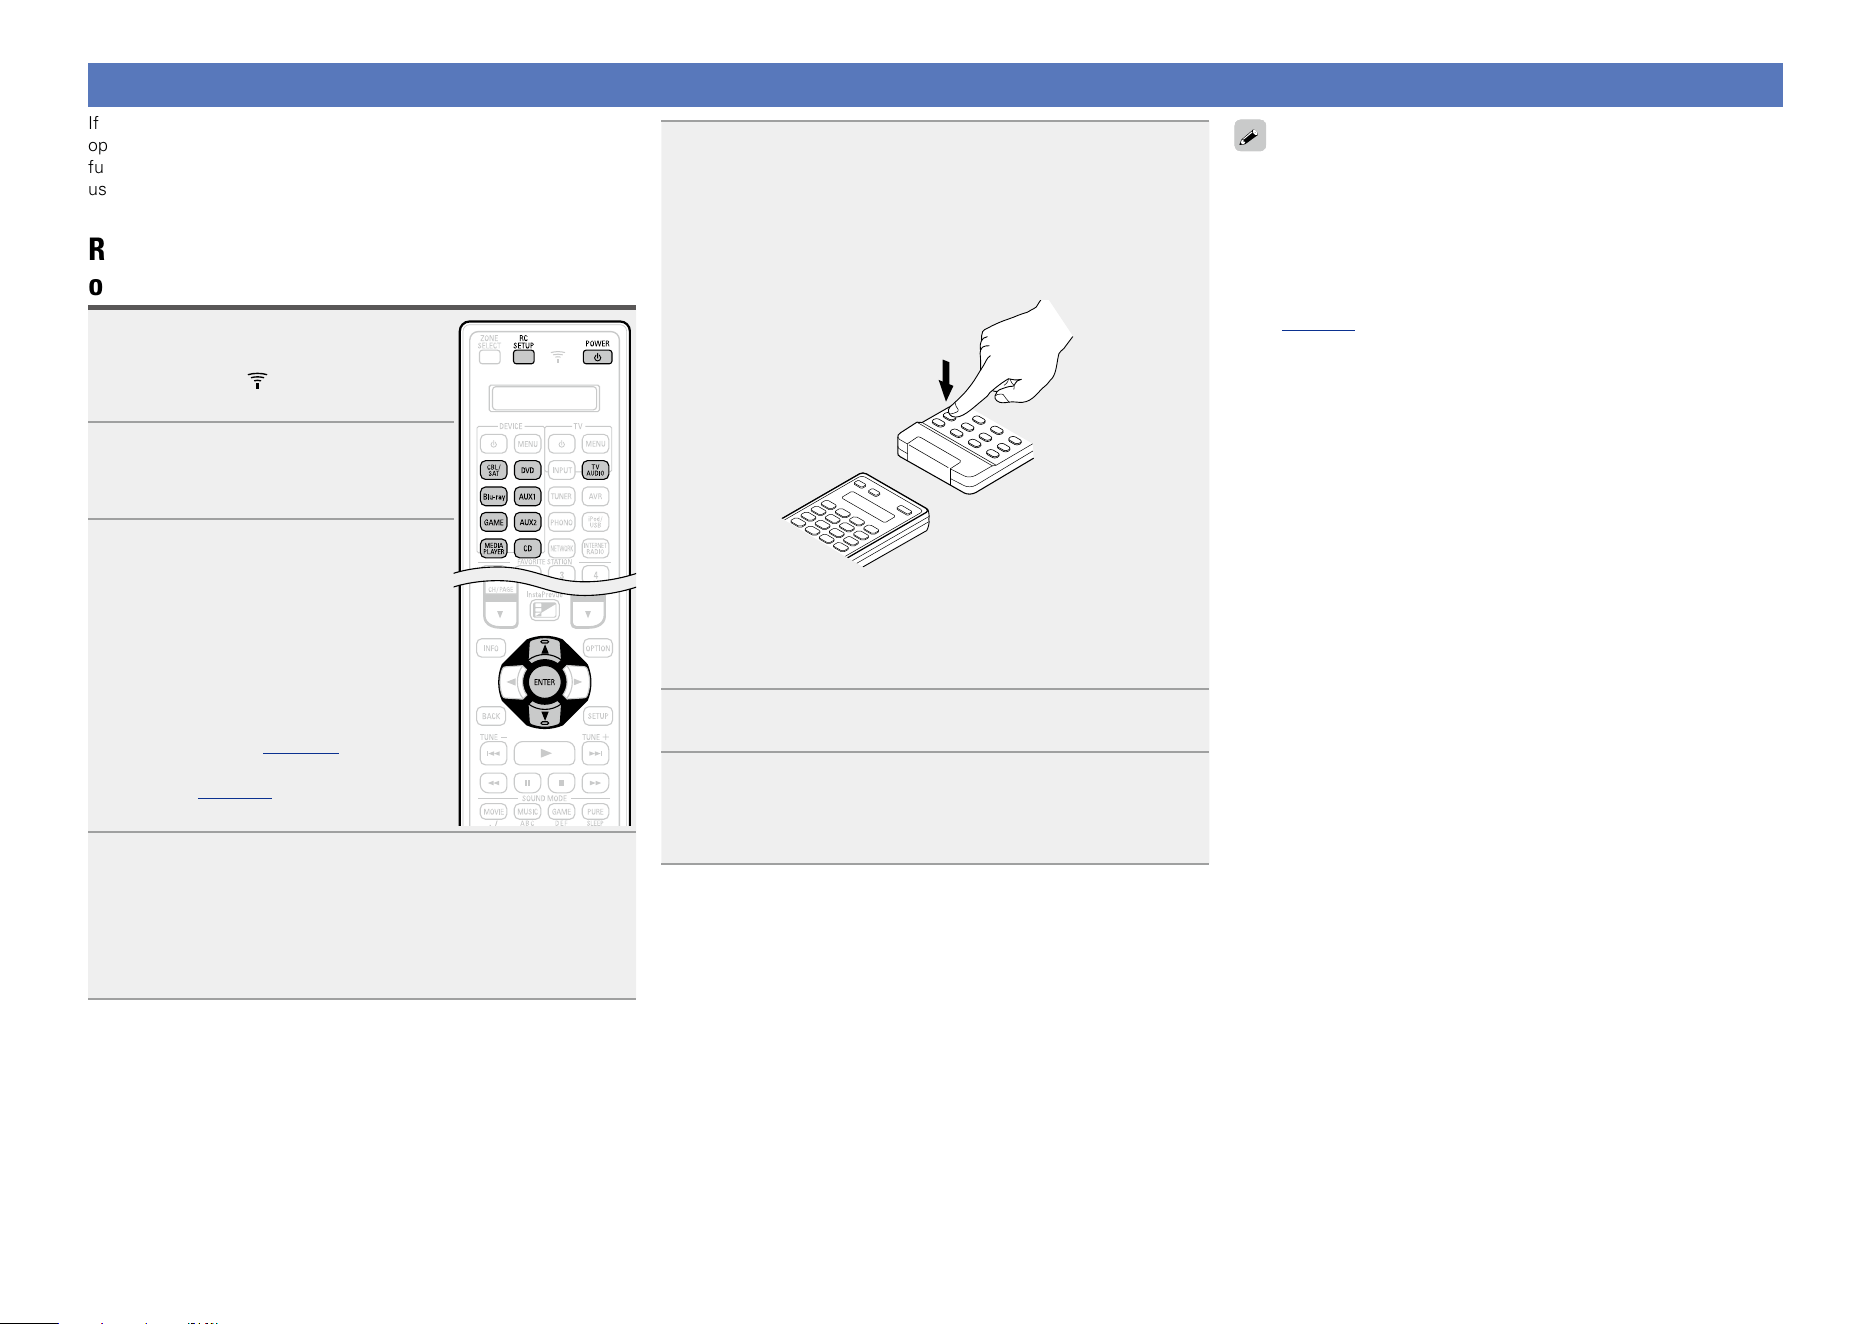
163
Operating learning function
If the AV device is not a DENON device, or if the device does not
operate even when the preset code is registered, use the learning
function. Remote codes for different devices can be remembered for
use by the DENON remote control included with this device.
Remembering remote control codes from
other devices
1
Press and hold RC SETUP for at
least 3 seconds.
“SETUP” and indicator flashes twice
on the remote control unit.
2
Use ui to display “LEARN” on
the remote control unit and press
ENTER.
3
When “DEVIC” appears on the
remote control unit, press the
input source select button of the
AV equipment that you want to
store.
•You cannot store the remote control code
in the AVR button.
•Before using the learning function, register
a preset code (vpage 157 “Registering
preset codes”) for a mode other than AVR
preset (vpage158) to each input source
switch button.
4
When “KEY” appears on the remote control unit,
press the button that you want to store.
•You cannot store the remote control code in the ZONE SELECT,
RC SETUP, POWER X, FAVORITE STATION 1 – 4, InstaPrevue,
SOUND MODE, SLEEP, MACRO A – D and input source select
button.
5
When “READY” appears on the remote control unit,
place the remote control unit of the AV equipment
face to face with main remote control unit (of this
unit). Next, press and hold down the desired button
(that you want to store) of the remote control unit of
the AV equipment.
•When the button is correctly stored, “OK” flashes four times on
the remote control unit.
•If the button is not correctly stored, “FAIL” flashes four times on
the remote control unit. If this happens, perform step 4 again.
6
To store another button, repeat steps 4 and 5.
7
When you have nished storing the remote control
codes, press RC SETUP.
“OK” flashes four times on the remote control unit and the
normal operation mode is restored.
•There are some remote control units that cannot be programmed,
or even if they can be programmed, they may not operate correctly.
If this happens, use the remote control unit supplied with the AV
equipment to operate it.
•The operations of the programmed buttons override the preset
memory. If you do not require the programmed buttons, erase
the stored remote control codes to return to the initial settings
(vpage164 “Erasing stored remote control codes”).
•The number of buttons that can be stored varies depending on the
remote control unit used. If you have stored the maximum number
of buttons allowed for the remote control unit, “FAIL” appears on
its display.
Basic version
Advanced version
Informations
Advanced version
DVD
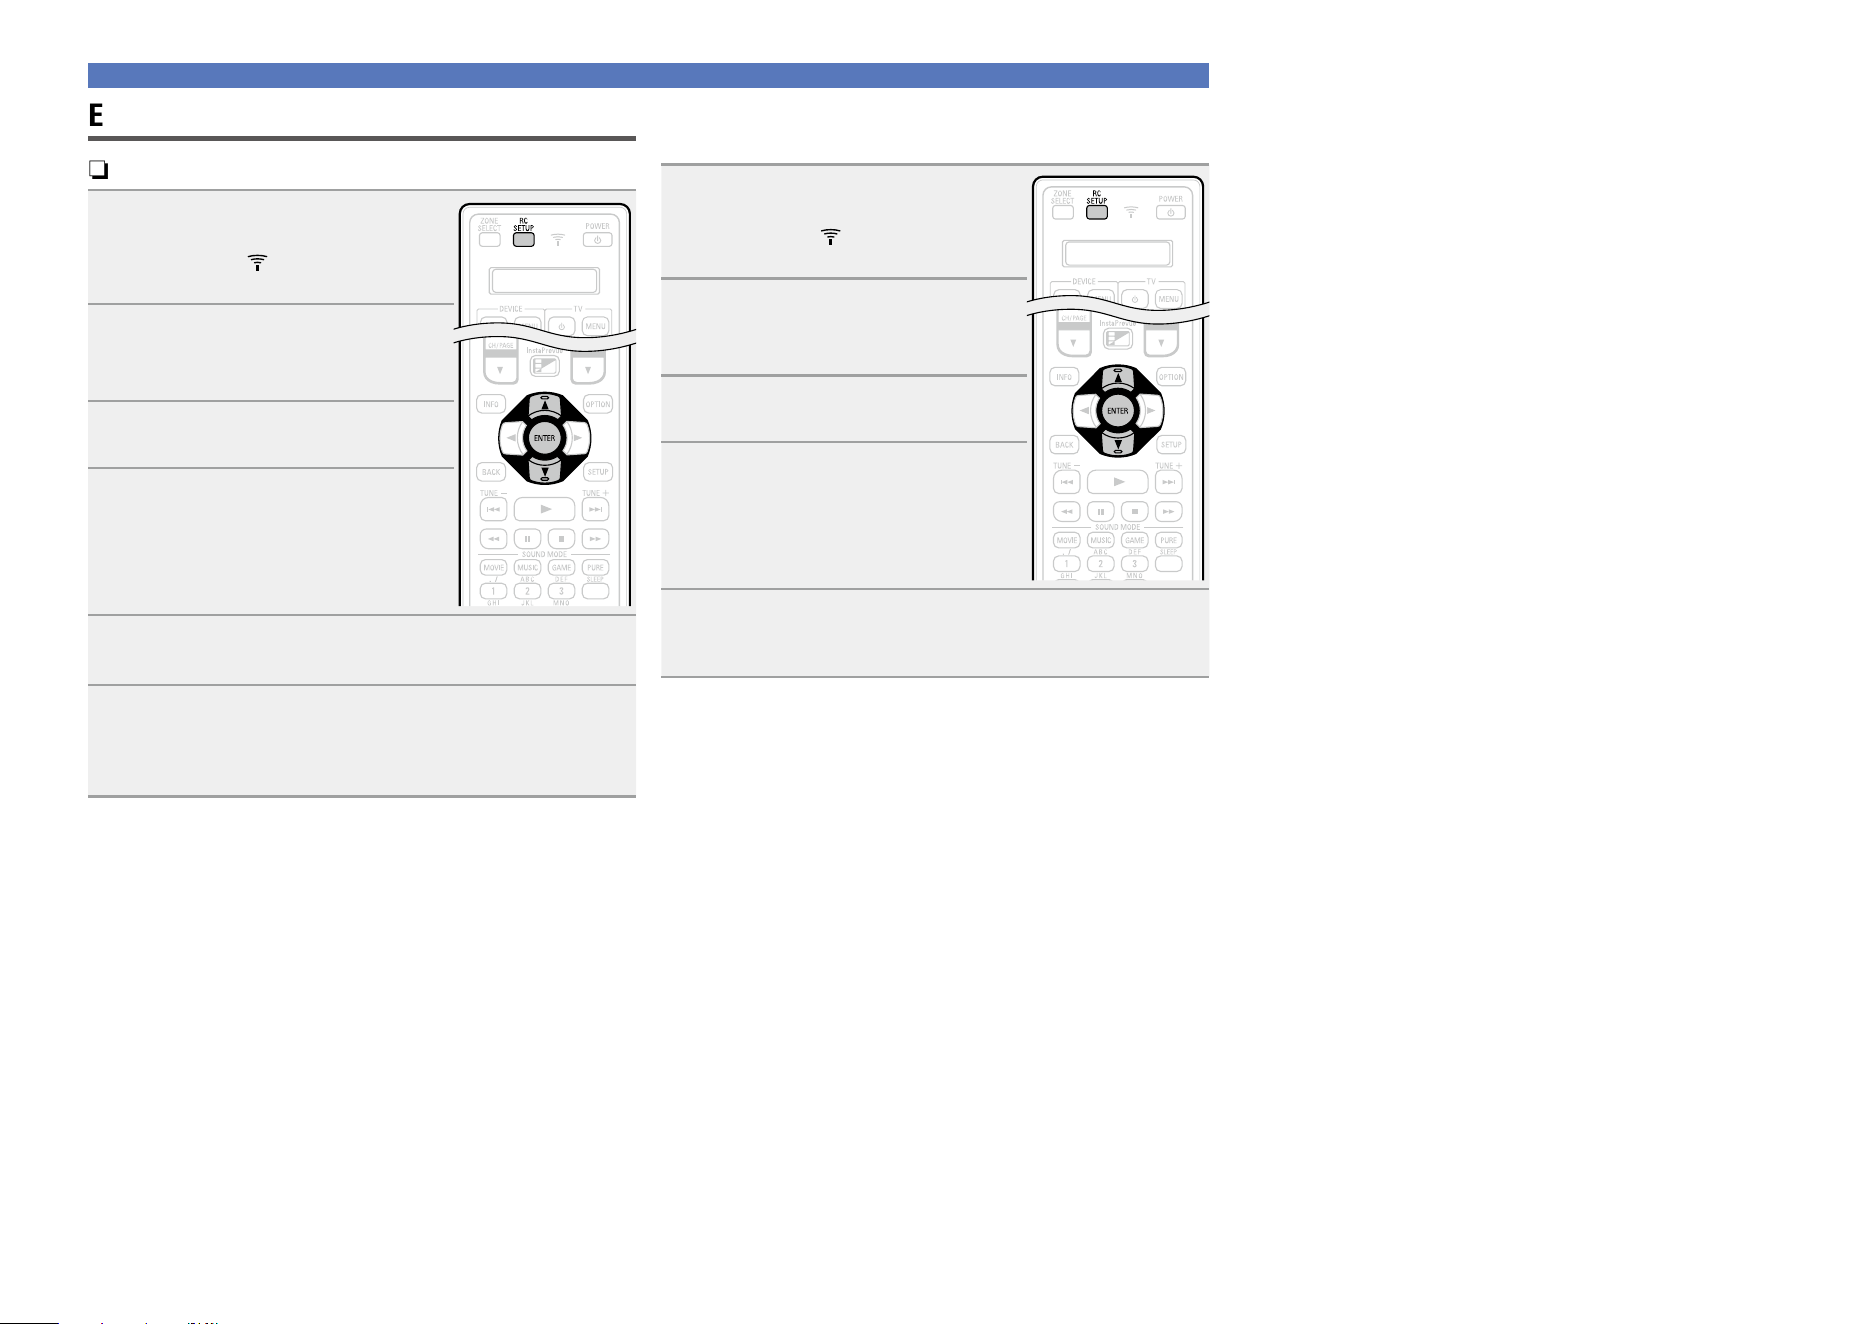
164
Erasing stored remote control codes
n Erasing the code by each button
1
Press and hold RC SETUP for at
least 3 seconds.
“SETUP” and indicator flashes twice
on the remote control unit.
2
Use ui to display “RESET” on
the remote control unit and press
ENTER.
3
When “LEARN” appears on the
remote control unit, press ENTER.
4
When “DEVIC” appears on the
remote control unit, press the
input source select button of the
AV equipment that you want to
erase.
5
Use ui to display “ONE” on the remote control
unit and press ENTER.
6
When “KEY” appears on the remote control unit,
press the button that you want to erase.
“RESET” flashes four times on the remote control unit and the
normal operation mode is restored.
n Erasing the code by each equipment input
source
1
Press and hold RC SETUP for at
least 3 seconds.
“SETUP” and indicator flashes twice
on the remote control unit.
2
Use ui to display “RESET” on
the remote control unit and press
ENTER.
3
When “LEARN” appears on the
remote control unit, press ENTER.
4
When “DEVIC” appears on the
remote control unit, press the
input source select button of the
AV equipment that you want to
erase.
5
When “ALL” appears, press ENTER.
“RESET” flashes four times on the remote control unit and the
normal operation mode is restored.
Operating learning function
Basic version
Advanced version
Informations
Advanced version
DVD
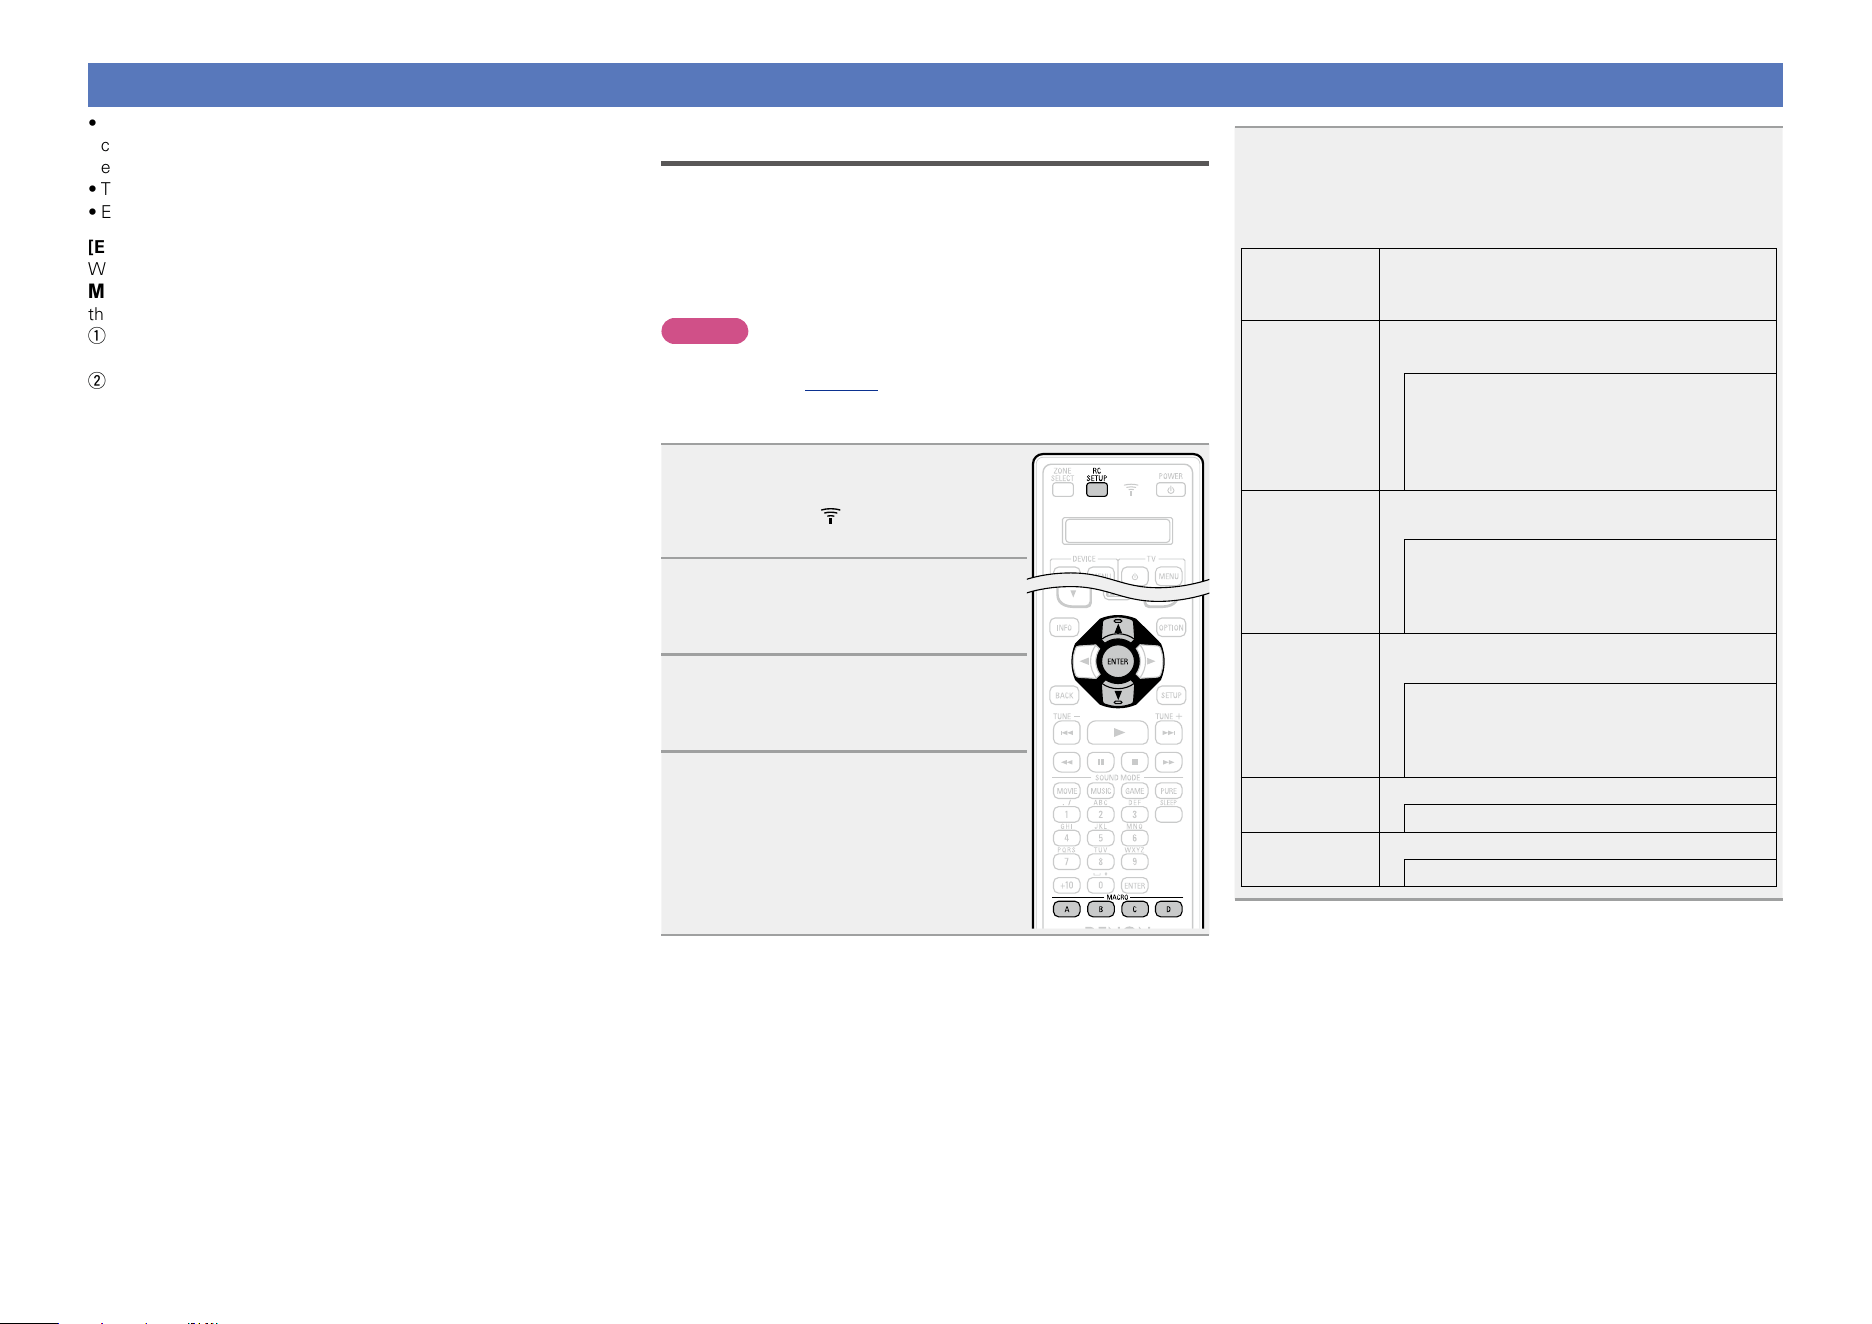
165
Operating macro function
•When the macro function is used, operations that usually require a
complicated series of multiple button operations can be performed
easily just by pressing the MACRO button.
•This device can remember up to 4 macro functions.
•Each macro can record a maximum of 18 steps.
[Example]
When the following set of operations has been registered to the
MACRO button, you can simply press the MACRO button to turn on
the TV and this unit and start playing back Blu-ray.
q Turn the TV’s power on
$
w Turn this unit’s power on
$
e Switch this unit’s input source to “Blu-ray”
$
r Turn the Blu-ray Disc player’s power on
$
t Play the Blu-ray Disc player
Recording automatic macro operations
You can automatically set the macro for your scene:
(1) Watch movies (MOVIE)
(2) Listen to music (MUSIC)
(3) Watch TV (CBL/SAT) (WATCH)
(4) Turn on all devices (ON)
(5) Turn off all devices (OFF)
NOTE
•Register preset codes for the remote control unit before setting
Auto macro (vpage157).
•Depending on the type or model of your device, macro may not work
properly even if it is set.
1
Press and hold RC SETUP for at
least 3 seconds.
“SETUP” and indicator flashes twice
on the remote control unit.
2
Use ui to display “MACRO” on
the remote control unit and press
ENTER.
3
Use ui to display “AUTO” on
the remote control unit and press
ENTER.
4
When “MCNo” appears on the
remote control unit, press the
MACRO A – D button that you
want to set.
5
Use ui to set the auto macro operation and press
ENTER.
“OK” flashes four times on the remote control unit and the
normal operation mode is restored.
Remote
control unit
display
Auto MACRO
MOVIE
Automatically turns on the devices and starts
playback when you watch movies.
TV power ON
Blu-ray power ON
AVR Power ON
Source Change Blu-ray
Playback Blu-ray
MUSIC
Automatically turns on the devices and starts
playback when you listen to music.
CD power ON
AVR Power ON
Source Change CD
Playback CD
WATCH
Automatically turns on the devices and starts
playback when you watch TV (CBL/SAT).
TV power ON
CBL/SAT Power ON
AVR Power ON
Source change CBL/SAT
ON
Turns on all the devices set for PRESET.
All DEVICE POWER ON
OFF
Turns off all the devices set for PRESET.
All DEVICE POWER OFF
Basic version
Advanced version
Informations
Advanced version
DVD
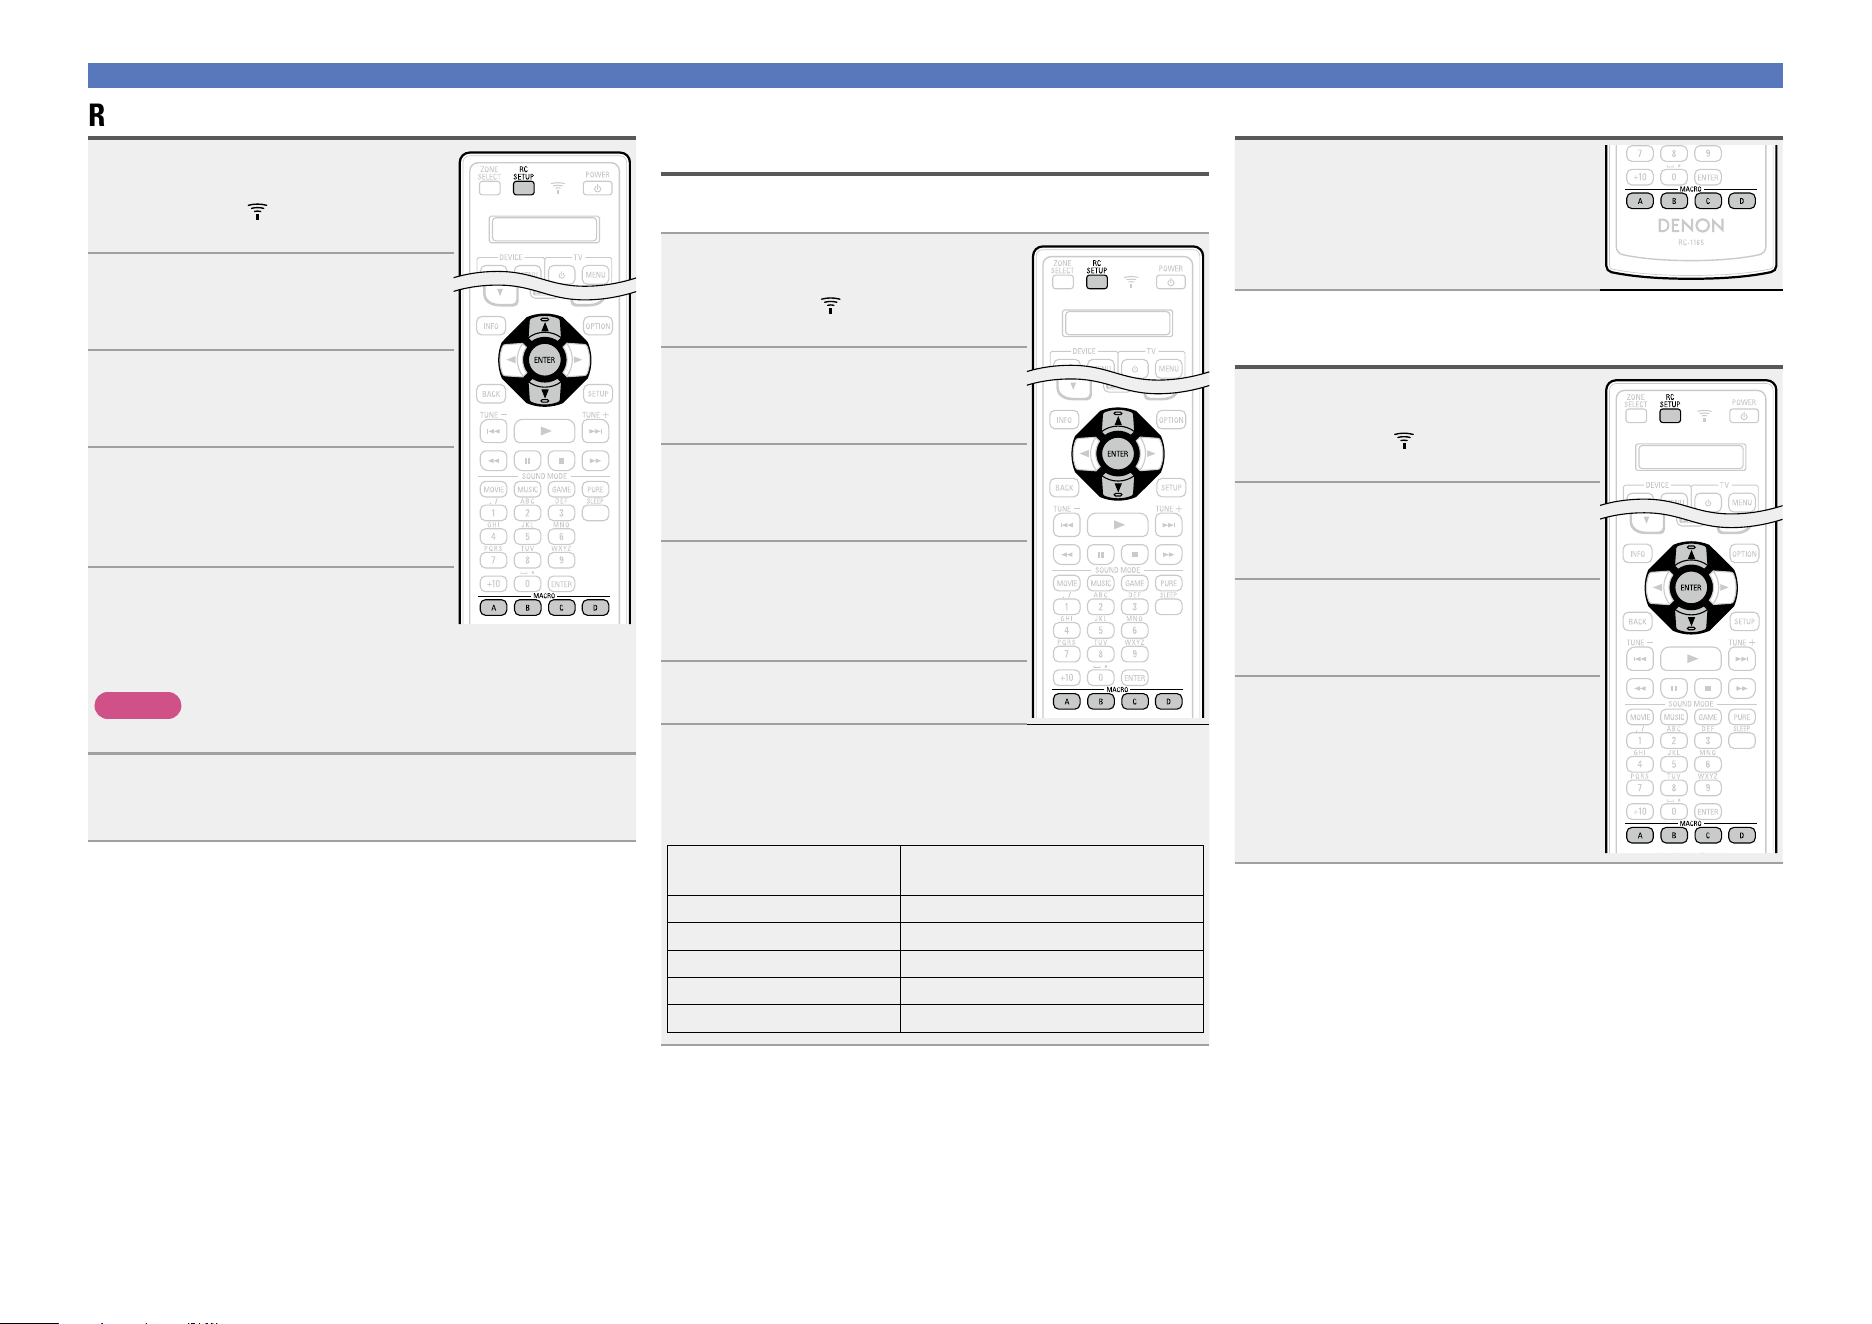
166
Operating macro function
Recording custom macro operations
1
Press and hold RC SETUP for at
least 3 seconds.
“SETUP” and indicator flashes twice
on the remote control unit.
2
Use ui to display “MACRO” on
the remote control unit and press
ENTER.
3
Use ui to display “MAN” on
the remote control unit and press
ENTER.
4
When “MCNo” appears on the
remote control unit, press the
MACRO A – D button that you
want to store.
5
Press the buttons to be stored one
by one.
•The step number for the storing procedure and mode are alternately
displayed on the remote control unit.
NOTE
You cannot store the macros for the ZONE SELECT button.
6
Press MACRO to exit the macro function.
“OK” flashes four times on the remote control unit and the
normal operation mode is restored.
Adjusting the interval time of macro
operations transmitting
The macro operation transmission interval can be adjusted.
•The factory setting is “0.5 sec”.
1
Press and hold RC SETUP for at
least 3 seconds.
“SETUP” and indicator flashes twice
on the remote control unit.
2
Use ui to display “MACRO” on
the remote control unit and press
ENTER.
3
Use ui to display “MAN” on
the remote control unit and press
ENTER.
4
When “MCNo” appears on the
remote control unit, press the
MACRO A – D button that you
want to set.
5
Press RC SETUP.
6
Use ui to set the macro operation transmission
interval and press ENTER.
“OK” flashes four times on the remote control unit and the
normal operation mode is restored.
Remote control unit
display
Time values that you can set
0.25 0.25 sec
0.50 0.5 sec
0.75 0.75 sec
1.00 1 sec
1.25 1.25 sec
Using the macro function
Press the MACRO A – D button you
used to store the macro function.
Resetting the macro function
1
Press and hold RC SETUP for at
least 3 seconds.
“SETUP” and indicator flashes twice
on the remote control unit.
2
Use ui to display “RESET” on
the remote control unit and press
ENTER.
3
Use ui to display “MACRO” on
the remote control unit and press
ENTER.
4
When “MCNo” appears on the
remote control unit, press the
MACRO A – D button that you
want to reset.
“RESET” flashes four times on the
remote control unit and the normal
operation mode is restored.
Basic version
Advanced version
Informations
Advanced version
DVD
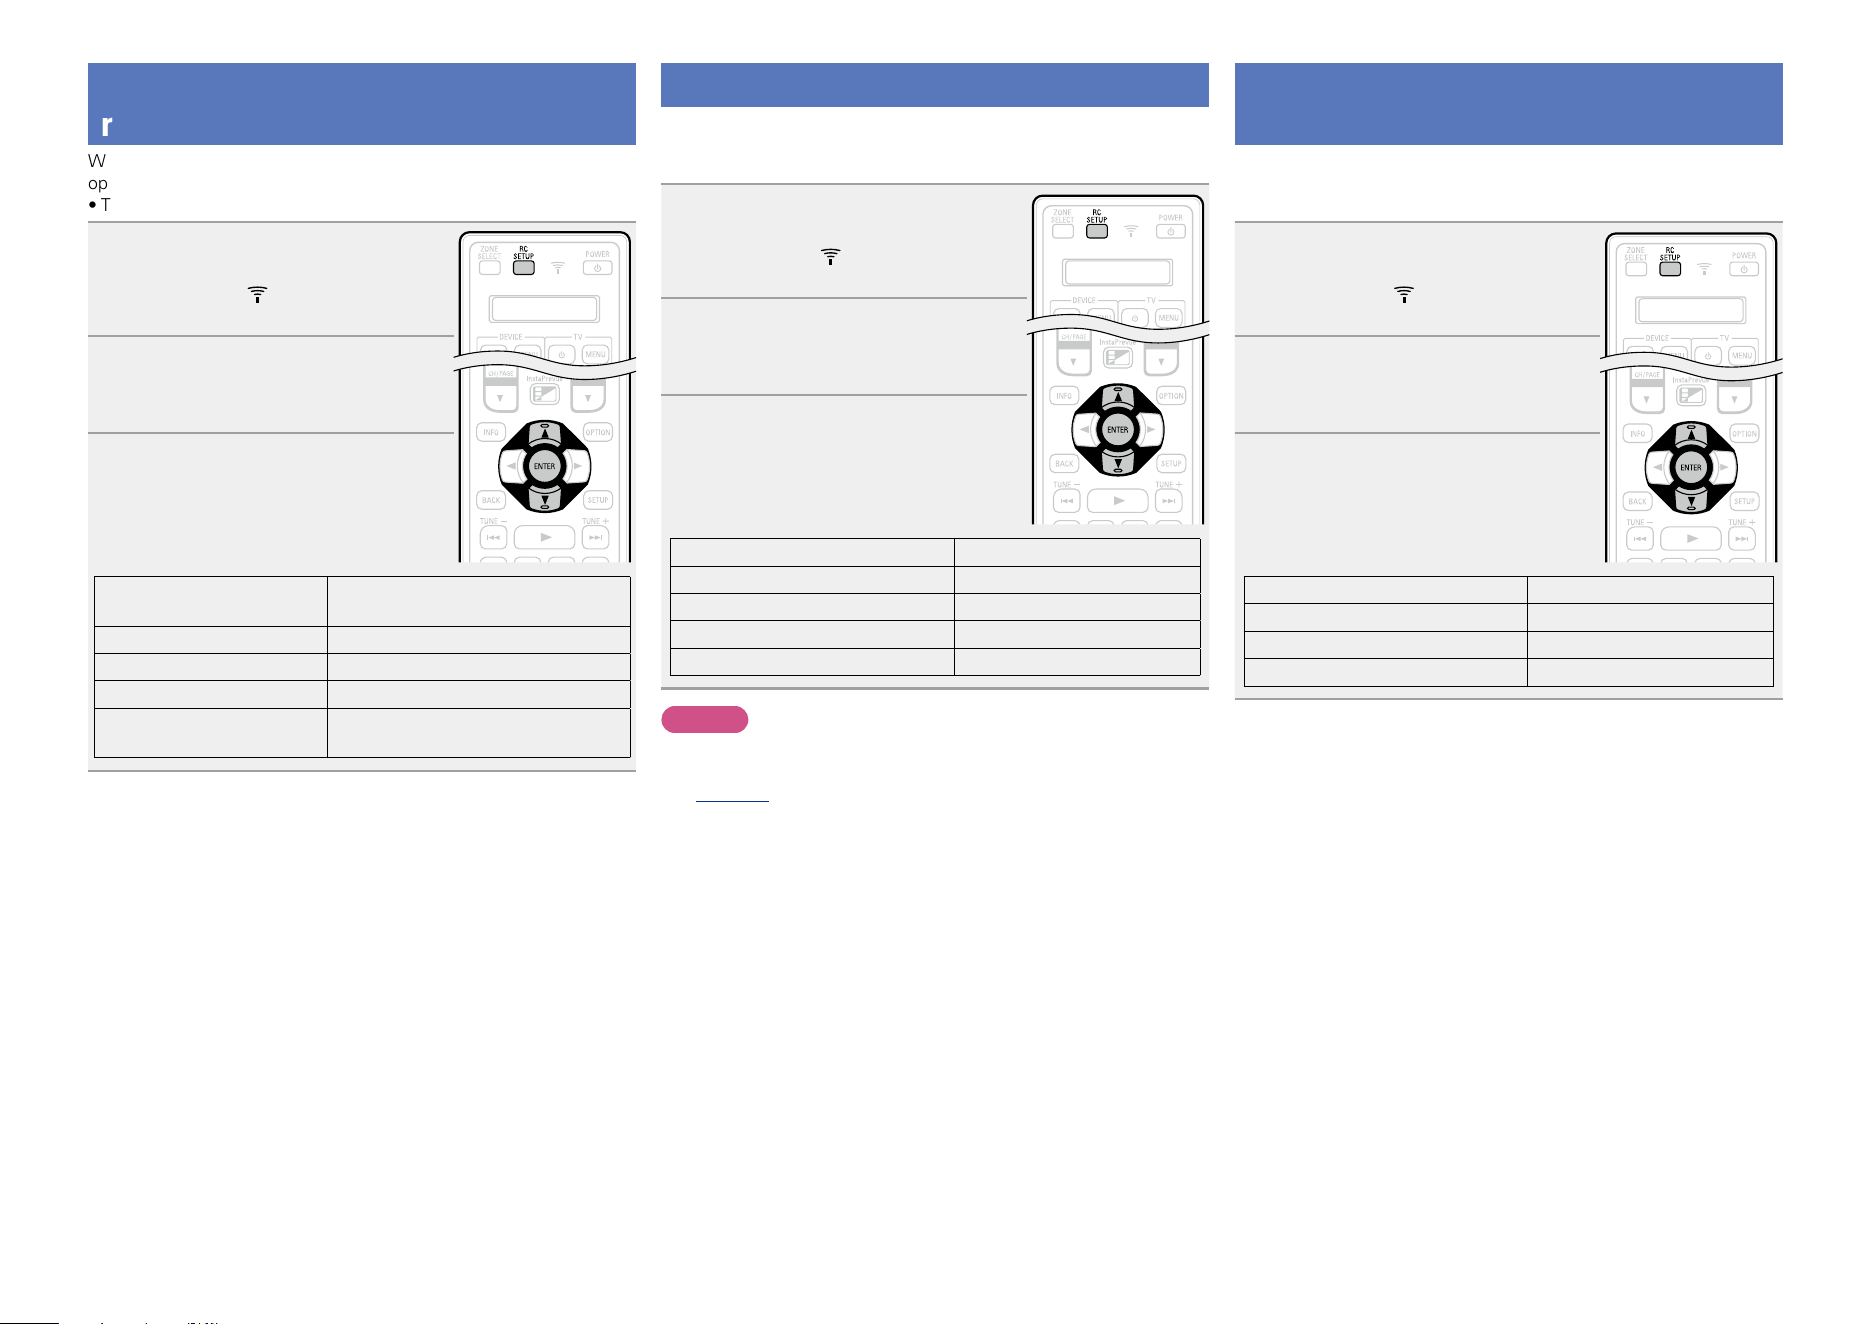
167
Specifying the zone used with the
remote control unit
When the ZONE SELECT button is pressed, only the set zone can be
operated with the remote control unit.
•The factory setting is “M234”.
1
Press and hold RC SETUP for at
least 3 seconds.
“SETUP” and indicator flashes twice
on the remote control unit.
2
Use ui to display “ZLOCK” on
the remote control unit and press
ENTER.
3
Use ui to set the zone to be used
and press ENTER.
“OK” flashes four times on the remote
control unit and the normal operation
mode is restored.
Remote control unit
display
Zone to be used
M MAIN ZONE only
M2 MAIN ZONE / ZONE2
M23 MAIN ZONE / ZONE2 / ZONE3
M234
MAIN ZONE / ZONE2 / ZONE3 /
ZONE4
Setting the Remote ID
When using multiple DENON AV receivers in the same room, make
this setting so that only the desired AV receiver operates.
•The factory setting is “ID-1”.
1
Press and hold RC SETUP for at
least 3 seconds.
“SETUP” and indicator flashes twice
on the remote control unit.
2
Use ui to display “RC-ID” on
the remote control unit and press
ENTER.
3
Use ui to set the remote ID and
press ENTER.
“OK” flashes four times on the remote
control unit and the normal operation
mode is restored.
Remote control unit display Remote ID
ID-1 1
ID-2 2
ID-3 3
ID-4 4
NOTE
When you change the remote ID, make sure that the remote
control unit and the remote ID of the main unit are exactly the same
(vpage152 “Remote ID”).
Setting the display time length of
the remote control unit display
Use the following procedure to set the length of time for which to
display data such as zone and mode on the display panel of the remote
control unit.
1
Press and hold RC SETUP for at
least 3 seconds.
“SETUP” and indicator flashes twice
on the remote control unit.
2
Use ui to display “DISPL” on
the remote control unit and press
ENTER.
3
Use ui to set the display time
length and press ENTER.
“OK” flashes four times on the remote
control unit and the normal operation
mode is restored.
Remote control unit display Display time
05SEC 5 sec
10SEC 10 sec
15SEC 15 sec
Basic version
Advanced version
Informations
Advanced version
DVD
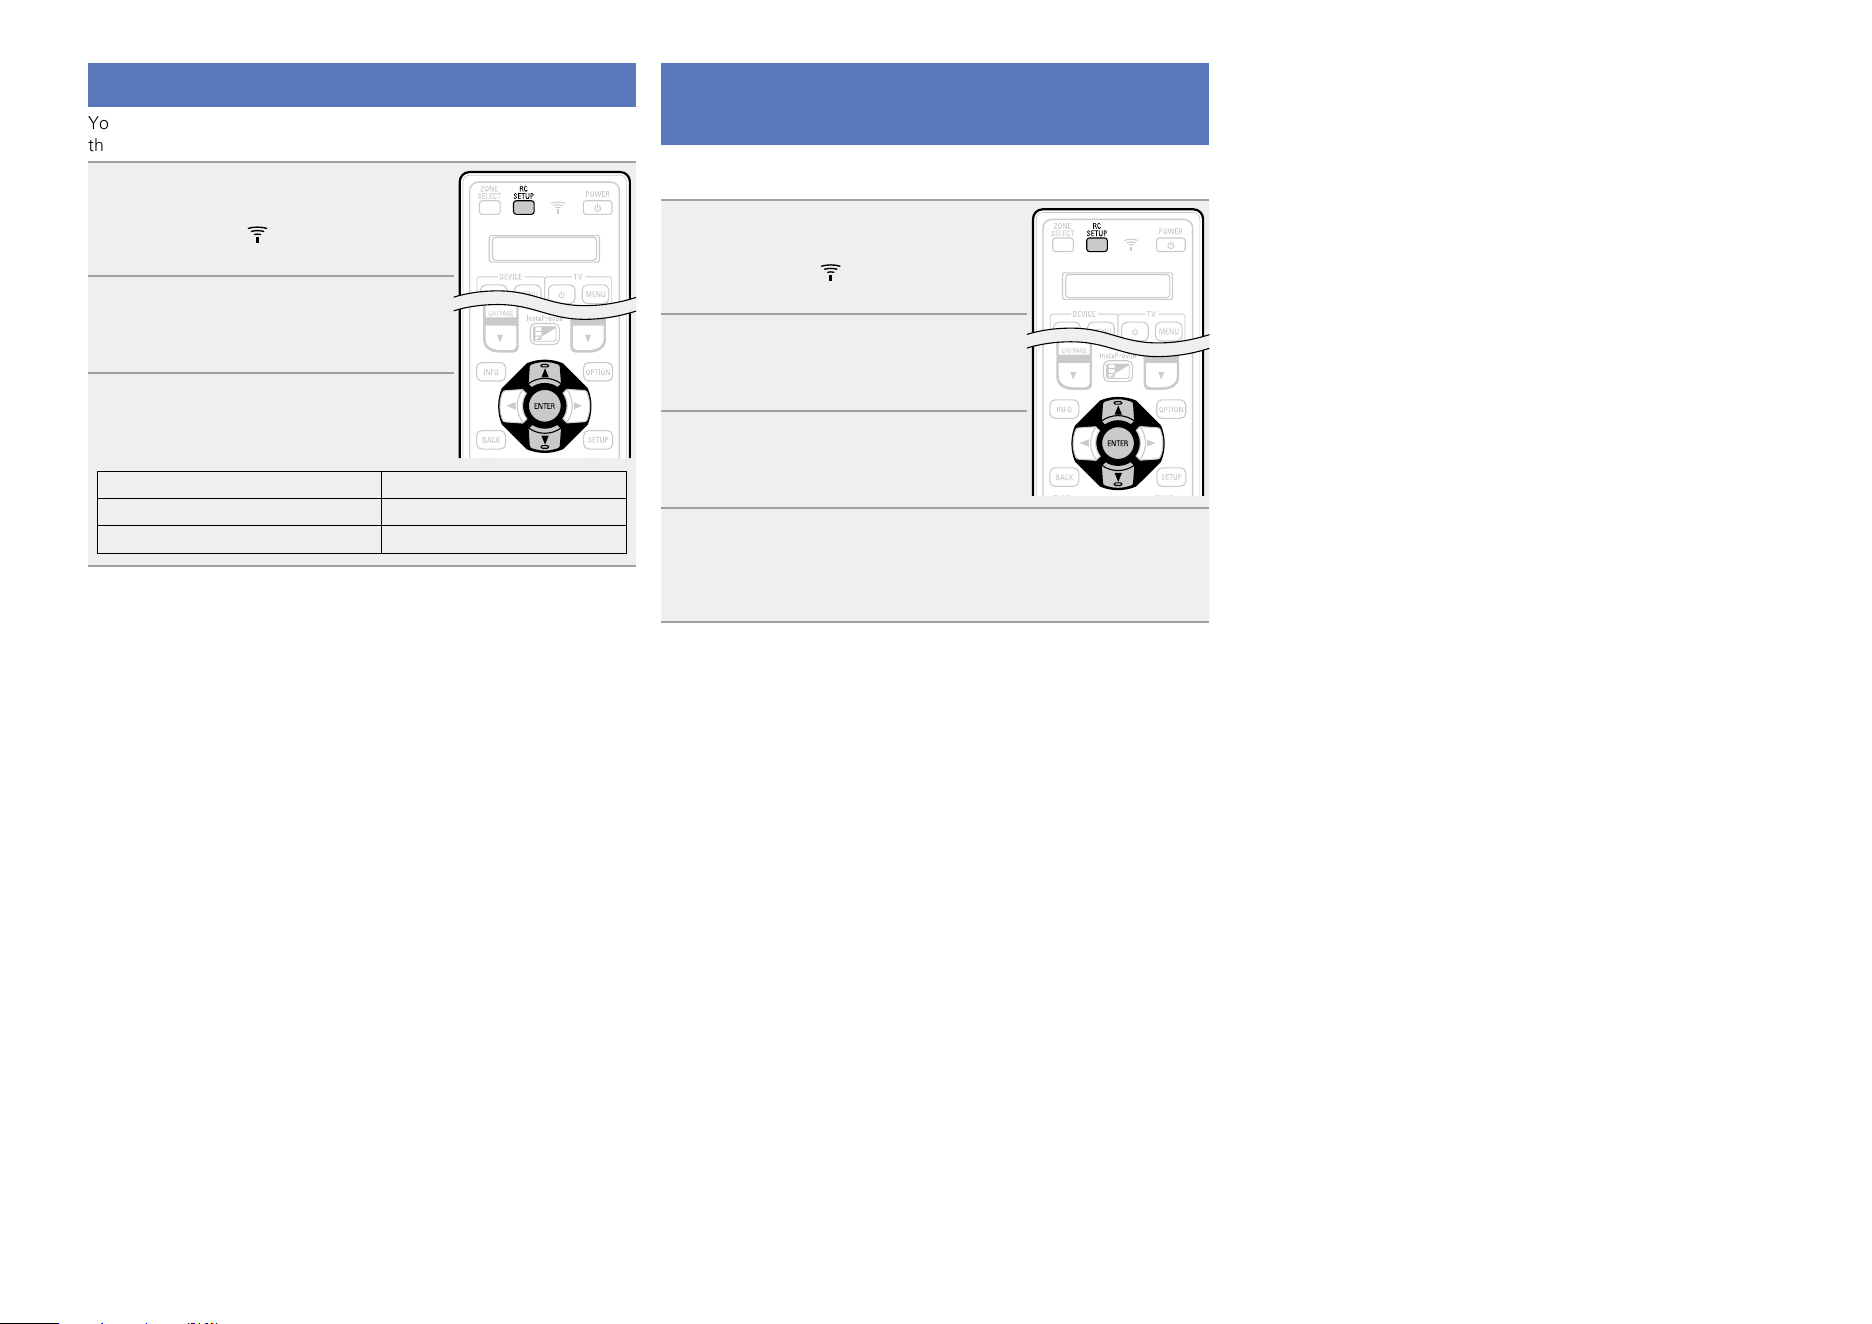
168
Setting the back light
You can set the back light on the remote control unit to off to prolong
the life of the dry cell batteries.
1
Press and hold RC SETUP for at
least 3 seconds.
“SETUP” and indicator flashes twice
on the remote control unit.
2
Use ui to display “LIGHT” on
the remote control unit and press
ENTER.
3
Use ui to set the back light and
press ENTER.
Remote control unit display Back light
ON Back light on
OFF Back light off
Restoring all settings of the remote
control unit to default
Use the following procedure to restore all default settings of the
remote control unit at the time of purchase.
1
Press and hold RC SETUP for at
least 3 seconds.
“SETUP” and indicator flashes twice
on the remote control unit.
2
Use ui to display “RESET” on
the remote control unit and press
ENTER.
3
Use ui to display “ALL” on
the remote control unit and press
ENTER.
4
Use ui to display “YES” on the remote control unit
and press ENTER.
“RESET” flashes four times on the remote control unit and the
normal operation mode is restored.
Basic version
Advanced version
Informations
Advanced version
DVD

Informations
169
F Part names and functions vpage170
F Other information vpage176
F Troubleshooting vpage196
F Specifications vpage202
F Index vpage203
Informations
Here, we list various information related to this unit.
Please refer to this information as needed.
Basic version
Advanced version
InformationsInformations
DVD
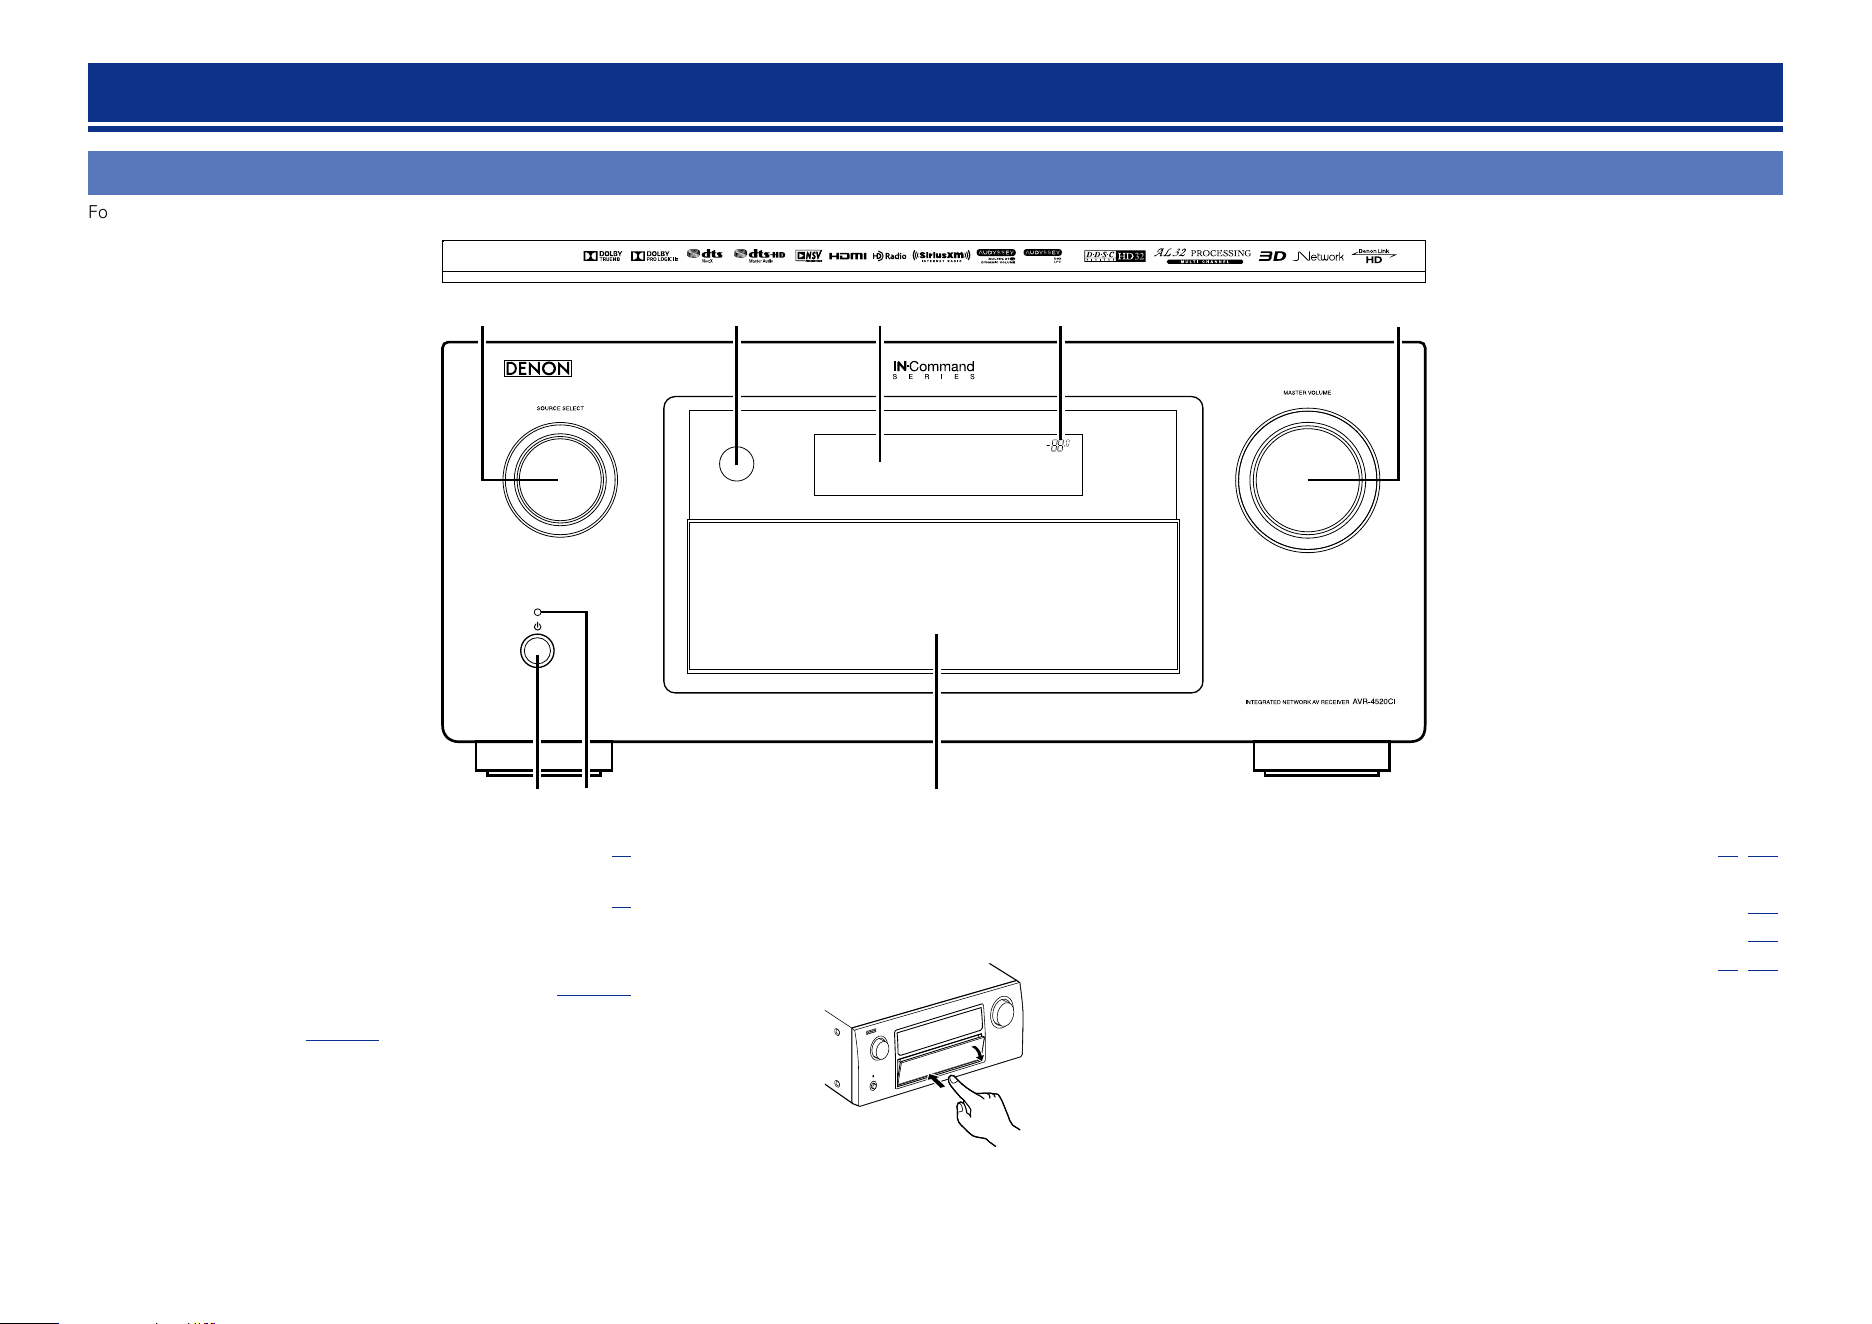
170
Front panel
For buttons not explained here, see the page indicated in parentheses ( ).
q ew
y
tui r
q Power operation button (X) ··················································· (41)
Turns power to this unit on and off (standby).
w Power indicator ······································································· (41)
GPower indicator statusH
•Power on : Green
•Normal standby : Off
•When “HDMI Pass Through” or “HDMI Control” (vpage130)
is set to “On” : Red
•When “Network” (vpage147) is set to “Always On” : Red
•When a mobile device that supports MHL is being charged : Red
r MASTER VOLUME knob ················································· (42, 113)
t Master volume indicator
y Display ···················································································· (172)
u Remote control sensor ························································· (175)
i SOURCE SELECT knob ··················································· (41, 113)
e Door
When you are using buttons and/or connectors behind the door,
press the bottom of the door to open it. When not using buttons
and/or connectors behind the door, close it. Be careful not to catch
your fingers when closing the door.
Part names and functions
Basic version
Advanced version
InformationsInformations
DVD
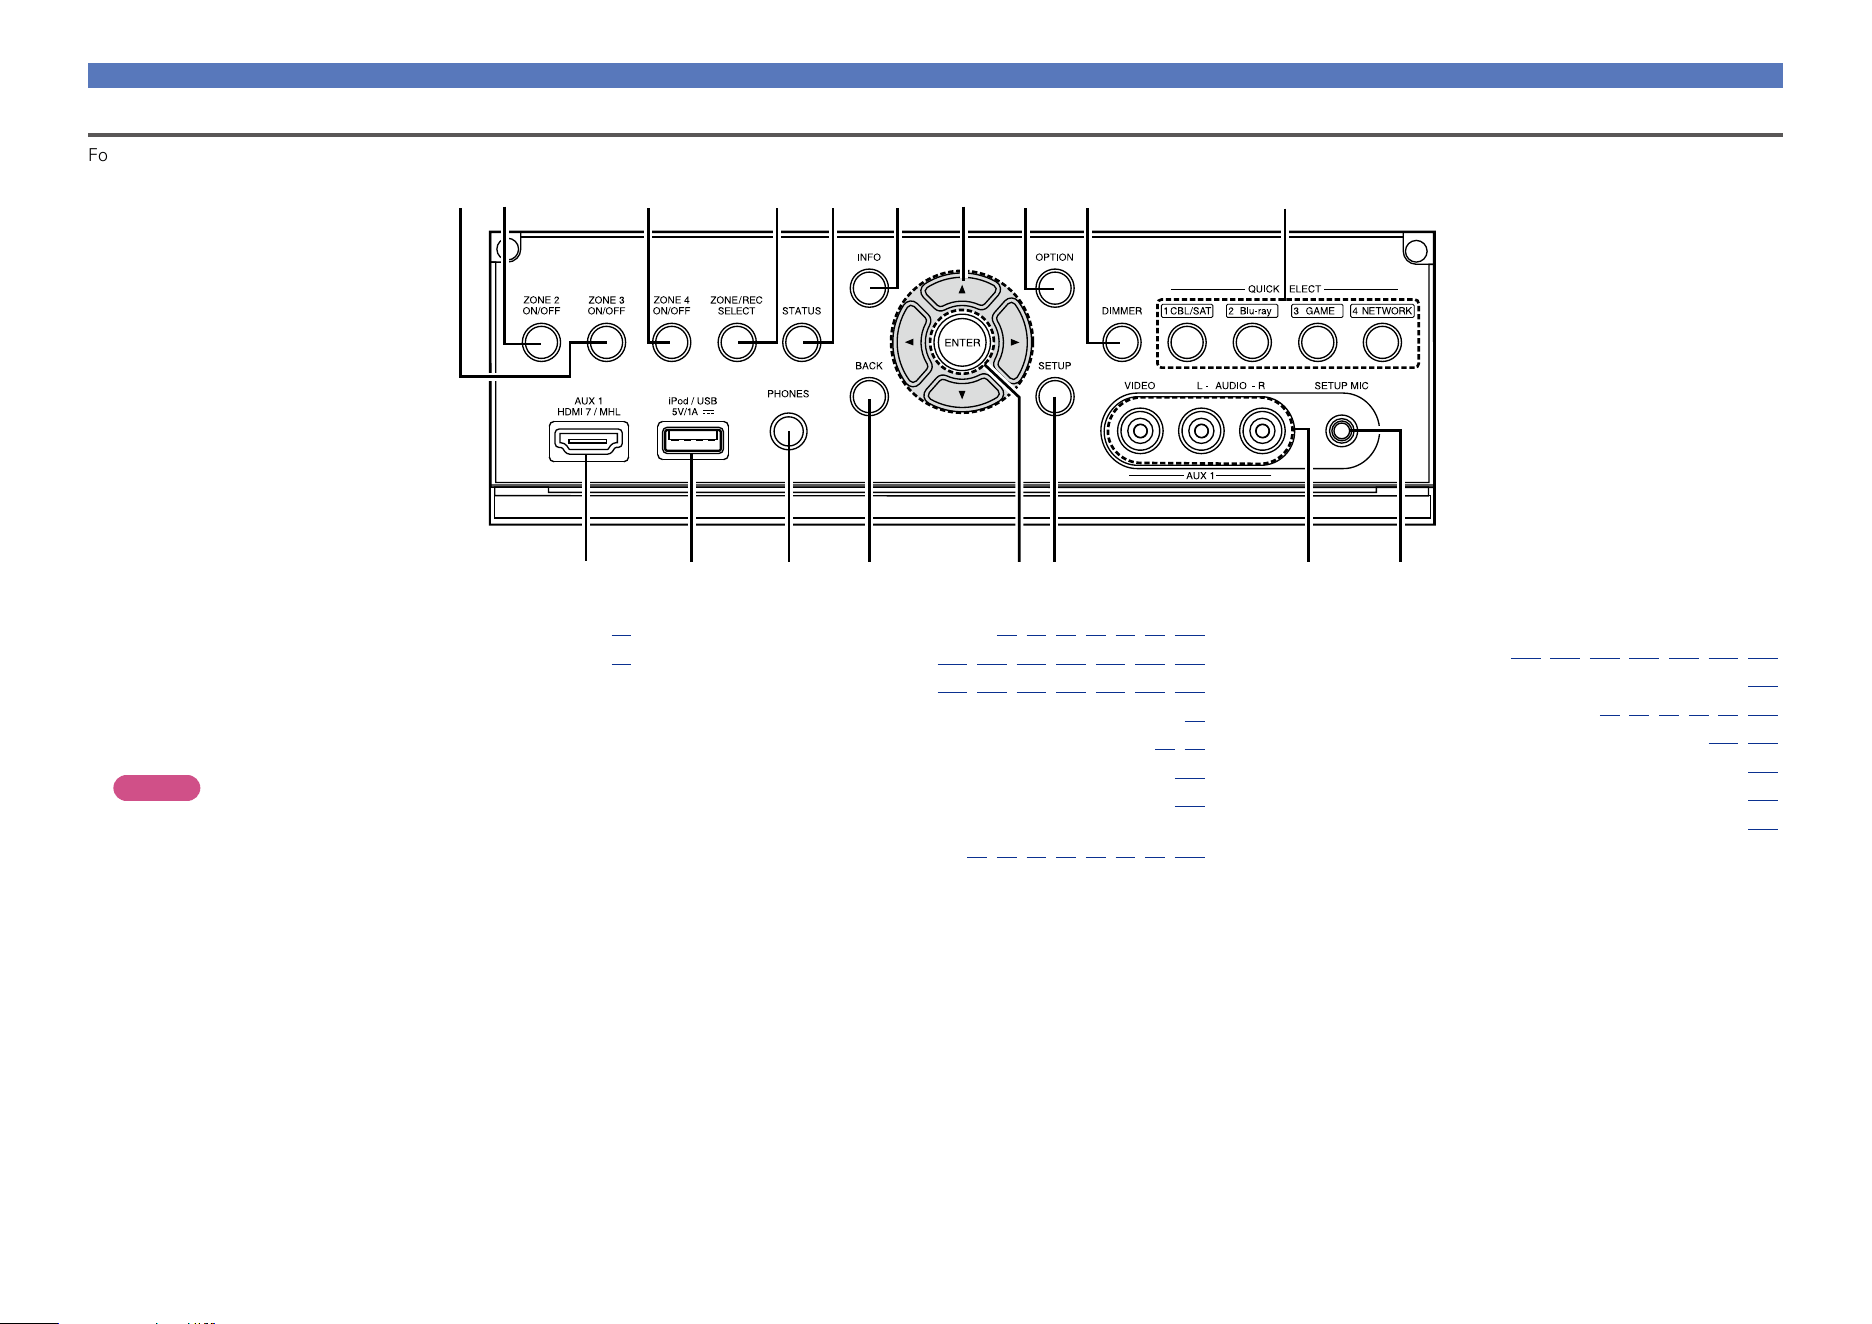
171
Front panel
With the door open
For buttons not explained here, see the page indicated in parentheses ( ).
Q4Q5Q6Q8 Q3 Q1 Q0
Q2
o
Q7
u
iw te r y
q
q AUX1 HDMI 7 / MHL connector ············································· (12)
w iPod/USB port ········································································· (23)
e Headphones jack (PHONES)
When the headphones are plugged into this jack, audio will no
longer be output from the connected speakers or from the PRE
OUT connectors.
NOTE
To prevent hearing loss, do not raise the volume level excessively
when using headphones.
Q2 Cursor buttons
(uio p) ································· (117,120,128,134,139,146,150)
Q3 Information button (INFO) ···················································· (154)
Q4 STATUS button ······································· (45, 58, 60, 64, 75, 153)
Q5 ZONE/REC SELECT button ··········································· (107, 113)
Q6 ZONE4 ON/OFF button ························································· (113)
Q7 ZONE2 ON/OFF button ························································· (113)
Q8 ZONE3 ON/OFF button ························································· (113)
r BACK button ······································ (48,60,64,67,72,75,201)
t ENTER button ······················· (117, 120, 128, 134, 139, 146, 150)
y SETUP button ························ (117, 120, 128, 134, 139, 146, 150)
u AUX1 INPUT connectors ························································ (21)
i SETUP MIC jack ································································· (34, 99)
o QUICK SELECT buttons ························································ (106)
Q0 DIMMER button ····································································· (153)
Q1 OPTION button
······················································ (44,48,51,60,65,67,75,104)
Basic version
Advanced version
InformationsInformations
DVD

172
Display
ty rui
oQ0Q1Q2
q w e
q Information display
The input source name, sound mode, setting values and other
information are displayed here.
w Front speaker indicator
This lights according to the setting of the front A and B speakers.
e Output signal channel indicators
Lights when audio signals are being output from the speakers.
r Master volume indicator
t MUTE indicator
This lights when the mute mode is selected (vpage42).
y Sleep timer indicator
This lights when the sleep mode is selected (vpage105).
u MULTI ZONE indicators
This lights up when ZONE2, ZONE3 or ZONE4 (separate room)
power is turned on (vpage113).
i Monitor output indicator
These light according to the HDMI monitor output setting.
When set to “Auto(Dual)”, the indicators light according to
connection status.
o Tuner reception mode indicators
These light according to the reception conditions when the input
source is set to “HD Radio”.
STEREO : In FM mode, this lights up when receiving stereo
broadcasts.
TUNED : Lights up when the broadcast is properly tuned in.
Q0 Audyssey
®
indicator
This indicator lights when the “MultEQ
®
XT 32” (vpage125),
“Dynamic EQ” (vpage 125), “Dynamic Volume”
(vpage 126), “Audyssey DSX
®
” (vpage 126) or “Audyssey
LFC™” (vpage126) setting is set to other than “Off”.
Q1 Decoder indicator
These light when Dolby or DTS signals are input or when the Dolby
or DTS decoder is running.
Q2 Input mode indicators
Set the audio input modes for the different input sources
(vpage138).
Basic version
Advanced version
InformationsInformations
DVD
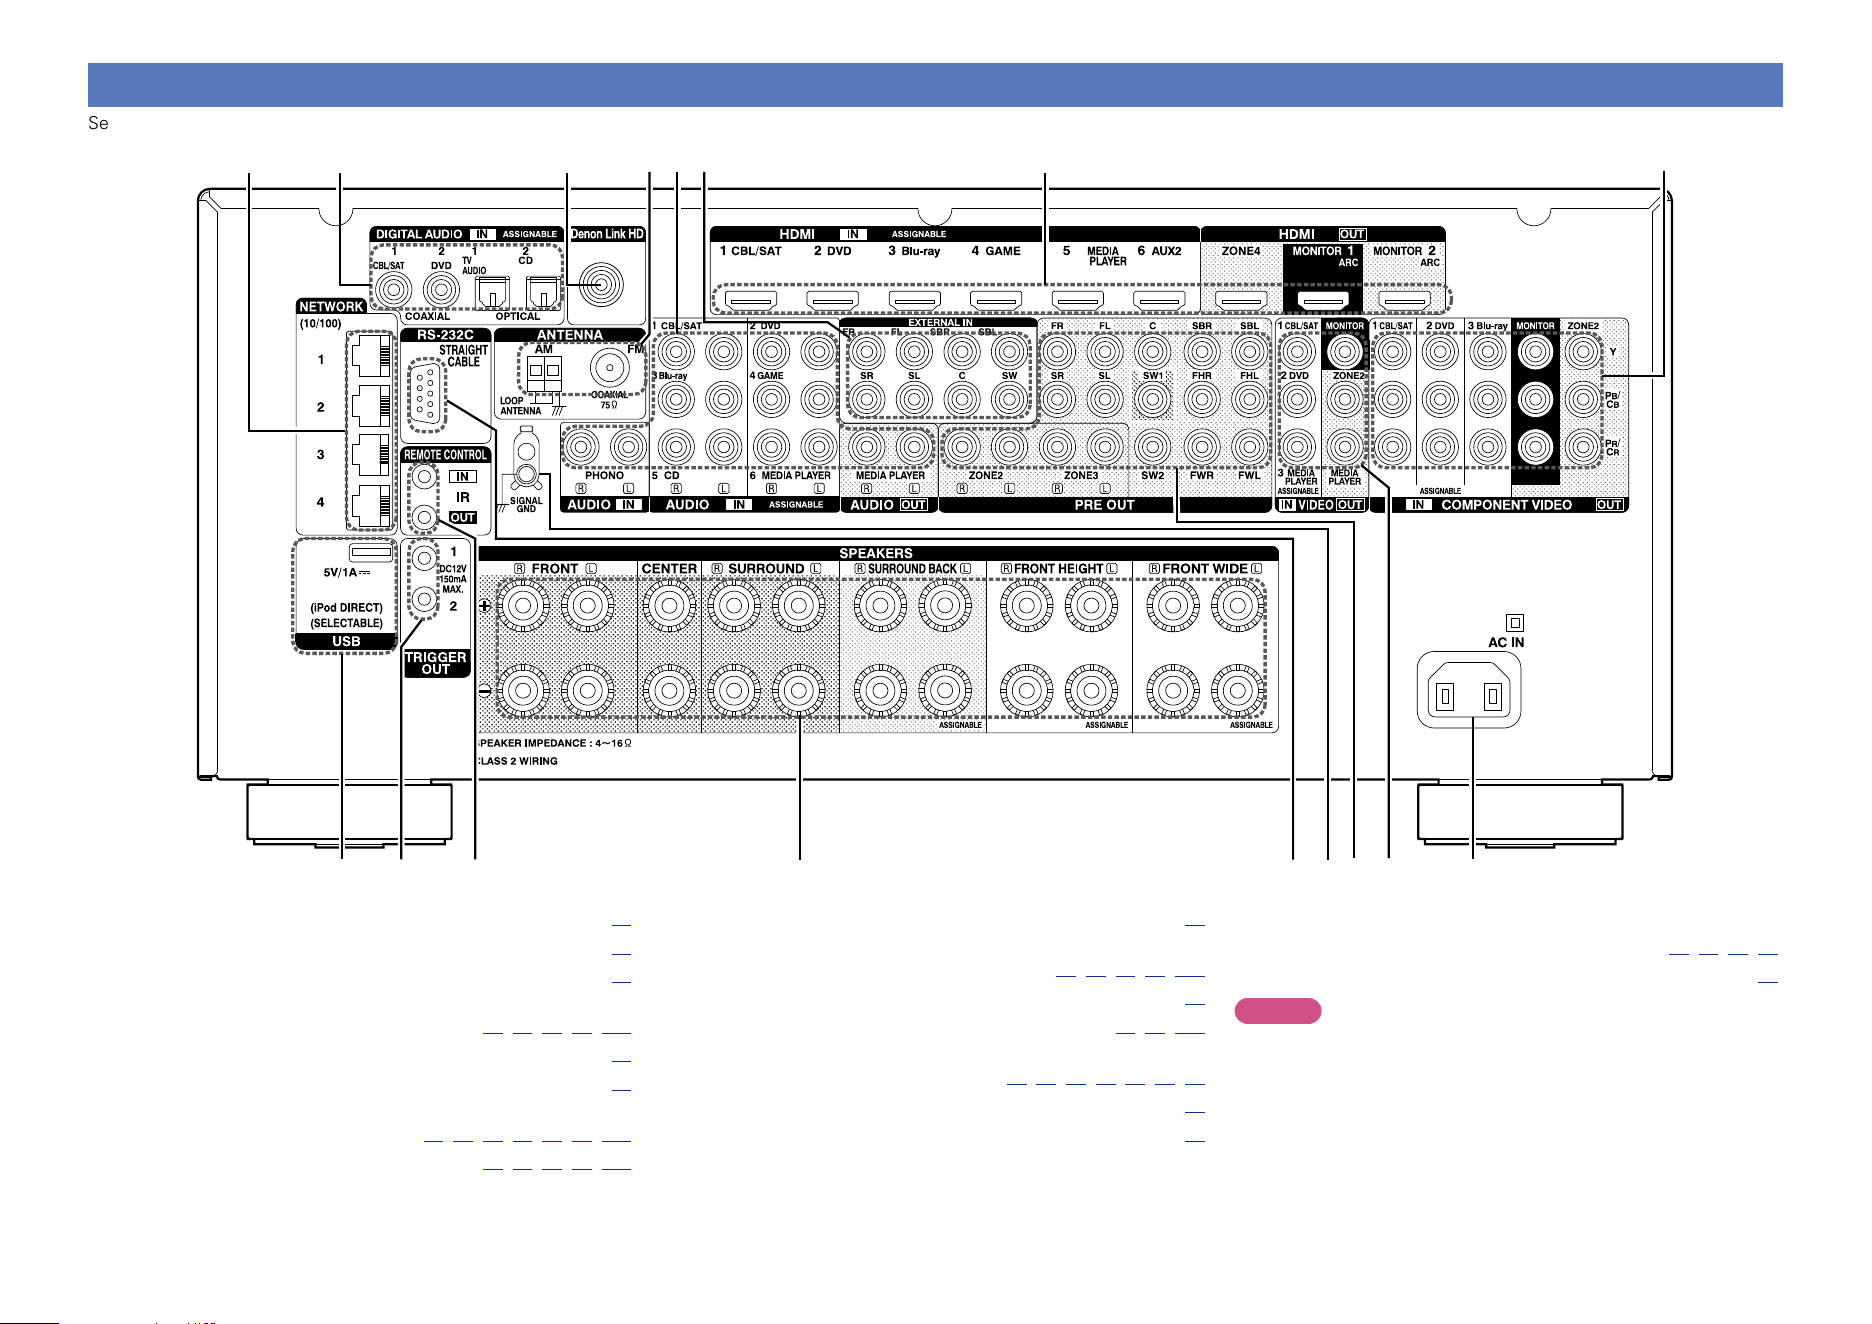
173
Rear panel
See the page indicated in parentheses ( ).
q w oiu
Q1
Q5Q7
r yte
Q0
Q3Q4 Q2
Q6
q USB port ··················································································· (23)
w TRIGGER OUT jacks ································································ (30)
e REMOTE CONTROL jacks ······················································· (30)
r Speaker terminals
(SPEAKERS) ··················································· (94, 95, 96, 97, 111)
t RS-232C connector ·································································· (30)
y SIGNAL GND terminal ···························································· (26)
u PRE OUT connectors
···························································· (29, 94, 95, 96, 97, 98, 112)
i Video connectors (VIDEO) ···························· (16, 17, 18, 22, 112)
o AC inlet (AC IN) ········································································ (32)
Q0 Component video connectors
(COMPONENT VIDEO) ·································· (16, 17, 18, 19, 112)
Q2 EXTERNAL IN connectors ······················································· (28)
Q1 HDMI connectors ······················································· (11, 12, 112)
Q3 Analog audio connectors
(AUDIO) ················································ (17, 18, 19, 20, 22, 25, 26)
Q4 FM/AM antenna terminals (ANTENNA) ································ (27)
Q5 Denon Link HD connector ······················································· (13)
Q6 Digital audio connectors
(DIGITAL AUDIO) ··················································· (16, 17, 18, 25)
Q7 Network connectors (NETWORK) ·········································· (31)
NOTE
Do not touch the inner pins of the connectors on the rear panel.
Electrostatic discharge may cause permanent damage to the unit.
Basic version
Advanced version
InformationsInformations
DVD
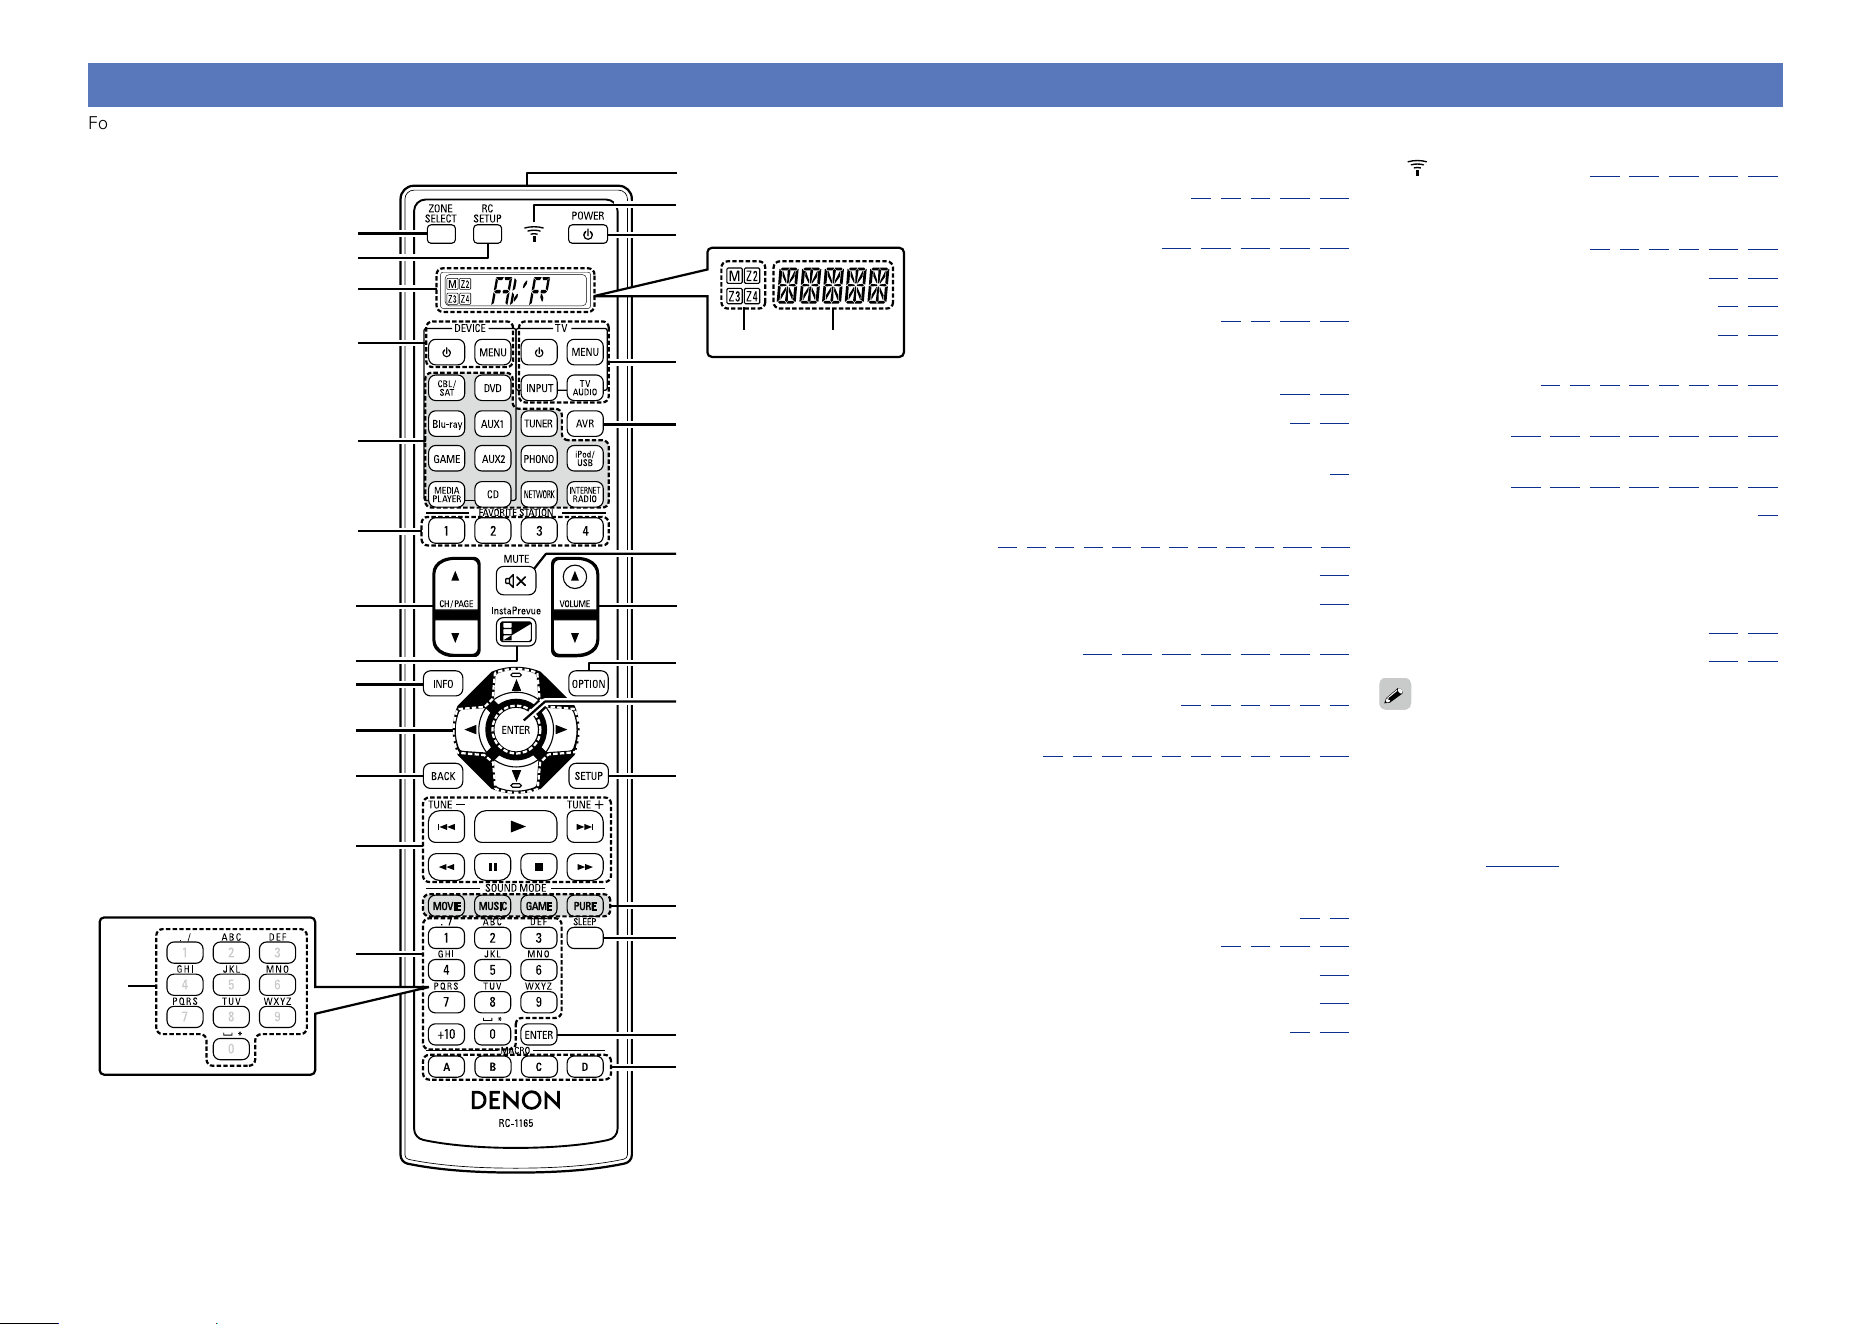
174
Remote control unit
For buttons not explained here, see the page indicated in parentheses ( ).
q
w
e
r
t
u
o
Q1
Q2
Q3
Q4
i
Q0
Q7
Q8
Q9
W0
W4
Q5
W1
W5
W6
W3
W7
W2
Q6
W3
y
q w
q ZONE SELECT button
········································· (34,80,99,113,167)
w RC SETUP button
··································· (157,163,165,167,168)
e Display
q Zone select indicators
·········································· (34,99,113,167)
w Operation mode indicator
r Device operation buttons
(DEVICE X / DEVICE MENU) ··········· (161, 162)
t Input source select buttons ··············· (41, 113)
y FAVORITE STATION buttons
(1 – 4) ··························································· (78)
u Channel/page search buttons
(CH/PAGE df)
···(46,49,55,58,61,65,68,71,73,75,161,162)
i InstaPrevue button ··································· (104)
o Information button (INFO) ······················· (154)
Q0 Cursor buttons (uio p)
··················· (117,120,128,134,139,146,150)
Q1 BACK button
······································· (48,60,64,67,72,75)
Q2 System buttons
··········· (46,49,61,65,68,71,73,75,161,162)
•Skip buttons (8, 9)
•Play button (1)
•Search buttons (6, 7)
•Pause button (3)
•Stop button (2)
Tuning up / Tuning down buttons
(TUNE +, –) ············································ (51, 52)
Q3 Number buttons ··················· (53, 55, 119, 157)
Q4 Character buttons ···································· (119)
Q5 Remote control signal transmitter ········· (175)
Q6 POWER button (X) ····························· (41, 113)
Q7 indicator ·············· (157,163,165,167,168)
Q8 TV operation buttons
(TV X / TV MENU / TV INPUT)
··································· (58,61,65,68,161,162)
Q9 AVR-operation mode button ··········· (158, 160)
W0 MUTE button (:) ····························· (42, 113)
W1 VOLUME buttons (df) ······················ (42, 113)
W2 OPTION button
························· (44,48,51,60,65,67,75,104)
W3 ENTER button
··················· (117, 120, 128, 134, 139, 146, 150)
W4 SETUP button
··················· (117, 120, 128, 134, 139, 146, 150)
W5 SOUND MODE buttons ······························ (84)
•MOVIE button
•MUSIC button
•GAME button
•PURE button
W6 SLEEP button ···································· (105, 113)
W7 MACRO buttons (A – D) ··················· (165, 166)
The remote control unit for this unit is automatically
lit when you touch it.
This is useful for operating the remote control unit
in a dark room such as when watching movies in a
theater room.
The time for which the backlight stays on can be
changed (vpage168 “Setting the back light”).
Basic version
Advanced version
InformationsInformations
v See overleaf
DVD

175
Remote control unit
Inserting the batteries
q Slide the rear cover off the
remote control unit in the
arrow direction.
w Load the two batteries properly
as indicated by the marks in the
battery compartment.
LR6/AA
e Put the rear cover back on.
NOTE
•Insert the specified batteries in the remote control unit.
•Replace the batteries with new ones if the set does not operate
even when the remote control unit is operated close to the unit. (The
supplied batteries are only for verifying operation. Replace them
with new batteries at an early date.)
•When inserting the batteries, be sure to do so in the proper direction,
following the q and w marks in the battery compartment.
•To prevent damage or leakage of battery fluid:
•Do not use a new battery together with an old one.
•Do not use two different types of batteries.
•Do not attempt to charge dry batteries.
•Do not short-circuit, disassemble, heat or dispose of batteries in
flames.
•Do not keep the battery in a place exposed to direct sunlight or in
places with extremely high temperatures, such as near a heater.
•If the battery fluid should leak, carefully wipe the fluid off the inside
of the battery compartment and insert new batteries.
•Remove the batteries from the remote control unit if it will not be in
use for long periods.
•Used batteries should be disposed of in accordance with the local
regulations regarding battery disposal.
•The remote control unit may function improperly if rechargeable
batteries are used.
Operating range of the remote control unit
Point the remote control unit at the remote sensor when operating it.
30°30°
Approx. 23 ft/7 m
NOTE
•The set may function improperly or the remote control unit may not
operate if the remote control sensor is exposed to direct sunlight,
strong artificial light from an inverter type fluorescent lamp or
infrared light.
•When using 3D video devices that transmit radio communication
signals (such as infrared signals etc) between the various units (such
as the monitor, 3D glasses, 3D transmitter unit etc), the remote
control unit may not operate due to interference from those radio
communication signals. If this occurs, adjust the direction and
distance of the 3D communication for each unit, and check that the
remote control unit operation is not affected by these signals.
Basic version
Advanced version
InformationsInformations
DVD
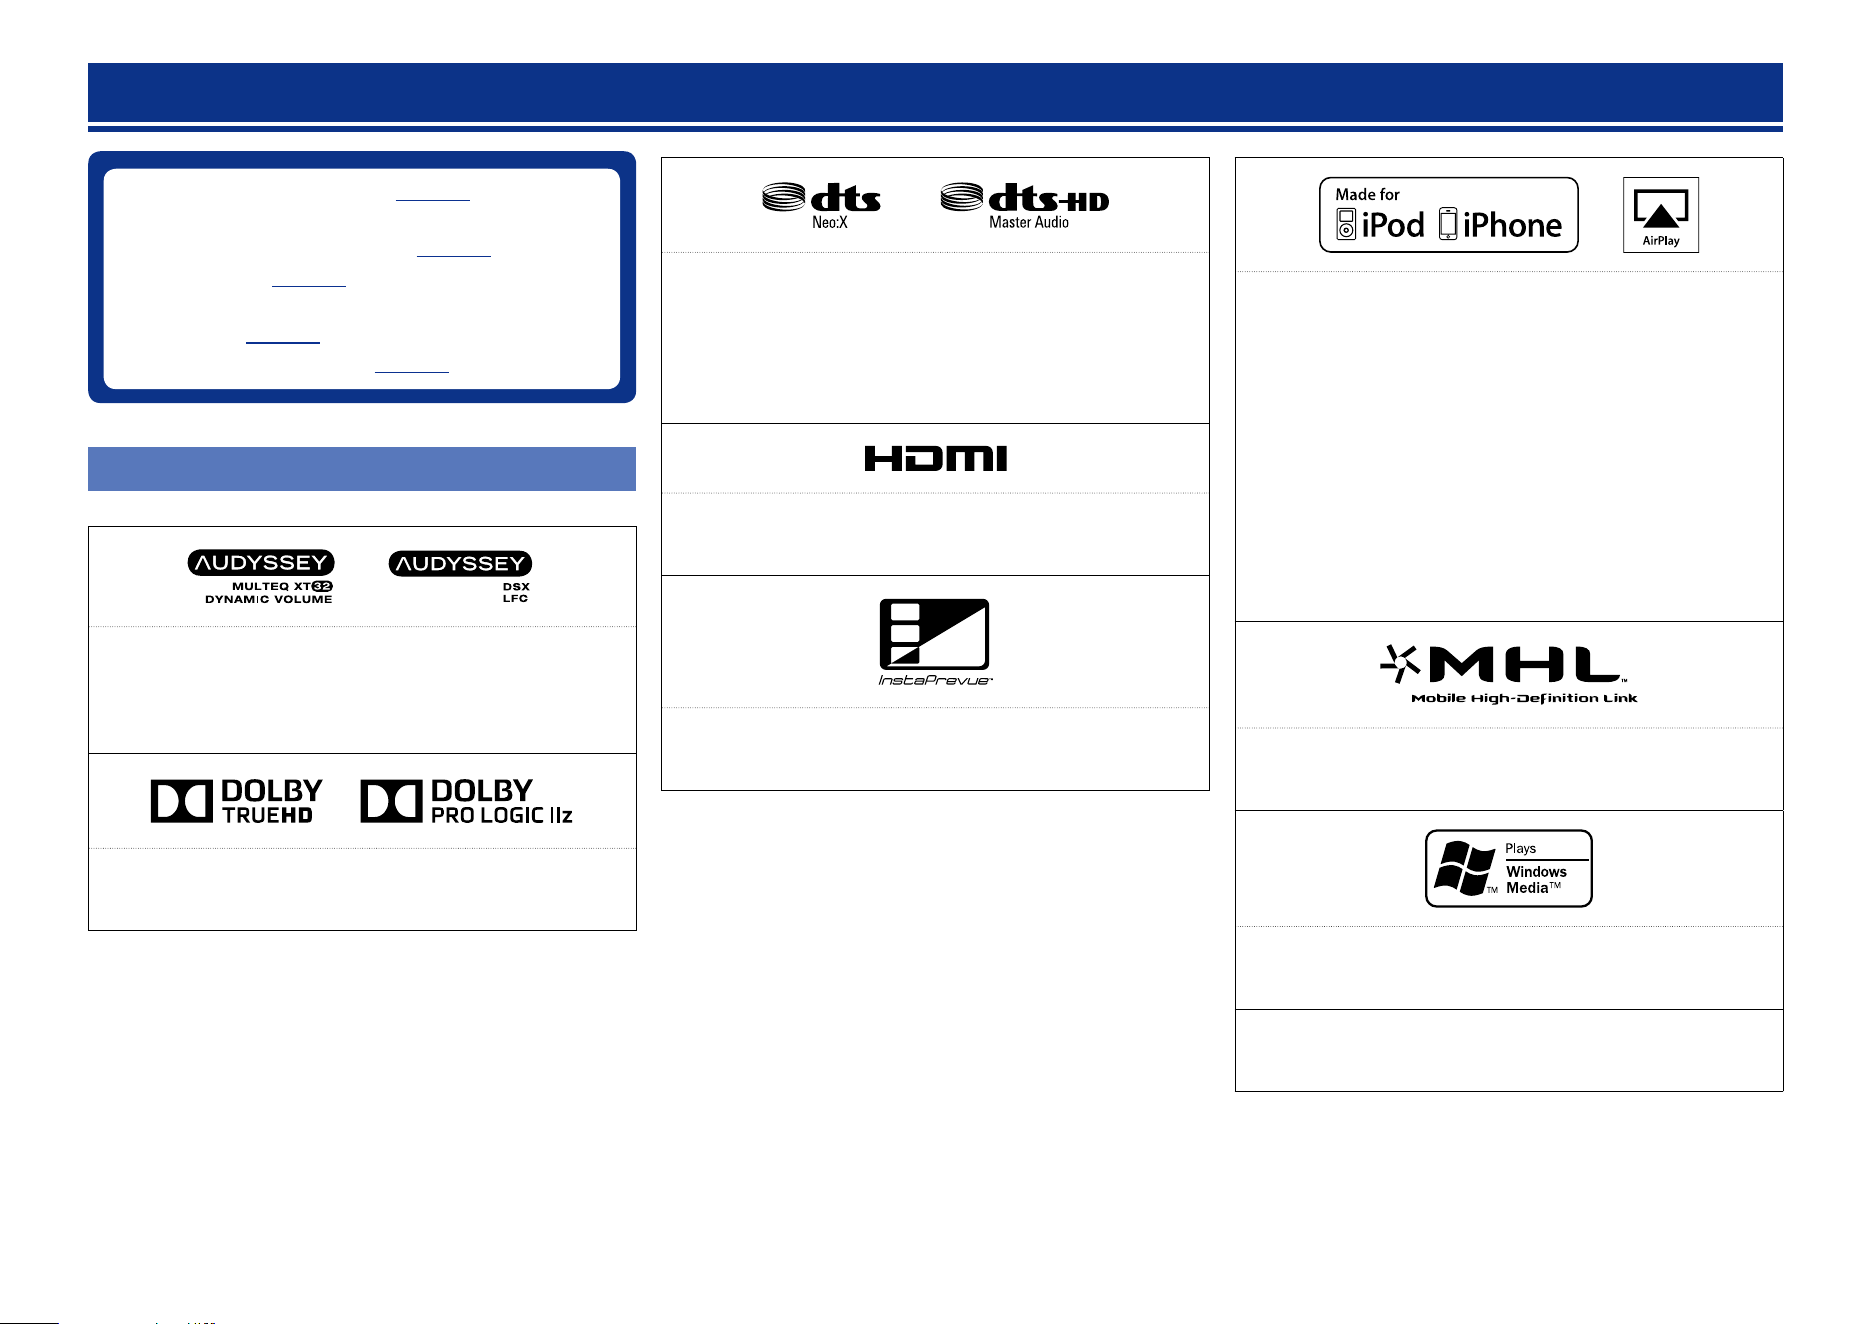
176
Other information
n Trademark information (vpage176)
n Relationship between the Amp Assign mode
settings and audio output (vpage177)
n Surround (vpage184)
n Relationship between video signals and monitor
output (vpage190)
n Explanation of terms (vpage193)
Trademark information
This product uses the following technologies (Random order):
Manufactured under license from Audyssey Laboratories™. U.S.
and foreign patents pending. Audyssey MultEQ
®
XT 32, Audyssey
Dynamic EQ
®
, Audyssey Dynamic Volume
®
and Audyssey DSX
®
are registered trademarks of Audyssey Laboratories. Audyssey
LFC™ is a trademark of Audyssey Laboratories.
Manufactured under license from Dolby Laboratories. “Dolby”,
“Pro Logic” and the double-D symbol are trademarks of Dolby
Laboratories.
“Made for iPod” and “Made for iPhone” mean that an electronic
accessory has been designed to connect specifically to iPod, or
iPhone, respectively, and has been certified by the developer to
meet Apple performance standards.
Apple is not responsible for the operation of this device or its
compliance with safety and regulatory standards. Please note that
the use of this accessory with iPod, or iPhone, may affect wireless
performance.
AirPlay, the AirPlay logo, iPad, iPhone, iPod, iPod classic, iPod nano,
iPod shuffle and iPod touch are trademarks of Apple Inc., registered
in the U.S. and other countries.
•Individual users are permitted to use iPhone, iPod, iPod classic, iPod
nano, iPod shuffle, and iPod touch for private copy and playback of
non-copyrighted contents and contents whose copy and playback
is permitted by law. Copyright infringement is prohibited by law.
MHL, the MHL Logo, and Mobile High-Definition Link are trademark
or registered trademarks of MHL LLC in the United States and other
countries.
Windows Media and the Windows logo are trademarks or registered
trademarks of Microsoft Corporation in the United States and/or
other countries.
This item incorporates copy protection technology that is protected
by U.S. patents and other intellectual property rights of Rovi
Corporation. Reverse engineering and disassembly are prohibited.
Manufactured under license under U.S. Patent No’s:5,956,674;5,9
74,380;5,978,762;6,487,535;6,226,616;7,212,872;7,003,467;7,272,
567;7,668,723;7,392,195;7,930,184;7,333,929;7,548,853;7,283,63
4 & other U.S. and worldwide patents issued and pending.
DTS-HD, the Symbol, & DTS-HD and the Symbol together are
registered trademarks & DTS -HD Master Audio is a trademark of
DTS, Inc. Product includes software. ©DTS, Inc. All Rights Reserved.
The terms HDMI and HDMI High-Definition Multimedia Interface,
and the HDMI Logo are trademarks or registered trademarks of
HDMI Licensing LLC in the United States and other countries.
InstaPrevue and the InstaPrevue logo are trademarks or registered
trademarks of Silicon Image, Inc. in the United States and other
countries.
Basic version
Advanced version
InformationsInformations
DVD
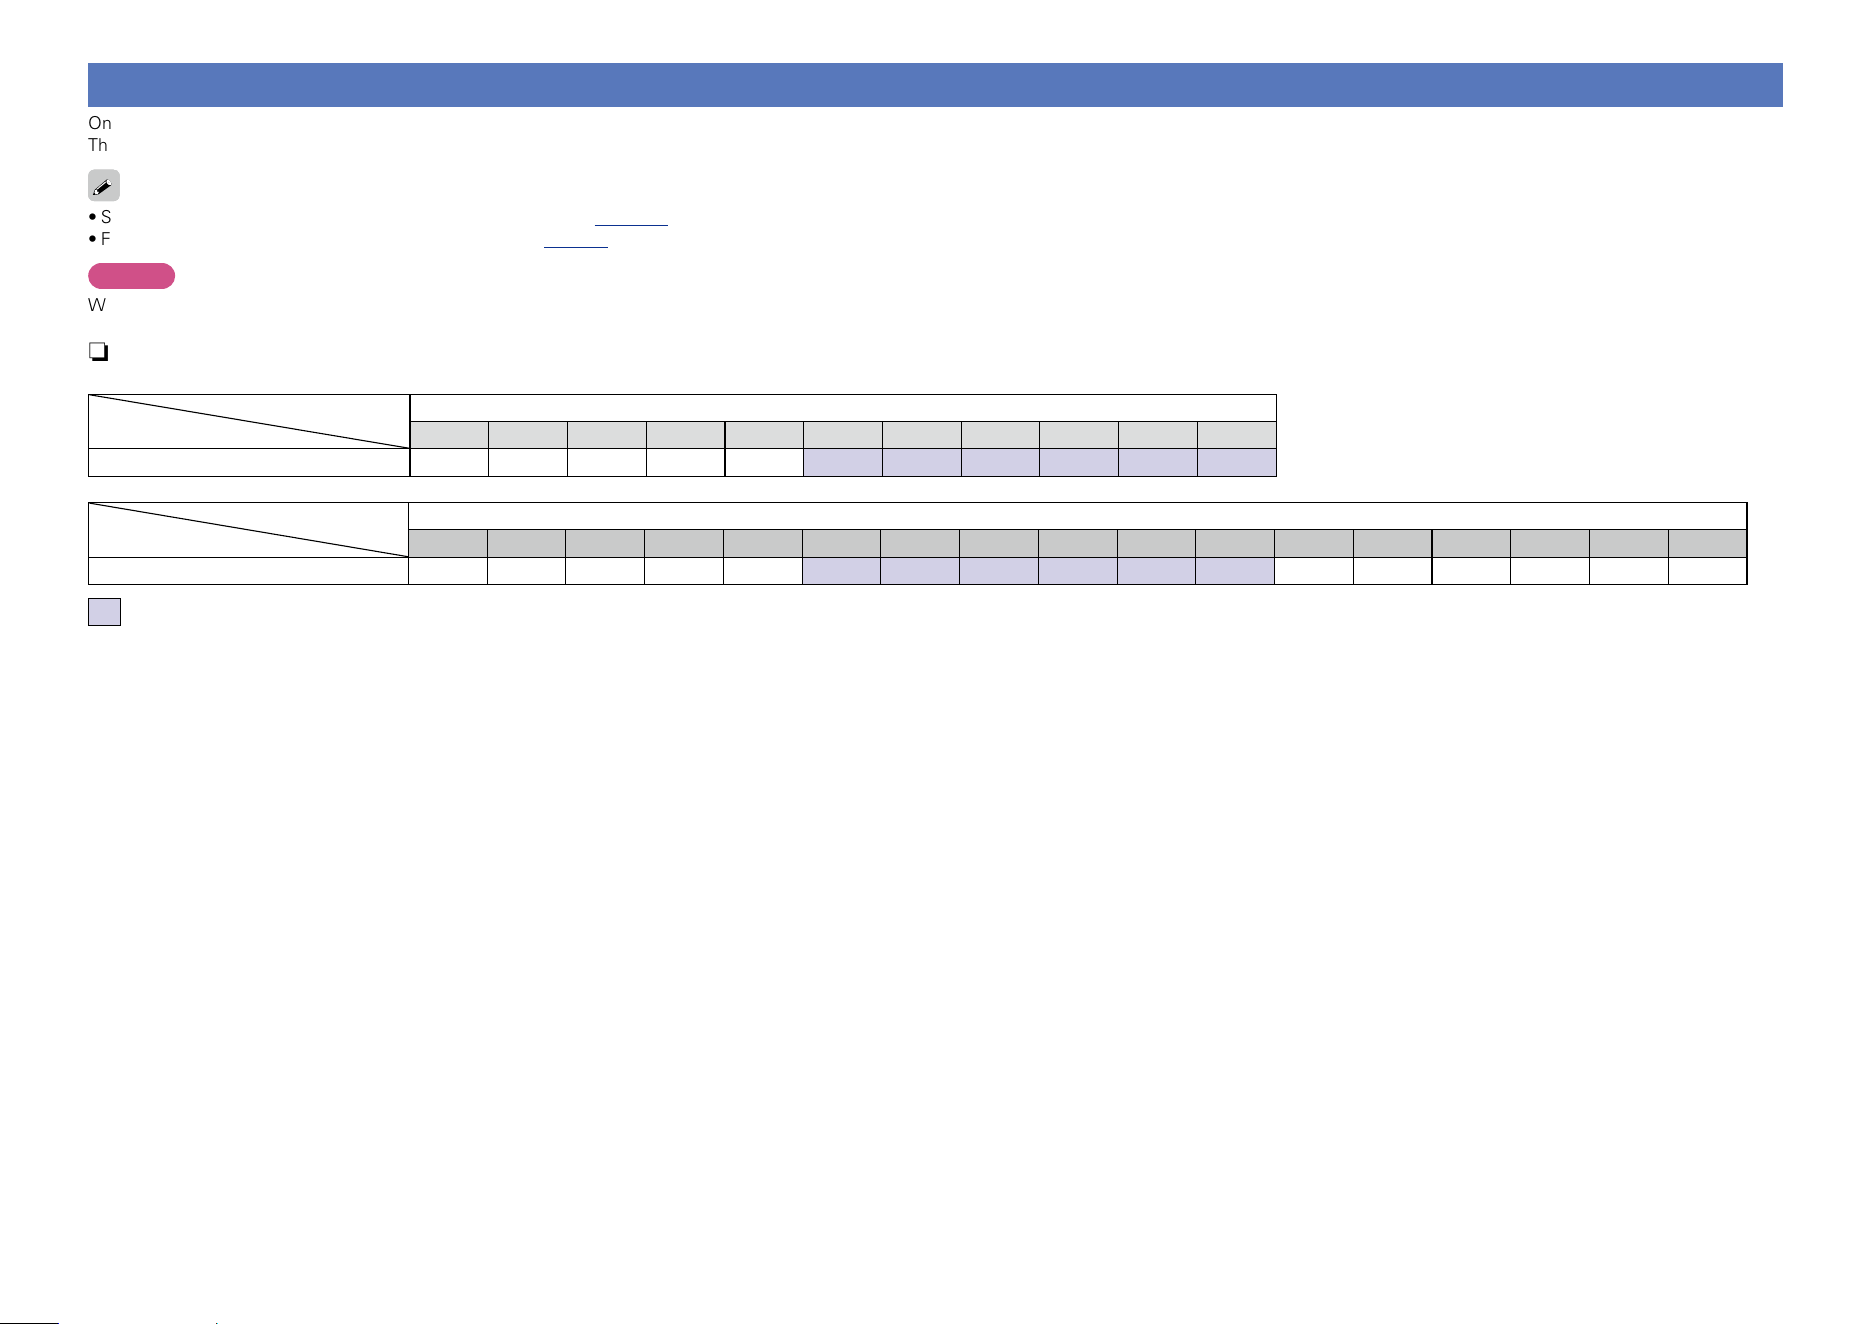
177
Relationship between the Amp Assign mode settings and audio output
On this unit, you can change how the power amplifiers within this unit are used according to your environment.
This allows you to output audio to rooms other than the room where the surround is played back (MAIN ZONE) and to enjoy high-quality playback from the front speaker in MAIN ZONE.
•Set the Amp Assign mode by referring to “Assign Mode” (vpage141).
•For speaker connection, see “Speaker connection” (vpage93).
NOTE
When making a bi-amplifier connection, use speakers that support the bi-amplifier connection. In this case, remove the short-circuit plate or short-circuit wire from the speaker connector.
n When “9.1ch(SB/FH/FW)” is selected for “Assign Mode”
Assigns all power amplifiers within this unit for MAIN ZONE. Up to 9.1ch playback is available.
Speaker terminal
FL FR C SL SR SBL SBR FHL FHR FWL FWR
Output signal FL FR C SL SR SBL SBR FHL FHR FWL FWR
Pre out terminal
FL FR C SL SR SBL SBR FHL FHR FWL FWR SW1 SW2 Z2L Z2R Z3L Z3R
Output signal FL FR C SL SR SBL SBR FHL FHR FWL FWR SW1 SW2 Z2L Z2R Z3L Z3R
Audio is output from the optimum speakers based on the selected sound mode.
Basic version
Advanced version
InformationsInformations
v See overleaf
DVD
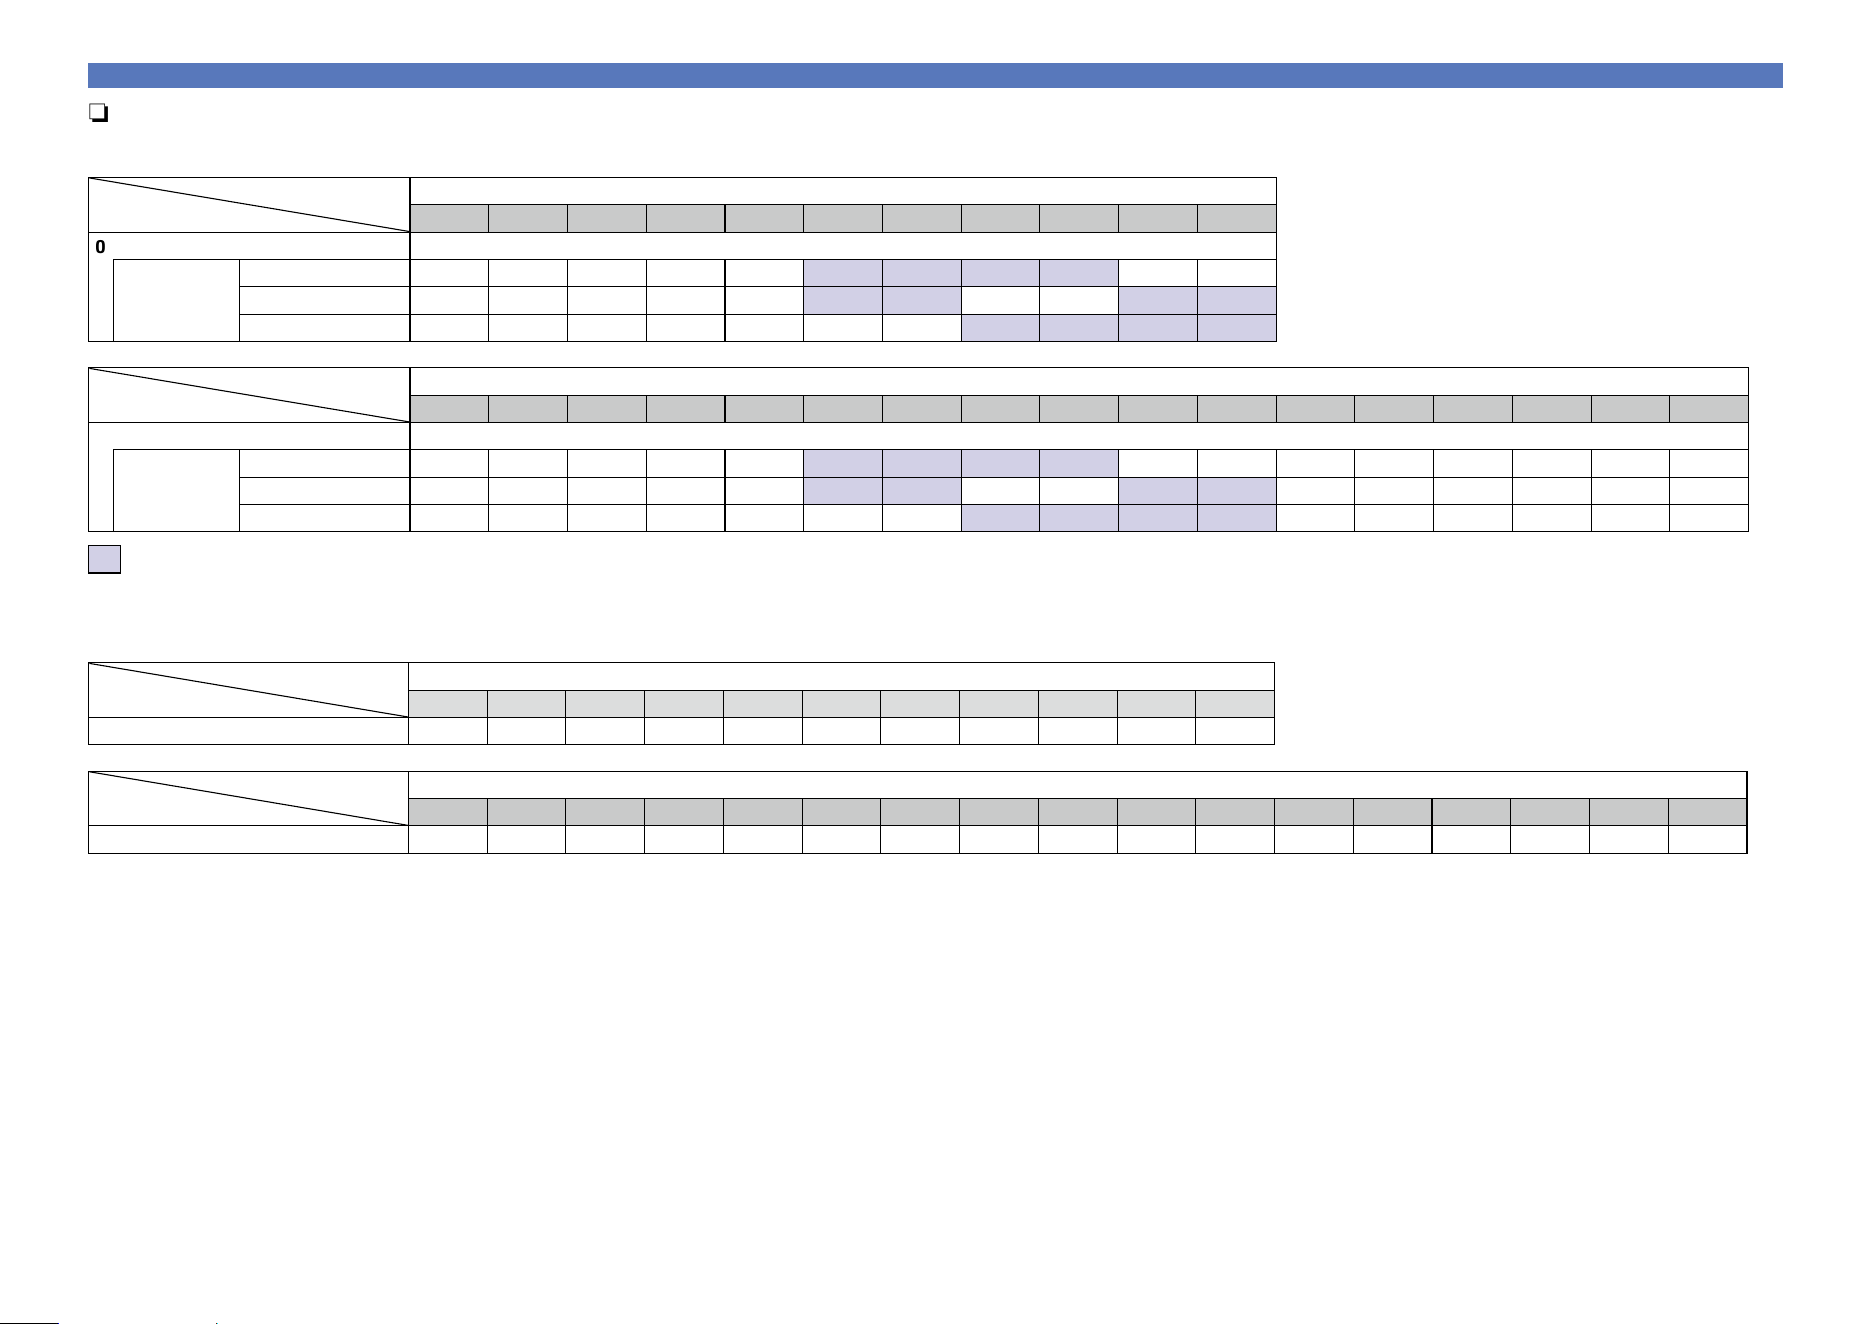
178
n When “7.1ch + ZONE2” is selected for “Assign Mode”
Assigns power amplifiers within this unit as follows: 7.1ch for MAIN ZONE and 2ch for ZONE2.
Select the desired speakers used for MAIN ZONE from the “Main Speakers” settings.
Speaker terminal
FL FR C SL SR SBL SBR FHL FHR FWL FWR
Output signal
Main Speakers
S.Back/F.Height FL FR C SL SR SBL SBR FHL FHR Z2L Z2R
S.Back/F.Wide FL FR C SL SR SBL SBR Z2L Z2R FWL FWR
F.Height/F.Wide FL FR C SL SR Z2L Z2R FHL FHR FWL FWR
Pre out terminal
FL FR C SL SR SBL SBR FHL FHR FWL FWR SW1 SW2 Z2L Z2R Z3L Z3R
Output signal
Main Speakers
S.Back/F.Height FL FR C SL SR SBL SBR FHL FHR – – SW1 SW2 Z2L Z2R Z3L Z3R
S.Back/F.Wide FL FR C SL SR SBL SBR – – FWL FWR SW1 SW2 Z2L Z2R Z3L Z3R
F.Height/F.Wide FL FR C SL SR – – FHL FHR FWL FWR SW1 SW2 Z2L Z2R Z3L Z3R
Audio is output from the optimum speakers based on the selected sound mode.
n When “5.1ch + ZONE2/3” is selected for “Assign Mode”
Assigns power amplifiers within this unit as follows: 5.1ch for MAIN ZONE and 2ch for ZONE2 and ZONE3 each.
Speaker terminal
FL FR C SL SR SBL SBR FHL FHR FWL FWR
Output signal FL FR C SL SR Z2L Z2R – – Z3L Z3R
Pre out terminal
FL FR C SL SR SBL SBR FHL FHR FWL FWR SW1 SW2 Z2L Z2R Z3L Z3R
Output signal FL FR C SL SR – – – – – – SW1 SW2 Z2L Z2R Z3L Z3R
Relationship between the Amp Assign mode settings and audio output
Basic version
Advanced version
InformationsInformations
v See overleaf
DVD
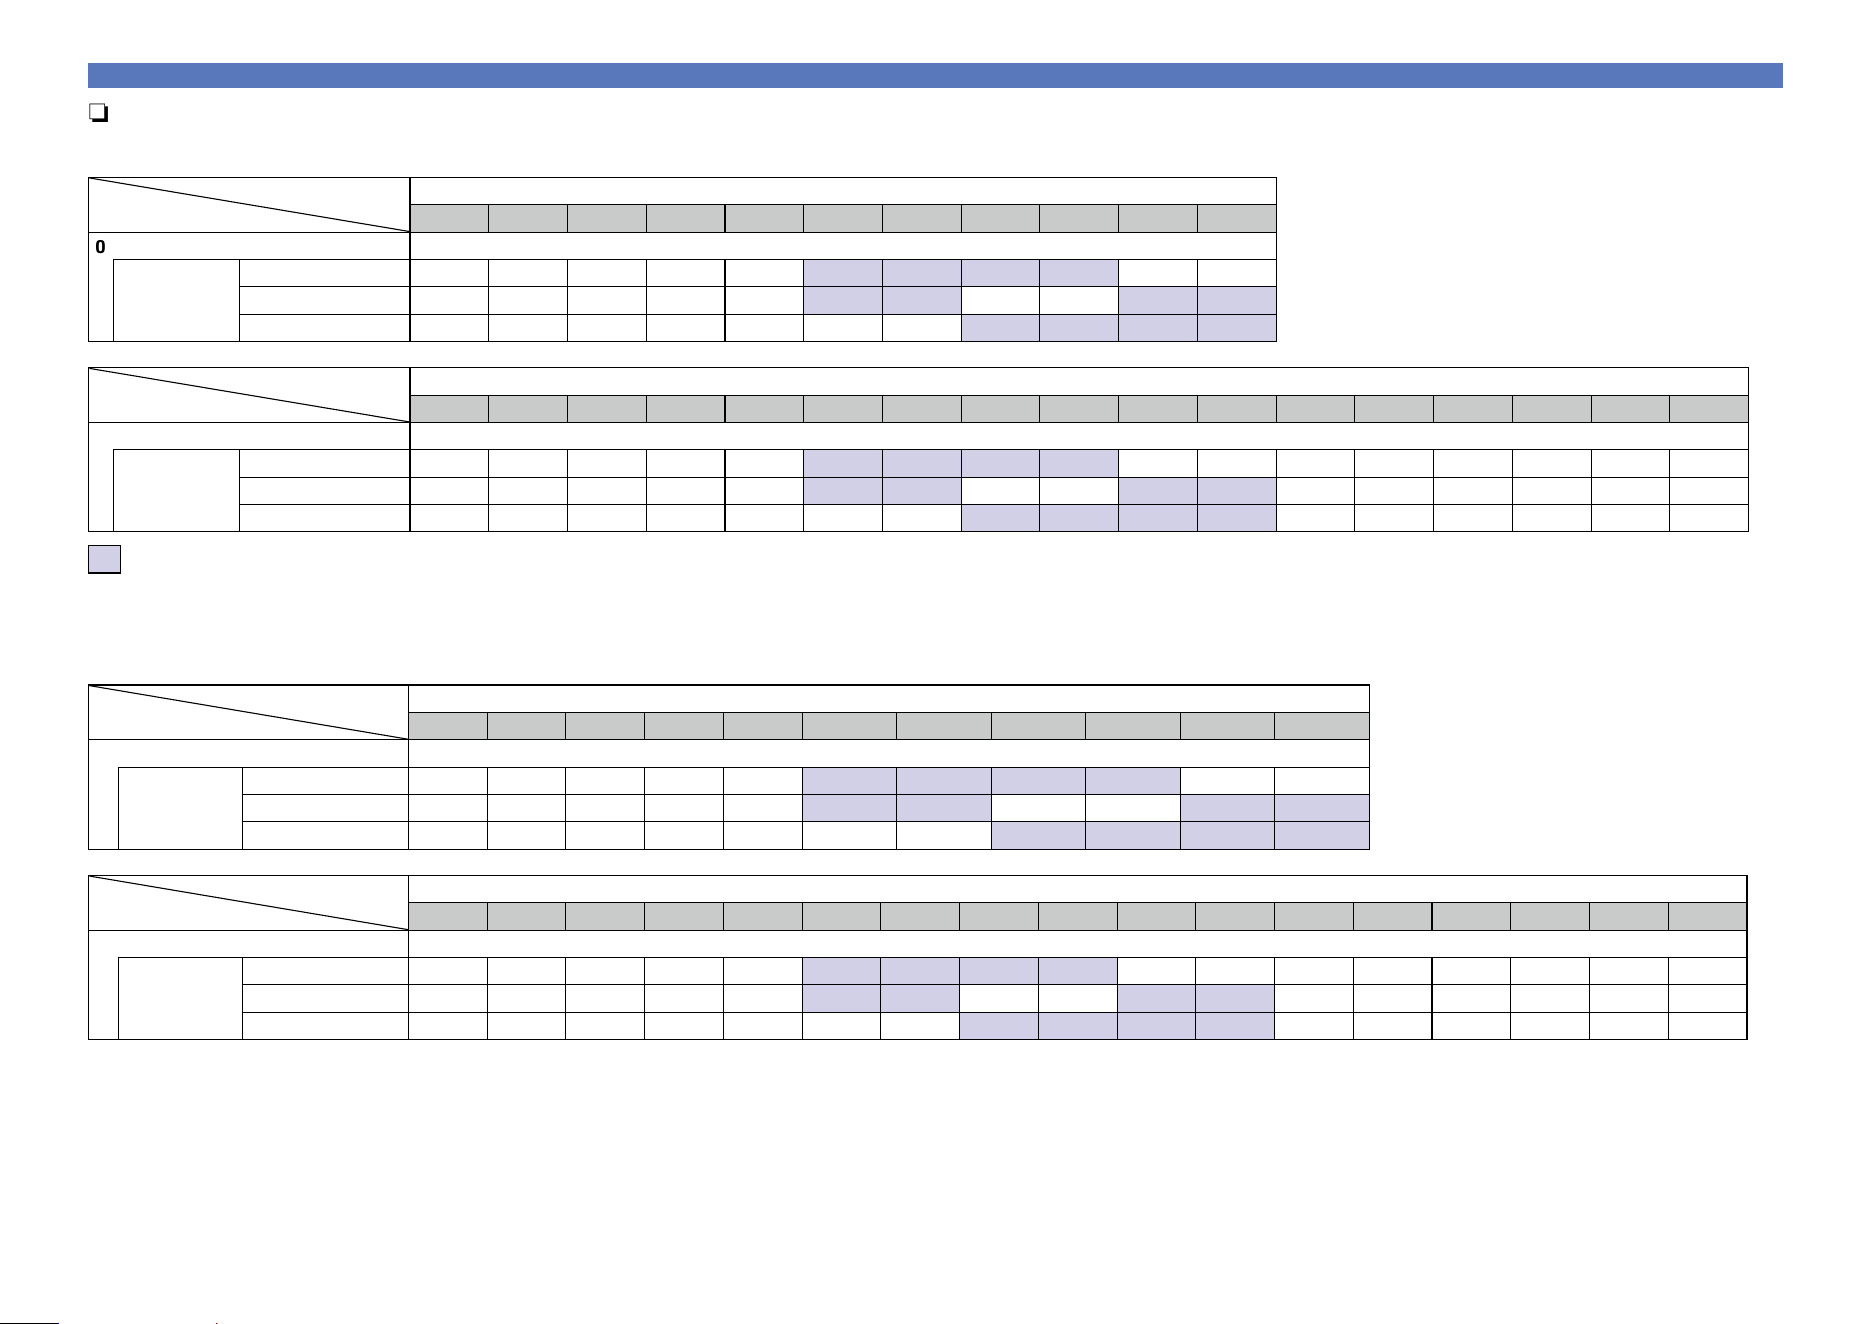
179
n When “7.1ch + ZONE2/3-MONO” is selected for “Assign Mode”
Assigns power amplifiers within this unit as follows: 7.1ch for MAIN ZONE and 1ch for ZONE2 and ZONE3 each.
Select the desired speakers used for MAIN ZONE from the “Main Speakers” settings.
Speaker terminal
FL FR C SL SR SBL SBR FHL FHR FWL FWR
Output signal
Main Speakers
S.Back/F.Height FL FR C SL SR SBL SBR FHL FHR Z2 MONO Z3 MONO
S.Back/F.Wide FL FR C SL SR SBL SBR Z2 MONO Z3 MONO FWL FWR
F.Height/F.Wide FL FR C SL SR Z2 MONO Z3 MONO FHL FHR FWL FWR
Pre out terminal
FL FR C SL SR SBL SBR FHL FHR FWL FWR SW1 SW2 Z2L Z2R Z3L Z3R
Output signal
Main Speakers
S.Back/F.Height FL FR C SL SR SBL SBR FHL FHR – – SW1 SW2 Z2 MONO Z2 MONO Z3 MONO Z3 MONO
S.Back/F.Wide FL FR C SL SR SBL SBR – – FWL FWR SW1 SW2 Z2 MONO Z2 MONO Z3 MONO Z3 MONO
F.Height/F.Wide FL FR C SL SR – – FHL FHR FWL FWR SW1 SW2 Z2 MONO Z2 MONO Z3 MONO Z3 MONO
Audio is output from the optimum speakers based on the selected sound mode.
n When “7.1ch(Bi-Amp)” is selected for “Assign Mode”
Assigns power amplifiers within this unit as follows: 7.1ch for MAIN ZONE and 2ch for the front speaker bi-amplifier connection.
Select the desired speakers used for MAIN ZONE from the “Main Speakers” settings.
Speaker terminal
FL FR C SL SR SBL SBR FHL FHR FWL FWR
Output signal
Main Speakers
S.Back/F.Height FL FR C SL SR SBL SBR FHL FHR FL (Bi-amp) FR (Bi-amp)
S.Back/F.Wide FL FR C SL SR SBL SBR FL (Bi-amp) FR (Bi-amp) FWL FWR
F.Height/F.Wide FL FR C SL SR FL (Bi-amp) FR (Bi-amp) FHL FHR FWL FWR
Pre out terminal
FL FR C SL SR SBL SBR FHL FHR FWL FWR SW1 SW2 Z2L Z2R Z3L Z3R
Output signal
Main Speakers
S.Back/F.Height FL FR C SL SR SBL SBR FHL FHR – – SW1 SW2 Z2L Z2R Z3L Z3R
S.Back/F.Wide FL FR C SL SR SBL SBR – – FWL FWR SW1 SW2 Z2L Z2R Z3L Z3R
F.Height/F.Wide FL FR C SL SR – – FHL FHR FWL FWR SW1 SW2 Z2L Z2R Z3L Z3R
Relationship between the Amp Assign mode settings and audio output
Basic version
Advanced version
InformationsInformations
v See overleaf
DVD
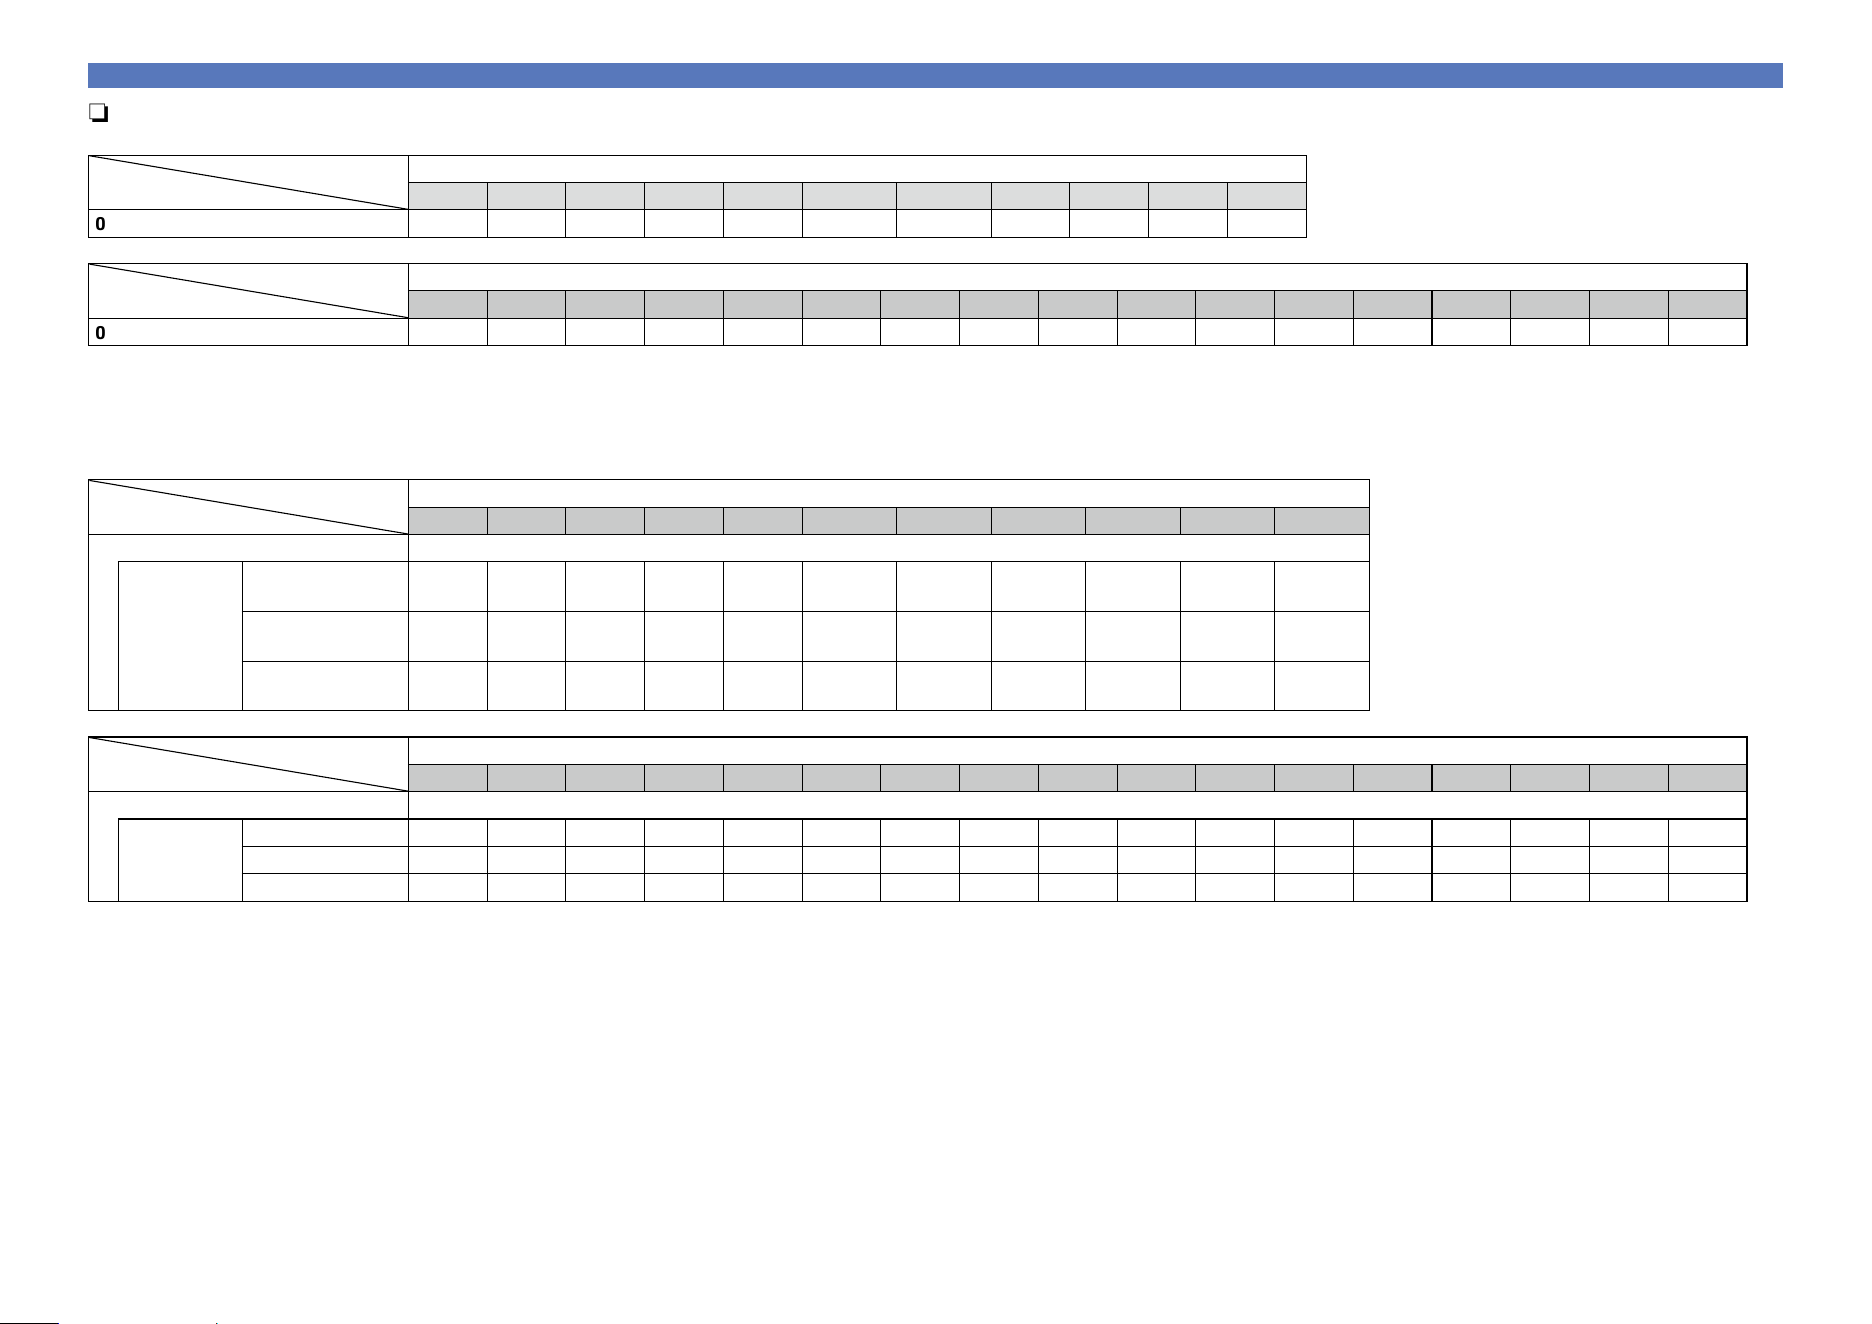
180
n When “5.1ch(Bi-Amp) + ZONE2” is selected for “Assign Mode”
Assigns power amplifiers within this unit as follows: 5.1ch for MAIN ZONE, 2ch for the front speaker bi-amplifier connection, and 2ch for ZONE2.
Speaker terminal
FL FR C SL SR SBL SBR FHL FHR FWL FWR
Output signal FL FR C SL SR FL (Bi-amp) FR (Bi-amp) Z2L Z2R – –
Pre out terminal
FL FR C SL SR SBL SBR FHL FHR FWL FWR SW1 SW2 Z2L Z2R Z3L Z3R
Output signal FL FR C SL SR – – – – – – SW1 SW2 Z2L Z2R Z3L Z3R
n When “9.1ch/2ch Front” is selected for “Assign Mode”
Assigns all power amplifiers within this unit for MAIN ZONE. Up to 9.1ch playback is available. You can also use a front speaker that is different from the one used during multi-channel playback for playback by
switching the internal power amplifier during 2ch playback.
Select the desired speakers used for MAIN ZONE from the “Main Speakers” settings.
Speaker terminal
FL FR C SL SR SBL SBR FHL FHR FWL FWR
Output signal
Main Speakers
S.Back/F.Height FL FR C SL SR SBL SBR FHL FHR
FL
for 2ch
FR
for 2ch
S.Back/F.Wide FL FR C SL SR SBL SBR
FL
for 2ch
FR
for 2ch
FWL FWR
F.Height/F.Wide FL FR C SL SR
FL
for 2ch
FR
for 2ch
FHL FHR FWL FWR
Pre out terminal
FL FR C SL SR SBL SBR FHL FHR FWL FWR SW1 SW2 Z2L Z2R Z3L Z3R
Output signal
Main Speakers
S.Back/F.Height FL FR C SL SR SBL SBR FHL FHR – – SW1 SW2 Z2L Z2R Z3L Z3R
S.Back/F.Wide FL FR C SL SR SBL SBR – – FWL FWR SW1 SW2 Z2L Z2R Z3L Z3R
F.Height/F.Wide FL FR C SL SR – – FHL FHR FWL FWR SW1 SW2 Z2L Z2R Z3L Z3R
Relationship between the Amp Assign mode settings and audio output
Basic version
Advanced version
InformationsInformations
v See overleaf
DVD
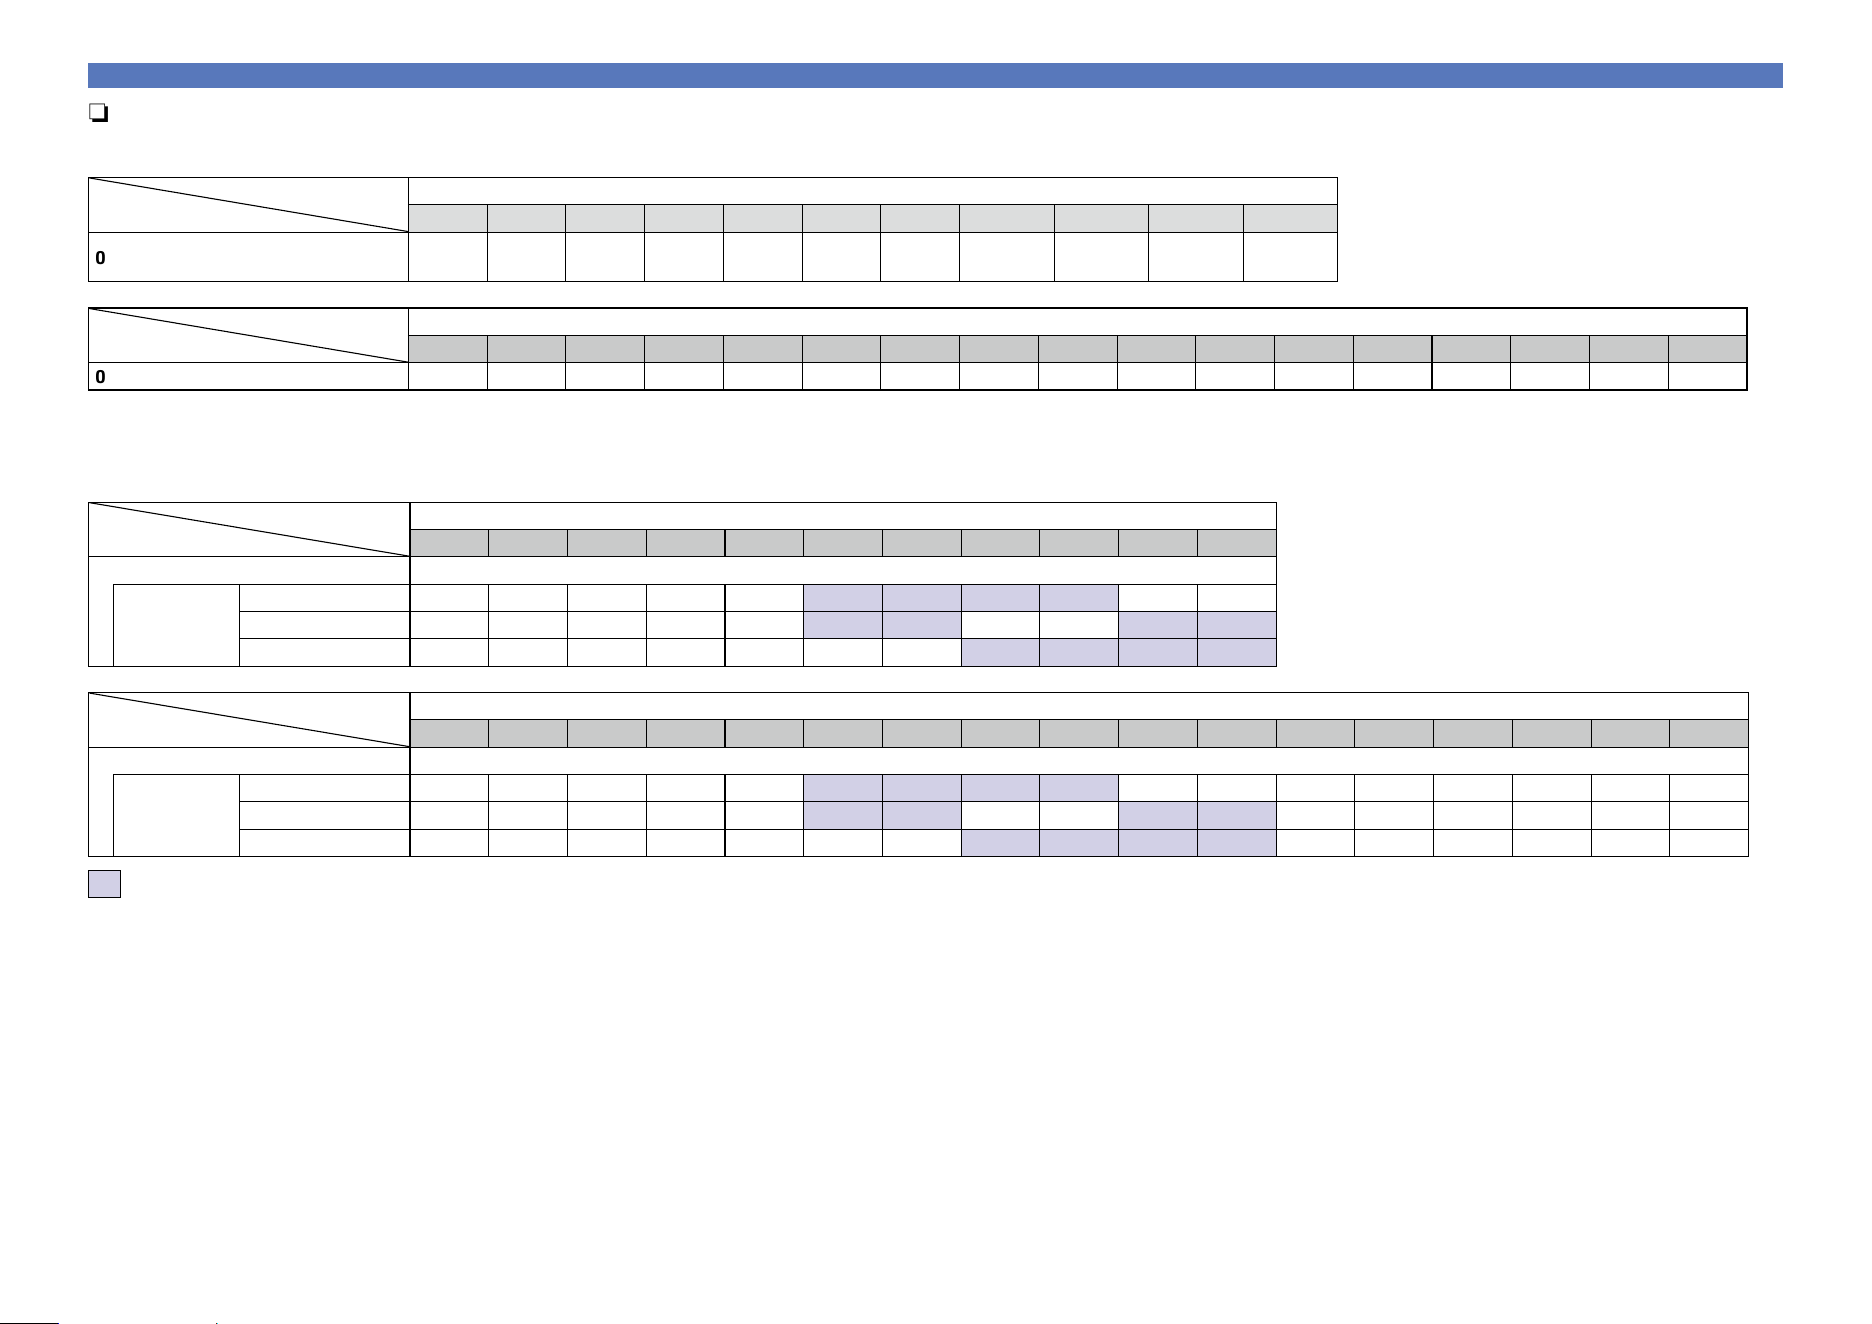
181
n When “7.1ch/2ch Front(Bi-Amp)” is selected for “Assign Mode”
Assigns power amplifiers within this unit as follows: 7.1ch for the MAIN ZONE multi-channel playback. You can also use a front speaker that is different from the one used during multi-channel playback for playback
under the bi-amplifier connection by switching the internal power amplifier during 2ch playback.
Speaker terminal
FL FR C SL SR SBL SBR FHL FHR FWL FWR
Output signal FL FR C SL SR SBL SBR
FL (Bi-amp)
for 2ch
FR (Bi-amp)
for 2ch
FL (Bi-amp)
for 2ch
FR (Bi-amp)
for 2ch
Pre out terminal
FL FR C SL SR SBL SBR FHL FHR FWL FWR SW1 SW2 Z2L Z2R Z3L Z3R
Output signal FL FR C SL SR SBL SBR – – – – SW1 SW2 Z2L Z2R Z3L Z3R
n When “7.1ch + Front B” is selected for “Assign Mode”
Assigns power amplifiers within this unit as follows: 7.1ch for MAIN ZONE and 2ch for the second front speaker connection.
Select the desired speakers used for MAIN ZONE from the “Main Speakers” settings.
Speaker terminal
FL FR C SL SR SBL SBR FHL FHR FWL FWR
Output signal
Main Speakers
S.Back/F.Height FL A FR A C SL SR SBL SBR FHL FHR FL B FR B
S.Back/F.Wide FL A FR A C SL SR SBL SBR FL B FR B FWL FWR
F.Height/F.Wide FL A FR A C SL SR FL B FR B FHL FHR FWL FWR
Pre out terminal
FL FR C SL SR SBL SBR FHL FHR FWL FWR SW1 SW2 Z2L Z2R Z3L Z3R
Output signal
Main Speakers
S.Back/F.Height FL FR C SL SR SBL SBR FHL FHR – – SW1 SW2 Z2L Z2R Z3L Z3R
S.Back/F.Wide FL FR C SL SR SBL SBR – – FWL FWR SW1 SW2 Z2L Z2R Z3L Z3R
F.Height/F.Wide FL FR C SL SR – – FHL FHR FWL FWR SW1 SW2 Z2L Z2R Z3L Z3R
Audio is output from the optimum speakers based on the selected sound mode.
Relationship between the Amp Assign mode settings and audio output
Basic version
Advanced version
InformationsInformations
v See overleaf
DVD
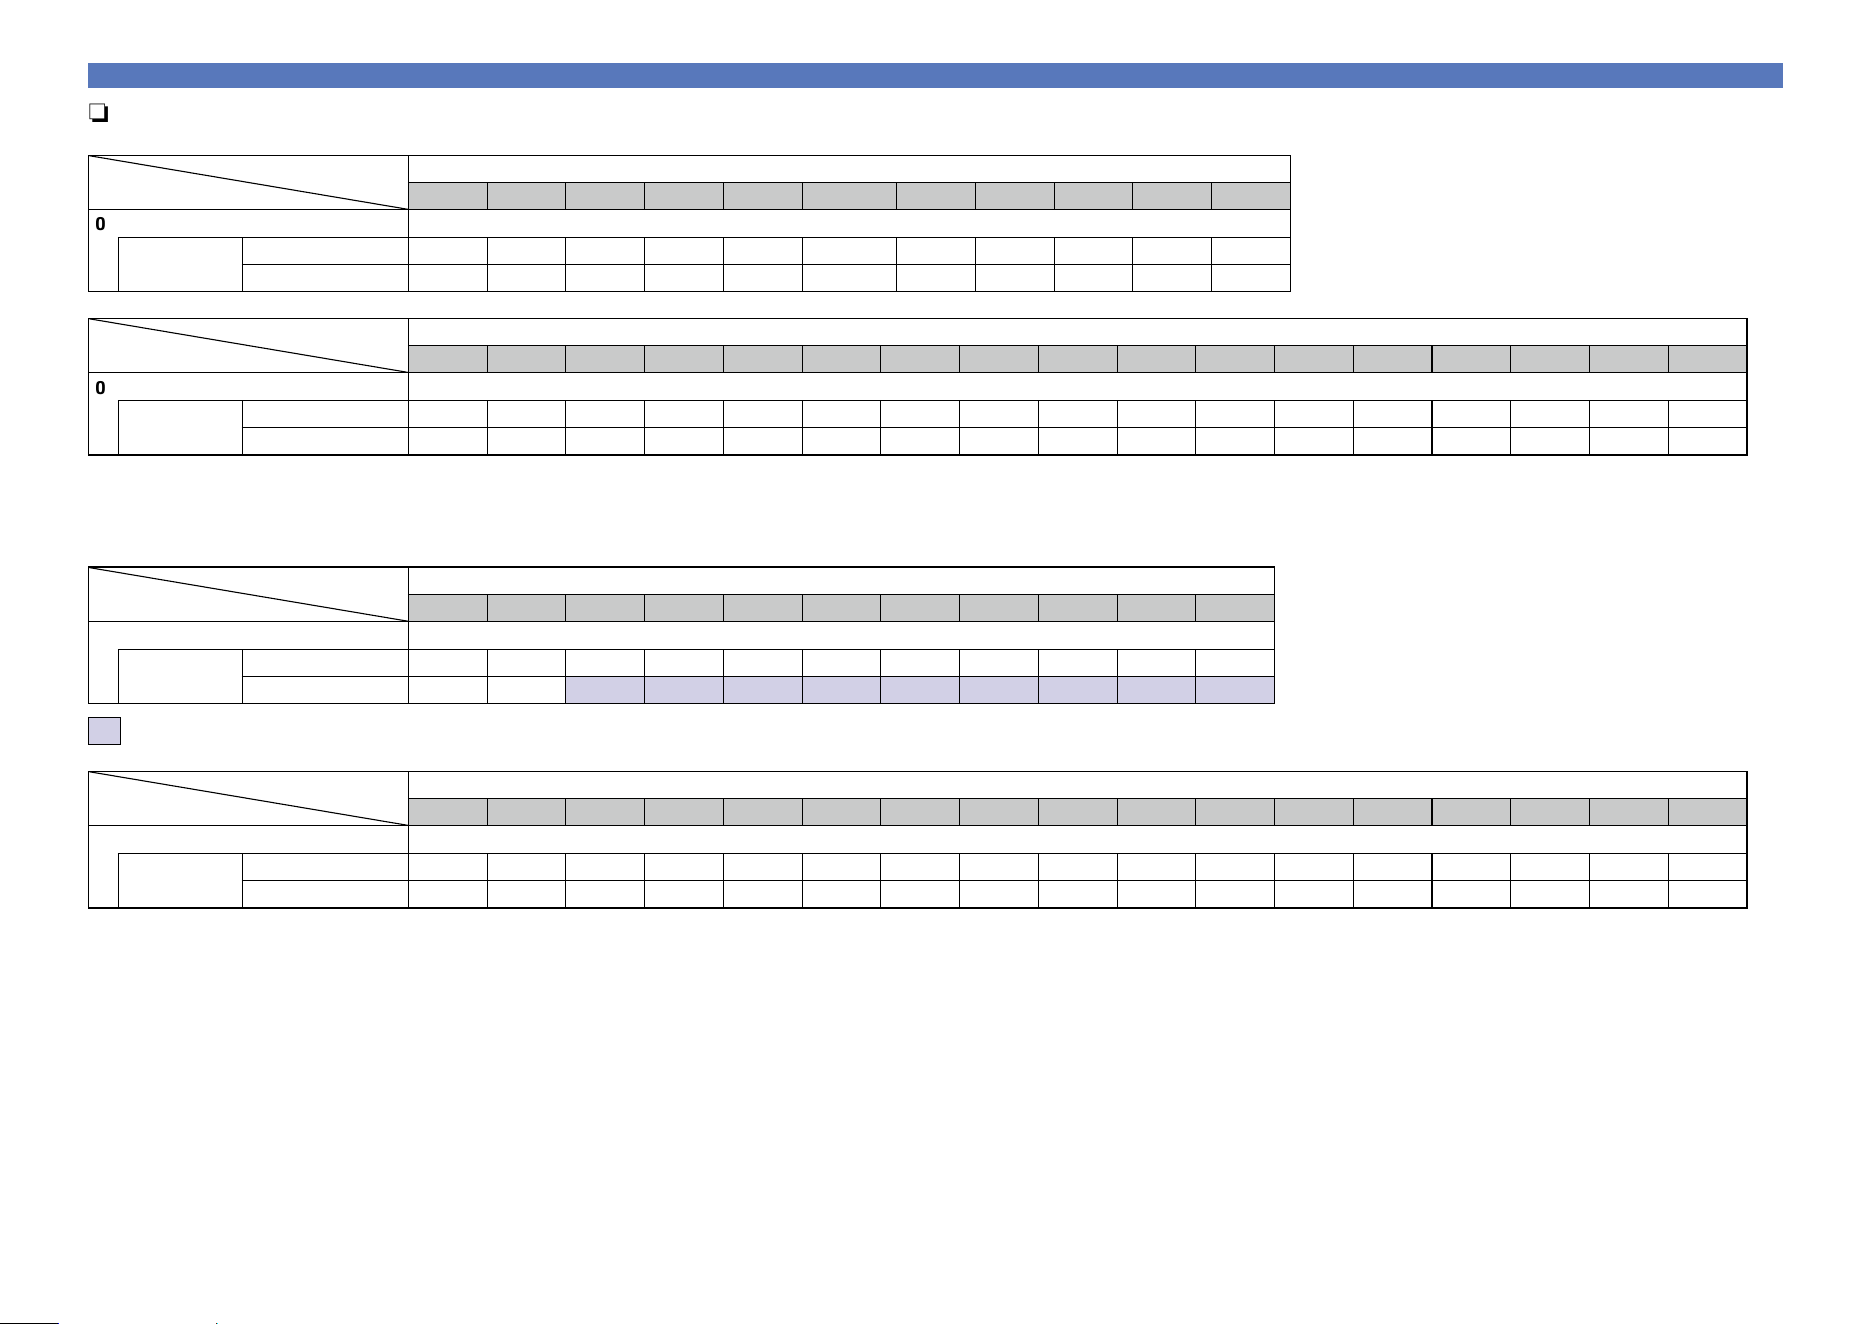
182
n When “Discrete 11.1ch” is selected for “Assign Mode”
Assigns 9.1ch for power amplifiers within this unit and 2ch (front/front height) for the external power amplifier connection. Up to 11.1ch playback is available.
Speaker terminal
FL FR C SL SR SBL SBR FHL FHR FWL FWR
Output signal
Main Pre-amps
Front – – C SL SR SBL SBR FHL FHR FWL FWR
Front Height FL FR C SL SR SBL SBR – – FWL FWR
Pre out terminal
FL FR C SL SR SBL SBR FHL FHR FWL FWR SW1 SW2 Z2L Z2R Z3L Z3R
Output signal
Main Pre-amps
Front FL FR C SL SR SBL SBR FHL FHR FWL FWR SW1 SW2 Z2L Z2R Z3L Z3R
Front Height FL FR C SL SR SBL SBR FHL FHR FWL FWR SW1 SW2 Z2L Z2R Z3L Z3R
n When “Pre Amplifier” is selected for “Assign Mode”
Connects all speakers by using an external power amplifier and uses this unit as a preamplifier.
You can select “Custom” for the “Pre-amp Assign” setting to change settings for each channel.
Speaker terminal
FL FR C SL SR SBL SBR FHL FHR FWL FWR
Output signal
Pre-amp Assign
All – – – – – – – – – – –
Custom – – C SL SR SBL SBR FHL FHR FWL FWR
You can set whether or not to output audio from speakers for each channel.
Pre out terminal
FL FR C SL SR SBL SBR FHL FHR FWL FWR SW1 SW2 Z2L Z2R Z3L Z3R
Output signal
Pre-amp Assign
All FL FR C SL SR SBL SBR FHL FHR FWL FWR SW1 SW2 Z2L Z2R Z3L Z3R
Custom FL FR C SL SR SBL SBR FHL FHR FWL FWR SW1 SW2 Z2L Z2R Z3L Z3R
Relationship between the Amp Assign mode settings and audio output
Basic version
Advanced version
InformationsInformations
v See overleaf
DVD
183
n When “Custom” is selected for “Assign Mode”
Assigns power amplifiers within this unit as you prefer.
Speaker terminal
FL FR C SL SR SBL SBR FHL FHR FWL FWR
Output signal
FL FR
C or – SL or – SR or –
FL FR FL FR
– –
C C C C C C
SL SR SL SR SL SR
SBL SBR SBL SBR SBL SBR
FHL FHR FHL FHR FHL FHR
FWL FWR FWL FWR FWL FWR
Z2L Z2R Z2L Z2R Z2L Z2R
Z3L Z3R Z3L Z3R Z3L Z3R
Z2 MONO Z3 MONO Z2 MONO Z3 MONO Z2 MONO Z3 MONO
– – – – – –
Pre out terminal
FL FR C SL SR SBL SBR FHL FHR FWL FWR SW1 SW2 Z2L Z2R Z3L Z3R
Output signal FL FR C SL SR SBL SBR FHL FHR FWL FWR SW1 SW2 Z2L Z2R Z3L Z3R
Relationship between the Amp Assign mode settings and audio output
Basic version
Advanced version
InformationsInformations
DVD
184
Surround
This unit is equipped with a digital signal processing circuit that lets you play program sources in the sound mode to achieve the same sense of presence as in a movie theater.
Sound modes and surround parameters
This table shows the speakers that can be used in each sound mode and the surround parameters adjustable in each sound mode.
Symbols in the table
S This indicates the audio output channels or surround parameters that can be set.
D This indicates the audio output channels. The output channels depend on the settings of “Speaker Config.” (vpage142).
Sound Mode (vpage84)
Channel output
Dialog Enhancer
(vpage121)
Subwoofer Level
(vpage121)
z1 During playback in PURE DIRECT mode, the surround parameters are
the same as in DIRECT mode.
z2 A signal for each channel contained in an input signal is output as
audio.
z3 You can select speakers to output audio on the “Speaker Select”
(vpage123) setting in the menu.
z4 Audio is output from the front height speaker when the set sound
mode name contains “+PLgz”. For information on how to check the
sound mode, see page84.
z5 Audio is output from the front height speaker when “Audyssey DSX
®
”
(vpage126) in the menu is set to ”Wides/Heights” or “Heights”.
z6 Audio is output from the front wide speaker when “Audyssey DSX
®
”
(vpage126) in the menu is set to ”Wides/Heights” or “Wides”.
z7 Only when “Subwoofer Mode” is set to “LFE+Main” (vpage144),
sound is output from the subwoofer.
Front
L/R
Center
Surround
L/R
Surround back
L/R
Front height
L/R
Front wide
L/R
Subwoofer
DIRECT/PURE DIRECT (2 channel)
z1
S D
z7
S
z7
DIRECT/PURE DIRECT (Multi-channel)
z1
S D D D
z2
D
z2
D
z2
D S
DSD DIRECT (2 channel)
z1
S D
z7
S
z7
DSD DIRECT (Multi-channel)
z1
S D D D S
EXTERNAL IN
S D D D D S
STEREO
S D S S
MULTI CH IN
S D D D D
z4
D S S
DOLBY PRO LOGIC gz S D D D D D S S
DOLBY PRO LOGIC gx S D D D D S S
DOLBY PRO LOGIC g S D D D S S
DOLBY PRO LOGIC gx A-DSX S D D D D
z5
D
z6
D S S
DOLBY PRO LOGIC g A-DSX S D D D
z5
D
z6
D S S
DTS NEO:X
S D D D
z3
D
z3
D
z3
D S S
Audyssey DSX
®
S D D D D
z5
D
z6
D S S
DOLBY DIGITAL
S D D D D
z4
D S S
DOLBY DIGITAL Plus
S D D D
z2
D
z2
D
z2
D S S
DOLBY TrueHD
S D D D
z2
D
z2
D
z2
D S S
DTS SURROUND
S D D D D
z4
D S S
DTS 96/24
S D D D D
z4
D S S
DTS-HD
S D D D
z2
D
z2
D
z2
D S S
DTS Express
S D D D D
z4
D S S
MULTI CH STEREO
S D D D
z3
D
z3
D
z3
D S S
WIDE SCREEN
S D D D
z3
D
z3
D
z3
D S S
SUPER STADIUM
S D D D
z3
D
z3
D
z3
D S S
ROCK ARENA
S D D D
z3
D
z3
D
z3
D S S
JAZZ CLUB
S D D D
z3
D
z3
D
z3
D S S
CLASSIC CONCERT
S D D D
z
3
D
z3
D
z3
D S S
MONO MOVIE
S D D D
z3
D
z3
D
z3
D S S
VIDEO GAME
S D D D
z3
D
z3
D
z3
D S S
MATRIX
S D D D
z3
D
z3
D
z3
D S S
VIRTUAL
S D S S
Basic version
Advanced version
InformationsInformations
v See overleaf
DVD
185
Surround
Sound Mode (vpage84)
Surround Parameter (vpage121)
z1 During playback in PURE DIRECT mode, the surround
parameters are the same as in DIRECT mode.
z8 This setting is unavailable when the set sound mode
name contains “+PLg Music” or “+NEO:X Music”.
For information on how to check the sound mode, see
page84.
z9 This setting is possible when the sound mode is
“Cinema” mode.
z10 This item can be selected when a Dolby TrueHD signal is
played.
z11 This item can be selected when a Dolby Digital or DTS
signal is played.
z12 This item can be selected when a Dolby Digital or DTS
signal or DVD-Audio is played.
z13 This setting is available when the set sound mode name
contains “+PLgz”. For information on how to check the
sound mode, see page84.
Cinema EQ
(vpage121)
Loudness
Management
z10
(vpage121)
Dynamic
Compression
z11
(vpage121)
Bass Sync
z12
(vpage121)
Low Frequency
Effects
z12
(vpage122)
Delay Time
(vpage122)
Effect Level
(vpage122)
Room Size
(vpage122)
Height Gain
z13
(vpage123)
Speaker Select
(vpage123)
DIRECT/PURE DIRECT (2 channel)
z1
S S
DIRECT/PURE DIRECT (Multi-channel)
z1
S S S
DSD DIRECT (2 channel)
z1
DSD DIRECT (Multi-channel)
z1
S
EXTERNAL IN
S
STEREO
S S S S
MULTI CH IN
S
z8
S S
DOLBY PRO LOGIC gz S S S S
DOLBY PRO LOGIC gx S
z9
S S
DOLBY PRO LOGIC g S
z9
S S
DOLBY PRO LOGIC gx A-DSX S
z9
S S
DOLBY PRO LOGIC g A-DSX S
z9
S S
DTS NEO:X
S
z9
S S S
Audyssey DSX
®
S S S S S
DOLBY DIGITAL
S
z8
S S S S
DOLBY DIGITAL Plus
S
z8
S S S S
DOLBY TrueHD
S
z8
S S S S S
DTS SURROUND
S
z8
S S S S
DTS 96/24
S
z8
S S S
DTS-HD
S
z8
S S S
DTS Express
S
z8
S S S
MULTI CH STEREO
S S S S S
WIDE SCREEN
S S S S S S
SUPER STADIUM
S S S S S S S
ROCK ARENA
S S S S S S S
JAZZ CLUB
S S S S S S S
CLASSIC CONCERT
S S S S S S S
MONO MOVIE
S S S S S S S
VIDEO GAME
S S S S S S S
MATRIX
S S S S S S
VIRTUAL
S S S S
Basic version
Advanced version
InformationsInformations
v See overleaf
DVD
186
Surround
Sound Mode (vpage84)
Surround Parameter (vpage121)
Tone
z14
(vpage123)
Audyssey (vpage125)
Restorer
z18
(vpage124)
z1 During playback in PURE DIRECT mode,
the surround parameters are the same as in
DIRECT mode.
z14 This item cannot be set when “Dynamic EQ”
(vpage125) is set to “On”.
z15 In this sound mode, bass is +6 dB, and treble
is 0 dB (Default).
z16 In this sound mode, bass is +6 dB, and treble
is +4 dB (Default).
z17 This item cannot be set when “MultEQ
®
XT
32” (vpage125) is set to “Off” or “Graphic
EQ”.
z18 This item can be set when the input signal is
analog, PCM 48 kHz or 44.1 kHz.
PRO LOGIC g/gx Music mode only
NEO:X mode
only
Panorama
(vpage122)
Dimension
(vpage122)
Center Width
(vpage122)
Center Gain
(vpage122)
MultEQ
®
XT 32
(vpage125)
Dynamic EQ
z17
(vpage125)
Dynamic
Volume
z17
(vpage126)
Audyssey
LFC™
z17
(vpage126)
Audyssey
DSX
®
(vpage126)
DIRECT/PURE DIRECT (2 channel)
z1
DIRECT/PURE DIRECT (Multi-channel)
z1
DSD DIRECT (2 channel)
z1
DSD DIRECT (Multi-channel)
z1
EXTERNAL IN
STEREO
S S S S S S
MULTI CH IN
S S S S S S
DOLBY PRO LOGIC gz S S S S S S S
DOLBY PRO LOGIC gx S S S S S S S S S S
DOLBY PRO LOGIC g S S S S S S S S S S
DOLBY PRO LOGIC gx A-DSX S S S S S S S S S S
DOLBY PRO LOGIC g A-DSX S S S S S S S S S S
DTS NEO:X
S S S S S S S
Audyssey DSX
®
S S S S S S S
DOLBY DIGITAL
S S S S S S
DOLBY DIGITAL Plus
S S S S S S
DOLBY TrueHD
S S S S S S
DTS SURROUND
S S S S S S
DTS 96/24
S S S S S S
DTS-HD
S S S S S S
DTS Express
S S S S S S
MULTI CH STEREO
S S S S S S
WIDE SCREEN
S S S S S S
SUPER STADIUM
S
z15
S S S S S
ROCK ARENA
S
z16
S S S S S
JAZZ CLUB
S S S S S S
CLASSIC CONCERT
S S S S S S
MONO MOVIE
S S S S S S
VIDEO GAME
S S S S S S
MATRIX
S S S S S S
VIRTUAL
S S S S S S
Basic version
Advanced version
InformationsInformations
DVD
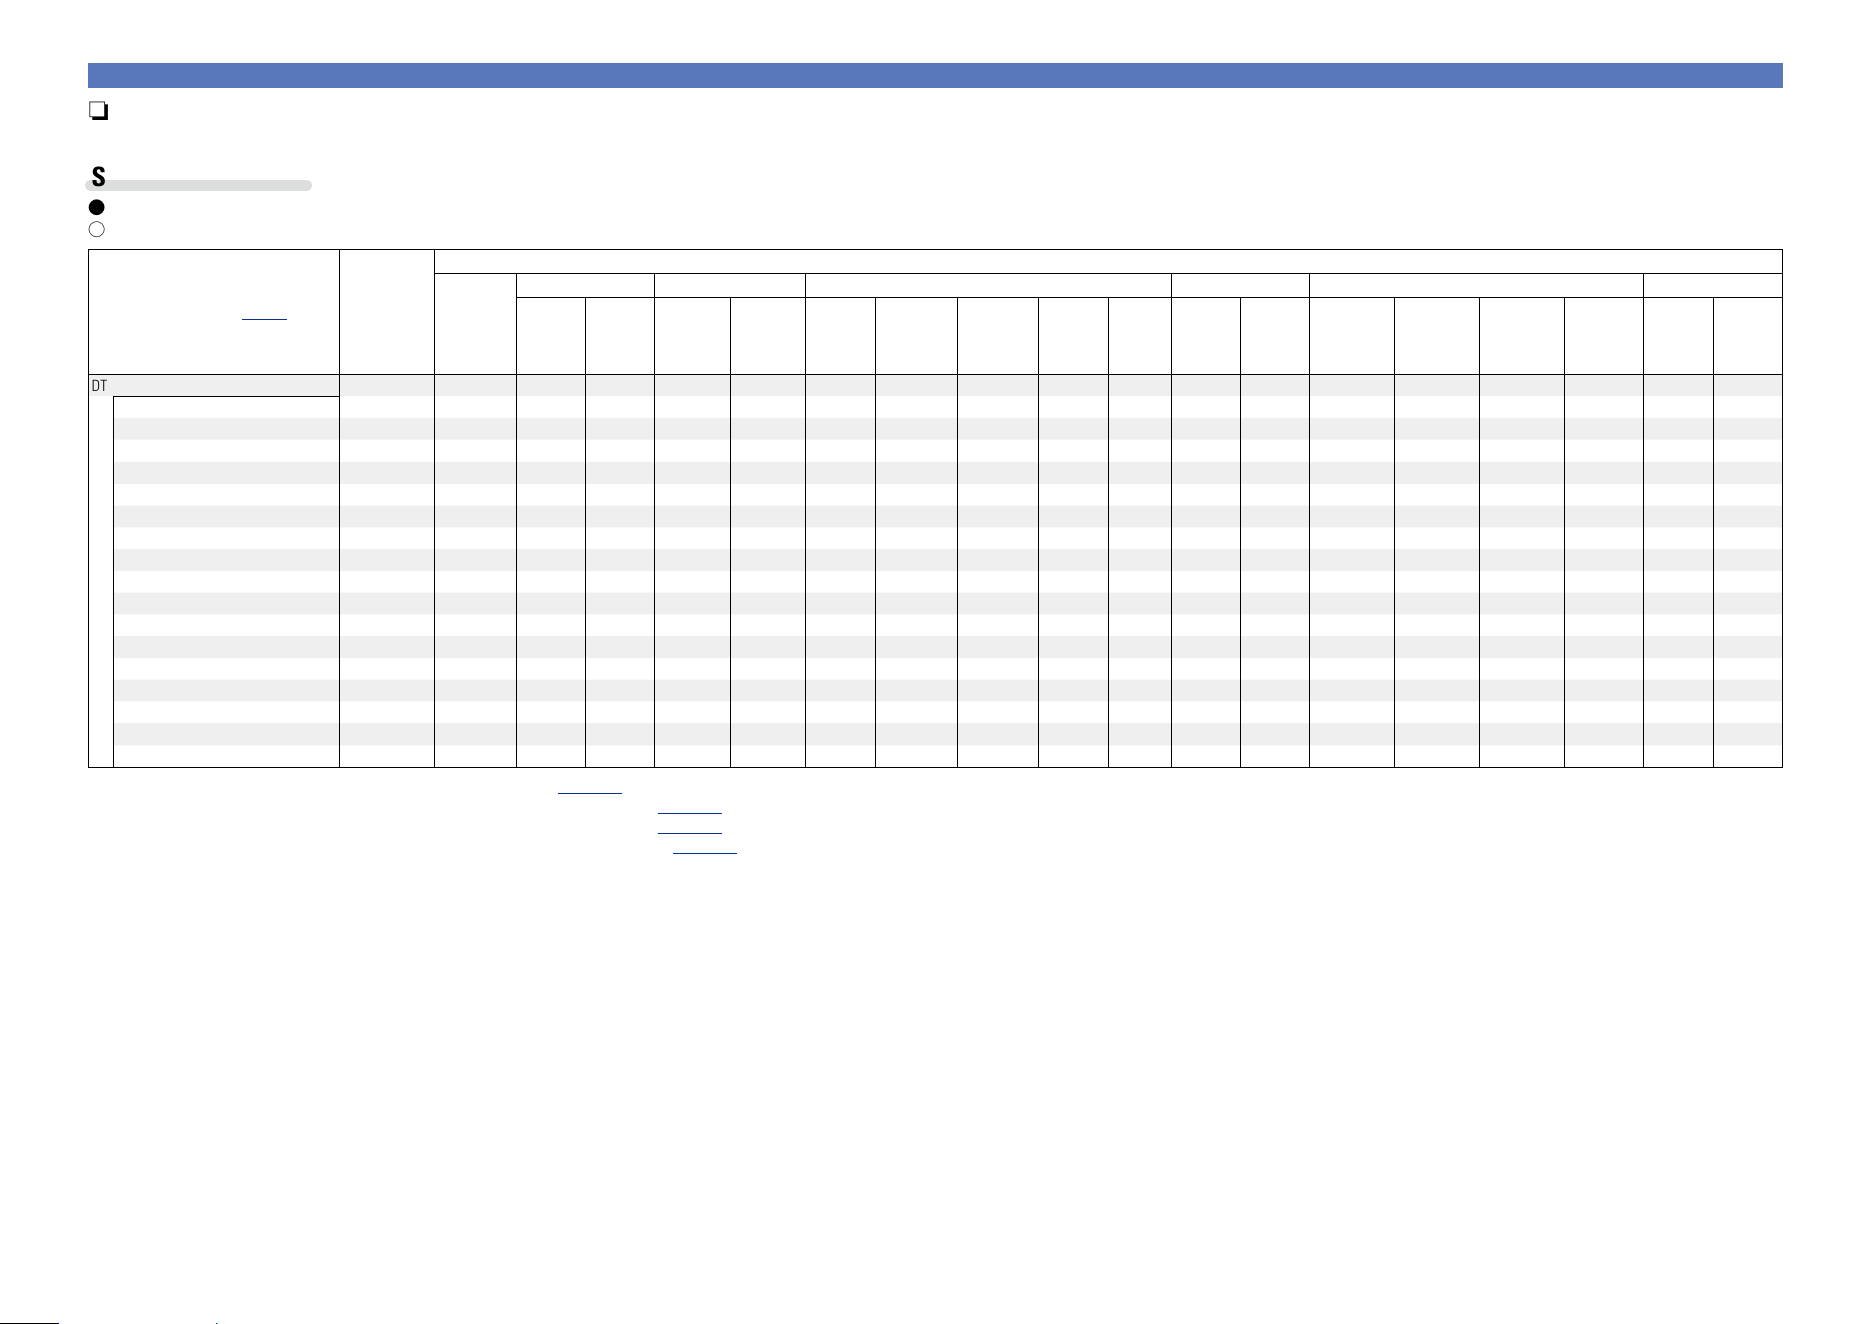
187
Surround
n Types of input signals, and corresponding sound modes
This table shows the input signal that can be played in each sound mode. Check the audio signal of the input source then select the sound mode.
Symbols in the table
F This indicates the default sound mode.
S This indicates the selectable sound mode.
Sound Mode (vpage84)
NOTE
Input signal types and formats
ANALOG
PCM DTS-HD DTS DOLBY DOLBY DIGITAL Super Audio CD
PCM
(multi ch)
PCM
(2ch)
DTS-HD
Master
Audio
DTS-HD
High
Resolution
Audio
DTS
EXPRESS
DTS ES
DSCRT
(With Flag)
DTS ES
MTRX
(With Flag)
DTS
(5.1ch)
DTS
96/24
DOLBY
TrueHD
DOLBY
DIGITAL
Plus
DOLBY
DIGITAL EX
(With Flag)
DOLBY
DIGITAL EX
(With no
Flag)
DOLBY
DIGITAL
(5.1ch)
DOLBY
DIGITAL
(2ch)
DSD
(multi ch)
DSD
(2ch)
DTS SURROUND
DTS-HD MSTR
z1 F
DTS-HD HI RES
z1 F
DTS ES DSCRT6.1
z2 F
DTS ES MTRX6.1
z2 F
DTS SURROUND
z1 S S F
DTS 96/24
z1 F
DTS (–HD) + PLgx Cinema z3 S S S S S
DTS (–HD) + PLgx Music z2 S S S S S
DTS (–HD) + PLgz z4 S S S S S S S
DTS EXPRESS
z1 F
DTS (–HD) + NEO:X Cinema
S S S S S S S
DTS (–HD) + NEO:X Music
S S S S S S S
DTS (–HD) + NEO:X Game
S S S S S S S
DTS NEO:X Cinema
z1 S S S
DTS NEO:X Music
z1 S S S
DTS NEO:X Game
z1 S S S
Audyssey DSX
®
S S S S S S S
z1 If “Audyssey DSX
®
” (vpage126) is set to “Wides/Heights”, “Heights” or “Wides”, the Audyssey DSX
®
effect is added to the sound mode marked with z1.
z2 If “Speaker Config.” – “Surr.Back” (vpage142) is set to “None”, this sound mode cannot be selected.
z3 If “Speaker Config.” – “Surr.Back” (vpage142) is set to “1spkr” or “None”, this sound mode cannot be selected.
z4 If “Speaker Config.” – “Front Height” (vpage142) is set to “None”, this sound mode cannot be selected.
Basic version
Advanced version
InformationsInformations
v See overleaf
DVD

188
Surround
Sound Mode (vpage84)
NOTE
Input signal types and formats
ANALOG
PCM DTS-HD DTS DOLBY DOLBY DIGITAL Super Audio CD
PCM
(multi ch)
PCM
(2ch)
DTS-HD
Master
Audio
DTS-HD
High
Resolution
Audio
DTS
EXPRESS
DTS ES
DSCRT
(With Flag)
DTS ES
MTRX
(With Flag)
DTS
(5.1ch)
DTS
96/24
DOLBY
TrueHD
DOLBY
DIGITAL
Plus
DOLBY
DIGITAL EX
(With Flag)
DOLBY
DIGITAL EX
(With no
Flag)
DOLBY
DIGITAL
(5.1ch)
DOLBY
DIGITAL
(2ch)
DSD
(multi ch)
DSD
(2ch)
DOLBY SURROUND
DOLBY TrueHD
z1 F
DOLBY DIGITAL+
z1 F
DOLBY DIGITAL EX
z2 S S S
DOLBY (D+) (HD) +EX
z2 S S
DOLBY DIGITAL
z1 F F F
DOLBY (D) (D+) (HD) + PLgx Cinema z3 S S S S S
DOLBY (D) (D+) (HD) + PLgx Music z2 S S S S S
DOLBY (D) (D+) (HD) + PLgz z4 S S S S S
DOLBY (D) (D+) (HD) + NEO:X Cinema
S S S S S
DOLBY (D) (D+) (HD) + NEO:X Music
S S S S S
DOLBY (D) (D+) (HD) + NEO:X Game
S S S S S
DOLBY PRO LOGIC gx Cinema z2 S S S S
DOLBY PRO LOGIC gx Music z2 S S S S
DOLBY PRO LOGIC gx Game z2 S S S S
DOLBY PRO LOGIC gx Cinema A-DSX S S S
DOLBY PRO LOGIC gx Music A-DSX S S S
DOLBY PRO LOGIC gx Game A-DSX S S S
DOLBY PRO LOGIC gz z4 S S S S
DOLBY PRO LOGIC g Cinema z1 S S S S
DOLBY PRO LOGIC g Music z1 S S S S
DOLBY PRO LOGIC g Game z1 S S S S
DOLBY PRO LOGIC g CINEMA A-DSX S S S
DOLBY PRO LOGIC g MUSIC A-DSX S S S
DOLBY PRO LOGIC g GAME A-DSX S S S
Audyssey DSX
®
S S S S S
z1 If “Audyssey DSX
®
” (vpage126) is set to “Wides/Heights”, “Heights” or “Wides”, the Audyssey DSX
®
effect is added to the sound mode marked with z1.
z2 If “Speaker Config.” – “Surr.Back” (vpage142) is set to “None”, this sound mode cannot be selected.
z3 If “Speaker Config.” – “Surr.Back” (vpage142) is set to “1spkr” or “None”, this sound mode cannot be selected.
z4 If “Speaker Config.” – “Front Height” (vpage142) is set to “None”, this sound mode cannot be selected.
Basic version
Advanced version
InformationsInformations
v See overleaf
DVD
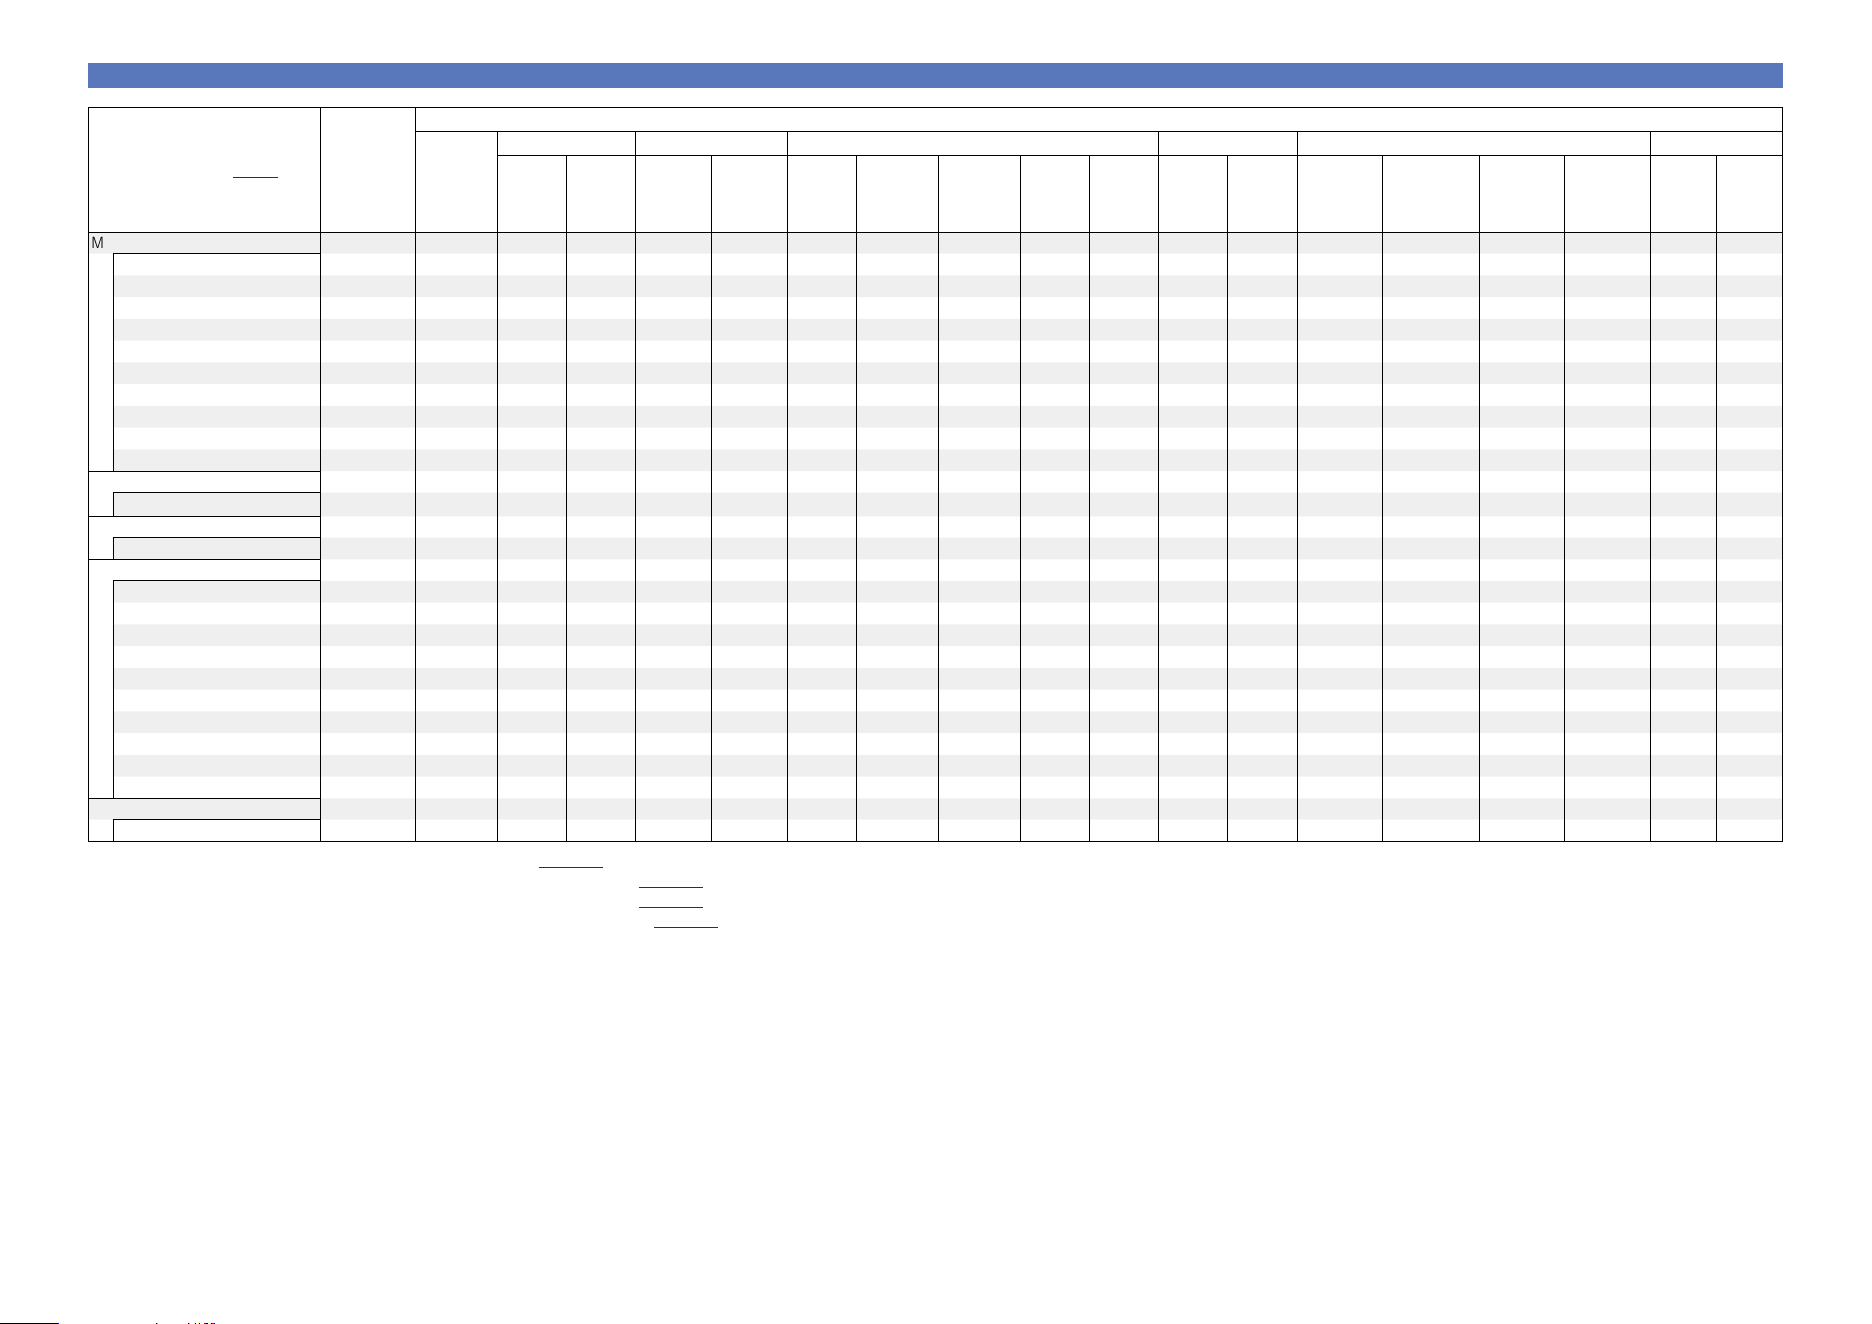
189
Surround
Sound Mode (vpage84)
NOTE
Input signal types and formats
ANALOG
PCM DTS-HD DTS DOLBY DOLBY DIGITAL Super Audio CD
PCM
(multi ch)
PCM
(2ch)
DTS-HD
Master
Audio
DTS-HD
High
Resolution
Audio
DTS
EXPRESS
DTS ES
DSCRT
(With Flag)
DTS ES
MTRX
(With Flag)
DTS
(5.1ch)
DTS 96/24
DOLBY
TrueHD
DOLBY
DIGITAL
Plus
DOLBY
DIGITAL EX
(With Flag)
DOLBY DIGITAL
EX
(With no Flag)
DOLBY
DIGITAL
(5.1ch)
DOLBY
DIGITAL
(2ch)
DSD
(multi ch)
DSD
(2ch)
MULTI CH IN
MULTI CH IN
z1 F S
MULTI CH IN + PLgx Cinema z3 S S
MULTI CH IN + PLgx Music z2 S S
MULTI CH IN + PLgz z4 S S
MULTI CH IN + NEO:X Cinema
S
MULTI CH IN + NEO:X Music
S
MULTI CH IN + NEO:X Game
S
MULTI CH IN + Dolby EX
z2 S S
MULTI CH IN 7.1
z2 F (7.1)
Audyssey DSX
®
S S
DIRECT
DIRECT
S S S S S S S S S S S S S S S S S S
PURE DIRECT
PURE DIRECT
S S S S S S S S S S S S S S S S S S
DSP SIMULATION
MULTI CH STEREO
S S S S S S S S S S S S S S S S S S
WIDE SCREEN
S S S S S S S S S S S S S S S S S S
SUPER STADIUM
S S S S S S S S S S S S S S S S S S
ROCK ARENA
S S S S S S S S S S S S S S S S S S
JAZZ CLUB
S S S S S S S S S S S S S S S S S S
CLASSIC CONCERT
S S S S S S S S S S S S S S S S S S
MONO MOVIE
S S S S S S S S S S S S S S S S S S
VIDEO GAME
S S S S S S S S S S S S S S S S S S
MATRIX
S S S S S S S S S S S S S S S S S S
VIRTUAL
S S S S S S S S S S S S S S S S S S
STEREO
STEREO
F S F S S S S S S S S S S S S S S S
z1 If “Audyssey DSX
®
” (vpage126) is set to “Wides/Heights”, “Heights” or “Wides”, the Audyssey DSX
®
effect is added to the sound mode marked with z1.
z2 If “Speaker Config.” – “Surr.Back” (vpage142) is set to “None”, this sound mode cannot be selected.
z3 If “Speaker Config.” – “Surr.Back” (vpage142) is set to “1spkr” or “None”, this sound mode cannot be selected.
z4 If “Speaker Config.” – “Front Height” (vpage142) is set to “None”, this sound mode cannot be selected.
Basic version
Advanced version
InformationsInformations
DVD
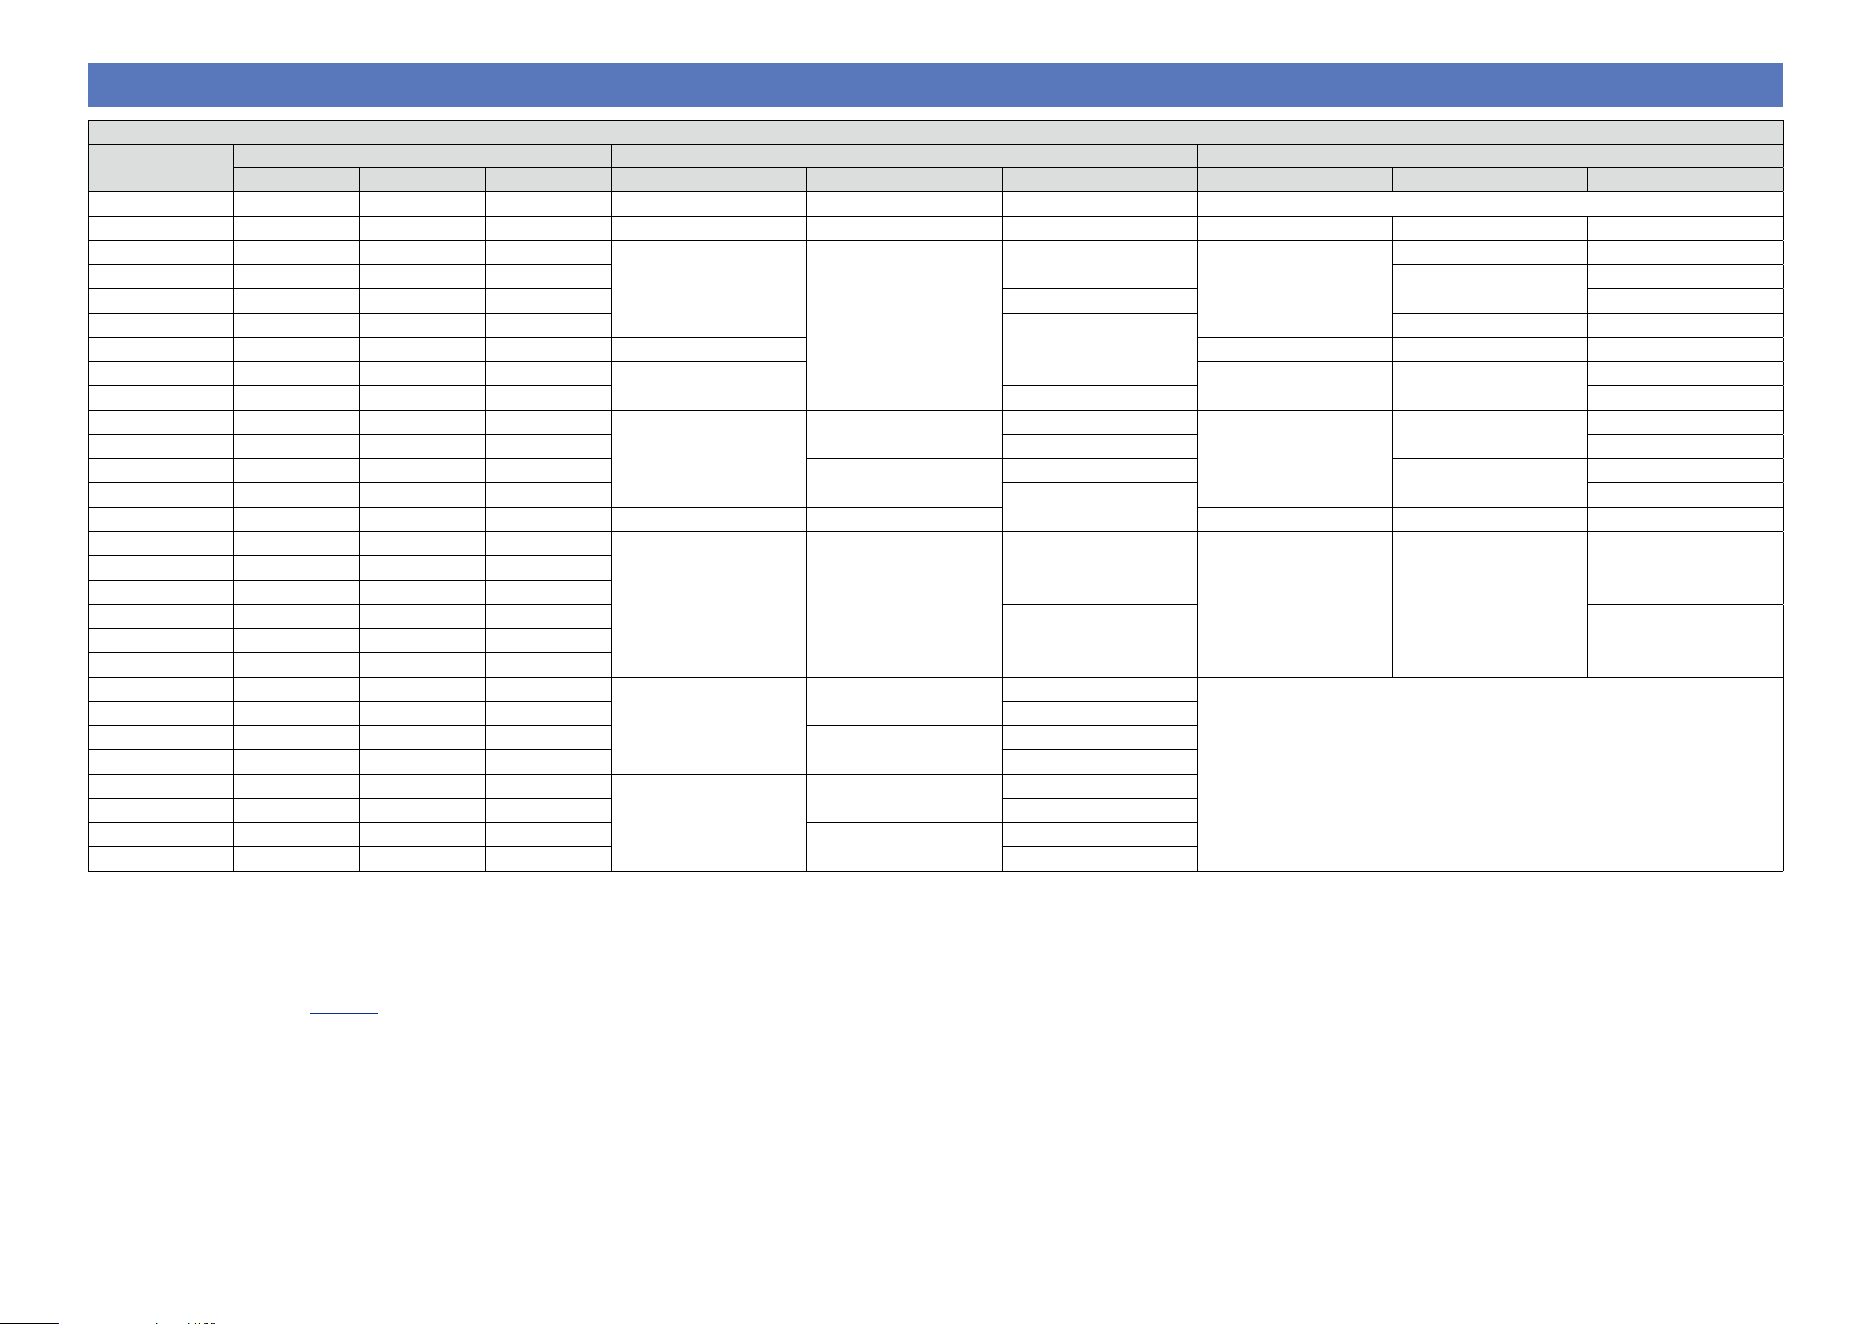
190
Relationship between video signals and monitor output
MAIN ZONE MONITOR OUT
Video Conversion
Input connector Output connector Menu displayed
HDMI COMPONENT VIDEO HDMI COMPONENT VIDEO HDMI COMPONENT VIDEO
On
A A A A A A
Only the menu is displayed
On
A A S S <VIDEO> S <VIDEO> S <VIDEO> S (VIDEO) S (VIDEO) S (VIDEO)
On
A S (1080p) A
S <COMPONENT>
S <COMPONENT>
A
S (COMPONENT)
A (COMPONENT)
z2
A
z2
On
A S (480p – 720p) A
S (COMPONENT)
A
On
A S (480i/576i) A S <COMPONENT> S (COMPONENT)
On
A S (1080p) S
S <VIDEO>
A (COMPONENT) A (VIDEO)
On
z1
A S (1080p) S A A S (VIDEO) S (VIDEO)
On
A S (480p – 720p) S
S <COMPONENT> S (COMPONENT) S (COMPONENT)
A (VIDEO)
On
A S (480i/576i) S S <COMPONENT> S (COMPONENT)
On
S A A
S <HDMI>
A
A
S (HDMI)
A
z2
A
z2
On
S A S S <VIDEO> A (VIDEO)
z2
On
S S A
S <COMPONENT>
A
A (COMPONENT)
z2
A
z2
On
S S S
S <VIDEO>
A (VIDEO)
z2
On
z3
A A S S <VIDEO> A S (VIDEO) A A (VIDEO)
On
z3
A S (1080p) A
S <COMPONENT> S <COMPONENT>
A
S (COMPONENT) A (COMPONENT)
AOn
z3
A S (480p – 720p) A
On
z3
A S (480i/576i) A
On
z3
A S (1080p) S
S <VIDEO> A (VIDEO)On
z3
A S (480p – 720p) S
On
z3
A S (480i/576i) S
Off
A A A
A
A
A
Only the menu is displayed
Off
A A S S <VIDEO>
Off
A S A
S <COMPONENT>
A
Off
A S S S <VIDEO>
Off
S A A
S <HDMI>
A
A
Off
S A S S <VIDEO>
Off
S S A
S <COMPONENT>
A
Off
S S S S <VIDEO>
S : Video signal input present
A : No video signal input
z1 When no HDMI monitor is connected or the HDMI monitor’s power is
not on.
z2 Only the menu is displayed when no HDMI monitor is connected or
the HDMI monitor’s power is not on.
z3 When “Resolution” (vpage 131) is set to “4K” for outputting
analog video input signals from the HDMI connector.
S < > : The input signal between the < > marks is output.
A : No video signal output
S ( ) : Superimposed on the picture indicated in ( ).
A ( ) : Only the picture in ( ) is output.
A : Neither the picture nor the menu is output.
Basic version
Advanced version
InformationsInformations
DVD
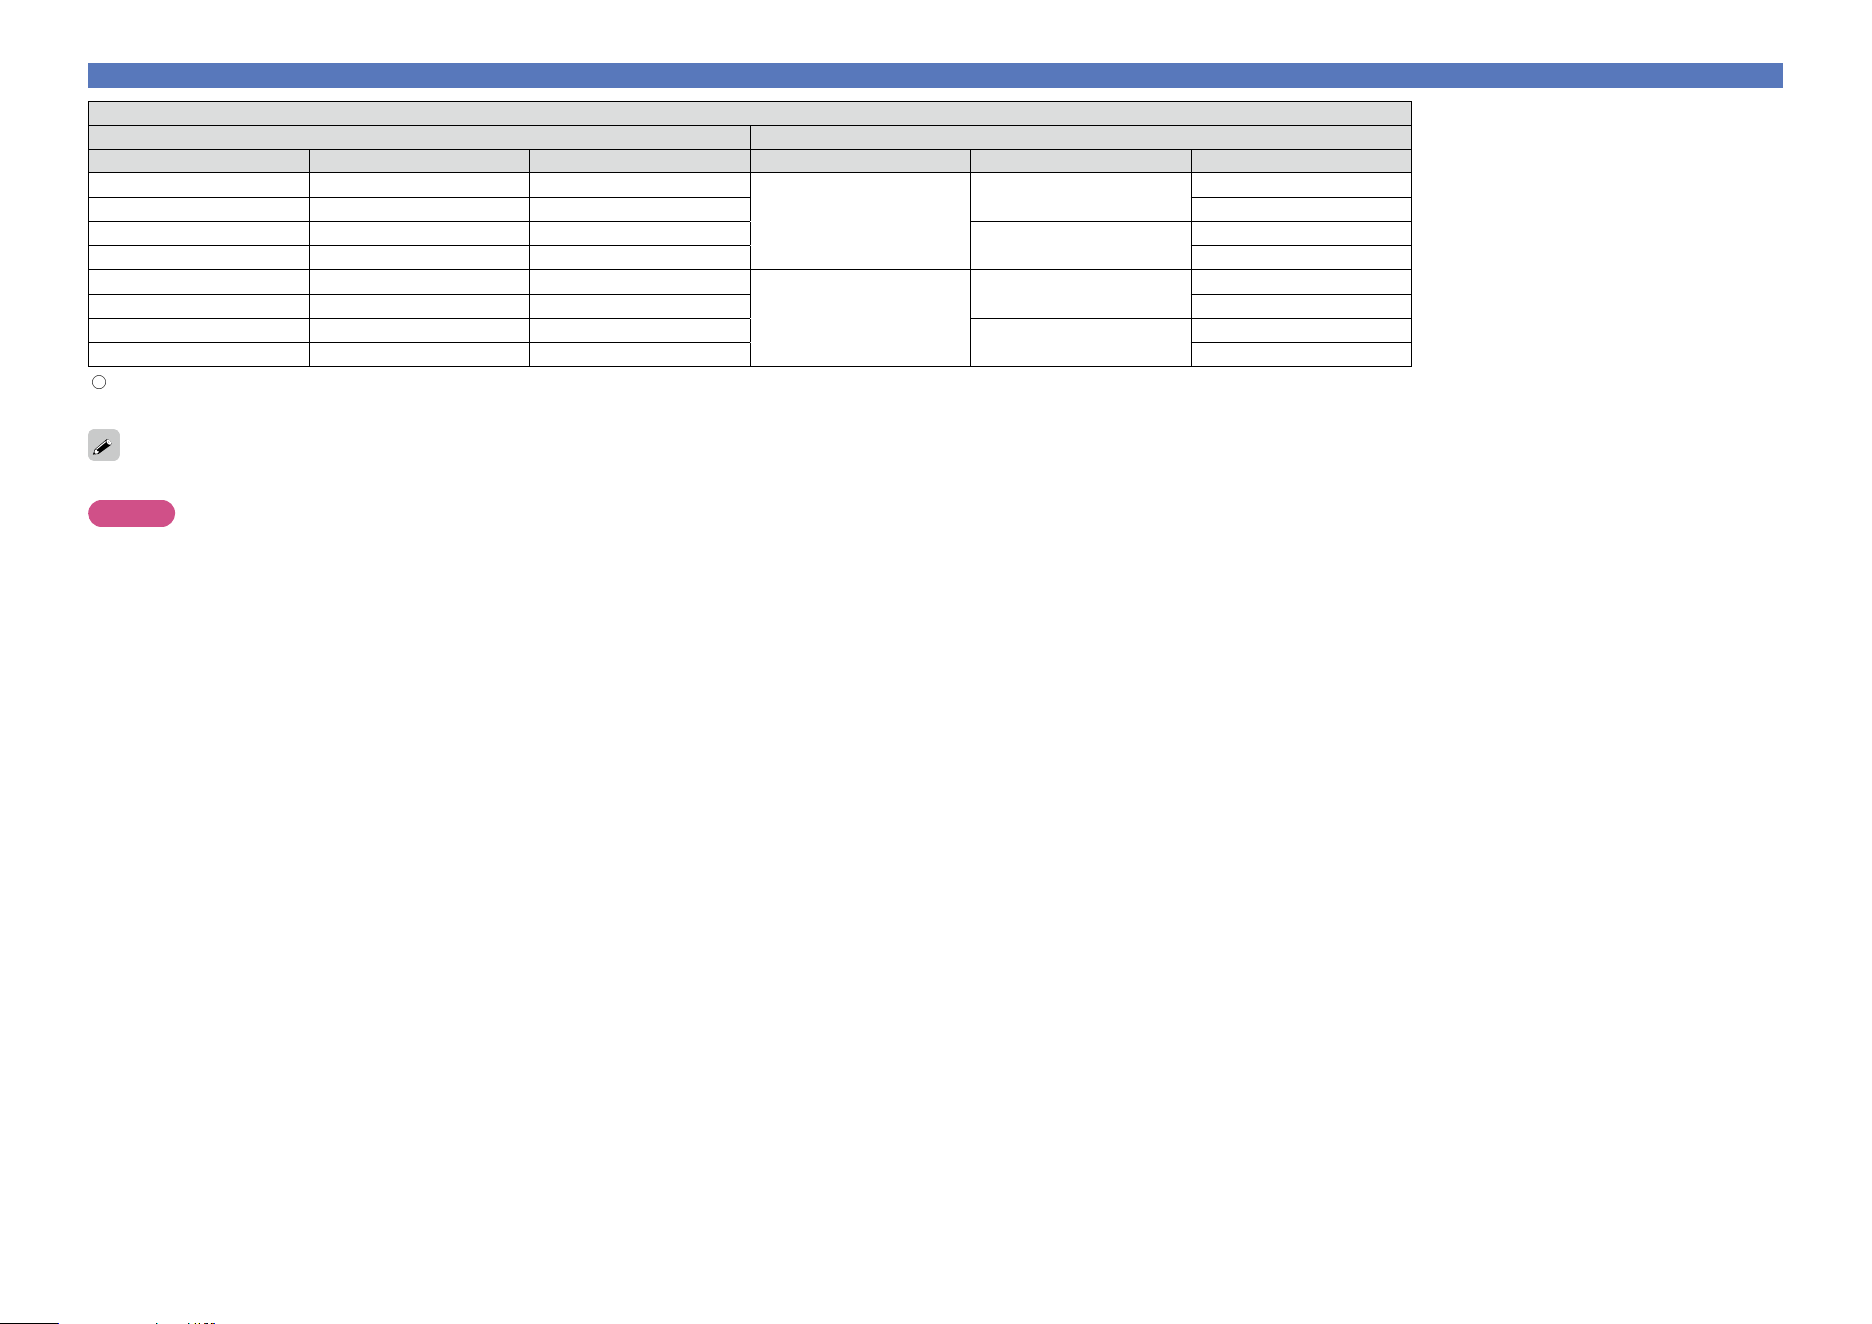
191
ZONE MONITOR OUT
Input connector Output connector
HDMI COMPONENT VIDEO HDMI ZONE4 COMPONENT (ZONE2) VIDEO (ZONE2)
A A A
A
A
A
A A S S <VIDEO>
A S A
S <COMPONENT>
A
A S S S <VIDEO>
S A A
S <HDMI>
A
A
S A S S <VIDEO>
S S A
S <COMPONENT>
A
S S S S <VIDEO>
S : Video signal input present
A : No video signal input
S < > : The input signal between the < > marks is output.
A : No video signal output
The main zone video conversion function is compatible with the following formats: NTSC, PAL, SECAM, NTSC4.43, PAL-N, PAL-M and PAL-60.
NOTE
•The status display screen cannot be displayed at a computer’s resolution (e.g. VGA) or while certain 3D video contents is being played.
•When the menu is operated on a computer’s resolution (e.g. VGA) or during playback of certain 3D video content, the playback image switches to the menu screen image.
Relationship between video signals and monitor output
Basic version
Advanced version
InformationsInformations
DVD
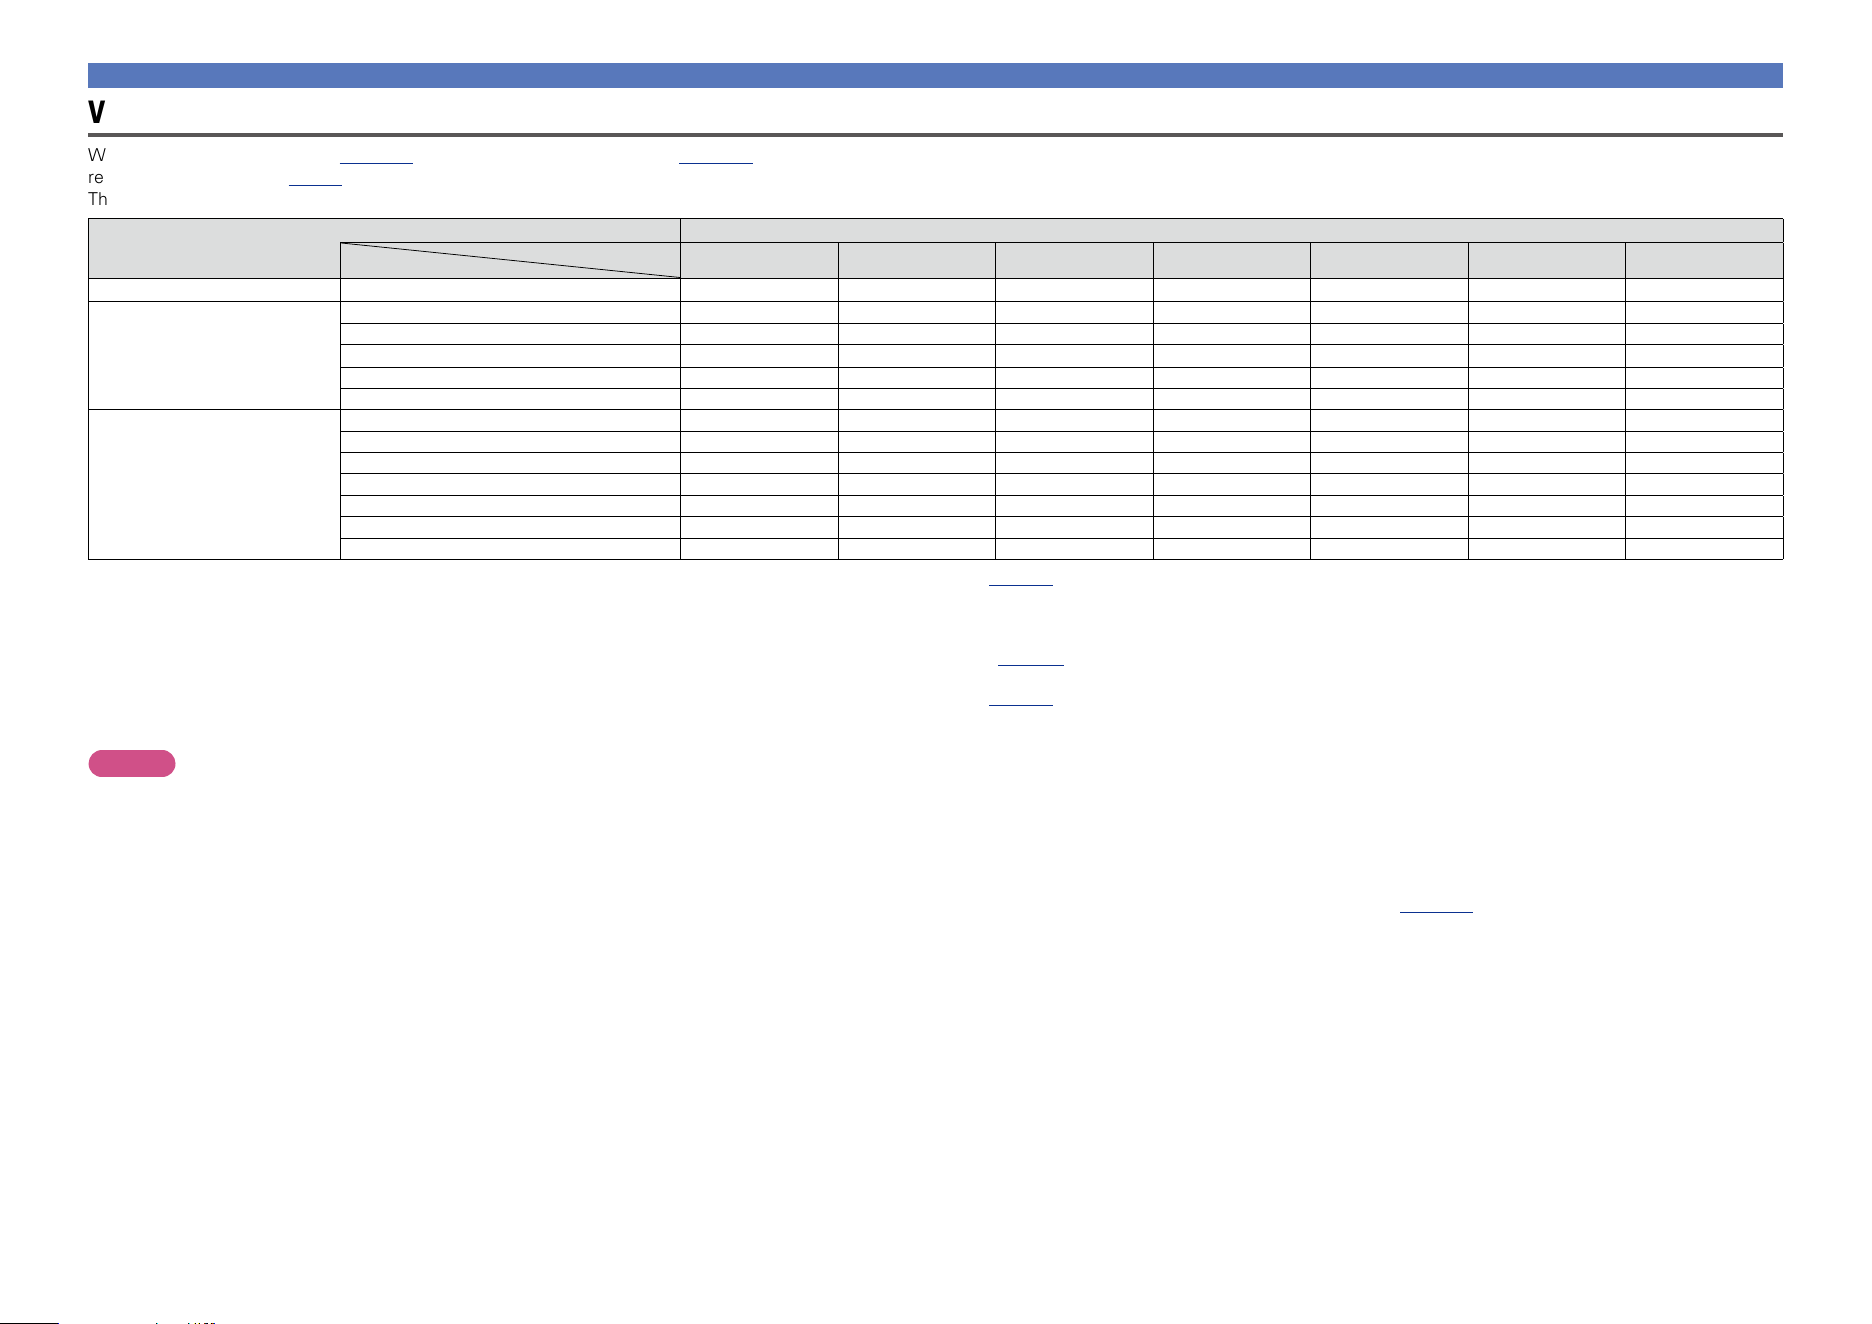
192
Video signal resolution conversion table
When “Video Conversion” (vpage131) is set to “On”, “i/p Scaler” (vpage131) is set to “Analog”, “Analog & HDMI” or “HDMI” are set, the resolution of the input video signal can be converted to a different
resolution for output (vpage7 “Converting input video signals for output (Video conversion function)”).
The relationship between the resolution of the convertible video signal and HDMI output resolution is shown in the table below.
HDMI Output
Output resolution
Input resolution
480i/576iz1
480p/576p 1080i 720p 1080p 1080p 24Hz
4Kz2
Video input 480i/576i
S S S S S S S
Component video input
480i/576i
S S S S S S Sz5
480p/576p –
S S S S S Sz5
1080i – –
S S S S Sz5
720p – –
S S S S Sz5
1080p – – – –
S S Sz5
HDMI input
480i/576i
S S S S S S S
480p/576p –
S S S S S S
1080i – –
S S S S S
720p – –
S S S S S
1080p 24Hz – – – –
Sz3 Sz4 S
1080p – – – –
S S S
4K – – – –
– –
Sz6
S The resolution set in “Resolution” (vpage132) in the menu is output.
– Output at the same resolution as the input video signal resolution.
z1 Only output when “i/p Scaler” in the menu is set to “Off”.
z2 Output at a resolution of 3840 x 2160 (24/25/30Hz).
z3 The resolution set in “Resolution” (vpage132) in the menu is set to “Auto”, and a television that does not support 1080p 24Hz video signals is
connected.
z4 The resolution set in “Resolution” (vpage132) in the menu is set to “Auto”, and a television that supports 1080p 24Hz video signals is connected.
z5 While signals are being upscaled to 4K, the menu screen is only displayed on a TV that is connected to this unit via HDMI.
z6 Output at the same resolution as the input video signal resolution.
NOTE
•Component video and video output are output at the same resolution as the input video signal resolution.
•The 4K, 3D, Computer resolution, “x.v.Color”, sYCC601 color, Adobe RGB color or Adobe YCC601 color input to HDMI is output at the same resolution as the input video signal.
•When “Video Mode” in the menu is set to “Game” or “Auto” and game contents are played, the same resolution as the input video signal is output.
•When “Resolution” in the menu is set to “Auto”, the number of pixels in the television panel connected to the HDMI output connector is automatically detected, and the optimum resolution is output according to
the table above.
•If 1080p 24Hz signals input from the HDMI terminal are converted into 1080p 60Hz/1080p 50Hz for output, they are output according to the specified “Format” (vpage133) setting in the menu:
“NTSC” – Output as 1080p 60Hz.
“PAL” – Output as 1080p 50Hz.
•You can not convert 60Hz into 50Hz or vice versa.
•You can not convert 50Hz into 24Hz.
•This item does not support the HDMI ZONE4 function.
Relationship between video signals and monitor output
Basic version
Advanced version
InformationsInformations
DVD

193
Explanation of terms
A
Adobe RGB color, Adobe YCC601 color
The color space defined by Adobe Systems Inc.
Because it is a wider color space than RGB, it can
produce more vivid and natural images.
AirPlay
AirPlay sends (plays) contents recorded in iTunes
or on an iPhone/iPod touch/iPad to a compatible
device via the network.
AL32 Processing Multi Channel
AL32 Processing for All Channels
DENON has further developed its proprietary AL32
Processing, an analog waveform reproduction
technology, to support the 192 kHz sampling
frequency. AL32 Processing, thoroughly
suppresses quantization noise associated with D/A
conversion to reproduce the low-level signals with
optimum clarity that will bring out all the delicate
nuances of the music.
App Store
App Store is a site that sells application software
for such devices as the iPhone or iPod Touch, and
is operated by Apple Inc.
Audyssey Dynamic EQ
®
Dynamic EQ solves the problem of deteriorating
sound quality as volume is decreased by taking into
account human perception and room acoustics.
Audyssey Dynamic EQ
®
works in tandem with
Audyssey MultEQ
®
XT 32 to provide well-balanced
sound for every listener at any volume level.
Audyssey Dynamic Surround Expansion
(A-DSX)
Audyssey DSX
®
is a scalable system that adds
new speakers to improve surround impression.
Starting with a 5.1 system Audyssey DSX
®
first
adds Wide channels for the biggest impact on
envelopment. Research in human hearing has
proven that information from the Wide channels is
much more critical in the presentation of a realistic
soundstage than the Back Surround channels found
in traditional 7.1 systems. Audyssey DSX
®
then
creates a pair of Height channels to reproduce the
next most important acoustical and perceptual cues.
In addition to these new Wide and Height channels,
Audyssey DSX
®
applies Surround Envelopment
Processing to enhance the blend between the front
and surround channels.
Audyssey Dynamic Volume
®
Dynamic Volume solves the problem of large
variations in volume level between television
programs, commercials, and between the soft
and loud passages of movies. Audyssey Dynamic
EQ
®
is integrated into Dynamic Volume so that as
the playback volume is adjusted automatically, the
perceived bass response, tonal balance, surround
impression, and dialog clarity remain the same.
Audyssey LFC™ (Low Frequency Containment)
Audyssey LFC™ solves the problem of low
frequency sounds disturbing people in neighboring
rooms or apartments. Audyssey researchers
found the range of frequencies that most readily
penetrate wood and cement construction typical
of homes and apartments and then created a
technology to contain them. Audyssey LFC™
dynamically monitors the audio content and
removes the low frequencies able to pass through
walls, floors and ceilings. Audyssey LFC™ then
applies psychoacoustic processing to restore the
perception of low bass for listeners in the room.
The result is great sound that no longer disturbs the
neighbors.
Audyssey MultEQ
®
XT 32
MultEQ
®
XT 32 is a room equalization solution
that calibrates any audio system so that it can
achieve optimum performance for every listener
in a large listening area. Based on several room
measurements, MultEQ
®
XT 32 calculates an
equalization solution that corrects for both time
and frequency response problems in the listening
area and also performs a fully automated surround
system setup.
Auto Lip Sync
If you connect the unit to a TV that supports the
Auto Lip Sync function, it can automatically correct
delay between the audio and video.
B
Bass Sync
Audio sources such as BD and DVD inherently have
time delay between the bass components of the
satellite channel and the LFE channel. This function
adjusts such a delay for reproducing (replaying)
richer bass sound during playback. This function
is by default set to 0 msec. Since the delay varies
according to the title, play back the audio source
and adjust to the most effective value for playback.
For some audio sources that are played back, this
function may have little effect.
D
Deep Color
An imaging technology supported by HDMI. Unlike
RGB, which uses 8 bits (256 shades) per color, it can
use 10 bits (1024 shades), 12 bits (4096 shades), or
16 bits (65536 shades) to produce colors in higher
definition.
Both devices linked via HDMI must support Deep
Color.
Denon Link HD
Denon Link HD uses the clock of the AV amplifier
connected by Denon Link HD to achieve HDMI
signal transfer with low jitter.
DLNA
DLNA and DLNA CERTIFIED are trademarks and/
or service marks of Digital Living Network Alliance.
Some contents may not be compatible with other
DLNA CERTIFIED
®
products.
Dolby Digital
Dolby Digital is a multi-channel digital signal format
developed by Dolby Laboratories.
A total of 5.1 channels are played: 3 front channels
(“FL”, “FR” and “C”), 2 surround channels
(“SL” and “SR”) and the “LFE” channel for low
frequencies.
Because of this, there is no crosstalk between
channels and a realistic sound field with a “three-
dimensional” feeling (sense of distance, movement
and positioning) is achieved.
A realistic, powerful sense of presence is achieved
when playing movie sources in AV rooms as well.
Dolby Digital EX
Dolby Digital EX is a 6.1-channel surround format
proposed by Dolby Laboratories that allows users
to enjoy in their homes the “DOLBY DIGITAL
SURROUND EX” audio format jointly developed by
Dolby Laboratories and Lucas Films.
The 6.1 channels of sound, including surround back
channels, provide improved sound positioning and
expression of space.
Dolby Digital Plus
Dolby Digital Plus is an improved Dolby Digital signal
format that is compatible with up to 7.1 channels
of discrete digital sound and also improves sound
quality thanks to extra data bit rate performance.
It is upwardly compatible with conventional Dolby
Digital, so it offers greater flexibility in response to
the source signal and the conditions of the playback
device.
Dolby Pro Logic g
Dolby Pro Logic g is a matrix decoding technology
developed by Dolby Laboratories.
Regular music such as that on CDs is encoded into
5 channels to achieve an excellent surround effect.
The surround channel signals are converted into
stereo and full band signals (with a frequency
response of 20 Hz to 20 kHz or greater) to create
a “three-dimensional” sound image offering a rich
sense of presence for all stereo sources.
Dolby Pro Logic gx
Dolby Pro Logic gx is a further improved version of
the Dolby Pro Logic g matrix decoding technology.
Audio signals recorded in 2 channels are decoded
to achieve a natural sound with up to 7.1 channels.
There are three modes: “Music” suited for playing
music, “Cinema” suited for playing movies, and
“Game” which is optimized for playing games.
Basic version
Advanced version
InformationsInformations
DVD

194
Dolby Pro Logic gz
Dolby Pro Logic gz introduces a new dimension to
Home Entertainment through the addition of a pair
of front height channels. Compatible with stereo,
5.1-channel and 7.1-channel content, Dolby Pro
Logic gz provides enhanced spaciousness, depth
and dimension to movies, concert video and video
game playback while maintaining the full integrity
of the source mix.
Dolby Pro Logic gz identifies and decodes spatial
cues that occur naturally in all content, directing
this information to the front height channels,
complementing the performance of left and right
surround sound speakers. Content that is encoded
with Dolby Pro Logic gz height channel information
can be even more revealing, with perceptually
discrete height channel information bringing an
exciting new dimension to home entertainment.
Dolby Pro Logic gz, with front height channels is
also an ideal alternative for households that cannot
support the placement of back surround speakers
of a typical 7.1-channel system but may have
bookshelf space available to support the addition of
height speakers.
Dolby TrueHD
Dolby TrueHD is a high definition audio technology
developed by Dolby Laboratories, using lossless
coding technology to faithfully reproduce the sound
of the studio master.
This format provides the facility to support up to
8 audio channels with a sampling frequency of
96 kHz/24 bit resolution and up to 6 audio channels
with a sampling frequency of 192 kHz/24 bit
resolution. Dolby TrueHD is adopted for applications
that put very high importance on sound quality.
Downmix
This function converts the number of channels of
surround audio to less number of channels and
plays back.
DTS
This is an abbreviation of Digital Theater System,
which is a digital audio system developed by DTS.
When playing back audio by connecting this system
with a device such as DTS amplifier, accurate sound
field position and realistic sound effect as if you are
in a movie theater can be obtained.
Explanation of terms
DTS 96/24
DTS 96/24 is a digital audio format enabling high
sound quality playback in 5.1 channels with a
sampling frequency of 96 kHz and 24 bit quantization
on DVD-Video.
DTS Digital Surround
DTS Digital Surround is the standard digital surround
format of DTS, Inc., compatible with a sampling
frequency of 44.1 or 48 kHz and up to 5.1 channels
of digital discrete surround sound.
DTS-ES™ Discrete 6.1
DTS-ES™ Discrete 6.1 is a 6.1-channel discrete
digital audio format adding a surround back (SB)
channel to the DTS digital surround sound.
Decoding of conventional 5.1-channel audio signals
is also possible according to the decoder.
DTS-ES™ Matrix 6.1
DTS-ES™ Matrix 6.1 is a 6.1-channel discrete digital
audio format inserting a surround back (SB) channel
to the DTS digital surround sound through matrix
encoding. Decoding of conventional 5.1-channel
audio signals is also possible according to the
decoder.
DTS Express
DTS Express is an audio format supporting low bit
rates (max. 5.1 channels, 24 to 256 kbps).
DTS-HD
This audio technology provides higher sound quality
and enhanced functionality than the conventional
DTS and is adopted as an optional audio for Blu-ray
Disc. This technology supports multi-channel, high
data transfer speed, high sampling frequency, and
lossless audio playback. Maximum 7.1-channels are
supported in Blu-ray Disc.
DTS-HD High Resolution Audio
DTS-HD High Resolution Audio is an improved
version of the conventional DTS, DTS-ES and
DTS 96/24 signals formats, compatible with
sampling frequencies of 96 or 48 kHz and up to
7.1 channels of discrete digital sound. High data
bit rate performance provides high quality sound.
This format is fully compatible with conventional
products, including conventional DTS digital
surround 5.1-channel data.
DTS-HD Master Audio
DTS-HD Master Audio is a lossless audio format
created by Digital Theater System (DTS). This
format provides the facility to support up to 8 audio
channels with a sampling frequency of 96 kHz/
24 bit resolution and up to 6 audio channels with
a sampling frequency of 192 kHz/24 bit resolution.
It is fully compatible with conventional products,
including conventional DTS digital surround
5.1-channel data.
DTS Neo:X
This matrix decoding technology uses the DTS
NEO:X decoder to playback 2-channel source
or 5.1/6.1/7.1 channel surround sources as a
maximum of 11.1 channel surround sound. There
are 3 modes: “Music” suited for playing music,
“Cinema” suited for playing movies, and “Game”
which is optimized for playing games.
Dynamic range
The difference between the maximum undistorted
sound level and the minimum discernible level
above the noise emitted by the device.
F
FLAC
FLAC stands for Free lossless Audio Codec, and is a
lossless free audio file format. Lossless means that
the audio is compressed without any loss in quality.
The FLAC license is as shown below.
Copyright (C) 2000,2001,2002,2003,2004,2005,200
6,2007,2008,2009 Josh Coalson
Redistribution and use in source and binary forms,
with or without modification, are permitted provided
that the following conditions are met:
•Redistributions of source code must retain the
above copyright notice, this list of conditions and
the following disclaimer.
•Redistributions in binary form must reproduce the
above copyright notice, this list of conditions and
the following disclaimer in the documentation and/
or other materials provided with the distribution.
•Neither the name of the Xiph.org Foundation nor
the names of its contributors may be used to
endorse or promote products derived from this
software without specific prior written permission.
THIS SOFTWARE IS PROVIDED BY THE
COPYRIGHT HOLDERS AND CONTRIBUTORS “AS
IS” AND ANY EXPRESS OR IMPLIED WARRANTIES,
INCLUDING, BUT NOT LIMITED TO, THE
IMPLIED WARRANTIES OF MERCHANTABILITY
AND FITNESS FOR A PARTICULAR PURPOSE
ARE DISCLAIMED. IN NO EVENT SHALL THE
FOUNDATION OR CONTRIBUTORS BE LIABLE
FOR ANY DIRECT, INDIRECT, INCIDENTAL,
SPECIAL, EXEMPLARY, OR CONSEQUENTIAL
DAMAGES (INCLUDING, BUT NOT LIMITED TO,
PROCUREMENT OF SUBSTITUTE GOODS OR
SERVICES; LOSS OF USE, DATA, OR PROFITS; OR
BUSINESS INTERRUPTION) HOWEVER CAUSED
AND ON ANY THEORY OF LIABILITY, WHETHER
IN CONTRACT, STRICT LIABILITY, OR TORT
(INCLUDING NEGLIGENCE OR OTHERWISE)
ARISING IN ANY WAY OUT OF THE USE OF
THIS SOFTWARE, EVEN IF ADVISED OF THE
POSSIBILITY OF SUCH DAMAGE.
Basic version
Advanced version
InformationsInformations
DVD

195
H
HDCP
When transmitting digital signals between devices,
this copyright protection technology encrypts
the signals to prevent content from being copied
without authorization.
HDMI
This is an abbreviation of High-Definition Multimedia
Interface, which is an AV digital interface that can
be connected to a TV or amplifier. Video signal and
audio signal can be connected using 1 cable.
I
iTunes
iTunes is the name of the multimedia player
provided by Apple Inc. It enables management
and playback of multimedia contents including
music and movies. iTunes supports many main file
formats including AAC, WAV, and MP3.
L
LFE
This is an abbreviation of Low Frequency Effect,
which is an output channel that emphasizes
low frequency effect sound. Surround audio is
intensified by outputting 20 Hz to 120 Hz deep
bass.
M
MAIN ZONE
The room where this unit is placed is called the
MAIN ZONE .
MP3 (MPEG Audio Layer-3)
This is an internationally standardized audio data
compression scheme, using the “MPEG-1” video
compression standard. It compresses the data
volume to about one eleventh its original size while
maintaining sound quality equivalent to a music CD.
MPEG (Moving Picture Experts Group),
MPEG-2, MPEG-4
These are the names for digital compression format
standards used for the encoding of video and audio.
Video standards include “MPEG-1 Video”, “MPEG-
2 Video”, “MPEG-4 Visual”, “MPEG-4 AVC”. Audio
standards include “MPEG-1 Audio”, “MPEG-2
Audio”, “MPEG-4 AAC”.
Explanation of terms
P
Progressive (sequential scanning)
This is a scanning system of video signal that
displays 1 frame of video as one image. Compared
to the interlace system, this system provides
images with less flickering and bleeding.
Protection Circuit
This is a function to prevent damage to devices
within the power supply when an abnormality
such as an overload, excess voltage occurs or
temperature for any reason.
In this unit, the power indicator blinks and the unit
enters standby mode when an abnormality occurs.
S
Sampling frequency
Sampling involves taking a reading of a sound wave
(analog signal) at regular intervals and expressing
the height of the wave at each reading in digitized
format (producing a digital signal).
The number of readings taken in one second is
called the “sampling frequency”. The larger the
value, the closer the reproduced sound is to the
original.
Speaker impedance
This is an AC resistance value, indicated in Ω
(ohms). Greater power can be obtained with this
value smaller.
sYCC601 color
Like “x.v.Color”, each of these color spaces defines
a palette of available colors that is larger than the
traditional RGB color model.
V
vTuner
This is a free online content server for Internet
Radio. Note that usage fees are included in upgrade
costs.
For inquiries about this service, visit the vTuner site
below.
vTuner website: http://www.radiodenon.com
This product is protected by certain intellectual
property rights of Nothing Else Matters Software
and BridgeCo. Use or distribution of such technology
outside of this product is prohibited without a
license from Nothing Else Matters Software and
BridgeCo or an authorized subsidiary.
W
Windows Media DRM
This is a copyright protection technology developed
by Microsoft.
Content providers are using the digital rights
management technology for Windows Media
contained in this device (WM-DRM) to protect
the integrity of their content (Secure Content) so
that their intellectual property, including copyright,
in such content is not misappropriated. This
device uses WM-DRM software to play Secure
Content (WM-DRM Software). If the security of
the WM-DRM Software in this device has been
compromised, owners of Secure Content (Secure
Content Owners) may request that Microsoft
revoke the WM-DRM Software’s right to acquire
new licenses to copy, display and/or play Secure
Content. Revocation does not alter the WM-DRM
Software’s ability to play unprotected content.
A list of revoked WM-DRM Software is sent to
your device whenever you download a license for
Secure Content from the Internet or from a PC.
Microsoft may, in conjunction with such license,
also download revocation list onto your device on
behalf of Secure Content Owners.
Windows Media Player Ver.11 or later
This is a media player distributed free of charge by
Microsoft Corporation.
It can play playlists created with Ver.11 or later of
Windows Media Player, as well as WMA, DRM
WMA, WAV, and other files.
WMA (Windows Media Audio)
This is audio compression technology developed by
Microsoft Corporation.
WMA data can be encoded using Windows
Media
®
Player Ver.7, 7.1, Windows Media
®
Player
for Windows
®
XP and Windows Media
®
Player 9
Series.
To encode WMA files, only use applications
authorized by Microsoft Corporation. If you use
an unauthorized application, the file may not work
properly.
X
x.v.Color
This function lets HDTVs display colors more
accurately. It enables display with natural,
vivid colors. “x.v.Color” is trademark of Sony
Corporation.
Z
ZONE2
This unit can operate in a room other than the room
where this unit is placed (MAIN ZONE) (ZONE2
playback). The room for ZONE2 playback is called
ZONE2.
ZONE3
This unit can operate in a room other than the room
where this unit is placed (MAIN ZONE) (ZONE3
playback). The room for ZONE3 playback is called
ZONE3.
ZONE4
This unit can operate in a room other than the room
where this unit is placed (MAIN ZONE) (ZONE4
playback). The room for ZONE4 playback is called
ZONE4.
Basic version
Advanced version
InformationsInformations
DVD
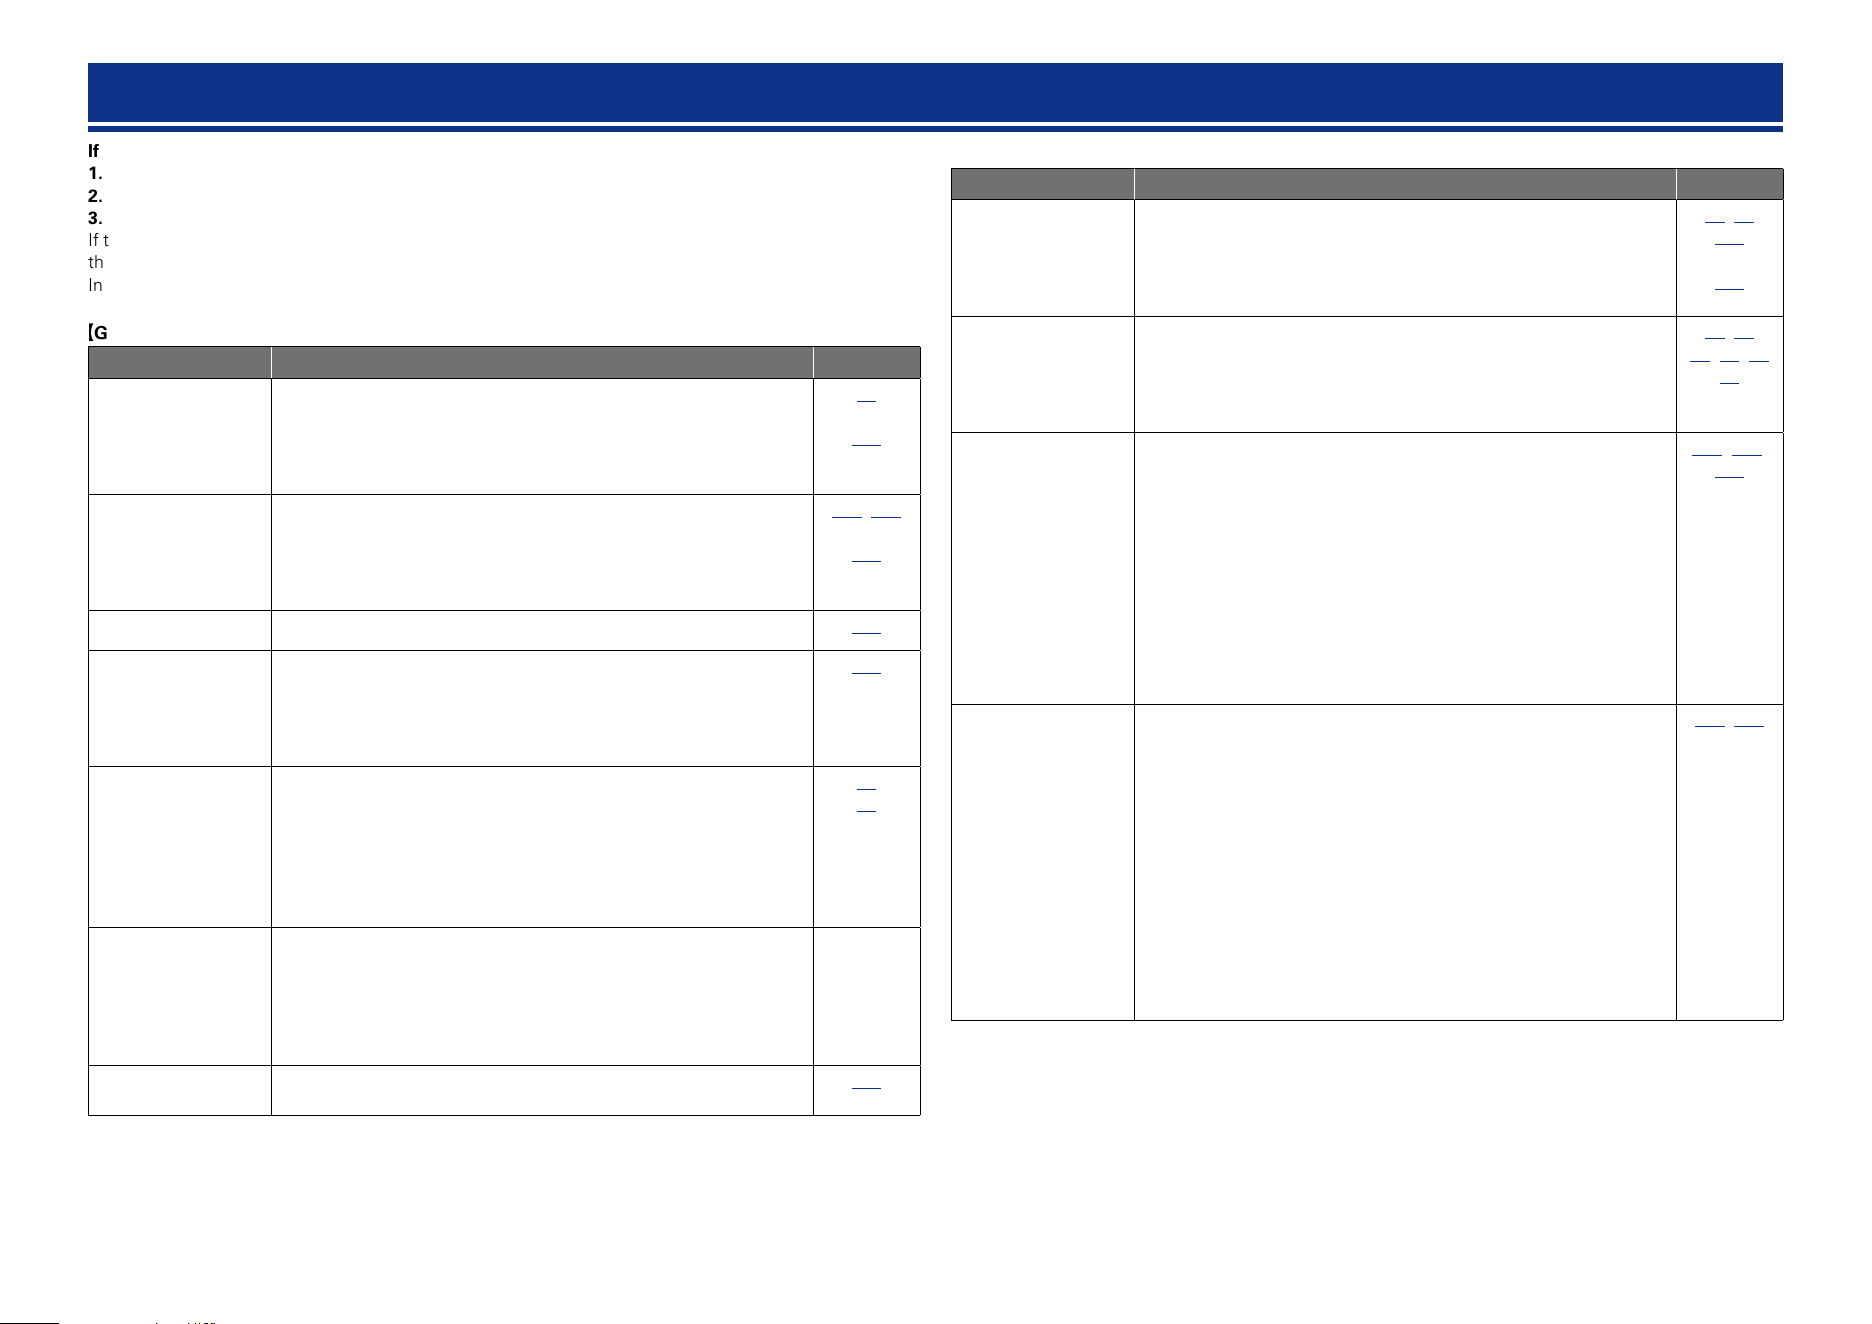
196
Troubleshooting
If a problem should arise, first check the following:
1. Are the connections correct?
2. Is the set being operated as described in the owner’s manual?
3. Are the other devices operating properly?
If this unit does not operate properly, check the items listed in the table below. Should the problem persist,
there may be a malfunction.
In this case, disconnect the power immediately and contact your store of purchase.
GGeneralH
Symptom Cause/Solution Page
Power does not turn
on.
•Check whether the power plug is correctly inserted into the power
outlet.
•The protection circuit is active. Disconnect the power plug from
the electric outlet, wait 5 to 10 seconds and then insert it back
into the outlet.
32
195
Power automatically
switches to standby
mode.
•The sleep timer is set. Turn on the power again, or change the
sleep timer settings.
•“Auto Standby” is triggered when there is no operation for a set
amount of time. To disable “Auto Standby”, set “Auto Standby”
on the menu to “Off”.
105, 113
153
Display is off. •Set “Dimmer” on the menu to something other than “Off”.
153
The power indicator
is blinking red
in intervals of
approximately 2
seconds.
•Due to the temperature rise within this unit, the protection circuit
is working. Please turn off power once, and re-apply the power
after the temperature has fallen sufficiently.
•Please re-install this unit in a place having good ventilation.
195
–
The power indicator
is blinking red
in intervals of
approximately 0.5
seconds.
•Please use speakers which have the specified impedance.
•The protection circuit has been activated because the speaker
cable core wires are touching, a core wire has come loose from
the terminal, or a core wire is touching the rear panel of this unit.
After unplugging the power cord, take corrective action such as
firmly re-twisting the core wire or taking care of the terminal, and
then reconnect the wire.
93
93
After turning on the
power, the power
indicator is blinking
red in intervals of
approximately 0.5
seconds.
•This unit amplifier circuit has failed. Turn off the power and please
contact the DENON service adviser.
–
Set does not operate
properly.
•Reset the microprocessor.
201
GHDMIH
Symptom Cause/Solution Page
No audio is
output with HDMI
connection.
•Check the connection of the HDMI connectors.
•When outputting HDMI audio from the speakers, set “HDMI
Audio Out” on the menu to “AVR”.
•When outputting HDMI audio from a TV, set “HDMI Audio Out”
on the menu to “TV”.
11, 12
129
129
No video is
output with HDMI
connection.
•Check the connection of the HDMI connectors.
•Set the input source to match the connected HDMI connector.
•Check whether the TV is compatible with copyright protection
(HDCP). If connected to a device not compatible with HDCP, video
will not be output correctly.
11, 12
11,12,41
14
When the following
operations are
performed on
devices compatible
with HDMI control,
the same operations
occur on this unit.
•Power ON/OFF
•Switching audio
output devices
•Adjust volume
•Switch input source
•Set “HDMI Control” in the menu to “Off”.
Furthermore, if you do not want to link the power off operation
with devices compatible with HDMI control, set “Power Off
Control” in the menu to “Off”.
102, 130,
131
When the HDMI
ZONE4 function
is used and an
operation is
performed in MAIN
ZONE, the following
operations occur.
•The player is turned
off or playback
pauses.
•The input source
on this unit
automatically
changes.
•“HDMI Control” is set to “On” and “Control Monitor” is set
to “Monitor 1” or “Monitor 2”. In this case, the HDMI control
function set for MAIN ZONE affects playback in ZONE4. When
using the HDMI ZONE4 function, from the menu, set “HDMI
Control” to “Off” or set “Control Monitor” to “ZONE4”.
•When the input source for ZONE4 is “SOURCE”, select an input
source that is different from the one for MAIN ZONE.
102, 130
–
Basic version
Advanced version
InformationsInformations
DVD
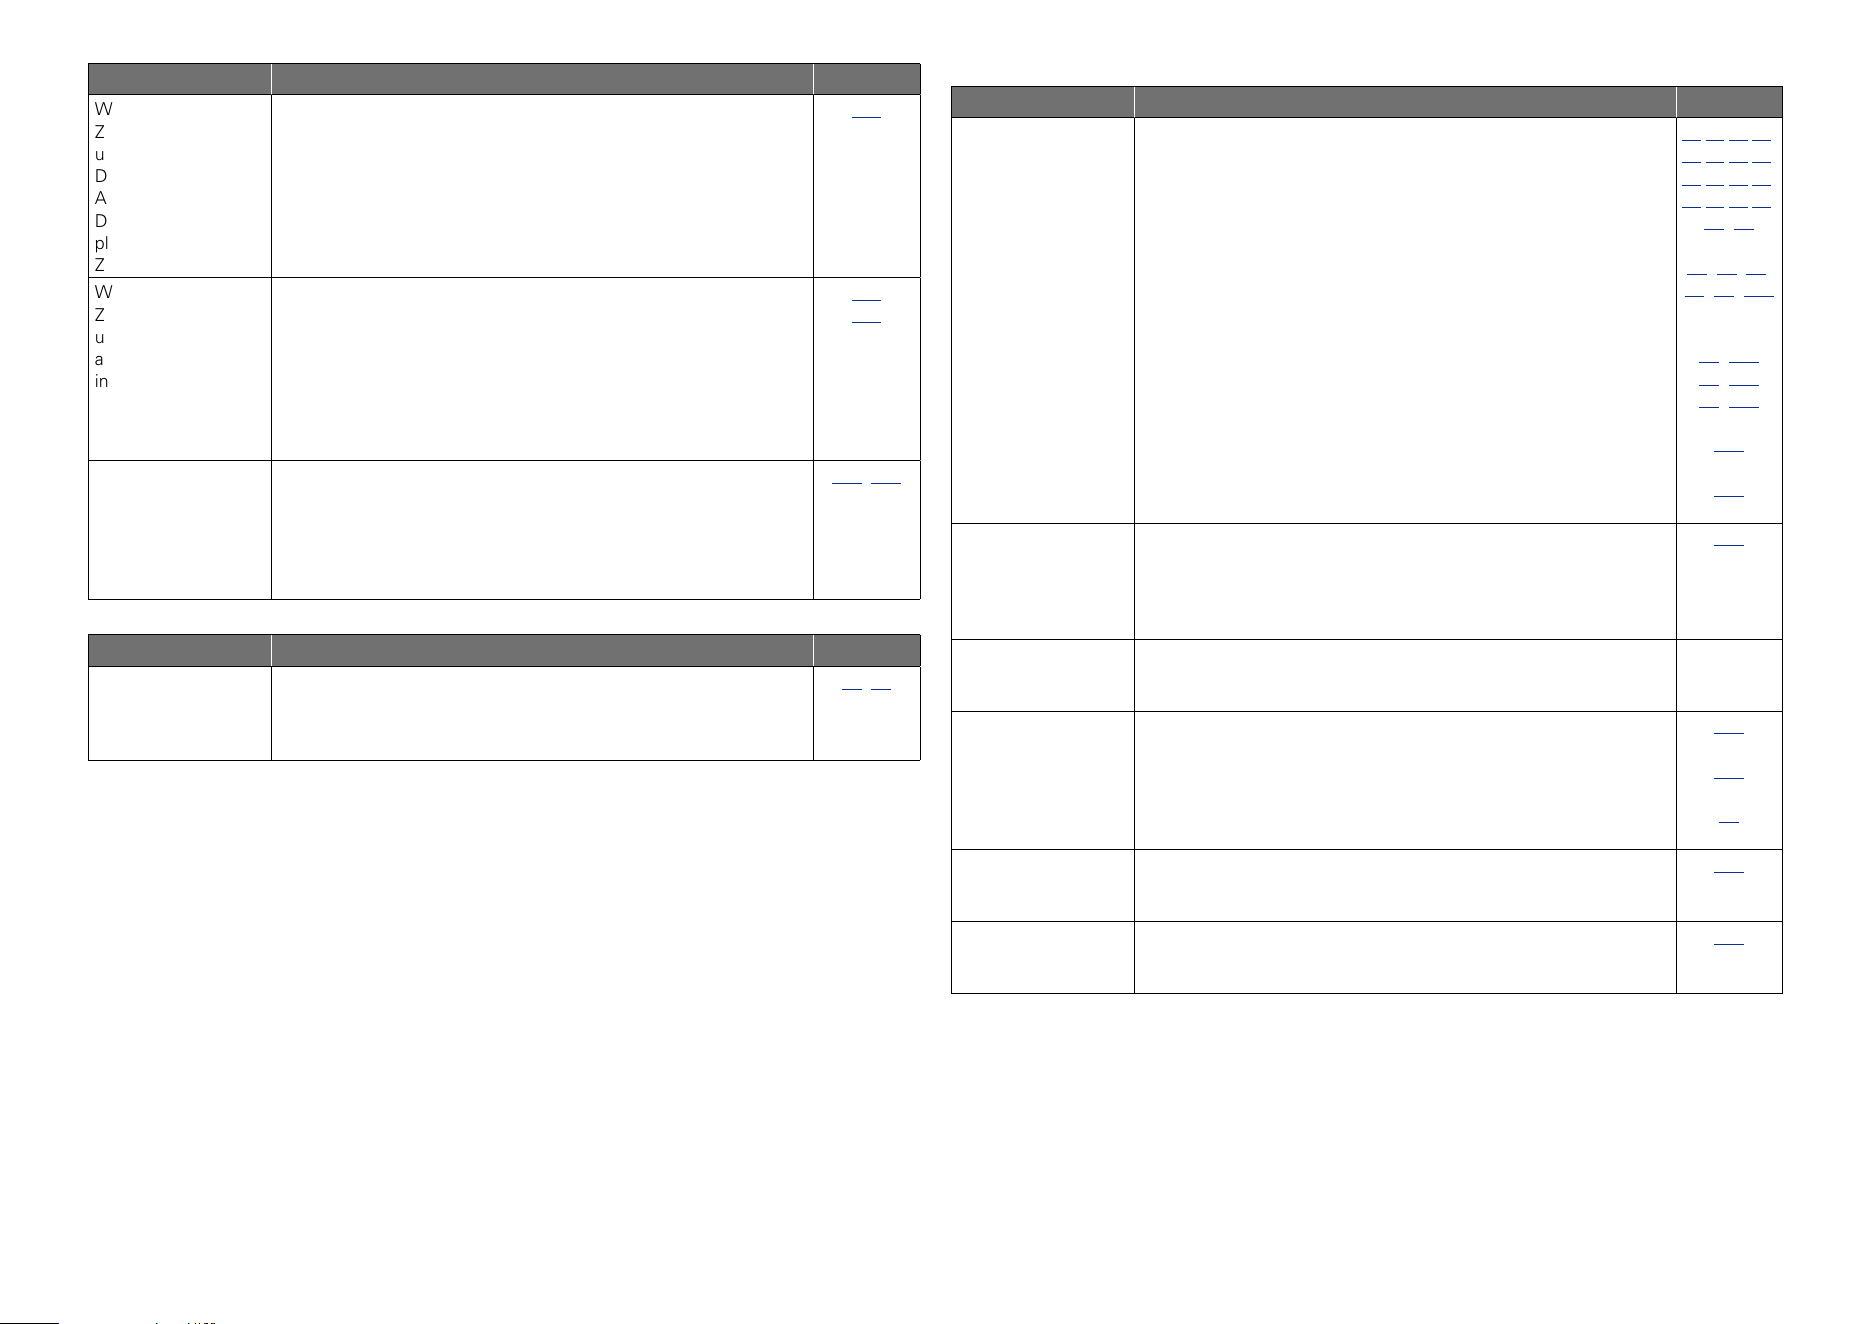
197
Symptom Cause/Solution Page
When the HDMI
ZONE4 function is
used, Dolby TrueHD/
DTS HD Master
Audio/Dolby Digital/
DTS cannot be
played back in MAIN
ZONE.
•Make sure that “HDMI Audio Out” in the menu is set to “AVR”.
When a same input source is selected for MAIN ZONE and
ZONE4, set the
ZONE4 ON/OFF button to “OFF”, or change the
input source for ZONE4 to an input source that is different from
the one for MAIN ZONE.
129
When the HDMI
ZONE4 function is
used, no video or
audio is output to TV
in ZONE4.
•Make sure that the power is on for ZONE4.
•Check the input source for ZONE4.
•Check the output settings (resolution/audio format) for the input
device.
•The HDMI 7 / MHL connector on the front panel does not support
the HDMI ZONE4 function.
•For ZONE4, playback is only possible when the input signals are
HDMI signals.
113
113
–
–
–
When playing back
the input device just
to use the HDMI
ZONE4 function, the
TV used for MAIN
ZONE is turned on.
•“HDMI Control” in the menu is set to “On”. When using the
HDMI ZONE4 function, set “HDMI Control” in the menu to “Off”.
102, 130
GVideoH
Symptom Cause/Solution Page
No picture appears. •Check the connection between the video output terminal of this
unit and the input terminal of the TV.
•Match the input settings to the input terminal of the TV connected
to this unit.
11, 16
–
GAudioH
Symptom Cause/Solution Page
Audio is not output. •Check the connections for all devices.
•Check the speaker connections and configurations.
•Check whether the audio device power is turned on.
•Adjust the master volume.
•Cancel the mute mode.
•Check the connection with the playback device and select the
proper input source.
•Match the input mode and the terminal assigned to be the digital
input terminal.
•Disconnect the headphones. No sound is output from the
speakers when headphones are connected.
11,12,13,16,
17,18,19,20,
21,22,23,25,
26,27,28,29,
30,31
94,95,96,
97,98,111
–
42, 113
42, 113
41, 113
138
171
The volume does not
increase.
•The maximum volume is set too low. Set the maximum volume
using “Limit”on the menu.
•Power for external devices connected to the output connectors
of the unit may not be turned on. Check the power of connected
external devices.
124
–
No sound is
produced from
surround speaker.
•Check if the surround speakers are connected to the SURROUND
terminals.
–
No sound is
produced from
surround back
speaker.
•Check if “Assign Mode” is set appropriately in order to output
audio from the surround back speakers.
•Set “Speaker Config.” – “Surr.Back” on the menu to something
other than “None”.
•Set the sound mode to something other than “STEREO” and
“VIRTUAL”.
141
142
84
No sound is
produced from front
height speaker.
•Set “Speaker Config.” – “Front Height” on the menu to something
other than “None”.
142
No sound is
produced from front
wide speaker.
•Set “Speaker Config.” – “Front Wide” on the menu to something
other than “None”.
142
Basic version
Advanced version
InformationsInformations
DVD
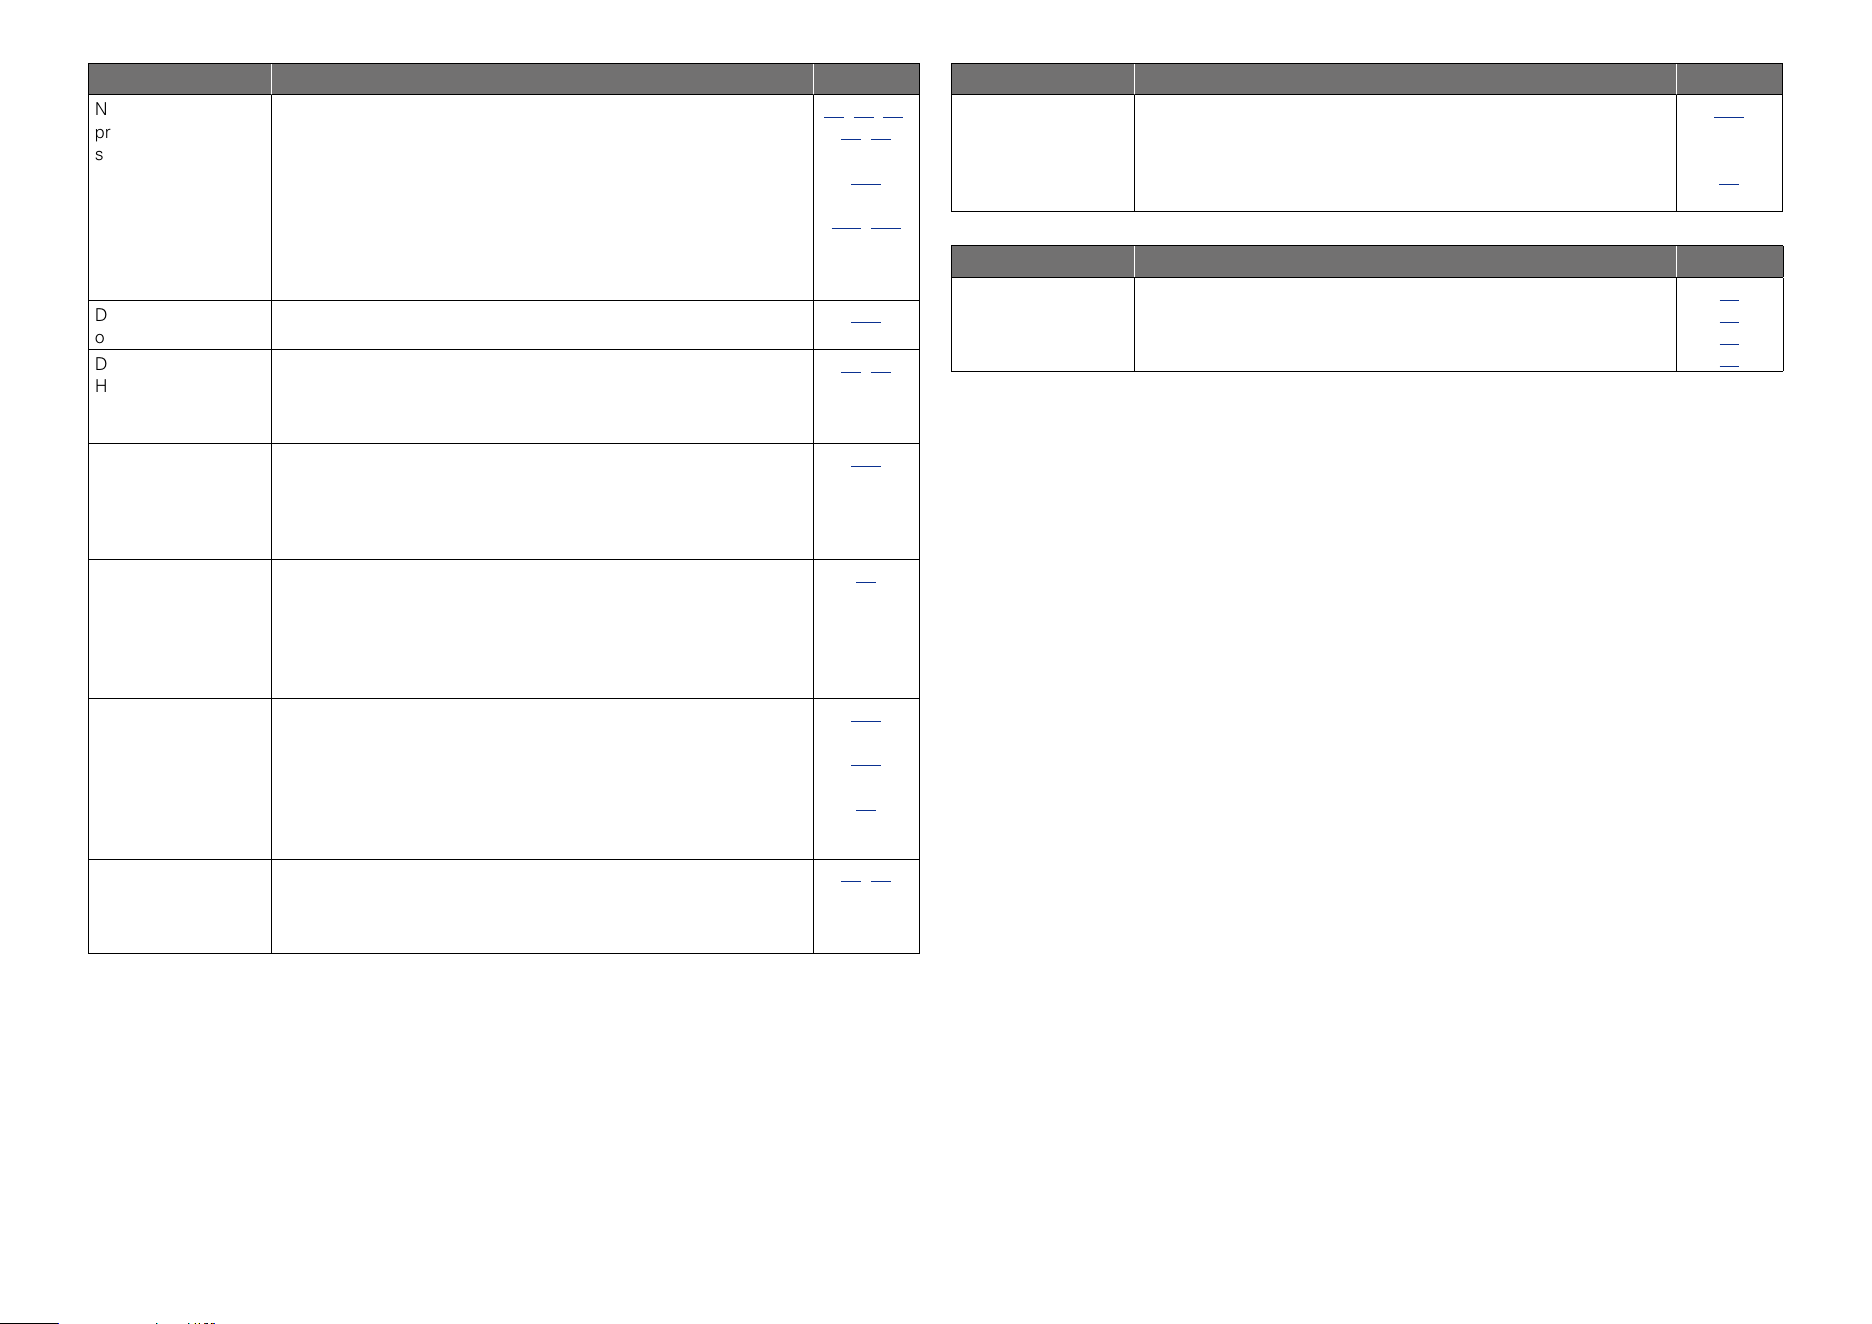
198
Symptom Cause/Solution Page
No sound is
produced from
subwoofer.
•Check the subwoofer connections.
•Turn on the subwoofer’s power.
•Set “Speaker Config.” – “Subwoofer” on the menu to “2spkrs”
or “1spkr”.
•If “Front” and “Center” for “Speaker Config.” are set to “Large”,
and “Subwoofer Mode” is set to “LFE”, no sound may be output
from the subwoofers, depending on the input signal or selected
sound mode.
94,95,96,
97,98
–
142
142, 144
DTS sound is not
output.
•Set “Decode Mode” on the menu to “Auto” or “DTS”.
138
Dolby TrueHD, DTS-
HD, Dolby Digital
Plus audio is not
output.
•Make HDMI connections.
11, 12
Dolby PLg mode or
DTS NEO:X mode
cannot be selected.
•Check that “Speaker Config.” – “Center” or “Surround” is set to
other than “None”. If the speaker system is 2.0/2.1ch, this sound
mode cannot be selected.
•When headphones are used, Dolby PLg or DTS NEO:X cannot be
selected.
142
–
Audyssey MultEQ
®
XT 32, Audyssey
Dynamic EQ
®
and
Audyssey Dynamic
Volume
®
cannot be
selected.
•Switch the sound mode to other than “DIRECT” or “PURE
DIRECT”.
•When headphones are used, Audyssey MultEQ
®
XT 32,
Audyssey Dynamic EQ
®
and Audyssey Dynamic Volume
®
cannot
be selected.
84
–
Audyssey DSX
®
cannot be selected.
•Check that “Speaker Config.” – “Front Height” or “Front Wide” is
set to other than “None”.
•Check that “Speaker Config.” – “Center” is set to other than
“None”.
•Switch the sound mode to DOLBY listening mode or DTS listening
mode.
•When headphones are used, Audyssey DSX
®
cannot be selected.
142
142
84
–
Audyssey Dynamic
EQ
®
and Audyssey
Dynamic Volume
®
cannot be selected.
•Run Audyssey
®
Setup.
33, 99
Symptom Cause/Solution Page
“Restorer” cannot
be selected.
•Check that an analog signal or PCM signal (Sample Rate=44.1/48
kHz) is input. For playback of multichannel signals such as Dolby
Digital or DTS surround, “Restorer” cannot be used.
•Switch the sound mode to other than “DIRECT” or “PURE
DIRECT”.
124
84
GHDRadioH
Symptom Cause/Solution Page
Reception fails, or
there is a lot of noise
or distortion.
•Change the antenna orientation or position.
•Separate the AM loop antenna from the unit.
•Use an FM outdoor antenna.
•Separate the antenna from other connection cables.
27
27
27
27
Basic version
Advanced version
InformationsInformations
DVD
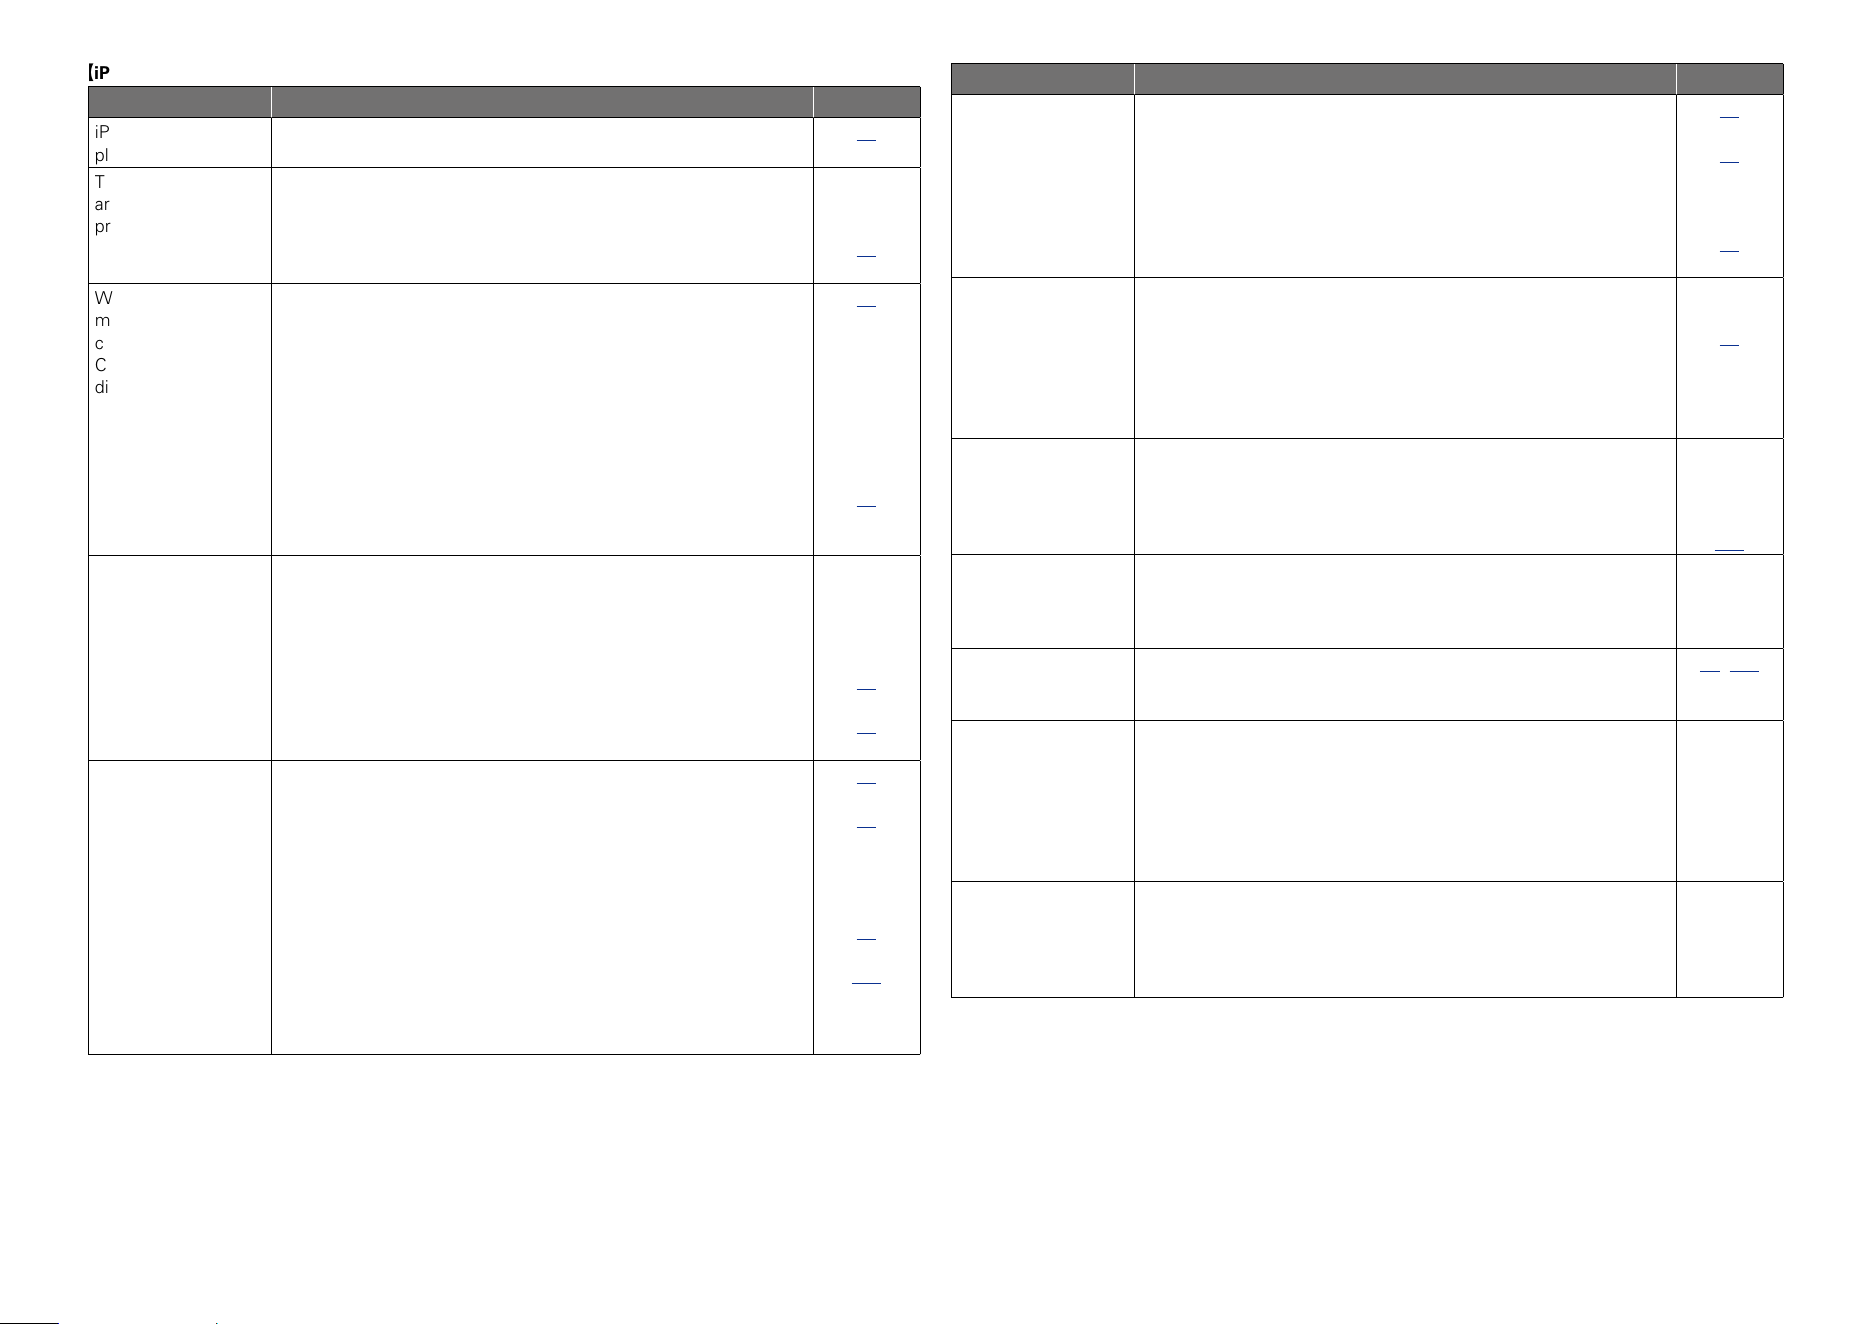
199
GiPod / USB memory device / Internet Radio / Media Server / Flickr / Pandora / SiriusXM / SpotifyH
Symptom Cause/Solution Page
iPod cannot be
played.
•Some iPods do not support being used connected directly to the
iPod/USB port.
23
The file names
are not displayed
properly (“...”, etc.).
•Characters that cannot be displayed are used. This is not a
malfunction. On this unit, characters that cannot be displayed are
replaced with a “.” (period).
•Invalid tags are used for files within the USB memory device
connected to this unit. Use tags that are supported by this unit.
–
47
When a USB
memory device is
connected, “No
Connection” is
displayed.
•The set cannot recognize a USB memory device. Check the
connection.
•This unit supports mass storage class and MTP-compatible USB
memory devices. It will not recognize other USB memory devices.
•A USB memory device that the set cannot recognize is connected.
This is not a malfunction. DENON does not guarantee that all USB
memory devices will operate or receive power.
•USB memory device is connected via USB hub. Connect the USB
memory device directly to the iPod/USB port.
•The unit supports file structures with up to 8 levels and a total
maximum of 5000 subfolders and files per 1 folder. Change the
file structure of the USB memory device if necessary.
23
–
–
–
47
Files on a USB
memory device
cannot be played.
•The USB memory device format should be set to FAT16 or
FAT32. For details, refer to the USB memory device’s operating
instructions.
•If the USB memory device is divided into multiple partitions, only
files in partition one can be played.
•Files are stored in a non-compatible format. Record the files in a
compatible format.
•You are attempting to play a file that is copyright protected. Files
that are copyright protected cannot be played on this unit.
–
–
47
47
Internet Radio cannot
be played.
•Ethernet cable is not properly connected or network is
disconnected. Check the connection status.
•Program is being broadcast in non-compatible format. Only
Internet Radio programs in MP3 and WMA can be played on this
unit.
•The firewall of the PC or router has been activated. Check the
firewall settings of the connected PC or router.
•Radio station is not currently broadcasting. Choose a radio station
that is currently broadcasting.
•IP address is wrong. Check the set’s IP address.
•Some radio stations may go silent at certain times of the day. In
this case, no audio is output even when a station is received. Try
again later, or switch to another radio station.
31
59
–
59
147
–
Symptom Cause/Solution Page
Files stored on a
computer cannot be
played.
•Files are stored in a non-compatible format. Record in a compatible
format.
•You are attempting to play a file that is copyright protected. Files
that are copyright protected cannot be played on this unit.
•Set and computer are connected by USB cable. The set’s iPod/
USB port cannot be used for connection to a computer.
•Media sharing settings are not correct. Change media sharing
settings so that the unit can access the folders on your computer.
62
62
–
63
Music stored on
a NAS cannot be
played.
•If you use a NAS in conformity with the DLNA standard, enable
the DLNA server function in the NAS setting.
•If you use a NAS that does not conform with the DLNA standard,
play the music via a PC. Set Windows Media Player’s media
sharing function and add NAS to the selected play folder.
•If connection is restricted, set audio equipment as the connection
target.
–
63
–
Server is not found,
or it is not possible
to connect to the
server.
•The computer’s or router’s firewall is activated. Check the
computer’s or router’s firewall settings.
•Computer’s power is not turned on. Turn on the power.
•Server is not running. Launch the server.
•Set’s IP address is wrong. Check the set’s IP address.
–
–
–
147
Cannot connect to
preset or favorite
radio stations.
•Radio station is not currently broadcasting. Wait a while before
trying again.
•Radio station is not currently in service. It is not possible to
connect to radio stations that are no longer in service.
–
–
A list of broadcasting
stations is not
displayed.
•Connection to the network is unstable. Reconnect to the network
or redo the “Network” setting in the menu.
31, 146
For some radio
stations, “Radio
station server full” or
“Connection down”
is displayed and
station cannot be
connected to.
•Station is congested or not currently broadcasting. Wait a while
before trying again.
–
Sound is broken
during playback.
•Network or USB memory device’s signal transfer speed is slow
or communications lines or radio station is congested. This is not
a malfunction. When playing broadcast data with a high bit rate,
the sound may be broken, depending on the communications
conditions.
–
Basic version
Advanced version
InformationsInformations
v See overleaf
DVD
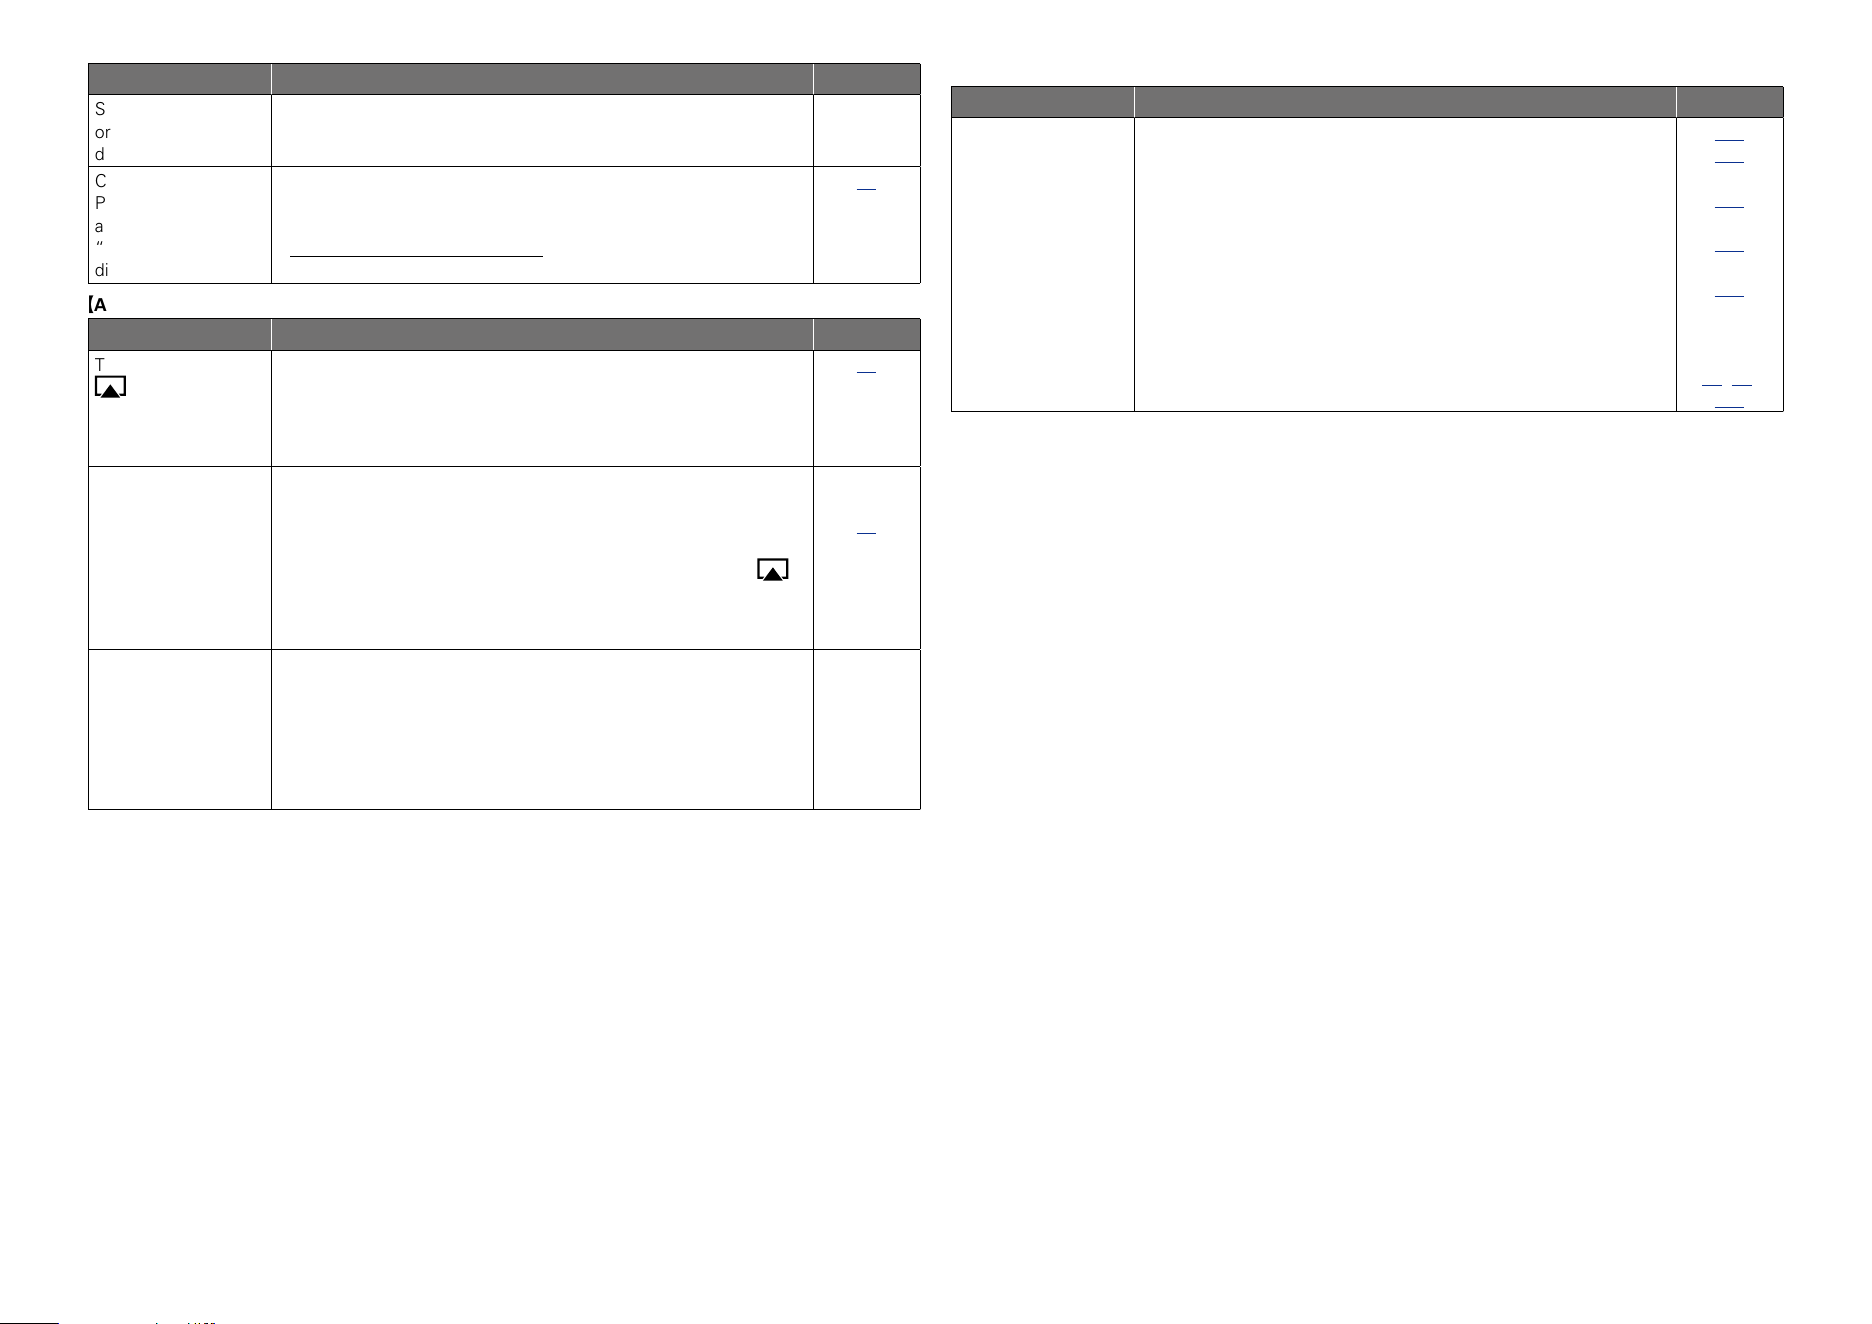
200
Symptom Cause/Solution Page
Sound quality is poor
or noise is heard
during play.
•File being played has a low bit rate. This is not a malfunction. –
Cannot login to
Pandora. (“Email
address” or
“Password” is
displayed.)
•Login information is incorrect. Check if the “Email address” for
Pandora has been properly entered. Re-enter the “Password”.
(Password is not displayed.)
http://www.pandora.com/denon
69
GAirPlayH
Symptom Cause/Solution Page
The AirPlay icon
is not displayed
in iTunes or on the
iPhone/iPod touch/
iPad.
•This unit and the computer or iPhone/iPod touch/iPad are not
connected to the same network (LAN). Connect the computer or
iPhone/iPod touch/iPad to the same network as this unit.
•iTunes or the iPhone/iPod touch/iPad do not have firmware that
supports AirPlay installed. Update to the latest firmware.
31
–
No sound. •The volume in iTunes or on the iPhone/iPod touch/iPad is set to
the minimum setting. Adjust the volume to the optimum level.
•This unit is not selected in the screen that is displayed when
iTunes or the iPhone/iPod touch/iPad is started. Start iTunes or
switch on the iPhone/iPod touch/iPad, click the AirPlay icon
in
the displayed screen, and select this unit.
•AirPlay playback has not started. Click the 1 button in iTunes or
press the 1 button on the iPhone/iPod touch/iPad.
–
82
–
When using AirPlay
with the iPhone/
iPod touch/iPad, the
sound suffers from
intermittent breaks
or AirPlay does not
function.
•Quit the application running in the background of the iPhone/iPod
touch/iPad, and then play using AirPlay.
•When playing via a wireless connection, outside conditions may
affect the unit. To remedy this, change the network environment,
e.g. shorten the distance to the wireless LAN access point.
•Update the iPhone/iPod touch/iPad application or iTunes to the
latest version.
–
–
–
GRemote control unitH
Symptom Cause/Solution Page
The set cannot be
operated with the
remote control unit.
•Batteries are worn out. Replace with new batteries.
•Operate the remote control unit within a distance of about
23 ft/7 m from this unit and at an angle of within 30°.
•Remove any obstacle between this unit and the remote control
unit.
•Insert the batteries in the proper direction, checking the q and
w marks.
•The set’s remote control sensor is exposed to strong light (direct
sunlight, inverter type fluorescent bulb light, etc.). Move the set
to a place in which the remote control sensor will not be exposed
to strong light.
•The setting of the zone to operate does not match. Press
ZONE
SELECT
to select the zone to operate.
175
175
175
175
175
34, 99,
113
Basic version
Advanced version
InformationsInformations
DVD
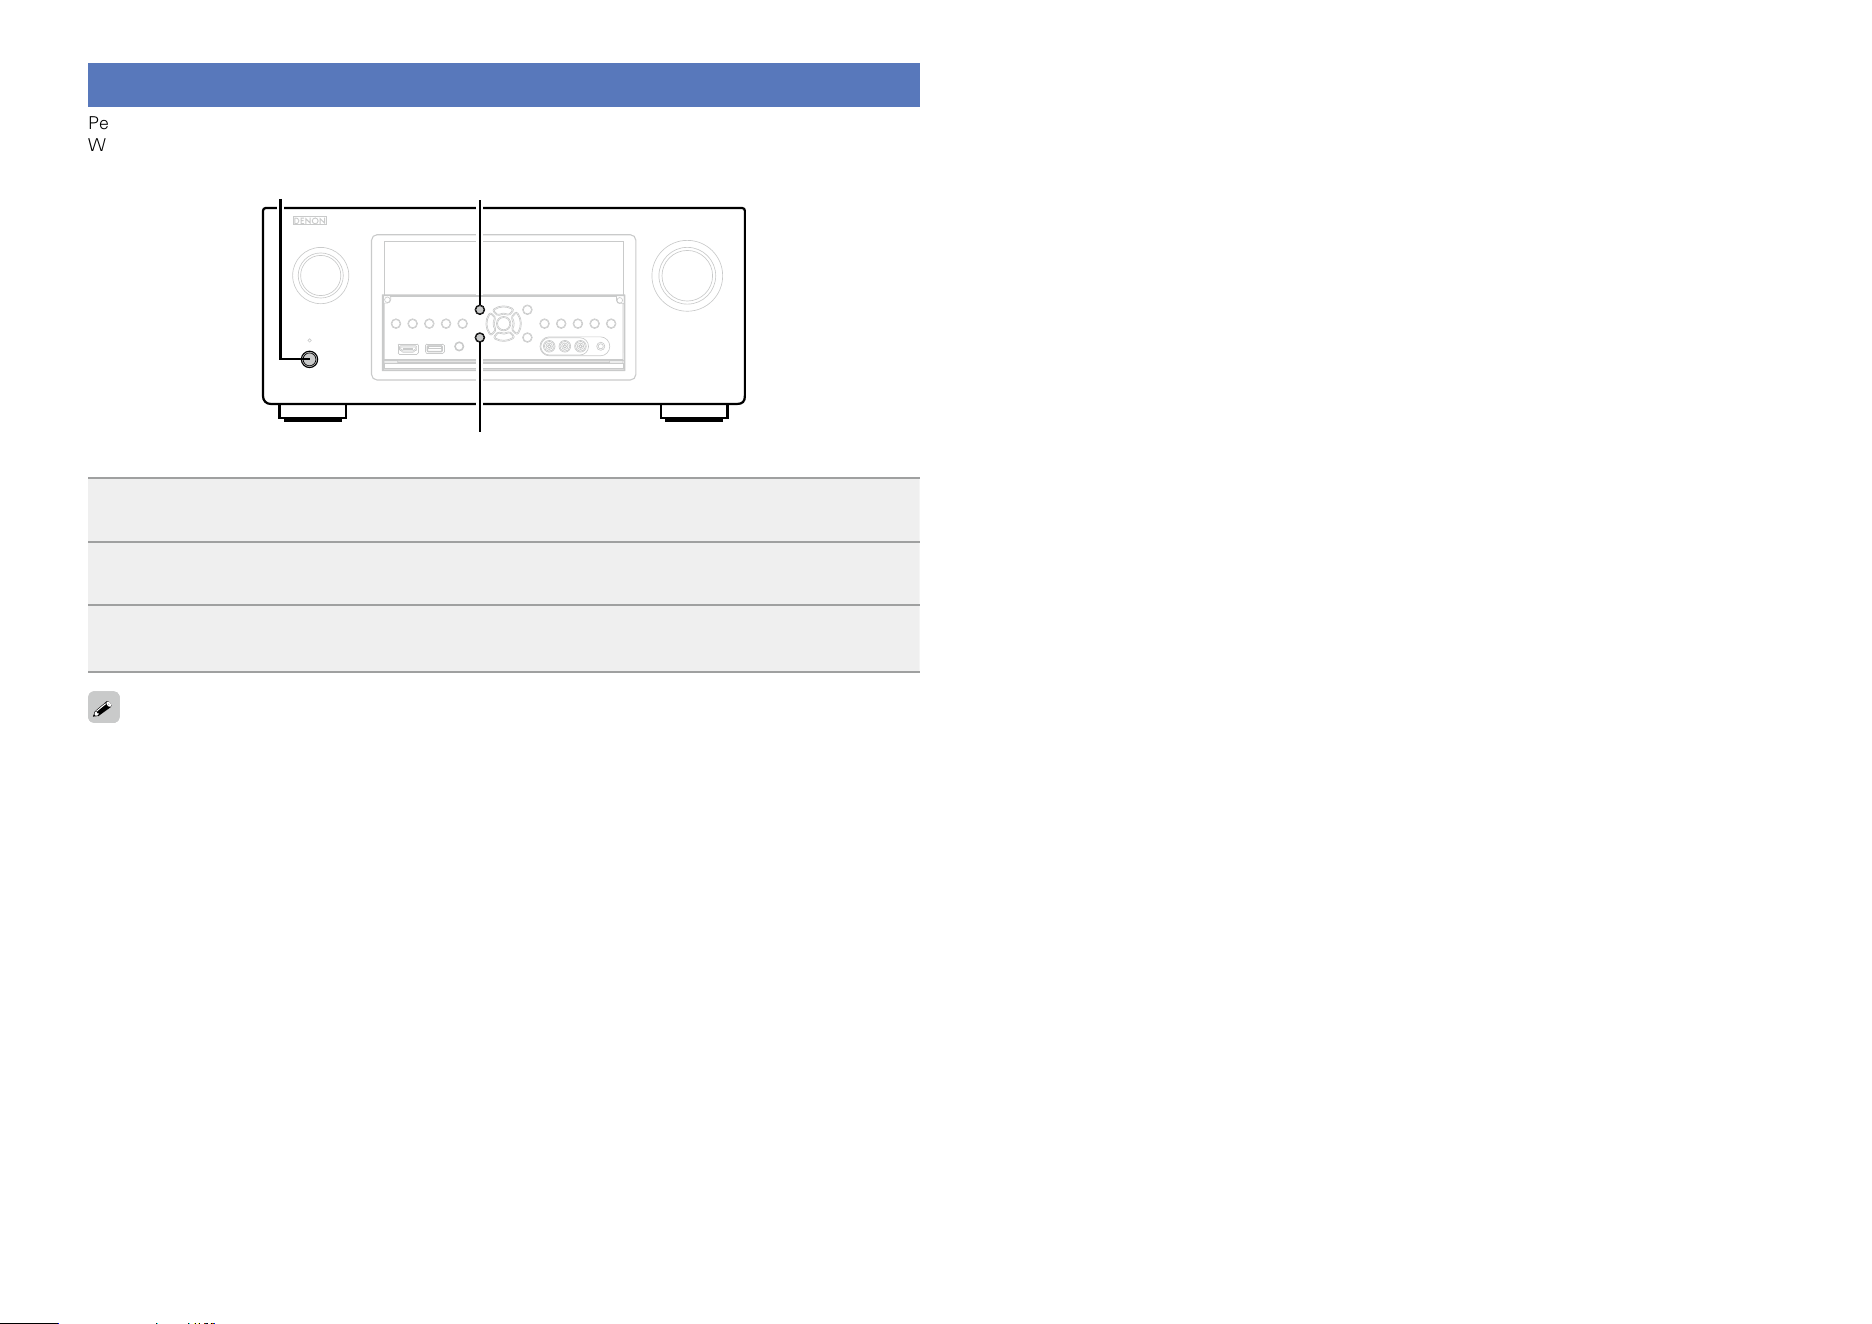
201
Resetting the microprocessor
Perform this procedure if the display is abnormal or if operations cannot be performed.
When the microprocessor is reset, all the settings are reset to their default values.
X
BACK
INFO
1
Turn off the power using X.
2
Press X while simultaneously pressing INFO and BACK.
3
Once the display starts ashing at intervals of about 1 second, release the two
buttons.
If in step 3 the display does not flash at intervals of about 1 second, start over from step 1.
Basic version
Advanced version
InformationsInformations
DVD

202
Specifications
n Audio section
•Power amplifier
Rated output: Front:
150 W + 150 W (8 Ω, 20 Hz – 20 kHz with 0.05 % T.H.D.)
190 W + 190 W (6 Ω, 1 kHz with 0.7 % T.H.D.)
Center:
150 W (8 Ω, 20 Hz – 20 kHz with 0.05 % T.H.D.)
190 W (6 Ω, 1 kHz with 0.7 % T.H.D.)
Surround:
150 W + 150 W (8 Ω, 20 Hz – 20 kHz with 0.05 % T.H.D.)
190 W + 190 W (6 Ω, 1 kHz with 0.7 % T.H.D.)
Surround back / Front height / Front wide:
150 W + 150 W (8 Ω, 20 Hz – 20 kHz with 0.05 % T.H.D.)
190 W + 190 W (6 Ω, 1 kHz with 0.7 % T.H.D.)
Dynamic power: 170 W x 2ch (8 Ω)
280 W x 2ch (4 Ω)
Output connectors: 4 – 16 Ω
•Analog
Input sensitivity/Input impedance: 200 mV/47 kΩ
Frequency response: 10 Hz – 100 kHz — +1, –3 dB (DIRECT mode)
S/N: 102 dB (IHF–A weighted, DIRECT mode)
Distortion: 0.005 % (20 Hz – 20 kHz) (DIRECT mode)
Rated output: 1.2 V
•Digital
D/A output: Rated output — 2 V (at 0 dB playback)
Total harmonic distortion — 0.008 % (1 kHz, at 0 dB)
S/N ratio — 102 dB
Dynamic range — 100 dB
Digital input: Format — Digital audio interface
•Phono equalizer (PHONO input — MEDIA PLAYER OUT)
Input sensitivity: 2.5 mV
RIAA deviation: ±1 dB (20 Hz – 20 kHz)
S/N: 74 dB (IHF–A weighted)
Rated output: 150 mV
Distortion factor: 0.03 % (1 kHz, 3 V)
n Video section
•Standard video connectors
Input/output level and impedance: 1 Vp-p, 75 Ω
Frequency response: 5 Hz – 10 MHz — 0, –3 dB (when “Video Conversion” set to “Off”)
•Color component video connector
Input/output level and impedance: Y signal — 1 Vp-p, 75 Ω
P
B / CB signal — 0.7 Vp-p, 75 Ω
P
R / CR signal — 0.7 Vp-p, 75 Ω
Frequency response: 5 Hz – 60 MHz — 0, –3 dB (when “Video Conversion” set to “Off”)
n Tuner section
(ANTENNA input – MEDIA PLAYER OUT)
[FM] [AM]
(Note: μV at 75 Ω, 0 dBf = 1 x 10
–15
W)
Receiving Range: 87.5 MHz – 107.9 MHz 530 kHz – 1710 kHz
Usable Sensitivity: 1.5 μV (14.8 dBf) 20 μV
S/N (IHF–A weighted): MONO 78 dB
STEREO 68 dB
HD 85 dB 85 dB
Distortion (1 kHz): MONO 0.1 %
STEREO 0.2 %
HD 0.02 % 0.02 %
n Switching hub
Standard IEEE 802.3 (10 Base-T)-compliant
IEEE 802.3u (100 Base-TX)-compliant
Number of ports 4 ports
n General
Power supply: AC 120 V, 60 Hz
Power consumption: 780 W
Power consumption in standby mode: 0.1 W
Power consumption in CEC standby
mode: 0.5 W
Power consumption in network
standby mode: 5.1 W
For purposes of improvement, specifications and design are subject to change without notice.
Basic version
Advanced version
InformationsInformations
DVD

203
v Numerics
2ch Playback ···················································· 145
3D ······································································· 13
4K ······································································· 13
v A
Accessories ·························································· 2
Add New Feature ············································· 155
Adjust EQ ························································· 127
Adjusting the master volume ····························· 42
Adobe RGB color / Adobe YCC601 color ········· 193
AirPlay ························································ 82, 193
AL32 Processing Multi Channel ······················· 193
All Zone Stereo Off ············································ 81
All Zone Stereo On ············································· 80
AM loop antenna ················································ 27
Amp Assign ······················································ 141
Analog Inputs ··················································· 137
Analog Video Out ············································· 132
App Store ························································· 193
ARC ···································································· 10
Aspect Ratio ····················································· 132
Audio ································································ 120
Audio Delay ······················································ 124
Audyssey ·························································· 125
Audyssey DSX
®
········································· 91, 126
Audyssey Dynamic EQ
®
·························· 125, 193
Audyssey Dynamic Surround Expansion ·········· 193
Audyssey Dynamic Volume
®
··················· 126, 193
Audyssey LFC™ ······································· 126, 193
Audyssey MultEQ
®
XT 32 ······················· 125, 193
Audyssey
®
Setup ········································ 33, 99
Auto Lip Sync ··········································· 129, 193
Auto Preset Memory ·········································· 54
Auto Standby ···················································· 153
v B
Bass ················································· 123, 144, 151
Bass Sync ················································· 121, 193
Bi-amp ································································ 95
Brightness ························································ 129
v C
Cable
Audio cable ······················································ 15
Coaxial digital cable·········································· 15
Component video cable ··································· 15
Ethernet cable·················································· 15
HDMI cable ················································ 11, 12
Optical cable ···················································· 15
Speaker cable ·················································· 93
Subwoofer cable ·············································· 93
Video cable ······················································ 15
Center Gain ······················································ 122
Center Width ···················································· 122
Channel ···························································· 151
Channel Indicators ············································ 153
Characters ························································ 118
Check Results ···················································· 40
Cinema EQ ······················································· 121
Condensation ······················································· 4
Connection
Blu-ray Disc player ····································· 12, 19
Cable TV··························································· 17
CD player ························································· 25
Denon Link HD ················································ 13
Digital camcorder ······································· 12, 21
DVD player ················································· 12, 18
EXTERNAL IN ·················································· 28
External power amplifier ·································· 29
Game console ············································ 12, 20
HDMI ································································· 9
HD Radio reception·········································· 27
Home network (LAN) ······································· 31
iPod (USB)························································ 23
Media player ·············································· 12, 22
Mobile ······························································ 12
Power cord ······················································ 32
Record player ··················································· 26
REMOTE CONTROL ········································ 30
RS-232C ··························································· 30
Satellite tuner··················································· 17
Set-top box ················································ 12, 17
Speaker ···························································· 93
TRIGGER OUT ················································· 30
TV······························································· 11, 16
USB memory device ········································ 23
Containment Amount ······································· 126
Content Type ······················································ 13
Contrast ···························································· 129
Control Monitor ················································ 130
Crossovers ······················································· 144
Curve Copy ······················································· 127
v D
Decode Mode ·················································· 138
Deep Color ················································· 14, 193
Delay Time ······················································· 122
Denon Link HD ····································· 13, 42, 193
Diagnostics ······················································· 149
Dialog Enhancer ··············································· 121
Digital Inputs ···················································· 137
Dimension ························································ 122
Dimmer ···························································· 153
Direct Tune ························································· 53
Display ······························································ 172
Distances ························································· 143
DLNA ································································ 193
Dolby
Dolby Digital············································· 88, 193
Dolby Digital EX ······································· 88, 193
Dolby Digital Plus ····································· 88, 193
Dolby Pro Logic II····································· 88, 193
Dolby Pro Logic IIx ··································· 88, 193
Dolby Pro Logic IIz ····························· 88, 91, 194
Dolby TrueHD ·········································· 88, 194
Downmix ·························································· 194
DTS ·································································· 194
DTS 96/24 ················································ 88, 194
DTS Digital Surround ····································· 194
DTS-ES Discrete 6.1 ································ 88, 194
DTS-ES Matrix 6.1 ··································· 88, 194
DTS Express ············································ 88, 194
DTS-HD ···················································· 88, 194
DTS-HD High Resolution Audio ····················· 194
DTS-HD Master Audio ··································· 194
DTS Neo:X ········································· 88, 91, 194
Dynamic Compression ····································· 121
Dynamic EQ ····················································· 125
Dynamic range ················································· 194
Dynamic Volume ·············································· 126
v E
Edit Name ························································ 147
Effect Level ······················································ 122
Enhancer ·················································· 121, 129
Error messages (Audyssey
®
Setup) ·················· 38
v F
Firmware ·························································· 154
FLAC ································································ 194
Flickr ····························································· 66, 67
FM indoor antenna ············································· 27
Format ······························································ 133
Friendly Name ·················································· 147
Front Display ···················································· 153
Front Height ····················································· 142
Front height speaker ···································· 92, 94
Front Panel ······················································· 170
Front Speaker ··················································· 145
Front Wide ······················································· 142
Front wide speaker ······································ 92, 94
v G
General ····························································· 150
Graphic EQ ······················································· 127
v H
HDCP ························································· 14, 195
HDMI ······················································ 9, 13, 195
HDMI Audio Out ·············································· 129
HDMI Control ··········································· 102, 130
HDMI Pass Through ········································· 130
HDMI Setup ····················································· 129
HDMI ZONE4 function ····································· 111
HD Radio reception ············································ 50
Headphones ····················································· 171
Height Gain ······················································ 123
Hide Sources ···················································· 137
High Pass Filter ················································ 151
Hue ··································································· 129
v I
Impedance ······················································· 145
Info ··································································· 133
Information ··············································· 147, 153
Audio······························································ 153
Firmware························································ 154
Video ······························································ 153
ZONE ····························································· 154
Input Assign ····················································· 135
Input Mode ······················································· 138
Inputs ······························································· 134
Input Select ······················································ 138
Input signal ······················································· 187
Inputting characters ········································· 118
InstaPrevue ······················································ 104
Internet Access ················································ 149
iPod Browse Mode ············································ 45
i/p Scaler ··························································· 131
iTunes ······························································· 195
Index
Basic version
Advanced version
InformationsInformations
DVD

204
v L
Language ·························································· 151
Lch Level ·························································· 151
Levels ······························································· 143
LFE ··································································· 195
Limit ································································· 124
Listening mode ·················································· 84
Listening position ··············································· 33
Lock ·································································· 156
Loudness Management ··································· 121
Low Frequency Effects ···································· 122
v M
Maintenance Mode ·········································· 149
MAIN ZONE ····················································· 195
Manual Setup ··················································· 141
Menu map ························································ 114
Mode ································································ 124
MP3 ·································································· 195
MPEG ······························································· 195
MultEQ
®
XT 32 ················································ 125
Mute Level ··············································· 124, 151
v N
Network ············································· 40, 146, 147
Noise Reduction ··············································· 129
Notifications ····················································· 155
Now Playing ····················································· 133
v O
On Screen Display ············································ 133
Output Settings ················································ 131
v P
Pandora
®
····················································· 66, 69
Panorama ························································· 122
Pass Through Source ······································· 130
Physical Connection ········································· 149
Picture Adjust ··················································· 129
Picture Mode ·············································· 80, 129
Playback
ALAC·························································· 47, 62
Blu-ray Disc player ··········································· 42
CD player ························································· 43
Denon Link HD ················································ 42
Direct ························································· 84, 89
DSD Direct ················································· 84, 89
DVD player ······················································· 42
FLAC ·························································· 47, 62
Flickr ································································ 67
HD Radio reception·········································· 51
Internet Radio ·················································· 59
iPod (USB)························································ 44
JPEG ·························································· 47, 62
MP3 ····················································· 47, 59, 62
MPEG-4 AAC ············································· 47, 62
NAS·································································· 62
Original listening mode ···································· 89
Pandora
®
························································· 69
PC ···································································· 62
Pure direct ················································· 84, 89
SiriusXM ·························································· 72
Spotify······························································ 74
Stereo ······························································ 89
Super Audio CD ··············································· 43
USB memory device ········································ 47
WAV··························································· 47, 62
WMA ··················································· 47, 59, 62
ZONE2/ZONE3/ZONE4 ·································· 113
Power Off Control ············································ 131
Power On Level ··············································· 124
Power On Volume ············································ 151
Preset codes ············································ 157, 205
Preset Memory ·················································· 55
Preset Name ······················································ 56
Preset Skip ························································· 57
Progressive ······················································ 195
Progressive Mode ············································ 132
Protection circuit ·············································· 195
v Q
Quick select ····················································· 106
Quick Select Names ········································· 152
v R
Random ························································ 46, 77
Rch Level ························································· 151
Rear panel ························································ 173
REC OUT mode ················································ 107
Reference Level Offset ···································· 125
Remote control unit ········································· 174
Inserting the batteries···································· 175
Learning function ··········································· 163
Macro function··············································· 165
Operating devices ·········································· 161
Operating external devices ···························· 160
Registering preset codes ······························· 157
Setting the back light ····································· 168
Remote ID ························································ 152
Remove from Favorites ······································ 79
Repeat ·························································· 46, 77
Resetting the microprocessor ·························· 201
Resolution ························································ 132
Restorer ··························································· 124
Room Size ························································ 122
Router Access ·················································· 149
v S
Sampling frequency ········································· 195
Saturation ························································· 129
Save to Favorites ················································ 78
Scale ································································· 124
Selecting the input source ································· 41
Settings ···························································· 148
Setup Lock ······················································· 156
SiriusXM ······················································· 66, 72
Sleep timer ··············································· 105, 113
Slideshow ··························································· 79
Slideshow Interval ·············································· 79
Sound Mode ··············································· 84, 184
Source Level ···················································· 137
Source Rename ················································ 137
Speaker
Connect ··························································· 93
Install ······························································· 91
Set up ························································ 33, 99
Speaker Config. ················································ 142
Speaker impedance ···································· 93, 195
Speakers ·························································· 139
Speaker Select ················································· 123
Speaker Selection ············································ 127
Spotify ·························································· 66, 74
Stage Height ···················································· 126
Stage Width ····················································· 126
Subwoofer ························································ 121
Subwoofer 1 Level ··········································· 121
Subwoofer 2 Level ··········································· 121
Subwoofer Level ·············································· 121
Subwoofer setting ·············································· 34
Surr. Back ························································· 142
Surround back speaker ································· 92, 94
Surround Parameter ········································· 121
SW Level Matching ············································ 39
sYCC601 color ·················································· 195
v T
Text Search ························································ 76
Tone ································································· 123
Tone Control ····················································· 123
Trademark ························································ 176
Treble ······················································· 123, 151
Trigger Out 1/2 ················································· 152
Troubleshooting ··············································· 196
Tune Mode ························································· 52
Turning off the sound temporarily ······················ 42
Turning the power on ········································· 41
TV Format ························································· 133
v U
Update ······························································ 154
USB Select ························································· 76
v V
Vertical Stretch ················································· 130
Video ································································ 128
Video conversion ·················································· 7
Video Conversion ············································· 131
Video Mode ······················································ 131
Video Output ···················································· 130
Video Select ····················································· 138
Video Source ···················································· 138
Volume ····················································· 124, 133
Volume Level ··················································· 151
Volume Limit ···················································· 151
vTuner ························································ 61, 195
v W
Web control ······················································ 108
Windows Media DRM ······································ 195
Windows Media Player ···································· 195
WMA ································································ 195
v X
x.v.Color ··························································· 195
v Z
ZONE ································································ 132
ZONE2 Setup ··················································· 151
ZONE2/ZONE3/ZONE4 ···················· 111, 172, 195
ZONE3 Setup ··················································· 151
Zone mode setting ······································· 34, 99
Zone Rename ··················································· 152
Basic version
Advanced version
InformationsInformations
DVD

205
AVR
D
Denon 73347
CBL/SAT group (0zzzz)
CBL
A
ABN 03322
ADB 01927, 02254
Alcatel-Lucent 02901
Amino 01602, 01481, 01822, 02482
Arion 03034, 03336
Arris 02187
AT&T 00858
au 03444, 03445, 03485, 03534
B
BBTV 02516, 02518, 02980
Bell 01998
BIG.BOX 03465
Bright House 01376, 01877
BSI 02979
BT 02294
C
C&M 02962, 02979, 03319, 03407
Cable Magico 03035
Cable One 01376, 01877
Cable&Wireless 01068
Cablecom 01582
Cablevision 01376, 01877, 03336
CCS 03322
Celrun 02959, 03196, 03442
Channel Master 03118
Charter 01376, 01877, 02187
Chunghwa 01917
Cisco
01877, 00858, 01982, 02345,
02378, 02563, 03028, 03265,
03294
CJ 03322
CJ Digital 02693, 02979
CJ HelloVision 03322
ClubInternet 02132
CMB 02979, 03389
CMBTV 03498
CNS 02350, 02980
Com Hem 00660, 01666, 02015, 02832
Comcast
01376, 00476, 01877, 01982,
02187
Coship 03318
Cox 01376, 01877
D
Daeryung 01877
DASAN 02683
Digeo 02187
Director 00476
DMT 03036
DSD 03340
DST 03389
DV 02979
E
Echostar 03452
Entone 02302
F
Freebox 01976
G
GBN 03407
GCS 03322
GDCATV 02980
Gehua 00476
General Instrument 00476
H
Hana TV 02681, 02881, 02959
Handan 03524
HCN 02979, 03340
HDT 02959, 03465
Hello TV 03322
HelloD 02979
Hi-DTV 03500
Hikari TV 03237
Homecast 02977, 02979, 03389
Huawei 01991
Humax
00660, 01981, 01983, 02165,
02620, 02683, 02701, 02832,
02881, 02962, 03051, 03053
HYA 02989
Hyroad 02979
I
I-Digital 03319, 03499
i3 Micro 01602
Insight 01376, 01877
ITV 02979, 03389
J
J:COM
02700, 02701, 02703, 02752,
03051, 03053
JCN 03491
Jerrold 00476
Jiuzhou 01991
K
Kabel Deutschland 01981, 01983
KabelBW 01981, 01983, 02174
Kaon 02979, 03389, 03407
kbro 02350
KCN 02979, 03389
KCTV 02979, 03340
KCTV JEJU 02979, 03356
KCTV-KJ 03500
KDDI 03444, 03445, 03485, 03534
KDMC 02979
Kiryung 03498
Kiss 02132
Knology 01877
KoolConnect 01481
KT 02683, 03478
L
LG
02692, 02979, 03196, 03340,
03389, 03406, 03407, 03500
LG U+ 02682, 03196
M
Mediacom 01376, 01877
Mega 02683
Mega TV 02683
Minerva Networks 03118
MIO 02275, 02802
mio TV 02275, 02802
Mitsubishi 03274, 03444, 03485
Motorola
01376, 00476, 00858, 01562,
01982, 01998, 02275, 02378,
03445, 03534
MovieLink 03276
Moxi 02187
MTS 01998
MyLGTV 02682
Myrio 01602, 01822
N
Neuf TV 03107
NIB 03322
Now TV 02014
NTL 01068, 01060
NTT 03237, 03274
Nuevo Siglo 03524
O
Oi TV 03452, 03454
OllehTV 02683, 03478
Ono 01068, 01562
Optus 01060
Orange 02407
P
Pace
01376, 01877, 01068, 01060,
01982, 02620, 03454
Panasonic
01982, 02703, 02752, 03474,
03475
Philips 01582, 02174, 02294
Pioneer 01877, 02700
Pirelli 02944
Premiere 02620
Prime 03033
PX 03348
Q
Qook TV 02683
Qrix 02979, 03465
Qtel 01822
R
RCN 01376, 00476
Rogers 01877
S
Sagem 02407
Samsung
01877, 01060, 01666, 01987,
02015, 02174, 02407, 02610,
02683, 02962, 02979, 03319,
03322, 03340, 03407, 03491
Sasktel 01998
SBC 03406
Scientific Atlanta
01877, 00858, 01982, 01987,
02132, 02345, 03028
SCS 03500
SCV 02950
Sejin 01602
Seokyung 03340
SetaBox 01917
SFR 03107
Sharp 03349
Shaw 01376, 02187
SingTel 01998, 02275, 02802
SK Broadband 02959, 03442
SK BTV 03442
SKBtv 02681, 02881, 02959
SKY 02620
SKY Deutschland 02174, 02620
SkyCable
02893, 02950, 03241, 03318,
03521
Skyworth 01991, 02893, 03521
SMtronics 03319
StarHub 01927
Stofa 02015
Suddenlink 01376, 01877
SureWest 01481, 01998
Suwon Cable 03319
T
T-Home 02132
Tbroad 03319
TCN 03340
Technotrend 03035
Telefonica
02901, 02944, 03028, 03033,
03034, 03035, 03036
Telenet 01920
Telewest 01068, 01987
Telus 02345
TFN 03127, 03139
Thomson
01582, 01981, 01982, 01983,
02174, 02407
Time Warner 01376, 01877, 02187
ToongTV 03322
Topfield 02981
TopTV 01991
Topway 01991
TP 02407
True Visions 03075
U
U+ 03196
Unihan 02453
Unitymedia 02610
UPC 01582
V
VeeTV 03231
Verizon 02378
Vidéotron 01877
Virgin Media
01068, 01060, 01987, 02563,
03265
VTR 01376
W
Welho 02832
WideOpenWest 01877
WNC 03118
Y
YBN 03322
Yuxing 02014
Z
Zhong Hua Dian Xin 01917
Ziggo 00660, 01666, 02015
ZyXEL 02944
CBL/PVR Combination
A
Amino 01822
Arion 03336
Arris 02187
au 03444
B
BBTV 02980
Bright House 01376, 01877
C
C&M 02962, 03407
Cable One 01376, 01877
Cablecom 01582
Cablevision 01376, 01877, 03336
CCS 03322
Celrun 03442
Charter 01376, 01877, 02187
Cisco 01877, 01982, 03265
CJ HelloVision 03322
Com Hem 02832
Comcast 01376, 01877, 01982, 02187
Cox 01376, 01877
D
Digeo 02187
F
Freebox 01976
G
GCS 03322
H
Hana TV 02959
Handan 03524
Hello TV 03322
Humax
01981, 01983, 02165, 02620,
02832, 02962, 03051, 03053
I
I-Digital 03499
Insight 01376, 01877
J
J:COM 02700, 02703, 03051, 03053
K
kbro 02350
KDDI 03444
Knology 01877
M
Mediacom 01376, 01877
Mitsubishi 03444
Motorola 01376
Moxi 02187
Myrio 01822
List of preset codes
Basic version
Advanced version
InformationsInformations
DVD

206
N
Nuevo Siglo 03524
P
Pace 01877, 02620
Panasonic 01982, 02703
Philips 01582
Pioneer 01877, 02700
R
Rogers 01877
S
Samsung 01877, 01987, 03407
Scientific Atlanta 01877, 01982, 01987
Shaw 01376, 02187
SK Broadband 03442
SK BTV 03442
SKY 02620
SKY Deutschland 02620
SkyCable 03241, 03521
Skyworth 03521
StarHub 01927
Suddenlink 01376, 01877
T
Telenet 01920
Telewest 01987
Thomson 01582
Time Warner 01376, 01877, 02187
ToongTV 03322
Topfield 02981
True Visions 03075
U
UPC 01582
V
Vidéotron 01877
Virgin Media 01987, 02563, 03265
VTR 01376
W
Welho 02832
WideOpenWest 01877
Y
YBN 03322
IP TV
A
ADB 02254
Alcatel-Lucent 02901
Amino 01481, 02482
AT&T 00858
au 03445, 03485, 03534
B
BBTV 02516, 02518, 02980
Bell 01998
BT 02294
C
Celrun 02959, 03196, 03442
Channel Master 03118
Chunghwa 01917
Cisco 00858, 02345, 02378, 03028
ClubInternet 02132
CNS 02980
D
DASAN 02683
E
Echostar 03452
Entone 02302
G
GDCATV 02980
H
Hana TV 02681, 02959
HDT 02959
Humax 02683
K
KDDI 03445, 03485, 03534
Kiss 02132
KoolConnect 01481
KT 02683
L
LG 03196
LG U+ 02682, 03196
M
Mega 02683
Mega TV 02683
Minerva Networks 03118
MIO 02275, 02802
mio TV 02275, 02802
Mitsubishi 03274, 03485
Motorola
01376, 00476, 00858, 01998,
02275, 02378, 03445, 03534
MTS 01998
MyLGTV 02682
N
Neuf TV 03107
Now TV 02014
NTT 03237, 03274
O
Oi TV 03452, 03454
OllehTV 02683
Orange 02407
P
Pace 03454
Philips 02174
Pirelli 02944
Q
Qook TV 02683
Qtel 01822
S
Sagem 02407
Samsung 02174, 02407, 02683
Sasktel 01998
Scientific Atlanta 00858, 02345, 03028
SetaBox 01917
SFR 03107
SingTel 01998, 02275, 02802
SK Broadband 02959, 03442
SK BTV 03442
SKBtv 02681, 02959
SKY Deutschland 02620
Skyworth 02893
SureWest 01481, 01998
T
T-Home 02132
Telefonica 02901, 02944, 03028
Telus 02345
Thomson 02174, 02407
U
U+ 03196
Unihan 02453
V
Verizon 02378
W
WNC 03118
Y
Yuxing 02014
Z
Zhong Hua Dian Xin 01917
ZyXEL 02944
SAT
@sat 01300
@Sky 01334
A
ABsat 00713
Acoustic Solutions 01284
ADB 00887, 01887
AEG 02738, 02813
Agora 01284
Airis 01993
Akura 01626
Alba 00713, 01284, 02034
Alltech 00713
Allvision 01334
Altech UEC 02059
Amitronica 00713
Amstrad
00847, 01175, 00713, 01662,
01693
Anglo 00713
Ankaro 00713
Ansonic 02418
Apro 01672
Arena 01736
Arnion 01300
ASA 00740
ASCI 01334
ASLF 00713
AssCom 00853
Astra 00713
Astrell 01986, 02418
Astro
00173, 00658, 01099, 01100,
01836, 02026, 02627
Atlanta 02418
Atom 02289
Audiola 02418
Audioline 01672
Aurora 00879
Austar 00879
Auvisio 02531
Avanit 01631
Awa 02418
Axil 01413, 01777, 01993, 02418
Axitronic 01626
B
B.net 01672
B@ytronic 00740
Bell 00775
Belson 02418
Best Buy 01993, 02728
Black Diamond 01284
Blaupunkt 00173
Blue Sky 00713
Boca
00713, 02026, 02308, 02458,
02797, 02813
Boshmann 01413, 01631
Boxer 01692, 01957
Brainwave 00658, 01672
Broco 00713
BskyB 00847, 01175, 01662, 01693
Bubu Sat 00713
Bush
01284, 01291, 01626, 01672,
01935, 01993, 02034, 02376,
02418, 02813
C
Canal Digital 00853, 01334, 01780
Canal+ 00853, 02657
CanalSat 00853, 02657
CDV 01993
Century 00856
CGV 01413, 01567, 02034
Chess 00713, 01334, 01626, 02026
Cignal 02289, 03128
CityCom 00299, 00658, 01176
Classic 01672
Clatronic 01413, 02738
Clayton 01626
CMX 02205
Cobra 02531
Com Hem 01176, 01915, 02357
Comag
01413, 01886, 02026, 02308,
02458, 02797, 02813
Comsat 01413
Comwell 01956
Coomax 02531
Coship 01672
Croner 02813
Crown 01284
CS 01631
Cyfra+ 01409
Cyfrowy Polsat 00853, 02262, 02527
D
D-box 00723, 01114
Daewoo 00713
DAK 01993
Dantax 01626
DASAN 03321
Denver 02418
Dgtec 01631, 02418
Di-Way 02289
Dicra 02738
Digenius 00299
Digi 02026
Digiality 01334
DigiCrystal 02978
Digihome 01284, 01935, 02034
DigiLogic 01284, 02034, 02241
DigiMax 02273
DigiQuest 01300, 01631, 02278, 02738
Digital 02273, 02308
DigitalBox 01100, 01631, 01886, 02289
Digiwave 01631
Dikom 02531
Dilog 01780, 01957
DiPro 02278
DirecTV
01377, 00392, 00566, 00099,
03377
Dish Network 00775
Dishpro 00775
DishTV 01300, 01780
Diunamai 02531
DMT 03321
Doro 01672
DRE 01176
Dream Multimedia 01237, 01652, 01923
DSE 02418, 02813
DSTV 00879
Dual 02034
Durabrand 01284, 02034, 02241
DVX 01993
Dyon 02738, 02813
E
Echostar
00775, 00853, 00713, 01323,
01409, 02262, 02272, 02527
Eco-Star 01413
Edision 01631, 02306, 02712
Ei8ht 02978
Einhell 00713
Elap 00713, 01413, 01567
Elbe 02418
Electron 01956
Elisa 01322
Elless 00740
Elsat 00713
Embratel 02796
Energy Sistem 01631, 02289, 02418
Engel 00713, 01993
Etisalat 02443
Europhon 00299, 00713, 01334
Europsat 01413, 01611
Eurosat 01886
Eurosky 00299, 00740
Eutelsat 00713
Eutra 00740
Evesham
Technology
02034
F
Fagor 01611
Fenner 00713
Ferguson 01291, 01935
Finepass 01780
Finlux 01626
Basic version
Advanced version
InformationsInformations
DVD

207
FinnSat 00740, 01195, 01197
Flair Mate 00713
FMD 01413
Fortec Star 01631
Foxtel 00879, 01176, 01356
Fracarro 00713
Freesat 02376
Freesat+ 02443
freeview 02982
Fte Maximal 00713, 01886
Fuba 00173, 00299, 02750
Fuji Onkyo 01631, 02728
G
Galaxis 00853, 00879
Galaxy 01956
GE 00566
General Instrument 00869
General Satellite 01176
Globo
00740, 01334, 01429, 01626,
02026, 02273
GoGen 02738
GOI 00775
Gold Box 00853
Gold Vision 01631
GoldMaster 01334, 01722
Goodmans 01284, 01291, 02034, 02376
Gradiente 00856, 00099, 00887
Gran Prix 00740
Grandin 01626
Grocos 01409
Grundig
00847, 00853, 00173, 00879,
01284, 01291, 01672, 01780,
02034, 02376
H
Haier 02418
Hailo 02289
Hallo 01626
Hama 01567
Handan 01780, 01957
Hanseatic 01099, 01100
Hauppauge 01672
HB 01736
HDT 01255, 03321
Hiro 01886
Hirschmann
00173, 00299, 00740, 01886,
02026
Hitachi 01284, 02034
Homecast 01736
Hornet 01300
HTS 00775
Hughes Network
Systems
01377
Humax
01377, 03321, 02736, 02443,
02408, 02357, 02289, 02144,
01989, 01915, 01882, 01808,
01788, 01675, 01427, 01255,
01176
I
i-Box 01652
ID Digital 01176
ID Sat 01334, 02289
Illusion 01631
Imperial
01195, 01197, 01334, 01429,
01672
Indovision
00856, 00887, 01255, 01887,
01989
iNETBOX 01237, 01652
Inno Hit 01626
Innova 00099
Inves 01993
inVion 02418
iotronic 01413
IQ 02813
ISkyB 00887
ITT 02418
ITT Nokia 00723
J
J-Point 01836
Jaeger 01334
Jerrold 00869
Jiuzhou 03140
JVC 00775
K
K-SAT 00713
KabelBW 01195, 01197, 01882, 01915
Kamm 00713
Kaon 01300, 02697
Kathrein
00173, 00658, 00713, 01561,
01567, 02263, 02569
Kenwood 00853
König 01567, 01631, 02289
Koscom 01956
KPN 01986
Kreiling 00658, 01626
Kreiselmeyer 00173
KT 03321
L
L&S Electronic 01334
LaSAT 00173, 00299, 00740
Lauson 02531
Lava 01631
Leiko 01626
Lemon 01334
Lenco 00713
Lenoxx 01611
LG 03193, 03321
Lifesat 00299, 00713
Linsar 01284
Listo 01626
Lodos 01284
Logik 01284, 02034
LogiSat 02797, 02813
Lorenzen 00299
Luxor 01935, 02034
M
Macab 00853
Magic TV 02982
Majestic 02738
Manata 00713
Manhattan 01300
Maplin 02034
Marusys 02799
Maspro 00173, 00713
Matsui 00173, 01284, 01626
Maxell 03438
Maximum 01334, 01672, 01986, 02813
Mediabox 00853
Mediacom 01206
MediaSat 00853
Mediaset 02750
Medion
00299, 00713, 00740, 01334,
01626, 02026, 02797
Medison 00713
Mega TV 03321
MegaSat 01631, 01886, 02289, 02813
Metronic
00713, 01334, 01413, 01631,
01986, 02418, 02738
Metz 00173
MiCO 01993
Micro 00713, 02797, 02813
Micro electronic 00713, 02308, 02813
Micro Technology 00713
Micromaxx 00299
Microstar 00299
Microtec 00713
Morgan's 00713, 02026
Motorola 00869, 00856, 03469
Movistar
02262, 02263, 02272, 02527,
02761, 03029
Multichoice 00879, 02059, 02060
myfreeviewHD 02982
Mysat 00713
N
Neom 01993
NEOTION 01334
NET 02262
Netgem 01322
Netsat 00099, 00887
Neuf TV 01322
Neuhaus 00713
Neuling 02458
Neusat 00713
Next Level 00869
Nextvision 01956
NextWave 01956
Nikkai 01993
Nikko 00723, 00713
Nilox 02278
Nokia 00853, 00723, 01023
Nordmende 01611
NPG 01631, 02289, 02531
O
Olleh-Skylife 03321
OllehTV 03321
Omni 01993
Onn 01284, 02034, 02241
Openbox 01956
Opensat 01956
Optex 00713, 01413, 01611, 01626
Opticum 02273
Optus 00879, 01356
Orbis 01334
Orbitech 01099, 01100, 01195, 01197
Orton 02273
P
Pace
00847, 00853, 00887, 01175,
03482, 03469, 03111, 02796,
02657, 02060, 02059, 01887,
01693, 01682, 01662, 01356,
01323
Pacific 01284
Palcom 00299, 01409, 01611
Panasat 00879
Panasonic
00847, 01304, 03239, 03484,
03939
Panda 00173
Pass 01567
peeKTon 01993, 02418
Philips
00856, 00099, 00853, 00173,
01114, 00887, 01499, 01672,
01836, 02176, 02619, 03469
Phoenix 01956, 02418
Phonotrend 01780
Pino 01334
Pioneer 00853
Pixel Magic 02982
Pixela 03409
PLDT 02836
PMB 00713, 01611
Premium 01736
Pro Basic 00853, 02205, 02531
Proline 01284
Proscan 00392, 00566
Q
Qook TV 03321
Qook-SkyLife 03321
Quelle 00299
R
RadioShack 00869
Radix 01255
RCA 00392, 00566, 00855, 01291
RiksTV 01692
Roadstar 00853, 00713
Rollmaster 01413
Ross 02540
Rover 00713
Rownsonic 01567
S
SAB 01300, 01631, 01956
Saba 00740, 02205
Sagem 01114, 01690, 01692, 03029
Sagemcom 01692
Saivod 02418
Samsung
01377, 00853, 01175, 01206,
01255, 01662, 01682, 03321
Sansui 01545
Sanyo 01626, 03436, 03437
Sat Control 01300
Sat Industrie 01611
Sat Team 00713
SAT+ 01409
SatCatcher 01956
Satec 00713
Satlink 02273
Satplus 01100
SatyCon 01631
Schaub Lorenz 02034, 02418
Schneider 01206
Schwaiger
00740, 01334, 01429, 01631,
01672, 02308, 02458, 02797,
02813
Scientific Atlanta 01980
SCS 00299, 00740
Sedea Electronique 01206, 01626
Seeltech 01993
SEG 01284, 01626, 01993, 02034
Servimat 01611
ServiSat 00713
Set-One 02728
Shark 01631
Sharp 01935, 02034
Shaw Direct 00869
Sherwood 01409
Siemens
00173, 01334, 01429, 01626,
01657, 01672, 02418
Sigmatek 02418, 02813
SignalMAX 01956
Silva 00299
Silva Schneider 00740
SilverCrest 02026, 02308, 02458
Skantin 00713
SKR 00713
SKY
00856, 00099, 00847, 00887,
01175, 01358, 01499, 01662,
01693, 02619, 03469, 03482
Sky Brasil
00856, 00887, 01358, 01499,
02619, 03111
SKY Deutschland 00723, 01429, 02176
SKY Italia 00853, 01356, 01693
SKY Mexico
00856, 00887, 01358, 02619,
03469, 03482
SKY PerfecTV! 02299, 03049, 03484, 03939
SkyCable 01631, 01957
Basic version
Advanced version
InformationsInformations
DVD

208
SkyLife 01255, 03321
Skymaster
00713, 01334, 01409, 01545,
01567, 01611, 02205, 02241,
02409, 02728
Skymax 01413
Skypex 00740
Skyplus 01175, 00740, 01334, 02026
SkySat 00713, 01100
Skyvision 01334, 02797
Skyworth 01631
SL 00299, 00740, 01672, 02026
SM Electronic 00713, 01409
Smart 00713, 01413, 01631, 02289
Sony
00847, 00853, 01558, 02299,
03049, 03446, 03448
Star 00887
Star Choice 00869
Starland 00713
Stream System 01300
Strong
00853, 00879, 00713, 01284,
01300, 01409, 01626, 02235,
02418, 02813
Sunny 01300
Sunsat 00713
Sunstech 01993, 02738
Supernova 00887
Supratech 01413, 01993
Systec 01334
Sytech 02418
T
Tatung 03117
TBoston 02418
Teac 01322, 01957, 02813
Technical 01626
Technicolor 03469
Technika 01284, 01672, 02034
TechniSat
01099, 01100, 01195, 01197,
01322
Technoit 02278
Technosat 01206
Technosonic 01672
Technotrend 01429, 01672, 02263
Techwood 01284, 01626, 01935, 02034
TELE System 01409, 01611, 02750, 02813
Telefonica
01692, 02262, 02263, 02272,
02527, 02761, 03029
Telestar
01099, 01100, 01195, 01197,
01334, 01626, 01672, 02540
Televes 01300, 01334
Televisa 00887
Telsey 02738
TelSKY 02540
Tevion
00713, 01409, 01672, 01993,
02026, 02205, 02813
Thomson
00392, 00847, 00853, 01175,
00713, 01291, 01662, 01935,
02176, 02619, 03469
Tiny 01672
Titan 01886, 02205
Tividi 01429, 01736
TNT SAT 01692
Tonna 00713, 01611, 02458
Topfield
01206, 01545, 01722, 01783,
01824, 01986
Toshiba 01284, 01429
Transparent Video
Systems
01780, 01957
Triax
00853, 00713, 01291, 01413,
01611, 01626, 01631, 01886,
02026
Tricolor TV 01176
True Visions 02408, 03140
TT-micro 01429
Turnsat 00713
TVB 01989
TWF 01993
Twinner 00713, 01611
U
UEC 00879, 01356, 01358
United 01626, 02278, 02418
Unitymedia 01429, 01882
Univers 01886
Universum 00173, 00299, 00740, 01099
Unixbox 01652
V
Vantage 02297
Vaova 01993
Variosat 00173
VEA 02418
Vestel 01284, 02034
VH Sat 00299
Via Embratel 02796
Viasat 01195, 01197, 01682, 02235
Viola Digital 01672
Vision 01626, 01886
Visiosat 00713, 01413
Vitecom 01413, 02531
Viva 00856
Vivax 02418
Volcasat 02418
Voom 00869
Vu+ 02799
W
Wavelength 01413
Welho 02357
Wharfedale 01284, 01935, 02034
Winix 02278
Wintel 00299
Wisi 00173, 00299, 00740, 01986
Woxter 02418, 02813
X
Xoro 02738, 02813
Xsat 00847, 00713, 01323
Xtreme 01300
Y
Yakumo 01413
Yamada 01993
Yes 00887, 01887
Yess 02978
Z
ZapMaster 00740
Zehnder
00740, 01334, 01413, 01631,
01777, 02034, 02289
Zenith 00856, 03469
Ziggo 01499, 01657, 02443
Zinwell 02761
CBL/SAT/PVR Combination
C
Com Hem 01176, 02357
F
Foxtel 01356
H
Handan 01957
Humax 01176, 02357, 02443
K
Kaon 01300
Kathrein 01561, 02569
P
Pace 01356
S
Siemens 01657
T
TechniSat 01195, 01197
Topfield 01545, 01783
V
Vantage 02297
W
Welho 02357
Z
Ziggo 01657, 02443
SAT - IP TV
D
DMT 03321
K
KT 03321
L
LG 03321
O
Olleh-Skylife 03321
OllehTV 03321
Q
Qook-SkyLife 03321
S
SkyLife 03321
SAT/PVR Combination
@sat 01300
A
AEG 02738, 02813
Amstrad 01175, 01662, 01693
B
B@ytronic 00740
Bell 00775
Boca 02308, 02797, 02813
Boxer 01957
BskyB 01175, 01662, 01693
C
Canal+ 02657
CanalSat 02657
Comag 02308, 02797, 02813
Cyfrowy Polsat 02527
D
Digihome 02034
DigiQuest 01300
Digital 02308
Dilog 01957
DirecTV 01377, 00392, 00099, 03377
Dish Network 00775
Dishpro 00775
Dream Multimedia 01237, 01923
Dyon 02738, 02813
E
Echostar 00775, 02272, 02527
Edision 01631, 02712
Embratel 02796
Etisalat 02443
Eurosky 00740
F
Foxtel 01356
Freesat+ 02443
Fuji Onkyo 01631
G
Goodmans 02034
H
Handan 01957
Hirschmann 00740
Hitachi 02034
Humax
01377, 01176, 01427, 01675,
01788, 01808, 02357, 02443
I
ID Sat 01334
iNETBOX 01237
J
JVC 00775
K
Kaon 01300
Kathrein 00658, 01561, 02569
L
LaSAT 00740
LogiSat 02797, 02813
Luxor 01935
M
Marusys 02799
Maxell 03438
Maximum 01334, 02813
Mediacom 01206
Medion 00740, 02797
MegaSat 01631, 02813
Micro 02797, 02813
Micro electronic 02308
Motorola 00869
Movistar 02272, 02527, 03029
Multichoice 02059, 02060
N
NEOTION 01334
Nokia 01023
O
Omni 01993
Orbitech 01195, 01197
P
Pace
01175, 01356, 01662, 01682,
01693, 02059, 02060, 02657,
02796
Panasonic 01304, 03484, 03939
Philips 00099
Proscan 00392
R
Ross 02540
S
Sagem 01692, 03029
Samsung
01377, 01175, 01206, 01662,
01682
Sansui 01545
Sanyo 03436, 03437
Sat Control 01300
Schneider 01206
Schwaiger 00740, 02308
Sedea Electronique 01206
SEG 02034
Sharp 01935, 02034
Shaw Direct 00869
Siemens 01657
SilverCrest 02308
SKY 01175, 01358, 01662, 01693
Sky Brasil 01358
SKY Italia 01356, 01693
SKY PerfecTV! 02299, 03484, 03939
SkyCable 01631, 01957
Skymaster 01545
Skypex 00740
Skyplus 01175, 00740, 01334
Skyvision 02797
Skyworth 01631
SL 00740
Smart 01631
Sony 02299
Star Choice 00869
Stream System 01300
Strong 01300, 02813
Sunny 01300
T
Tatung 03117
Teac 01957
TechniSat 01195, 01197
Technosat 01206
Telefonica 01692, 02272, 02527, 03029
Telestar 01195, 01197, 02540
TelSKY 02540
Thomson 01175, 01662, 01935
TNT SAT 01692
Topfield 01206, 01545, 01783, 01824
U
UEC 01358
V
Vantage 02297
Via Embratel 02796
Viasat 01195, 01197, 01682
Vu+ 02799
W
Wisi 00740
X
Xoro 02738, 02813
Xtreme 01300
Y
Yamada 01993
Z
Zehnder 00740, 01777, 02034
Basic version
Advanced version
InformationsInformations
DVD

209
MEDIA PLAYER /
Video - Accessory
A
A.C.Ryan 02709
ABS 01272
Acer 01272
Alienware 01272
Apple 02615
Asus 02987
C
Claritas 01272
CyberPower 01272
D
Daily Media 01272
Digitech 02260
E
Elonex 01272
Eminent 02260
Emtec 02709
F
Fantec 02709
Fujitsu Siemens 01272
G
Gateway 01272
H
Hewlett Packard 01272
hFX 01272
Howard Computers 01272
Hush 01272
I
iBUYPOWER 01272
iconBIT 02709
ISTAR 02260
L
LaCie 03345
LG 03373
Linksys 01272
M
Magnavox 03339
Mede8er 02709
Media Center PC 01272
Microsoft 01272, 01805
Mind 01272
N
Netgear 03292, 03324
Niveus Media 01272
Northgate 01272
P
Packard Bell 01272
Patriot 03307
Philips 01272, 03526
PopBox 02260
Popcorn Hour 02260
R
RCA 03335
Ricavision 01272
Roku 02371, 03061
S
Samsung 01967
Seagate 02698
Sony 01272, 02713
Stack 9 01272
Systemax 01272
T
Tagar Systems 01272
Tec 03522
Toshiba 01272
Touch 01272
Trust 01272
V
VIA Technologies 01272
Viewsonic 01272
Voodoo 01272
W
Western Digital 02558
Woxter 02709
X
Xbox 01272, 01805
Y
Yamaha 02865
Z
ZT Group 01272
TV group (1zzzz)
TV
888 10264
A
A.R. Systems 10556, 10037
Accent 10037
Acer 11339
Acoustic Solutions
11037, 11523, 11667, 11865,
12676
Action 10650
Addison 10653, 10108, 10092, 11150
Admiral
10093, 10463, 10264, 10179,
13485
AEG
11037, 11163, 11324, 11556,
12197
Agashi 10264
Aiko 10037, 10264, 10092
Aim 10706, 10037
Aiwa 11910, 11916
Akai
10812, 10702, 10765, 10178,
10030, 10556, 10037, 10548,
10714, 10264, 10208, 11326,
11413, 11675, 11865, 12414,
12676, 13183
Akiba 10037
Akira 11243, 12241
Akito 10037
Akura
10171, 10037, 10714, 10668,
11037, 10264, 11363, 11498,
11556, 11585, 11667, 11687,
11770, 11983
Alaron 10179
Alba
10037, 10714, 10668, 11037,
10036, 10587, 10443, 10474,
11585, 11865, 12104, 12676
Alien 11037
Allstar 10037
America Action 10180
Amstrad 10171, 10037, 11037, 10264
Anam 10250, 10180, 10037, 10650
Andersson 11163, 11585
Anglo 10264
Anhua 10051
Anitech 10037, 10264, 10474
Ansonic 10037, 10668
AOC
10093, 10180, 10178, 10030,
10625, 10108, 10092, 10179,
10474, 11150, 11365, 11589,
12014, 12087, 12214, 12621
Aolinpike 10264
Apex Digital 10765, 10767, 12397
Ardem 10037, 10714
Arena 10037
Aristona 10556, 10037
ART 11037
Art Mito 11585
ASA 10179
Asberg 10037
Astra 10037
Asuka 10264
Asus 12175, 13340
ATD 10698
Atlantic 10037
Audinac 10180
Audiosonic
10037, 10714, 10264, 11675,
11983, 12104
Audioton 10264
Audiovox
10180, 10092, 11276, 11564,
11865, 11937, 12121, 12513
Audioworld 10698
Auria 12087, 12277
Aventura 10171
Awa 10264, 10036, 10108, 12241
Axion 11937
Axxon 10714
B
Baihe 10264
Baile 10661
Baird 10208
Bang & Olufsen 10620
Baohuashi 10264
Barco 10556
Basic Line
10556, 10037, 10668, 11037,
11163
Baur 10037, 10195, 10512
Baysonic 10463, 10180
BBK 11523
Beaumark 10178
Beijing 10812, 10264, 10208, 10661
Beko
10037, 10714, 10808, 11652,
12125
Bell & Howell 10017
Belson 10698, 12032, 12241
Belstar 11037
BenQ 11523, 11756, 12449, 12730
Bensten 11326
Beon 10037
Berkshire 10047
Berthen 10556, 10668
Bestar 10037
Bestwell 11326
Bexa 12493
BGH 10898
Black Diamond 11037, 10587, 11163
Blaupunkt 10195, 10036
Blue Sky
10556, 10037, 10625, 10714,
10668, 11037, 10624, 11243,
11314, 11324, 11363, 11652,
11916, 12153
BlueH 11745
Bluetech 12561
Boca 11652
bogo 12561
Boman 11324
Bork 11363
BPL 10037, 10208
Bradford 10180
Brandt 10625, 10714, 10560
Brinkmann 10037, 10668
Brionvega 10037
Britânia 12414
Broksonic 10463
Bush
10556, 10037, 10714, 10668,
11037, 10698, 10264, 10036,
10587, 12214, 12241, 12676,
12125, 12104, 12053, 12032,
12007, 11983, 11916, 11865,
11687, 11667, 11652, 11645,
11589, 11585, 11556, 11243,
10661, 10443, 10208
Byd:sign 11311
C
Cameron 11523
Camper 10037
Candela 13546
Candle 10030
Capetronic 10030
Capsonic 10264
Carad 10668, 11037
Carena 10037
Carnivale 10030
Carrefour 10037, 10036
Cascade 10037
Casio 10037
Cathay 10037, 10474
CCE 10037
Celebrity 10000
Celera 10765
Celestial 10767, 11243
cello 11770
Centrum 11037
Centurion 10037
Changcheng 10051, 10264, 10661
Changfeng 10264
Changhong
10156, 10765, 10264, 10508,
10767, 11156, 11243, 11498,
11910
Chimei 11666
Ching Tai 10092, 10179, 10474
Chun Yun
10000, 10180, 10706, 10092,
10179, 10474, 11150, 11687,
11756
Chunfeng 10264
Chung Hsin
10180, 10053, 10036, 10108,
10474, 11150
Cineral 10092
Cinex 11556
Citizen 10180, 10030, 10092
Clarion 10180
Clarivox 10037
Clatronic 10037, 10714, 10264, 11324
Clayton 11037
Coby
12306, 12315, 12340, 12343,
12344, 12345, 12347, 12348,
12350, 13478
Commercial
Solutions
10047, 11447
Condor 10037, 10264
Conia 11498, 11523, 11687, 12032
Conrac 10808
Conrowa 10156, 10698, 10264, 11156
Contec 10180, 10037, 10036
Contex 13309
Coradir 12844
Cosmel 10037
CPTEC 10625, 11363
Craig 10180, 13423
Crosley 10000
Crown
10180, 10053, 10037, 10714,
10668, 11037, 10208, 11652
CTX 11756
Curtis
11326, 12352, 12397, 12466,
12855, 13228, 13577
Curtis Mathes
10047, 10051, 10093, 10702,
10030, 11661, 11347
CXC 10180
Cyberpix 11667
Cytron 11326
Cytronix 11298
D
D-Vision 10556, 10037, 12197
Daenyx 10180, 10179
Daewoo
10180, 10178, 10030, 11661,
10556, 10037, 10634, 10108,
10092, 10474, 10624, 10661,
11150, 12098
Dansai 10037, 10036, 10208
Dantax
10714, 11037, 11163, 11652,
11916
Datsura 10208
Dawa 10037
Daytron 10180, 10037
Dayu 10661
Basic version
Advanced version
InformationsInformations
DVD

210
De Graaf 10548, 10208
DEC 11326
Decca 10037
Dell 11264, 11863
Denko 10264
Denver 10037, 10587, 11770, 12197
Desmet 10037
Dew 11770
Diamant 10037
Diamond 10706, 10698
Digatron 10037
Digihome 11667
Digiline 10037, 10668
Digisonic 11826
Digitor 10037, 10698
Dikom 12561
Dish Network 11948
Disney 11665, 11892
diVision 12197
Dixi 10037
DL 10587, 11326, 11363
DMTech 11937
Domeos 10668
Dream Vision 11704
Drean 10037
DSE
10698, 10767, 11326, 11556,
12241
Dual
10037, 11037, 11163, 11585,
11667, 12032, 12241, 12676
Dumont 10017
Durabrand
10463, 10180, 10178, 10171,
10714, 11037, 11652, 11665
Dux 10037
DX Antenna 11817, 13460
DX Broadtec 13460
Dynaconnective 12811
Dynatron 10037
Dynex 11810, 12049, 12184
E
E.S.C. 10037, 10474
E:max 11324
Easy Living 11666, 12104
ECE 10037
Elbe 10556, 10037
Electroband 10000
Electrohome 10463, 11670
Elekta 10264
Elektra 10017, 11661
Element
11687, 11886, 12183, 12964,
13559
Elfunk 11037, 11208
ELG 10037
Elin 10037, 10548
Elite 10037
Elta 10264, 10474
Emerson
10463, 10180, 10178, 10171,
11661, 10037, 10714, 10668,
10624, 11394, 10179, 11665,
11864, 11886, 11944, 11963,
12183
Envision
10030, 11365, 11506, 11589,
12014, 12087
Erres 10037
ESA 10812, 10171, 11944, 11963
Essentials 12486
Ether 10030
Eurofeel 10264
Euroman 10037, 10264
Europa 10037
Europhon 10037
Evesham
Technology
11248, 11667
Evolution 11756
Evotel 12561
Excello 11037, 11326
Exquisit 10037
F
F&U 12676
Fair Mate 11326
Feiyan 10264
Ferguson
10053, 10037, 10625, 10548,
10560, 10195, 11037, 10443,
11585, 11865, 12053
Fidelity
10171, 10037, 10264, 10474,
10512
Finlandia 10548, 10208
Finlux
10556, 10037, 10714, 10179,
10808, 11248, 11556, 11667,
12676
Firstline
10556, 10037, 10714, 10668,
11037, 10208, 10624, 10808,
11363
Fisher 10047, 10036, 10208
Flint 10037, 10264
Fluid 12964
Formenti 10037
Fortress 10093
Fraba 10037
Freesat 11636
Friac 10037
Frigidaire 11826
Frontech 10264, 10474
Fujimaro 11498, 11687
Fujimaru 11687
Fujitsu 10179
Fujitsu Siemens
10808, 11163, 11248, 11298,
11666
Funai
10000, 10180, 10171, 10714,
10668, 11037, 10264, 10179,
11271, 11394, 11666, 11817,
11963
Furi 10264
Futronic 10264
Futuretech 10180
G
G-Hanz 12449
G-HanzS 11363
Gaba 11037
Galaxi 10037
Galaxis 10037
Gateway 11756
GE
10047, 10051, 10093, 10180,
10765, 10178, 10030, 11447,
11454, 10625, 10560, 10092,
11347, 11547
GEC 10037
Genesis 10037
Genexxa 10037
Gericom 10808, 11298
GFM
10171, 11665, 11864, 11886,
11963
Gibralter 10017, 10030
Gibson 11826
Gilma 12449
Gintai 10474, 11150
Global Home 10767
Godrej 11585
Gold 11770
Gold Vision 10661
Goldfunk 10668
GoldStar
10178, 10030, 10037, 10714,
10474, 11150, 11910
Goodmans
10556, 10037, 10625, 10714,
10560, 10668, 10634, 11037,
10264, 10036, 12053, 12393,
12676, 11983, 11916, 11687,
11667, 11645, 11585, 11523,
11163, 10808, 10661, 10624,
10179
Gorenje 11585, 12676
GPX 10179, 13402
Gradiente 10053, 10037, 11804
Graetz 10714, 11163
Granada
10037, 10548, 10560, 10036,
10108, 10208
Grandin
10556, 10037, 10714, 10668,
11037, 10624, 11298, 11652
Grundig
10706, 10556, 10037, 10195,
10036, 10587, 10443, 11223,
11523, 11645, 11667, 11916,
12007, 12053, 12125, 12561
Grunkel 11163
Grunpy 10180, 10179
GVA 11326, 11363, 12098
H
H & B 10808
Haaz 10706
Haier
10037, 10698, 10587, 10508,
11748, 11749, 11983, 12214,
12309, 12449, 13382
Haiyan 10264
Halifax 10264
Hallmark 10178
Hankook 10180, 10178, 10030
Hannspree 11348, 11745, 11826
Hanseatic
10556, 10037, 10625, 10714,
10634, 10661, 10808
Hantarex 10037, 12197
Hantor 10037
Harley Davidson 10179
Harvard 10180
Harwood 10037
Hauppauge 10037
Havermy 10093
HB 10714, 11324
HCM 10037, 10264
Heran 11826
Herosonic 11826
Highline 10037, 10264
Hikona 10474, 11983
Himitsu 10180
Hinari
10037, 10264, 10036, 10179,
10208, 10443
HiPlus 11826
Hisawa 10714
Hisense
10156, 10556, 10508, 10208,
11156, 11208, 11314, 11363,
12098, 12183, 12355, 12419
Hitachi
10156, 10150, 10178, 10030,
11145, 11256, 10037, 10548,
10634, 11037, 10036, 10108,
10508, 11643, 11667, 11691,
11854, 12170, 12207, 12214,
12676, 13317, 13456, 11585,
11576, 11163, 11156, 11150,
10744, 10679, 10578, 10474,
10179, 10092
Hitachi Fujian 10150, 10108
Hitec 10698
Höher 10714, 11163, 11556
Hongmei 10093, 10264, 11910
Hongyan 10264
Hornyphon 10037
Hua Tun 11150
Huangshan 10264
Huanyu 10264, 11910
Huaqiang 10264
Huari 10264
Hugoson 11666
Huodateji 10051
Hypson
10556, 10037, 10714, 10668,
11037, 10264
Hyundai
10706, 11037, 10698, 10767,
11326, 11523, 11556, 11770,
12676
I
Iberia 10037
ICE 10037, 10264
iDEAL 11556
iLo
11286, 11394, 11665, 11684,
11990
Imperial 10037
Imperial Crown 10264, 10661
Indiana 10037
Initial 11990
Inno Hit 11037, 11163, 11585
Innova 10037
Innowert 11298
Insignia
10463, 10171, 11326, 11423,
11564, 11892, 11963, 12049,
12184, 12417
Inspira 11556
Inteq 10017
Interbuy 10037, 10264
Interfunk 10037, 10512
Internal 10556, 10624
Intervision 10037, 10264
Irradio 10037
IRT 11661, 10698
Isis 12676
Isukai 10037
iSymphony 13094
ITS 10037, 10264
ITT
10548, 10179, 10208, 11523,
12125, 12676
ITT Nokia 10180, 10548, 10179, 10208
ITV 10037, 10264
J
J:COM 12811
JCB 10000
JCM 12256
Jean
10156, 10051, 10036, 10092,
10179, 10474
Jensen 11326
Jiahua 10051
JiaLiCai 10264
Jinfeng 10051, 10208
Jinhai 11910
Jinque 10264
Jinta 10264, 11910
Jinxing
10156, 10556, 10037, 10698,
10264
JMB 10556, 10634, 10443, 12676
Jubilee 10556
Juhua 10264
JVC
10093, 10463, 10053, 10036,
10650, 10653, 10508, 11253,
11428, 11601, 11774, 12271
K
Kaige 10264
Kaisui 10037
Kangchong 11910
Kangli 10264, 10661
Kangyi 10264
Karcher
10714, 10264, 11324, 11556,
12125
Kathrein 10556
KDS 11498, 11687
KEC 10180
Basic version
Advanced version
InformationsInformations
DVD

211
Ken Brown 10463
Kendo 10037, 11037, 11585, 12676
Kenia 10030
Kennex 11037
Kenwood 10030
Keymat 11326
Khind 10706, 10661
Kioto 10706, 10556
Kiton 10037, 10668
KLH 10765, 10767
KLL 10037
Kneissel 10556, 10037
Kolin
10180, 10150, 10053, 10037,
10036, 10108, 10474, 11150,
11240, 11331, 11610
Kolster 10037
Kongque 10264
König 10037
Konka
10037, 10714, 10587, 10725,
13419
Korpel 10037
Kosmos 10037
KTV 10180, 10030
Kuaile 10264
Kunlun 10051, 10264, 10208, 10661
Küppersbusch 12676
L
L&S Electronic 10714, 10808
Lavic 11363
Lavis 11037
Lecson 10037
Lenco
10037, 11037, 10587, 10474,
11983
Leyco 10037, 10264
LG
10017, 11265, 10178, 10030,
11447, 10556, 10037, 10714,
10698, 10108, 12731, 12424,
12362, 12358, 12182, 11840,
11663, 11423, 10856, 10474
Liesenkötter 10037
Lifetec 10037, 10714, 10668, 11037
Linetech 12676
Linsar 11585, 11667, 12676
Local India Brand 10264, 10208, 11413
Local Malaysia
Brand
10698
Lodos 11037
Loewe 10037, 10512, 10633, 11884
Logik
11037, 10698, 11687, 11865,
12241, 12486
Logix 10668
Longjiang 10264
Luma 11037
Lumatron 10037, 10668, 10264, 11937
Lumenio 10037
Lux May 10037
Luxor
10548, 11037, 10179, 10208,
11163, 12676
LXI 10047, 10156, 10178
M
Madison 10037
MAG 11498, 11687
Magnavox
10051, 10030, 10171, 11454,
10706, 10036, 10179, 11365,
11455, 11506, 11866, 11867,
11944, 11963, 11990, 12372
Magnum 10037, 10714, 11556
Mandor 10264
Manesth 10037, 10264
Manhattan 10037, 10668, 11037
Marantz 10030, 11454, 10556, 10037
Mark 10037, 10714
Marks & Spencer 11770
Mascom 11556
Mastro 10053, 10706, 10698, 11556
Masuda 10037, 10264
Matsui
10556, 10037, 10714, 10195,
11037, 10036, 10208, 10443,
10744, 11666, 11667, 11916,
12007, 12486, 12676
Matsushita 10250, 10051, 10650
Matsuviama 10587
Maxdorf 11276
Maxent 10762
Maxess 12493
Maxim 11556
Meck 10698
Mediator 10556, 10037
Medion
10556, 10037, 10714, 10668,
11037, 10698, 10512, 10808,
11163, 11248, 11556, 11585,
11667, 12676
Megatron 10178
MEI 11037
Meile 10264, 11910
Melectronic
10037, 10714, 10634, 10195,
10512, 10661, 11652
Memorex
10250, 10463, 10150, 10178,
11037, 10179, 11665, 11670,
11892
Memory 11983
Mercury 10037
Mermaid 10037
Metronic 10625
Metz
10668, 10195, 11037, 10587,
11163
MGA 10150, 10178, 10030
Micromaxx
10037, 10714, 10668, 11037,
10808, 11324
Microstar 10808
Midland 10047, 10017, 10051
Mikomi 10744, 11585, 11667
Minato 10037
Minerva 10195, 10108, 11248
Ministry Of Sound 11667
Minoka 10037
Mintek 11990
Mirai 11666
Miray 13309, 13321
Mitsai 11556
Mitsubishi
10250, 10093, 10180, 10150,
11250, 10178, 10030, 10556,
10037, 11037, 10036, 10108,
13542, 13514, 13500, 13330,
12313, 11797, 11150, 10512,
10474, 10179
Mivar 10609
Moree 10037
Morgan's 10037
Moserbaer 11585, 12449
Motorola 10093
MTC 10030, 10512
MTlogic 10714, 12104
Mudan 10051, 10264, 10208
Multitec 10037, 10668, 11037, 11556
Multitech 10180, 10037, 10264
Murphy 10474
Mx Onda 11498, 11687, 11983
Myrica 11666
Myryad 10556
N
NAD 10156, 10178, 10037, 11156
Naiko 10037
Nakimura 10037
Nanbao 10264, 11910
Nansheng 10264
National 10051, 10508, 10208
Naxa 12104, 13382
NEC
10156, 10051, 10053, 10178,
10030, 10264, 10036, 10653,
10508, 10474, 10661, 11150,
11704, 11797, 12461
Neckermann 10556, 10037
NEI 10037, 11037
NEO 11324
Neoka 11826
Nesco 10179
Netsat 10037
NetTV 10762
Neufunk 10556, 10037, 10714
New Sonic 11826
New Tech 10556, 10037
Newave 10093, 10178, 10092, 11150
Nexus Electronics 12183
Nikai 11163
Nikkai 10037, 10264, 10036
Nikkei 10714
Nikko 10178, 10030, 10092
Nikon 11910
Nimbro 12104
Noblex 10264
Nokia 10180, 10548, 10179, 10208
Norcent 11365, 11589, 11745
Nordmende
10037, 10714, 10560, 10195,
11163, 11413, 11585, 11667,
12007
Normerel 10037
Nortek 10668
Norwood Micro 11286
Novatronic 10037
Novex 11523
Novita 11585
NTC 10092
O
O.K.Line 11037, 11324
Oceanic 10548, 10208
Odeon 10264
Odys 12513
Okano 10037, 10264
OKI 11585, 11667, 12125, 12676
Ölevia 11240, 11331, 11610
Omega 10264
Omni 10698
Onei 11667
Onida 10053, 10653, 11253, 12414
Onimax 10714
Onix 10698
Onn 11667, 11770, 12125
Onwa 10180
Onyx 11770
Opera 10037, 10714, 11770
Optimus 10250, 10650
Optoma 11348
Optonica 10093
Orbit 10037
Orion
10463, 10556, 10037, 10714,
11037, 10264, 10179, 10443,
10474, 11916, 12007, 12032,
12108
Orline 10037
Ormond 10668, 11037
Osaki 10556, 10037, 10264, 10474
Osio 10037
Osume 10037, 10036, 10474
Otic 11326, 11498, 11687, 11983
Otto Versand
10093, 10556, 10037, 10195,
10036, 10512
P
Pacific
10556, 10714, 11037, 10443,
11324, 11916
Packard Bell 10092, 11314
Palladium 10556, 10037, 10714
Palsonic
10037, 10698, 10264, 10725,
11326, 12461
Panama 10037, 10264
Panasonic
10250, 10051, 10037, 10548,
10650, 10108, 10508, 12170,
11946, 11941, 11650, 11636,
11480, 11291, 11271, 11168,
10208
Panavision 10037
Panda
10051, 10706, 10698, 10264,
10508, 10208, 11910
PARK 12104
Penney
10047, 10156, 10051, 10178,
10030, 11347
Perdio 10037
Perfekt 10037
Petters 10037, 11523
Philco
10463, 10180, 10178, 10030,
10171, 11661, 10037, 13426,
13022, 12414, 11963, 11665,
11394, 11271, 10474, 10179,
10092
Philips
10017, 10000, 10051, 10178,
10030, 10171, 11454, 10556,
10037, 10108, 11756, 11866,
11867, 11887, 12227, 12372,
12374, 12800, 11744, 11506,
11455, 11394, 10810, 10639,
10512, 10474, 10092
Phocus 10714, 11652
Phoenix 10037
Phonola 10556, 10037
Pilot 10030, 10706
Pioneer
10037, 10698, 10512, 10679,
11260, 11457, 11636
Pionier 11556
Pixela 13496
Planar 11589
Plantron 10037, 10264
Playsonic 10037, 10714, 11652
Plustron 11770
Polaroid
10765, 11276, 11286, 11314,
11326, 11498, 11523, 11645,
11687, 11826, 12121, 12125
Polyvision 10889
Portland 11661, 10092, 10624
Power Acoustik 11865
Powerpoint 10037, 10698, 11770
Premier 10264
Prima 10264, 10474, 11749
Princess 11326
Prinston 11037
Prism 10051
Pro Vision
10556, 10037, 10714, 11324,
12197
Prodia 13496
Profilo 11556
Profitronic 10037
Proline 10037, 10625, 10634, 11037
Proscan
10047, 10030, 11447, 11347,
12147, 12183, 12256, 13577
Prosco 10156
Basic version
Advanced version
InformationsInformations
DVD

212
Prosonic
10037, 10714, 10668, 11163,
11314, 11324, 11523, 11585,
11667, 11770, 11865, 12125,
12197, 12676
Protech 10037, 10668, 11037, 10264
Proton 10178, 10030, 10474
Proview 11498, 11687
Pulsar 10017
Pye 10556, 10037
Q
Qingdao 10051, 10264, 10208
Quadro 11326
Quasar
10250, 10051, 10650, 10474,
11291
Quelle
10037, 10668, 10195, 11037,
10512
Questa 10036
R
R-Line 10037
Radiola 10556, 10037
Radiomarelli 10037
RadioShack
10047, 10180, 10178, 10030,
10037
Radiotone 10037, 10668, 11037, 10264
Rank Arena 10036
RCA
10047, 10000, 10051, 10093,
10178, 10030, 11661, 11447,
11454, 10625, 10560, 10618,
12746, 12434, 12247, 12932,
12187, 13577, 11953, 11948,
11781, 11547, 11347, 10679,
10624, 10092, 10090
Realistic 10180, 10178, 10030
Recco 10706
Recor 10037
Rectiligne 10037
Red 12032
Red Star 10037
Rediffusion 10548, 10036
Reflex 10037, 10668, 11037
Relisys 11585, 11645
Relon 11826
Remotec 10250, 10093, 10171, 10037
Reoc 10714, 12197
Revox 10037, 10808
Rex 10264
RFT 10037, 10264
Roadstar
10037, 10714, 10668, 11037,
10264, 11916
Rolsen 12098
Rover 10036
Rowa
10037, 10698, 10264, 10587,
10898, 12042
Runco 10017, 10030
S
Saba
10250, 10625, 10548, 10714,
10560
Sagem 10618
Saisho 10264
Saivod
10037, 10668, 11037, 11163,
11556
Sakura 11326
Salora
10548, 10208, 11556, 12125,
12197
Sampo
10093, 10178, 10030, 10171,
10036, 10650, 10092, 10474,
10762, 10898, 13419
Samsung
10156, 10093, 10812, 10702,
10178, 10030, 10556, 10037,
10264, 10587, 10618, 10650,
10179, 10208, 10474, 10092,
10090, 11150, 11619, 11632,
12042, 12051
Sanjian 10264
Sanken 12042
Sansei 10092
Sansui
10463, 10171, 10706, 10037,
10714, 10898, 11243, 11248,
11413, 11556, 11670, 11892,
13564
Sanyo
10156, 10180, 11037, 10264,
10036, 10508, 13348, 12676,
12461, 11667, 11585, 11498,
11365, 11276, 11208, 11150,
11142, 10474, 10208
Sanyuan 10093
SBR 10556, 10037
Sceptre 11360, 11599, 12337, 12506
Schaub Lorenz
10548, 10714, 11324, 11363,
11667, 12125, 12241, 12676
Schneider
10556, 10037, 10714, 10668,
11037, 12676
Schöntech 11037
Scotch 10178
Scott 10180, 10178, 10179, 11983
Sears
10047, 10156, 10178, 10171,
10179
Seaway 10634
Seelver 11037
SEG
10037, 10668, 11037, 10264,
10036, 10624, 11163, 11523,
12125
SEI 10037
Sei-Sinudyne 10037
Seiki 10178, 12964, 13559
Semivox 10463, 10180
Semp 10156, 11743
Semp Toshiba 10156, 11743
Sencor 10714
Sens 11865
Serie Dorada 10156, 10180, 10178, 10030
Serino 10093
Shancha 10264
Shanghai 10264, 10208, 11910
Sharp
10093, 10053, 10030, 10036,
10650, 11193, 13101, 12810,
12676, 12360, 12214, 11659,
11423, 11407, 11393, 10818,
10474
Shen Ying 10092, 10179, 10474
Shencai 10264
Sheng Chia 10093, 10179, 10474, 11150
Shenyang 10264
Shinco 11990
Shinelco 12104
Shintoshi 10037
Shivaki 10178, 10037, 10443
Shorai 10179
Siam 10037
Siemens 10037, 10195
Siera 10556, 10037
Sigmac 13423
Silva 10037
Silva Schneider 10037, 11556, 12125, 12197
Silvano 10587
Silver 10036, 10179
SilverCrest 11037, 12676
Singer 11556
Sinudyne 10037
SKY 10037, 11745
Skygiant 10180
Skyworth 10037, 10698, 10264
Sliding 11324
SLX 10668
Soemtron 11298
Solavox 10037, 10548
Soniko 10037
Soniq 12493
Sonitron 10208
Sonneclair 10037
Sonoko 10037, 10264
Sonolor 10548, 10208
Sontec 10037
Sontech 11983
Sony
10000, 11505, 10036, 10810,
11300, 11551, 11625, 11651,
11825, 12568, 12571, 12736,
12747, 12778
Soundesign 10180, 10178, 10179
Soundwave 10037, 11037
Sowa
10156, 10051, 10178, 10036,
10092, 10474, 11150
Soyea 12042
Soyo 11826
Spectroniq 11498, 11687
Squareview 10171
SR Standard 10037, 11037
SSS 10180
Starlite 10180, 10037, 10264
Stern 10264
Strato 10037, 10264, 12032
Strong 11163
SunBriteTV 11610, 12337
Sungoo 11248
Sunny 10037
Sunstar 10037, 10264
Sunview 13265
Sunwood 10037
Superscan 10093, 10864, 11944
Supersonic 10208, 12104
SuperTech 10556, 10037
Supra 10178
Supreme 10000
Susumu 10474
SVA
10587, 11326, 11498, 11963,
12042
Svasa 10208
Swisstec 11745, 12104, 12106
Sylvania
10030, 10171, 10587, 11271,
11314, 11394, 11665, 11864,
11886, 11944, 11963
Symphonic 10180, 10171, 11394, 11944
Synco
10000, 10093, 10178, 10036,
10092, 10474, 11826
Syntax 11240, 11331, 11610
Sysline 10037
T
Tacico
10178, 10092, 10179, 10474,
11150
Tai Yi 11150
Talent 10178
Tandy 10093
Tashiko 10036, 10650, 10092, 11150
Tatung
10156, 10051, 10037, 10036,
10474, 11150, 11156, 11248,
11286, 11324, 11556, 11687,
11756, 11916
Tauras 12197
TCL
10706, 10698, 10898, 11916,
12414, 12434, 12449, 13183
TCM 10714, 10808
Teac
10178, 10171, 10706, 10037,
10714, 10668, 11037, 10698,
10264, 10587, 10624, 10512,
10898, 11248, 11363, 11645,
11770, 11983, 12032, 12241
Tec 10037, 10474
Tech Line 10037, 10668, 11163
Technica 11037, 12106
Technics 10250, 10051, 10556, 10650
Technika
11667, 11865, 11983, 12032,
12106, 12125, 12197, 12676
TechniSat 10556
Technisson 10714, 11652
Techno 11585
Technol Ace 10179
Technosonic
10556, 10625, 11324, 11326,
12032
Techvision 12032
Techwood
10051, 11037, 11163, 11667,
12676
Tecnimagen 10556
Teco
10051, 10093, 10053, 10178,
10030, 10264, 10036, 10653,
10092, 10474, 10762, 11523,
11687, 11838
Tedelex 10208
Teknika 10180, 10150, 10092, 10179
TELE System 11585, 12125
Telecor 10037
Telefunken
10702, 10037, 10625, 10714,
10560, 10698, 10587, 11243,
11326, 11556, 11585, 11667,
12676
Telefusion 10037
Telegazi 10037, 10264
Telemeister 10037
Telesonic 10037
Telestar 10556, 10037
Teletech 10037, 10668, 11037
Teleton 10036
Teleview 10037
Tempest 10264
Tennessee 10037
Tensai 10037, 11037
Tera 10030, 10092, 10474
Tesla
10556, 10037, 10714, 11037,
11652
Tevion
10556, 10037, 10714, 10668,
11037, 12241, 12032, 11687,
11667, 11645, 11585, 11556,
11498, 11298, 11248, 10808,
10767
Thomson 11447, 10037, 10625, 10560
Thorn 10037, 10036, 10512
Tiane 10093
TMK 10178
TML 11756
TNCi 10017
Tobo 10264
Tokai 10037, 10668, 11037
Tokaido 11037
Tongguang 10264
Tongtel 10587
Tophouse 10180
Topline 10668, 11037
Toshiba
10156, 10093, 11265, 11256,
10195, 11037, 10264, 10036,
10618, 10650, 10508, 11945,
12006, 12311, 12676, 12724,
13105, 13492, 13503, 13504,
13570, 11916, 11743, 11704,
11656, 11652, 11556, 11524,
11508, 11156, 11150, 10767
Tosumi 11770
Toyoda 10264
Trakton 10264
TRANS-continents 10556, 10037, 10668, 11037
Transonic
10037, 10698, 10264, 10587,
10512, 11326, 11363
Triad 10556
Trio 11248, 11498, 11687
Tristar 10264
Basic version
Advanced version
InformationsInformations
DVD

213
Triumph 10556, 10037
TruTech 11665
Tuntex 10030, 10092, 10474
TVS 10463
TVTEXT 95 10556
U
Uher 10037
Ultravox 10037
UMC 11745, 12106
Unic Line 10037
Uniden 12122
United
10556, 10037, 10714, 11037,
10587, 11163, 11523, 11652,
11770, 11916, 11983, 12125
Universal 10037, 10714
Universum
10037, 10668, 10195, 11037,
10264, 10036, 10618, 10474,
10512, 10808, 11163
Univox 10037
US Logic 11286
V
V7 Videoseven 11666
Vector Research 10030
Venturer 11865
Venus 11326
Vestel
10037, 10668, 11037, 11163,
11585, 11667
Vexa 10037
Victor
10250, 10053, 10036, 10650,
10653, 11428
Videocon 10037, 10508
VideoSystem 10037
Vidtech 10178, 10036
Viewsonic
10864, 10885, 11365, 11564,
11578, 11627, 11742, 11745,
12014, 12049, 12087, 12277,
13247
Viore
11684, 12104, 12352, 13094,
13118, 13382
Vision 10037, 10264, 10474, 11826
Vistron 11363
Visual Innovations 12106
Vito 12376
Vivax 11326
Vizio
10864, 10885, 11756, 11758,
12116, 12512, 12757, 13758
Vortec 10037
Voxson 10178, 10037, 12197
VU 11365, 12098, 12449
W
Walker 11667
Waltham 10037, 10668, 11037, 10443
Wansa 12098
Wards
10047, 10017, 10000, 10156,
10051, 10180, 10178, 10030,
10179, 11156, 11347
Warumaia 10661
Watson 10037, 10714, 10668, 11037
Waycon 10156
Wega 10037, 10036
Welltech 10714, 11652
Weltstar 11037
Westinghouse
10885, 10889, 11282, 11300,
11577, 11712, 11826, 13470,
13579
Wharfedale
10556, 10037, 11324, 11556,
11667, 11983
White
Westinghouse
10463, 11661, 10037, 10624
Wilson 10556
Windsor 10668, 11037
Windy Sam 10556
Wintel 10714
World-of-Vision 11298
Wyse 11365
X
Xenius 10634, 10661
Xi-En 11770
Xiahua 10698, 10264
Xiangyang 10264
Xihu 10264
Xinghai 10264
Xinrisong 11910
Xiron 11983
XLogic 10698
Xoceco 10725, 12121, 13022
Xomax 11770
Xoro 11243
Xrypton 10037
Xuelian 11910
Y
Yamaha 10030, 10650, 11407, 11576
Yamishi 10037
Yapshe 10250
Yokan 10037
Yoko 10037, 10264
Yongbao 11910
Yousida 11910
YU-MA-TU 10037
Z
Zenith
10047, 10017, 10000, 10463,
11265, 10178, 10030, 11145,
11661, 10092, 10624, 11365,
11423, 12358, 12362, 12731
Zepto 11585
Zinwell 12116
Zonda 10698
TV/DVD Combination
A
Acoustic Solutions 11865
AEG 12197
Akai 11675, 11865, 12676
Akura 11770, 11983
Alba 10587, 11865, 12104, 12676
Audiosonic 11983, 12104
Audiovox 11865, 11937, 12513
Axion 11937
B
Belson 12241
Black Diamond 11037
Blue Sky 11037, 12153
Bush
11037, 10698, 10587, 11556,
11983, 12104, 12676
C
cello 11770
Centrum 11037
Changhong 11243
Coby
12315, 12340, 12343, 12344,
12347, 12350
Coradir 12844
Crown 11037
Curtis 12466, 12855
D
D-Vision 12197
Denver 10587, 11770, 12197
Dew 11770
DMTech 11937
Dual 11037, 12241
Dynaconnective 12811
Dynex 11810, 12049, 12184
E
Easy Living 12104
Electrohome 11670
Elfunk 11037
Emerson 11394, 11864, 11886, 11963
ESA 11963
Essentials 12486
F
Ferguson 11037
Finlux 11556
Funai 11963
G
GFM 11963
Gold 11770
Goodmans 11037, 11687, 11983, 12676
H
Haier 11748, 12309
Hantarex 12197
Hikona 11983
Hitachi
11037, 11667, 12207, 12676,
13317, 13456
Hyundai 11770
I
iLo 11990
Initial 11990
Insignia 11963, 12049, 12417
iSymphony 13094
J
J:COM 12811
JVC 11774, 12271
L
Lenco 10587, 11983
LG 11423
Linsar 12676
Logik 11037, 11687, 11865, 12486
Luxor 11037
M
Magnavox
11866, 11944, 11963, 11990,
12372
Marks & Spencer 11770
Matsui 11037, 12486, 12676
Medion 12676
Memorex 11670
Memory 11983
Mintek 11990
Mitsubishi 13330
MTlogic 12104
Mx Onda 11983
N
Naxa 12104, 13382
Nimbro 12104
O
Onn 11770
Onyx 11770
Opera 11770
Otic 11983
P
Panasonic 11941, 12170
Philips 11454, 10556, 11394, 12372
Plustron 11770
Polaroid 11523
Power Acoustik 11865
Powerpoint 10698, 11770
Proscan 12256
Prosonic 11770, 11865, 12197, 12676
R
RCA
11447, 11948, 12187, 12746,
12932
S
Salora 12197
Samsung 12051
Sansui 11670, 13564
Sanyo 12676
Scott 11983
SEG 11037
Sens 11865
Sharp 10818, 12360, 12676
Shinco 11990
Shinelco 12104
Soniq 12493
Sontech 11983
Sony 12778
Supersonic 12104
Swisstec 12104
Sylvania
10171, 11394, 11864, 11886,
11963
T
Tauras 12197
TCL 11916
Teac
10698, 10587, 11770, 11983,
12241
Technica 11037
Technika 11865, 11983, 12106
Telefunken 10698
Teletech 11037
Tevion 12241
Thomson 10625
Toshiba
11256, 11524, 12006, 13105,
13492
Tosumi 11770
Transonic 10587
U
UMC 12106
United 11037, 10587, 11770, 11983
V
Venturer 11865
Vestel 11037
Viewsonic 10864, 12049
Viore
12104, 12352, 13094, 13118,
13382
W
Weltstar 11037
Westinghouse 11300, 11712
Wharfedale 11983
X
Xiron 11983
Xomax 11770
TV/VCR Combination
A
Aiwa 11910, 11916
America Action 10180
Amstrad 10171
Audiovox 10180
B
Blue Sky 10624, 11916
Broksonic 10463
Bush 11916
C
Curtis Mathes 10051
D
Daewoo 10624
Dantax 11916
E
Emerson 10463, 10624
F
Ferguson 10625
Fidelity 10171
Firstline 10624
G
GE 10047, 10051, 10093
GoldStar 10037
Goodmans 10624, 11916
Gradiente 11804
Grandin 10624
Grundig 10556, 10037, 10195, 11916
H
Hinari 10036, 10179
I
Internal 10624
J
JVC 11253
L
LG 10178
M
Matsui 11916
Memorex 10250
Mitsubishi 10093, 10556, 11150
O
Orion 10463, 11916
P
Pacific 11916
Panasonic 10250, 10051
Penney 10051
Philips 10556, 10037
Portland 10624
Q
Quasar 10250, 10051
R
Radiola 10556
RCA 10047, 10051, 10093
Roadstar 11916
Basic version
Advanced version
InformationsInformations
DVD

214
S
Saba 10625
Sansui 10463
Schneider 10556, 10037
SEG 10624
Sharp 10093
Siemens 10037
Sony 10000, 11505
T
Tatung 11916
Teac 10178, 10171, 10624
Technics 10556
Thomson 10625
Toshiba 11916, 11945, 12006
U
United 11916
W
White
Westinghouse
10624
Z
Zenith 10017
TV/VCR/DVD Combination
E
Emerson 11944, 11963
ESA 11944
I
Insignia 11963
M
Magnavox 11944, 11963
P
Panasonic 11941, 11946
R
RCA 11953
S
Superscan 11944
Sylvania 11944
Symphonic 11944
T
Toshiba 11945
VCR/PVR group (2zzzz)
VCR
A
ABS 21972
Accent 20072
Accurian 20000
Admiral 20048, 20209
Adventura 20000
Adyson 20072
AEG 21593
Aiko 20278
Aim 20278, 20642
Aiwa
20037, 20032, 20000, 20209,
20041, 20742, 21137
Akai
20037, 20240, 20000, 20041,
20642
Akiba 20072
Akura 20041, 20072
Alba
20081, 20000, 20209, 20072,
20278
Alienware 21972
Allegro 20039, 21137
Allorgan 20240
Allstar 20081
America Action 20278
American High 20035
Amstrad 20000, 20072, 20278
Anam
20162, 20037, 20240, 20278,
21562
Anitech 20072
Ansonic 20000
Aristona 20081
ASA 20037, 20081
Asha 20240
Asuka 20037, 20081, 20000, 20072
Audiolab 20081
Audiosonic 20278
Audiovox 20037, 20278
AVP 20000
Awa
20037, 20043, 20278, 20642,
20320
B
Baird 20000, 20104, 20041, 20278
Basic Line 20104, 20072, 20278
Beaumark 20240
Bell & Howell 20104
Bestar 20278
Black Diamond 20642
Black Panther 20278
Blaupunkt 20162, 20081
Blue Sky
20037, 20209, 20072, 20278,
20642, 20742, 21137
Bondstec 20072
Brandt 20041, 20320
Brandt Electronique 20041
Brinkmann 20209
Broksonic 20121, 20209, 20742
Bush
20081, 20000, 20209, 20072,
20278, 20642, 20742
C
Calix 20037
Canon 20035
Carena 20081, 20209
Carrefour 20045
Carver 20081
Casio 20000
Cathay 20278
CCE 20072, 20278
Centrum 20593, 21593
CGE 20000, 20041
Changhong 20048, 20081
Cimline 20209, 20072
Cineral 20278
CineVision 21137
Citizen 20037, 20278
Clatronic 20000, 20072, 21593
Colt 20072
Condor 20278
Craig 20037, 20047, 20240, 20072
Crosley 20081, 20000
Crown 20037, 20072, 20278
Curtis Mathes
20060, 20035, 20162, 20240,
20041, 20278
Cybernex 20240
CyberPower 21972
Cyrus 20081
D
Daewoo
20045, 20104, 20209, 20278,
20642, 21137
Dansai 20072, 20278
Dantax 20742
Daytron 20278
De Graaf 20048, 20081, 20042, 20104
Decca
20081, 20000, 20067, 20209,
20041
Deitron 20278
Dell 21972
Denko 20072
Denon 20042
Diamant 20037
Digitor 20642
DirecTV 20739
Domland 20209
DSE 20000, 20642, 21593
Dual 20081, 20000, 20041, 20278
Dumont 20081, 20000, 20104
Durabrand 20039, 20642, 20593, 21593
Dynatech 20000
E
E.S.C. 20240, 20278
Elbe 20278
Elcatech 20072
Electrohome 20037, 20043
Electrophonic 20037
Elin 20240
Elsay 20072
Elta 20072, 20278
Emerex 20032
Emerson
20035, 20037, 20240, 20045,
20000, 20121, 20043, 20209,
20072, 20278, 20593, 21593
ESA 21137
EuroLine 21593
F
Ferguson
20000, 20041, 20278, 20320,
20742
Fidelity 20240, 20000, 20072
Finlandia
20037, 20048, 20081, 20000,
20042, 20104, 20043
Finlux 20081, 20000, 20042, 20104
Firstline
20037, 20045, 20042, 20043,
20209, 20072, 20278, 21137
Fisher 20047, 20104
Flint 20209
Frontech 20072
Fuji 20035, 20033
Fujitsu 20045, 20000
Fujitsu General 20037
Fujitsu Siemens 21972
Funai 20000, 20593, 21593
G
Galaxi 20000
Galaxis 20278
Garrard 20000
Gateway 21972
GE
20060, 20035, 20048, 20240,
20320, 20202
GEC 20081
General 20045
Genexxa 20104
GFM 21593
Go Video 20240, 21137
GoldHand 20072
GoldStar 20037, 20000, 20209, 21137
Goodmans
20037, 20081, 20240, 20000,
20209, 20072, 20278, 20642,
20742
GPX 20037
Gradiente 20000, 21137
Graetz 20240, 20104, 20041
Granada
20037, 20048, 20081, 20240,
20000, 20042, 20104
Grandin
20037, 20000, 20209, 20072,
20278, 20742
Grundig 20081, 20072, 20320, 20742
H
Hanseatic 20037, 20081, 20209
Haojie 20240
Harley Davidson 20000
Harman/Kardon 20081
Harwood 20072
HCM 20072
Hewlett Packard 21972
HI-Q 20047
Hinari
20240, 20209, 20041, 20072,
20278
Hisawa 20209
Hischito 20045
Hitachi
20037, 20081, 20240, 20000,
20042, 20041, 20593
Höher 20278, 20642
Hornyphon 20081
Howard Computers 21972
Hughes Network
Systems
20042
Humax 20739
Hush 21972
Hypson
20037, 20000, 20209, 20072,
20278
I
iBUYPOWER 21972
Imperial 20000
Ingersoll 20240, 20209
Inno Hit 20072
Instant Replay 20035
Interbuy 20037, 20072
Interfunk 20081, 20104
Internal 20278
International 20037, 20278, 20642
Intervision 20037, 20000, 20209, 20278
Irradio 20037, 20081, 20072, 21137
ITT 20240, 20104, 20041
ITV 20037, 20278
J
JBL 20278
Jensen 20041
JMB 20209, 20742
Joyce 20000
JVC 20081, 20045, 20067, 20041
K
Kaisui 20072
Kambrook 20037
Karcher 20081, 20278, 20642
KEC 20037, 20278
Kendo
20037, 20209, 20072, 20278,
20642
Kenwood 20067, 20041
KIC 20000
Kimari 20047
KLH 20072
Kneissel 20037, 20209, 20278
Kodak 20035, 20037
Kolin 20043, 20041
Kolster 20209
Korpel 20072
Kuba Electronic 20047
Kyoto 20072
L
Lenco 20278
Leyco 20072
LG
20037, 20045, 20000, 20042,
20209, 20278, 21137
Lifetec 20209
Linksys 21972
Lloyd's 20000
Loewe
21062, 20162, 20037, 20081,
21562
Logik 20240, 20209, 20072
Lumatron 20593, 21137
Lunatron 21137
Lux May 20072
Luxor
20048, 20047, 20104, 20043,
20072
LXI 20037
M
Magnasonic 20278, 20593
Magnavox
20035, 20039, 20081, 20000,
20642, 20593, 21593
Magnin 20240
Magnum 20642
Manesth 20081, 20045, 20209, 20072
Marantz 20035, 20081, 20209
Basic version
Advanced version
InformationsInformations
DVD

215
Mark 20000, 20278
Marta 20037
Mascom 20642
Mastec 20642
Master's 20278
Matsui
20037, 20240, 20209, 20278,
20742
Matsushita 20035, 20162
Media Center PC 21972
Mediator 20081
Medion 20209, 20642
MEI 20035
Melectronic 20037, 20000
Memorex
20035, 20162, 20037, 20048,
20039, 20047, 20240, 20000,
20104, 20209
Memphis 20072
Metronic 20081
Metz
21062, 20162, 20037, 20081,
21562, 20836, 20837
MGA 20240, 20043
MGN Technology 20240
Micromaxx 20209
Microsoft 21972
Migros 20000
Mind 21972
Minolta 20042
Mitsubishi
20048, 20081, 20000, 20067,
20043, 20041, 20642
Motorola 20035, 20048
MTC 20240, 20000
Multitec 20037
Multitech 20000, 20072
Murphy 20000
Myryad 20081
N
NAD 20104
Naiko 20642
NAP 20039
Nebula Electronics 20033
NEC
20035, 20037, 20048, 20104,
20067, 20041, 20278, 21137
Neckermann 20081, 20041
Nesco 20000, 20072
Neufunk 20209, 21137
Newave 20037
Nikkai 20072, 20278
Nikko 20037
Niveus Media 21972
Noblex 20240
Nokia
20048, 20081, 20240, 20042,
20104, 20041, 20278
Nordmende 20067, 20041, 20642, 20320
Northgate 21972
Nu-Tec 20209
O
Oceanic
20048, 20081, 20000, 20104,
20041, 20320
Okano 20209, 20072, 20278
Olympus 20035
Onimax 20642
Optimus
21062, 20162, 20037, 20048,
20104, 20593
Orbit 20072
Orion 20121, 20209, 20742
Orson 20000
Osaki 20037, 20000, 20072
Osume 20072
Otake 20209
Otto Versand 20081
P
Pacific 20000, 20642, 20742
Packard Bell 21972
Palladium 20037, 20209, 20041, 20072
Palsonic 20000, 20072, 20642
Panasonic
21062, 20035, 20162, 21562,
20616, 20836, 20837
Pathe Cinema 20043
Pathe Marconi 20041
Penney 20035, 20037, 20240, 20042
Pentax 20042
Perdio 20000, 20209
Philco 20035, 20000, 20209, 20072
Philips
20035, 20081, 20000, 20593,
20739
Phoenix 20278
Phonola 20081
Pilot 20037
Pioneer 20162, 20081, 20042, 20067
Polk Audio 20081
Portland 20278
Presidian 21593
Prinz 20000
Pro Vision 20278
Profitronic 20081, 20240
Proline 20000, 20278, 20642, 20320
Proscan 20060, 20202
Prosco 20278
Prosonic 20209, 20278
Protech 20081, 20072
Pulsar 20039
Pye 20081, 20000
Q
Qisheng 20060
Quasar 20035, 20162, 20278
Quelle 20081
R
Radialva 20037, 20048, 20081, 20072
Radiola 20081
Radionette 20037, 21137
RadioShack 20037, 20000
Radix 20037
Randex 20037
Rank 20041
Rank Arena 20041
RCA
20060, 20035, 20048, 20240,
20000, 20042, 20320, 20202,
20880
Realistic
20035, 20037, 20048, 20047,
20000, 20104
ReplayTV 20616
Rex 20041
RFT 20072
Ricavision 21972
Rio 21137
Roadstar
20037, 20081, 20240, 20072,
20278, 20742
Royal 20072
Runco 20039
S
Saba 20041, 20278, 20320
Saisho 20209
Salora 20104, 20043
Sampo 20037, 20048
Samsung 20240, 20045, 20742
Sanky 20048, 20039
Sansei 20048
Sansui
20000, 20067, 20209, 20041,
20072
Sanyo
20048, 20047, 20240, 20104,
20067, 21137
Saville 20240, 20278
SBR 20081
ScanSonic 20240
Sceptre 20104
Schaub Lorenz 20000, 20104, 20041
Schneider
20037, 20081, 20240, 20000,
20042, 20072, 20278, 20642,
21137
Scott 20045, 20121, 20043, 20593
Sears
20035, 20037, 20047, 20000,
20042, 20104
Seaway 20278
SEG
20081, 20240, 20072, 20278,
20642, 20593
SEI 20081
Sei-Sinudyne 20081
Seleco 20037, 20041
Semivox 20045, 20209
Semp 20045
Semp Toshiba 20045
Sentra 20072
Setron 20072
Sharp
20037, 20048, 20209, 20848,
21137
Shinco 20000
Shintom 20104, 20072
Shivaki 20037
Shogun 20240
Siemens 20037, 20081, 20104, 20320
Siera 20081
Signature 20035
Silva 20037
Silva Schneider 21137
Silver 20278
SilverCrest 20642
Singer 20045, 20072
Sinudyne 20081, 20209
Sonic Blue 20616, 21137
Sonneclair 20072
Sonolor 20048
Sontec 20037, 20278
Sonwa 20642
Sony
20035, 20032, 20033, 20000,
21032, 21972
Soundwave 20037, 20209
SR Standard 20278
Ssangyong 20072
Stack 9 21972
Stern 20278
STS 20042
Sunkai 20209, 20278
Sunstar 20000
Suntronic 20000
Sunwood 20072
Supra 20037, 20278
Sylvania
20035, 20081, 20000, 20043,
20593, 21593
Symphonic 20000, 20593, 21593
Systemax 21972
T
T+A 20162
Tagar Systems 21972
Taisho 20209
Tandberg 20278
Tandy 20000, 20104
Tashiko
20037, 20048, 20081, 20240,
20000
Tatung
20048, 20081, 20045, 20000,
20067, 20043, 20209, 20041,
20742
Teac
20037, 20000, 20041, 20072,
20278, 20642, 20593, 21593
Tec 20072
Tech Line 20072
Technics 20035, 20162, 20081
Teco 20035, 20037, 20048, 20041
Tedelex 20037, 20209, 20642
Teknika 20035, 20037, 20000
Teleavia 20041
Telefunken
20209, 20041, 20278, 20642,
20320, 20593
Telestar 20037
Teletech 20000, 20072, 20278
Tenosal 20072
Tensai 20037, 20000, 20072, 20278
Tesla 20081
Tevion 20209, 20642
Texet 20278
Thomas 20000
Thomson
20060, 20067, 20041, 20278,
20320, 20202
Thorn 20037, 20104, 20041
TiVo 20739
TMK 20240
Tokai 20037, 20104, 20041, 20072
Toshiba
20081, 20045, 20042, 20067,
20043, 20209, 20041, 20742,
21972
Totevision 20037, 20240
Touch 21972
Towada 20072
Toyoda 20278
Tradex 20081
Triad 20278
U
Uher 20240
Ultravox 20278
Unitech 20240
United 20742, 21593
Universum
20037, 20081, 20240, 20000,
20104, 20209, 21137
V
Vector 20045
VIA Technologies 21972
Victor 20067, 20041
Video Concepts 20045
Video Technic 20000
Videomagic 20037
Videosonic 20240
Viewsonic 21972
Villain 20000
Voodoo 21972
W
Wards
20060, 20035, 20048, 20039,
20047, 20081, 20033, 20240,
20045, 20000, 20042, 20072
Watson 20081, 20642
Weltblick 20037
Wharfedale 20642, 20593
White
Westinghouse
20209, 20072, 20278
X
XR-1000 20035, 20000, 20072
Y
Yamaha 20041
Yamishi 20072, 20278
Yokan 20072
Yoko 20037, 20240, 20072
Yoshita 20072
Z
Zenith
20037, 20039, 20033, 20000,
20209, 21137
ZT Group 21972
ZX 20209
Basic version
Advanced version
InformationsInformations
DVD

216
PVR
A
ABS 21972
Alienware 21972
C
CyberPower 21972
D
Dell 21972
DirecTV 20739
G
Gateway 21972
H
Hewlett Packard 21972
Howard Computers 21972
Humax 20739
Hush 21972
I
iBUYPOWER 21972
L
Linksys 21972
M
Media Center PC 21972
Microsoft 21972
Mind 21972
N
Niveus Media 21972
Northgate 21972
P
Panasonic 20616
Philips 20739
R
RCA 20880
ReplayTV 20616
S
Sonic Blue 20616
Sony 21972
Stack 9 21972
Systemax 21972
T
Tagar Systems 21972
TiVo 20739
Toshiba 21972
Touch 21972
V
Viewsonic 21972
Voodoo 21972
Z
ZT Group 21972
SAT/PVR Combination
D
DirecTV 20739
TV/VCR Combination
A
Aiwa 20000, 20742, 21137
America Action 20278
Amstrad 20000
Audiovox 20278
B
Bestar 20278
Blue Sky 20278, 20742
Broksonic 20742
Bush 20742
C
Citizen 20278
Colt 20072
Curtis Mathes 20035
D
Daewoo 20278
Dantax 20742
E
Emerson 20278, 20593
F
Ferguson 20000, 20278, 20742
Fidelity 20000
Firstline 20278
Funai 20000, 20593
G
GE 20060, 20035, 20048, 20240
GoldStar 20037
Goodmans 20278, 20742
Gradiente 21137
Grandin 20278, 20742
Grundig 20081, 20742
Harley Davidson 20000
H
Hitachi 20000, 20593
Hypson 20037
I
Internal 20278
J
JBL 20278
K
Kambrook 20037
Kneissel 20278
L
LG 20037
Lloyd's 20000
Loewe 20037
M
Magnasonic 20278, 20593
Magnavox 20081, 20000, 20593
Magnin 20240
Matsui 20742
Memorex 20162, 20037
MGA 20240
Mitsubishi 20048, 20081, 20043
O
Optimus 20162, 20593
Orion 20742
P
Pacific 20742
Palsonic 20000
Panasonic 20035, 20162
Penney 20035, 20037, 20240
Philips 20081
Q
Quasar 20035, 20162
R
Radiola 20081
RadioShack 20000
RCA 20060, 20035, 20048, 20240
Roadstar 20742
Saba 20320
S
Samsung 20240, 20742
Sansui 20000
Sanyo 20240
Schneider 20081, 20000
Sears 20037, 20000
Sharp 20037, 20048
Shivaki 20037
Siemens 20081
Sony 20032, 20000
Sylvania 20081, 20593
Symphonic 20000, 20593
T
Tatung 20742
Teac 20037, 20000, 20642, 20593
Technics 20081
Telefunken 20278
Thomas 20000
Thomson 20278
Toshiba 20742
U
United 20742
W
White
Westinghouse
20278
Z
Zenith 20000
BD/DVD group (3zzzz)
DVD
3D LAB 30539
A
Accurian 30675
Acoustic Solutions 30730, 30713, 32082
AEG
30770, 30790, 30675, 31233,
32173
Afreey 30698
Aim 30672
Airis 30672, 31107
Aiwa 30533, 30641
Akai
30770, 30695, 30790, 30675,
30884, 31233
Akura 31233, 31383
Alba
30672, 30539, 30717, 30695,
30730, 30713, 30884
Alco 30790
Amitech 30770, 32187
Amstrad 30770, 30790, 30713, 32139
AMW 30872
Ansonic 30831
Apex Digital 30672, 30717, 30796, 31061
Aristona 30539, 30646
Arrgo 31023
ASDA 32213
Audio Authority 32555
Audiosonic 31383
Audiovox 30717, 30790
Audioworld 30790
Audix 30713
Autovox 30713
AVideo 32173
Awa 30730, 30872, 32587
Axil 32139
Axion 30730
B
Basic Line 30713
Bel Canto Design 31571
Belson 32139
Berthen 31643
Best Buy 32139
Black Diamond 30713, 30884
Blaupunkt 30717
Blu:sens 31233
Blue Parade 30571
Blue Sky
30672, 30651, 30695, 30790,
30713, 30884, 32623
Brainwave 30770
Brandt 30503, 30651, 30551
Broksonic 30695
Bush
30672, 30717, 30730, 30831,
30713, 30884, 31383
Byd:sign 30872
C
California Audio
Labs
30490
CCE 30730
Centrex 30672
Centrum 30675, 30713
Changhong 30627, 31061
Cinea 30831
Cineral 30730
Cinetec 30713, 30872
Citizen 30695
CJ Digital 31643, 32173
Classic 30730
Clatronic 30672, 30675, 31233
Clayton 30713
CMX 31643
Coby 30730, 31107, 31628, 32494
Codex 31233
Compacks 31107
Conia 30672
Contel 32331
Continental Edison 30831, 30872
Craig 30831
Crown 30770, 30713
Cybercom 30831
CyberHome 31023
Cytron 30651
D
Daenyx 30872
Daewoo 30770, 30872, 32187
Dansai 30770
Dantax 30539, 30790, 30713
Datsun 31233
Daytek 30872
Dayton Audio 30872
DCE 30831
Decca 30770
Denon
30490, 31634, 32258, 32748,
33698
Denver 30672, 31107
Dgtec 30672
Diamond 30651, 30790
Dicra 32173
Digihome 30713
DigiLogic 30713
digiRED 30717
Digital 32173
DigitalMax 31738
Digitor 30651
Digitrex 30672
DiK 30831
Disney 30831, 30675, 31270
DK Digital 30831, 31643, 32095
DMTech 32173, 32187
Dragon 30831
DSE 30675, 32095
Dual
30651, 30730, 30831, 30790,
30713, 30884, 31023
Durabrand 30831, 30675, 30713, 31023
DVS 30672
Dynex 32596
E
E:max 30770, 31233, 31643
ECC 30730
Elfunk 30713, 30884
Elin 30770
Elite 32854
Elta
30672, 30770, 31233, 31643,
32173
Eltax 31233
Emerson 30675, 32213
Encore 30698
EuroLine 30675, 31233, 31643
F
Fenner 30651
Ferguson 30651, 30695, 30713, 30884
Finlux 30672, 30741, 30770
Firstline 30713
Funai 30695, 30675
G
G-Hanz 32213
G-HanzS 32213
GE 30522, 30717
GFM 30675
Go Video 30744, 30741, 31044, 31075
GoldStar 30741
Goodmans
30651, 30730, 30790, 30713,
30884, 31383
GoWell 31643
GPX 30741
Gradiente 30651
Gran Prix 30831
Grandin 30713, 31233, 32173
Greenhill 30717
Basic version
Advanced version
InformationsInformations
DVD

217
Grundig
30539, 30651, 30551, 30695,
30790, 30713, 31643
Grunkel 30770, 30831, 30790
GVG 30770
H
H & B 30713, 31233, 32173
Hanseatic 30741, 30790
Harman/Kardon 31229, 32927
HE 30730
Hello Kitty 30831
Henss 30713
Hikona 31383
Hitachi
30573, 30664, 30695, 30713,
30884
Hitech 33523
Hiteker 30672
Höher
30651, 30831, 30713, 31643,
32173
Home Electronics 30770, 30730
Home Tech
Industries
31107, 31643
Humax 30646
HYD 31233
Hyundai 31061
I
Iekei 31107
Ingersoll 31023
Initial 30717
Inno Hit 30713
Insignia
30741, 30675, 32095, 32428,
32596
Integra
30571, 30627, 31634, 31769,
32147
Irradio 30646, 31233
ISP 30695
it's 30717
ITT 31233
J
JDB 30730
JMB 30695
JNC 30672
JVC
30503, 30539, 30623, 30867,
31164, 31602, 32365, 32855
jWin 30672
K
Kansai 31107
Kansas
Technologies
31233
Kawasaki 30790
Kendo 30672, 30831, 30713
Kennex 30770, 30713
Kenwood 30490, 30534
KeyPlug 31643
Kiiro 30770
King D'Home 30796
King Vision 31643
KLH 30717, 30790
Koss 30651
KXD 31107
L
Lazer 32173
Leiker 30872
Lenco 30651, 30770, 30713, 31383
Lexicon 32545
LG 30741, 30790, 31233, 31602
Lifetec 30651, 30831
LiteOn 31738
LM 31643
Lodos 30713, 30884
Loewe 30539, 30741
Logik 30713, 30884, 32594
Logitech 32639
Lumatron 30741, 30695, 30713
Lunatron 30741
Luxman 30573
Luxor 30717, 30713, 30884
M
Magnasonic 30651
Magnavox
30503, 30539, 30646, 30675,
30713, 31354, 31506
Magnum 31382
Majestic 31107
Manhattan 30713
Marantz 30539, 31627, 32414
Mark 30713
Marquant 30770, 31628
Matsui
30672, 30651, 30695, 30713,
30884
Maxim 30713, 30872
MBO 30730
McIntosh 31533
MDS 30713
Mecotek 30770
Medion
30651, 30630, 30741, 30831,
31107, 31270
MEI 30790
Memorex
30695, 30831, 31270, 32213,
32331, 33153
Memory 31383
Metz 30571, 30713
Micromaxx 30695
Micromedia 30503, 30539
Micromega 30539
Microsoft 30522
Microstar 30831
Minax 30713
Minoka 30770
Mintek 30717
Miray 33506
Mitsubishi 31521, 30713, 33133
Mizuda 30770
Mustek 30730
Muvid 31643, 32173
Mx Onda 30651, 31383
Mystral 30831
N
NAD 30741
Naiko 30770
NEC 30741, 30785, 31602
Neom 31643
Nesa 30717
Nevir 30672, 30770, 30831
Nexius 30790
Noblex 31233
Norcent 30872, 31107
Nordmende 30831
Nortek 31643, 32173
O
Ölevia 32331
Olidata 30672
Omni 30698
One For All 32555
Onkyo
30503, 30627, 31627, 31769,
32147, 32562
Oppo 32545
Orbit 30872, 31643
Orion 30695, 30713, 31233
Oritron 30651
Ormond 30713
Otic 31383
P
Pacific 30831, 30790, 30713
Packard Bell 30831
Palladium 30695, 30713
Palsonic 30672
Panasonic
30503, 30490, 31579, 31641,
31762, 32523, 32710, 32859,
33641, 33944, 33949
Panda 30717, 31107
Pelican Accessories 30533
Philco 30790, 30675
Philips
30503, 30539, 30646, 30675,
30713, 31267, 31340, 31354,
31506, 32056, 32084, 32334,
32434, 32789, 32791
Pioneer
30571, 30142, 30631, 31531,
31571, 32442, 32854
Play It 31643
Polaroid 31061
Polk Audio 30539
Portland 30770
Powerpoint 30872
Presidian 30675, 31738
Prinz 30831
Prism 30831
PrivateLabel 32616
Pro Vision 30730, 31107
Proceed 30672
Proline
30672, 30651, 31643, 31738,
32082, 32616
Proscan 30522
Proson 30713
Prosonic 32082, 32187
Pye 30539, 30646
Q
QONIX 30790
Qwestar 30651
R
Radionette 30741
Radiotone 30713
RCA
30522, 30571, 30717, 30790,
30822, 31769, 32213, 32587,
32592, 32594
RE-BL 32555
REC 30490
Recco 30698
Red 32213
Red Star 30770, 31107
Richmond 31233
Roadstar 30672, 30730, 30713
Ronin 30872
Rotel 30623
Rowa 30717, 30872
S
Saba 30651, 30551, 31643, 32173
Saivod 30831
Salora 30741
Sampo 30698
Samsung
30490, 30573, 30744, 33195,
32951, 32942, 32843, 32556,
32489, 32329, 32107, 32069,
31635, 31470, 31075, 31044,
30820, 30199
Sansui 30695, 32082
Sanyo 30695, 30713
ScanMagic 30730
Schaub Lorenz 30770, 31643, 32173
Schneider
30539, 30646, 30651, 30831,
30790, 30713
Schöntech 30713
Scott
30672, 30651, 31233, 31383,
32173
Seeltech 31643
SEG 30713, 30872, 30884
Semp 30503
Shanghai 30672
Sharp
30630, 30675, 30713, 32250,
32479, 32652, 33313, 33314
Sherwood 30717, 30741, 30770, 31043
Shinco 30717
Shinsonic 30533
Siemssen 31382
Sigmatek 32139
Silva Schneider 30741, 30831
SilverCrest 32173
Sistemas 30672
Skantic 30539, 30713
Skymaster 30730
SM Electronic 30730
Smart 30713
Sogo 30672
Sonashi 30831
Soniq 30831
Sontech 31383
Sony
30533, 31533, 30864, 30772,
31033, 31070, 31431, 31516,
31536, 31633, 32132, 32178,
32180, 32504, 33519, 33939
Sound Color 31233
Soundwave 30713
Spectra 30872
SR Standard 30651, 30831
Strato 31382
Strong 30713
Sunkai 30770
Sunstech 30831, 32139
Superior 31643, 32173
Supersonic 33946
Supratech 32139
SVA 30672, 30717
Swisstec 32187
Sylvania 30630, 30675
Symphonic 30675
Sytech 30831, 32139
T
Tandberg 30713
Targa 30741
Tatung 30770
TBoston 32139
Tchibo 30741
TCL 32587
TCM 30741, 30790
Teac
30571, 30717, 30741, 30790,
30675, 31383, 32139
Technica 30713, 30884
Technics 30490
Technika 30770, 30831, 31383, 32187
Technisson 30672
Technosonic 30730
TechnoStar 31643
Techwood 30713
TELE System 32173
Telefunken 30551, 30790
Teletech 30713, 30884
Tensai 30651, 30770
Tevion 30651, 31382
Theta Digital 30571
Thomson 30522, 30551, 30831
Thule Audio 30551
Tokai 30790, 30698, 31233
Tokaido 30698
Toshiba
30503, 30695, 31154, 31510,
31769, 32006, 32277, 32551,
32705, 33157
TRANS-continents 30831, 30872, 31233
Basic version
Advanced version
InformationsInformations
DVD

218
Transonic 30730
Trent 31643
Trevi 30831
TVE 30713
U
UMC 32187
United
30695, 30730, 30675, 30713,
30884, 31233, 31383, 31643
Universum 30741, 30790, 30713
Urban Concepts 30503
V
Venturer 30790, 31769, 32082
Vestel 30713, 30884
Viore 32553
Vizio 32563
Voxson 30730, 30831
Vtrek 32587
W
Waitec 30730, 31233
Walkvision 30717
Waltham 30713
WB Electronics 32555
Welkin 30831
Wellington 30713
Weltstar 30713
Wharfedale 30790, 30698, 30713, 31383
Wilson 30831, 31233
Windsor 30713
Windy Sam 30573
Woxter 32139
X
X-View 31233
Xbox 30522
Xenius 30790
Xiron 31383
XMS 30770
Y
Yamada 30872, 32139
Yamaha
30490, 30539, 30646, 30545,
30817, 31354, 32298, 32558
Yamakawa 30872
YBA 30872
Yukai 30730
Z
Zenith 30503, 30741
Blu-ray Disc
D
Denon 32258, 32748, 33698
E
Elite 32854
F
Funai 30675
H
Harman/Kardon 32927
I
Insignia 30675, 32428, 32596
Integra 32147
J
JVC 32365, 32855
L
Lexicon 32545
LG 30741, 31602
M
Magnavox 30675
Marantz 32414
Memorex 32331
Mitsubishi 33133
O
Ölevia 32331
Onkyo 32147, 32562
Oppo 32545
P
Panasonic
31641, 32523, 32710, 32859,
33641, 33944, 33949
Philips 32084, 32434, 32789
Pioneer 30142, 32442, 32854
S
Samsung 30199, 32951, 33195
Sharp
32250, 32479, 32652, 33313,
33314
Sony
31516, 32178, 32180, 32504,
33519, 33939
Sylvania 30675
T
Toshiba 32551, 32705, 33157
V
Viore 32553
Vizio 32563
Y
Yamaha 32298
DVD-R
A
Accurian 30675
Aristona 30646
D
Denon 30490
DigitalMax 31738
E
Emerson 30675
F
Funai 30675
G
Go Video 30741
GPX 30741
H
Humax 30646
I
Irradio 30646
J
JVC 31164
L
LG 30741
LiteOn 31738
Loewe 30741
M
Magnavox 30646, 30675, 31506
Medion 30741
Mitsubishi 33133
P
Panasonic
30490, 31579, 32523, 32710,
32859, 33944, 33949
Philips 30646, 31340, 31506
Pioneer 30631
Presidian 31738
Proline 31738
Pye 30646
R
RCA 30522
S
Samsung
30490, 31470, 31635, 32107,
32489, 32942
Schneider 30646
Sharp
30630, 30675, 32479, 33313,
33314
Sony
31033, 31070, 31431, 31516,
31536, 31633, 32132, 32178,
32180, 33519, 33939
Sylvania 30675
T
Targa 30741
Thomson 30551
Toshiba 31510, 32277, 32551
Y
Yamaha 30646
Z
Zenith 30741
HD-DVD
I
Integra 31769
L
LG 30741
O
Onkyo 31769
R
RCA 31769
T
Toshiba 31769
TV/DVD Combination
A
Acoustic Solutions 32082
Akai 30695
Akura 31383
Alba 30695, 30884
Audiosonic 31383
B
Black Diamond 30713, 30884
Blue Sky 30713, 30884
Broksonic 30695
Bush 30713, 30884, 31383
C
Centrum 30713
Citizen 30695
Crown 30713
D
Dual 30713, 30884
E
Elfunk 30713, 30884
Emerson 30675
F
Ferguson 30695, 30713, 30884
G
Goodmans 30713, 30884, 31383
Grandin 30713
Grundig 30539, 30695
H
Hikona 31383
Hitachi 30713, 30884
L
Lenco 31383
Logik 30713, 30884
Luxor 30713, 30884
M
Matsui 30713, 30884
Memory 31383
Mx Onda 31383
O
Orion 30695
Otic 31383
P
Philips 30539
Proline 32082
Prosonic 32082
S
Sansui 30695, 32082
Scott 31383
SEG 30713, 30884
Sontech 31383
Supersonic 33946
Sylvania 30630, 30675
T
Teac 31383
Technica 30713, 30884
Technika 31383
Teletech 30713, 30884
Thomson 30551
Toshiba 30695
U
United 30713, 30884, 31383
Universum 30713
V
Venturer 32082
Vestel 30884
W
Weltstar 30713
Wharfedale 31383
X
Xiron 31383
TV/VCR/DVD Combination
F
Ferguson 30695
M
Matsui 30695
S
Sharp 30630
Audio group (4zzzz)
CD
A
Acoustic Research 40420
Advantage 40032
AH! 40157
Aiwa 40157
Arcam 40157
Atoll Electronique 40157
Audio Research 40157
Audiolab 40157
Audiomeca 40157
Audioton 40157
AVI 40157
B
Balanced Audio
Technology
40157
Burmester 40420
C
Cairn 40157
California Audio
Labs
40029, 40303
Cambridge 40157
Cambridge Audio 40157
Carver 40157
CCE 40157
CDC 40420
CEC 40420
Cyrus 40157
D
Denon 40626, 40003, 42867, 42868
DKK 40000
DMX Electronics 40157
Dual 40003
Dynaco 40157
G
Garrard 40420
Genexxa 40000, 40032
Goldmund 40157
Grundig 40157
H
Harman/Kardon 40157, 40173
Hitachi 40032
I
Inkel 40180
Integra 40101
J
JVC 40072
K
Kenwood 40626, 40157, 40028, 40036
Krell 40157
L
Linn 40157
Loewe 40157
Lyngdorf 42766
M
Magnavox 40157
Marantz 40626, 40029, 40157, 40180
Matsui 40157
MCS 40029
Memorex 40032, 40180
Meridian 40157
Micromega 40157
Miro 40000
Mission 40157
MTC 40420
Myryad 40157
N
NAD 40000
Naim 40157
NSM 40157
O
Onkyo 40101
Optimus 40000, 40032, 40420
P
Panasonic 40029, 40303, 40752
Parasound 40420
Philips 40626, 40157
Pioneer 40032, 40101
Polk Audio 40157
Primare 40157
Proceed 40420
Proton 40157
Q
QED 40157
Quad 40157
Quasar 40029
R
Radiola 40157
RCA 40032, 40420
Realistic 40180, 40420
Restek 40157
Revox 40157
Roksan 40420
Rotel 40157, 40420
Basic version
Advanced version
InformationsInformations
DVD

219
Royal 40420
S
SAE 40157
Sansui 40157
SAST 40157
Sharp 40180
Sherwood 40180
Siemens 40157
Silsonic 40036
Simaudio 40157
Sonic Frontiers 40157
Sony 40490, 40000, 41364, 40185
Sylvania 40157
T
TAG McLaren 40157
Tandy 40032
Tangent 43304
Tascam 40420
Teac 40180, 40420
Technics 40029, 40303
Thorens 40157
Thule Audio 40157
Tokai 40420
Traxdata 40626
U
Universum 40157
V
Victor 40072
W
Wards 40000, 40032, 40157
Y
Yamaha 40490, 40032, 40036
Z
Zonda 40157
CD-R
D
Denon 40626, 42868
J
JVC 40072
K
Kenwood 40626
M
Marantz 40626
P
Philips 40626
R
RCA 40420
S
Sony 40000, 41364
T
Teac 40420
Basic version
Advanced version
InformationsInformations
DVD

LICENSE
License
This section describes software license used for
this unit. To maintain the correct content, the
original (English) is used.
n Boost
http://www.boost.org/
Boost Software License - Version 1.0 - August 17th, 2003
Permission is hereby granted, free of charge, to any
person or organization obtaining a copy of the software and
accompanying documentation covered by this license (the
“Software”) to use, reproduce, display, distribute, execute,
and transmit the Software, and to prepare derivative works
of the Software, and to permit third-parties to whom the
Software is furnished to do so, all subject to the following:
The copyright notices in the Software and this entire
statement, including the above license grant, this restriction
and the following disclaimer, must be included in all copies
of the Software, in whole or in part, and all derivative works
of the Software, unless such copies or derivative works
are solely in the form of machine-executable object code
generated by a source language processor.
THE SOFTWARE IS PROVIDED “AS IS”, WITHOUT
WARRANTY OF ANY KIND, EXPRESS OR IMPLIED,
INCLUDING BUT NOT LIMITED TO THE WARRANTIES
OF MERCHANTABILITY, FITNESS FOR A PARTICULAR
PURPOSE, TITLE AND NON-INFRINGEMENT. IN NO
EVENT SHALL THE COPYRIGHT HOLDERS OR ANYONE
DISTRIBUTING THE SOFTWARE BE LIABLE FOR
ANY DAMAGES OR OTHER LIABILITY, WHETHER IN
CONTRACT, TORT OR OTHERWISE, ARISING FROM,
OUT OF OR IN CONNECTION WITH THE SOFTWARE OR
THE USE OR OTHER DEALINGS IN THE SOFTWARE.
n Expat
http://www.jclark.com/xml/expat.html
Expat License. Copyright (c) 1998, 1999, 2000 Thai Open
Source Software Center Ltd
Permission is hereby granted, free of charge, to any
person obtaining a copy of this software and associated
documentation files (the “Software”), to deal in the
Software without restriction, including without limitation
the rights to use, copy, modify, merge, publish, distribute,
sublicense, and/or sell copies of the Software, and to
permit persons to whom the Software is furnished to do
so, subject to the following conditions:
The above copyright notice and this permission notice
shall be included in all copies or substantial portions of the
Software.
THE SOFTWARE IS PROVIDED “AS IS”, WITHOUT
WARRANTY OF ANY KIND, EXPRESS OR IMPLIED,
INCLUDING BUT NOT LIMITED TO THE WARRANTIES
OF MERCHANTABILITY, FITNESS FOR A PARTICULAR
PURPOSE AND NONINFRINGEMENT. IN NO EVENT
SHALL THE AUTHORS OR COPYRIGHT HOLDERS
BE LIABLE FOR ANY CLAIM, DAMAGES OR OTHER
LIABILITY, WHETHER IN AN ACTION OF CONTRACT,
TORT OR OTHERWISE, ARISING FROM, OUT OF OR IN
CONNECTION WITH THE SOFTWARE OR THE USE OR
OTHER DEALINGS IN THE SOFTWARE.
n FastDelegate
http://www.codeproject.com/KB/cpp/FastDelegate.aspx
THE WORK (AS DEFINED BELOW) IS PROVIDED UNDER
THE TERMS OF THIS CODE PROJECT OPEN LICENSE
(“LICENSE”). THE WORK IS PROTECTED BY COPYRIGHT
AND/OR OTHER APPLICABLE LAW. ANY USE OF THE
WORK OTHER THAN AS AUTHORIZED UNDER THIS
LICENSE OR COPYRIGHT LAW IS PROHIBITED.
BY EXERCISING ANY RIGHTS TO THE WORK PROVIDED
HEREIN, YOU ACCEPT AND AGREE TO BE BOUND
BY THE TERMS OF THIS LICENSE. THE AUTHOR
GRANTS YOU THE RIGHTS CONTAINED HEREIN IN
CONSIDERATION OF YOUR ACCEPTANCE OF SUCH
TERMS AND CONDITIONS. IF YOU DO NOT AGREE
TO ACCEPT AND BE BOUND BY THE TERMS OF THIS
LICENSE, YOU CANNOT MAKE ANY USE OF THE WORK.
1. Definitions
.
a. “Articles” means, collectively, all articles written by
Author which describes how the Source Code and
Executable Files for the Work may be used by a user.
b. “Author” means the individual or entity that offers the
Work under the terms of this License.
c. “Derivative Work” means a work based upon the Work
or upon the Work and other pre-existing works.
d. “Executable Files” refer to the executables, binary
files, configuration and any required data files included
in the Work.
e. “Publisher” means the provider of the website,
magazine, CD-ROM, DVD or other medium from or by
which the Work is obtained by You.
f. “Source Code” refers to the collection of source code
and configuration files used to create the Executable
Files.
g. “Standard Version” refers to such a Work if it has not
been modified, or has been modified in accordance
with the consent of the Author, such consent being in
the full discretion of the Author.
h. “Work” refers to the collection of files distributed by
the Publisher, including the Source Code, Executable
Files, binaries, data files, documentation, whitepapers
and the Articles.
i. “You” is you, an individual or entity wishing to use the
Work and exercise your rights under this License.
2. Fair Use/Fair Use Rights. Nothing in this License is
intended to reduce, limit, or restrict any rights arising
from fair use, fair dealing, first sale or other limitations
on the exclusive rights of the copyright owner under
copyright law or other applicable laws.
3. License Grant. Subject to the terms and conditions of
this License, the Author hereby grants You a worldwide,
royalty-free, non-exclusive, perpetual (for the duration
of the applicable copyright) license to exercise the
rights in the Work as stated below:
a. You may use the standard version of the Source Code
or Executable Files in Your own applications.
b. You may apply bug fixes, portability fixes and other
modifications obtained from the Public Domain or from
the Author. A Work modified in such a way shall still be
considered the standard version and will be subject to
this License.
c. You may otherwise modify Your copy of this Work
(excluding the Articles) in any way to create a Derivative
Work, provided that You insert a prominent notice in
each changed file stating how, when and where You
changed that file.
d. You may distribute the standard version of the
Executable Files and Source Code or Derivative Work in
aggregate with other (possibly commercial) programs
as part of a larger (possibly commercial) software
distribution.
e. The Articles discussing the Work published in
any form by the author may not be distributed or
republished without the Author’s consent. The author
retains copyright to any such Articles. You may use
the Executable Files and Source Code pursuant to
this License but you may not repost or republish or
otherwise distribute or make available the Articles,
without the prior written consent of the Author.
Any subroutines or modules supplied by You and linked
into the Source Code or Executable Files this Work shall
not be considered part of this Work and will not be subject
to the terms of this License.
4. Patent License. Subject to the terms and conditions
of this License, each Author hereby grants to You
a perpetual, worldwide, non-exclusive, no-charge,
royalty-free, irrevocable (except as stated in this
section) patent license to make, have made, use,
import, and otherwise transfer the Work.
5. Restrictions. The license granted in Section 3 above is
expressly made subject to and limited by the following
restrictions:
a. You agree not to remove any of the original copyright,
patent, trademark, and attribution notices and
associated disclaimers that may appear in the Source
Code or Executable Files.
b. You agree not to advertise or in any way imply that this
Work is a product of Your own.
c. The name of the Author may not be used to endorse or
promote products derived from the Work without the
prior written consent of the Author.
d. You agree not to sell, lease, or rent any part of the
Work. This does not restrict you from including the
Work or any part of the Work inside a larger software
distribution that itself is being sold. The Work by itself,
though, cannot be sold, leased or rented.
e. You may distribute the Executable Files and Source
Code only under the terms of this License, and You
must include a copy of, or the Uniform Resource
Identifier for, this License with every copy of the
Executable Files or Source Code You distribute and
ensure that anyone receiving such Executable Files
and Source Code agrees that the terms of this License
apply to such Executable Files and/or Source Code.
You may not offer or impose any terms on the Work
that alter or restrict the terms of this License or the
recipients’ exercise of the rights granted hereunder. You
may not sublicense the Work. You must keep intact all
notices that refer to this License and to the disclaimer
of warranties. You may not distribute the Executable
Files or Source Code with any technological measures
that control access or use of the Work in a manner
inconsistent with the terms of this License.
f. You agree not to use the Work for illegal, immoral or
improper purposes, or on pages containing illegal,
immoral or improper material. The Work is subject to
applicable export laws. You agree to comply with all
such laws and regulations that may apply to the Work
after Your receipt of the Work.
6. Representations, Warranties and Disclaimer. THIS
WORK IS PROVIDED “AS IS”, “WHERE IS” AND “AS
AVAILABLE”, WITHOUT ANY EXPRESS OR IMPLIED
WARRANTIES OR CONDITIONS OR GUARANTEES.
YOU, THE USER, ASSUME ALL RISK IN ITS USE,
INCLUDING COPYRIGHT INFRINGEMENT, PATENT
INFRINGEMENT, SUITABILITY, ETC. AUTHOR
EXPRESSLY DISCLAIMS ALL EXPRESS, IMPLIED
OR STATUTORY WARRANTIES OR CONDITIONS,
INCLUDING WITHOUT LIMITATION, WARRANTIES
OR CONDITIONS OF MERCHANTABILITY,
MERCHANTABLE QUALITY OR FITNESS FOR A
PARTICULAR PURPOSE, OR ANY WARRANTY OF
TITLE OR NON-INFRINGEMENT, OR THAT THE WORK
(OR ANY PORTION THEREOF) IS CORRECT, USEFUL,
BUG-FREE OR FREE OF VIRUSES. YOU MUST PASS
THIS DISCLAIMER ON WHENEVER YOU DISTRIBUTE
THE WORK OR DERIVATIVE WORKS.
7. Indemnity. You agree to defend, indemnify and hold
harmless the Author and the Publisher from and
against any claims, suits, losses, damages, liabilities,
costs, and expenses (including reasonable legal or
attorneys??? fees) resulting from or relating to any use
of the Work by You.
8. Limitation on Liability. EXCEPT TO THE EXTENT
REQUIRED BY APPLICABLE LAW, IN NO EVENT
WILL THE AUTHOR OR THE PUBLISHER BE
LIABLE TO YOU ON ANY LEGAL THEORY FOR
ANY SPECIAL, INCIDENTAL, CONSEQUENTIAL,
PUNITIVE OR EXEMPLARY DAMAGES ARISING
OUT OF THIS LICENSE OR THE USE OF THE
WORK OR OTHERWISE, EVEN IF THE AUTHOR
OR THE PUBLISHER HAS BEEN ADVISED OF THE
POSSIBILITY OF SUCH DAMAGES.
9. Termination.
a. This License and the rights granted hereunder will
terminate automatically upon any breach by You of any
term of this License. Individuals or entities who have
received Derivative Works from You under this License,
however, will not have their licenses terminated
provided such individuals or entities remain in full
compliance with those licenses. Sections 1, 2, 6, 7, 8,
9, 10 and 11 will survive any termination of this License.
b. If You bring a copyright, trademark, patent or any
other infringement claim against any contributor
over infringements You claim are made by the Work,
your License from such contributor to the Work ends
automatically.
c. Subject to the above terms and conditions, this License
is perpetual (for the duration of the applicable copyright
in the Work). Notwithstanding the above, the Author
reserves the right to release the Work under different
license terms or to stop distributing the Work at any
time; provided, however that any such election will not
serve to withdraw this License (or any other license
that has been, or is required to be, granted under the
terms of this License), and this License will continue in
full force and effect unless terminated as stated above.
10. Publisher. The parties hereby confirm that the Publisher
shall not, under any circumstances, be responsible for
and shall not have any liability in respect of the subject
matter of this License. The Publisher makes no warranty
Basic version
Advanced version
InformationsInformations
DVD

LICENSE
whatsoever in connection with the Work and shall not
be liable to You or any party on any legal theory for any
damages whatsoever, including without limitation any
general, special, incidental or consequential damages
arising in connection to this license. The Publisher
reserves the right to cease making the Work available
to You at any time without notice
11. Miscellaneous
a. This License shall be governed by the laws of the
location of the head office of the Author or if the Author
is an individual, the laws of location of the principal
place of residence of the Author.
b. If any provision of this License is invalid or unenforceable
under applicable law, it shall not affect the validity or
enforceability of the remainder of the terms of this
License, and without further action by the parties to
this License, such provision shall be reformed to the
minimum extent necessary to make such provision
valid and enforceable.
c. No term or provision of this License shall be deemed
waived and no breach consented to unless such waiver
or consent shall be in writing and signed by the party to
be charged with such waiver or consent.
d. This License constitutes the entire agreement
between the parties with respect to the Work licensed
herein. There are no understandings, agreements or
representations with respect to the Work not specified
herein. The Author shall not be bound by any additional
provisions that may appear in any communication from
You. This License may not be modified without the
mutual written agreement of the Author and You
n libogg
http://www.xiph.org/ogg/
Copyright (c) 2002, Xiph.org Foundation
Redistribution and use in source and binary forms, with
or without modification, are permitted provided that the
following conditions are met:
•Redistributions of source code must retain the above
copyright notice, this list of conditions and the following
disclaimer.
•Redistributions in binary form must reproduce the above
copyright notice, this list of conditions and the following
disclaimer in the documentation and/or other materials
provided with the distribution.
•Neither the name of the Xiph.org Foundation nor the
names of its contributors may be used to endorse or
promote products derived from this software without
specific prior written permission.
THIS SOFTWARE IS PROVIDED BY THE COPYRIGHT
HOLDERS AND CONTRIBUTORS ``AS IS’’ AND ANY
EXPRESS OR IMPLIED WARRANTIES, INCLUDING,
BUT NOT LIMITED TO, THE IMPLIED WARRANTIES OF
MERCHANTABILITY AND FITNESS FOR A PARTICULAR
PURPOSE ARE DISCLAIMED. IN NO EVENT SHALL THE
FOUNDATION OR CONTRIBUTORS BE LIABLE FOR ANY
DIRECT, INDIRECT, INCIDENTAL, SPECIAL, EXEMPLARY,
OR CONSEQUENTIAL DAMAGES (INCLUDING, BUT NOT
LIMITED TO, PROCUREMENT OF SUBSTITUTE GOODS
OR SERVICES; LOSS OF USE, DATA, OR PROFITS; OR
BUSINESS INTERRUPTION) HOWEVER CAUSED AND ON
ANY THEORY OF LIABILITY, WHETHER IN CONTRACT,
STRICT LIABILITY, OR TORT (INCLUDING NEGLIGENCE
OR OTHERWISE) ARISING IN ANY WAY OUT OF THE
USE OF THIS SOFTWARE, EVEN IF ADVISED OF THE
POSSIBILITY OF SUCH DAMAGE.
n libvorbis
http://www.xiph.org/vorbis/
Copyright (c) 2002-2004 Xiph.org Foundation
Redistribution and use in source and binary forms, with
or without modification, are permitted provided that the
following conditions are met:
•Redistributions of source code must retain the above
copyright notice, this list of conditions and the following
disclaimer.
•Redistributions in binary form must reproduce the above
copyright notice, this list of conditions and the following
disclaimer in the documentation and/or other materials
provided with the distribution.
•Neither the name of the Xiph.org Foundation nor the
names of its contributors may be used to endorse or
promote products derived from this software without
specific prior written permission.
THIS SOFTWARE IS PROVIDED BY THE COPYRIGHT
HOLDERS AND CONTRIBUTORS ``AS IS'' AND ANY
EXPRESS OR IMPLIED WARRANTIES, INCLUDING,
BUT NOT LIMITED TO, THE IMPLIED WARRANTIES OF
MERCHANTABILITY AND FITNESS FOR A PARTICULAR
PURPOSE ARE DISCLAIMED. IN NO EVENT SHALL THE
FOUNDATION OR CONTRIBUTORS BE LIABLE FOR ANY
DIRECT, INDIRECT, INCIDENTAL, SPECIAL, EXEMPLARY,
OR CONSEQUENTIAL DAMAGES (INCLUDING, BUT NOT
LIMITED TO, PROCUREMENT OF SUBSTITUTE GOODS
OR SERVICES; LOSS OF USE, DATA, OR PROFITS; OR
BUSINESS INTERRUPTION) HOWEVER CAUSED AND ON
ANY THEORY OF LIABILITY, WHETHER IN CONTRACT,
STRICT LIABILITY, OR TORT (INCLUDING NEGLIGENCE
OR OTHERWISE) ARISING IN ANY WAY OUT OF THE
USE OF THIS SOFTWARE, EVEN IF ADVISED OF THE
POSSIBILITY OF SUCH DAMAGE.
n Tremolo
http://wss.co.uk/pinknoise/tremolo
Copyright (C) 2002-2009 Xiph.org Foundation Changes
Copyright (C) 2009-2010 Robin Watts for Pinknoise
Productions Ltd
Redistribution and use in source and binary forms, with
or without modification, are permitted provided that the
following conditions are met:
•Redistributions of source code must retain the above
copyright notice, this list of conditions and the following
disclaimer.
•Redistributions in binary form must reproduce the above
copyright notice, this list of conditions and the following
disclaimer in the documentation and/or other materials
provided with the distribution.
•Neither the name of the Xiph.org Foundation nor the
names of its contributors may be used to endorse or
promote products derived from this software without
specific prior written permission.
THIS SOFTWARE IS PROVIDED BY THE COPYRIGHT
HOLDERS AND CONTRIBUTORS ``AS IS’’ AND ANY
EXPRESS OR IMPLIED WARRANTIES, INCLUDING,
BUT NOT LIMITED TO, THE IMPLIED WARRANTIES OF
MERCHANTABILITY AND FITNESS FOR A PARTICULAR
PURPOSE ARE DISCLAIMED. IN NO EVENT SHALL THE
FOUNDATION OR CONTRIBUTORS BE LIABLE FOR ANY
DIRECT, INDIRECT, INCIDENTAL, SPECIAL, EXEMPLARY,
OR CONSEQUENTIAL DAMAGES (INCLUDING, BUT NOT
LIMITED TO, PROCUREMENT OF SUBSTITUTE GOODS
OR SERVICES; LOSS OF USE, DATA, OR PROFITS; OR
BUSINESS INTERRUPTION) HOWEVER CAUSED AND ON
ANY THEORY OF LIABILITY, WHETHER IN CONTRACT,
STRICT LIABILITY, OR TORT (INCLUDING NEGLIGENCE
OR OTHERWISE) ARISING IN ANY WAY OUT OF THE
USE OF THIS SOFTWARE, EVEN IF ADVISED OF THE
POSSIBILITY OF SUCH DAMAGE.
n Tremor
http://wiki.xiph.org/index.php/Tremor
Copyright (c) 2002, Xiph.org Foundation
Redistribution and use in source and binary forms, with
or without modification, are permitted provided that the
following conditions are met:
•Redistributions of source code must retain the above
copyright notice, this list of conditions and the following
disclaimer.
•Redistributions in binary form must reproduce the above
copyright notice, this list of conditions and the following
disclaimer in the documentation and/or other materials
provided with the distribution.
•Neither the name of the Xiph.org Foundation nor the
names of its contributors may be used to endorse or
promote products derived from this software without
specific prior written permission.
THIS SOFTWARE IS PROVIDED BY THE COPYRIGHT
HOLDERS AND CONTRIBUTORS ``AS IS’’ AND ANY
EXPRESS OR IMPLIED WARRANTIES, INCLUDING,
BUT NOT LIMITED TO, THE IMPLIED WARRANTIES OF
MERCHANTABILITY AND FITNESS FOR A PARTICULAR
PURPOSE ARE DISCLAIMED. IN NO EVENT SHALL THE
FOUNDATION OR CONTRIBUTORS BE LIABLE FOR ANY
DIRECT, INDIRECT, INCIDENTAL, SPECIAL, EXEMPLARY,
OR CONSEQUENTIAL DAMAGES (INCLUDING, BUT NOT
LIMITED TO, PROCUREMENT OF SUBSTITUTE GOODS
OR SERVICES; LOSS OF USE, DATA, OR PROFITS; OR
BUSINESS INTERRUPTION) HOWEVER CAUSED AND ON
ANY THEORY OF LIABILITY, WHETHER IN CONTRACT,
STRICT LIABILITY, OR TORT (INCLUDING NEGLIGENCE
OR OTHERWISE) ARISING IN ANY WAY OUT OF THE
USE OF THIS SOFTWARE, EVEN IF ADVISED OF THE
POSSIBILITY OF SUCH DAMAGE.
n Mersenne Twister
http://www.math.sci.hiroshima-u.ac.jp/~m-mat/MT/
MT2002/CODES/mt19937ar.c
Copyright (C) 1997 - 2002, Makoto Matsumoto and
Takuji Nishimura,
All rights reserved.
Redistribution and use in source and binary forms,
with or without modification, are permitted provided
that the following conditions are met:
1. Redistributions of source code must retain the
above copyright notice, this list of conditions
and the following disclaimer.
2. Redistributions in binary form must reproduce
the above copyright notice, this list of
conditions and the following disclaimer in the
documentation and/or other materials provided
with the distribution.
3. The names of its contributors may not be used
to endorse or promote products derived from
this software without specific prior written
permission.
THIS SOFTWARE IS PROVIDED BY THE COPYRIGHT
HOLDERS AND CONTRIBUTORS “AS IS” AND ANY
EXPRESS OR IMPLIED WARRANTIES, INCLUDING,
BUT NOT LIMITED TO, THE IMPLIED WARRANTIES OF
MERCHANTABILITY AND FITNESS FOR A PARTICULAR
PURPOSE ARE DISCLAIMED. IN NO EVENT SHALL THE
COPYRIGHT OWNER OR CONTRIBUTORS BE LIABLE
FOR ANY DIRECT, INDIRECT, INCIDENTAL, SPECIAL,
EXEMPLARY, OR CONSEQUENTIAL DAMAGES
(INCLUDING, BUT NOT LIMITED TO, PROCUREMENT
OF SUBSTITUTE GOODS OR SERVICES; LOSS OF USE,
DATA, OR PROFITS; OR BUSINESS INTERRUPTION)
HOWEVER CAUSED AND ON ANY THEORY OF LIABILITY,
WHETHER IN CONTRACT, STRICT LIABILITY, OR TORT
(INCLUDING NEGLIGENCE OR OTHERWISE) ARISING IN
ANY WAY OUT OF THE USE OF THIS SOFTWARE, EVEN
IF ADVISED OF THE POSSIBILITY OF SUCH DAMAGE.
n zlib
http://www.zlib.net/
zlib.h -- interface of the ‘zlib’ general purpose compression
library version 1.2.3, July 18th, 2005
Copyright (C) 1995-2004 Jean-loup Gailly and Mark Adler
This software is provided ‘as-is’, without any express or
implied warranty. In no event will the authors be held liable
for any damages arising from the use of this software.
Permission is granted to anyone to use this software for
any purpose, including commercial applications, and to
alter it and redistribute it freely, subject to the following
restrictions:
Basic version
Advanced version
InformationsInformations
DVD

LICENSE
1. The origin of this software must not be misrepresented;
you must not claim that you wrote the original
software. If you use this software in a product, an
acknowledgment in the product documentation would
be appreciated but is not required.
2. Altered source versions must be plainly marked as
such, and must not be misrepresented as being the
original software.
3. This notice may not be removed or altered from any
source distribution.
Jean-loup Gailly [email protected], Mark Adler madler@
alumni.caltech.edu
n cURL
http://curl.haxx.se
COPYRIGHT AND PERMISSION NOTICE
Copyright (c) 1996 - 2011, Daniel Stenberg, <daniel@haxx.
se>.
All rights reserved.
Permission to use, copy, modify, and distribute this
software for any purpose with or without fee is hereby
granted, provided that the above copyright notice and this
permission notice appear in all copies.
THE SOFTWARE IS PROVIDED “AS IS”, WITHOUT
WARRANTY OF ANY KIND, EXPRESS OR IMPLIED,
INCLUDING BUT NOT LIMITED TO THE WARRANTIES
OF MERCHANTABILITY, FITNESS FOR A PARTICULAR
PURPOSE AND NONINFRINGEMENT OF THIRD PARTY
RIGHTS. IN NO EVENT SHALL THE AUTHORS OR
COPYRIGHT HOLDERS BE LIABLE FOR ANY CLAIM,
DAMAGES OR OTHER LIABILITY, WHETHER IN AN
ACTION OF CONTRACT, TORT OR OTHERWISE,
ARISING FROM, OUT OF OR IN CONNECTION WITH THE
SOFTWARE OR THE USE OR OTHER DEALINGS IN THE
SOFTWARE.
Except as contained in this notice, the name of a copyright
holder shall not be used in advertising or otherwise to
promote the sale, use or other dealings in this Software
without prior written authorization of the copyright holder.
n c-ares
http://c-ares.haxx.se
Copyright 1998 by the Massachusetts Institute of
Technology.
Permission to use, copy, modify, and distribute this
software and its documentation for any purpose and
without fee is hereby granted, provided that the above
copyright notice appear in all copies and that both that
copyright notice and this permission notice appear in
supporting documentation, and that the name of M.I.T. not
be used in advertising or publicity pertaining to distribution
of the software without specific, written prior permission.
M.I.T. makes no representations about the suitability of
this software for any purpose. It is provided “as is” without
express or implied warranty.
License Information for the Software
Used in the Unit
About GPL (GNU-General Public License), LGPL (GNU
Lesser General Public License) License
This product uses GPL/LGPL software and software made
by other companies.
After you purchase this product, you may procure, modify
or distribute the source code of the GPL/LGPL software
that is used in the product.
DENON provides the source code based on the GPL and
LPGL licenses at the actual cost upon your request to our
customer service center. However, note that we make
no guarantees concerning the source code. Please also
understand that we do not offer support for the contents
of the source code.
Basic version
Advanced version
InformationsInformations
DVD
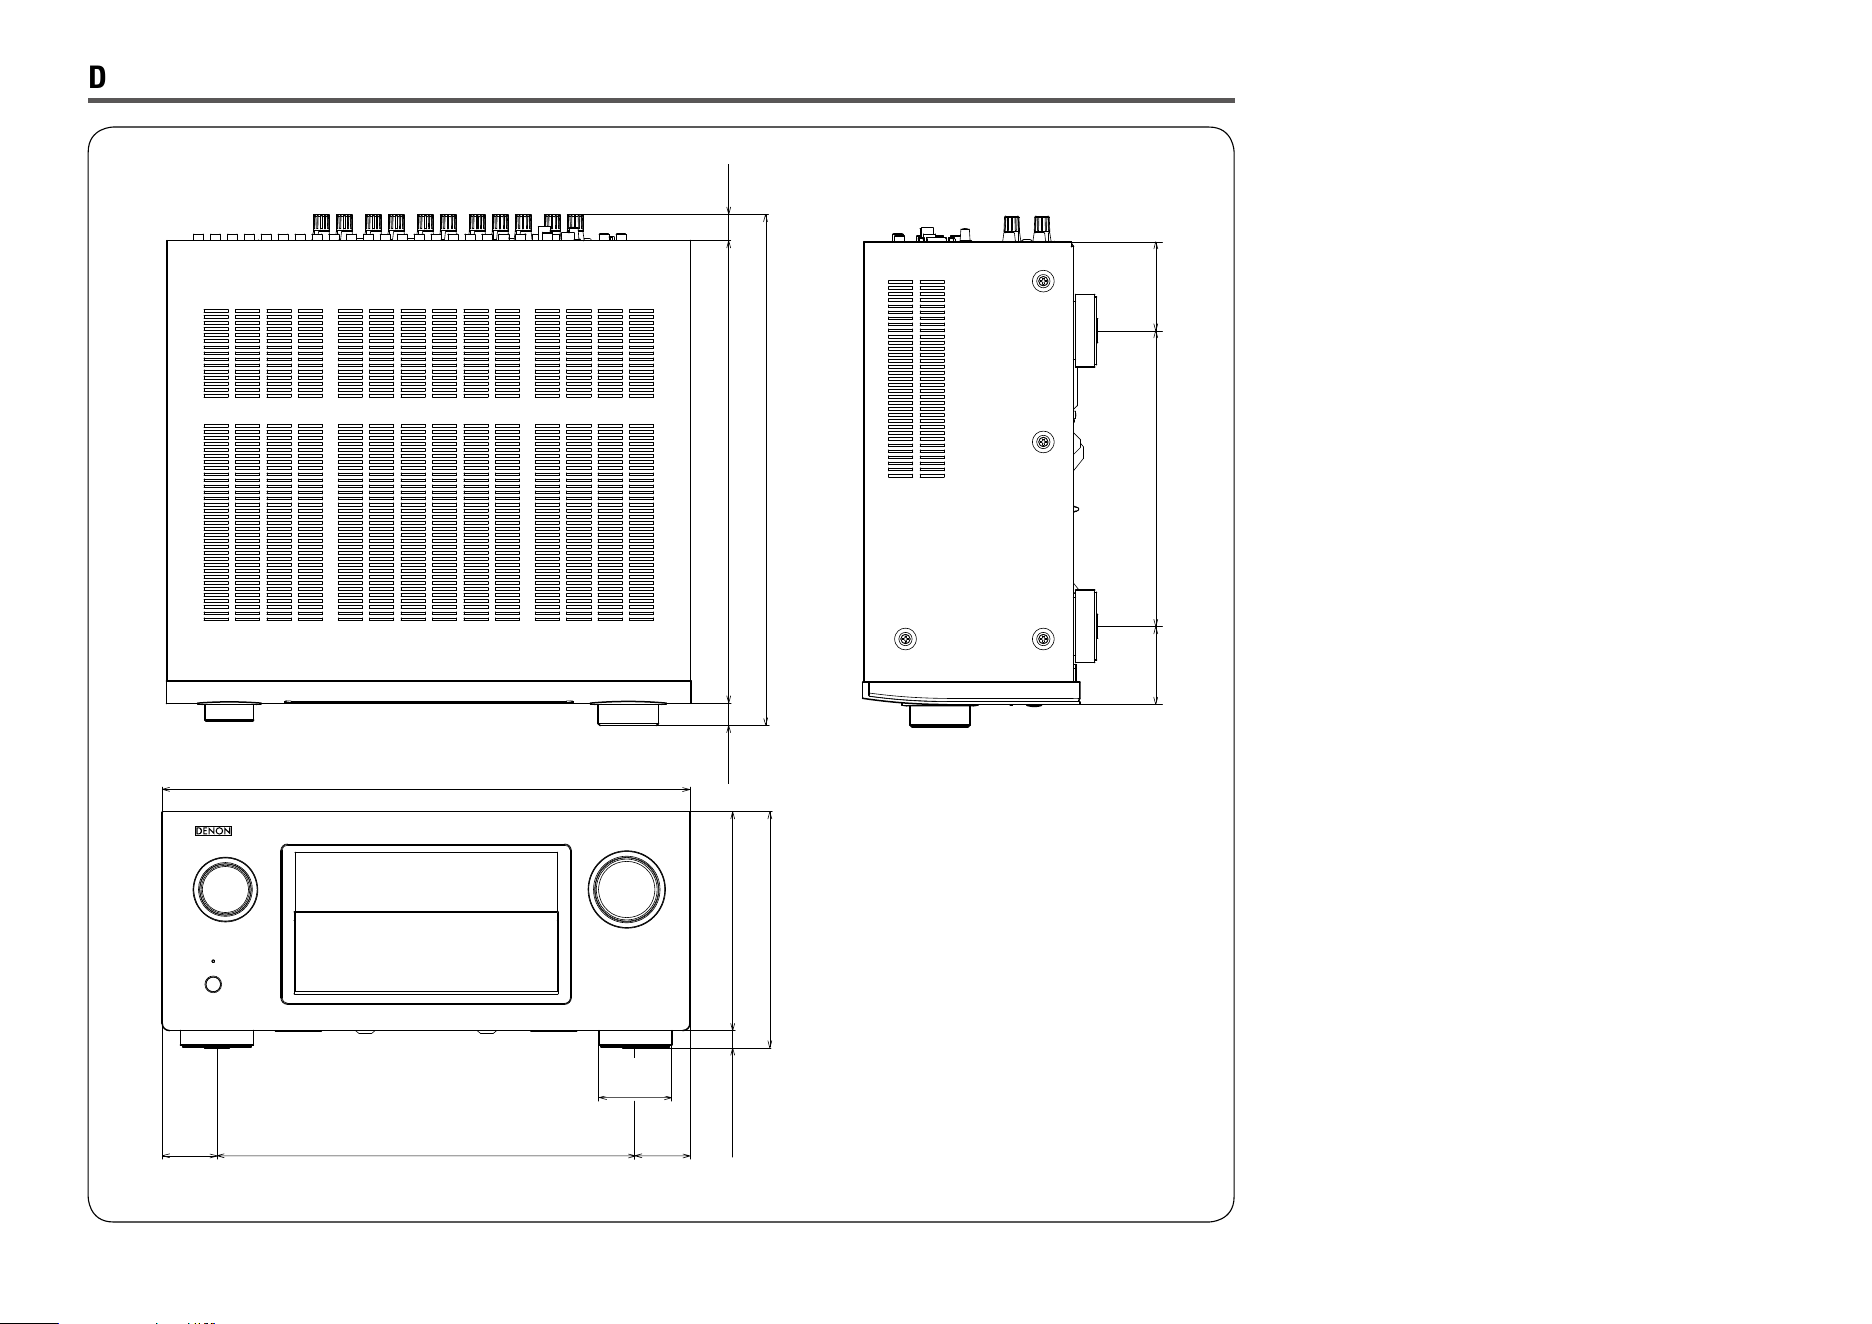
Dimensions
Unit : in. (mm)
15 5/64 (382.8)
16 41/64 (422.7)
9 5/8 (244.5)
2 35/64
(64.7)
2 57/64
(73.6)
37/64 (14.5) 7 3/32 (180.0)
7 21/32 (194.5)
17 3/32 (434.0)
13 25/64 (340.0)
2 23/64
(60.0)
1 27/32
(47.0)
1 27/32
(47.0)
47/64
(18.5)
27/32
(21.4)
Weight : 36 lbs 6 oz (16.5 kg)
Basic version
Advanced version
InformationsInformations
DVD

D&M Holdings Inc.
3520 10173 10AD
V01
www.denon.com