Loading ...
Loading ...
Loading ...
Contact us for assistance: (866) 985-7877 | www.wtliving.com 6
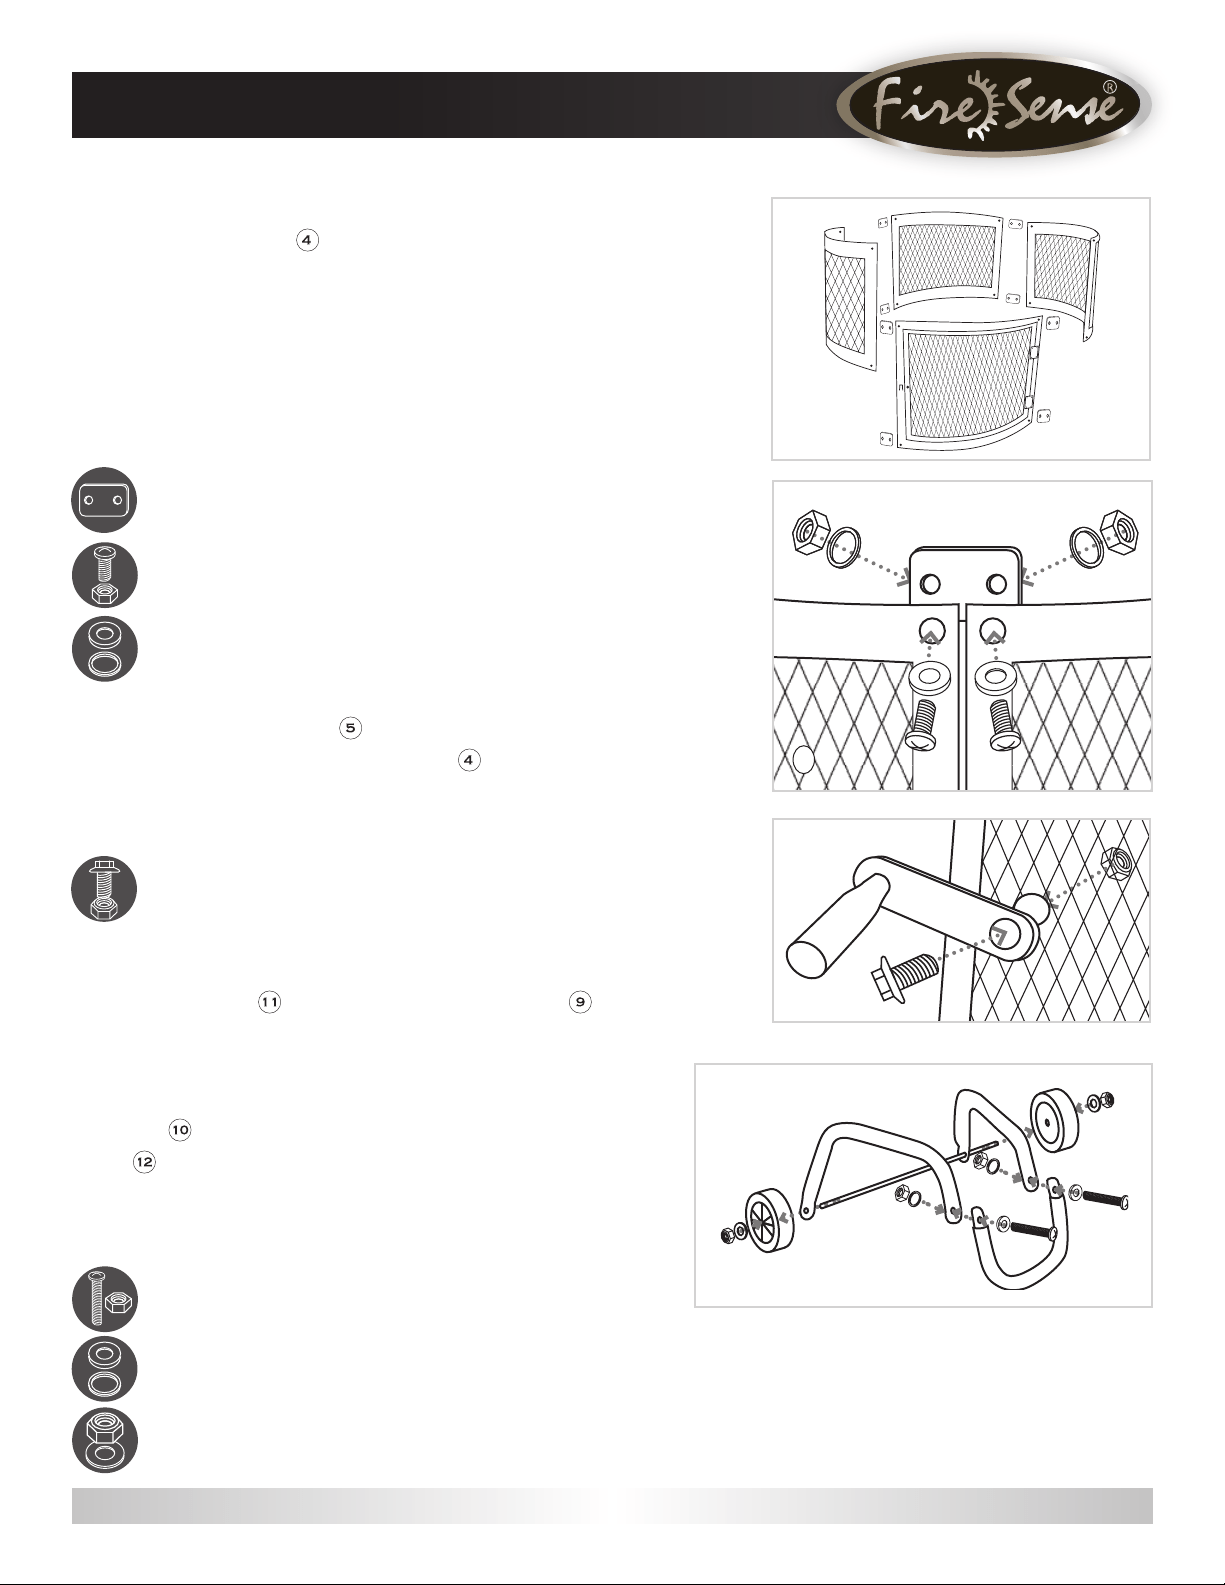
3
Align holes in Connecting Brackets
I
with the Screens
and the Screen Door . (Note: Connecting brackets
need to face to the outside of screen sections, and tabs on
top of connecting brackets need to face to the outside of
screen sections). Slide M6x18 Washer
C
onto M6x15
Screw
A
and through the hole in the Connecting Bracket and
Screen. Secure with M6x9 Lock Washer
B
and M6x15 Nut
A
.
Repeat with remaining Connecting Brackets.
Hardware Used: 8x Connecting Brackets
16x M6x15 Screw/Nut,
M6x9 Lock Washer,
M6x18 Washer
4
To attach the Door Latch , align the hole in the Door
Latch with the hole in the Screen Door and insert
M5x10 Screw
D
and secure with M5x10 Lock Nut
D
.
Tighten all hardware.
Hardware Used: 1x M5x10 Screw/Lock Nut
5
Insert the U-Leg into the ends of the 2 Leg Stands
and align holes. Slide M6x18 Washer
C
onto M6x35
Screw
E
, then insert through holes and secure with M6x9
Lock Washer
B
and M6x35 Nut
E
. Repeat for other side.
Insert Axle through
the holes on the 2 Leg Stands. Then slide
Wheel over end of Axle. Place M12x22 Washer
F
over end
of Axle and secure Wheel with M10 Lock Nut
G
. Repeat for
other side. Tighten all hardware.
Hardware Used: 2x M6x35 Screw,
M6x9 Lock Washer,
M6x18 Washer, M6x35 Nut,
M12x22 Washer, M10 Lock Nut
ASSEMBLY
3
3
4
5
Loading ...
Loading ...
Loading ...