Loading ...
Loading ...
Loading ...
Page 7
FREE STANDING MODELS
Your Vintage Grill has provision for mounting onto a mobile cart. Contact your Vintage dealer for the
appropriate cart for your grill.
1. Remove all packaging materials.
2. Ensure that tile burners are positioned correctly on their orifices, and are fully seated onto their supports.
3. Position the Briquette trays onto their location brackets and place briquettes evenly across tray.
(Note: The XBBQ models utilize the V-Flame heat distribution system. No briquettes are needed)
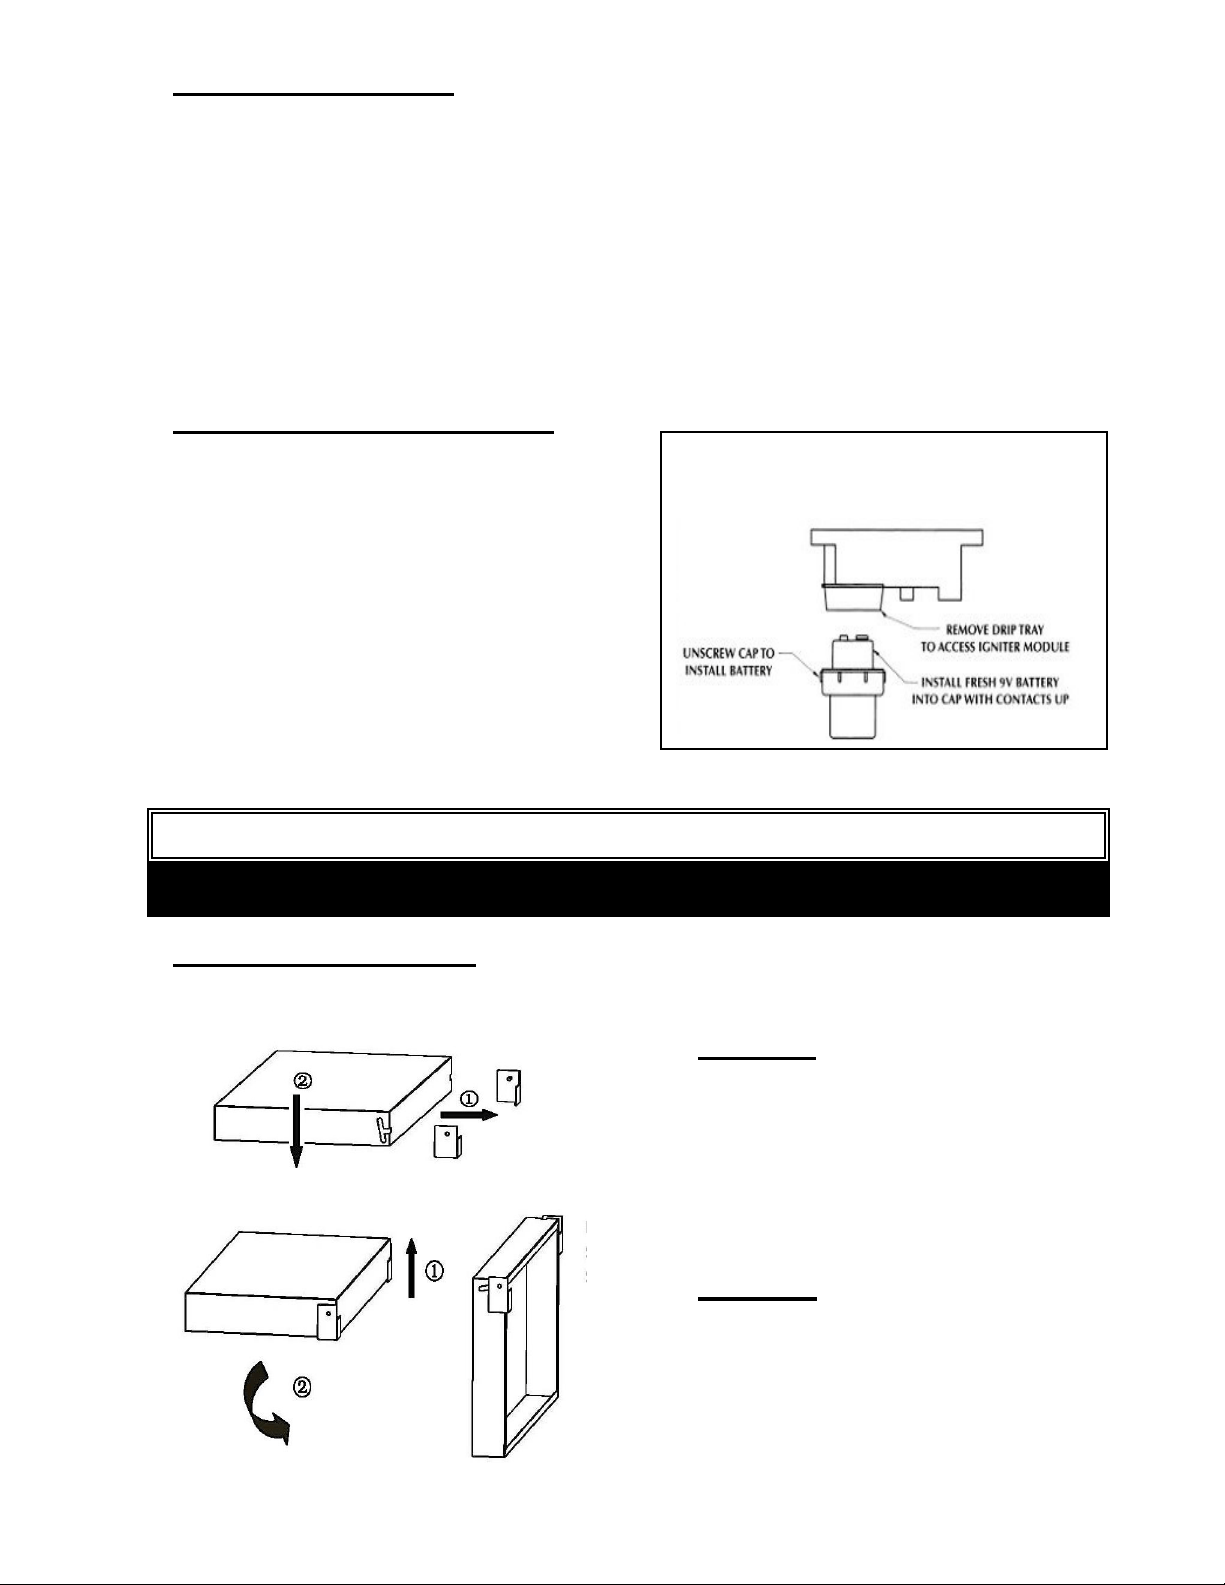
4. Ensure that NEW batteries are fitted and the igniter cap is properly installed. (See Fig. 1).
5. Make the connection to the gas regulator according to the instructions on pages 8 & 9 for your gas type.
6. Allow a minimum of 3" clearance around all sides of grill for proper air movement.
7. Lock the rear casters to prevent unwanted grill movement.
IGNITER BATTERY INSTALLATION
Install 9V igniter batteries
1.
Locate the igniter modules at the bottom of the
control panel by removing the drip tray.
2.
Unscrew the round black cap from the module
and install a new 9V battery into the cap.
3.
Reinstall cap into module and tighten cap
completely.
4.
Replace the drip tray
NOTE: 30” Grills have only one module and require one
9V battery. All other grills have two modules and
require two 9V batteries.
SIDE SHELF INSTALLATION
For VBQ models, please use the following side shelf installation:
Installation: Insert the shelf into the
side shelf brackets. Push the side
shelf down so that the pin on the
bracket is secured into the notch of
the side shelf.
Fold Down: Lift shelf up following
the tracks and then fold the shelf
down 90 degrees.
!!!WARNING!!!
Never operate the grill without the drip tray installed as hot grease can leak through the grill and cause a hazard.
Figure 1- Battery Installation
Loading ...
Loading ...
Loading ...