Loading ...
Loading ...
Loading ...
7
ENGLISH
USB storage
device
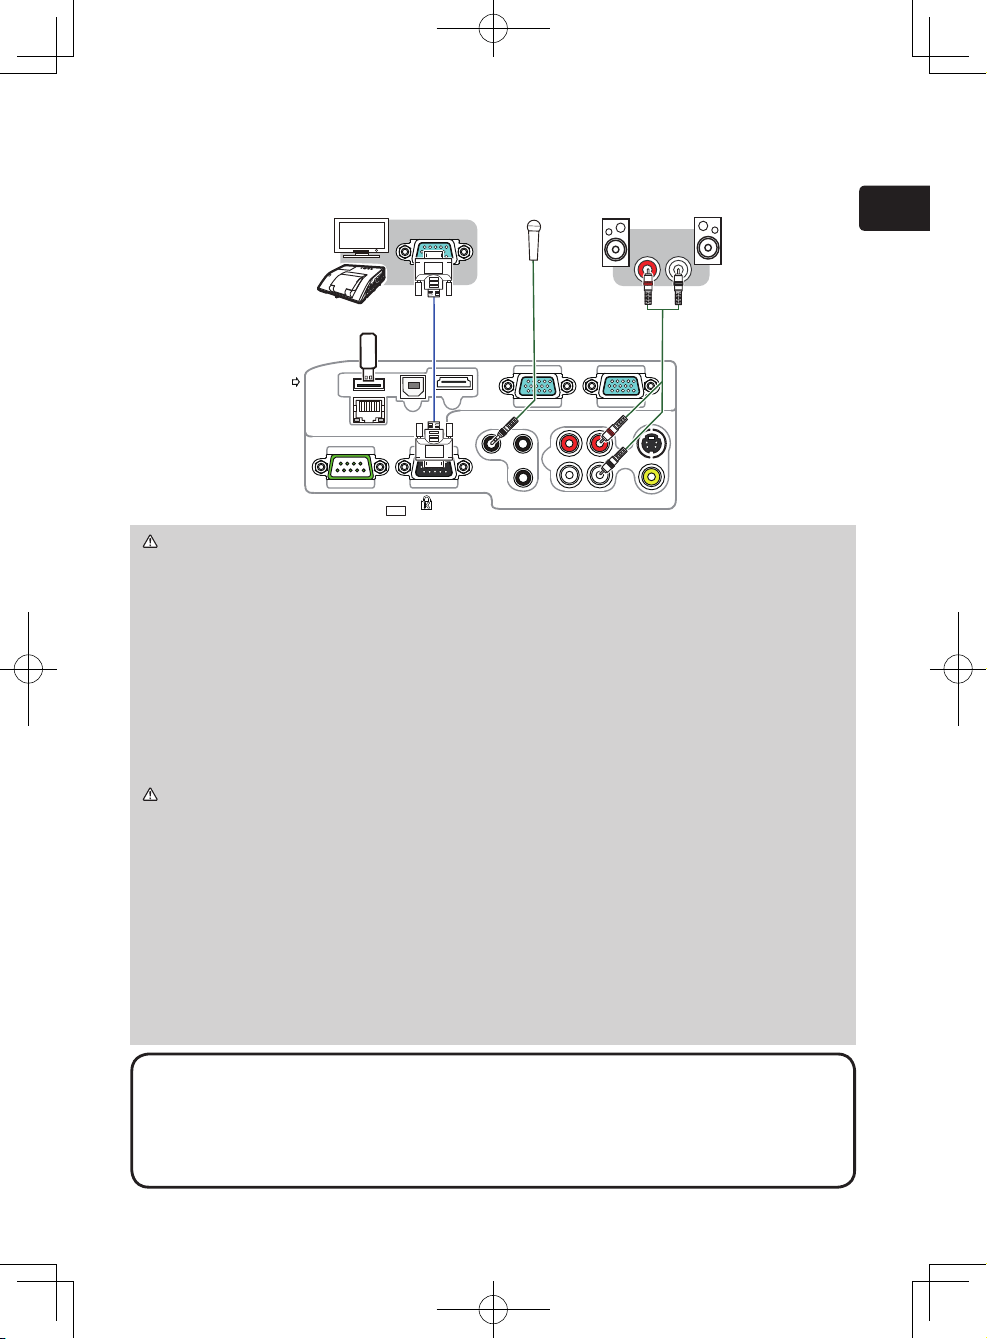
Connecting with your devices (continued)
COMPUTER IN1COMPUTER IN2
HDMI
USB TYPE B
S-VIDEO
VIDEO
AUDIO OUT
AUDIO IN3AUDIO IN1
AUDIO IN2
MIC
MONITOR OUT
CONTROL
USB
TYPE A
DC5V
0.5A
R
L
RGB IN
Microphone
system
Speakers
(with an amplier)
Monitor
NOTE • If a loud feedback noise is produced from the speaker, move the
microphone away from the speaker.
• This projector doesn't support plug-in power for the microphone.
•
The COMPUTER IN1/2 port can support a component signal also. The specic
adapter or the specic cable is required for a component video input to the projector.
WARNING ►Use only the appropriate accessories. Otherwise it could
cause a re or damage to the device and the projector.
- Use only the accessories specied or recommended by the projector’s
manufacturer. Consult your dealer when the required accessory did not come
with the product or the accessory is damaged. It may be regulated under
some standard.
- For a cable with a core at only one end, connect the end with the core to the
projector. That may be required by EMI regulations.
- Neither disassemble nor modify the projector and the accessories.
- Do not use the damaged accessory. Be careful not to damage the
accessories. Route a cable so that it is neither stepped on nor pinched out.
CAUTION ►Do not turn on or off the projector while connected to a device
in operation, unless that is directed in the manual of the device.
►Be careful not to mistakenly connect a connector to a wrong port.
►Before connecting the projector to a network, be sure to obtain the consent of
the administrator of the network.
►Do not connect the LAN port to any network that might have the excessive
voltage.
►
Before removing the USB storage device from the port of the projector, be sure
to use the REMOVE USB function on the thumbnail screen to secure your data.
NOTICE ►Use the cables with straight plugs, not L-shaped ones, as the input
ports of the projector are recessed.
Loading ...
Loading ...
Loading ...