Loading ...
Loading ...
Loading ...
n
Layout
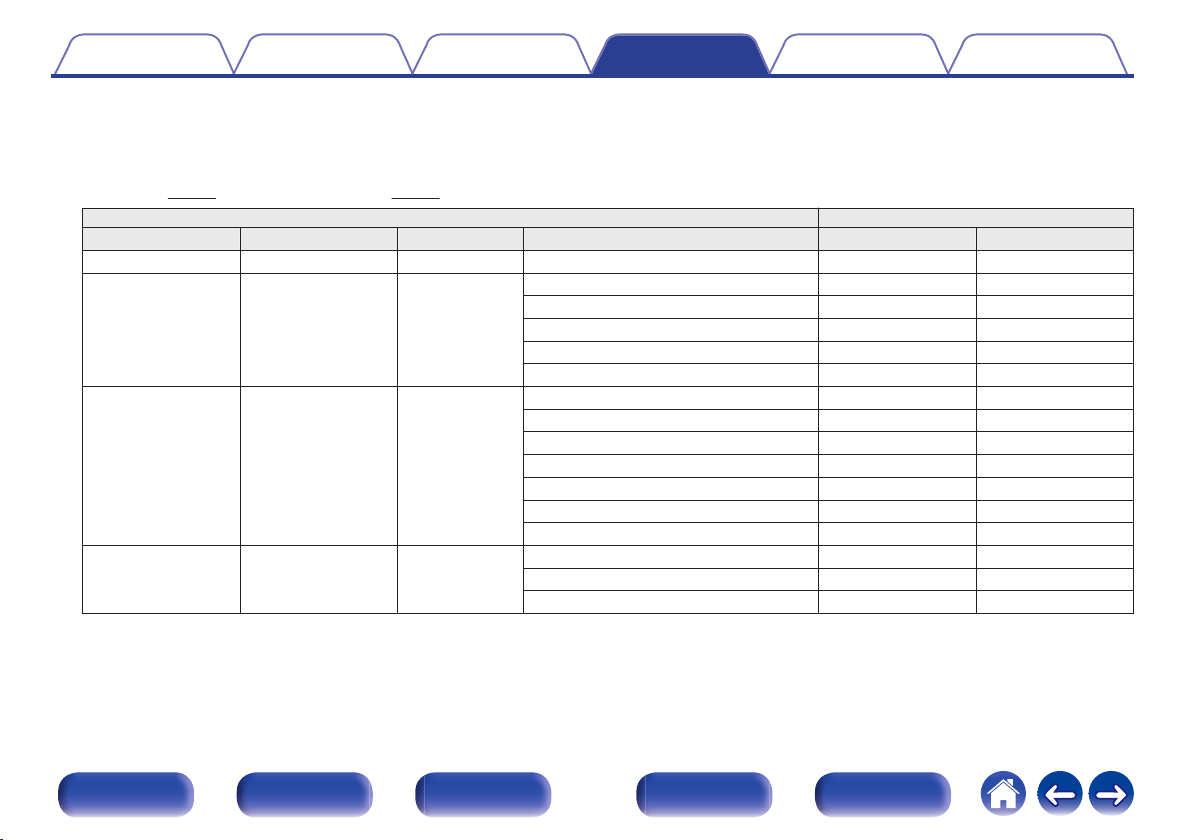
Select the height, ceiling, or Dolby Atmos Enabled speaker location.
The layouts that can be selected differ depending on the combinations of “Assign Mode” and “Floor” - “Layout” in the menu. (“ Assign
Mode ” (v
p. 222), “Floor” - “ Layout ” (v p. 225))
Settings AUDIO OUT connectors
Height Sp Dolby Sp NOTE Layout HEIGHT 1 HEIGHT 2
None None - - -
2ch None
Front Height (Default) Front Height -
Top Front Top Front -
Top Middle Top Middle -
Top Rear Top Rear -
Rear Height Rear Height -
4ch None
z
1
Front Height & Top Middle Front Height Top Middle
Front Height & Top Rear Front Height Top Rear
Front Height & Rear Height
z
2
Front Height Rear Height
Front Height & Surr. Height Front Height Surr. Height
Top Front & Top Rear Top Front Top Rear
Top Front & Rear Height Top Front Rear Height
Top Middle & Rear Height Top Middle Rear Height
None 2ch
Front Dolby Front Dolby -
Surround Dolby Surround Dolby -
Back Dolby
z
3
Back Dolby -
z1
This can be selected when “Assign Mode” is set to “11.1ch” or “9.1ch” in the menu.
z2
For the best Auro-3D experience Surround Height speakers are recommended, however you may substitute Rear Height speakers from a Dolby Atmos speaker setup
in place of Surround Height speakers.
z3
This can be selected when “Assign Mode” is set to “11.1ch” or “9.1ch” and “Floor” - “Layout” is set to “5ch & SB” in the menu.
Contents Connections Playback Settings Tips Appendix
226
Front panel Display Rear panel Remote Index
Loading ...
Loading ...
Loading ...