
Loading ...
Loading ...
Loading ...
20
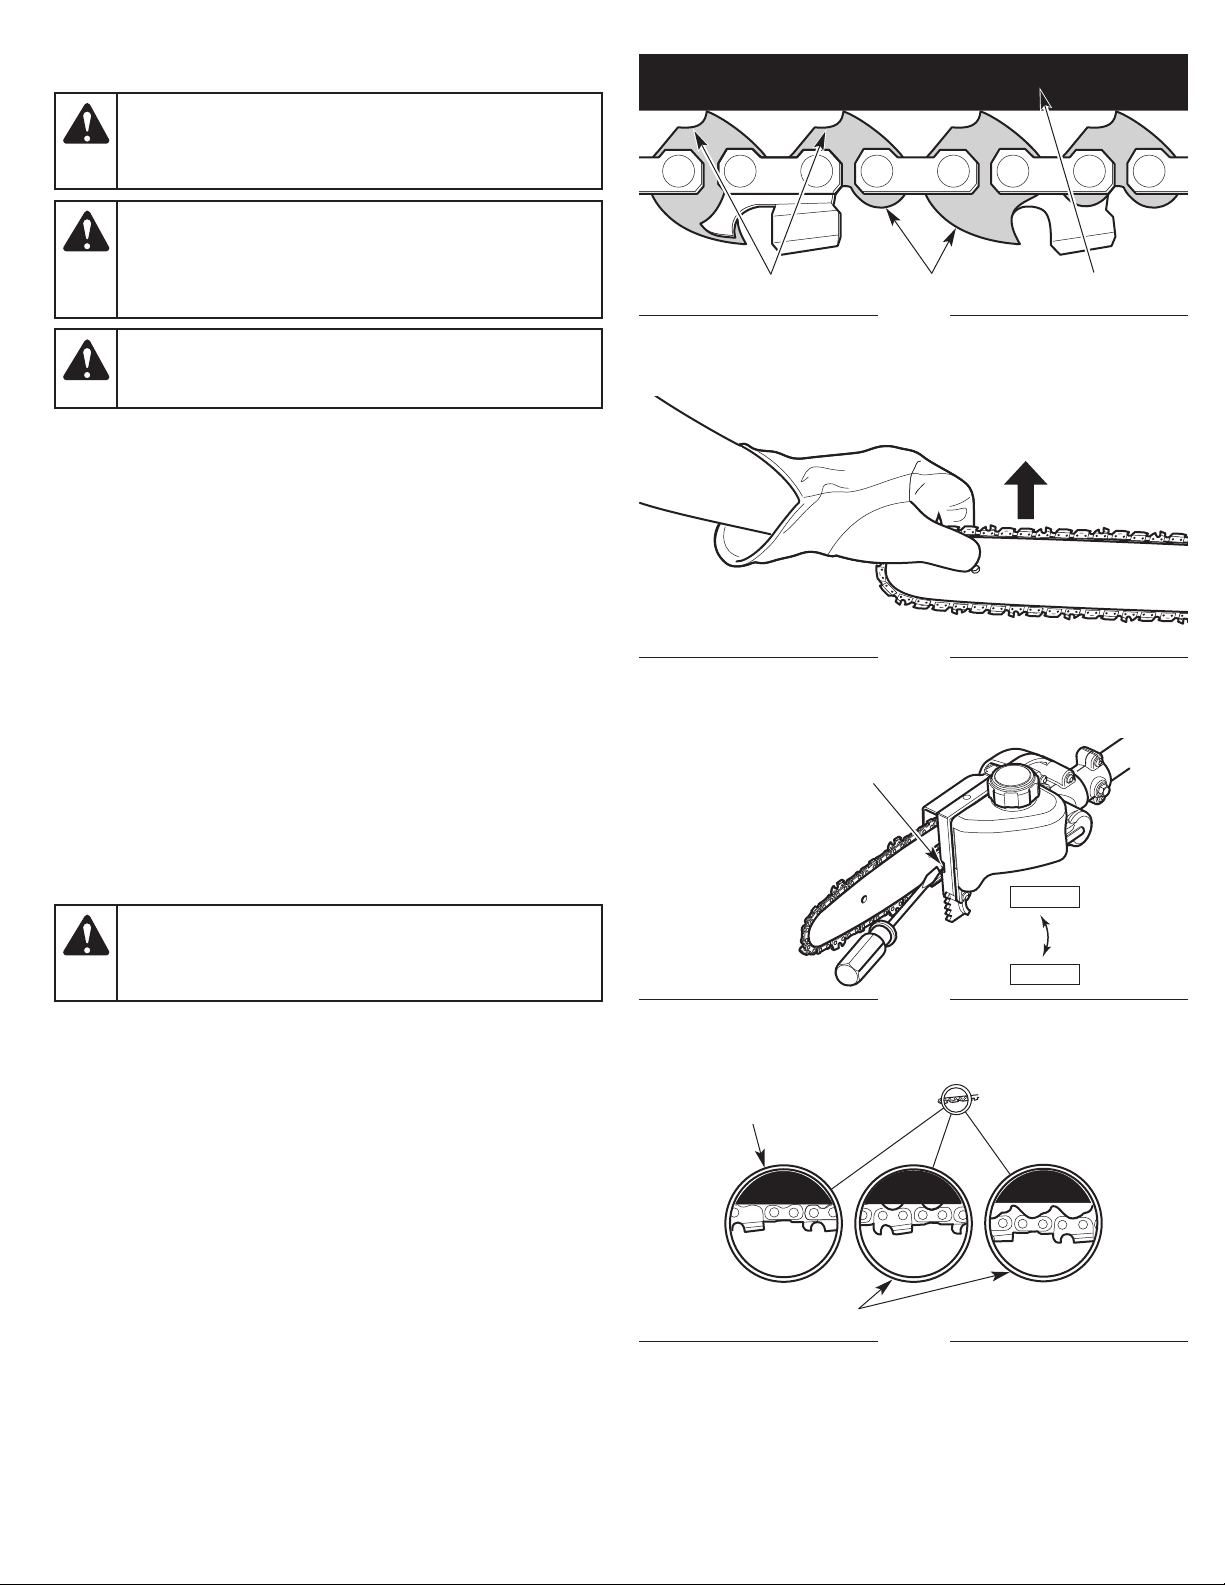
Fig. 15
Chain-Tensioning Screw
ADJUSTING THE CHAIN TENSION
Check the chain tension before and during operation. The saw chain
will expand as it heats up during operation. Adjust the chain tension
whenever the flats on the saw chain hang out of the bar groove (Fig. 13
& Fig. 16).
NOTE: A new saw chain tends to stretch and will need readjustment
after as few as five (5) cuts. This is normal during the break-in
period. The interval between future adjustments will lengthen
quickly.
1. Loosen the bar-retaining nuts, but do not remove them (Fig. 10).
2. Hold the guide bar tip up (Fig. 14) and use a flat-head
screwdriver to turn the chain-tensioning screw (Fig. 15).
• Turn the chain-tensioning screw clockwise to tighten the saw
chain.
• Turn the chain-tensioning screw counterclockwise to loosen
the saw chain.
The saw chain should fit snuggly against the underside of the
guide bar. There should be no sag (Fig. 16).
3. Continue to hold the guide bar tip up. Tighten the bar-retaining
nuts securely.
4. Move the saw chain back and forth on the guide bar. If the saw
chain does not move freely, loosen the chain tension.
CAUTION:
The guide bar, saw chain, and saw bearings
will wear more rapidly if the saw chain is not properly
tensioned. Maintaining proper chain tension will improve
cutting performance and prolong the life of the saw chain.
WARNING:
To prevent serious injury, never touch the
saw chain or adjust the chain tension while the unit is
running. Always stop the engine and allow it to cool.
Disconnect the spark plug wire to prevent the unit from
starting accidentally.
WARNING:
The saw chain is very sharp. Always wear
heavy-duty protective gloves when handling or performing
maintenance on the saw chain.
Fig. 13
Flats
Drive Links
Guide Bar
CAUTION:
If the saw chain was tensioned while warm, it
may become too tight when cooled. Loosen the chain
tension after operation and check the chain tension before
the next use.
Fig. 14
Loosen
Tighten
Fig. 16
Incorrect Tension
Correct Tension
Loading ...
Loading ...
Loading ...