Loading ...
Loading ...
Loading ...
Setting Warmer Drawer Controls
Removing and Replacing Warmer Drawer (If equipped)
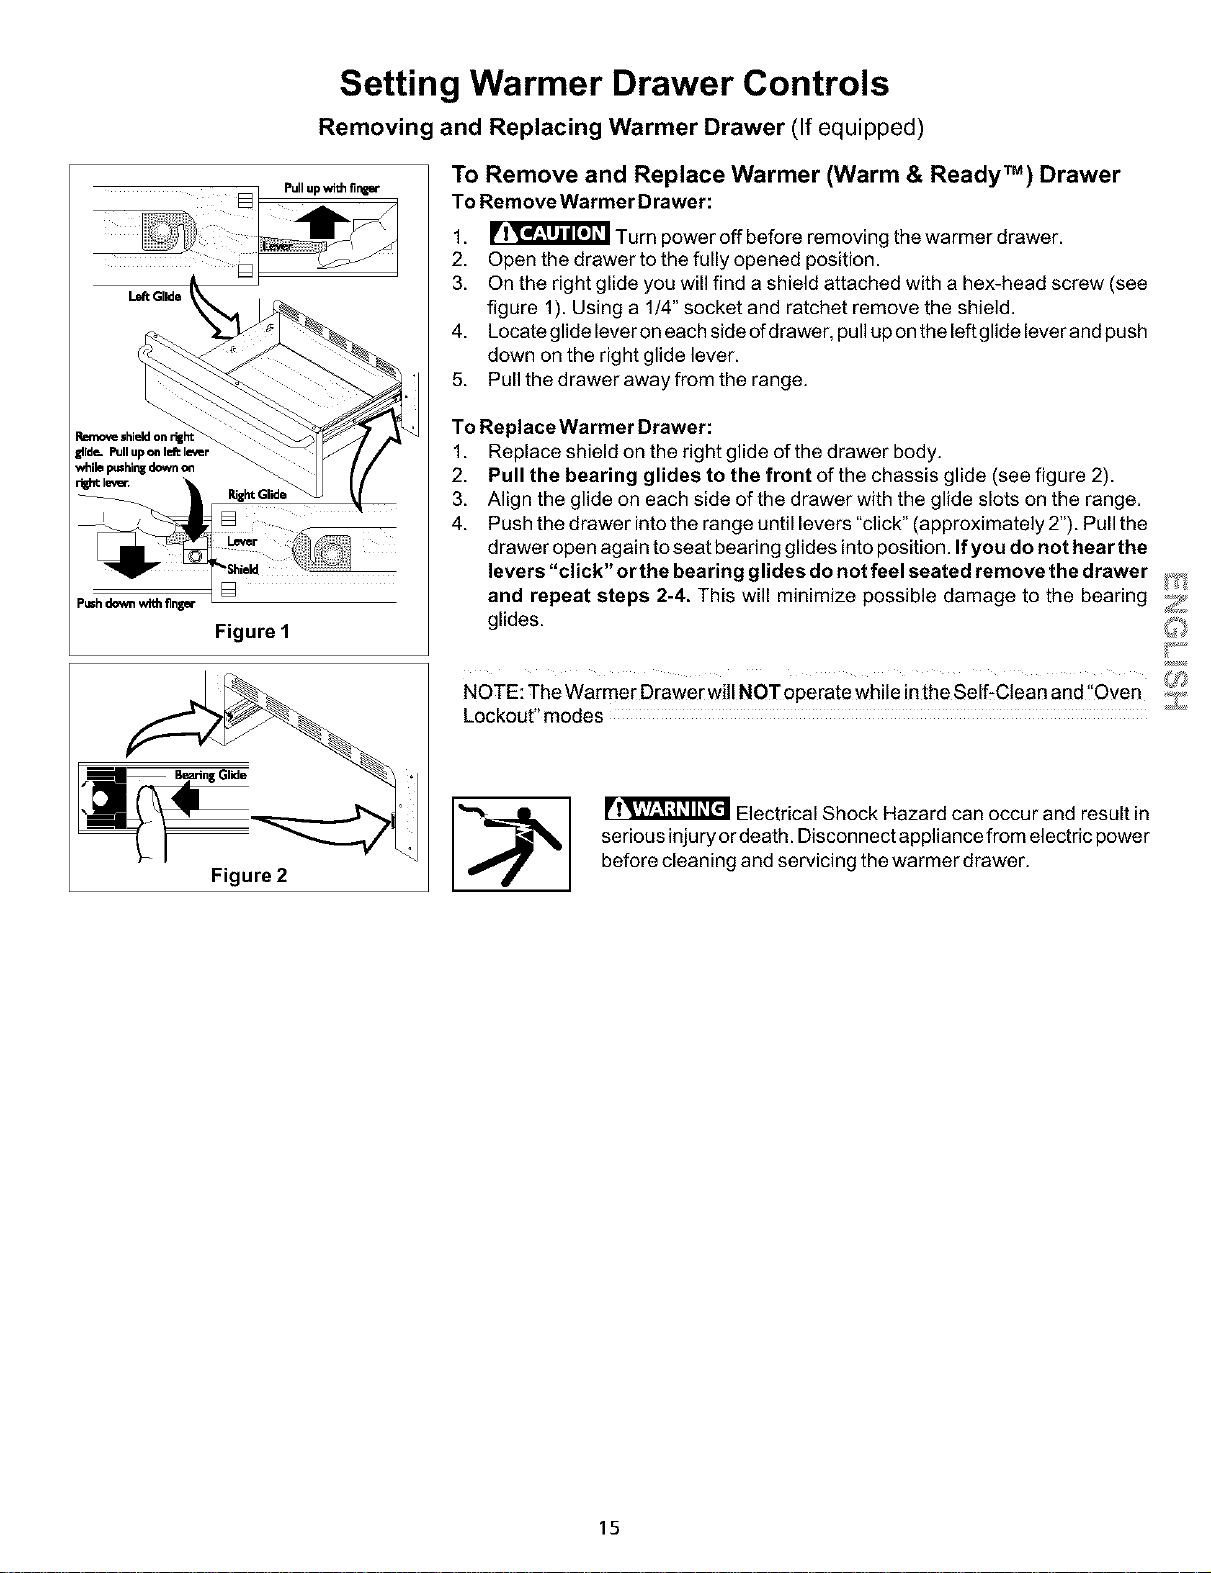
Pullup with firmer
R_nove shieldonrizl
Elide.Pulluponleftle_er
whilepushingdowno_
Pu=hdownwithflnpr
Figure I
Figure 2
To Remove and Replace Warmer (Warm & Ready TM) Drawer
To Remove Warmer Drawer:
1. _ Turn power off before removing the warmer drawer.
2. Open the drawer to the fully opened position.
3. On the right glide you will find a shield attached with a hex-head screw (see
figure 1). Using a 1/4" socket and ratchet remove the shield.
4. Locate glide lever on each side of drawer, pull up on the left glide lever and push
down on the right glide lever.
5. Pull the drawer away from the range.
To Replace Warmer Drawer:
1. Replace shield on the right glide of the drawer body.
2. Pull the bearing glides to the front of the chassis glide (see figure 2).
3. Align the glide on each side of the drawer with the glide slots on the range.
4. Push the drawer intothe range until levers "click" (approximately 2"). Pull the
drawer open again to seat bearing glides intoposition. If you do not hear the
levers "click" or the bearing glides do not feel seated remove the drawer _
and repeat steps 2-4. This will minimize possible damage to the bearing
glides.
NOTE: The Warmer Drawer wi!! NOT operate while inthe Self-C!ean and ,Qven ,,_,_,
Lockout" modes
'_ _ Electrical Shock Hazard can occur and result in
serious injury or death. Disconnect appliance from electric power
before cleaning and servicing the warmer drawer.
15
Loading ...
Loading ...
Loading ...