For quick start tutorial,
please scan the QR code below

Contents
EN 01-19 User Manual
JP 19-36 ユーザーマニュアル
DE 37-58 Benutzerhandbuch
IT 59-78 Manuale d'uso
FR 79-97 Manuel de l’utilisateur
ES 98-115 Manual del usuario
KR 116-132 사용자 매뉴얼
RU 133-152 Руководство пользователя
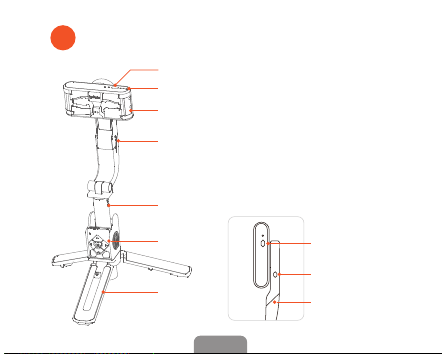
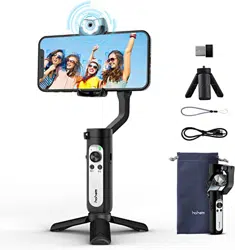
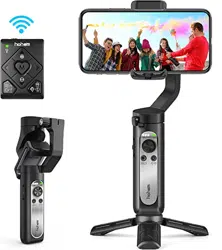
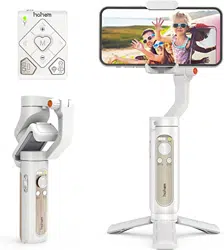
iSteady Q Overview
1
①
②
③
⑥
⑧
⑨
Power Button(Mode Switching)
Phone Clamp
(Built-in 360° Innite Rotary Motor)
Extendable
Stick
Indicator Light
Rotary Joint
Remote
Control
Tripod
④
⑤
⑥
Motor Lock
Rotary Joint
Type C
Charging Port
⑦
EN 01
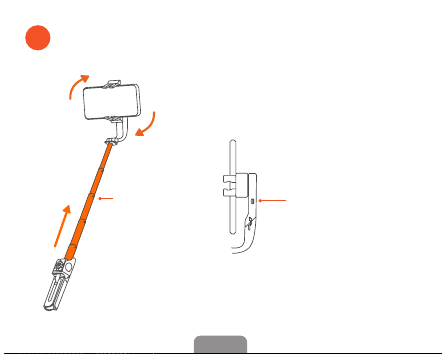
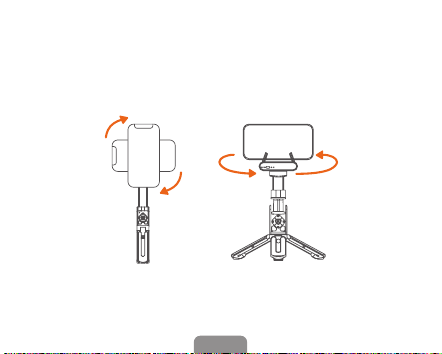
Handheld Use
2
Motor Lock
*Conrm the position of the notch on the
back of the phone clamp. Lock the motor,
and the bolt will be inserted into the notch.
The motor will be xed and won't rotate.
Extendable
Stick
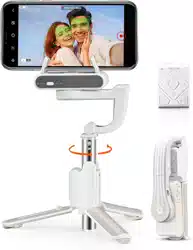
iSteady Q's phone clamp can make
360° innite rotation. It is able to lock
the phone clamp to use as a sele
stick when it is in low power mode.
When to lock the phone clamp?
360°
EN 02
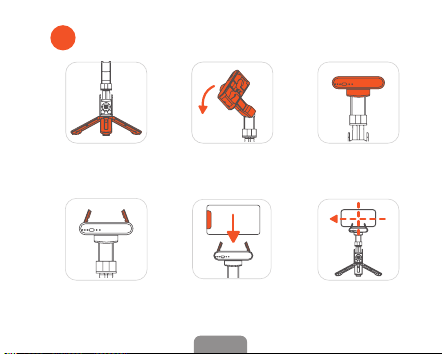
Desktop Use
3
①
Unfold the tripod and
put it on the table
②
Manually rotate 90°
along arm's bevel cut
③
Rotate phone clamp to
level with the desktop
④
Unfold the
phone clamp
⑥
Clamp the phone
in the middle
⑤
Put the phone into
the phone clamp
EN 03

*To use 360° tracking, please make iSteady Q
in desktop use, launch Hohem Joy app, turn
on iSteady Q's power button, and ensure the
Bluetooth is connected. Hohem Joy app supports
face tracking, gesture control, motion timelapse,
and moment mode.
EN 04
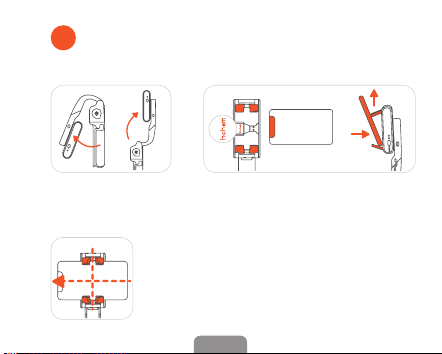
① Unfold the Stick ② Phone Mounting
③ Phone Balancing
Phone Mounting
4
· Unfold the phone clamp and turn
'hohem' logo towards the left.
· Meanwhile, turn the phone camera
towards the left, put the phone stuck in
the bottom of the phone clamp, and pull
the head of the phone clamp to mount
your phone.
EN 05
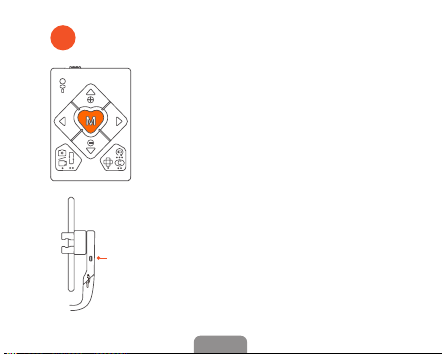
*The remote control will connect to
the stabilizing stick automatically after
turning on.
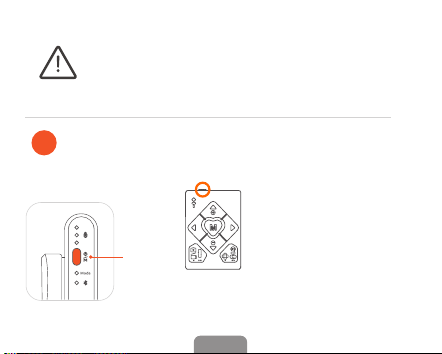
Powering On:
Long press the power button for 3s
5
Turn On Remote Control
Turn the power button on.
Power
Button
*The stabilizing stick would work improperly if there is no
mobile phone mounted.
*Make sure your phone clings to the rubber mat and
clamps in the middle, otherwise the stabilizing stick would
vibrate or turn o automatically.
EN 06
Single Press: Switch the landscape
and portrait modes
6
Double Press: Recenter the stabilizing stick
Press Five Times: Auto calibration
(Please do calibration on a at surface when the
stabilizing stick is not level or drifting. There will
be a beep sound after enabling the calibration,
and do not move the stabilizing stick until the
calibration is done and hear another beep sound.)
If the remote control is not working properly, please follow the
steps to pair the device again:
① Turn on the stabilizing stick rst. Press the power button 7 times to
enter the pairing mode, and the working mode indicator light ashes
alternately in yellow and green.
② Then turn on the remote control. Pairing is complete in about 1
second, and the working mode indicator light stays on green.
EN 07
Long Press 5s: Power o the stabilizing stick
Triple Press: Auto rotation
(300° Auto Inception/360° Horizontal Rotation)
360°
Horizontal Rotation
Switch the landscape and
portrait modes / Inception
EN 08
M Button: Switch Working Mode
7
Single Press: Lock Mode (Default Mode)
* When the handle rotates along the motor shaft,
the phone does not follow the motor to rotate, and
the working mode indicator light stays on green.
Double Press: POV Follow Mode
Long Press 5s: Low Power Mode
(Longer battery life)
* When the handle rotates along the motor shaft,
the phone does follow the motor to rotate slowly,
and the working mode indicator light single
ashes green.
* The motor will stop working, and it can be used
as a regular sele stick by locking the motor.
Motor
Lock
EN 09

Search " Hohem Joy " in the App Store or Google Play.
(App supports face tracking, gesture control, motion timelapse and
moment mode)
*Hohem Joy app requires iOS 10.0 or above,
Android 6.0 or above.
*More product tutorial videos can be found
on the app homepage.
Scan the QR code
to enter the download page
Download the Hohem Joy App,
Register and Login
8
EN 10
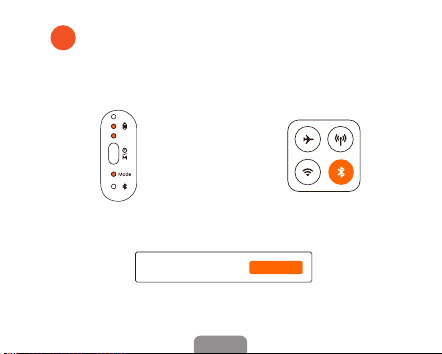
Connect iSteady Q with Phone
Bluetooth in the App
9
③ Follow the Prompts at the top of Hohem
Joy App Homepage and Click 'Connect'
*Press stabilizing stick power button 9 times
to cancel the Bluetooth pairing.
① Turn on iSteady Q ② Enable Phone Bluetooth
Found iSteady Q Connect
EN 11
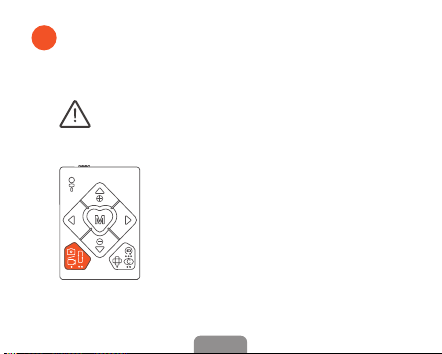
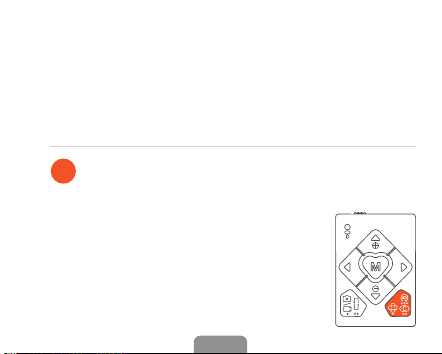
Single Press the Shutter Button:
Take Photo/Video
10
Please ensure Bluetooth is successfully
connected to use the feature.
Double Press:
Switch the photo and video modes
Triple Press:
Switch the front and rear cameras
(Only available in the app)
EN 12

Navigation Button
11
Long Press Left/Right Button:
Control the rotation of stabilizing stick
Double Press Left/Right Button:
90° counterclockwise / clockwise fast rotation
Long Press Up/Down Button:Zoom in/out
(Only available in Hohem Joy app and and
some smartphone native cameras)
Please ensure Bluetooth is successfully
connected to use the feature.
EN 13
Double Press:
Switch the photo and video modes
Triple Press:
Switch the front and rear cameras
(Only available in the app)

More Functions of Power Button
12
Double Press: Recenter the stabilizing stick
Press Five Times: Auto calibration
Press Seven Times: Remote control pairing
Press Nine Times: Cancel the phone Bluetooth pairing
Single Press:
Switch between lock/POV follow mode
(Lock mode is the default mode)
Triple Press: Auto rotation
(300° Auto Inception/360° Horizontal
Rotation)
Power
Button
(Please do calibration on a at surface when the stabilizing stick is
not level or drifting. There will be a beep sound after enabling the
calibration, and do not move the stabilizing stick until the calibration is
done and hear another beep sound.)
EN 14
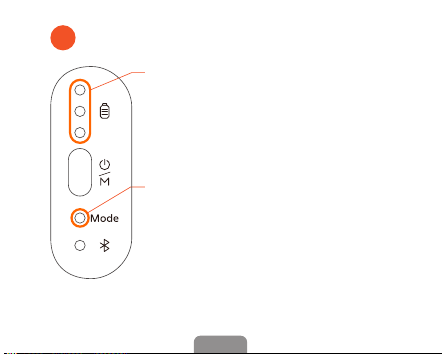
About Indicator Lights
13
Battery Indicator Light
Stay on: Battery remaining/Charging completed
Single ashing: Charging
(Only one grid shows single ash indicates low
battery warning)
Working Mode Indicator Light
Green light stay on: Lock mode
Green light single ashing:
Yellow light ashing:
Yellow light stay on:
POV follow mode
Response of pressing the
remote control
Low power mode
(The motor of iSteady Q stops
operating, but the remote
control is still connected)
EN 15

Bluetooth Indicator Light
Stay on: Connected
Light o: Unconnected
Blink: Firmware updating
EN 16

Specications
Model iSteady Q
Weight 195g
Folded Dimensions 140 x 54 x 36mm
Material PA&PC + ABS
Battery 460mAh
Operating Time 3 hours
Mechanical Range * Pan: 360° / Roll: 360°
Controllable Range * Pan: 360° / Roll: 360°
Compatible Phones Weight: ≤ 280g Thickness: ≤ 11mm
Width: 55.5mm~100mm
EN 17
Unconnected

Warranty Card
User Name:
Contact No.:
Address:
Purchase Date:
Prod. Serial No.:
Failure Cause:
Service Record:
Within 15 days upon the purchase
date. Any functional disorder
or quality problem enjoys free
replacement service. But ensure the
commodity and package with no
damage, and we will oer a brand
new replacement after conrming the
product problem.
Warranty valid only under normal use.
Used in the normal circumstances, 1
year warranty, maintenance of life (not
include the All accidents or articial
damage, improper disassembly or
misuse damage is NOT covered by the
warranty).
Please keep and oer the warranty
card for claiming the warranty service.
1.
2.
3.
4.
EN 18