
Loading ...
Loading ...
Loading ...
7
UNDER CABINET INSTALLATION
For Model No.: RA3830SQB-1 / RA3836SQB-1
Preparation before Installation
NOTE: TO AVOID DAMAGE TO YOUR HOOD,
PREVENT DEBRIS FROM ENTERING THE
VENT OPENING.
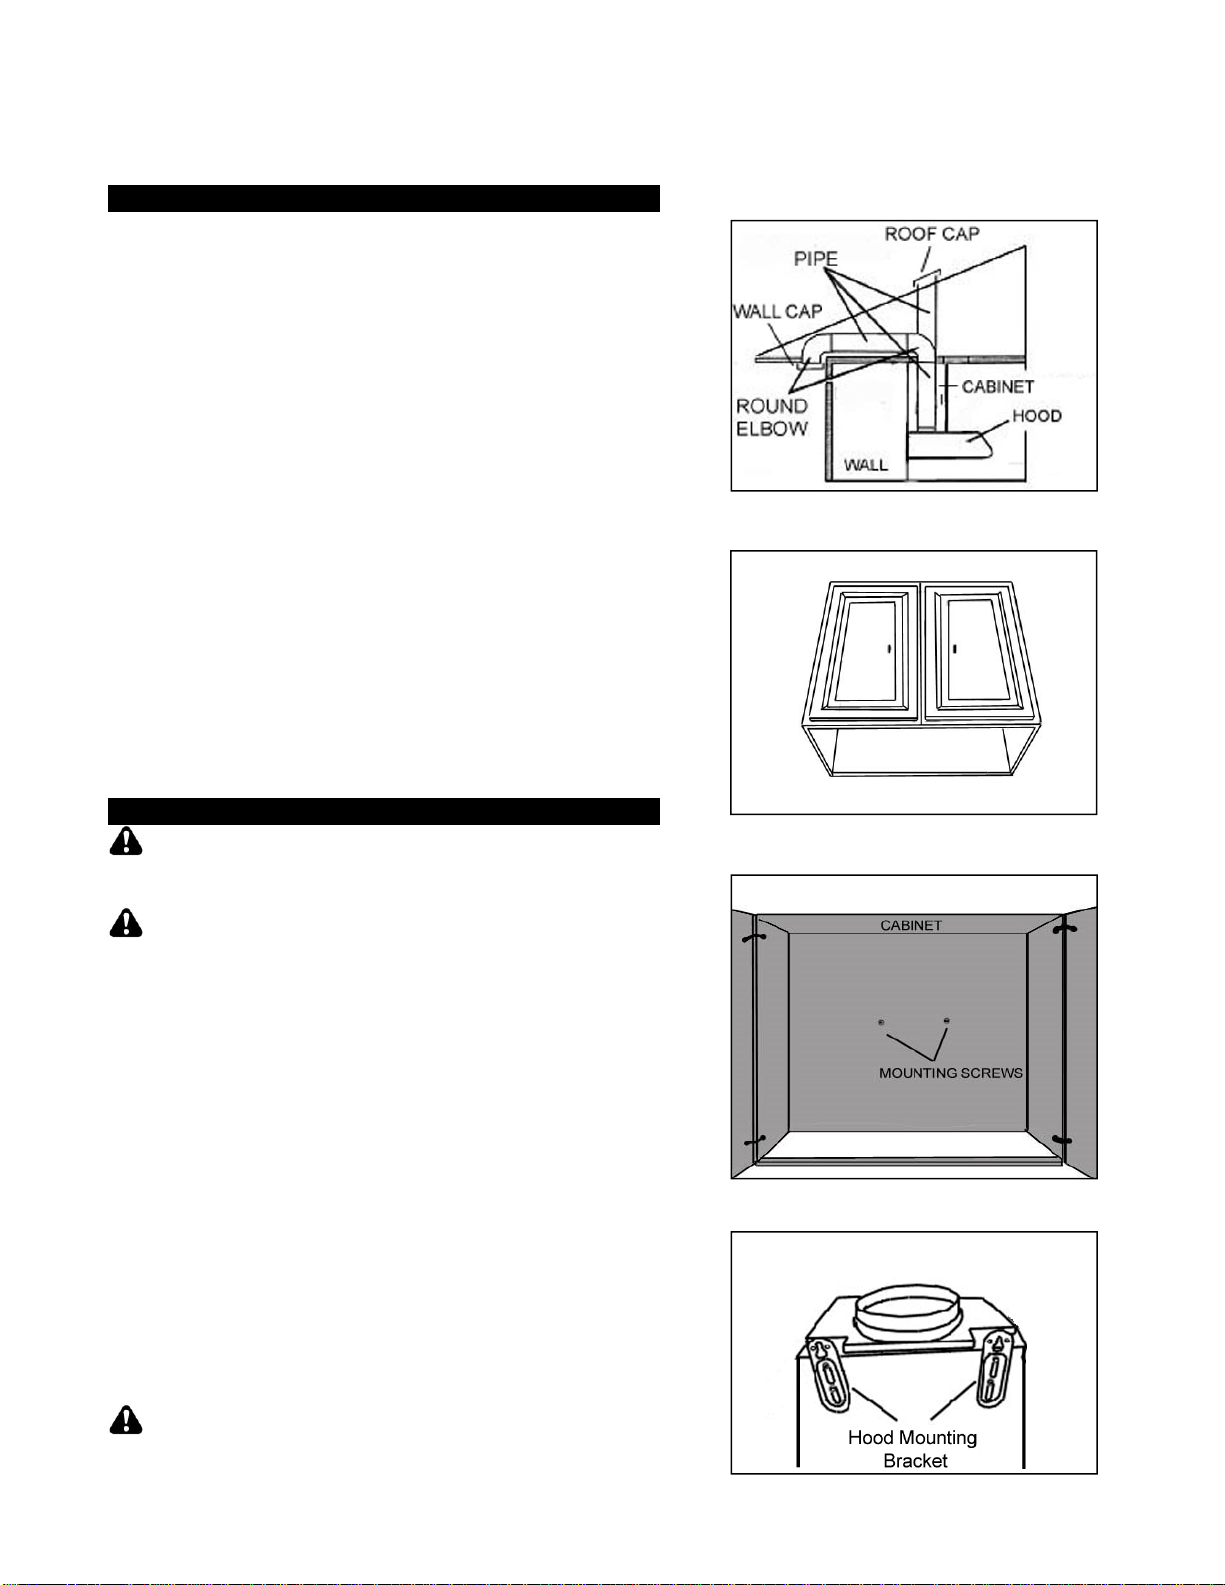
- Decide the location of the venting pipe from the hood
to the outside. (Figure 1)
- A straight, short vent run will allow the hood to perform
more efficiently.
- Try to avoid as many transitions, elbows, and long run
as possible. This may reduce the performance of the
hood.
- Temporarily wire the hood to test for proper operation
before installing. If the hood does not operate,
check the circuit breaker or house fuse. If the
hood is still not working, disconnect power supply
and check the continuity of all wire connections.
- Peel protective film off the hood (if any).
- Use duct tape to seal joints between pipe sections.
- Make sure the cabinet has full access opening for the
hood as shown on Figure 2.
- Using reference on Page 14 to measure and create
access opening for electrical wires and exhaust under
the cabinet.
Hood I
nstallation
CAUTION: USE HAND TOOLS ONLY. DO NOT
OVER TIGHTEN SCREWS. IT MAY CAUSE DAMAGE
TO THE HOOD.
CAUTION: If moving the cooking range is
necessary to install the hood, turn off the power in an
electric range at the main electrical box. SHUT OFF
THE GAS BEFORE MOVING A GAS RANGE. And use
a protective covering to protect cooktop and/or
countertop from damage.
1. Using references on Table 1 and measurements on
page 14 mark the leveling point for hood-mounting
bracket inside the cabinet.
2. Secure two hood mounting screws (provided) inside
the cabinet leaving 1/8” away from the cabinet as
shown on Figure 3.
3. Optional step for adjusting hood-mounting bracket
height:
- Loosen hood-mounting brackets at the back of the
hood, adjust brackets and tighten screws as
shown in Figure 4.
4. Refer to Figure 5. Align hood-mounting bracket to the
mounting screws inside the cabinet and hook hood
into place. Secure and tighten the mounting screws.
CAUTION: MAKE SURE THE HOOD IS SECURE
BEFORE RELEASING.
Figure 1
Figure 2
Figure 3
Figure 4
Loading ...
Loading ...
Loading ...