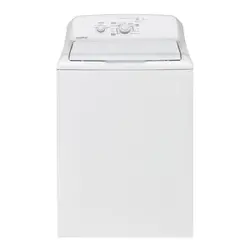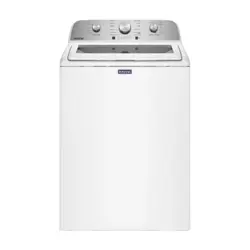
Washers
29-6074
Safety Instructions
..........2, 3
Operating Instructions
Care and Cleaning
of the Washer .................... 13
Features ..........................12
Loading and Using
the Washer ...................... 11
Operating instructions .........4–10
Installation Instructions
.14–18
Troubleshooting Tips
.....19–24
Consumer Support
Consumer Help Indicator .........10
Consumer Support ................26
Parts and Accessories. . . . . . . . . . .3, 26
Warranty ..........................25
G003
Printed in Mexico
Write the model and serial
numbers here:
Model # _____________
Serial # ______________
You can find
them under
the lid of the
washer.
Owner’s Manual &
Installation Instructions
HTW200BMKWW
MTW200BMKWW
English/Français/Español
2
IMPORTANT SAFETY INFORMATION.
READ ALL INSTRUCTIONS BEFORE USING.
This is the safety alert symbol. This symbol alerts you to potential hazards that can kill you or hurt you and others. All safety
messages will follow the safety alert symbol and the word “DANGER”, “WARNING”, or “CAUTION”. These words are defined as:
Indicates a hazardous situation which, if not avoided, will result in death or serious injury.
Indicates a hazardous situation which, if not avoided, could result in death or serious injury.
Indicates a hazardous situation which, if not avoided, could result in minor or moderate injury.
DANGER
WARNING
CAUTION
IMPORTANT SAFETY INSTRUCTIONS
To reduce the risk of death, fire, explosion, electric shock, or injury to persons when using your appliance,
follow basic precautions, including the following:
Read all instructions before using the appliance.
DO NOT wash or dry articles that have been previously cleaned in, washed in, soaked in or spotted with gasoline, dry-
cleaning solvents, or other flammable or explosive substances, as they give off vapors that could ignite or explode.
DO NOT add gasoline, dry-cleaning solvents, or other flammable or explosive substances to the wash water. These
substances give off vapors that could ignite or explode.
Under certain conditions, hydrogen gas may be produced in a hot-water system that has not been used for 2 weeks
or more. HYDROGEN GAS IS EXPLOSIVE. If the hot water system has not been used for such a period, before using a
washing machine, turn on all hot-water faucets and let the water flow from each for several minutes. This will release
any accumulated hydrogen gas. As the gas is flammable, DO NOT smoke or use an open flame during this time.
DO NOT allow children to play on or in this appliance. Close supervision of children is necessary when this appliance is
used near children. Before the washer is removed from service or discarded, remove the door or lid. Failure to follow
these instructions may result in death or injury to persons.
DO NOT reach into the appliance if the tub or agitator is moving to prevent accidental entanglement.
DO NOT install or store this appliance where it will be exposed to the weather.
DO NOT tamper with controls, repair or replace any part of this appliance or attempt any servicing unless specifically
recommended in the user maintenance instructions or in published user repair instructions that you understand and
have the skills to carry out.
DO NOT operate this appliance if it is damaged, malfunctioning, partially disassembled, or has missing or broken parts
including a damaged cord or plug.
Unplug the appliance or turn off the circuit breaker before servicing. Pressing the Power button DOES NOT disconnect power.
See “Electrical Requirements” located in the Installation Instructions for grounding instructions.
SAVE THESE INSTRUCTIONS
WARNING
3
GEAppliances.com
SAVE THESE INSTRUCTIONS
WHEN NOT IN USE
Turn off water faucets to minimize leakage if a break or
rupture should occur. Check the condition of the fill hoses;
GE recommends changing the hoses every 5 years.
Ensure that the hot water hose is connected to the “H”
valve and the cold water hose is connected to the “C”
valve.
Install or store where it will not be exposed to
temperatures below freezing or exposed to the weather,
which could cause permanent damage and invalidate the
warranty.
Properly ground washer to conform with all
governing codes and ordinances. Follow details
in Installation Instructions.
Ensure washer is properly leveled and washer legs are
adjusted such that unit is stable.
Optional drain hose extension recommended for
discharging heights from 60” - 96”.
This washer does not include water supply hoses.
GE strongly recommends the use of factory specified
parts. A list of factory hoses available for purchase are
listed. These hoses are manufactured and tested to meet
GE specifications.
GE strongly recommends the use of new water supply
hoses. Hoses degrade over time and need to be replaced
every 5 years to reduce the risk of hose failures and water
damage.
Parts and Accessories
Order on-line at GEApplianceparts.com today, 24 hours a
day or by phone at 800.626.2002 during normal business
hours. In Canada, visit your local GE parts distributor or call
800.661.1616.
Part Number Accessory
PM14X10002 4 ft rubber water supply hoses
Or
PM14X10005 4 ft braided water supply hoses
WH49X301 Drain hose extension
PM7X1 Washer Floor Tray
PROPER INSTALLATION
This washer must be properly installed and located in accordance with the Installation Instructions before it is used.
Any time the washer is being started or restarts after the
washer lid has been opened and closed, the washer will
turn on the cold water valve for two short periods followed
by a 10 second pause before continuing.
If the lid is opened during this period, the washer will
pause. You will have to push the Start button again to
restart the cycle.
START-UP SEQUENCE
¥
- Electrical Shock Hazard
WARNING
Plug into a grounded 3 prong outlet.
DO NOT remove ground prong.
DO NOT use an adapter.
DO NOT use an extension cord.
Failure to follow these instructions can result in death
or electrical shock.
Throughout this manual, features and appearance may vary from your model.
4
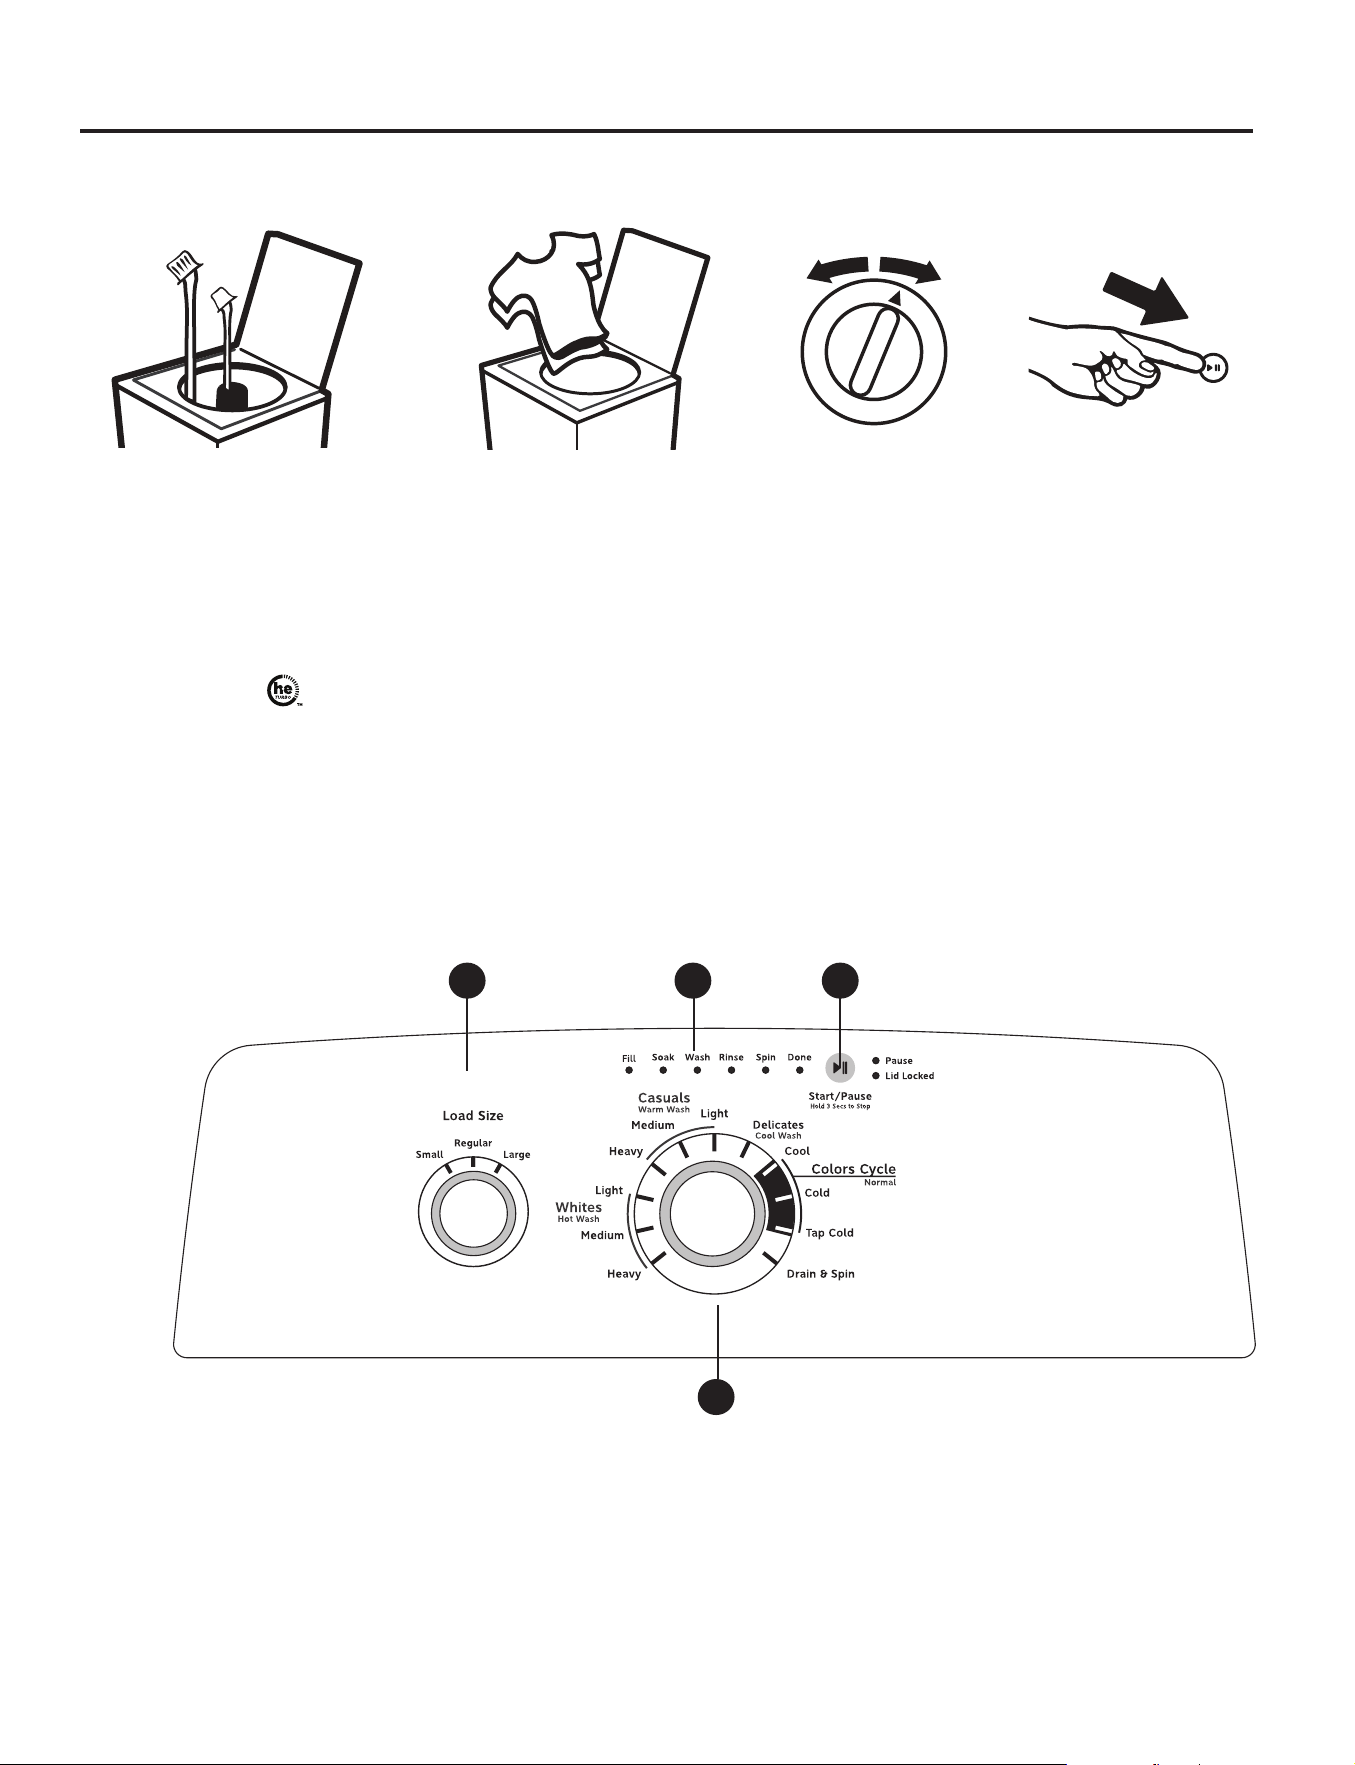
Operating instructions.
Controls
• Loosely add items around
agitator. Overloading may
negatively impact wash
performance. See page 11
for suggested loading
examples.
• Close lid.
NOTE: Washer will not start
with lid open.
Step 2
Step 3
Step 4
Step 1
• Select wash cycle.
• Select wash options,
including Deep Rinse
option (on some
models) when using
fabric softener.
• Select options.
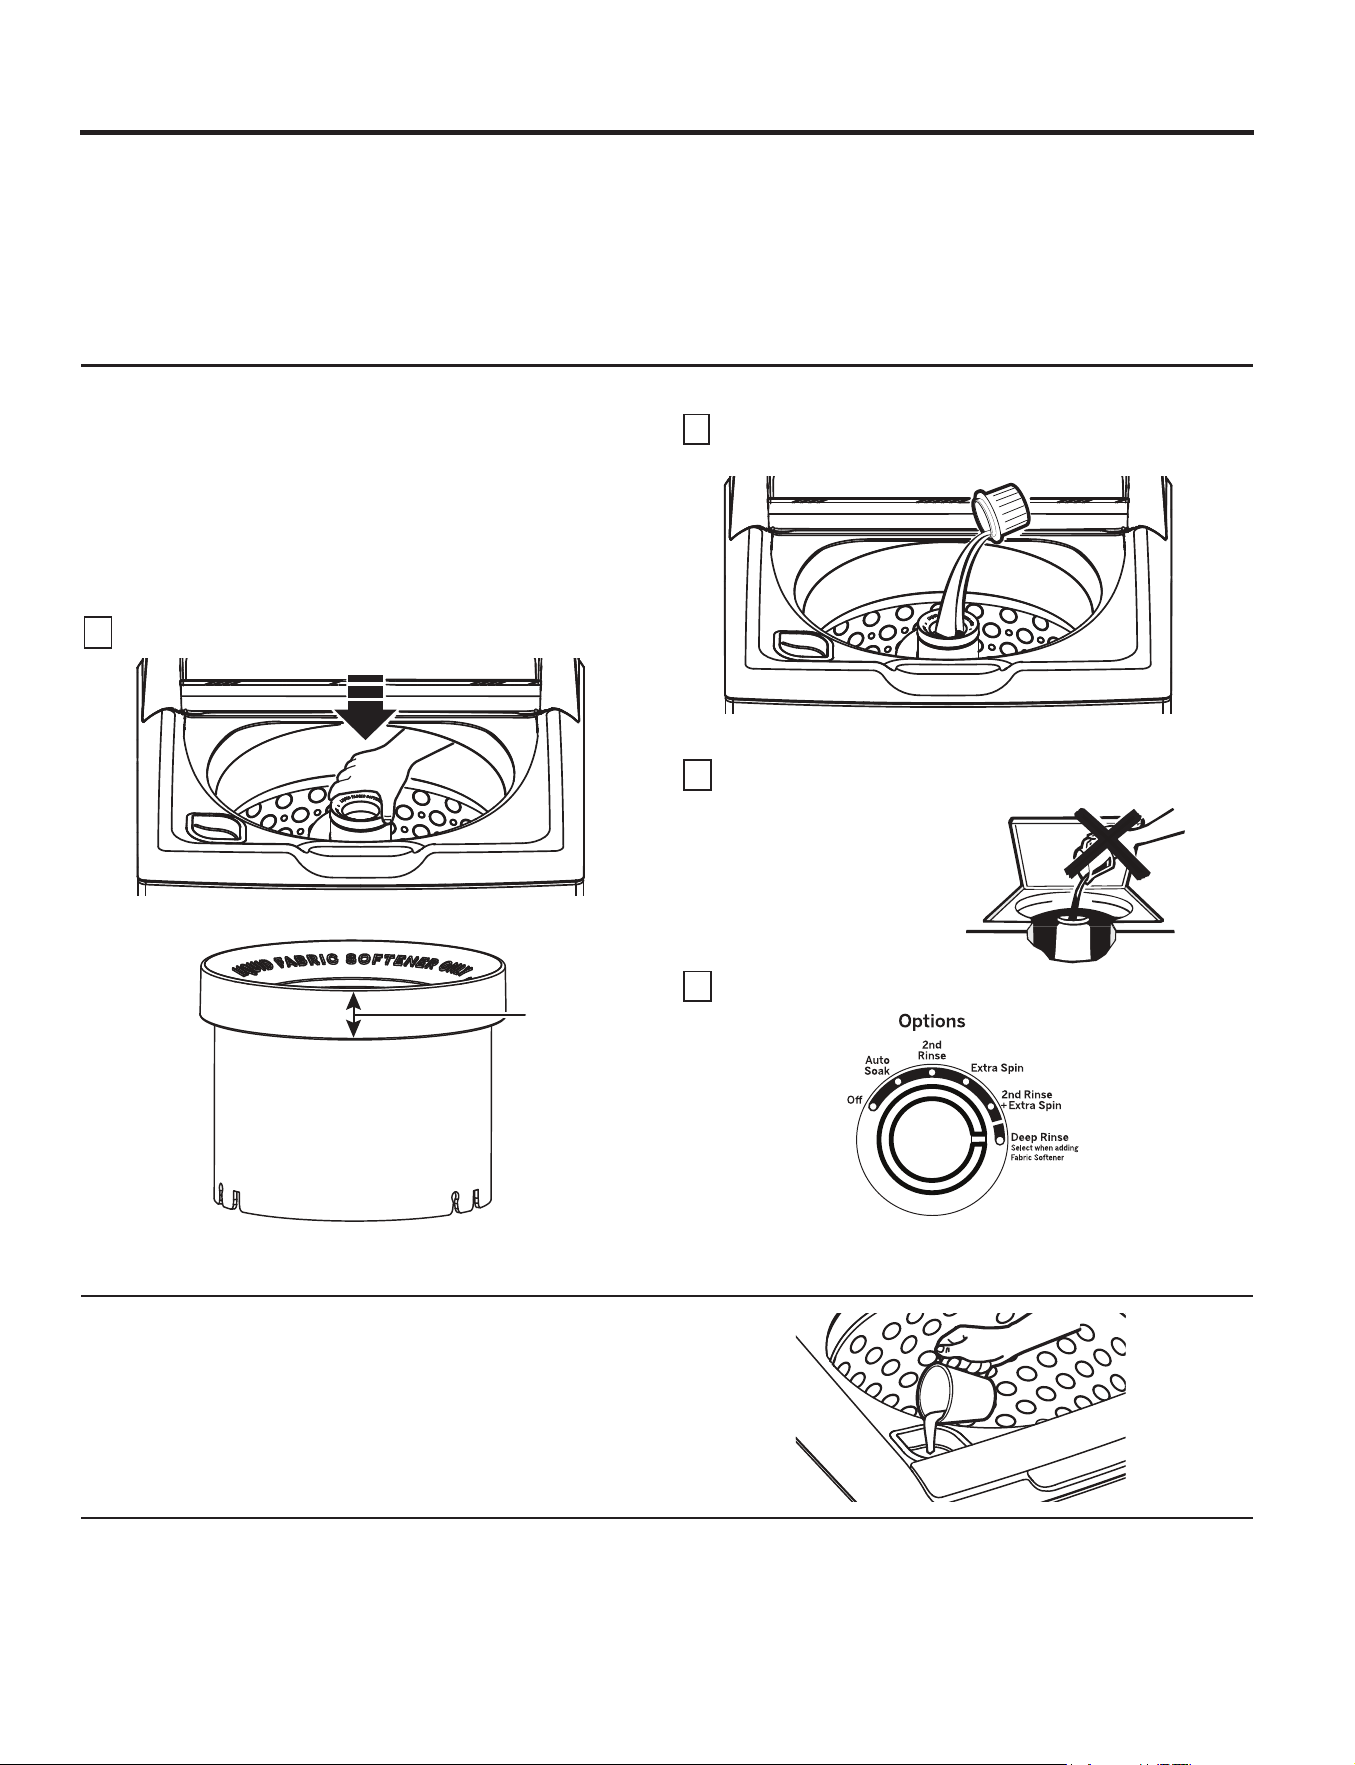
• Press Start.• Add fabric softener to the
fabric softener dispenser
(on some models); see page 12.
• Add the manufacturer’s
recommended amount of
detergent.
GE recommends
the use of High Efficiency
detergents such as in your
energy efficient washer.
Place
detergent pods in the bottom
of the wash basket before
adding clothes.
BAc
D
A
B
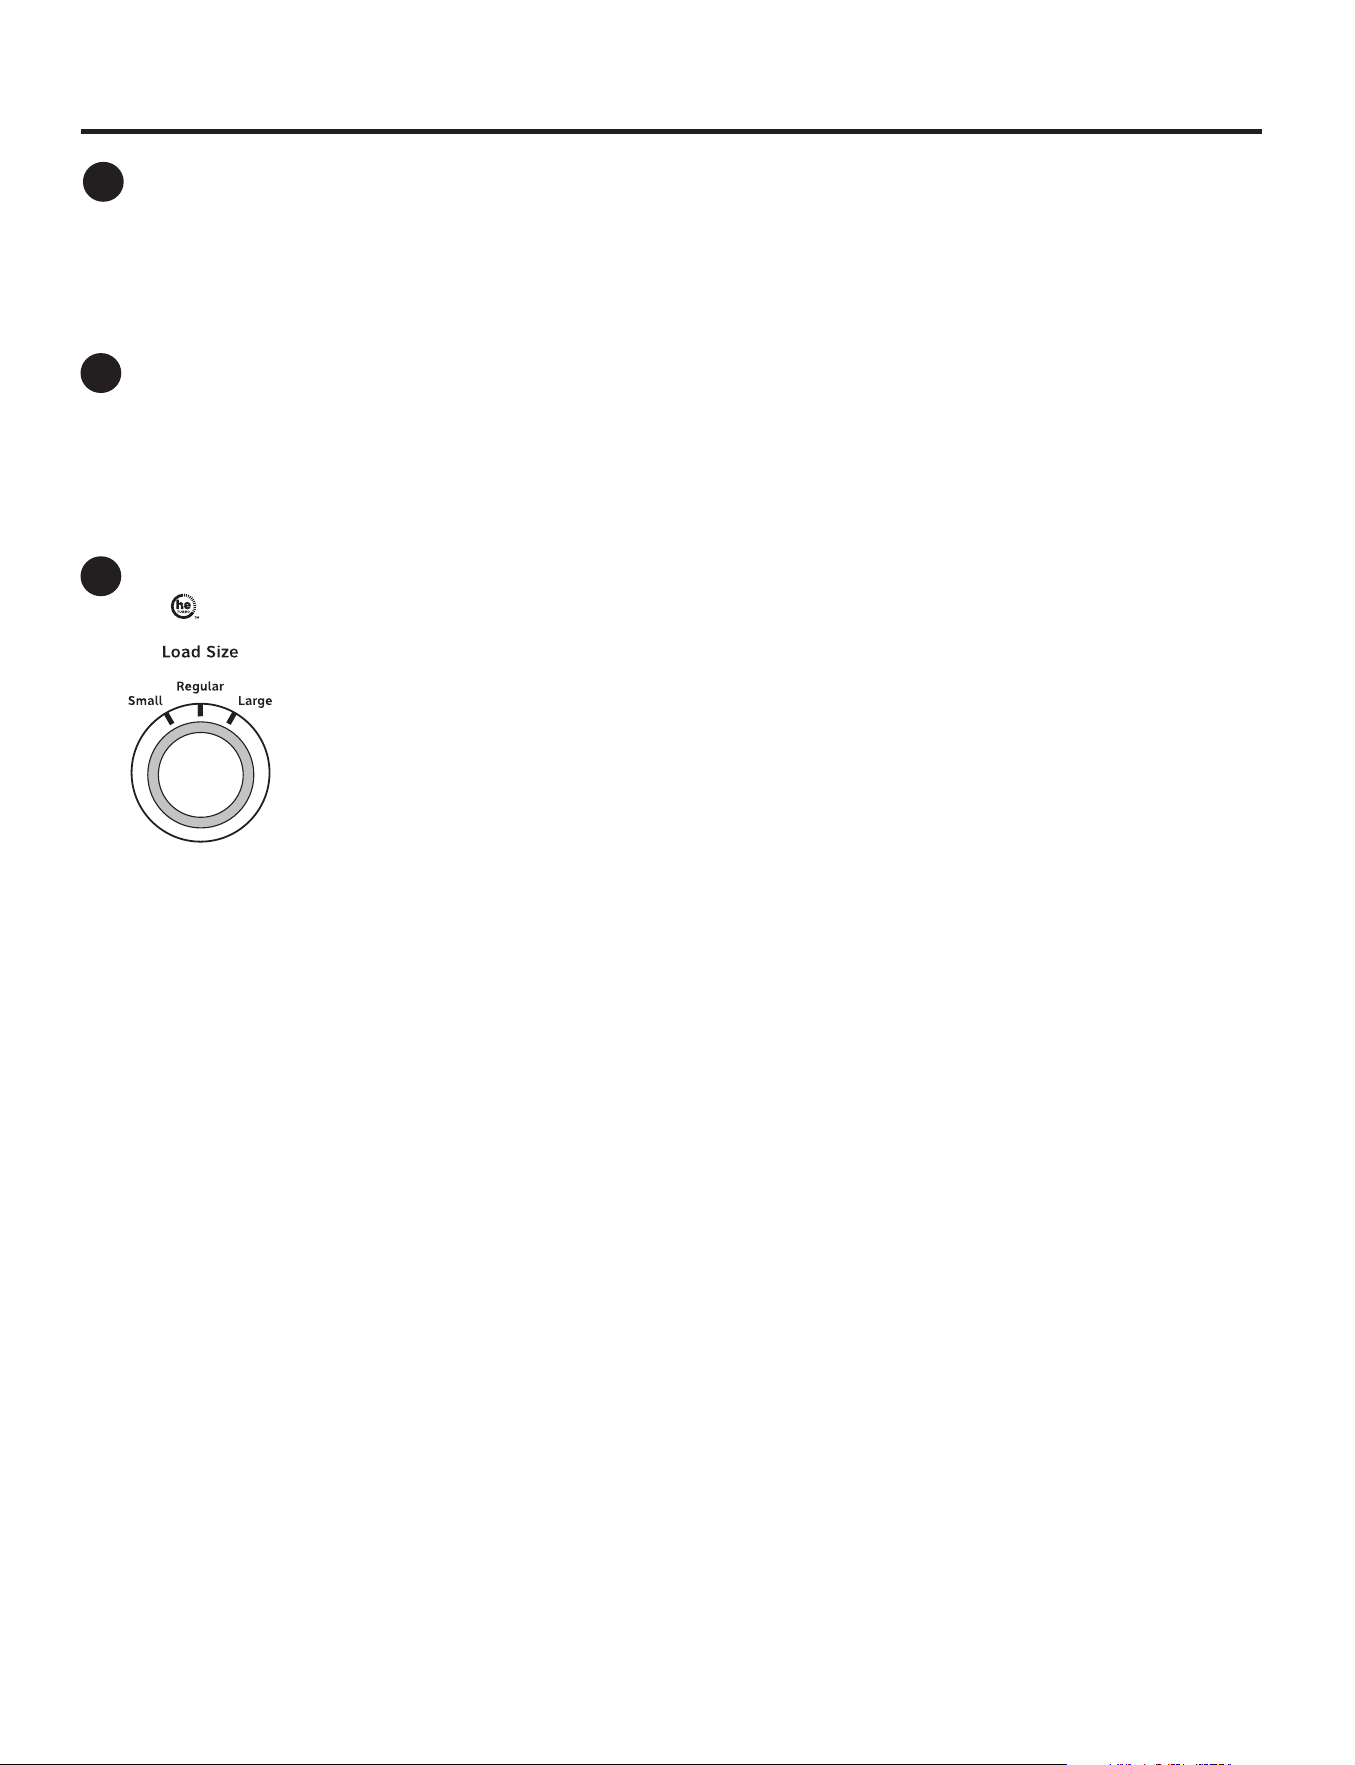
Load Size (on some models)
Add detergent to the bottom of the basket and fabric softener to the dispenser (on some models) prior to loading clothes.
Loosely load items in the washer basket. Overloading may negatively impact wash performance.
Adjust the load size accordingly.
C
5
Operating instructions.
Start/Pause
Press Start to begin the cycle. NOTE: The lid must be closed for the washer to start the cycle. If the lid is closed, the lid will lock and the Lid
Locked light will illuminate.
Pressing Pause will unlock the lid (if locked at that time), pause the cycle and the Pause indicator light will blink.
To continue the cycle, press Start again. If machine is paused more than 24 hours, the cycle will be cancelled. If water remains in the
machine, select the Drain & Spin cycle to drain basket and spin water out of the washer basket.
Cycle Status Lights
Shows whether the washer is in the Fill, Soak, Wash, Rinse or Spin portion of the cycle.
If an out-of-balance condition is detected by the washer, the Spin light will blink during the remaining portion of the cycle and will
stay illuminated for a short time after cycle completion. When this occurs, the washer is taking actions to correct the out-of-balance
condition and complete the cycle normally. In some cases, the washer may not be able to balance the load and spin up to full
speed. If you notice the load is more wet than normal at the end of the cycle, redistribute the load evenly in the wash basket and
run a Drain & Spin cycle.

7
D
Wash Cycles-Cycle Selector Knob
The wash cycle controls the type of washing process. The cycle selector knob can be turned in either direction. Turning the knob after
starting a cycle will stop the washer and change the cycle/options to the new selection. Press Start to begin the new cycle selection.
The chart below will help you match the items to be washed with the best wash cycle settings. For optimal performance, select the
cycle that most closely matches the items being washed.
Selections and options shown in bold are the recommended settings for that cycle.
Some cycles and options may not be available on some models.
GEAppliances.com
Items to Wash Cycle Wash Temp Soil Level Spin Selection Options Available Cycle Details
Cycle for normal,
regular, or typical
use for washing
up to a full load
of normally soiled
cotton clothing.
Colors Hot
Warm
Colors
Cool
Cold
Tap Cold
Ex. Heavy
Heavy
Normal
Light
Ex. Light
Max/Extra
Normal
Stain PreTreat Guide
Deep Fill
Auto Soak
Deep Rinse
2nd Rinse
Cycle for normal, regular, or typical
use for washing up to a full load
of normally soiled cotton clothing.
Choose the Heavy or Extra Heavy
soil level selection and Warm or
Hot water temperature selection as
appropriate for your clothes load
for a higher degree of cleaning.
Incorporates multi-stage fills and
wash periods to provide optimal
fabric care.
Dark colored
items, linens, and
mixed loads.
Dark
Colors
Hot
Warm
Colors
Cool
Cold
Tap Cold
Ex. Heavy
Heavy
Normal
Light
Ex. Light
Max/Extra
Normal
Stain PreTreat Guide
Deep Fill
Auto Soak
Deep Rinse
2nd Rinse
Lower wash temperatures, a shorter
wash period, and a deep fill rinse
(on some models) minimizes fading
and spotting of dark colored fabrics.
Incorporates multi-stage fills and
wash periods to provide optimal
fabric care.
Casual clothes,
lightly soiled
office wear.
Casuals Hot
Warm
Colors
Cool
Cold
Tap Cold
Ex. Heavy
Heavy
Normal
Light
Ex. Light
Max/Extra
Normal
Stain PreTreat Guide
Deep Fill
Auto Soak
Deep Rinse
2nd Rinse
Wash period tailored to care for
casual clothes and office wear items.
Incorporates multi-stage fills and
wash periods to provide optimal fabric
care.
Lingerie and
special care
fabrics with light
soil.
Delicates Hot
Warm
Colors
Cool
Cold
Tap Cold
Ex. Heavy
Heavy
Normal
Light
Ex. Light
Max/Extra
Normal
Stain PreTreat Guide
Deep Fill
Auto Soak
Deep Rinse
2nd Rinse
Utilizes a unique “tri-pulse” extra
gentle agitate profile to provide
special care to delicate fabrics. It is
recommended to place small or ultra
delicate items in mesh bags before
washing.
Dark colored
fabrics and mixed
loads.
Cold
Wash
Hot
Warm
Colors
Cool
Cold
Tap Cold
Ex. Heavy
Heavy
Normal
Light
Ex. Light
Max/Extra
Normal
Deep Fill
Auto Soak
Deep Rinse
2nd Rinse
Cycle combines multiple extended
wash agitation periods with soak
periods to provide enhanced cleaning
performance and energy efficiency
with colder water temperatures.
Medium to lightly
soiled athletic
wear items of
technical or
synthetic fabrics.
Active
Wear
Hot
Warm
Colors
Cool
Cold
Tap Cold
Ex. Heavy
Heavy
Normal
Light
Ex. Light
Max/Extra
Normal
Stain PreTreat Guide
Deep Fill
Auto Soak
Deep Rinse
2nd Rinse
Cycle designed for care of medium
to lightly soiled active wear, aththletic
wear, and technical fabrics.
Incorporates a multi stage wash
period with soak to effectively treat
body soils and odors. Use the Heavy
Duty cycle for heavily soiled sports
clothing constructed of sturdy fabric.
6
8
Operating instructions.
D
Wash Cycles-Cycle Selector Knob - Continued
Items to Wash Cycle Wash Temp Soil Level Spin Selection Options Available Cycle Details
Small loads of
lightly soiled items
that are needed in
a hurry.
Speed
Wash
Hot
Warm
Colors
Cool
Cold
Tap Cold
Ex. Heavy
Heavy
Normal
Light
Ex. Light
Max/Extra
Normal
Stain PreTreat Guide
Deep Fill
Auto Soak
Deep Rinse
2nd Rinse
Utilizes an expedited wash period and
time saving continuous spray rinse to
clean small lightly soiled loads in the
fastest time possible.
Wet load of items.
For items that need
only to be rinsed,
use this cycle with
Deep Rinse option.
Drain &
Spin
Max/Extra
Normal
Deep Rinse
2nd Rinse
Utilizes a high speed spin to extract
water from wet items. For items that
need to be rinsed, select the Deep
Rinse and/or 2nd Rinse option when
using this cycle.
Jeans with
medium to light
soil. For heavily
soiled work jeans,
use the Heavy
Duty Cycle.
Jeans Hot
Warm
Colors
Cool
Cold
Tap Cold
Ex. Heavy
Heavy
Normal
Light
Ex. Light
Max / Extra
Normal
Stain PreTreat Guide
Deep Fill
Auto Soak
Deep Rinse
2nd Rinse
Combines higher water levels, a
specially designed agitation profile,
and multi step wash and soak periods
to care for jeans with medium to
light soil. Use the Heavy Duty cycle
for heavily soiled work jeans.
Sturdy fabrics with
heavy to medium
soil.
Heavy
Duty
Hot
Warm
Colors
Cool
Cold
Tap Cold
Ex. Heavy
Heavy
Normal
Light
Ex. Light
Max / Extra
Normal
Stain PreTreat Guide
Deep Fill
Auto Soak
Deep Rinse
2nd Rinse
Incorporates multi-step wash and
soak periods combined with extended
wash periods to effectively clean
heavily to medium soiled sturdy
fabrics.
Large coats, bed
spreads, mattress
covers, sleeping
bags, and similar
large bulky items.
Bulky
Items
Hot
Warm
Colors
Cool
Cold
Tap Cold
Ex. Heavy
Heavy
Normal
Light
Ex. Light
Max / Extra
Normal
Stain PreTreat Guide
Deep Fill
Auto Soak
Deep Rinse
2nd Rinse
Provides a Deep Fill/max fill wash
water level to wash bulky items.
Also incorporates a Deep Fill rinse to
effectively rinse bulky items.
Towels.
Sheets.
Towels /
Sheets
Hot
Warm
Colors
Cool
Cold
Tap Cold
Ex. Heavy
Heavy
Normal
Light
Ex. Light
Max / Extra
Normal
Stain PreTreat Guide
Deep Fill
Auto Soak
Deep Rinse
2nd Rinse
Cycle designed washing towels or
sheets, using a higher water level
and a soak period to effectively
clean these items. It is recommended
that towels and sheets be washed
separately for best care and
washing performance.
Whites and
household linens
Whites Hot
Warm
Colors
Cool
Cold
Tap Cold
Ex. Heavy
Heavy
Normal
Light
Ex. Light
Max / Extra
Normal
Stain PreTreat Guide
Deep Fill
Auto Soak
Deep Rinse
2nd Rinse
Cycle tailored to clean and brighten
your whites.
7
8
Consumer Help Indicator
Your washer is equipped with Consumer Help Indicator (CHI). CHI is our way to communicate a simple remedy for some situations
that you can perform without the need to call for service. The chart below describes the helpful lights you may notice flashing on
the display.
Spin light blinkingIf an out-of-balance condition is detected by the washer, the Spin light will blink during the remaining portion
of the cycle and will stay illuminated for a short time after cycle completion. When this occurs, the washer is
taking actions to correct the out-of-balance condition and complete the cycle normally. In some cases, the
washer may not be able to balance the load and spin up to full speed. If you notice the load is more wet
than normal at the end of the cycle, redistribute the load evenly in the wash basket and run a Drain & Spin
cycle.
Fill light (Water not
entering washer)
Check your house water supply. Did you forget to turn on one or both supply valves after installation or
period. The washer controls won’t respond/change during this time. After the 4 minutes, you can begin your
cycle again. If you try to bypass the lock-out period by unplugging the washer, the 4 minute timer will start
over again.
Lid Locked light Lid Locked light will flash if 3 cycles have been started without opening the lid. The washer will not start
another cycle until the lid is opened. Try opening, then closing the lid and starting a new cycle. If the problem
persists, call 800.GE.CARES (800.432.2737) for service.
11
GEAppliances.com
Loading the Washer
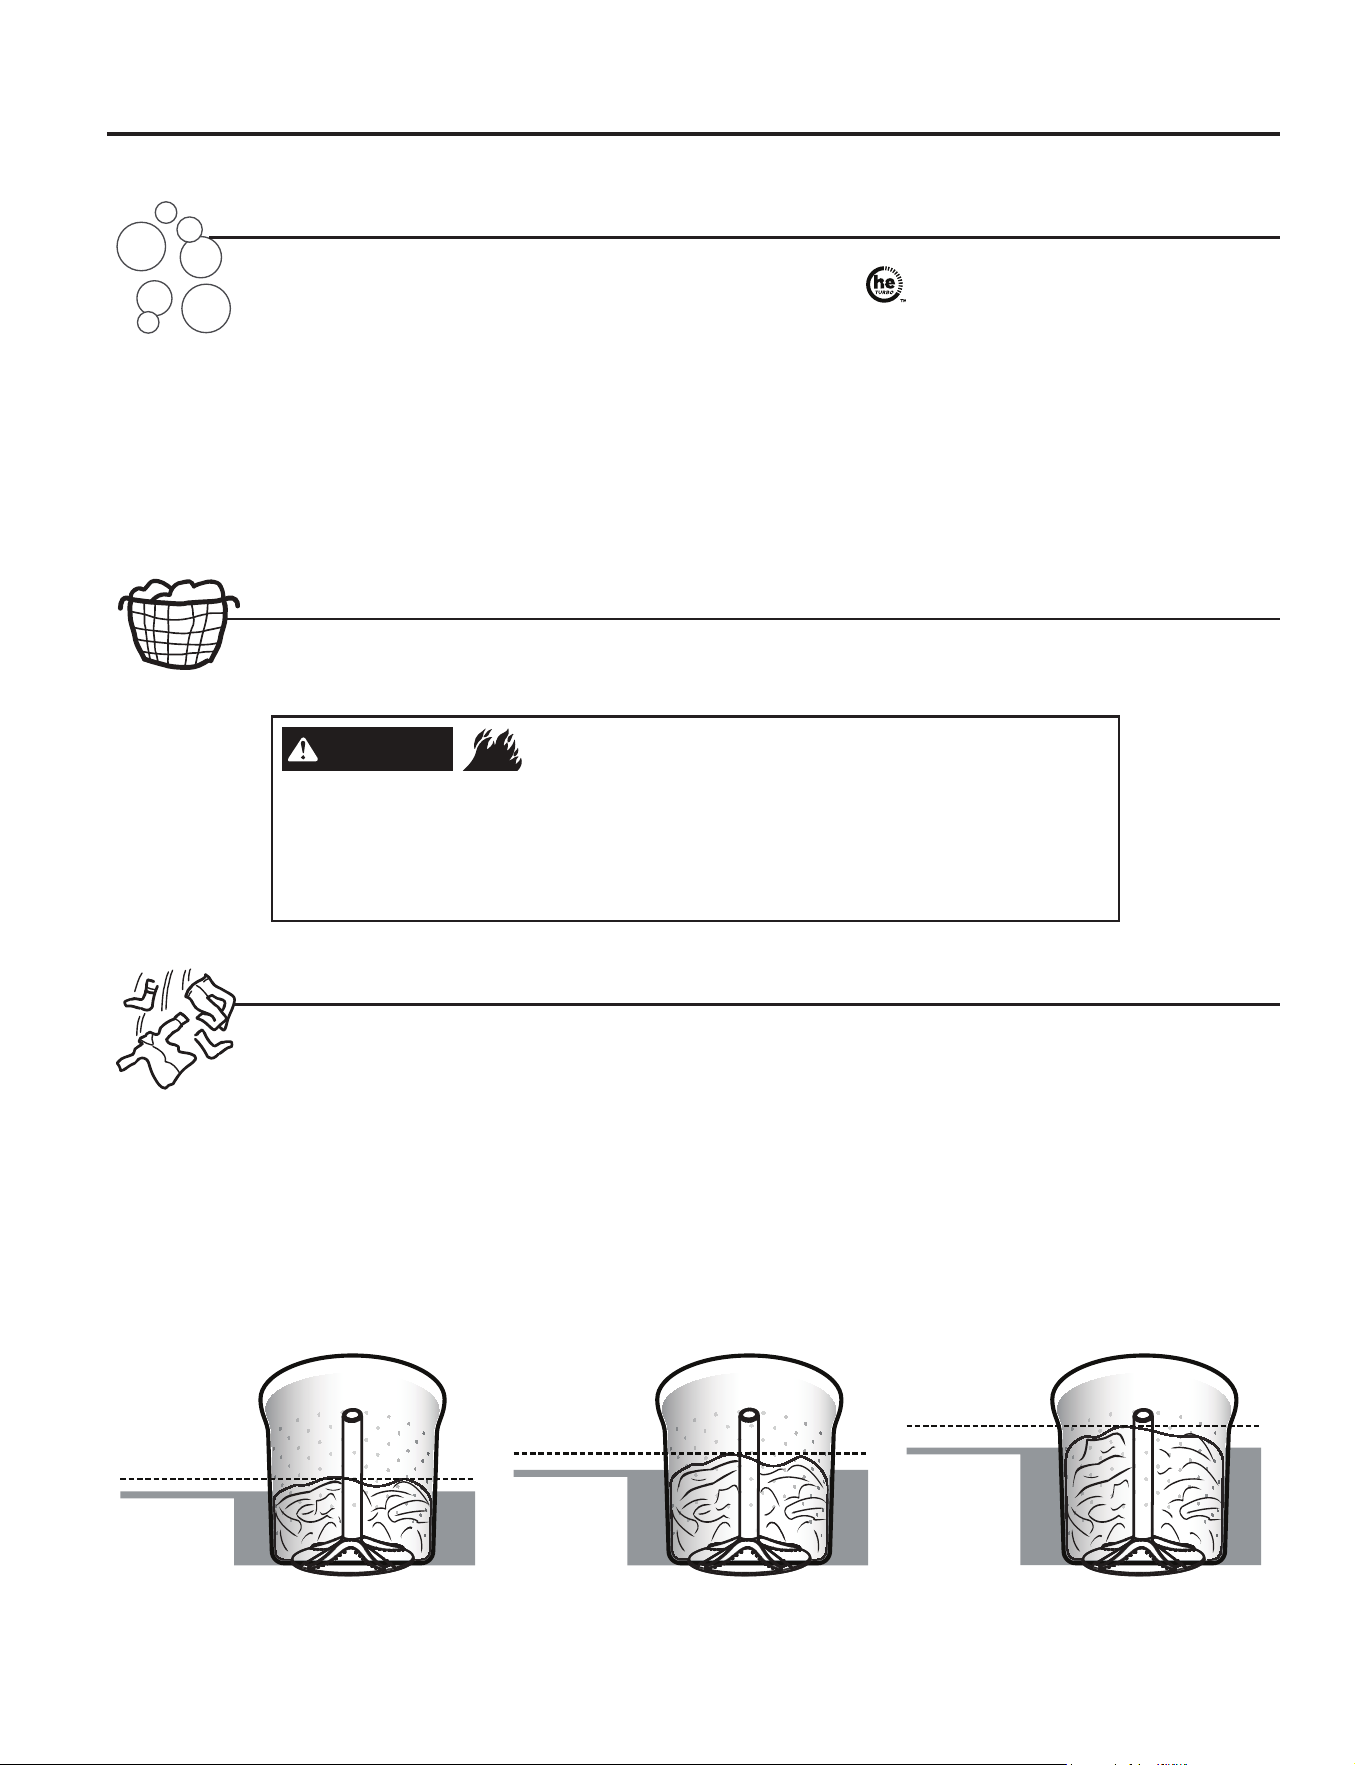
Proper Use of Detergent
Sorting Wash Loads
Sort by color (whites, lights, colors), soil level, fabric type (sturdy cottons, easy care, delicates) and whether the
fabric produces lint (terry cloth, chenille) or collects lint (velveteen, corduroy). Wash lint producers such as cotton
towels and socks separate from lint collectors including synthetic garments and dress pants.
- Fire Hazard
WARNING
Never place items in the washer that are dampened with gasoline or other flammable liquids.
No washer can completely remove oil.
Do not dry anything that has ever had any type of oil on it (including cooking oils).
Doing so so can result in death, explosion, or fire.
Using too little or too much detergent is a common
cause of laundry problems.
Use less detergent if you have soft water, a smaller
load or a lightly soiled load.
For spots, apply pre-treatment to items as
recommended on the product label. Application should
be made in the basket to prevent overspray which may
cause the coloring on the lid or graphics to fade.
Place detergent pods in the bottom of the wash basket
before adding clothes.
GE recommends the use of High Efficiency detergents
such as
in your energy efficient washer.
HE detergents are formulated to work with low
water wash and rinse systems. HE detergents reduce
the oversudsing problems commonly associated with
regular detergents.
When using high efficiency or concentrated
detergents, consult the product label to determine
amount required for optimum performance. Excessive
detergent will negatively impact wash performance.
Loading and using the washer.
Always follow fabric manufacturer’s care label when laundering.
Load dry items loosely in the washer basket. For best
results, load items evenly and loosely around the
outside of the basket, filling in towards the center on
larger loads. To add items after washer has started,
press Start/Pause if the lid is locked; wait until the Lid
Lock indicator on the display is no longer illuminated
before attempting to open the lid. Lift the lid and
submerge additional items around the outside of
the basket. Close the lid and press Start to resume.
Adjust load size selection and/or use Deep Fill option if
necessary.
Do not place large items such as sheets, blankets
and towels across the Infusor (on some models).
Load them around the outside of the basket.
Do not put lawn or sofa cushions into the washer as
they are too big to move. Remove outer covers and
ONLY wash them.
Average Small Load
Clothes Level
Water Level
Average Medium Load
Clothes Level
Water Level
Clothes Level
Water Level
Average Large Load
9
12
About washer features.
Automatic Load Sensing (on some models)
This determines the correct agitate profile, agitate duration and amount of water suited to the size and type of load placed in the washer.
The washer will not start the wash cycle or fill with water if the lid is open. When the lid is closed the machine is able to begin filling with
water in order to sense the load size.
NOTE: Automatic Load Sensing initiates a spin at the beginning of the cycle and will take as much as 3 minutes to complete (significantly
shorter for smaller loads); this is normal operation.
NOTE: This is a high efficiency washing machine with agitator wash action. This system requires less water while providing effective cleaning
action. You may notice that the water level is lower than on your previous washer. This is normal for an agitator-equipped washer.
The agitator cap fits into the top of the agitator. If it accidentally comes
off, simply put it back on.
The fabric softener dispenser automatically releases liquid fabric
softener at the proper time during the cycle.
Do not stop the washer or raise the lid during the first spin. This will
cause the dispenser to empty too soon.
To use, follow these steps:
1
Make sure dispenser is securely attached to agitator.
2
Use only liquid diluted fabric softener. Pour into dispenser, using
amount recommended on package.
Never pour fabric softener directly on clothes. It may stain them.
3
Add water to dispenser until it reaches the maximum fill line.
4
Select Deep Rinse option.
Note: Fabric softener may not dispense properly if the Deep Rinse
option is not selected.
Liquid Fabric Softener Dispenser (on some models)
Liquid chlorine bleach should be added through the bleach
dispenser in the front left corner. Follow bleach manufacturer’s
recommendations for the correct amount of liquid chlorine bleach
based on load size, taking care to not apply or spill it directly on
clothing.
NOTE: Do not use liquid chlorine bleach and laundry pretreatments
such as an Oxi product in the same wash load.
Liquid Bleach
Place laundry pretreatments, such as an Oxi product, directly in the
bottom of the wash basket before loading clothes.
NOTE: Do not use liquid chlorine bleach and laundry pretreatments
such as an Oxi product in the same wash load.
Pretreatment
ONLY this
portion of the
dispenser is
visible once
installed into
agitator
Do not pour anything into the agitator
if the agitator cap or dispenser is
removed.
10
Hoses connecting washer to faucet should be
replaced every 5 years.
Water Supply Hoses
Ask the service technician to remove water from
drain pump and hoses. Do not store the washer
where it will be exposed to the weather.
Moving and Storage
Be sure water supply is shut off at faucets. Drain
all water from hoses and water filter pump area if
weather will be below freezing.
Long Vacations
Care and cleaning of the washer.
GEAppliances.com
Leave the lid open after washing to allow
moisture to evaporate. If you want to clean the
basket, use a clean soft cloth dampened with
liquid detergent; then rinse. (Do not use harsh or
gritty cleaners.)
13
Immediately wipe off any spills with a damp cloth.
Exterior of the Washer
Interior of the Washer
Separate for cleaning
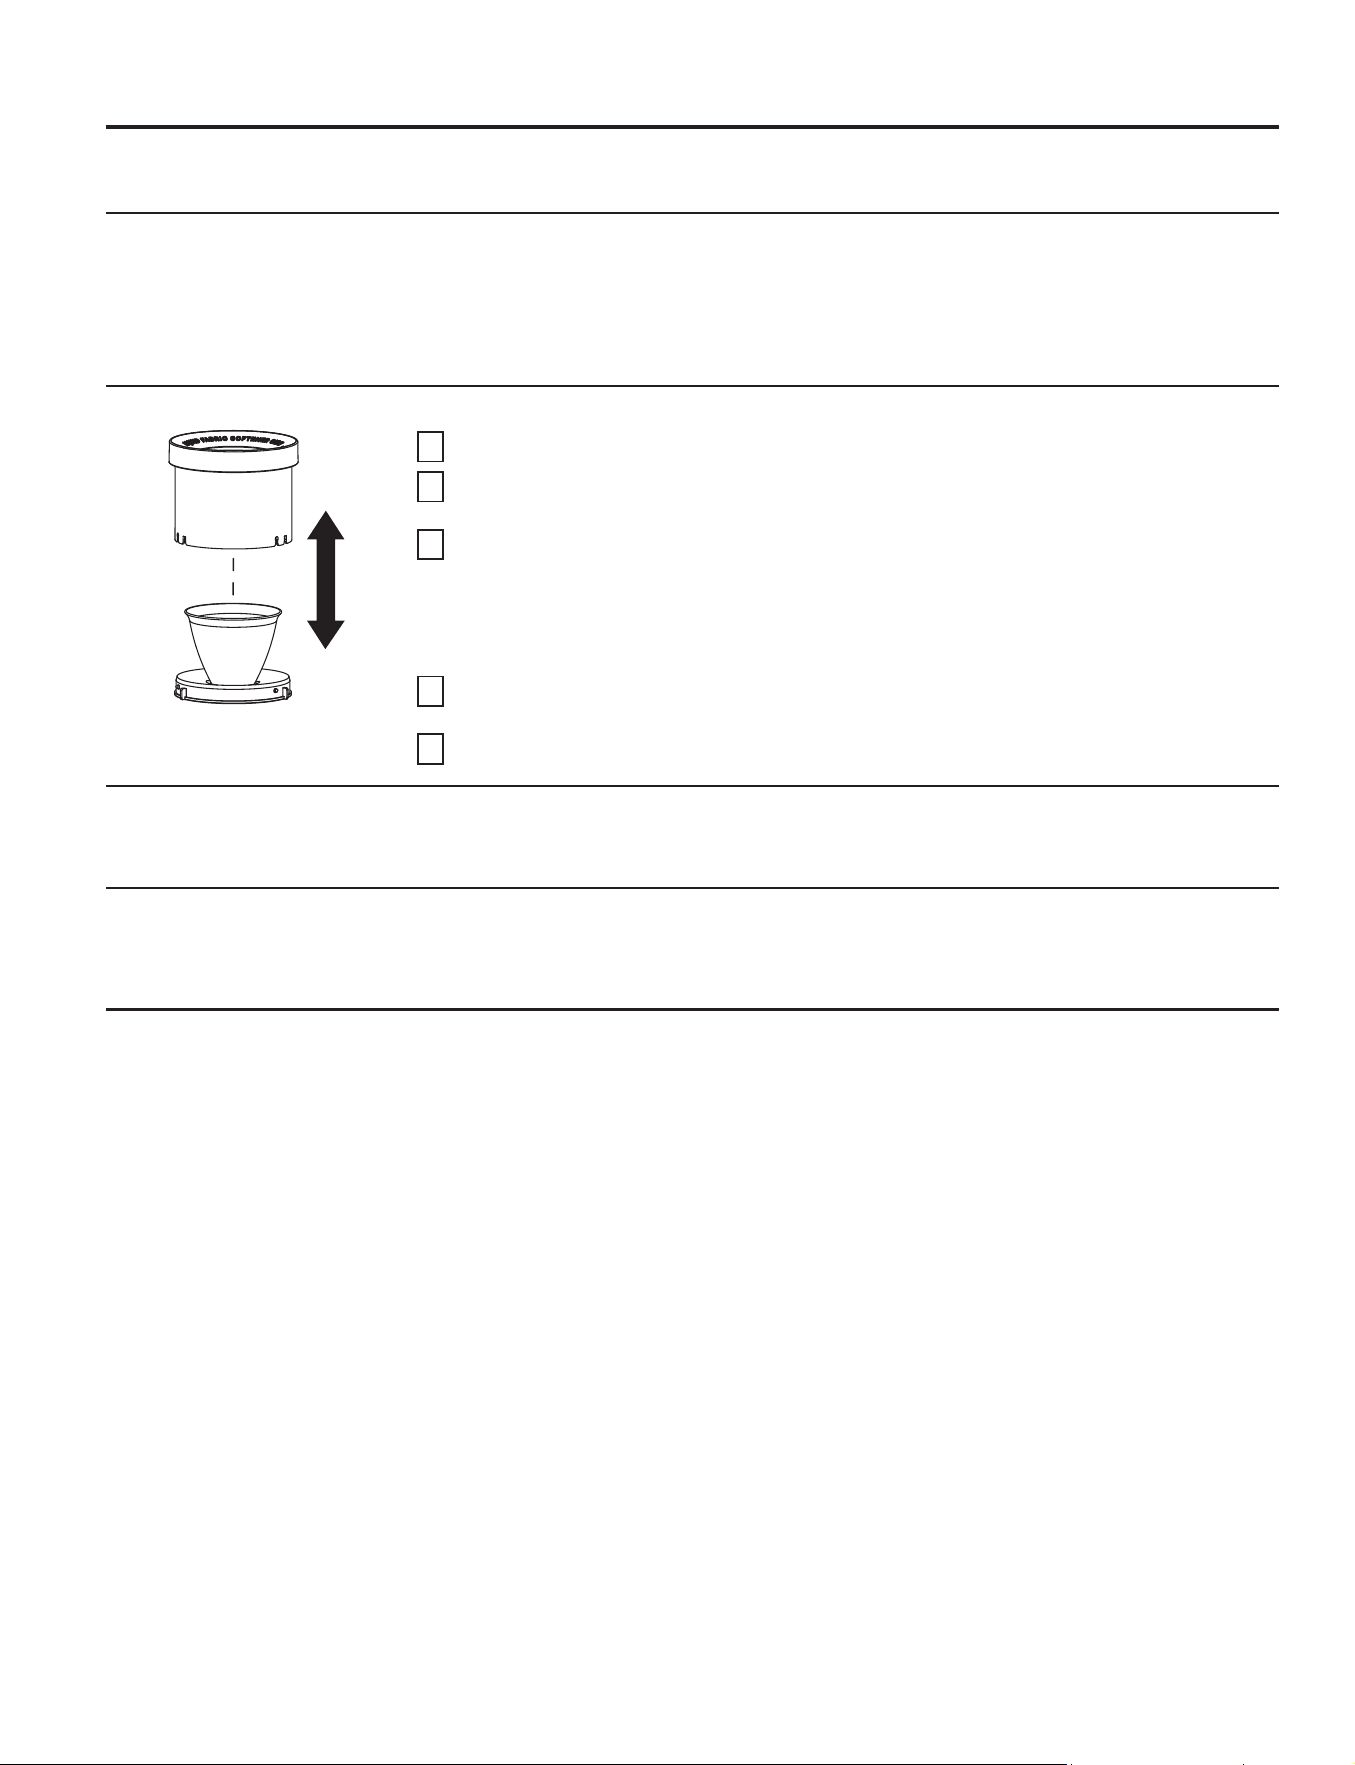
Cleaning the Fabric Softener Dispenser (on some models)
1
Remove the dispenser from the top of the agitator.
2
Separate the dispenser cup from the cover by grasping the top and pushing down on the inside of
the cup with your fingers. Dispenser cup will pop free from the cover.
3
To clean the dispenser, soak both the dispenser cup and the dispenser cover in the following
solution:
1 US gallon (3.8 liters) warm water
1/4 cup (60 ml) heavy-duty liquid detergent
1 cup (240 ml) bleach
4
If necessary, loosen buildup with a clean, soft cloth after soaking. Do not use a stiff brush; you may
roughen the surface of the dispenser.
5
Rinse and reassemble dispenser. Place dispenser back on the agitator.
11
Installation
Washer
Instructions
If you have any questions, call 800.GE.CARES (800.432.2737)
or visit our Website at: GEAppliances.com
In Canada, call 1.800.561.3344
or visit www.GEAppliances.ca
TOOLS REQUIRED FOR
WASHER INSTALLATION
Pliers
Level
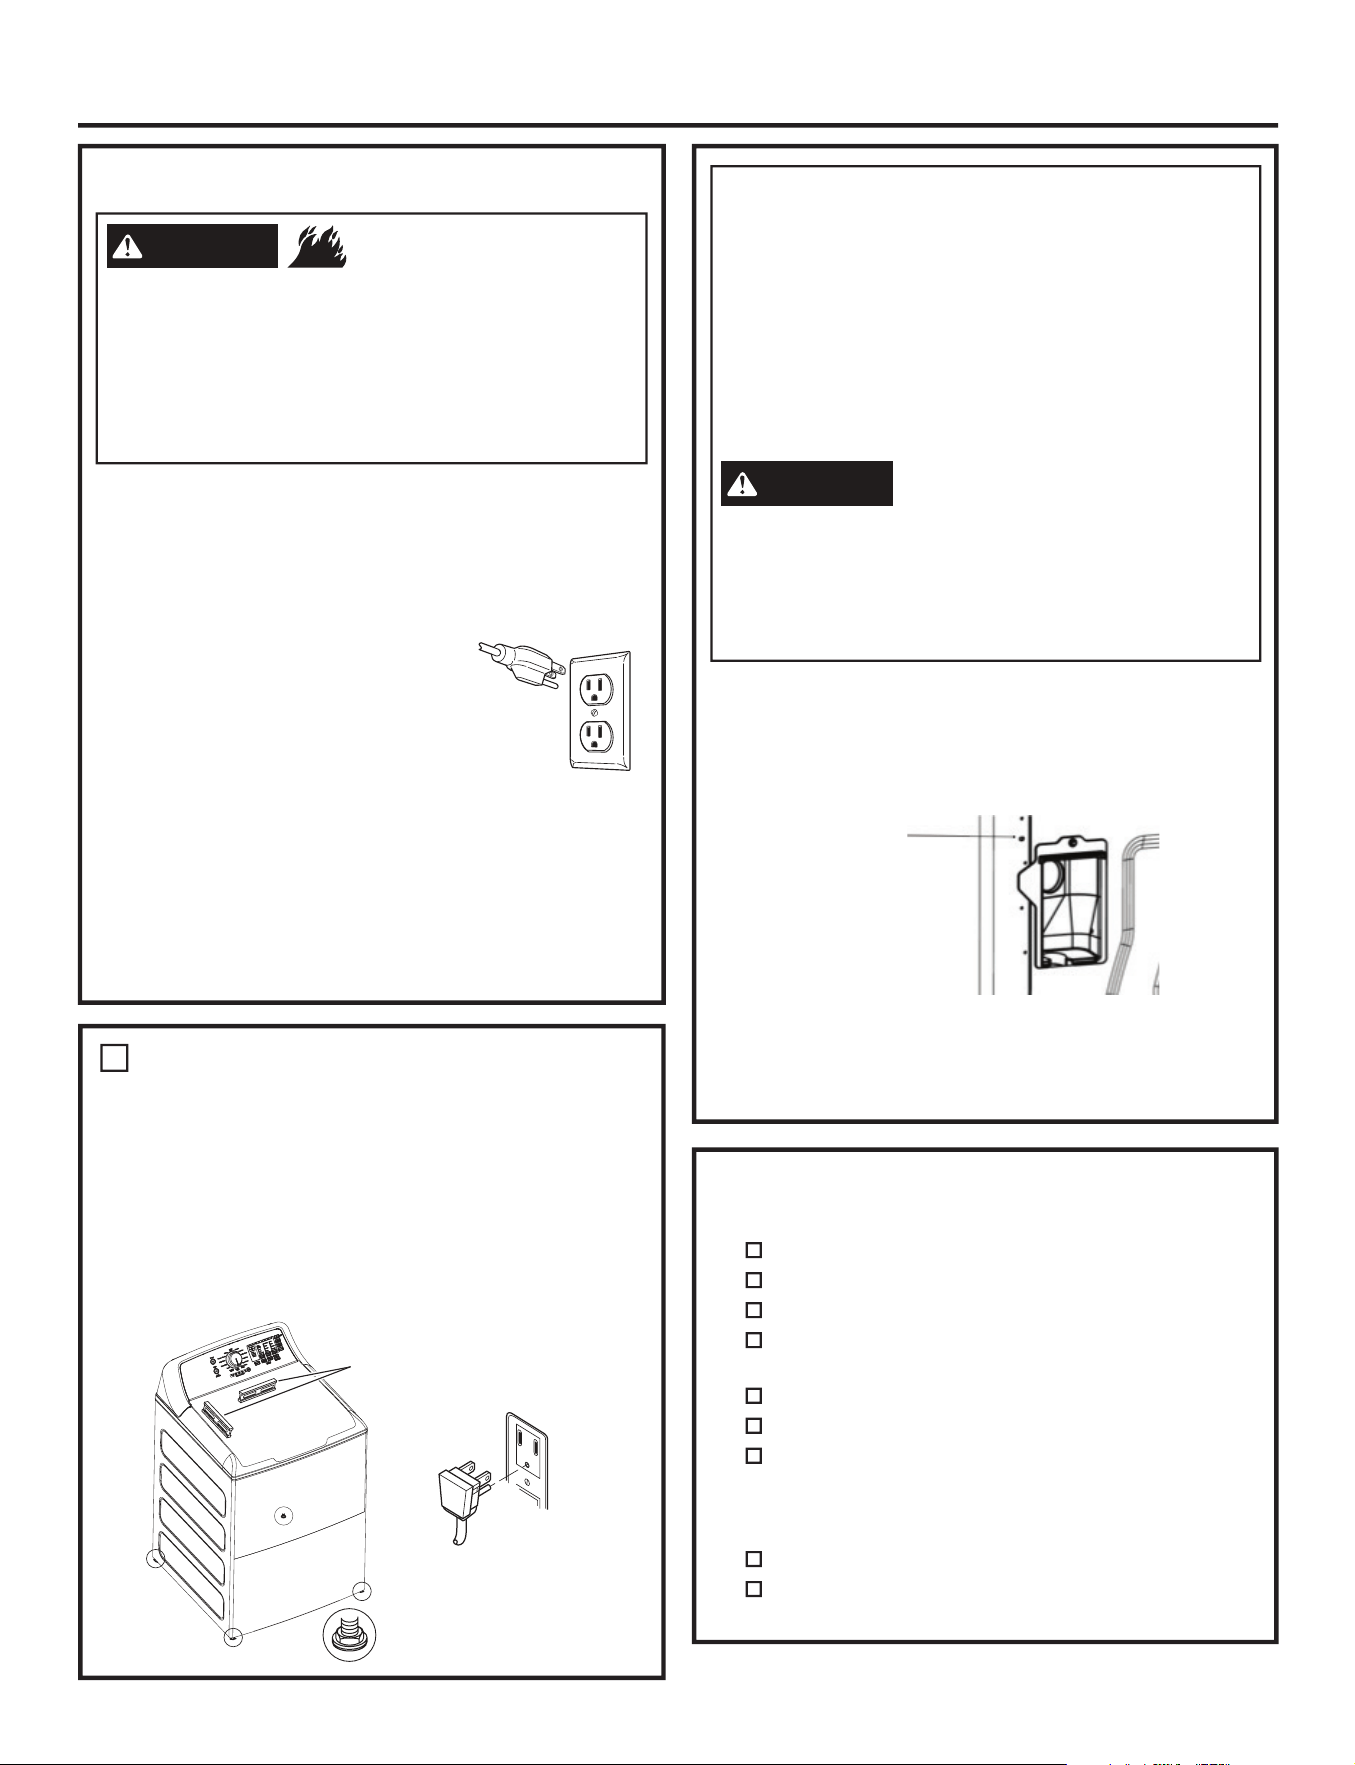
PARTS SUPPLIED
PARTS REQUIRED
(Sold separately)
Water Hoses (2)
GE Parts and Accessories
Order on-line at GEApplianceparts.com today, 24 hours a day
or by phone at 800.626.2002 during normal business hours.
Part Number Accessory
PM14X10002 4 ft Rubber Water Supply Hoses
Or
PM14X10005 4 ft Braided Metal Water Supply Hoses
WH1X2267 Rubber Washer (1) and Screen (1)
WH49X301
Drain Hose Extension (For discharge
heights from 60" - 96"
This is the safety alert symbol. This symbol alerts you to potential hazards that can kill you or hurt you and others.
All safety messages will follow the safety alert symbol and the word “DANGER”, “WARNING”, or “CAUTION”. These
words are defined as:
Indicates a hazardous situation which, if not avoided, will result in death or serious injury.
Indicates a hazardous situation which, if not avoided, could result in death or serious injury.
Indicates a hazardous situation which, if not avoided, could result in minor or moderate injury.
DANGER
WARNING
CAUTION
12
Rubber Washers (2)
and Strainer Screens (2)
Drain Hose Extension (For discharge heights from 60" - 96"
NOTE: We strongly recommend the use of new water
supply hoses. Hoses degrade over time and need to be
replaced every 5 years to reduce the risk of hose failures
and water damage.
BEFORE YOU BEGIN
Read these instructions completely and carefully.
•
IMPORTANT –
Save these instructions
for local inspector’s use.
•
IMPORTANT – Observe all governing
codes and ordinances.
•
Note to Installer –
Be sure to leave these
instructions with the Consumer.
•
Note to Consumer –
Keep these instructions
for future reference.
• Skill level – Installation of this appliance requires
basic mechanical and electrical skills.
• Completion time – 1-3 hours
• Proper installation is the responsibility of the installer.
• Product failure due to improper installation is not
covered under the Warranty.
Cable tie
Clamp
13
Installation Instructions
LOCATION OF YOUR WASHER
Do Not Install the Washer:
1. In an area exposed to dripping water or outside
weather conditions. The ambient temperature
should never be below 60°F (15.6°C) for proper
washer operation.
2. In an area where it will come in contact with curtains or
drapes.
3. On carpet. The floor MUST be a hard surface with
a maximum slope of 1/2
per foot (1.27 cm per
30 cm). To make sure the washer does not vibrate
or move, you may have to reinforce the floor.
NOTE: If floor is in poor condition, use 3/4 impregnated
plywood sheet solidly attached to existing floor covering.
IMPORTANT: Minimum Installation Clearances
- Alcove or Closet
• If your washer is approved for installation in an alcove
or closet, there will be a label on the back of the
machine describing requirements.
• Minimum clearance between washer and adjacent
walls or other surfaces: 0" either side, 2" front, 3"
rear. Vertical space from floor to overhead shelving,
cabinets, ceiling, etc. = 60".
• Closet doors must be louvered or otherwise ventilated
and require 60 square inches of opening near the top
of the door and 60 square inches near the bottom of
the door. If a dryer is located in the same closet, then
these areas must be doubled.
NOTE: The clearances stated on this label are minimums.
Consideration must be given to providing adequate
clearances for installing and servicing.
After the machine is in the home, remove outside packing
material/carton from washer.
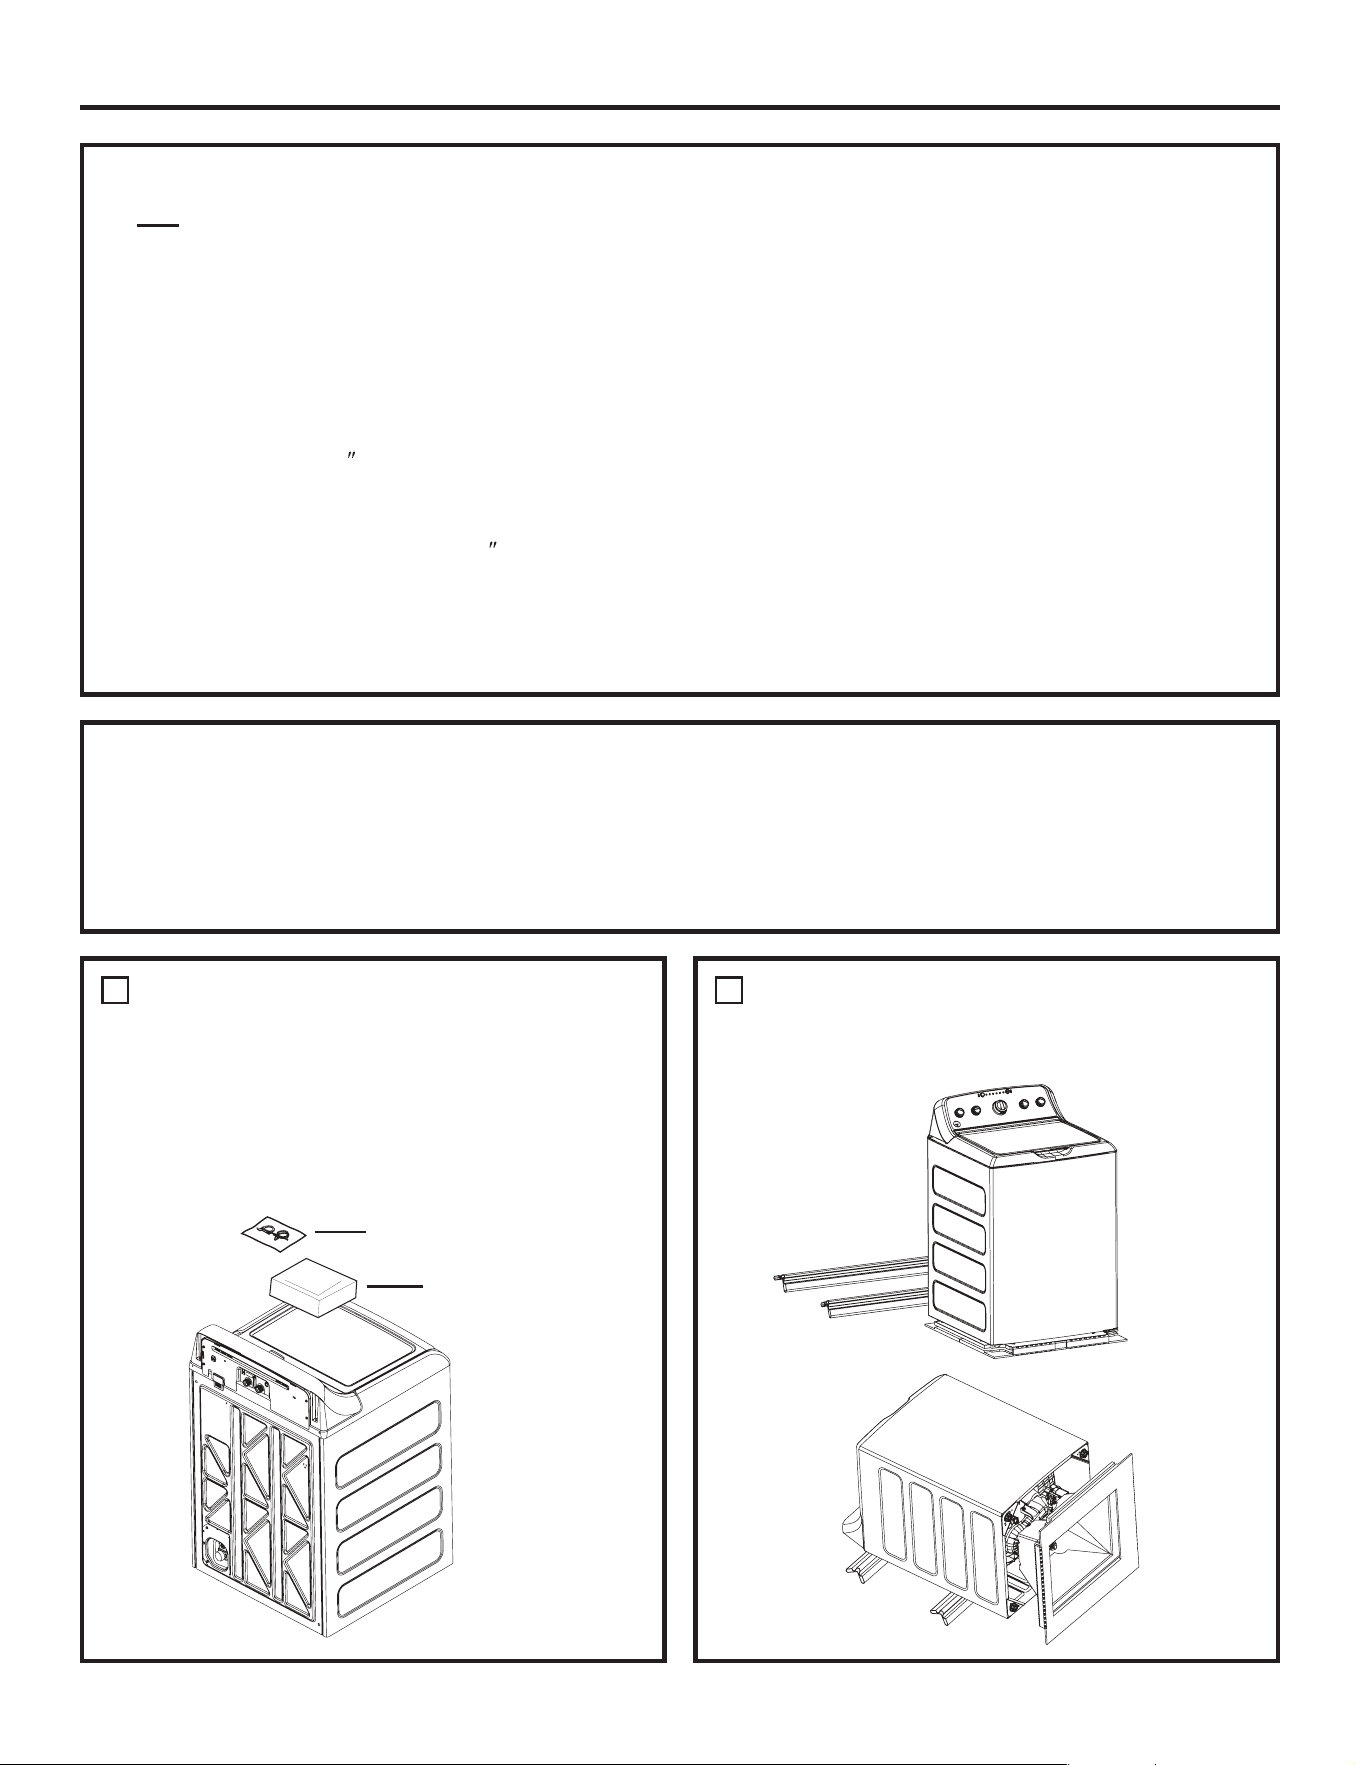
Remove bag (containing clamp, cable tie and drain hose clip),
drain hose and Owner's Reference Guide from tub.
NOTE: Leave foam shipping material inside tub opening to
hold tub in place during the rest of installation.
Bag
Leave shipping
material inside tub
1
UNPACKING THE WASHER
Remove base from unit by placing foot on side of base and
tipping unit back on corner post. Remove base and bring the
washer back upright.
2
REMOVE THE BASE
WATER SUPPLY REQUIREMENTS
WATER PRESSURE - Must be 20 psi minimum to 120 psi maximum.
WATER TEMPERATURE - Household water heater should be set to deliver water at 120° to 150°F (50° to 66°C) TO THE WASHER when
hot wash is selected.
SHUTOFF VALVES - Both hot and cold shutoff valves (faucets) should be supplied.
DRAIN - Water should be drained into standpipe. Discharge height MUST NOT BE LESS THAN 30 INCHES, and no more than 8 feet
above the base of the washer. Standpipe must be 1-1/2 inches minimum inside diameter and must be open to atmosphere.

Installation Instructions
CONNECT WATER HOSES TO OUTLET
VALVES
Disconnect electrical cord before installing water hoses. If not
installed, install rubber washer in one end of hot water hose.
Thread hot water hose onto connection labeled H at top rear of
washer. Hand tighten
and use pliers to tighten hoses between
1/8 and 1/4 turn beyond hand-tight.
If not installed, install rubber washer in one end of cold water
hose C. Thread cold water hose onto connection labeled C at top
rear of washer. Hand tighten
and use pliers to tighten hoses
between 1/8 and 1/4 turn beyond hand-tight.
room for you to make water, drain, and electrical connections
to your home.
CONNECT WATER HOSES TO WASHER
Rubber
washer
Rubber
washer
Determine which is HOT water line before attaching water
hoses to faucets. Traditionally, HOT faucet is on left.
(If screen washers are not installed) With protruding part of
screen toward you, install strainer screen/rubber washer
into each of the free ends of two water hoses.
Connect hot water hose to hot water
outlet valve of your home. Hand
tighten and use pliers to tighten hoses
between 1/4 and 1/2 turn beyond
hand-tight. Open hot water valve.
Connect cold water hose to cold
water outlet valve of your home. Hand
tighten and use pliers to tighten hoses
between 1/4 and 1/2 turn beyond
hand-tight. Open cold water valve.
Check for leaks and drips at the hose
couplings. Tighten as necessary.
14
4
3

Installation Instructions
5
CONNECT TO DRAIN
The drain or standpipe must be capable of accepting a
discharge at a rate of 16 galper minute. The drain height
must be 33” minimum and 96” máximum.
The standpipe diameter must be 1-1/2” minimum.
There MUST be an air gap around the drain hose in the
stand pipe. A snug fit can cause a siphoning action.
For a drain facility less than 33” high, the hose, coupling
and clamps provided in the machine must be used and,
in addition, a siphon break MUST be installed on the back
of the machine. Obtain and use a siphon break kit and
follow the instructions in the kit.
If water valves and drain are built into wall, fasten drain
hose to one of water hoses with cable tie provided
(ribbed side on inside). If your drains is a standpipe,
fasten drain hose to standpipe with cable tie provided.
NOTE:
Placing the drain hose too far down the drain pipe
can cause a siphoning action. No more than 5" of
hose should be in the drain pipe. There must be an
air gap around the drain hose. A snug fit can also
cause a siphoning action.
15
Wall
5" Max.
insertion
into
drain
30"
Min.
Drain
hose
Cable
tie
30"
Min.
5" Max.
insertion
into
drain
Drain
hose
Cable
tie
Standpipe
Installation Instructions
ELECTRICAL REQUIREMENTS
- Fire Hazard
WARNING
Plug into a grounded 3-prong outlet.
DO NOT remove ground prong.
DO NOT use an adapter.
DO NOT use an extension cord.
Failure to follow these instructions can result in death,
fire or electrical shock.
CIRCUIT – Individual, properly polarized and grounded 15
or 20 amp circuit breaker or time-delay fuse.
POWER SUPPLY – 2 wire plus ground, 120 Volt, single
phase, 60 Hz, alternating current.
Outlet Receptacle – Properly grounded 3-prong
receptacle to be located so the power
cord is accessible when the washer
is in an installed position. If a 2-prong
receptacle is present, it is the owner’s
responsibility to have a licensed
electrician replace it with a properly
grounded 3-prong grounding type
receptacle.
Washer must be electrically grounded in accordance with
local codes and ordinances, or in the absence of local
codes, in accordance with the NATIONAL ELECTRICAL
CODE, ANSI/NFPA NO. 70 latest edition. Check with a
licensed electrician if you are not sure that the washer is
properly grounded.
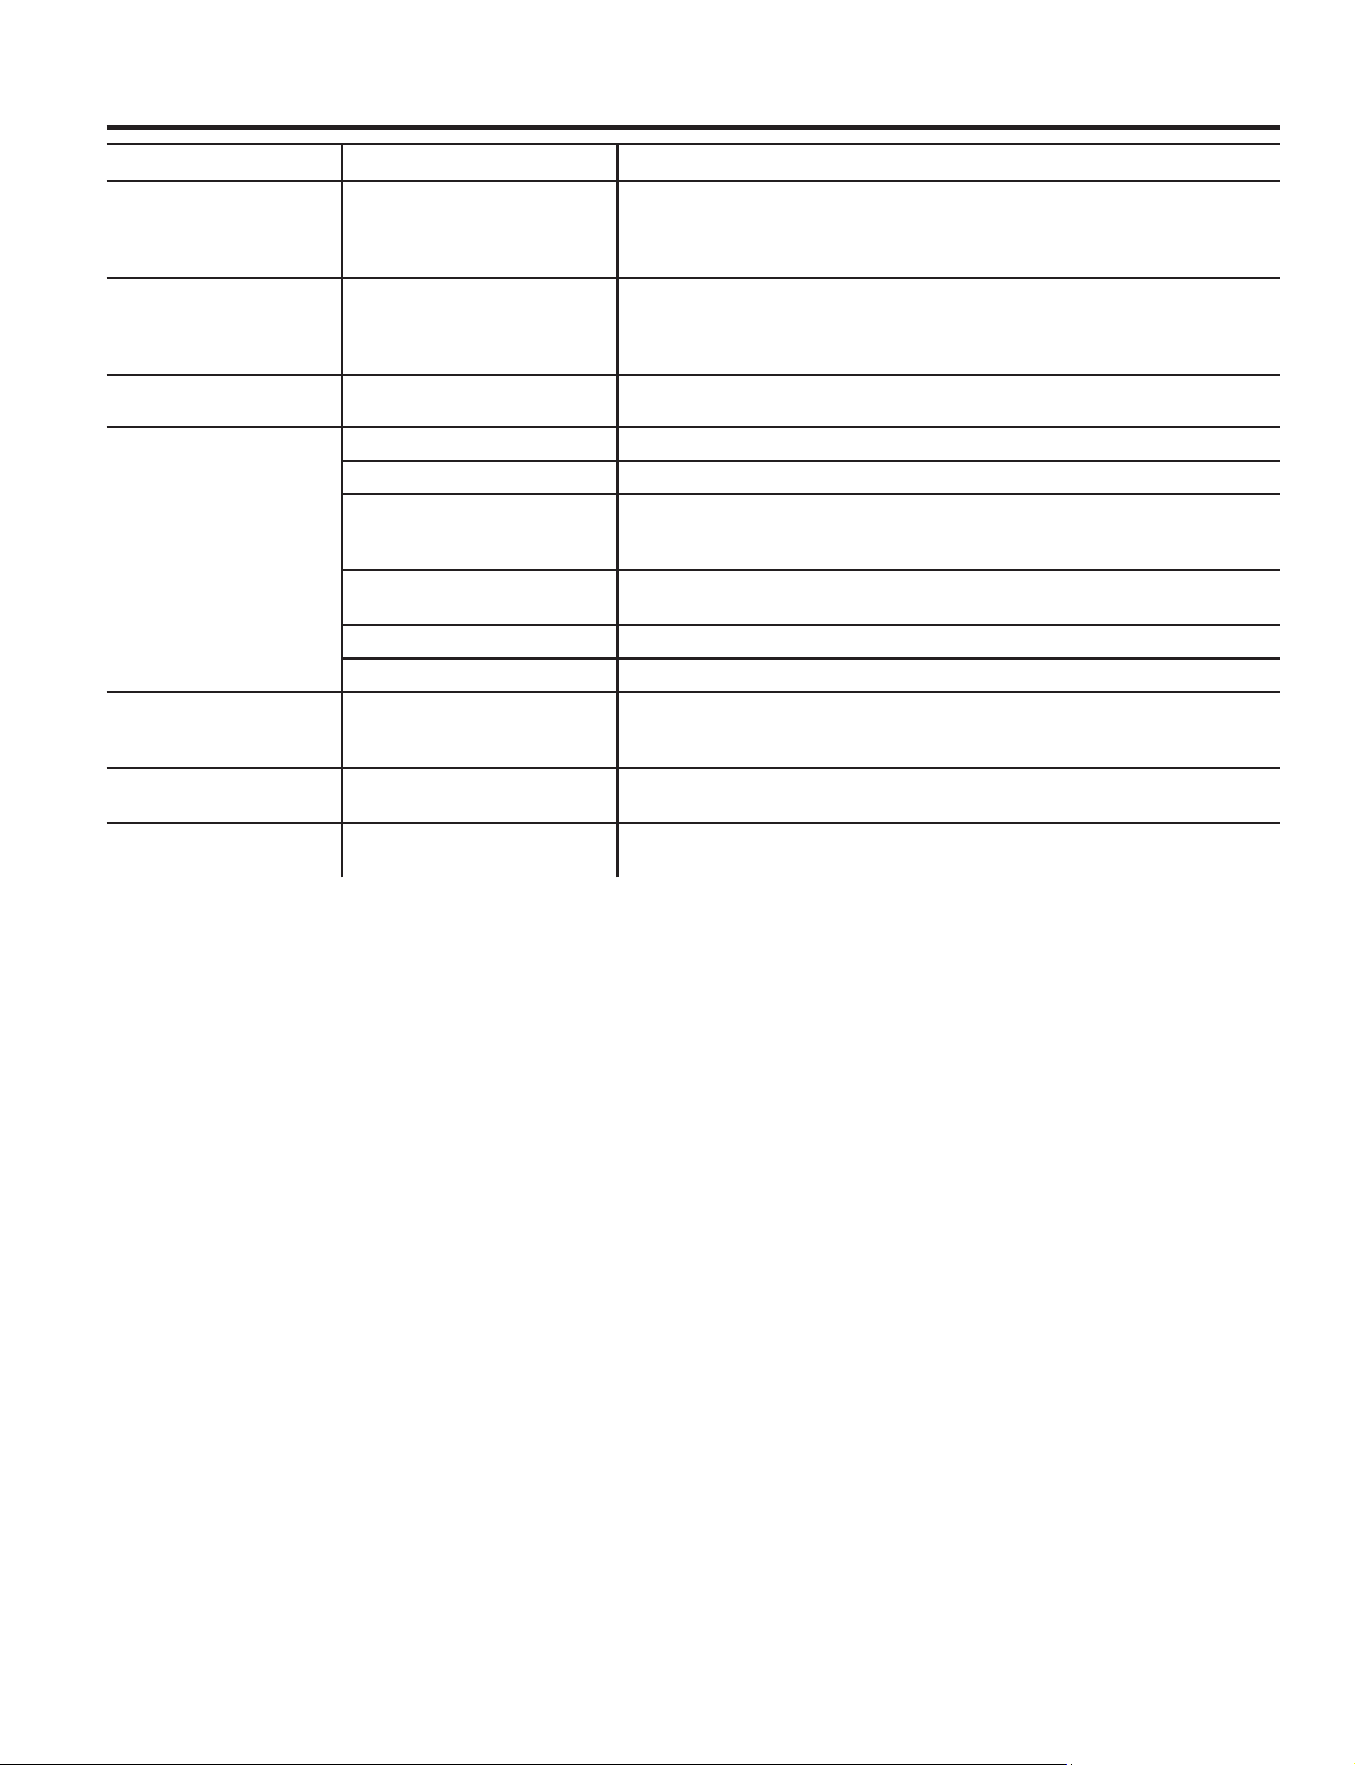
If required by local codes, an external 18 gauge or larger
copper ground wire (not provided) may be added. Attach
to washer cabinet with a #10-16 x
1/2
” sheet metal screw
(available at any hardware store) to rear of washer as
illustrated.
Mobile Home Installation:
Installation must conform to Standard for Mobile Homes,
ANSI A119.1 and National Mobile Home Construction and
Safety Standards Act of 1974 (PL93-383).
GROUNDING INSTRUCTIONS
This appliance must be grounded. In the event of
malfunction or breakdown, grounding will reduce the risk
of electric shock by providing a path of least resistance
for electric current. This appliance is equipped with
a cord having an equipment- grounding conductor
and a grounding plug. The plug must be plugged
into an appropriate outlet that is properly installed
and grounded in accordance with all local codes and
ordinances.
WARNING
Improper connection of the equipment-
grounding conductor can result in a risk
of electrical shock. Check with a qualified electrician, or
service representative or personnel, if you are in doubt as to
whether the appliance is properly grounded. DO NOT
modify the plug on the power supply cord . If it will not fit the
outlet, have a proper outlet installed by a qualified
electrician.
Attach ground
wire and ground
screw (obtain
locally)
Washer
back
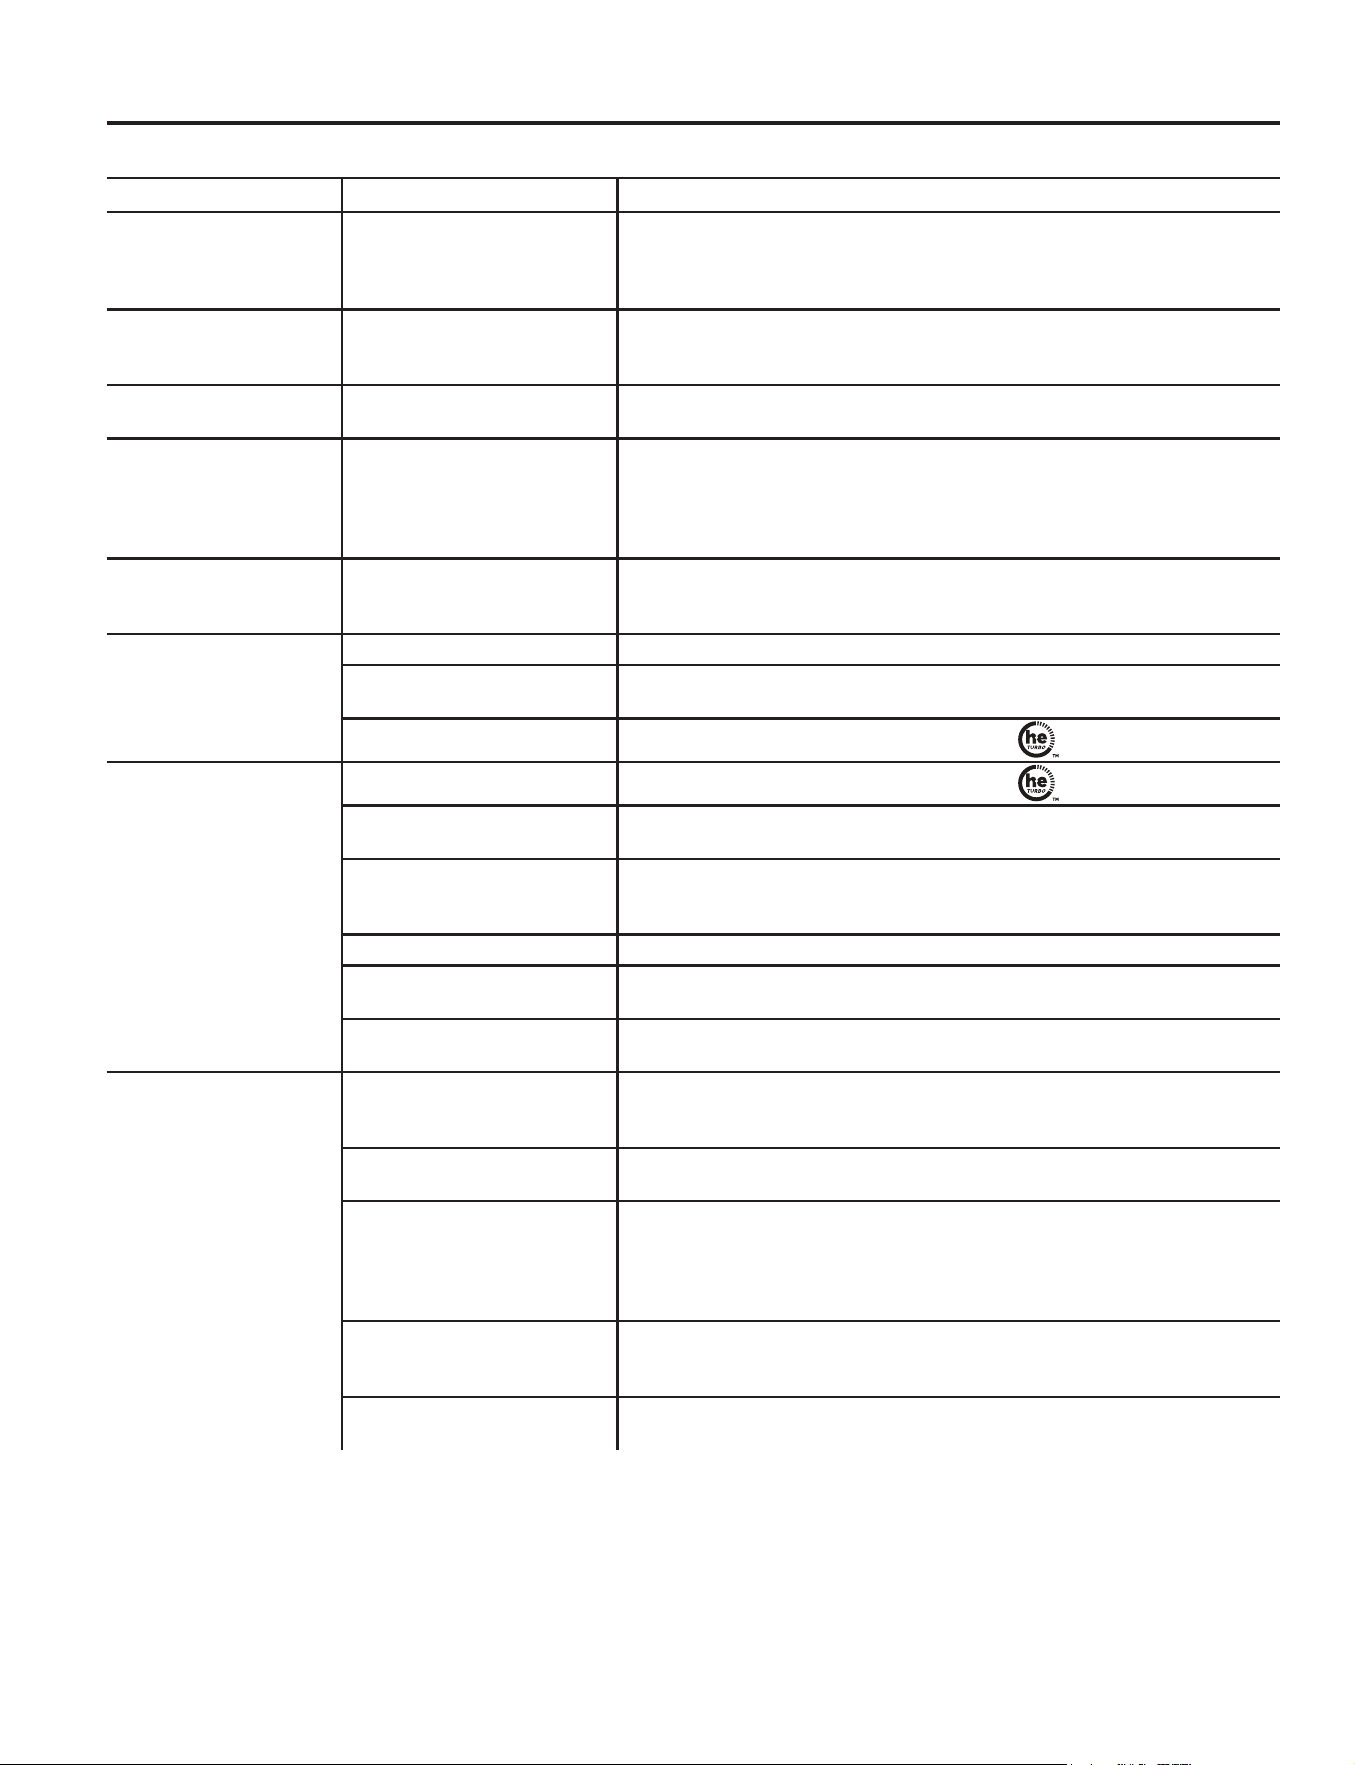
Make sure large dial control (on some models) on washer is
pushed in to the OFF position.
Insert plug of electrical cord into a 115V, 15- or 20-amp wall
receptacle. Move washer into final position. Place level on flat top
side edges of washer. Adjust all four leveling legs until
washer
is level left-to-right and front-to-back. Remove level.
Open tub lid. Remove and discard tub shipping material (see Step 1).
Remove plastic protector sheet from control panel face.
7
CONNECT POWER AND INSTALL
Level
Before starting the washer, check to make sure:
Main power is turned on.
The washer is plugged in.
The water faucets are turned on.
The unit is level and all four leveling legs are firmly
on the floor.
The shipping foam and cardboard are removed.
The drain hose is properly tied up.
There are no leaks at the faucet, drain line
or washer.
Run the washer through a complete cycle.
Check for water leaks and proper operation.
Place these instructions in a location near the
washer for future reference.
FINAL CHECKLIST
16
19
Save time and money! Review the charts on the following pages, or visit GEAppliances.com. You may not need to call for service.
Before you call for service…Troubleshooting Tips
WATER Possible Causes What To Do
Small amount of water
remaining in dispenser
(on some models) at
end of cycle
Normal dispenser
operation
It is normal for a small amount of water to remain in dispenser after the
cycle.
Short spray and delay
after pushing the Start
button
Lid was opened and closed
between cycle selection
and start
This is normal. See START-UP SEQUENCE in the Safety Instructions
section.
Water level seems low This is normal Water may not cover the top level of the clothes. This is normal for this
high efficiency washer.
Low water flow Water valve screens are
stopped up
Turn off the water source and remove the water connection hoses from
the upper back of the washer and the water faucets. Clean both the
hose screens (if so equipped) and the screens in the machine using a
brush or a toothpick. Reconnect the hoses and turn the water back on.
Check to ensure there are no leaks at the connections.
Water siphoning out
of washer
Drain standpipe is too
low or hose too far into
standpipe
The drain hose must exceed 32” height at some point between
the washer back and the drain pipe. Use anti-siphon clip. See the
Installation Instructions.
Too many suds Soft water Try less detergent.
Too much detergent Measure your detergent carefully. Use less soap if you have soft water, a
smaller load or a lightly soiled load.
Type of detergent
Switch to High Efficiency detergent such as
.
Water leaks Type of detergent
Switch to High Efficiency detergent such as
.
Using too much detergent
in washer
Use less detergent. Use less soap if you have soft water, a smaller load
or a lightly soiled load.
Fill hoses or drain hose is
improperly connected
Make sure hose connections are tight at faucets and rubber washers
are installed. Make sure end of drain hose is correctly inserted in and
secured to drain facility.
Household drain clogged Check household plumbing. You may need to call a plumber.
Drain hose rubs on wall Make sure drain hose does not make contact with the wall. May cause
excessive wear on the hose.
Constant water pressure to
fill hoses at water source
Tighten hoses at the faucets.
Check condition of the fill hoses; they should be replaced every 5 years.
Water temperature
seems incorrect
Cooler water temperatures
provide improved energy
efficiency
New laundry detergents have been formulated to work with cooler
water temperatures without affecting wash performance.
Water supply is turned off
or improperly connected
Turn both hot and cold faucets fully on and make sure hoses are
connected to correct faucets. NOTE: Water valves are marked “H” and “C”.
Water valve screens are
stopped up
Turn off the water source and remove the water connection hoses from
the upper back of the washer and the water faucets. Clean both the
hose screens (if so equipped) and the screens in the machine using a
brush or a toothpick. Reconnect the hoses and turn the water back on.
Check to ensure there are no leaks at the connections.
Cool/Cold Water when
selecting Hot
This is normal. The washer senses water temperature (on some models)
and optimizes for best results. Cold water is added periodically when hot
is selected.
House water heater is not
set properly
Make sure house water heater is delivering water at 120°F–140°F
(48°C–60°C).
17

20
Save time and money! Review the charts on the following pages, or visit GEAppliances.com. You may not need to call for service.
Before you call for service…Troubleshooting Tips
WATER Possible Causes What To Do
Water pumped out
before cycle is complete
Lid lifted or cycle was put
in pause for over 24 hours
Reset cycle.
Water won’t drain Drain hose is kinked or
improperly connected
Straighten drain hose and make sure washer is not sitting on it.
Top of drain outlet should be less than 6 ft (1.8 m) above floor.
Washer spins and pauses
at the beginning of cycles
This is normal The washer is sensing the load.
Washer pauses during
wash cycle
The Soak Option was
chosen
This is normal. The washer alternates between agitate and soak during
these cycles to get your clothes cleaner with less wear.
This is normal Many cycles incorporate as series of soaks within the agitation period to
get your clothes clean with less wear.
18
21
GEAppliances.com
OPERATION Possible Causes What To Do
Residual powder in
dispenser or clogging
of dispensers (on some
models)
Wash water too cold or low
home water pressure
Select a warmer wash temperature if possible to improve dissolving of
detergent or use liquid detergent. Make sure siphon caps are free of debris
and fully pressed into position. Remove and clean tray if clogging occurs.
Laundry additives
dispensing too soon
(Dispensers on some
models)
Overfilling of dispensers Do not overfill or add water to dispenser. Select Deep Rinse option when
using fabric softener.
Washer pauses during
spin cycle
This is normal The washer may pause during the spin cycle to remove soapy water more
efficiently.
Washer won’t operate Washer is unplugged Make sure cord is plugged securely into a working outlet.
Water supply is turned off Turn both hot and cold faucets fully on.
/LGLVRSHQ³VDIHW\IHDWXUH
prevents agitation and
spinning when lid is up
Close lid and press Start.
Circuit breaker/fuse is
tripped/blown
Check house circuit breakers/fuses. Replace fuses or reset breaker. Washer
should have a separate outlet.
Electronics need to be reset Unplug washer, wait 2 minutes, plug back in and press Start.
Start was not pressed Press Start.
Detergent packets
not dissolving
Laundry detergent packet
placed in dispenser
Laundry detergent packets should not be used in the dispensers.
They should only be added directly to the wash basket following the
manufacturer’s directions.
Unexplained time and/
or settings changes
Changing options (on some
models)
This is normal. Several options will change other options to maximize
washer performance.
Basket seems loose Basket moves or rotates
freely
Washer basket does not have a traditional brake. Washer basket will move
freely. This is normal.
19
22
PERFORMANCE
Possible Causes What To Do
Colored spots Incorrect use of fabric
softener
Check fabric softener package for instructions and follow directions for
using dispenser.
Make sure you have selected the Deep Rinse option.
Pretreat stain and rewash using Speed Wash cycle before drying.
Dye transfer Sort whites or lightly colored items from dark colors.
Grayed or yellowed
clothes
Detergent amount Be sure to follow detergent manufacturer’s directions.
Hard water Use a water conditioner or install a water softener.
Water is not hot enough Make sure water heater is delivering water at 120°F–140°F (48°C–60°C).
Washer is overloaded Loosely load clothes no higher than the top row of holes in the washer
basket. For best results, load items around the outside of the basket.
Dye transfer Sort clothes by color. If fabric label states wash separately, unstable dyes
may be indicated.
Lint or residue on
clothes
Clothes are air or line dried If you do not dry your clothes with a clothes dryer, your clothes may retain
more lint.
Incorrect sorting Separate lint producers from lint collectors.
Washing too long Wash small loads for a shorter time using Light Soil setting.
Detergent not dissolving
Rewash; next time:
Try a liquid detergent
Use warmer water temperature.
Overloading Loosely load clothes in the washer basket. For best results, load items
around the outside of the basket.
Incorrect use of fabric
softener
Check fabric softener package for instructions and follow directions for
using dispenser.
Make sure you have selected the Deep Rinse option.
Before you call for service…Troubleshooting Tips
20
23
PERFORMANCE Possible Causes What To Do
Clothes too wet No spin selected Select a spin option.
Incorrect cycle selected Make sure the cycle selected matches the load you are washing. Some
fabrics will feel wetter when rinsed with cold water.
Wash load out of balance
Redistribute load in washer and run through Drain & Spin cycle.
Blinking Spin light or
Spin light on at end of
cycle
Out of balance condition
has been detected
Allow cycle to continue and finish.
If load is wet at the end of the cycle, even out load and run a Drain &
Spin cycle.
Pilling Result of normal wear on
poly-cotton blends and fuzzy
fabrics
While this is not caused by the washer, you can slow the pilling process by
washing garments inside out.
Snags, holes, tears, rips
or excessive wear
Pins, snaps, hooks, sharp
buttons, belt buckles,
zippers and sharp objects
left in pockets
Fasten snaps, hooks, buttons and zippers.
Remove loose items like pins, objects in pockets and sharp buttons.
Turn knits (which snag easily) inside out.
Undiluted chlorine bleach Check bleach package instructions for proper amount.
Never add undiluted bleach to wash or allow clothes to come in contact
with undiluted bleach.
Chemicals like hair bleach
or dye, permanent wave
solution
Rinse items that may have chemicals on them before washing.
Use Speed Wash cycle with Extra Rinse option.
Wrinkling Incorrect wash and dry
cycles
Match Cycle selection to the type of fabric you are washing (especially for
easy care loads).
Improper sorting Avoid mixing heavy items (like jeans) with light items (like blouses).
Try a fabric softener.
Overloading Loosely load clothes in the washer basket.
Repeated washing in water
that is too hot
Wash in warm or cold water.
GEAppliances.com
21

24
SOUNDS Possible Causes Reason
“Clicking” Shifter mechanism is
engaging or disengaging
The drive system will engage at the start of agitate and disengage when
agitate is complete. This occurs multiple times during the wash.
Back and forth
“swoosh”
Electric motor reversing
direction
This sound is the motor rotating back and forth to clean your laundry.
“Clicking” behind
Control during fill
Automatic Temperature
Control Valve
Two valves mix cold and hot water. The “clicking” is when either valve
turns on or off to raise or lower the fill water temperature.
Water flow changes
during fill
Automatic Temperature
Control Valve
Two valves mix cold and hot water. The “clicking” is when either valve
turns on or off to raise or lower the fill water temperature.
Motor sounds during
spin
Motor ramping up/down
during spin cycle
The motor will speed up incrementally during the spin cycle.
When spin is complete, it will coast until it stops.
“Humming” Water drain pump The drain pump will make a humming sound when pumping out water
after agitation stops and continue until spin is complete.
Drive motor The drive motor will make a “humming” sound during the wash and spin
phases of the cycle.
“Gurgling” Water drain pump When the pump starts drawing in air, It starts to gurgle. The washer should
then begin spinning and the sound will continue until it is done spinning.
Water “swishing”
Washing process
Water swishing while the unit is agitating is normal, especially with smaller
loads.
Washer rocking/
moving
Washer leveling legs
uneven
To level the washer, adjust the leveling legs by rotating the individual leg
in the proper direction for up or down.
“Squeaking” sound Washer not level and
rubbing on cabinet
To level the washer, adjust the leveling legs by rotating the individual leg
in the proper direction for up or down.
Before you call for service…Troubleshooting Tips
Washer sounds that may be different from your prior washer:
Clicks, water flowing, gear sounds followed by pauses, and electric hum sounds are
all part of the normal wash cycle.
To listen and watch videos of normal washer operation, please go to
http://products.geappliances.com/appliance/gea-support-search-content?contentid=23061
or scan the QR code.
22
25
Service trips to your home to teach you how to use
the product.
Improper installation, delivery or maintenance.
Failure of the product if it is abused, misused, or
used for other than the intended purpose or used
commercially.
Replacement of house fuses or resetting of circuit breakers.
Products which are not defective or broken, or which are
working as described in the Owner’s Manual.
Damage to the product caused by accident, fire, floods
or acts of God.
Incidental or consequential damage caused by possible
defects with this appliance.
Defects or damage due to operation in freezing
temperatures.
Damage caused after delivery.
Product not accessible to provide required service.
What Is Not Covered:
GE Appliances Washer Warranty.
(;&/86,212),03/,(':$55$17,(6³<RXUVROHDQGH[FOXVLYHUHPHG\LVSURGXFWUHSDLUDVSURYLGHGLQWKLV/LPLWHG
Warranty. Any implied warranties, including the implied warranties of merchantability or fitness for a particular purpose,
are limited to one year or the shortest period allowed by law.
Servicing your appliance may require the use of the onboard data port for diagnostics. This gives a GE
Factory Service technician the ability to quickly diagnose any issues with your appliance and helps GE
improve its products by providing GE with information on your appliance. If you do not want your appliance
data to be sent to GE, please advise your technician NOT to submit the data to GE at the time of service.
This warranty is extended to the original purchaser and any succeeding owner for products purchased for home use
within the USA. If the product is located in an area where service by a GE Authorized Servicer is not available, you may be
responsible for a trip charge or you may be required to bring the product to an Authorized GE Service location for service.
In Alaska, the warranty excludes the cost of shipping or service calls to your home.
Some states do not allow the exclusion or limitation of incidental or consequential damages. This warranty gives you
specific legal rights, and you may also have other rights which vary from state to state. To know what your legal rights are,
consult your local or state consumer affairs office or your state’s Attorney General.
Warrantor: General Electric Company. Louisville, KY 40225
In the United States:
In Canada:
This warranty is extended to the original purchaser and any succeeding owner for products purchased in Canada for
home use within Canada. If the product is located in an area where service by a GE Authorized Servicer is not available,
you may be responsible for a trip charge or you may be required to bring the product to an Authorized GE Service location.
Some provinces do not allow the exclusion or limitation of incidental or consequential damages. This warranty gives you
specific legal rights, and you may also have other rights which vary from province to province. To know what your legal
rights are, consult your local or provincial consumer affairs office.
Warrantor: MC Commercial, Burlington, ON, L7R 5B6
All warranty service provided by our Factory Service Centers, or an
authorized Customer Care
®
technician. To schedule service, in the
United States, visit us on-line at GEAppliances.com, or call 800.GE.CARES
(800.432.2737). In Canada, visit GEAppliances.ca or call 1.800.561.3344
Please have serial number and model number availa ble when calling
for service.
Staple your receipt here.
Proof of the original purchase
date is needed to obtain
service under the warranty.
For The Period Of: We Will Replace:
One Year Any factory specified part of the washer which fails due to a defect in materials or workmanship.
From the date of the During this limited one-year warranty, we will also provide, free of charge, all labor and related
original purchase service to replace the defective part.
23
Consumer Support.
GE Appliances Website
In the U.S.: GEAppliances.com
Have a question or need assistance with your appliance? Try the GE Appliances Website 24 hours a day,
any day of the year! For greater convenience and faster service, you can now download Owner’s Manuals,
order parts or even schedule service on-line. In Canada: www.GEAppliances.ca
Schedule Service
In the U.S.: GEAppliances.com
Expert GE repair service is only one step away from your door. Get on-line and schedule your service at your
convenience any day of the year! Or call 800.GE.CARES (800.432.2737) during normal business hours.
In Canada, call 1.800.561.3344
Real Life Design Studio In the U.S.: GEAppliances.com
all ages, sizes and capabilities. We recognize the need to design for a wide range of physical and mental abilities
and impairments. For details of GE’s Universal Design applications, including kitchen design ideas for people with
disabilities, check out our Website today. For the hearing impaired, please call 800.TDD.GEAC (800.833.4322).
In Canada, contact: laicremmoC CM,snoitaleR remusnoC ,reganaM
Suite 310, 1 Factory Lane
Moncton, N.B. E1C 9M3
Extended Warranties In the U.S.: GEAppliances.com
Purchase a GE extended warranty and learn about special discounts that are available while your warranty is still
in effect. You can purchase it on-line anytime, or call 800.626.2224 during normal business hours. GE Consumer Home
Services will still be there after your warranty expires. In Canada, consult your local listings for an extended
warranty provider.
Parts and Accessories In the U.S.: GEAppliances.com
Individuals qualified to service their own appliances can have parts or accessories sent directly to their homes
(VISA, MasterCard and Discover cards are accepted). Order on-line today, 24 hours every day or by phone at
800.626.2002 during normal business hours.
Instructions contained in this manual cover procedures to be performed by any user. Other servicing generally should
be referred to qualified service personnel. Caution must be exercised, since improper servicing may cause unsafe
operation.
In Canada, consult your local listings for your nearest GE parts distributor or call 1.800.661.1616
Contact Us In the U.S.: GEAppliances.com
If you are not satisfied with the service you receive from GE, contact us on our Website with all the details including your
snoitaleR remotsuC ,reganaM lareneG :ot etirw ro ,rebmun enohp
GE Appliances, Appliance Park
Louisville, KY 40225
In Canada: www.GEAppliances.ca, or write to: Director, Consumer Relations, MC Commercial
Suite 310, 1 Factory Lane
Moncton, N.B. E1C 9M3
For questions on installation call 1-800-626-2000 (US) and 1-800-561-3344 (Canada).
Register Your Appliance In the U.S.: GEAppliances.com
communication and prompt service under the terms of your warranty, should the need arise. You may also
mail in the pre-printed registration card included in the packing material. In Canada: www.GEAppliances.ca
24

Laveuses
Sécurité
.............................2 et 3
Utilisation
Caractéristiques ..........................12
Chargement et utilisation de la laveuse ... 11
Entretien et nettoyage de la laveuse ...... 13
Utilisation ..............................4–10
Instructions d’installation
.......14-18
Dépannage ........................19–24
Service à la clientèle
Indicateur d’aide au consommateur ..........10
Garantie .................................25
Pièces et accessoires ...................3, 26
Service à la clientèle ......................26
Inscrivez ici les numéros de
modèle et de série :
N° de modèle ____________
N° de série ______________
Vous pouvez les
trouver sous le
couvercle de la
laveuse.
Manuel de l’utilisateur et
Instructions d’installation
HTW200BMKWW
MTW200BMKWW
2
CONSIGNES DE SÉCURITÉ IMPORTANTES.
LISEZ TOUTES LES INSTRUCTIONS AVANT D’UTILISER VOTRE APPAREIL.
Il s'agit du symbole d'avertissement de sécurité. Il vous avertit des dangers potentiels qui pourraient provoquer la mort
ou des blessures, à vous ou à autrui. Tous les messages de sécurité suivent ce symbole d'avertissement de sécurité et
les mots « DANGER », « AVERTISSEMENT » ou « ATTENTION ». Voici la définition de ces mots :
Indique une situation dangereuse qui, si elle n'est pas évitée, entraînera la mort ou des blessures
sérieuses.
Indique une situation dangereuse qui, si elle n'est pas évitée, pourrait entraîner la mort ou des
blessures sérieuses.
Indique une situation dangereuse qui, si elle n'est pas évitée, pourrait entraîner des blessures mineures ou
plus sérieuses.
DANGER
CONSIGNES DE SÉCURITÉ IMPORTANTES
Pour réduire les risques de décès, d'incendie, d'explosion, de choc électrique ou de blessures
lorsque vous utilisez votre appareil, suivez les mesures de sécurité de base, notamment :
Lisez toutes les instructions avant d'utiliser l'appareil.
NE nettoyez et NE séchez PAS d'articles qui ont été nettoyés, lavés, trempés ou tachés avec de l'essence, du solvant
pour nettoyage à sec ou d'autres produits combustibles ou substances explosives, car ces derniers peuvent dégager
GHVYDSHXUVTXLSRXUUDLHQWVHQÀDPPHURXH[SORVHU
N'ajoutez PAS de l'essence, du solvant pour nettoyage à sec ou d'autres produits combustibles ou substances explosives
jOHDXGHODYDJH&HVVXEVWDQFHVSHXYHQWGpJDJHUGHVYDSHXUVTXLSRXUUDLHQWVHQÀDPPHURXSURYRTXHUXQH
explosion.
Dans certaines conditions, de l'hydrogène peut se former dans un circuit d'eau chaude qui n'a pas été utilisé pendant
deux semaines ou plus. L'HYDROGÈNE EST UN GAZ EXPLOSIF. Si le circuit d'eau chaude n'a pas été utilisé pendant une
telle période, ouvrez tous les robinets d'eau chaude et laissez l'eau couler pendant plusieurs minutes avant d'utiliser
votre laveuse. Ainsi, l'hydrogène accumulé sera évacué du système. Ce gaz étant inflammable, NE fumez PAS et
QXWLOLVH]SDVGHÀDPPHQXHSHQGDQWFHWWHRSpUDWLRQ
NE laissez PAS les enfants jouer sur ou à l'intérieur de cet appareil. La présence d'enfants près de cet appareil lorsqu'il
est en marche doit faire l'objet d'une étroite supervision. Avant de mettre la laveuse au rebut ou hors service, retirez la
porte ou le couvercle. Le non-respect de ces instructions peut entraîner le décès ou des blessures.
NE mettez PAS la main dans l'appareil lorsque le tambour ou l'agitateur est en mouvement pour éviter d'être happé
accidentellement.
N'installez ou n'entreposez PAS cet appareil dans un endroit où il sera exposé aux intempéries.
1(PRGL¿H]3$6OHVFRPPDQGHVQHUpSDUH]RXQHUHPSODFH]SDVGHSLqFHGHFHWDSSDUHLOHWQHWHQWH]SDVGHȺHFWXHU
une réparation, sauf si cette procédure est recommandée expressément dans les instructions d'entretien de l'utilisateur
ou dans les instructions de réparation de l'utilisateur et que vous possédez les connaissances et les aptitudes requises
pour le faire.
N'utilisez PAS cet appareil s'il est endommagé, s'il fonctionne mal, s'il est partiellement démonté ou si certaines de ses
pièces manquent ou sont cassées (y compris le cordon d'alimentation ou la fiche).
Débranchez l'appareil ou fermez son disjoncteur avant de procéder à l'entretien. Appuyer sur le bouton d'alimentation
Power de l'appareil NE le déconnecte PAS de l'alimentation.
Consultez la section sur le « Branchement électrique » des instructions d'installation pour obtenir les procédures de
mise à la terre.
CONSERVEZ CES INSTRUCTIONS
ATTENTION
AVERTISSEMENT
AVERTISSEMENT
3
www.electromenagersGE.ca
LORSQUE L'APPAREIL N'EST PAS UTILISÉ
Fermez les robinets d'eau pour réduire les fuites
en cas de tuyau cassé. Vérifiez l'état des tuyaux de
remplissage. GE recommande de les remplacer tous les
5 ans.
Assurez-vous que le boyau d'eau chaude est raccordé
au robinet « H » et que le boyau d'eau froide est
raccordé au robinet « C ».
Installez ou entreposez l'appareil à un endroit où il ne
sera exposé ni à des températures en dessous du point
de congélation ni aux intempéries; l'appareil pourrait
subir des dommages permanents et la garantie serait
annulée.
Mettez la laveuse à la terre conformément aux codes
et règlements en vigueur. Suivez les instructions
détaillées de la section « Instructions d'installation ».
Ensure washer is properly leveled and washer legs are
adjusted such that unit is stable.
Une rallonge de tuyau d'évacuation optionnelle est
recommandée pour les hauteurs d'évacuation allant
de 60 à 96 po (152,4 à 243,8 cm).
Cette laveuse n'est pas fournie avec des boyaux
d'alimentation en eau.
GE recommande fortement d'utiliser les pièces
spécifiées du fabricant. Une liste de boyaux
manufacturés disponibles pour l'achat est indiquée.
Ces boyaux ont été fabriqués et testés afin de
répondre aux spécifications de GE.
GE recommande fortement d'utiliser de nouveaux
boyaux d'alimentation en eau. Les boyaux se
dégradent avec le temps et doivent être remplacés
tous les cinq ans afin de réduire le risque de bris de
boyau et de dégâts d'eau.
Pièces et accessoires
Consultez votre annuaire local pour un détaillant de
pièces authorisé ou applez-nous au 1-800-661-1616.
Numéro de pièce Accessoire
PM14X10002 Boyaux d'alimentation en eau en
caoutchouc de 4 pi (1,2 m)
Ou
PM14X10005 Boyaux d'alimentation en eau de type
tressé de 4 pi (1,2 m)
WH49X301 Rallonge de tuyau d'évacuation
PM7X1 Plateau de plancher pour laveuse
INSTALLATION APPROPRIÉE
Cette laveuse doit être installée conformément aux instructions d'installation avant d'être utilisée.
À chaque démarrage ou redémarrage suite à l’ouverture
ou la fermeture du couvercle, la laveuse ouvre le robinet
d’eau froide durant deux courtes périodes suivies d’une
pause de 10 secondes avant de poursuivre.
Si le couvercle est ouvert pendant cette période, la laveuse
effectuera une pause. Il vous faudra rappuyer sur le
bouton Start (départ) pour redémarrer le programme.
SÉQUENCE DE DÉMARRAGE
¥
CONSERVEZ CES INSTRUCTIONS
AVERTISSEMENT
- Risque d’électrocution
Brancher à une prise de courant à 3 broches mise à
la terre.
NE PAS retirer la broche de contact de mise à la terre.
N’UTILISEZ pas de rallonge électrique.
N’UTILISEZ pas d’adaptateur de prise.
Le non-respect de ces instructions pourrait entraîner
un décès ou un choc électrique.
Les caractéristiques et l'apparence de la cuisinière montrée dans ce manuel peuvent varier selon le modèle.
4
Commandes
• Chargez le linge sans le
tasser en le répartissant
autour de l’agitateur.
Charger trop de linge peut
avoir un impact négatif sur
la performance de lavage.
Consultez la page 11 pour
obtenir des suggestions de
chargement.
• Fermez le couvercle.
REMARQUE : La laveuse
ne se démarrera pas si le
couvercle est ouvert.
Étape 2
Étape 3
Étape 4
Étape 1
• Sélectionnez un
programme de lavage.
• Sélectionnez les options
de lavage, y compris
Deep Rinse (rinçage
en profondeur) (sur
certains modèles) lors
de l’utilisation d’un
assouplissant.
• Sélectionnez des
options.
• Appuyez sur
Start (départ).
• Ajoutez de l’assouplissant dans
le distributeur d’assouplissant
(sur certains modèles);
consultez la page 12.
•
Ajoutez la quantité de détergent
recommandée par le fabricant
.
GE recommande l’utilisation
de détergents Haute Efficacité
tels que
dans votre laveuse
écoénergétique
.
Placez les
dosettes de détergent dans
le fond du tambour avant
d’ajouter des vêtements.
Utilisation
BAc
D

A
B
Load Size (Taille de charge) (sur certains modèles)
Ajoutez le détergent HE au fond du panier et l’assouplissant dans le distributeur (sur certains modèles) avant de charger les vêtements dans la laveuse.
Placez les vêtements dans le panier de la laveuse sans les comprimer. Toute surcharge pourrait avoir un impact négatif sur les performances de
laveuse.
C
Operating instructions.
Start/Pause (départ/pause)
Appuyez sur Start (départ) pour lancer le programme. REMARQUE : Le couvercle doit être fermé pour que la laveuse pour démarrer le cycle. Si le
couvercle est fermé et le voyant Lid Locked (couvercle verrouillé) s’allumera.
Une pression sur Pause déverrouillera le couvercle (s’il est verrouillé à ce moment), mettra le programme en pause et le voyant Pause clignotera.
Pour relancer le programme, appuyez de nouveau sur la touche Start (départ). Si la laveuse est mise en pause pendant plus de 24 heures, le
programme sera annulé. S’il reste de l’eau dans la laveuse, sélectionnez le programme Drain & Spin (drainer et essorer) pour évacuer l’eau et la
vidanger.
Voyants de progression
Il indique si la laveuse est en mode Fill (remplissage), Soak (trempage), Wash (lavage), Rinse (rinçage) ou Spin (essorage).
Si une condition de déséquilibre est détectée par la laveuse, le voyant d’essorage (Spin) clignotera pendant le restant du cycle et restera allumé
pendant une courte période de temps après que le cycle soit terminé. Lorsque cela se produit, la laveuse prend des mesures pour corriger la
condition de déséquilibre et de terminer le cycle normalement. Dans certains cas, il est possible que la laveuse ne puisse pas être en mesure
d’équilibrer la charge et essorer à plein vitesse. Si vous remarquez que la charge est plus humide que normalement à la fin du cycle, répartissez la
charge uniformément dans le panier de lavage et commencez un cycle de Drain & Spin (drainer et essorer).
5
www.electromenagersGE.ca
Programmes de lavage - Bouton de sélection de programme
Le programme de lavage commande le type de processus de lavage. Le bouton de sélection de programme peut être tourné vers la droite ou la
gauche. La rotation du bouton de sélection de programme après le début d'un programme arrête la laveuse et règle le programme/les options sur
le nouveau programme sélectionné. Appuyez sur Start (départ) pour lancer le nouveau programme sélectionné.
Le tableau ci-dessous vous aidera à apparier les articles à laver avec les meilleurs réglages des cycles de lavage. Pour un rendement optimal,
sélectionnez le cycle qui s’approche le plus des articles à laver.
Les sélections et les options en gras sont les réglages du cycle recommandés.
Certains cycles et options ne sont pas offerts sur tous les modèles.
D
7
Articles à laver Cycle Temp. Lavage
Degré
saleté
Sélection
essorage
Options disponibles Description du cycle
Cycle pour une
utilisation normale,
régulière ou typique
pour le lavage
jusqu’à une charge
complète de
vêtements de coton
normalement sale.
Couleurs Très chaude
Chaude
Couleurs
Fraîche
Froide
Froide du
robinet
Extrêm. sale
Très sale
Normal
Légère-
ment
Extrêm.
Légère-
ment
Max/Extra
Normal
Guide de détachage
Remplissage profond
Trempage
automatique
Rinçage en
profondeur
Rinçage n
o
. 2
Cycle pour une utilisation normale,
régulière ou typique pour le lavage
jusqu’à une charge complète de
vêtements de coton normalement sale.
Choisissez les options de degré de saleté
Très sale ou Extrêmement sale et les
températures Chaude ou Très chaude
selon la charge de vêtements et le degré
de nettoyage à obtenir. Comprend des
périodes de remplissage et de lavage
HQSOXVLHXUVSKDVHVD¿QGHSURFXUHUXQ
traitement optimal des tissus.
Articles de couleur
foncée, lins, et
charges mélangées.
Couleurs
sombres
Très chaude
Chaude
Couleurs
Fraîche
Froide
Froide du
robinet
Extrêm. sale
Très sale
Normal
Légère-
ment
Extrêm.
Légère-
ment
Max/Extra
Normal
Guide de détachage
Remplissage profond
Trempage
automatique
Rinçage en
profondeur
Rinçage n
o
. 2
Des températures de lavage plus basses,
une période de lavage plus courte, et un
rinçage en profondeur (certains modèles)
réduisent le risque de décoloration
des
tissus de foncés. Comprend des
périodes de remplissage et de lavage
HQSOXVLHXUVSKDVHVD¿QGHSURFXUHUXQ
traitement optimal des tissus.
Vêtements de
loisir, vêtements de
bureau légèrement
sales.
Vête-
ments de
loisir
Très chaude
Chaude
Couleurs
Fraîche
Froide
Froide du
robinet
Extrêm. sale
Très sale
Normal
Légère-
ment
Extrêm.
Légère-
ment
Max/Extra
Normal
Guide de détachage
Remplissage profond
Trempage
automatique
Rinçage en
profondeur
Rinçage n
o
. 2
Cycle de lavage conçu pour l’entretien
des vêtements de loisir ou de bureau.
Comprend des périodes de remplissage
HWGHODYDJHHQSOXVLHXUVSKDVHVD¿QGH
procurer un traitement optimal des tissus.
Pour la lingerie
¿QHHWOHVWLVVXVj
entretien spécial,
légèrement à sales.
Tissus
délicats
Très chaude
Chaude
Couleurs
Fraîche
Froide
Froide du
robinet
Extrêm. sale
Très sale
Normal
Légère-
ment
Extrêm.
Légère-
ment
Max/Extra
Normal
Guide de détachage
Remplissage profond
Trempage
automatique
Rinçage en
profondeur
Rinçage n
o
. 2
Utilise une séquence d’agitation « tri-pulse
» exclusive très délicate pour procurer un
traitement spécial aux tissus délicats. Il est
recommandé de placer les articles très
GpOLFDWVRXSHWLWVGDQVGHVVDFVHQ¿OHW
avant le lavage.
Tissus de couleur
foncée, charges
mélangées.
Lavage
Froide
Très chaude
Chaude
Couleurs
Fraîche
Froide
Froide du
robinet
Extrêm. sale
Très sale
Normal
Légère-
ment
Extrêm.
Légère-
ment
Max/Extra
Normal
Remplissage profond
Trempage
automatique
Rinçage en
profondeur
Rinçage n
o
. 2
Cycle qui combine plusieurs périodes de
brassage et des périodes de trempage
D¿QGHSURFXUHUXQQHWWR\DJHDPpOLRUp
HWXQHHȻFDFLWppQHUJpWLTXHjGHV
températures d’eau froides.
Vêtements de sport
de saleté modérée
à légère de tissus
techniques et
synthétiques.
Tenue
active
Très chaude
Chaude
Couleurs
Fraîche
Froide
Froide du
robinet
Extrêm. sale
Très sale
Normal
Légère-
ment
Extrêm.
Légère-
ment
Max/Extra
Normal
Guide de détachage
Remplissage profond
Trempage
automatique
Rinçage en
profondeur
Rinçage n
o
. 2
Cycle conçu pour l’entretien des tenues
actives, des vêtements de sport et des
tissus techniques de saleté modérée à
légère. Comprend une période de lavage
HQSOXVLHXUVSKDVHVDYHFWUHPSDJHD¿Q
G·pOLPLQHUHȻFDFHPHQWOHVVRXLOOXUHVHWOHV
odeurs corporelles. Utilisez le cycle Heavy
Duty (Linge résistant) pour les vêtements de
sport très sales fabriqués de tissus résistants.
6