Loading ...
Loading ...
Loading ...
MAINTENANCE
CONDENSER
Cleaning of the condenser is recom-
mended every 3-6 months.
TO CLEAN:
• Remove Machine Compartment cover
(see page4).
• Turn the power to the unit off using the
Main Power switch.
NOTE:
Turning the power off on the elec-
tronic control panel inside the refriger-
ator stops cooling only in both com-
partments. It DOES NOT turn off
power to the unit.
• Use the soft
brush vacuum
attachment
to loosendust
and lint on
the condenser fins.Vacuum to remove
the soil.
• After cleaning, turn the Main Power
switch back on.
• Replace the machine compartment
cover.
LIGHT BULB
REPLACEMENT
UPPER FRESH FOOD AND
FREEZER COMPARTMENTS
There are light bulbs at the top of each
compartment.
WARNING: Always re-
member to turn OFF ("O') the
power to the refrigerator at the
main power switch and to wear
gloves when replacing light bulbs.
TO ACCESS THE UPPER LIGHT
BULB AREA IN EITHER
COMPARTMENT:
LL JJ
• Push in on _ _ r
the finger- __1 : _
tabs located
behind the
electronic control panel at the top of
the compartment.
• Lower the light shield.
• Replace the burned out bulb(s) with
standardAI 5-40 watt appliance bulb(s).
Available from your dealer.
• After replacing
the bulb(s),push
the light shield
up into its orig-
inal position.
LOWER FRESH FOOD
COMPARTMENT
There is aTS-40 watt bulb located behind
each OptiFresh TM drawer. Replacement
bulbs are availablefrom your dealer.
IMPORTANT:
• To avoid damageto the OptiFresh TM
drawers, power must be turned off
at the Main Power switch (seepage4)
before changingthe bulb.
TO REPLACETHE BULB BEHIND
THE UPPER OPTIFRESH TM
DRAWER:
• Turn the power off to the refrigerator
at the Main Power switch in the upper
machine compartment (see page4).
• Unload and remove the upper
OptiFresh TM drawer.
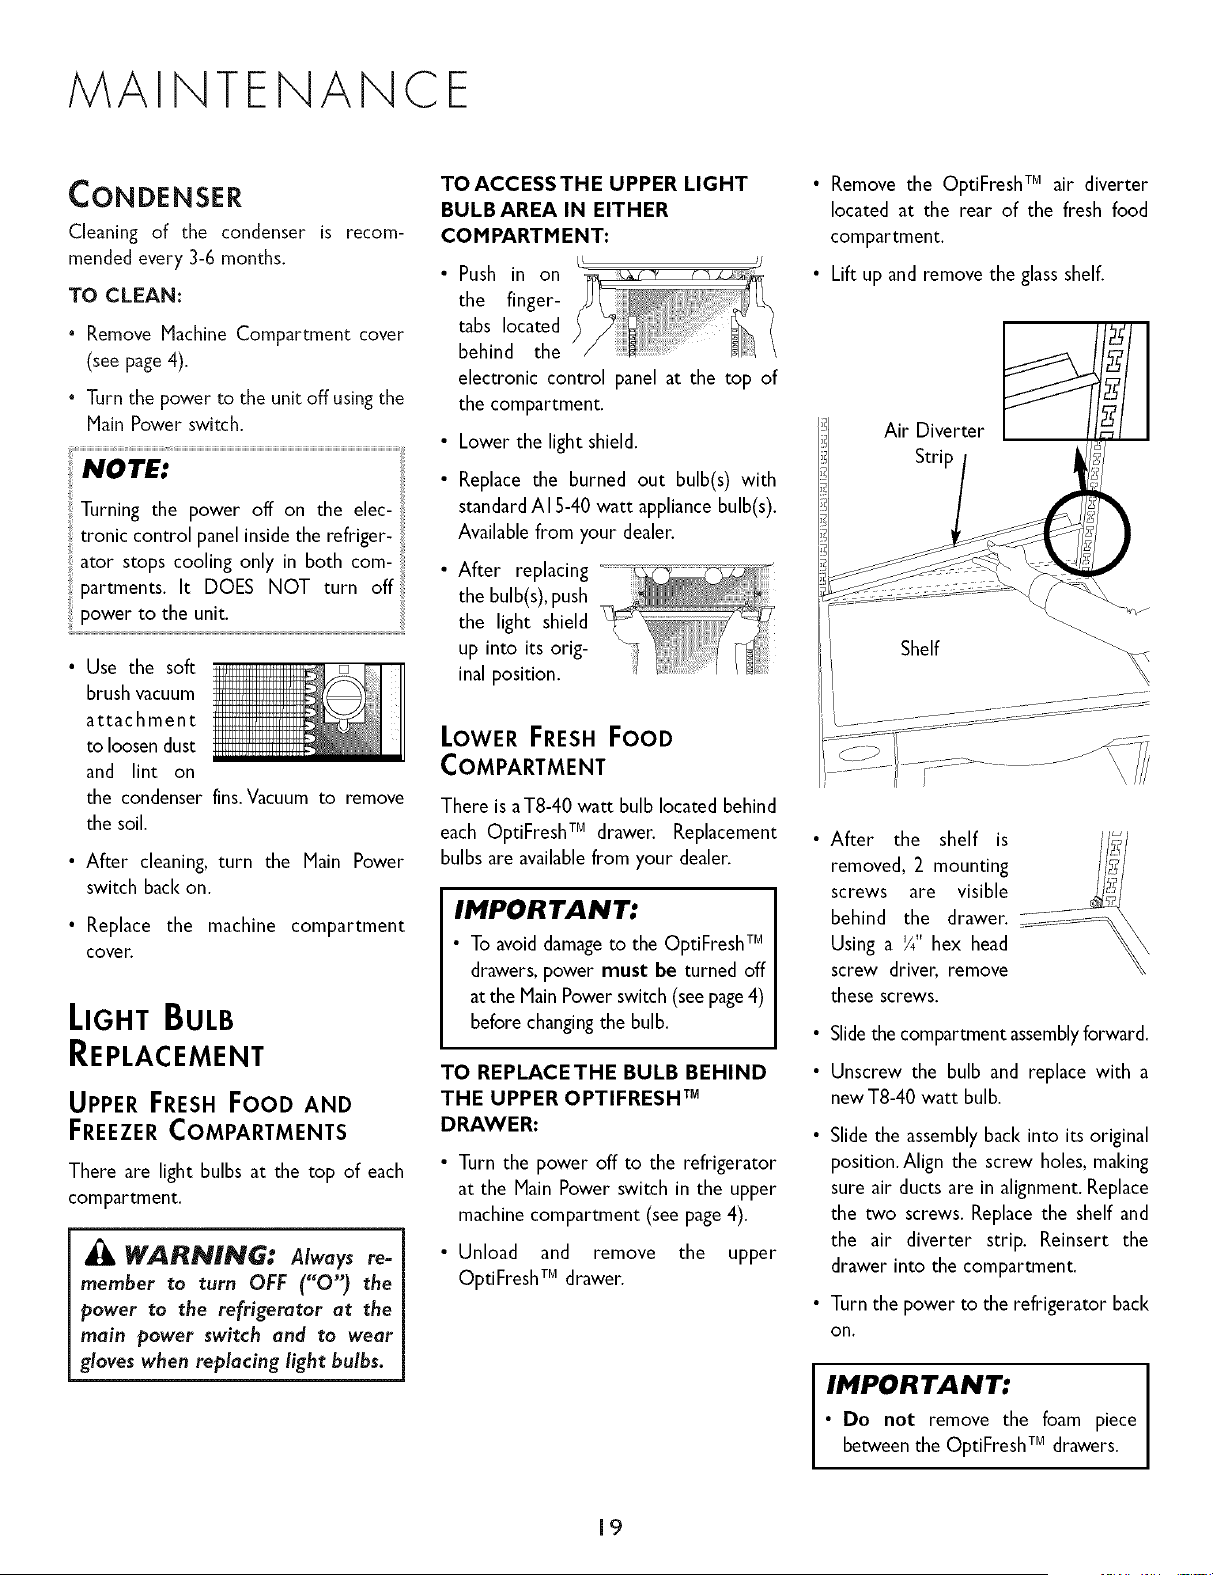
• Remove the OptiFresh TM air diverter
located at the rear of the fresh food
compartment.
• Lift up and remove the glass shelf.
Air Diverter
Strip
Shelf
After the shelf is //_/
removed, 2 mounting Ii_1
screws are visible
behind the drawer. 7_g_=-_\
Using a ¼" hex head
screw driver, remove
these screws.
• Slidethe compartment assemblyforward.
• Unscrew the bulb and replace with a
new T8-40 watt bulb.
• Slide the assembly back into its original
position.Align the screw holes, making
sure air ducts are in alignment. Replace
the two screws. Replace the shelf and
the air diverter strip. Reinsert the
drawer into the compartment.
• Turn the power to the refrigerator back
on.
IMPORTANT:
• Do not remove the foam piece
between the OptiFreshTM drawers.
19
Loading ...
Loading ...
Loading ...