
Loading ...
Loading ...
Loading ...
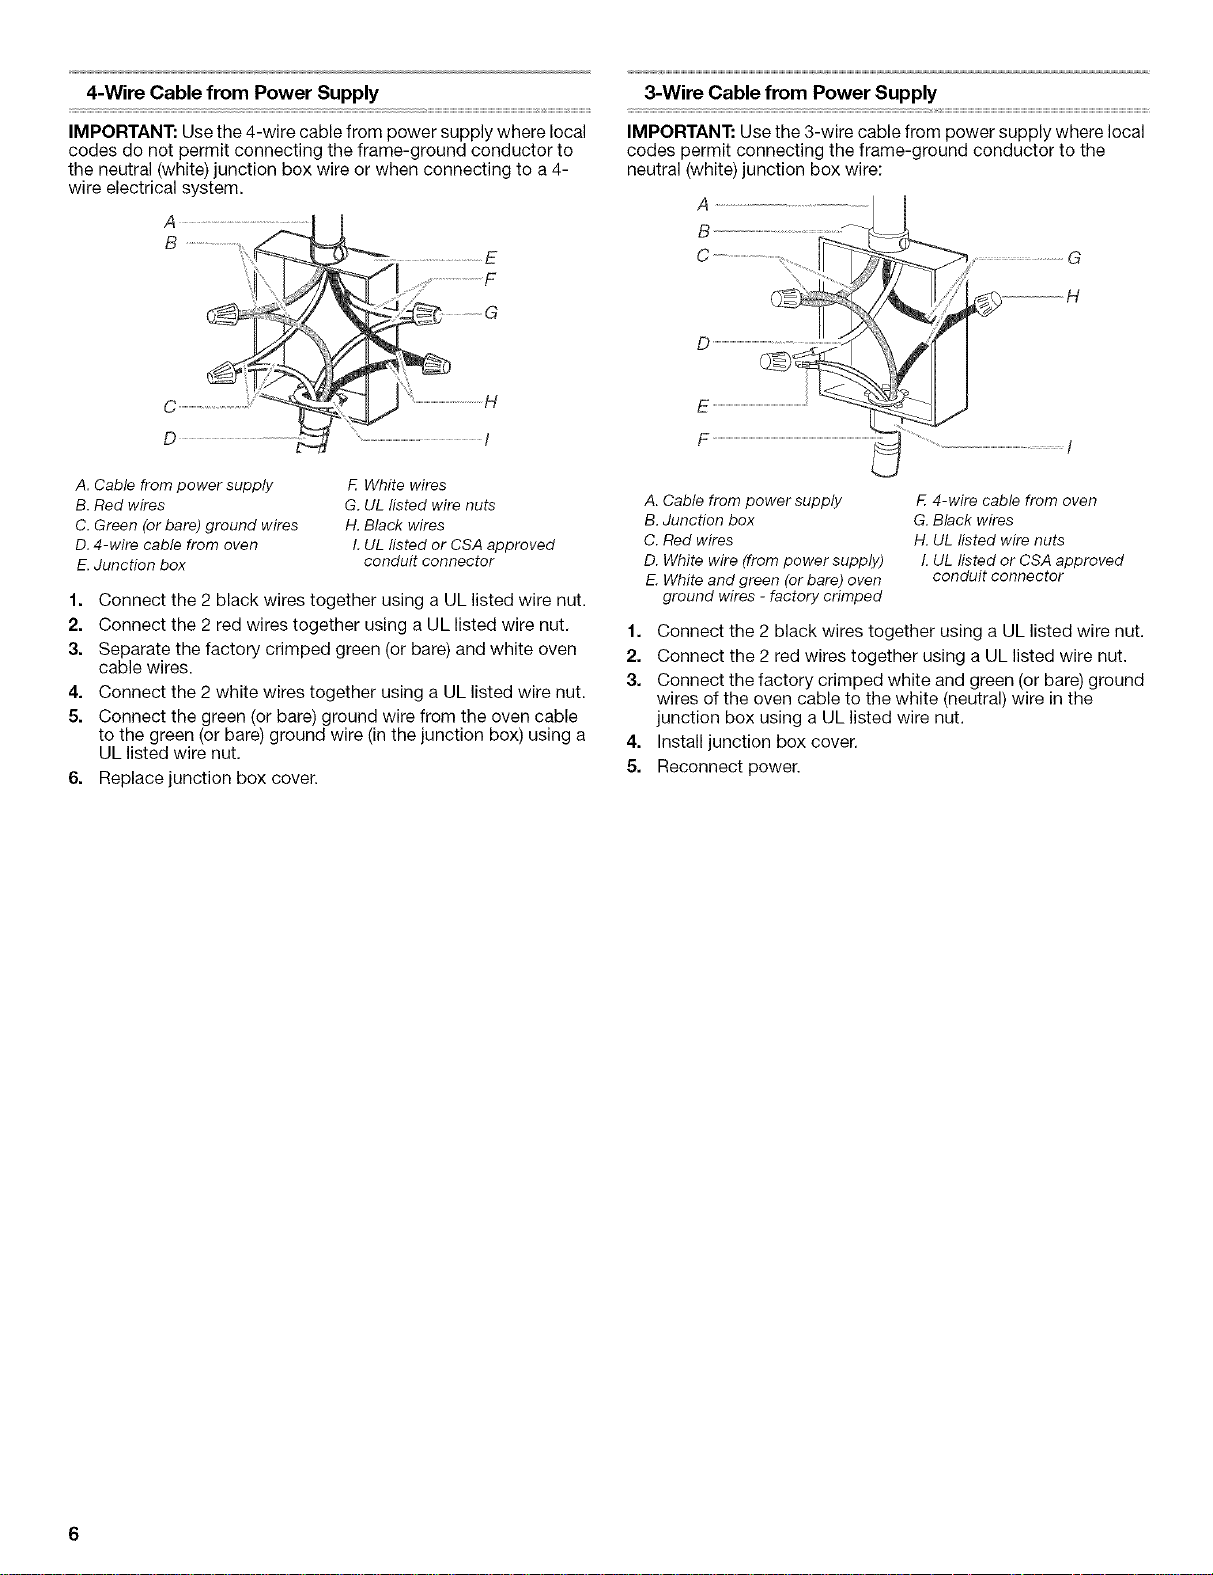
4-Wire Cable from Power Supply
IMPORTANT: Use the 4-wire cable from power supply where local
codes do not permit connecting the frame-ground conductor to
the neutral (white) junction box wire or when connecting to a 4-
wire electrical system.
A
B
...................................... E
C
D ............................................ I
A. Cable from power supply
B. Red wires
C. Green (or bare) ground wires
D. 4-wire cable from oven
E.Junction box
F. White wires
G. UL listed wire nuts
H. Black wires
I. UL listed or CSA approved
conduit connector
1. Connect the 2 black wires together using a UL listed wire nut.
2. Connect the 2 red wires together using a UL listed wire nut.
3. Separate the factory crimped green (or bare) and white oven
cable wires.
4. Connect the 2 white wires together using a UL listed wire nut.
5. Connect the green (or bare) ground wire from the oven cable
to the green (or bare) ground wire (in the junction box) using a
UL listed wire nut.
6. Replace junction box cover.
3-Wire Cable from Power Supply
IMPORTANT: Use the 3-wire cable from power supply where local
codes permit connecting the frame-ground conductor to the
neutral (white) junction box wire:
E ..............................................................................
i
A. Cable from power supply
B. Junction box
C. Red wires
D. White wire (from power supply)
E. White and green (or bare) oven
ground wires - factory crimped
F 4-wire cable from oven
G. Black wires
H. UL listed wire nuts
L UL listed or CSA approved
conduit connector
1. Connect the 2 black wires together using a UL listed wire nut.
2. Connect the 2 red wires together using a UL listed wire nut.
3. Connect the factory crimped white and green (or bare) ground
wires of the oven cable to the white (neutral) wire in the
junction box using a UL listed wire nut.
4. Install junction box cover.
5. Reconnect power.
Loading ...
Loading ...