Loading ...
Loading ...
Loading ...
5
English
NOTE: When the appliance is used together with a Furrion
gas cooktop or induction cooktop, the cabinet cutout
must be located with respect to the minimum clearance
to combustible materials (minimum clearances from
combustible materials: 2 inches from the rear, left and right
sides (see D dimension in Fig. 1) and 30 inches from the top if
a cooktop is installed). When planning the location, consider
curtains or other combustible materials to be installed around
the oven.
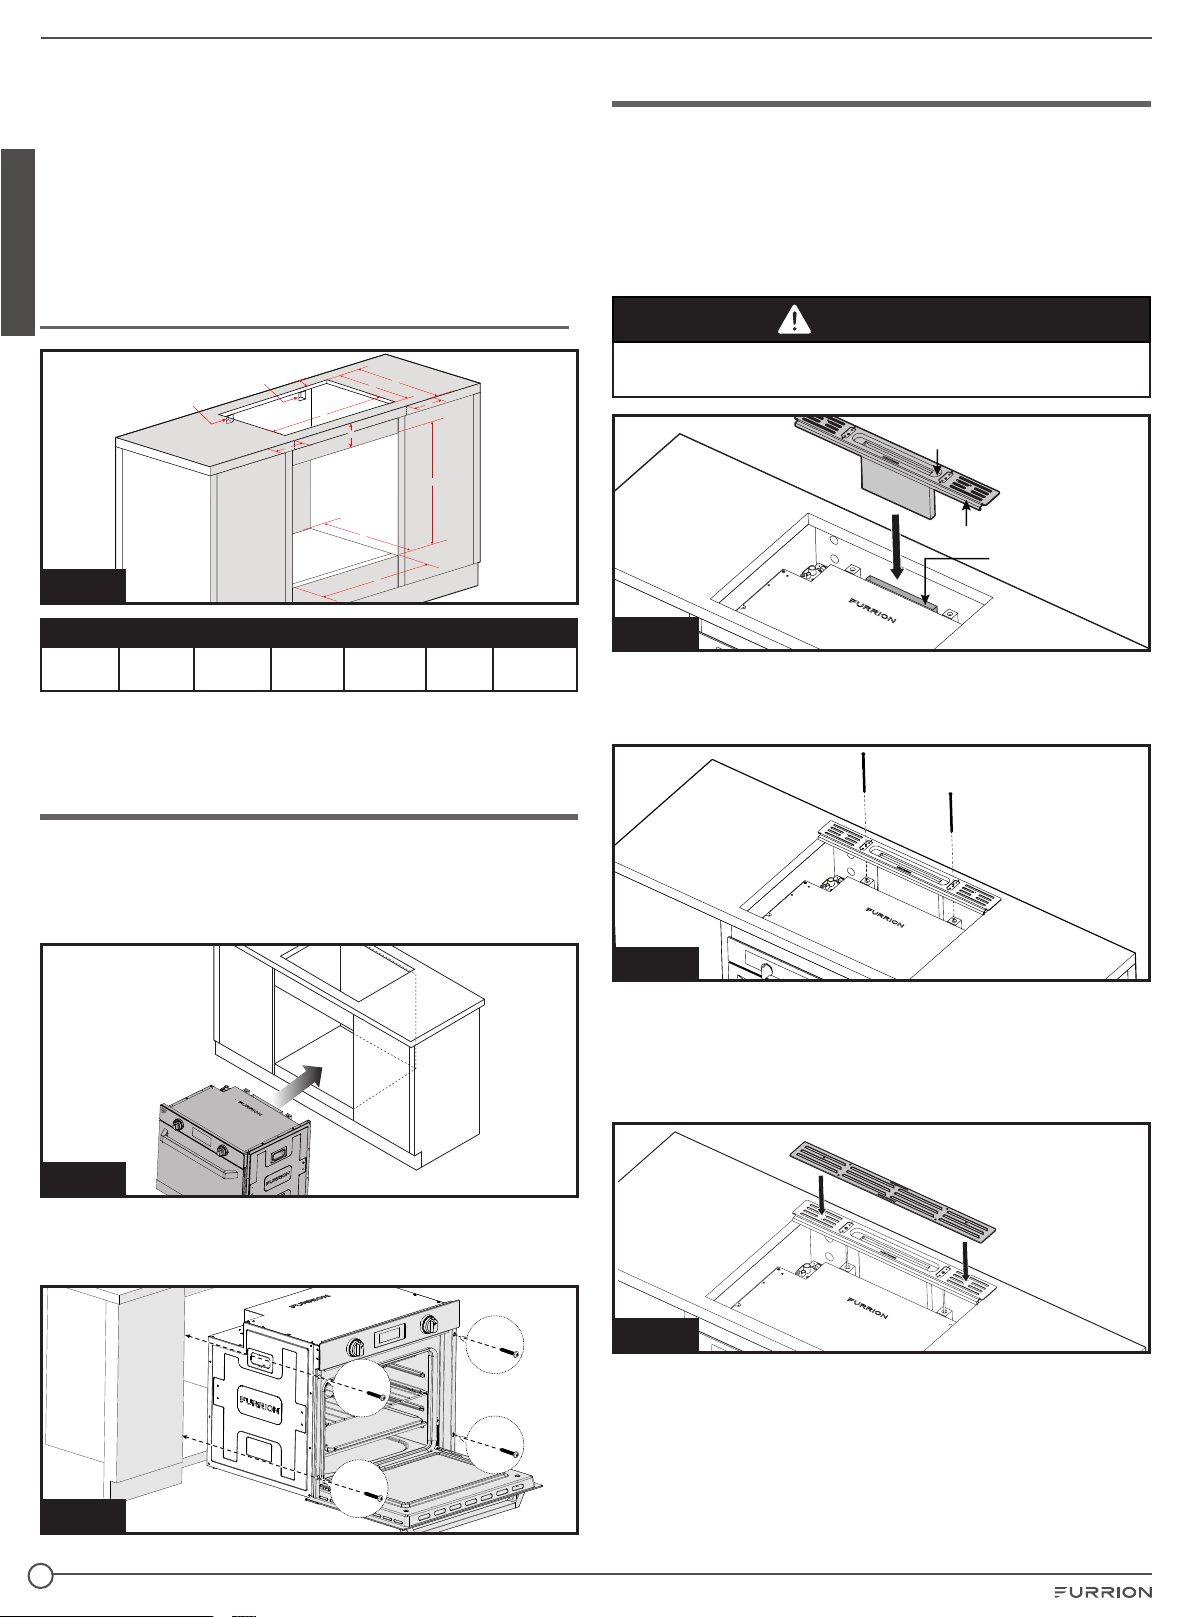
Gas Oven with Gas or Electric Cooktop (Fig. 1)
D
D
F
G
D
A
B
E
Electrical Cord Cutout
Gas Pipe Cutout
B
C
Fig. 1
A B C D E F G
20½”
525mm
23½”
597mm
4”
101mm
Min. 2”
51mm
Min. 16⅛”
522mm
16¾”
426mm
Min. 18⅜”
467mm
The recommended minimum distance between the floor and
the bottom of the cutout opening is 4” (101mm).
Oven Installation
When the cabinet has been prepared according to the
dimensions given above and the gas line is in place.
1. Remove the oven from its packaging and slide the oven
into the cabinet opening. (Fig. 2)
Fig. 2
2. Verify the oven is level from side to side and front to rear.
3. Open the oven door and securely fasten the oven in place
with four screws (not provided). (Fig. 3)
Fig. 3
Ventilation Installation
After securely mounting the oven into the cabinet, install the
vent through the top cutout area of the cabinet.
1. Install the vent outer flue assembly onto the top of the
oven unit. Ensure the outer flue slides over the middle
flue opening on the oven. Ensure the vent outer flue vent
assembly has the cooktop edge support facing forward.
(Fig 4)
WARNING
The minimum overlap of the vent outer flue and the vent oven
middle flue is ¾”. Refer to Fig. 4 for assembly instructions.
Outer Flue
Middle Flue
Cooktop Edge Support
Fig. 4
2. Fix the vent assembly to the oven with the two screws
provided (M4x140mm) and tighten with screwdriver. Do
not over tighten. (Fig. 5)
Fig. 5
3. Place the vent cover over the vent assembly. Make sure
the vent cover louvers are facing forward. (Fig. 6 & Fig. 7)
NOTE: The Vent is pokey yoked with the vent trim
attachment screw holes to have the louvers facing
forward.
Fig. 6
Loading ...
Loading ...
Loading ...