Loading ...
Loading ...
Loading ...
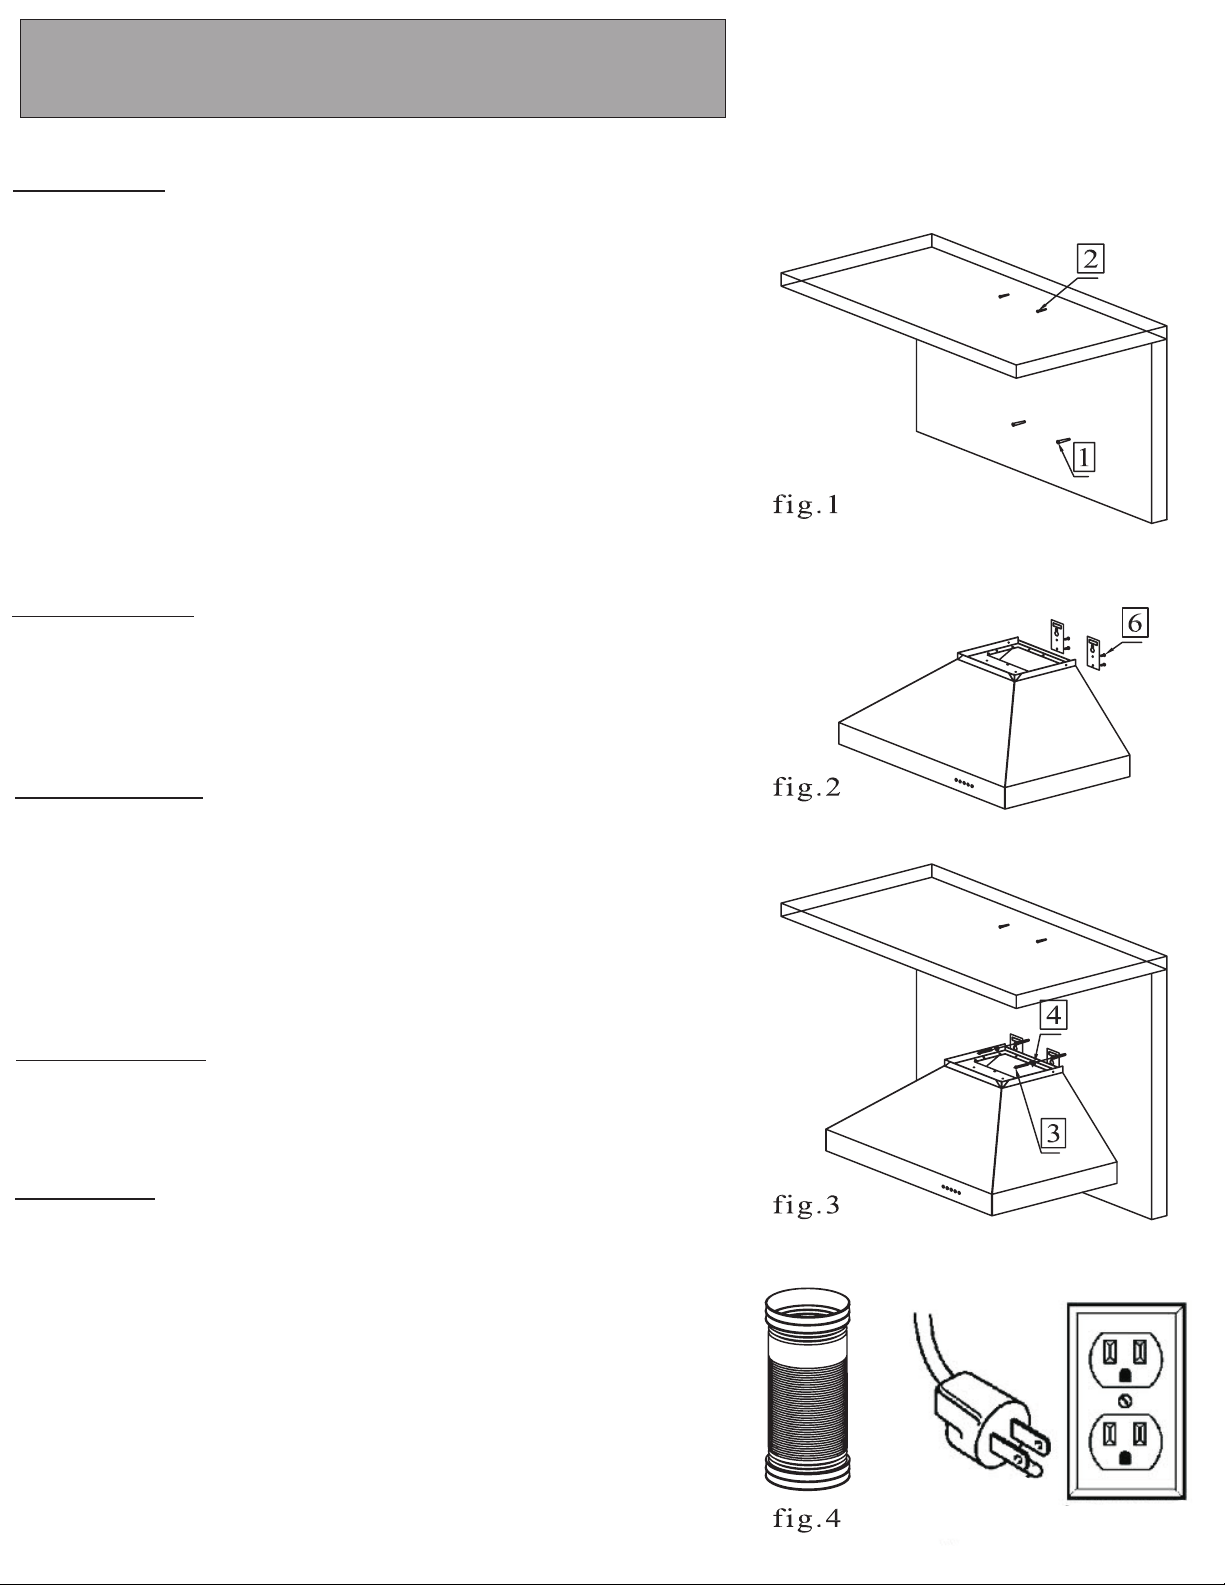
Step one: Find the center of the wall
where you are installing the hood.
Make sure there is sufficient bracing
to hold the weight of the hood. Mark
your center line and measure out
from center to find your two mounting
points. Make sure your mounting
points are level when you mark them.
It is recommended to install the hood
directly into wood supports. fig 1
Step two: Mark your mounting points
and install the two mounting screws
provided leaving the heads out 1/4” to
mount hood. fig 1
Step four: Mount the main body of
the hood to the two screws and
screw into place. fig 3
Step three: If your hood comes with
separate mounting brackets, they
must be installed to the back of the
hood at this point. fig.2 Otherwise
your mounting points are integrated
into the construction of the hood.
Step 5: Make your electrical and
ducting connections. Use 8” rigid
duct wherever possible. Try and
minimize the use of elbows. More
elbows and longer runs create higher
static pressure. The hood comes
with a grounded three prong plug
that can either be direct wired or
plugged into a 20 amp. circuit. fig. 4
Professional Series Wall Installation
12
Loading ...
Loading ...
Loading ...