Loading ...
Installation Instructions
249-8969-3 07-14 GE
SECURE CUSTOM PANEL TO
METAL MOUNTING PANEL
• Lay the custom panel, appearance side down, on a
clean surface.
• Remove all tape and packing material from the metal
panel.
• Place the flat side of the metal panel onto the back side of
the custom panel, with the mounting flanges facing up.
• Align the lamp hole in the panel with the mounting panel.
• Confirm squareness and correct position of the metal
panel to the custom panel.
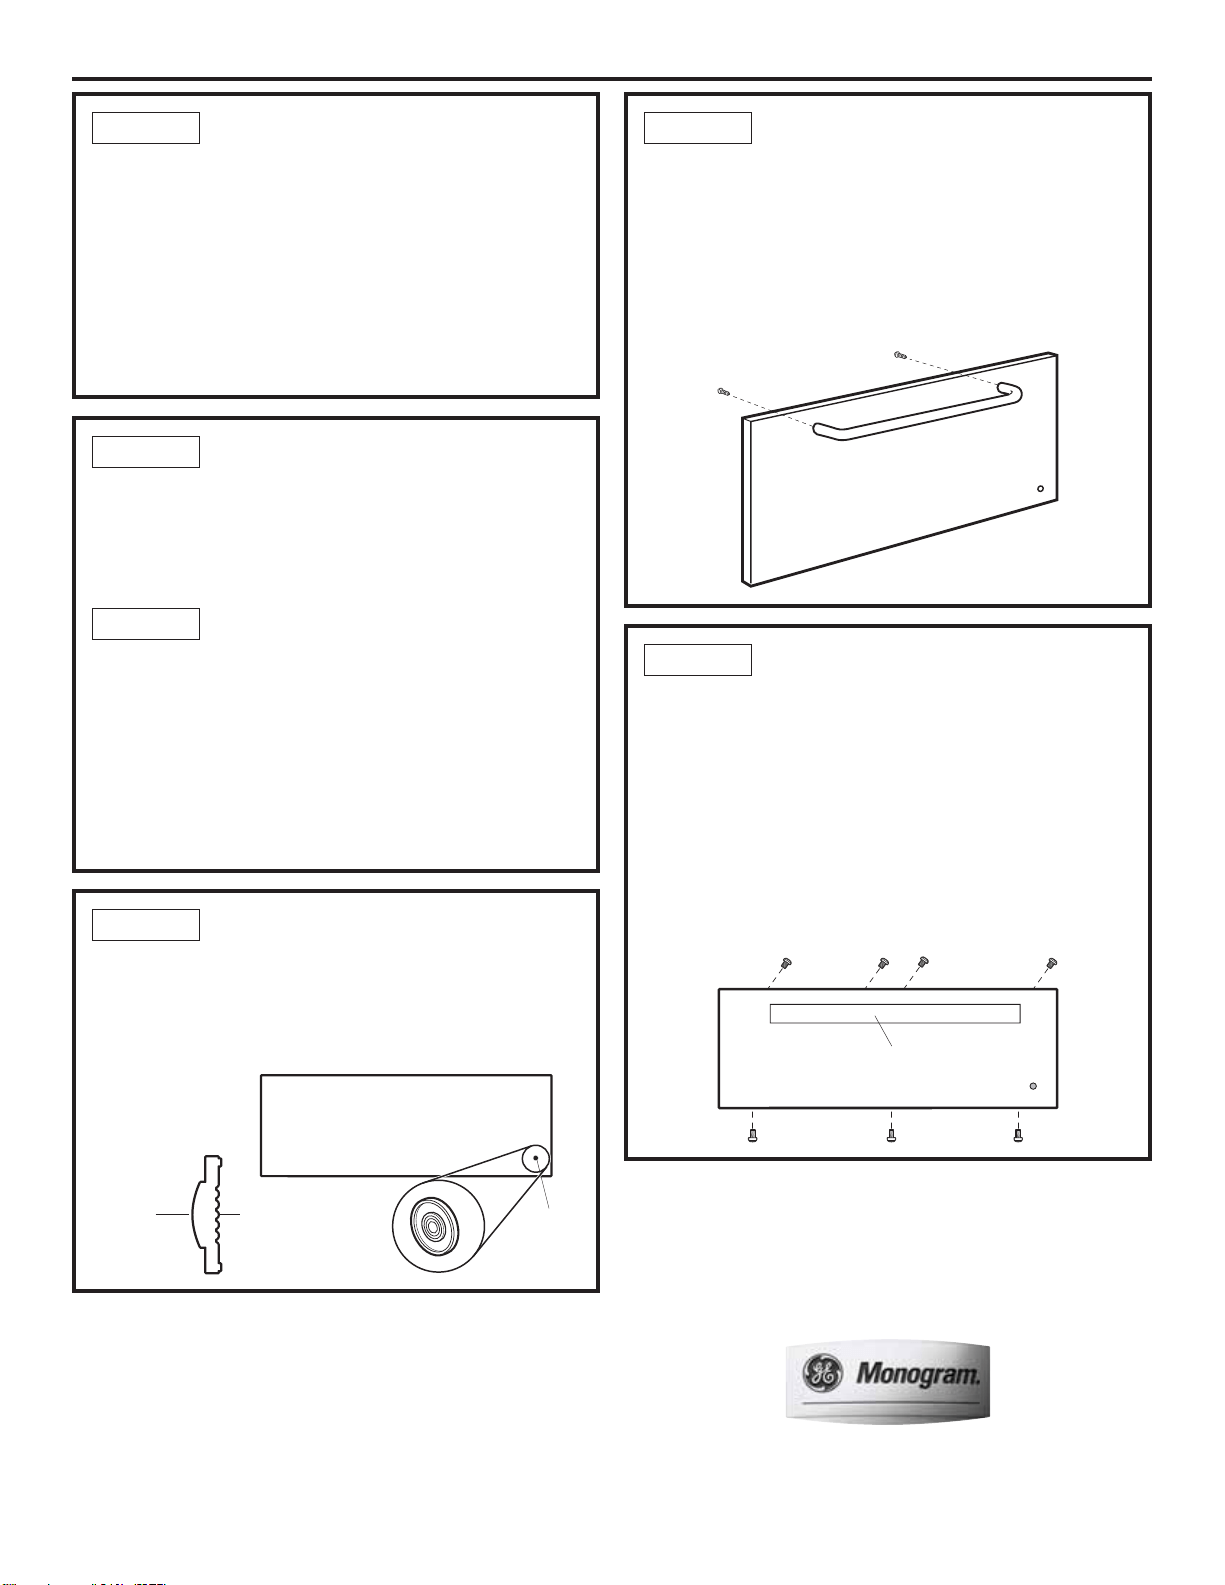
REINSTALL ORIGINAL HANDLE
OR OPTIONAL CUSTOM HANDLE
• A custom handle (not supplied) may be installed.
• Drill pilot holes through the front of the custom panel
and through the metal panel to match the chosen
handle.
NOTE: The handle screws should be installed through the
metal panel, the custom panel and into the custom or
original handle.
INSTALL ASSEMBLED PANEL TO
THE DRAWER
• Determine which holes in the metal panel line up with
the holes in the exposed drawer front and marked the
screw hole locations onto the custom panel.
• Drill 1/8” deep holes into the custom panel for clearance
to the #6 screws. The #6 screws will extend into the
custom panel slightly.
• Using the #6 screws supplied in the bag, install the
custom panel assembly to the exposed drawer front
with seven screws.
• The original #8 screws are not needed.
INSTALL LAMP JEWEL
• Turn the assembly appearance side up.
• Use plastic to wood adhesive to secure the lamp jewel to
the front of the wood panel. On the side with the bulge,
(see illustration) apply a small bead of adhesive around
the outside edge. Place the jewel into the drilled hole.
FOR PANELS LESS THAN
3/4” THICK
• Separate the custom panel and metal panel.
• Apply a few horizontal beads of adhesive to the metal
panel. Avoid adhesive within 1” of lamp hole area and
outer edges.
FOR 3/4” (OR GREATER)
THICK PANELS
• 3/4” thick panels may be secured to the metal panel
with screws.
• Use the metal panel as a template. Position the metal
panel over the back side of the custom panel and drill
pilot holes. Drill pilot holes sized to match screws being
used (screws not provided).
NOTE: Select screw length carefully to avoid penetration
of the finished side.
STEP 4 STEP 7
STEP 8
STEP 6
STEP 5
STEP 5A
Insert
Jewel
Appearance
Side
This Side
Against
Wood
Custom Handle
or Original Handle
NOTE: Product improvement is a continuing endeavor at General Electric.
Therefore, materials, appearance and specifications are subject to change
without notice.