Home
Bookmarks
Home
LiftMaster
LiftMaster 8160 User Manual
Page 4
LiftMaster 8160 1/2 HP DC Chain Drive Garage Door Opener
User Manual - Page 4
For 8160.
PDF File Manual
,
48 pages
,
Read Online
|
Download pdf file
Models 8160â¢8165â¢8065â¢8075
Preparation
Safety Symbol and Signal Word Review
Check the Door
Tools Needed
Carton Inventory - Model 8065
Carton Inventory - Model 8075
Carton Inventory - Model 8160
Carton Inventory - Model 8165
Assembly
1 Attach the Rail to the Garage Door Opener
2 Tighten the Chain
Installation
IMPORTANT INSTALLATION INSTRUCTIONS
1 Determine the Header Bracket Location
2 Install the Header Bracket
3 Attach the Rail to the Header Bracket
4 Position the Garage Door Opener
5 Hang the Garage Door Opener
6 Install the Light Bulbs
7 Attach the Emergency Release Rope and Handle
8 Install the Door Bracket
9 Connect the Door Arm to the Trolley
Install the Door Control
1 Install the Door Control
2 Wire the door control to the garage door opener
3 Attach the warning labels
Install the Protector System®
Introduction
1 Install the Safety Reversing Sensors
2 Wire the Safety Reversing Sensors
Power
1 Connect Power
2 Ensure the Safety Reversing Sensors are Aligned
3 Ensure the Door Control is Wired Correctly
Adjustments
Introduction
1 Program the Travel
2 Test the Safety Reversal System
3 Test the Protector System®
Operation
IMPORTANT SAFETY INSTRUCTIONS
Features
Using the Door Control
Control Panel Setup
Remote Control
To Open the Door Manually
Maintenance
Maintenance Schedule
The Remote Control Battery
Troubleshooting
Accessories
Warranty
Repair Parts
Page 4/48
Page 1
Page 2
Page 3
Page 4
Page 5
Page 6
Page 7
Page 8
Page 9
Page 10
Page 11
Page 12
Page 13
Page 14
Page 15
Page 16
Page 17
Page 18
Page 19
Page 20
Page 21
Page 22
Page 23
Page 24
Page 25
Page 26
Page 27
Page 28
Page 29
Page 30
Page 31
Page 32
Page 33
Page 34
Page 35
Page 36
Page 37
Page 38
Page 39
Page 40
Page 41
Page 42
Page 43
Page 44
Page 45
Page 46
Page 47
Page 48
Contents
Table of Contents
Search
Previous
Next
Troubleshooting
Bookmarks
Loading ...
Loading ...
Loading ...
4
P
re
par
a
ti
on
T
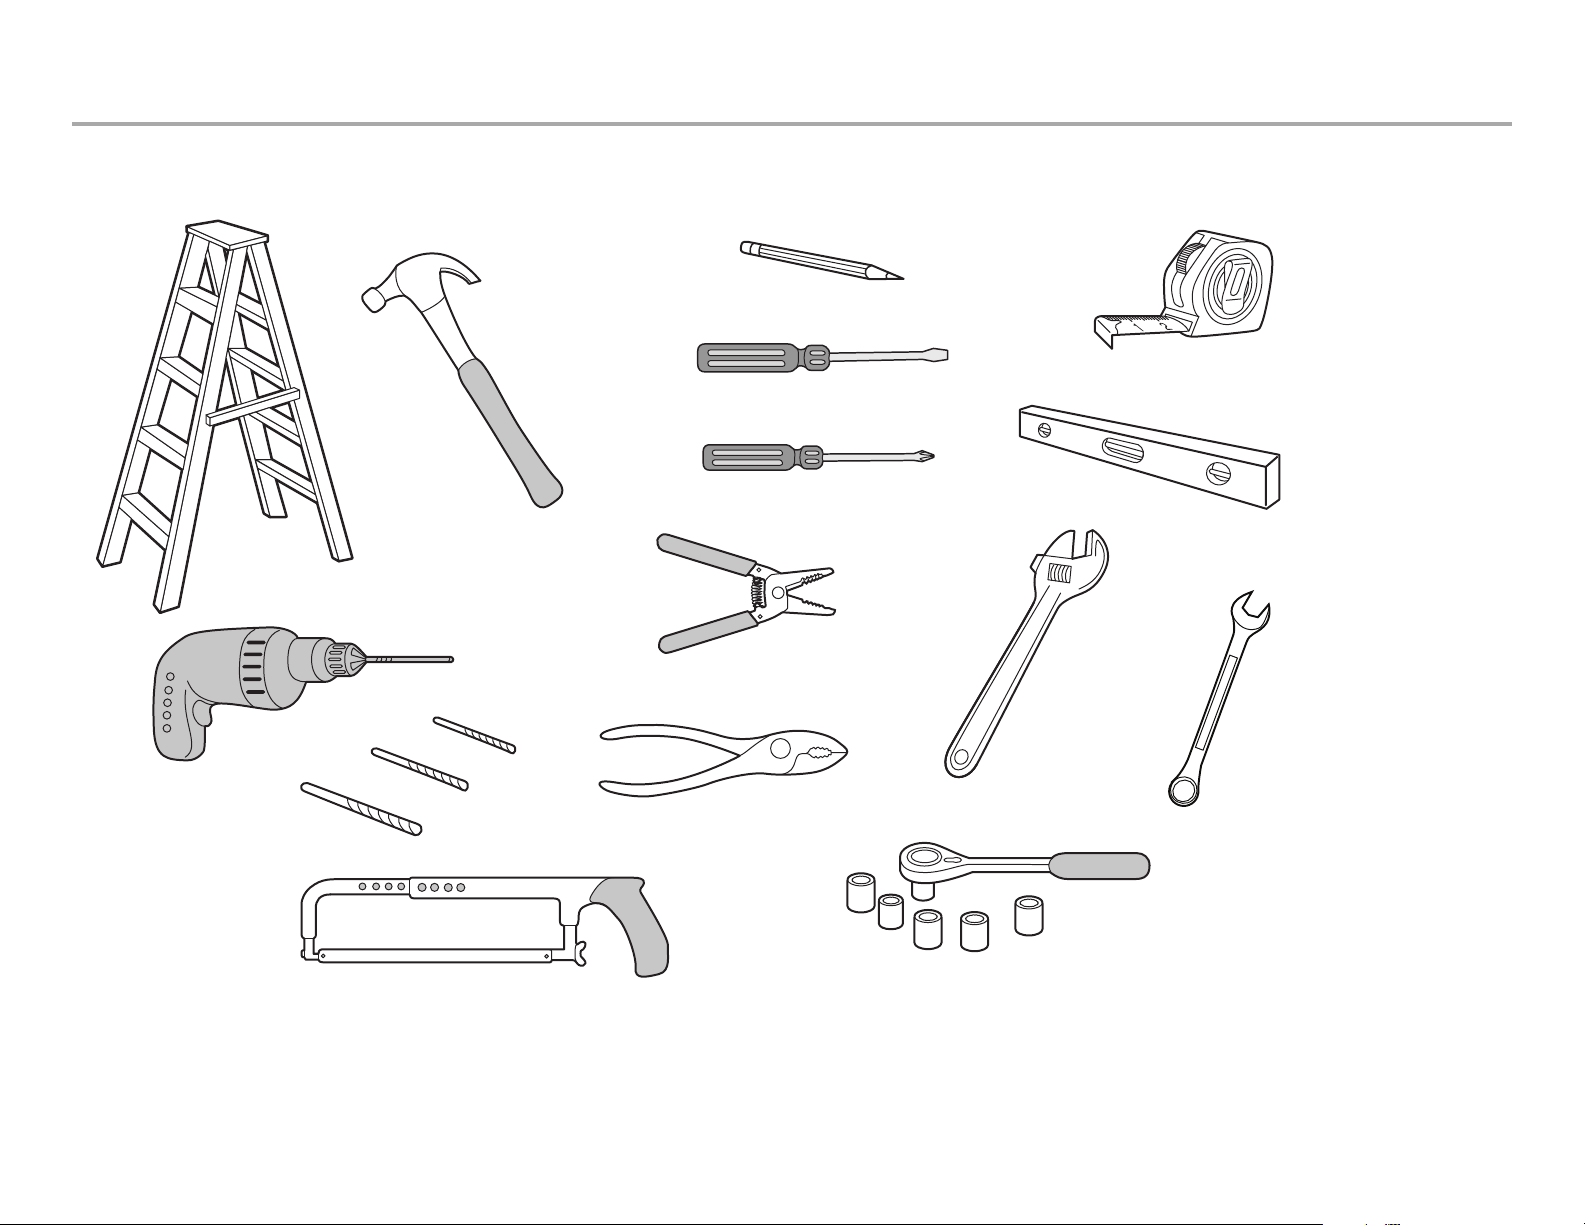
oo
ls
Ne
ed
ed
3/16
5/32
5/16
7/16
1/2
5/8
9/16
1/4
7/16
Loading ...
Loading ...
Loading ...
File type: PDF
File name: 32931881_8160.pdf
File size: 4.08 MB
File Language: English
Pages: 48
Author: LiftMaster
Published: 2022-05-15
Updated: 2023-05-10
Download File
Table of Contents
×
Models 8160â¢8165â¢8065â¢8075
1
Preparation
3
Safety Symbol and Signal Word Review
3
Check the Door
3
Tools Needed
4
Carton Inventory - Model 8065
5
Carton Inventory - Model 8075
6
Carton Inventory - Model 8160
7
Carton Inventory - Model 8165
8
Assembly
9
1 Attach the Rail to the Garage Door Opener
9
2 Tighten the Chain
9
Installation
10
IMPORTANT INSTALLATION INSTRUCTIONS
10
1 Determine the Header Bracket Location
11
2 Install the Header Bracket
12
3 Attach the Rail to the Header Bracket
13
4 Position the Garage Door Opener
13
5 Hang the Garage Door Opener
14
6 Install the Light Bulbs
15
7 Attach the Emergency Release Rope and Handle
15
8 Install the Door Bracket
16
9 Connect the Door Arm to the Trolley
17
Install the Door Control
18
1 Install the Door Control
18
2 Wire the door control to the garage door opener
20
3 Attach the warning labels
20
Install the Protector System®
21
Introduction
21
1 Install the Safety Reversing Sensors
22
2 Wire the Safety Reversing Sensors
23
Power
25
1 Connect Power
25
2 Ensure the Safety Reversing Sensors are Aligned
26
3 Ensure the Door Control is Wired Correctly
26
Adjustments
27
Introduction
27
1 Program the Travel
28
2 Test the Safety Reversal System
29
3 Test the Protector System®
29
Operation
30
IMPORTANT SAFETY INSTRUCTIONS
30
Features
31
Using the Door Control
32
Control Panel Setup
34
Remote Control
35
To Open the Door Manually
37
Maintenance
38
Maintenance Schedule
38
The Remote Control Battery
38
Troubleshooting
39
Accessories
41
Warranty
42
Repair Parts
43
Search:
×
Search