Loading ...
Loading ...
Loading ...
Page 4L117 0311A
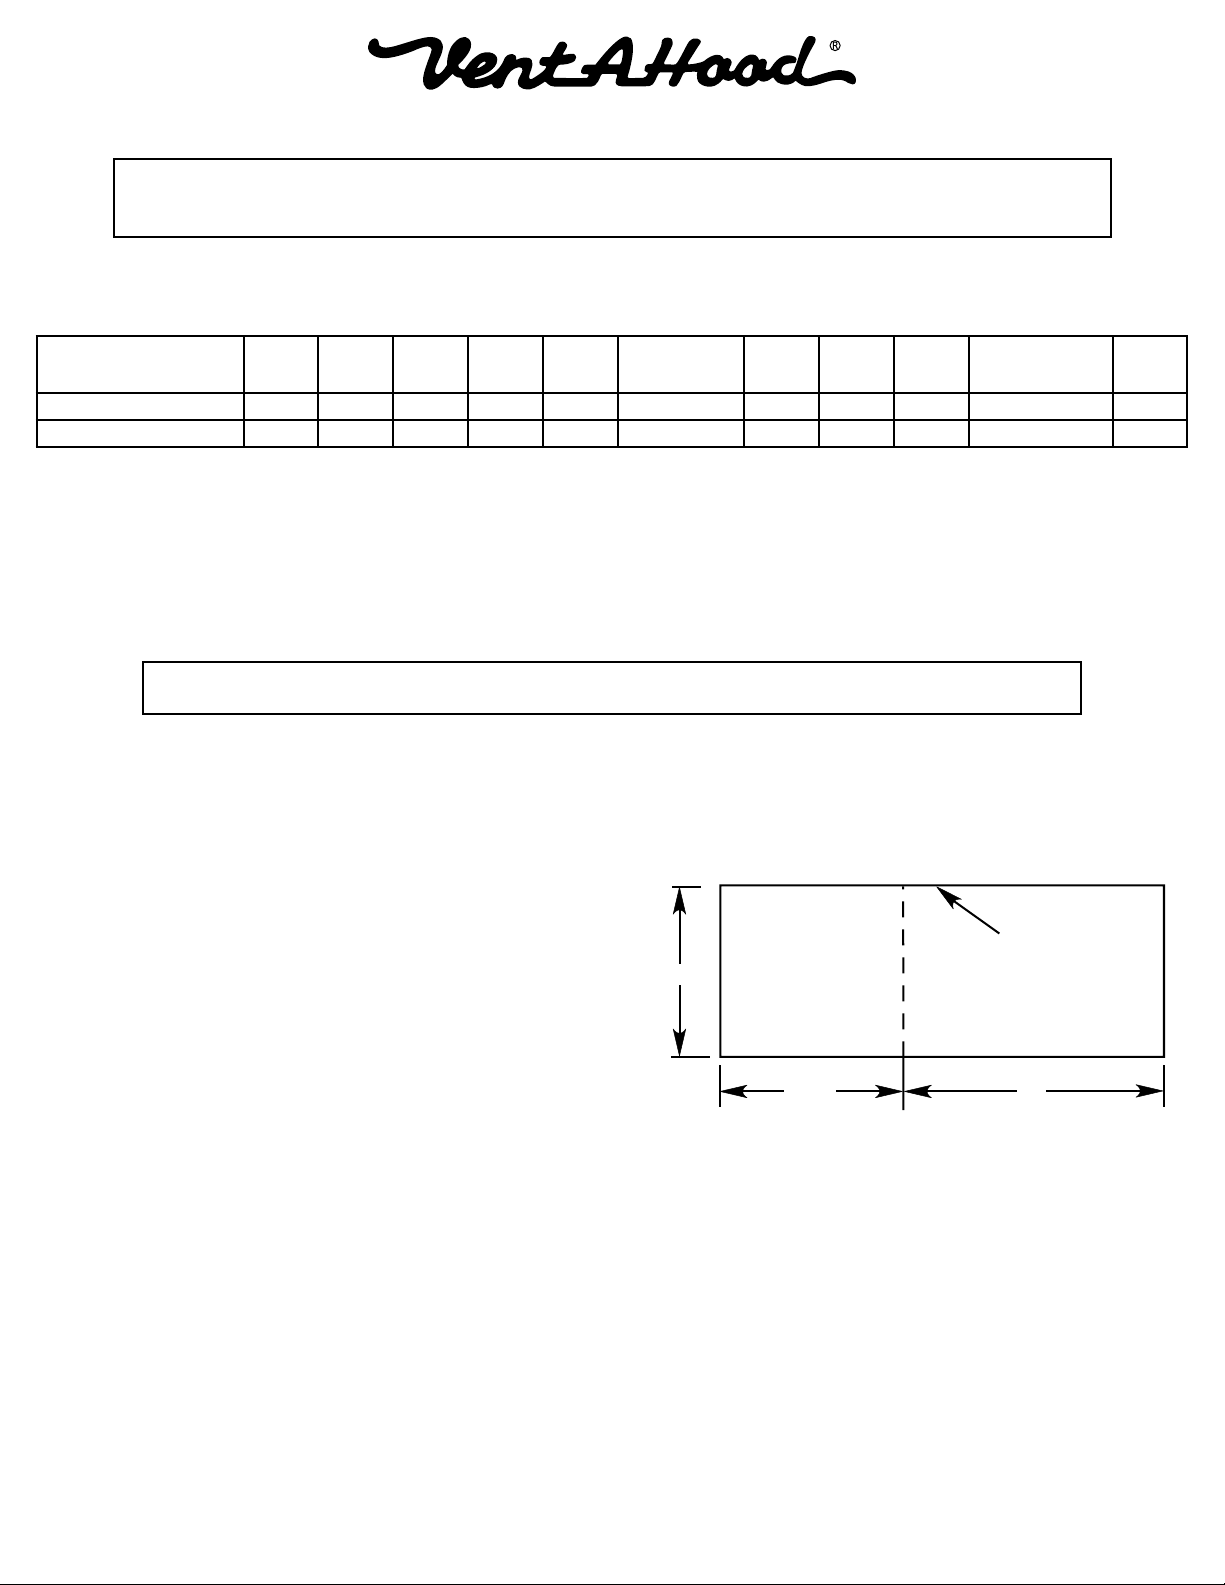
Wall Cutout for Horizontal Ducting
Viewed from Front
Top of Liner
5"
5 1⁄8" 7"
C
L
Installation Details Continued
6) Determine whether the electrical wire will enter from the top or the back of the liner. Remove the electrical enclosure
cover (1 screw) and the top or back electrical knockout from the liner. Install an appropriate 1/2” UL listed electrical
wire clamp through the electrical knockout. Install electrical wiring from the electrical panel to the liner location.
Warning: Make sure power is off and locked at the service disconnecting
means on the service panel during installation.
7) Insert the electrical wire through the electrical wire clamp allowing 3”- 4” of wire inside the enclosure for hookup.
Tighten the electrical wire clamp.
8) From inside the liner, using UL listed wire nuts, attach the “neutral” wire to the white lead, the “hot” wire to the black
lead, and the ground wire to the green lead inside the junction box. Replace the electrical cover previously removed
in Step 6.
Warning: Do not operate hood without proper ground connection.
9) FOR BACK VENTING APPLICATIONS ONLY. IF YOU ARE NOT BACK VENTING, PROCEED DIRECTLY TO STEP 12.
Note: Wall studs may interfere with back venting installations.
Additional framing may be required. It is necessary to cut a
duct access hole in the wall prior to installing the liner. Starting
1” above the bottom edge of the enclosure, cut a hole 5” high
x 12 1/8” wide (see diagram at right).
10) While guiding the wires, lift the liner up into the enclosure
ushing the bottom edges of the liner and the enclosure. Note:
The liner must be tilted to allow the exhaust collar on the back
of the liner to enter the wall cutout. Screw the liner (wood
screws provided) to the enclosure through the holes along the
bottom edge of the liner. Wood strips may be necessary to ll
any gaps between the opening and the liner if the opening in
the wood surround is larger than the liner.
11) Install the duct from the outside of the home to the exhaust
collar on the liner. Note: The duct work must t inside the
exhaust collar. Where possible, use duct tape to seal joints.
SKIP STEP 12. PROCEED DIRECTLY TO STEP 13.
12) While aligning the duct and guiding the wires, lift the liner up into the enclosure ushing the bottom edges of the
liner and the enclosure. Duct should connect together as the liner is raised into place. Note: Unless using the VP521
transition, the duct work must t inside the exhaust collar. If using the VP521, 7” round duct should be placed with
the non-crimped end on the outside of the collar of the VP521 exhaust outlet. Screw the liner (wood screws provided)
to the enclosure through the holes along the bottom edge of the liner. Wood strips may be necessary to ll any gaps
between the opening and the liner if the opening in the wood surround is larger than the liner.
13) Refer to the Owner Maintenance Guide Operating Instructions for proper hood operation. Test all blower and light
functions to ensure they are operating properly.
Model Volts Amps Hz RPM
CFM
Equivalent CFM
•
CFM
CFM
CFM
Minimum Round
Duct Size
Sones
#
K250 (Top Vent) 115 3.2 60 1550 250 375 223 220 190 7" (38 in.
2
) 7.4
K250 (Back Vent) 115 3.2 60 1550 220 330 196 194 167 7" (38 in.
2
) 7.4
•
Because the Magic Lung
®
blower uses centrifugal ltration rather than conventional bafe or mesh lters, the Magic Lung
®
blower can handle cooking equipment with higher cubic feet per minute (CFM) requirements and can deliver equivalent CFM much more
efciently than other than other ltration systems. When comparing the Magic Lung
®
with other blower units made by other manufacturers, use the “Equivalent CFM”.
#
Ratings in accordance with the Standard Test Code by the Energy Systems Laboratory of the Texas Engineering Experiment Station.
Loading ...