Loading ...
Loading ...
Loading ...
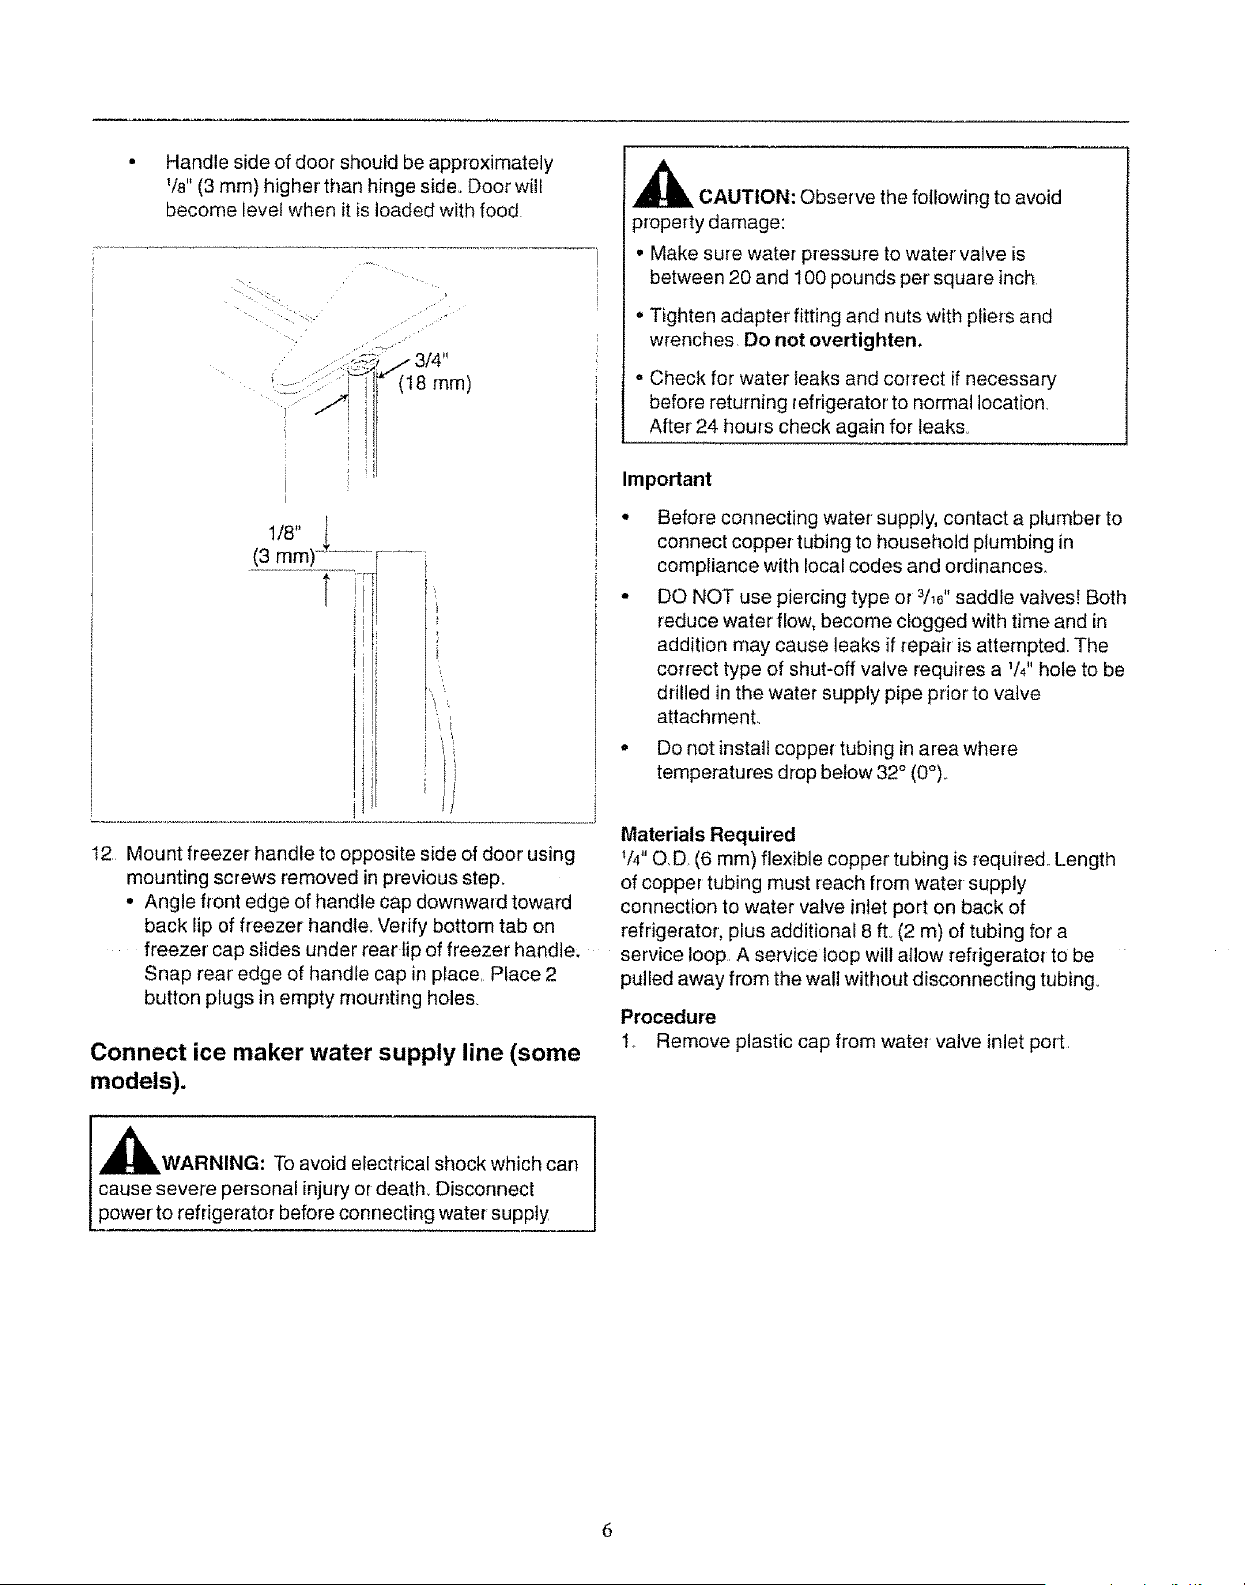
• Handle side of door should be approximately
I/8" (3 mm) higher than hinge side. Door wilf
become level when it is loaded with food
(18 mm)
1/8"
12 Mount freezer handle to opposite side of door using
mounting screws removed in previous step.
• Angle front edge of handle cap downward toward
back lip of freezer handle.. Verify bottom tab on
freezer cap slides under rear fip of freezer handle;
Snap rear edge of handle cap in place, Place 2
button plugs in empty mounting holes,
Connect ice maker water supply line (some
models).
,_WARNING: To avoid electrical shock which can
cause severe personal injury or death. Disconnect
power to refrigerator before connecting water supply
_ CAUTION: Observe the following to avoid
property damage:
• Make sure water pressure to water valve is
between 20 and 100 pounds per square inch
o Tighten adapter fitting and nuts with pliers and
wrenches. Do not overtighten.
, Check for water leaks and correct if necessary
before returning refrigerator to normal location.
After 24 hours check again for leaks
Important
• Before connecting water supply, contact a plumber to
connect copper tubing to household plumbing in
compliance with local codes and ordinances.
• DO NOT use piercing type or 3/1_"saddle valves! Both
reduce water flow, become clogged with time and in
addition may cause leaks if repair is attempted The
correct type of shut-off valve requires a 1/4"hole to be
drilled in the water supply pipe prior to valve
attachment.
o Do not install copper tubing in area where
temperatures drop below 32 ° (0°)_
Materials Required
t/4" O.D (6 mm) flexible copper tubing is required.. Length
of copper tubing must reach from water supply
connection to water valve inlet port on back of
refrigerator, plus additional 8 fL (2 m) of tubing for a
service loop. A service loop will allow refrigerator to be
pulled away from the wall without disconnecting tubing_
Procedure
1,. Remove plastic cap from water valve inlet port,
Loading ...
Loading ...
Loading ...