Loading ...
Loading ...
Loading ...
16
19. Insert the grease tray into the
back of the oven.
20. Insert the battery into the
electronic ignition. Unscrew the
button and place battery positive
(+) tip facing OUT. Screw button
back on.
Your complete oven is now
assembled.
L.P. GAS INSTALLATION
Gas grills that are set to operate with L.P. gas come with a high capacity hose and regulator
assembly. (Note: Only use the pressure regulator and hose assembly supplied with the grill
or a replacement pressure regulator and hose assembly specified by the manufacturer). This
assembly is designed to connect directly to a standard 9 kg (20 lb.) L.P. cylinder. L.P. cylinders are
not included with the grill. L.P. cylinders can be purch
ased separately at an independent dealer.
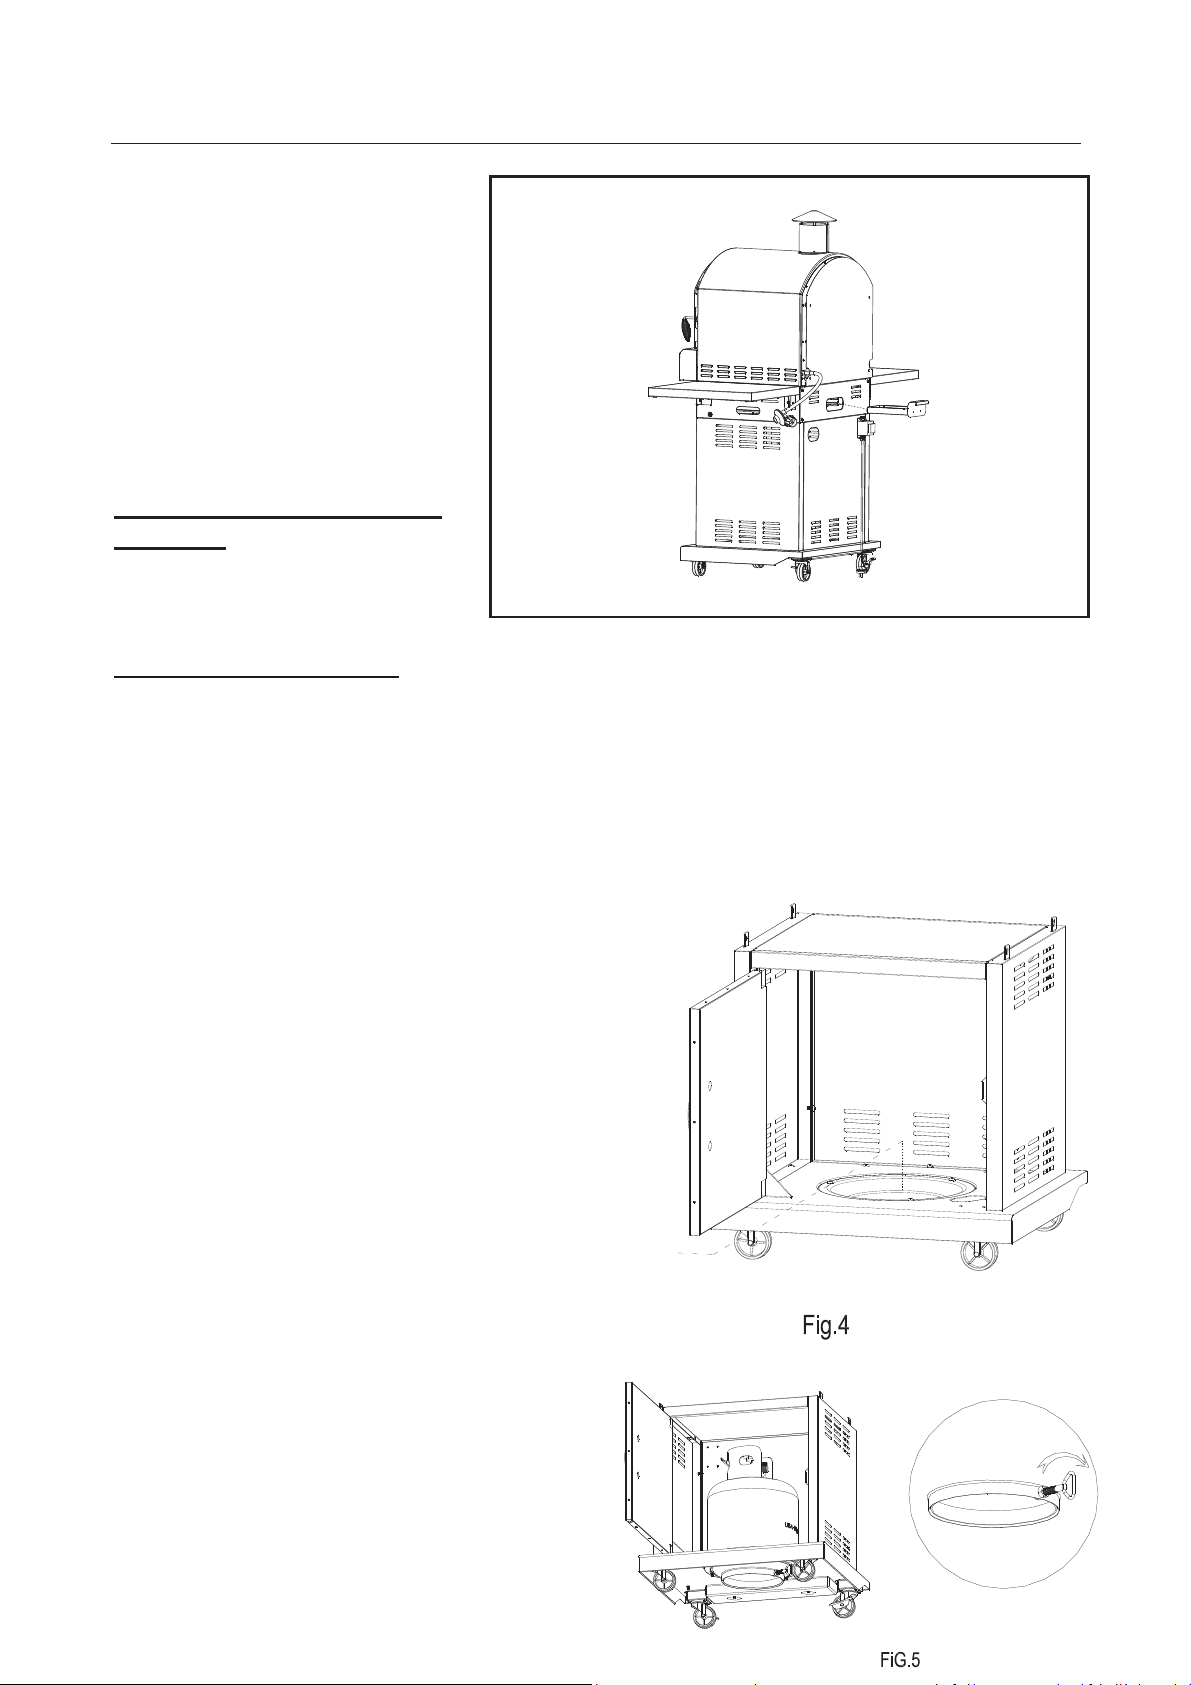
Connecting a Liquid Propane Gas Tank to the
Grill:
1. Open the doors of the cabinet. Place a 9 kg (20
Ib.) tank with foot ring into the tank tray. See Fig. 4.
Make sure the tank valve is in the OFF position.
2. Tighten the retention screw beside the tank tray
to secure the tank. See Fig. 5.
3. Check the tank valve to ensure it has proper
external mating threads to fit the hose and
regulator assembly provided (Type 1 co
nnection
per ANSI Z21
.89b-2012).
4. Inspect the valve connection port of the
regulator assembly. Look for damage or
debris. Remove any debris. Inspect hose for
damage. Never use damaged or plugged
equipment.
Loading ...
Loading ...
Loading ...