
Loading ...
Loading ...
Loading ...
English
10
Accessories
WARNING: Since accessories, other than those
offered by CRAFTSMAN, have not been tested with
this product, use of such accessories with this tool
could be hazardous. To reduce the risk of injury, only
CRAFTSMAN recommended accessories should be
used with thisproduct.
Recommended accessories for use with your tool are
available at extra cost from your local dealer or authorized
service center. If you need assistance in locating any
accessory, please contact CRAFTSMAN, call 1-888-331-4569.
MAINTENANCE
WARNING: To reduce the risk of serious personal
injury, turn unit off and remove the battery pack
before making any adjustments or removing/
installing attachments or accessories. An
accidental start-up can causeinjury.
MAXIMUM RECOMMENDED
CAPACITIES
CMCD721
WOOD
Auger 7/8" (22 mm)
Paddle 1–1/4" (32 mm)
Twist 1/2" (13 mm)
Self-feed 1–3/8" (35 mm)
Hole saw 2" (50 mm)
METAl
Twist 1/2" (13 mm)
Hole saw 1–3/8" (35 mm)
MAsOnRY
Carbide 1/4" (6.5 mm)
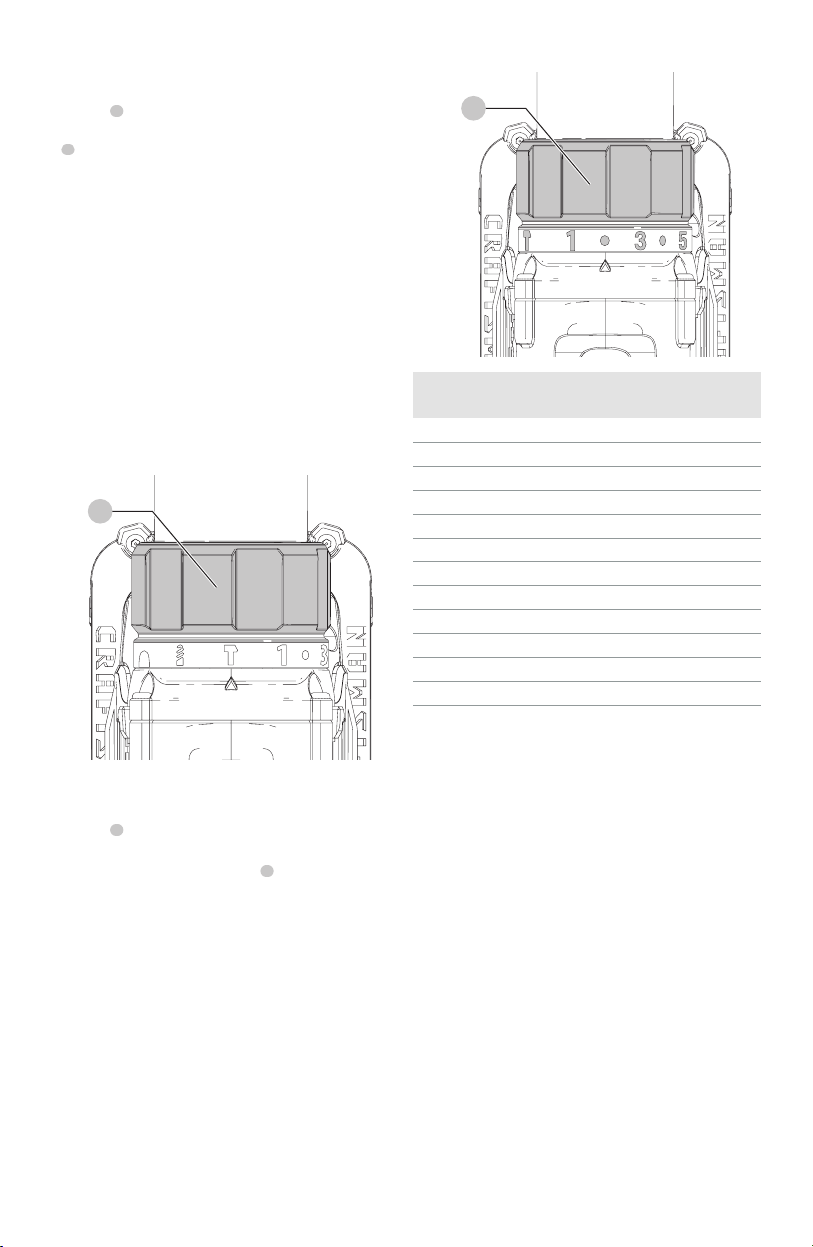
Hammerdrilling (Fig. A, K)
1. Select the desired speed/torque range using the speed
selector
4
to match the speed and torque to the
planned operation. Turn the torque adjustment collar
3
to the hammerdrillsymbol.
iMPORTAnT: Use carbide-tipped or masonry bits rated
for percussion drillingonly.
2. Drill with just enough force on the hammer to keep
it from bouncing excessively or "rising" off the bit.
Too much force will cause slower drilling speeds,
overheating, and a lower drillingrate.
3. Drill straight, keeping the bit at a right angle to the work.
Do not exert side pressure on the bit when drillling as
this will cause clogging of the bit flutes and a slower
drillingspeed.
4. When drilling deep holes, if the hammer speed starts to
drop off, pull the bit partially out of the hole with tool
still running to help clear debris from thehole.
nOTE: A smooth, even flow of dust from the hole indicates
proper drilling rate.
Fig.K
3
Screwdriving (Fig. A, L)
1. Select the desired speed/torque range using the speed
selector
4
to match the speed and torque to the
plannedoperation.
2. Turn the torque adjustment collar
3
to the
desiredposition.
nOTE: Use the lowest torque setting required to
seat the fastener at the desired depth. The lower the
number, the lower the torqueoutput.
3. Insert the desired fastener accessory into the chuck as
you would any drillbit.
4. Make some practice runs in scrap or on unseen areas of
the workpiece to determine the proper position of the
torque adjustmentcollar.
5. Always start with lower torque settings, then advance
to higher torque settings to avoid damage to the
workpiece orfastener.
Fig.L
3
Loading ...
Loading ...
Loading ...