Loading ...
Loading ...
3
Confirm if the washing machine waste inlet needs to be moved from right to left before securing the unit to
the wall. If they do need to be changed see page 6 of these installation instructions.
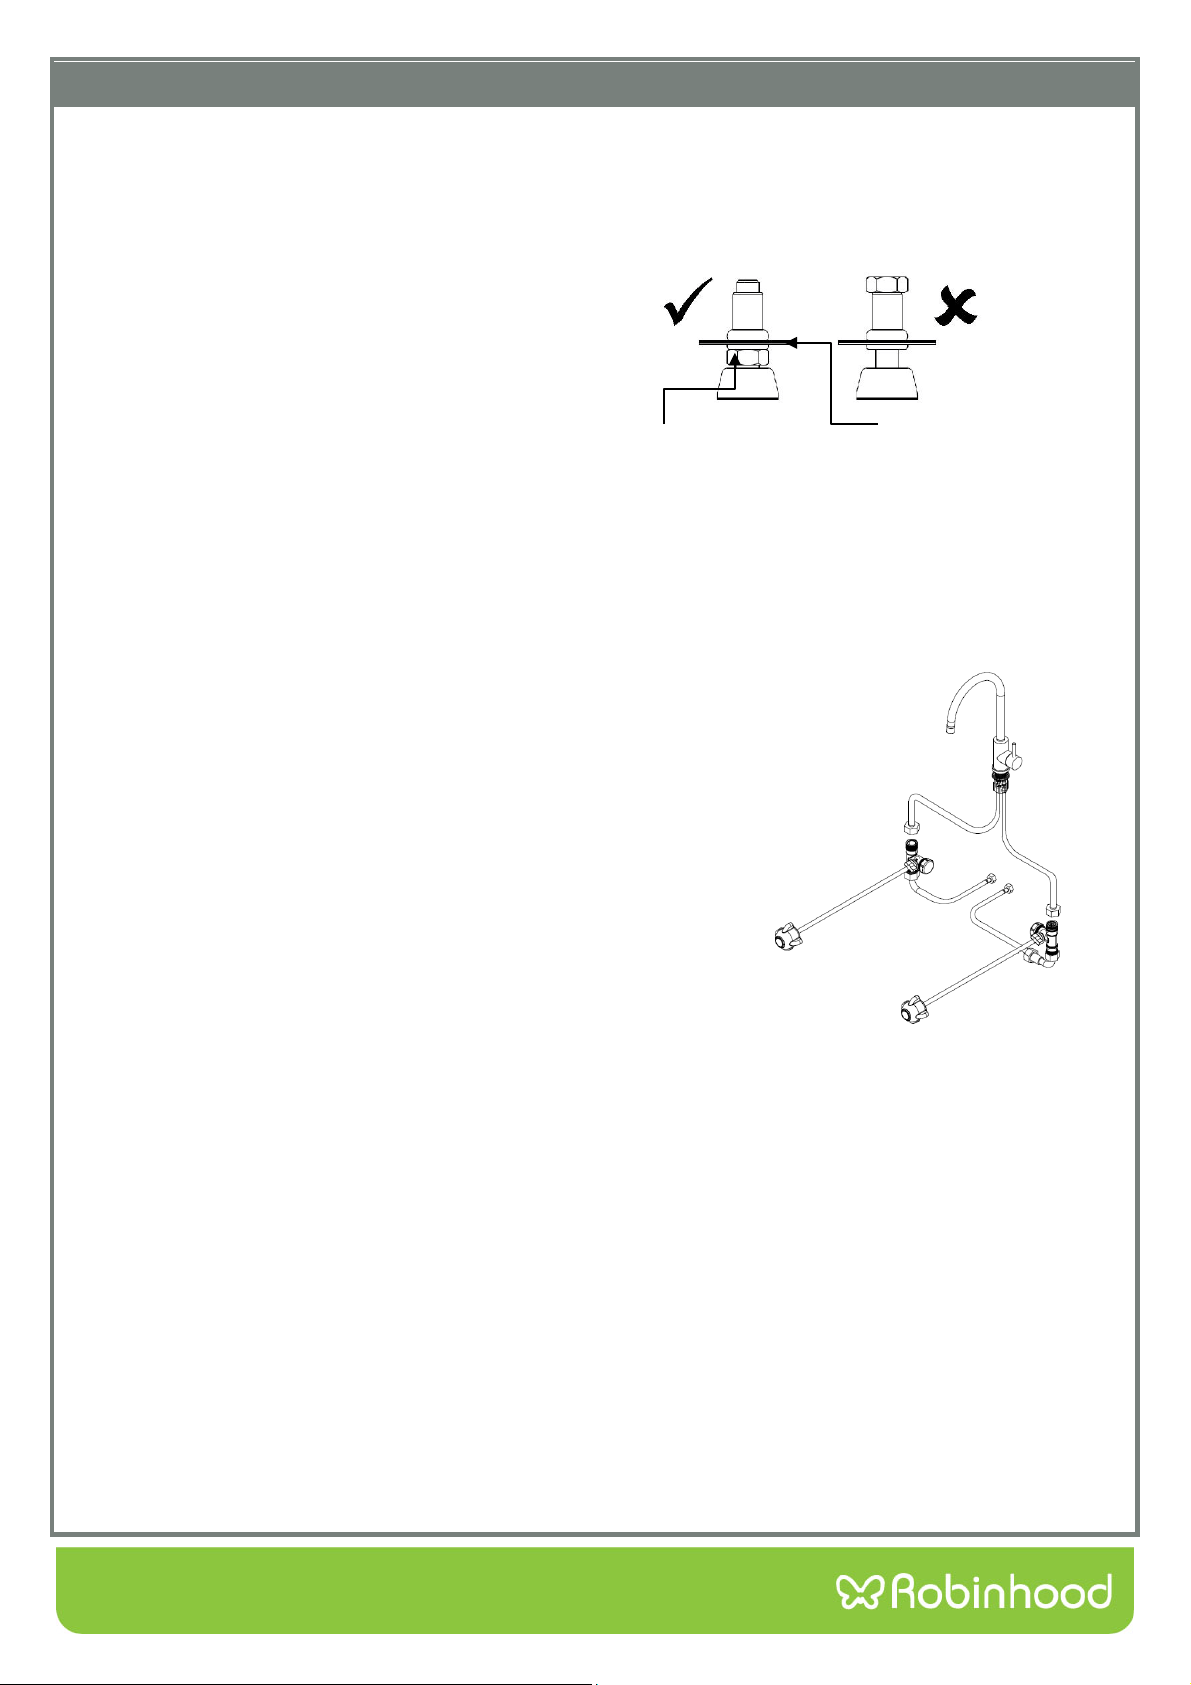
1. Fit the four adjustable feet supplied to the
bottom of the
cabinet and adjust to align with
worktop or washing machine height. Use the
lock nut to secure the feet into position. Tilt
laundry tub slightly to assist with access. Check
the top of the laundry tub with a spirit level to
ensure that it is level and check that the cabinet
does not “rock” confirm that the door operates
correctly.
Locknut Bottom of the unit
2. Line up the laundry tub to the installation and confirm enough room, if necessary remove the skirting
board at the require distance 560 mm this will allow the unit to sit flush against the wall. (Check with
your local council for building regulations). Remove the laundry tub away from the wall.
3. Remove the transit cable tie’s holding the 3 way ball valve in position.
4. Fit the tapware to the tub using the supplied fittings.
Connect the two flexible hoses onto the body of the
tap ware from the underside; ensure that the flexible
hoses are fitted correctly. Hand tightened and then
finished with a quarter turn only.
5. Position the laundry tub and cut the house waste pipe (which should already be installed) to the exact
height. The final height will depend on the waste trap dimensions.
6. Fasten the laundry tub to the wall through any of the holes in the rear flanges. Alternative fastening can be
achieved through the floor. Confirm that the drawers operate correctly.
7. Connect the flexible hoses from the 3 way ball valves to the hot and cold mains wingbacks and connect the
waste system to the laundry tub.
8. Test the laundry tub for leaks. Check the tap ware, washing machine caps and the waste system.
9. Seal the laundry tub to the wall using suitable approved sealant. (Check with your local council for building
regulations).
Installing the Supertub
Loading ...
Loading ...
Loading ...