Loading ...
Loading ...
Loading ...
13
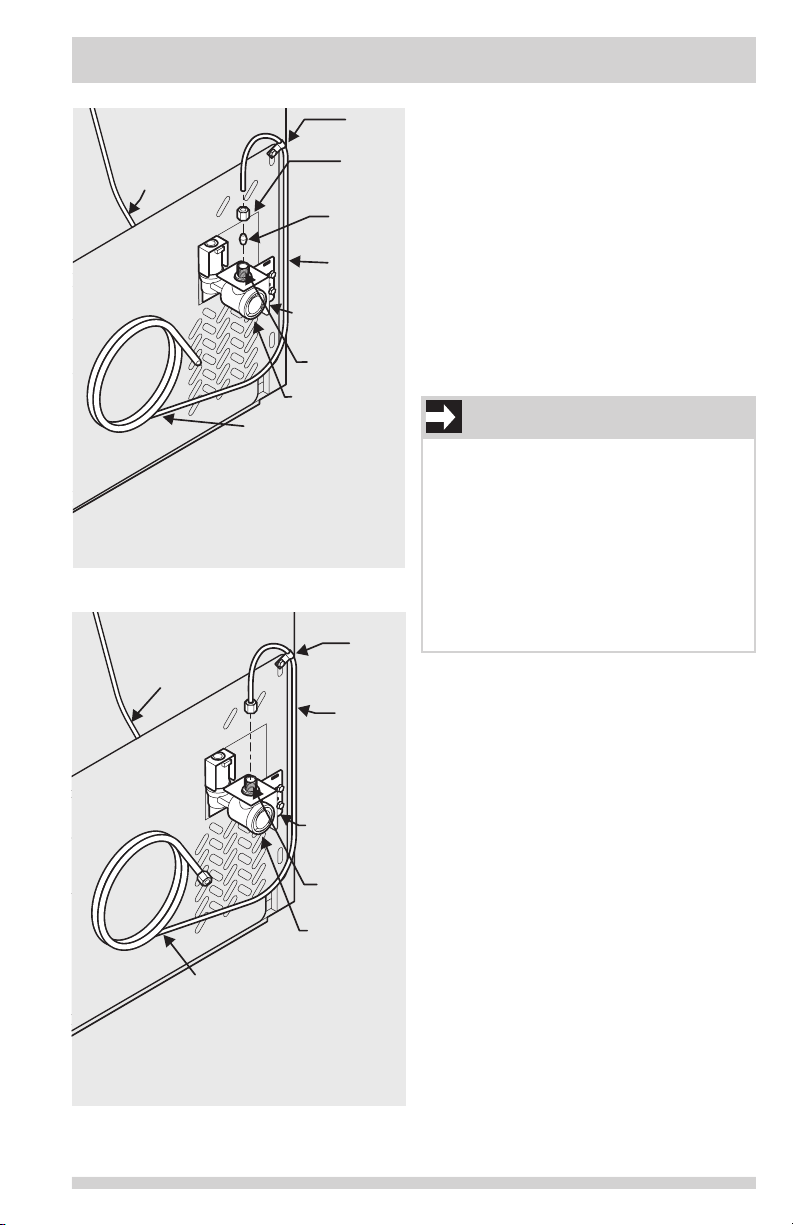
Steel
Clamp
Braided
Flexible
Stainless
Steel
Water Line
Water Valve
Bracket
Valve Inlet
Water Valve
6 ft (1.8 Meters) Braided flexible
stainless steel water line from
household water supply.
Plastic Water Tubing
to Ice Maker
Fill Tube
(Include enough tubing in loop to allow
moving refrigerator out for cleaning.)
Figure 2
Figure 1
Plastic Water
Tubing to Ice
Maker Fill
Tube
Steel
Clamp
Brass
Compression
Nut
Ferrule
(Sleeve)
Copper
water line
Water Valve
Bracket
Valve Inlet
Water Valve
Copper water line
from household
water supply
(Include enough tubing in loop to allow
moving refrigerator out for cleaning.)
CONNECTING THE WATER SUPPLY
5. With steel clamp and screw, secure water
supply line (copper tubing only) to rear
panel of refrigerator as shown.
6. Coil excess water supply line (copper
tubing only), about 2½ turns, behind
refrigerator as shown and arrange coils so
they do not vibrate or wear against any
other surface.
7. Turn ON water supply at shutoff valve and
tighten any connections that leak.
8. Reconnect refrigerator to electrical
power source.
9. To turn ice maker on, lower wire signal arm.
IMPORTANT
After connecting the water supply, refer to
“How to Prime the Water Supply System”
for important information about priming an
empty water supply system.
Your refrigerator’s water supply system
includes several tubing lines, a water lter,
a water valve, and a water tank. To ensure
that your water dispenser works properly,
this system must be completely lled with
water when your refrigerator is rst con-
nected to the household water supply line.
Loading ...
Loading ...
Loading ...