Loading ...
Loading ...
Loading ...

8
INSTRUCTIONS FOR THE INSTALLER
connection to a standard household socket. The
electrical supply is required to power the electronic
ignition system.
NOTE: It will be necessary for servicing purposes
to disconnect the electrical power supply. The
power point should therefore be accessible after
the appliance is installed, as specified in the local
wiring regulations.
TESTING APPLIANCE OPERATION
After installation the installer must fully test the
appliance and ensure it operates correctly before
handing it over to the customer.
Check all connections for gas leaks with soap and
water.
DO NOT use a naked flame for detecting leaks.
Ignite all burners both individually and concurrently
to ensure correct operation of gas valves, burners
and ignition. Turn gas taps to low flame position
and observe stability of the flame for each burner
individually and concurrently. When satisfied with
the hotplate, please instruct the user on the correct
method of operation. In case the appliance fails
to operate correctly after all checks have been
carried out, refer to the authorised service provider
in your area.
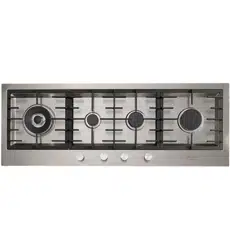
GAS CONVERSIONS AND ADJUSTMENTS
Data Label
This appliance is suitable for Natural Gas and
Universal LPG; ensure that the available gas supply
matches the Data Label.
When converting from Natural Gas to Universal
LPG ensure that the NG regulator is removed
and replaced with the Test Point Assembly. An
Australian Approved gas regulator suitable for a
supply pressure of 2.75kPa should be part of the
gas tank supply and the test point pressure should
be adjusted to 2.75kPa.
Replacing the injectors
If the equipment is adjusted for a type of gas that is
different from the one available, it is necessary to
replace the burner injectors.
The choice of the injectors to replace must be
made according to the table of the “technical
characteristics” as enclosed.
Act as follows:
– remove the racks and burners.
– by means of a straight spanner L, unscrew
the injectors U (fig. 7) and substitute it with the
corresponding one.
– tighten the injectors strongly.
After changing the injectors, it is necessary to
eliminate residual natural gas in the system.
To do this you have to turn to the maximum
position then press the knob of each burner and
wait few seconds.
Adjusting the burners
The lowest flame point must always be properly
adjusted and the flame must remain on even if
there is an abrupt shift from the maximum to the
minimum position.
If this is not so, it is necessary to adjust the lowest
flame point as follows:
– start the burner up
– turn the tap up to the minimum position (small
flame)
– remove the knob from the tap rod
– introduce a flat-tip screwdriver in the hole F of the
tap (fig. 8) and turn the by-pass screw up to a
proper adjustment of the lowest flame point.
As regards U-LPG gas burners, the by-pass
screw must be tightened completely.
MAINTENANCE
Maintenance Schedule
No regular maintenance is required for the hotplates
except cleaning.
Replacing the power supply cable
If the power supply cable should be replaced,
it is necessary to use a cable with a section of
3x0.75mm
2
, type H05VV-F or H05RR-F, complying
with the regulations in force.
The connection to the terminal board must be
effected as shown in fig.9 - 9/A:
brown cable L (phase)
blue cable N (neutral)
green-yellow cable (ground)
Loading ...
Loading ...
Loading ...