MODELS / MODÈLES :
CP171MED – AccuCold
Two-door refrigerator-freezer with two compressors
Réfrigérateur-congélateur avec deux portes et deux compresseurs
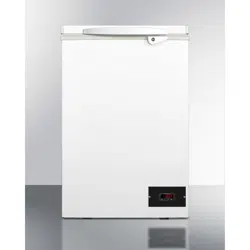
FCL44 / SCF401SS MED Series – AccuCold
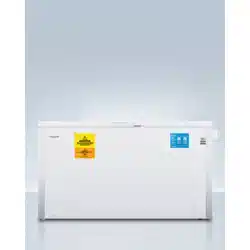
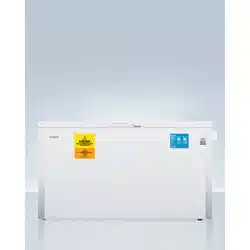
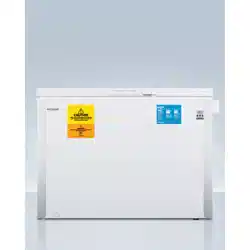
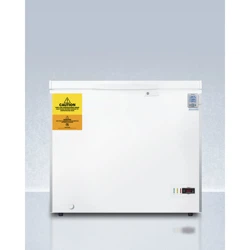
Chest freezers / Congélateurs horizontaux
SCFF55 / SCFF51OSWH MED Series – AccuCold
Built-in frost-free freezers / Congélateurs sans givre encastrés
SCFF/ SCFR Series – AccuCold
Frost-free chest freezers and refrigerators
Congélateurs et réfrigérateurs horizontaux sans givre
SCUF18/20 / SCUR18/20 Series – Summit Commercial
Full-size frost-free all-freezers and all-refrigerators
Congélateurs et réfrigérateurs grand format sans givre
VT/ VLT Series – AccuCold
Low temperature freezers / Congélateurs à basse température
MEDICAL, LABORATORY AND SCIENTIFIC REFRIGERATORS AND FREEZERS
RÉFRIGÉRATEURS ET CONGÉLATEURS POUR USAGES MEDICAUX,
SCIENTIFIQUES ET EN LABORATOIRE
If you need service or call with a question, please have this
information ready.
Si vous avez besoin de service ou si vous appelez avec une
question, s'il vous plaît disposer de ces informations prêtes.
Model / Modéle: Serial no.:_________________
Options added /
Options qui ont été ajoutées: ______________________________
Date of purchase / Date d'achat: __________________________
Dealer / Revendeur : ____________________________________
For parts: visit our website / Pour les pièces: visitez notre site Web:
www.summitappliance.com/support
USE & CARE GUIDE / MODE D’EMPLOI
Felix Storch, Inc.
ISO 9001:2008 Registered
770 Garrison Avenue
Bronx, New York 10474
www.medicalrefrigerators.com
APPLIANCE SAFETY
Your safety and the safety of others are very important to us.
We have provided many important safety messages in this manual and
on your appliance. Always read and obey all safety messages.
You can be seriously injured or even killed if you don’t follow instructions.
Safety messages will tell you what the potential hazard is, how to reduce
the chance of injury, and what can happen if the instructions are not
followed.
Plug into a grounded 3-prong outlet.
Do not remove ground prong, nor use a 3/2 adapter.
Do not use an extension cord.
Use care not to plug into outlets controlled by wall switches.
Disconnect power before servicing.
After servicing, replace all parts and panels before operating.
Use nonflammable cleaners.
Keep flammable materials and vapors, such as gasoline, away from
appliances.
Use two or more people to move and install appliance.
Drawer refrigerators are provided with anti-tip brackets. Always install
prior to use.
Proper Disposal of Your Old Appliance e
Old appliances can represent a suffocation hazard to children.
Remove doors from your old appliance.
Leave shelves in place.
If an old appliance contains refrigerants, it must be recycled by a licensed
service or disposal company.
IMPORTANT SAFETY INSTRUCTIONS
WARNING: To reduce the risk of fire, electric shock, or injury
when using your appliance, follow these basic precautions:
Felix Storch, Inc.
Page 2
Page 2 Page 2
INSTALLATION INSTRUCTIONS
Excessive Weight Hazard !
Use two or more people to move and install your appliance.
Failure to do so can result in back or other injury.
CAUTION: YOU MUST ALLOW APPLIANCE TO SIT UPRIGHT FOR 24 HOURS
BEFORE TURNING ON, TO ALLOW THE COMPRESSOR LUBRICANT TO
DRAIN. FAILURE TO DO SO MAY ADVERSELY AFFECT PERFORMANCE
AND THE LIFETIME OF THE UNIT.
1. Remove packaging materials.
2. Remove tape and glue residue from surfaces before turning on the
appliance. Rub a small amount of liquid dish soap over the adhesive
with your fingers. Rinse with warm water and dry.
3. Do not use sharp instruments, rubbing alcohol, flammable fluids, or
abrasive cleaners to remove tape or glue. These products can
damage the surface of your appliance.
4. When Moving Your Appliance:
Your appliance is heavy. When moving the appliance for cleaning or
service, be sure to protect the floor. Always pull the appliance straight
out when moving it. Do not wiggle or “walk” the appliance when trying
to move it, because floor damage can occur.
5. Clean Before Using:
After you remove all of the packaging materials, clean the inside of
your appliance before using it. See cleaning instructions in Appliance
Care.
6. Some upright models have leveling legs. Level as necessary for best
operation.
7. If your appliance has casters, after moving into place, lock the brakes
on those casters supplied with brakes. Always unlock before moving
the appliance for cleaning.
Key Eject Lock (some models)
To lock or unlock the appliance, you must hold the key in the lock while
turning. The lock is spring loaded, so the key cannot be left in the lock.
If the key is lost, contact your dealer or SUMMIT APPLIANCE for a
replacement. Always give the model and serial number of your appliance
when requesting a replacement key. Keys for most models can be
ordered online at www.summitappliance.com/support
Page 3
Felix Storch, Inc.
LOCATION REQUIREMENTS
Keep flammable materials and vapors, such as gasoline,
away from appliances. Failure to do so can result in fire,
explosion or death.
IMPORTANT: Do not install the appliance near an oven, radiator, or
other heat source, nor in a location where the temperature will fall below
40°F (5°C). Do not place in direct sunlight.
Check the strength of the floor before installing your appliance. It should
hold the weight of a fully loaded appliance. Allow at least 1” (2.5 cm) of
airspace at the top and on both sides of the appliance and 1” (2.5 cm)
between the back of the appliance and the wall. If the appliance is going
to be placed against a wall, leave extra space on the hinge side so the
door can open wider than its width.
Note: This appliance may be installed side by side with another
appliance or appliances. Allow for a 3” (7.5 cm) clearance at the top
and sides and a ¼” (0.64 cm) clearance between the appliances. IF
YOUR MODEL HAS THE LETTERS “BI” IN THE SUFFIX, IT IS
DESIGNED FOR BUILT-IN USE, AND DOES NOT REQUIRE
CLEARANCE EXCEPT IN THE BACK.
Electrical Shock Hazard !
Plug into a grounded 3-prong outlet.
Do not remove ground prong.
Do not use an adapter.
Do not use an extension cord.
Failure to follow these instructions can result in fire, electrical
shock or death.
Recommended grounding method
A 115 Volt (AC only) 60 Hz grounded electrical supply with a 15- or 20-
amp fuse or circuit breaker is required. It is recommended that a separate
circuit serving only your appliance be provided. Use outlets that cannot
be turned off by a switch or pull chain. Do not use an extension cord.
Felix Storch, Inc.
Page 4
1. Locate the two front leveling legs that may be taped among the packing
materials. In many models these legs are already mounted into the
underside of the appliance.
2. Screw these legs into the front holes on the bottom of the appliance. The
back of the appliance rests on two fixed supports. (Built-in models also
have rear level legs that can provide more precise leveling).
3. Adjust the front legs just enough to lift the cabinet up off the floor.
Note: If your model is equipped with front rollers, the front legs should be
lowered enough to lift the rollers off of the floor to ensure the appliance
does not roll forward when the door is opened.
4. Place a leveling tool on top of the appliance, first side to side, then front to
back. Turn leg counterclockwise to raise a corner. Turn leg clockwise to
lower a corner.
5. Repeat Step 4 until appliance is level.
6. After appliance is fully loaded, recheck with level as in Step 4.
7. If your appliance is equipped with casters, the two front casters have
brakes to prevent rolling. Keep brakes locked, and unlock for moving only.
Level your appliance (some upright models)
APPLIANCE USE
In order to ensure proper temperature, you need to permit proper airflow in
the appliance. Do not block off any air vents. If the vents are blocked, airflow
will be prevented, and temperature and moisture problems may occur. Always
position contents to allow some airflow between shelves or baskets.
Allow the appliance to cool at least 6 to 8 hours before adding contents. Allow
24 hours for temperature to stabilize.
Note: When the appliance is first started, the compressor will run constantly
until the appliance is cooled. It may take 6 to 8 hours (or longer),
depending on room temperature and the number of times the appliance
door is opened. After the appliance is cooled, the compressor will turn on
and off as needed to keep the appliance at the proper temperature.
For optimum temperature performance, it is recommended that this unit
be at least 30% full during use. If you are only using this unit to store
small loads, we recommend adding some water bottles or freezer packs
to ensure temperature stability.
The outside of your appliance may feel warm. This is normal. The appliance’s
design and main function is to remove heat from packages and air space
inside the appliance. The heat is transferred to the room air, making the
outside of the appliance feel warm. (In some models the condenser that gets
warm is just inside the side walls, making these walls warm to the touch.)
ENERGY-SAVING TIPS
The more airflow provided around an appliance, the less energy it will use.
If your appliance requires manual defrosting, keep ice build-up to less than 1/2".
Keep doors open a minimum of time, and shut securely.
Felix Storch, Inc.
Page 5
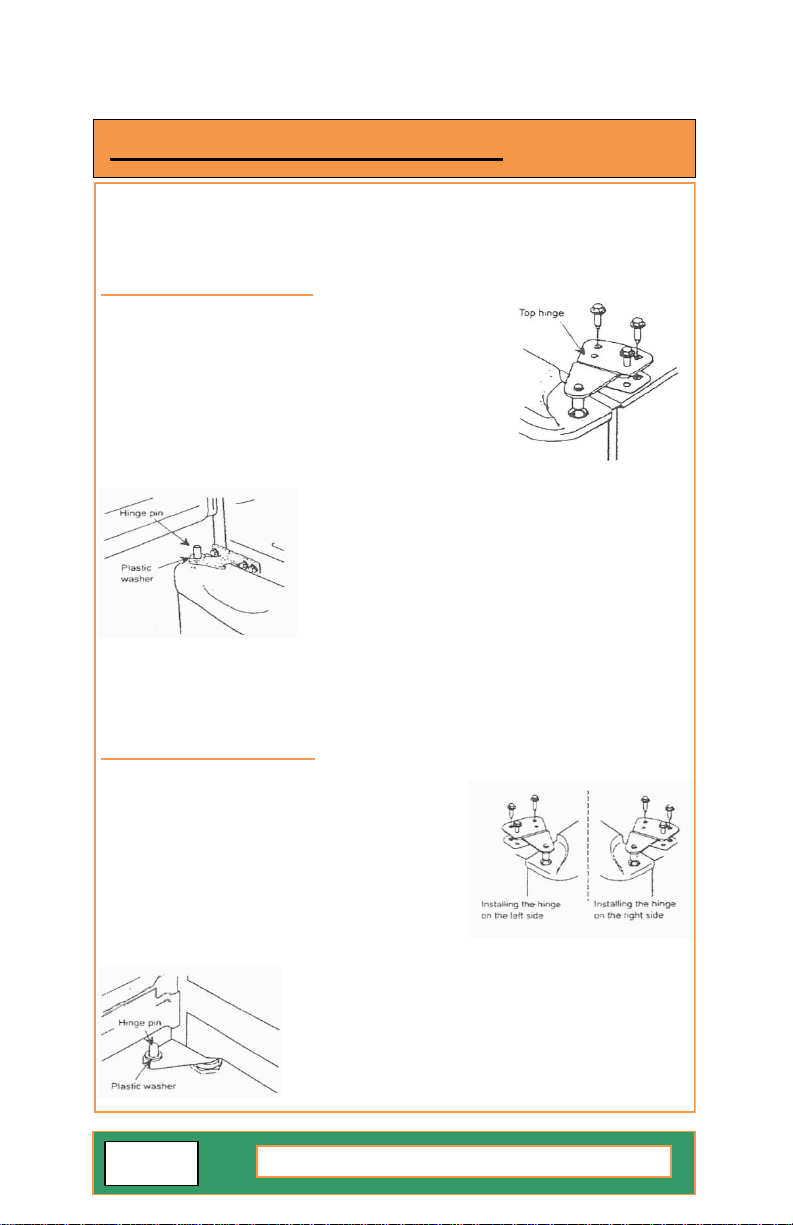
REVERSING THE DOOR SWING (some models)
If you find the direction of opening the door on your appliance inconvenient, you
can change it. Holes on the opposite side have already been prepared in the
factory.
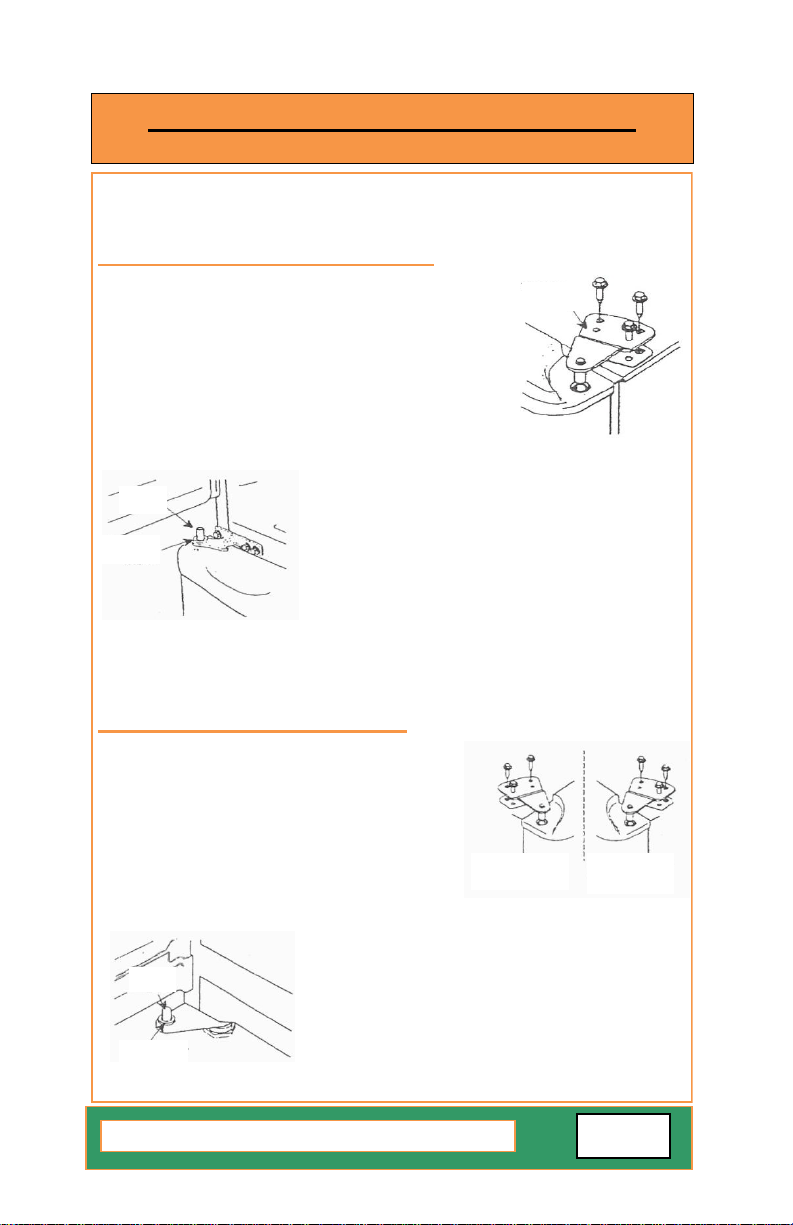
For two-door units:
Take off the upper hinge cover from the top door and
remove the screws that hold the top hinge.
Lift the hinge straight up to free the hinge pin from the
socket in the top of the door.
Lift the top door to free its bottom socket from the hinge
pin on the central hinge bracket.
Remove the screws to the central hinge to free its pin
from the top of the lower door.
Lift the door up and away from the bottom hinge
pin.
Remove the screws to the bottom hinge.
Remove the decorative caps from the opposite
side and install the bottom hinge. Plug the holes
from the original side with the decorative caps.
Replace door onto the pin on the bottom hinge,
then install the central hinge into lower door.
Insert screws into the central hinge and plug the
holes on the reverse side.
Replace the upper door onto the central hinge pin.
Insert screws into the top hinge and tighten.
For one-door units:
Take off the upper hinge cover from the door and
remove the screws that hold the top hinge.
Lift the hinge straight up to free the hinge pin from
the socket in the top of the door.
Lift the door up and away to free its bottom
socket from the hinge pin.
Remove the screws to the bottom hinge.
Remove the decorative caps from the opposite side and plug the holes from the
original side with the decorative caps.
Move the bottom hinge to the opposite side and
tighten the screws. Install any lock washers or nuts
if they were used in the original installation.
Replace door onto the hinge pin on the bottom
hinge. Place top hinge pin into door. Insert screws
into the top hinge and tighten.
Felix Storch, Inc.
Page 6
APPLIANCE CARE
Cleaning a frost-free appliance
(including models beginning with SCFF, SCFR, SCUF, SCUR)
Use nonflammable cleaners.
Frost-free means that you do not have to defrost your appliance. Frost is
removed by air moving and collecting any moisture and depositing it on the
cooling coil. The cooling coil periodically warms up enough to melt the frost,
and the water then flows down to the drain pan (located behind the base grill)
where it is evaporated.
Complete cleaning should be done at least once a year.
1. Unplug appliance or disconnect power.
2. Remove all contents.
3. Wash the inside walls with a solution of mild detergent in warm water or
2 tbs (26 g) baking soda to 1 qt (0.95 L) warm water.
Do not use abrasive or harsh cleaners such as window sprays,
scouring cleansers, flammable fluids, cleaning waxes, concentrated
detergents, bleaches or cleansers containing petroleum products on
plastic parts, interior and door liners or gaskets. Do not use paper
towels, scouring pads, or other harsh cleaning tools. These can
scratch or damage surfaces.
4. Rinse well and wipe dry with a clean soft cloth.
5. Use the appropriate cleaning method for the exterior finish.
Painted metal: Wash exteriors with a clean sponge or soft cloth and a
mild detergent in warm water. Do not use abrasive or harsh cleaners,
or cleaners designed for stainless steel. Dry thoroughly with a soft
cloth. For additional protection against damage to painted metal
exteriors, apply appliance wax (or auto paste wax) with a clean, soft
cloth. Do not wax plastic parts.
6. Plug in appliance or reconnect power.
7. Replace all containers.
Cleaning a cycle defrost or manual defrost appliance
Cycle defrost models utilize a system where ice builds up on the rear wall and
melts when the compressor is off. Manual defrost models continually build ice
on inner walls.
NEVER USE A METAL OBJECT TO REMOVE ICE FROM THE REAR WALL.
IF NEEDED, USE A PLASTIC ICE-SCRAPER OR A HAIR DRYER.
Clean surfaces using the same instructions as for frost-free models.
For CSS Models (completely stainless steel), only use cleaners
especially made for stainless steel.
Felix Storch, Inc.
Page 7
Base Grill (some models only)
To Remove and Replace the Base Grill:
1. Open the appliance door and remove the base grill by pulling down
and out from the top.
2. Replace the base grill by putting the clips in the openings in the
appliance panel. Push in until the base grill snaps into place.
Changing the Light Bulb (some models only)
NOTE: Not all appliance bulbs will fit your appliance. Be sure to replace
the bulb with one of the same size, shape, base size and wattage.
You can purchase bulbs from www.summitappliance.com/support
1. Unplug appliance or disconnect power.
2. Remove the light shield. Most models do not require tools.
3. Replace the light bulb with an appliance bulb of the same wattage.
4. Replace the light shield.
5. Plug in appliance or reconnect power.
Loss of Power
After the power is restored, unplug the appliance for 30 minutes to allow
the refrigeration system to equalize. During this time, keep the door
closed as much as possible.
Remember: A full appliance stays cold longer than a partially filled one.
Moving Care
1. Remove all containers.
2. Unplug the appliance.
3. Clean it thoroughly.
4. Tape the appliance shut and tape the electrical cord to the cabinet.
When you get to the new location, refer to the Installation Instructions and
Temperature Selection sections for information on installation and setting
the controls.
APPLIANCE CARE (cont’d)
Felix Storch, Inc.
Page 8
YOUR APPLIANCE MAY HAVE A MECHANICAL (DIAL) OR
DIGITAL THERMOSTAT. DIAL INSTRUCTIONS ARE BELOW.
DIGITAL INSTRUCTIONS ARE ON PAGE 10.
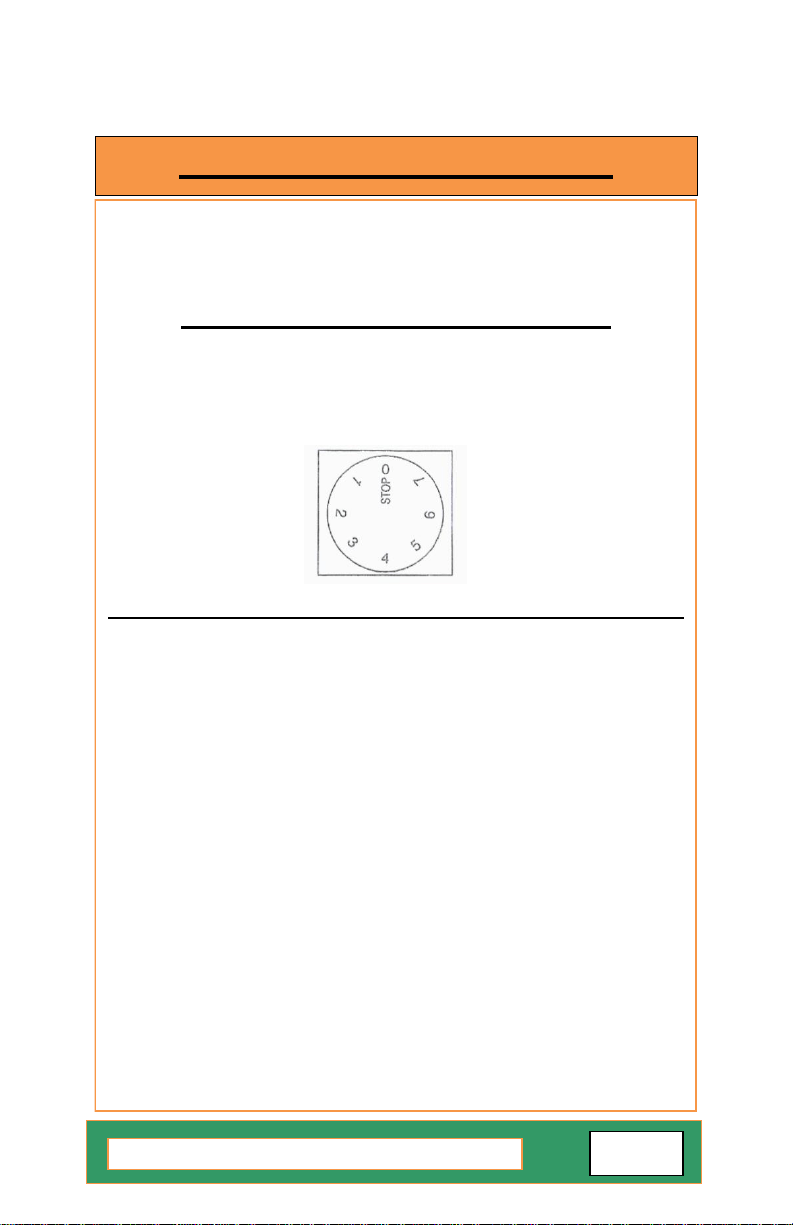
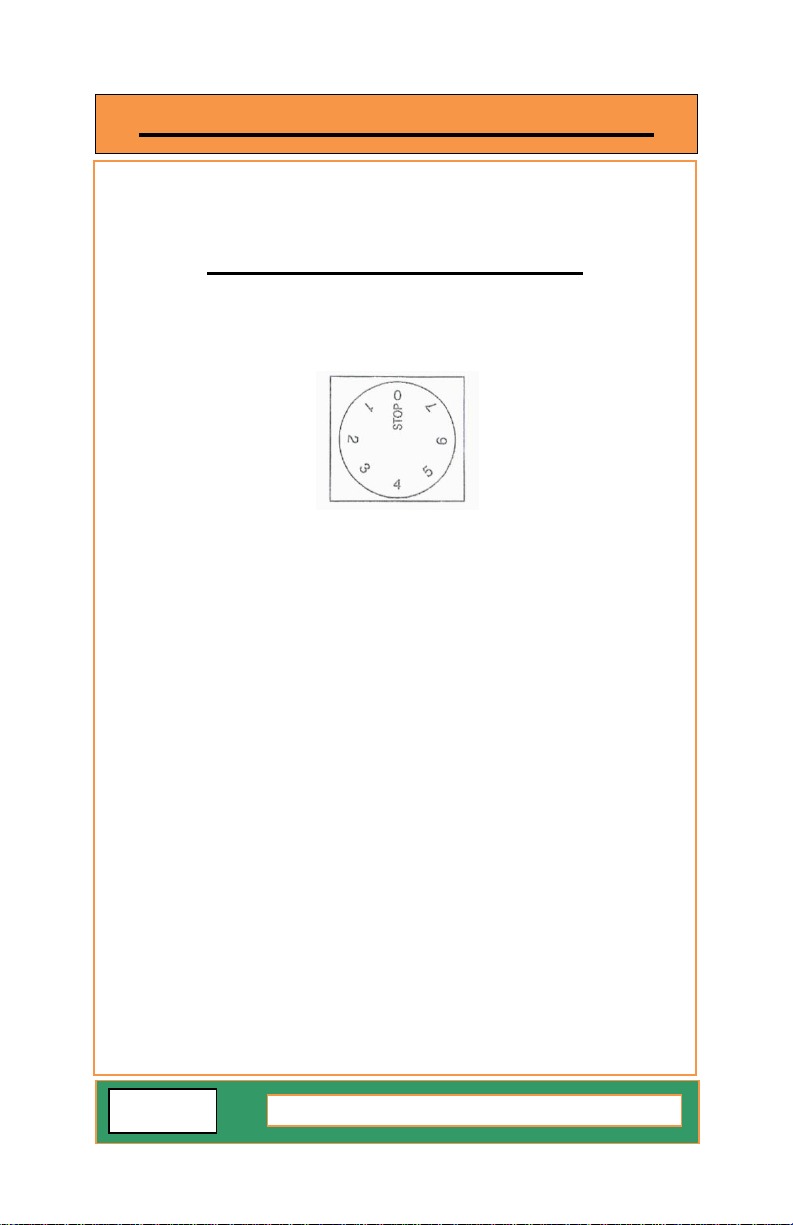
HOW TO ADJUST THE THERMOSTAT
Your appliance may be controlled with a thermostat knob located
inside the unit, towards the right-hand corner. Turn the knob
clockwise from the STOP (0) position toward the higher numbers
for colder temperatures.
Temperature Controls
Higher settings on the knob (higher numbers) mean lower
temperatures (colder) in all compartments of the appliance. The
temperature inside a refrigerator may even drop below 32°F. Use
higher thermostat settings only when required or recommended.
When the ambient temperature is normal, we recommend a medium
setting.
Changes of the ambient temperature affect temperature in the interior
of the appliance, so keep this in mind when choosing the setting of the
thermostat knob.
In STOP (0) position, the appliance does not operate (the cooling
system is switched off), yet the power supply is not interrupted (the
light is on when you open the refrigerator door).
The temperatures in the refrigerator and in the freezer compartment
also depend on how often you open the door.
In all small refrigerators and freezers without interior fans, tempera-
tures are coldest near the bottom, and occasionally near the rear.
Place contents accordingly.
For optimum temperature performance, it is recommended that this
unit be at least 30% full during use. If you are only using this unit to
store small loads, we recommend adding some water bottles or
freezer packs to ensure temperature stability.
TEMPERATURE SELECTION
Felix Storch, Inc.
Page 9

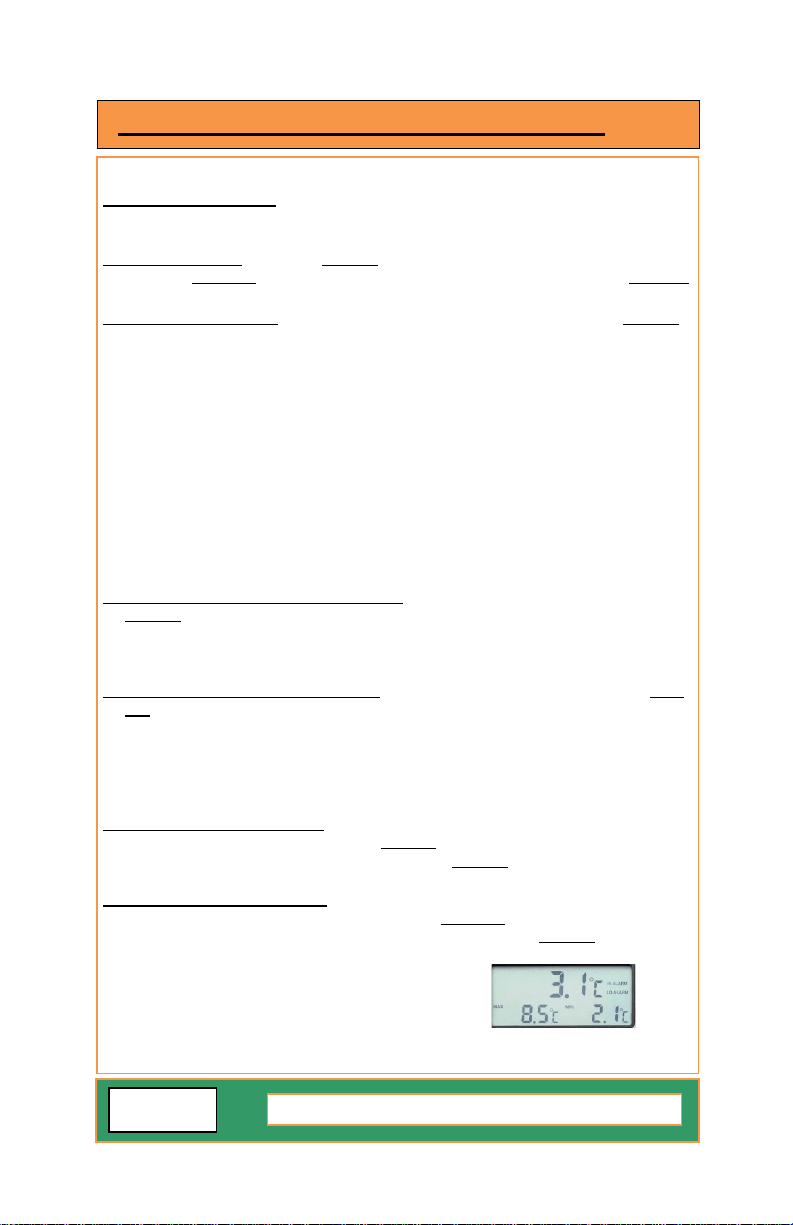
Every unit is equipped with a Traceable Thermometer/
Alarm that simultaneously displays minimum, maximum
and current interior temperatures and provides a visual
and audible signal when the temperature inside the unit
falls outside the set temperature range.
The temperature sensor, or probe, is enclosed in a
glycol-filled bottle that you insert into the location to be
monitored, such as inside a refrigerator or freezer, once the unit has been
programmed. The thermometer/alarm itself can be attached to the door of
the unit with the magnet on the back, or it can be placed on a convenient
table or shelf.
Power to the Thermometer/Alarm is supplied with a lithium iron disulfide
battery with a 10-year shelf life. When it is inserted correctly, the unit will
beep and all segments of the LCD display will be temporarily activated.
(Note that alarm temperatures will have to be reset after replacing the
battery.)
The temperature display can be switched between Celsius (°C) and
Fahrenheit (°F) by sliding the °C/°F button located on the back of the unit.
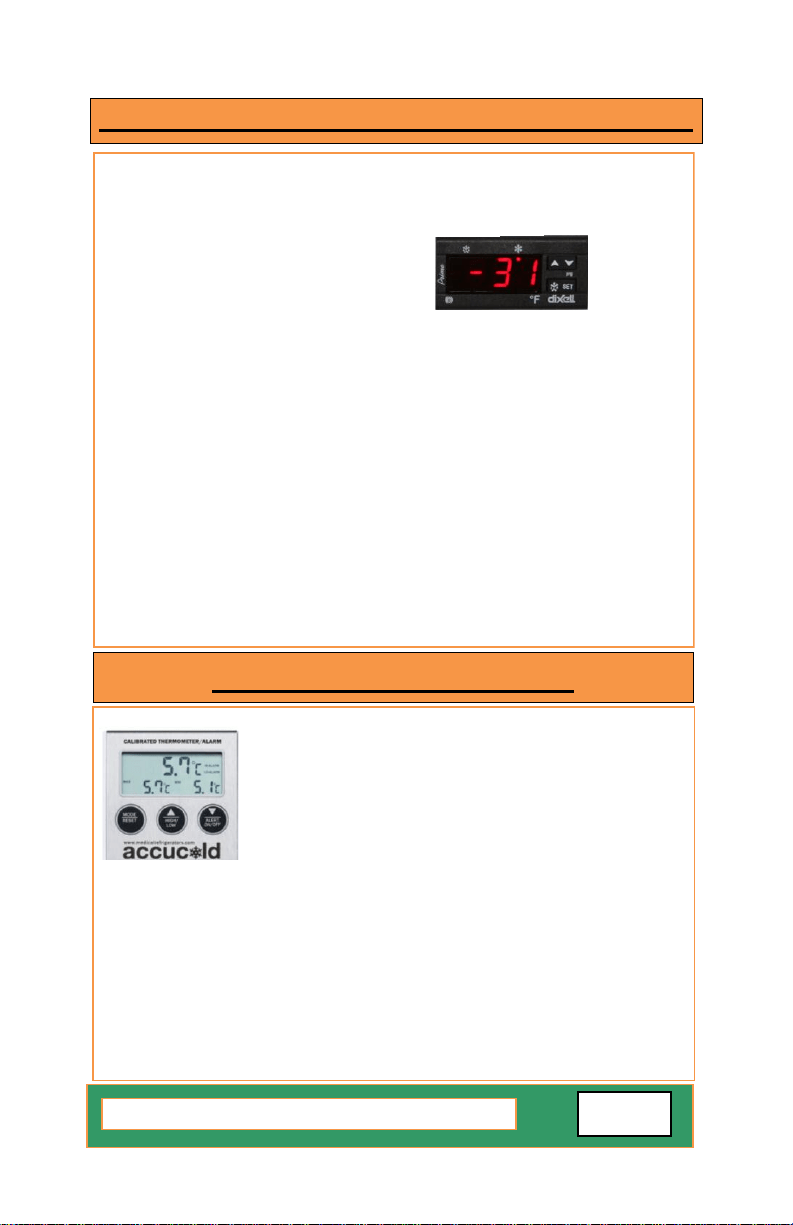
If you find that it is necessary to change the temperature setting for your
digital-thermostat controlled appliance, please refer to the following
instructions. The front panel of the thermostat is illustrated here:
To see the SET POINT:
Push and immediately release the SET key. The display will show the SET
POINT value. Wait 5 seconds and the probe value will display again.
To change the SET POINT:
Push and hold the SET key for more than 3 seconds to change the set point
value. The value of the set point will be displayed, and the “snowflake” LED
will start blinking.
To change the SET value:
Push the UP or DOWN arrow to the desired setting. The new setting will be
memorized after 15 seconds, provided no other keys are pushed.
Note: The minimum and maximum range of your thermostat is preset
and locked by us, so it cannot easily be accidentally moved between
freezer and refrigerator temperatures. To reset this range lock, either
call us or find information on our website under Troubleshooting.
melting
snowflake
UP & DOWN arrows
SET key
snowflake
DIGITAL THERMOSTAT INSTRUCTIONS
TRACEABLE THERMOMETER / ALARM
Felix Storch, Inc.
Page 10
Function of Controls:
MODE/RESET Key: Press ONCE to reset Max/Min temperature record. When
the unit is sounding an alarm, press ONCE to turn off the beeping sound.
HIGH/LOW Key: Press ONCE to display high alarm setting. Press TWICE to
display low alarm setting. Press THREE TIMES to display current
temperature reading.
ALERT ON/OFF Key: When the unit is sounding an alarm, press ONCE to
turn off. However, the High-Alarm or Low-Alarm will still flash until the
temperature goes back to normal or the Alarm function is turned off.
Programming the Alarms:
The thermometer displays the internal temperature of the unit being
monitored, as well as the maximum and minimum temperatures reached. The
maximum and minimum readings reflect the highest and lowest temperatures
since the battery was inserted or since the MODE/RESET key was last
pressed. If the temperature rises above or falls below the set temperature
range, the alarm will sound. By default, the high alarm temperature setting is
8°C (46.4°F) and the low alarm temperature setting is 2°C (35.6°F). To reset
these limits, follow these instructions:
High Alarm Temperature Setting: Press the HIGH/LOW key ONCE, then press
MODE/RESET to enter the High Alarm temperature setting mode. Use the
Up and Down arrows to adjust the temperature accordingly. Press
MODE/RESET once again to confirm the setting.
Low Alarm Temperature Setting: Press the HIGH/LOW key TWICE, then
press MODE/RESET to enter the Low Alarm temperature setting mode.
Use the Up and Down arrows to adjust the temperature accordingly. Press
MODE/RESET ONCE to confirm the setting.
By default, the low and high alarms should be audible. To turn alarms on/off:
Audible High Alarm Setting: To make sure the high alarm is audible, press
HIGH/LOW key ONCE (to activate HI-SET on the screen). Then press the
ALERT ON/OFF key ONCE to activate the HIGH-ALARM beeping sound.
Press again to deactivate.
Audible Low Alarm Setting: To make sure that the low temperature alarm is
audible, press the HIGH/LOW key TWICE to activate LOW-SET on the
screen. Then press the ALERT ON/OFF key ONCE to activate the LOW-
ALARM beeping sound. Press again to deactivate.
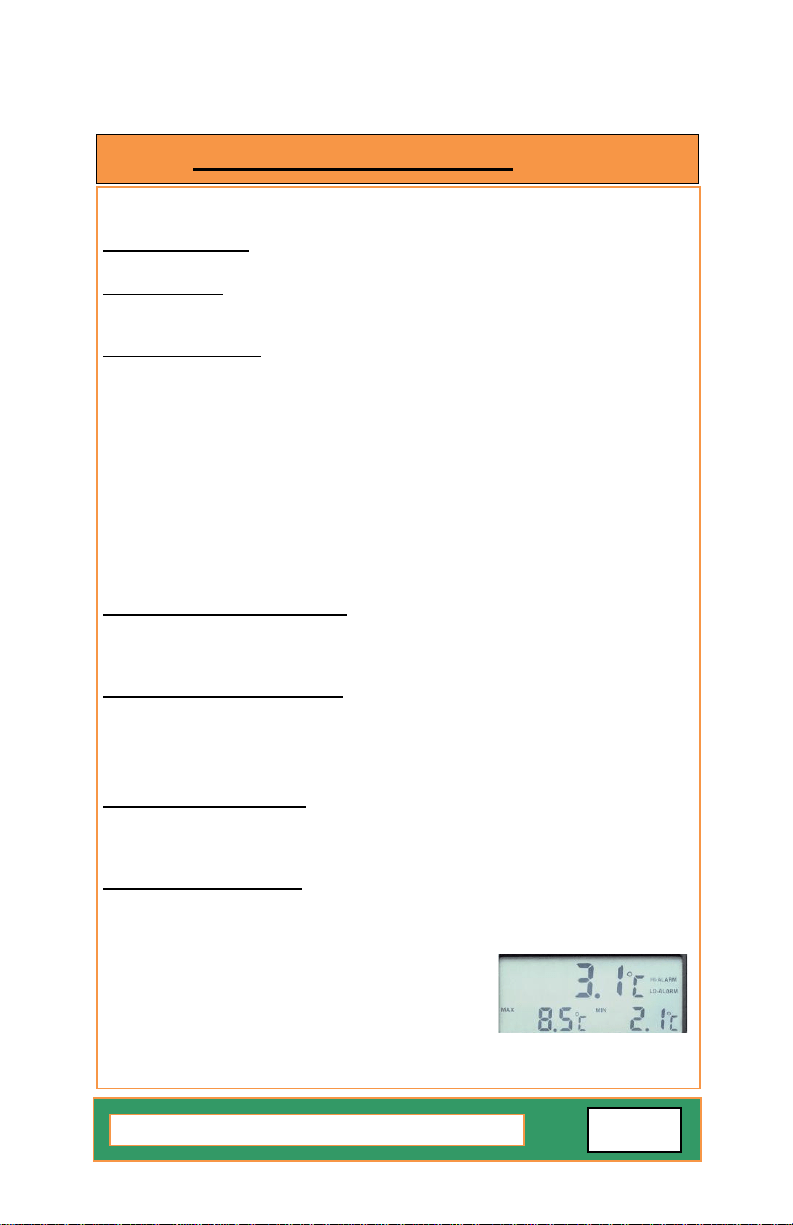
NOTE: For an activated high alarm and low
alarm buzzer, the display should indicate
HI-ALARM and LO-ALARM as shown here.
More details about the features and usage of the Thermometer/ Alarm can be
found in the User Manual accompanying the unit.
THERMOMETER / ALARM (cont’d)
Felix Storch, Inc.
Page 11

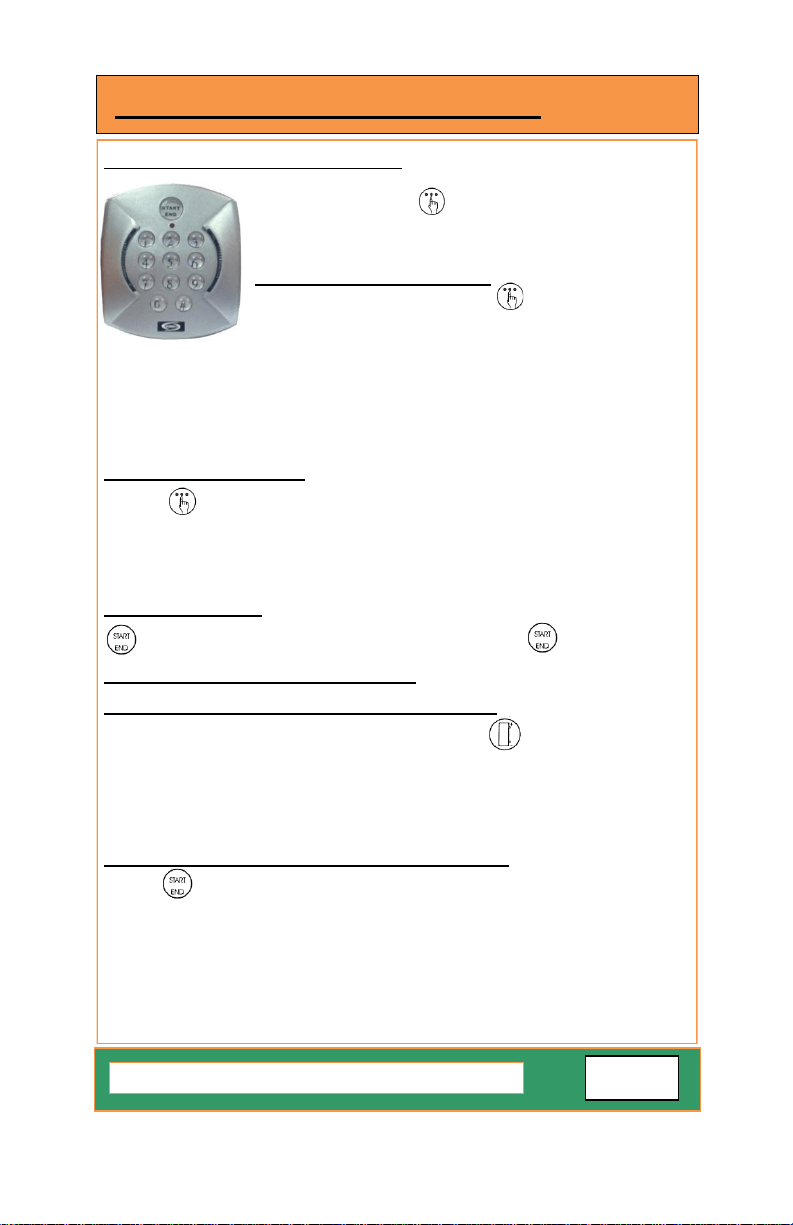
Factory-set default password:
The factory-set default password is 0123. If the
default password is lost, press the key (located inside
the battery box) for 30 seconds, then wait for the warning
sound which signifies the factory-set default password has
been restored.
To set the password: While door is open, press the
key (located inside the battery box) until it jingles,
enter the 0123 password, then # within 10 seconds to
confirm. Enter the password (1-16 digits), then press # again to confirm. A
total of 10 passwords can be set.
Note:
Each password starts with a number from 0 to 9 in order. The first password
starting
with 0 is the default password. For example, use 1xxx, then 2xxx
etc. for 10 users.
Changing password: While the door is open, press the key (located
inside the battery box) until it jingles, enter the old password and press #
within 10 seconds to confirm. Enter the new password, then press # to
confirm.
Note: The first digit cannot be changed.
To open the door: While the door is closed, press the key, enter the
password, then press again to confirm.
To lock door manually: Press #.
Function setting of automatic lock: Setting of the auto-lock time: Press the
key (inside the battery box), enter a number (any number between 10-
99), then press # to confirm. The auto-lock time can be set between 10-99
seconds after opening the door. If the time is set less than 10 seconds, the
door will not lock automatically, only manually.
Deleting the door-opening passwords: Press the key, enter default
password followed by 0000, then press # and all the door-opening passwords
will be deleted except for the default password.
Note: To access the battery box you need to remove only the two small
screws on the top and bottom of that cover. Do not remove the 4 screws
holding the keypad and cover to the appliance door.
KEYPAD LOCK (Optional on most models)
Felix Storch, Inc.
Page 12
NOTE: Models with BI in the model number are designed for built-in operation and need only
minimal clearance on the sides and above the units. All other models require 4 inches of
airflow on the sides and above the units. All models operate best when 2 inches is
provided between the rear wall and the back of the unit.
FCL44, SCF401SS Series
These are manual defrost all-freezers. No internal fans are present, and ice will build up along
the cooling coils. Periodically defrost the ice (recommended when the ice level reaches a
thickness of 1/4 to 1/2 inch). NEVER USE A METAL INSTRUMENT as you can damage the
cooling coils, which will void your warranty and often cannot be repaired. To defrost,
disconnect from the power supply, empty the contents, provide a tray in the bottom to collect
water, and use a hairdryer or other source of warm air to melt the ice (or leave the door open
and the power off for 24 to 48 hours).
For built-in (BI) models and clearance information, see Note above.
SCFF Series / SCFR Series
These models are chest freezers or chest refrigerators, all completely frost-free with forced air
cooling. No defrosting is normally needed. For best operation, allow free airflow within the
interior (do not overfill). The thermostat is located on the bottom rear on the right side of the
unit. Large sizes may have lid-activated lights. The lights will generate some heat, so be
careful to close lids securely to deactivate.
SCUF18, SCUF20, SCUR18, SCUR20
The thermostat for these models is located on the exterior top of the units, and is always digital
(see Page 10 for instructions). All units are fully frost-free and normally never require
defrosting. If supplied with casters (standard), operate with at least two in the locked position,
and never move units with contents inside. If supplied with 6-inch legs (optional), the hex nut
on the bottom of the legs can be rotated to level the unit.
VT, VLT Low-Temperature Freezer Models
These models are all manual defrost, upright or chest type freezers. Keep door closed for best
operation, and follow defrosting instructions for FCL44, SCF401SS Series models above. The
thermostats for these models are always digital, so follow directions on Page 10. VERY LOW
TEMPERATURE FREEZERS CAN DAMAGE UNPROTECTED SKIN, SO ALWAYS WEAR
GLOVES WHEN OPENING FREEZERS, AND NEVER DISCARD THE WARNING LABELS
ON THE FRONT OF THE FREEZER! These freezers will operate best when adequate airflow
is provided on the top, sides and rear of the unit. The compressor on some models is fan-
cooled, so be sure not to block the air vents on the compressor housing. The refrigerant in low
temperature freezers is different from that used in household appliances, so never have
unqualified technicians attempt to repair these units. These units will operate best under some
load, so try to avoid operating empty or nearly empty. If needed, fill with ice-packs to at least
25% of the volume of the freezer.
CP171MED
This model has a separate refrigerator (top) section with automatic defrost, and a freezer
(lower) section with manual defrost, each with its own compressor and thermostat for totally
independent control. The thermostats are both located on the top, on the exterior of the unit,
and are more easily accessed with the refrigerator door opened. This unit has no internal fans.
Defrost as needed (see FCL44, SCF401SS Series above). For clearance information, see
Note at the top of this page.
OPERATION OF SPECIFIC MODELS
Felix Storch, Inc.
Page 13

ABOUT THE FIXED SHELF
If you notice a problem with your appliance, try these solutions first to
avoid the cost of an unnecessary service call.
The appliance will not operate:
Has a fuse blown or circuit breaker tripped?
Replace the fuse or reset the circuit breaker.
Is the appliance defrosting (on some models)?
Recheck to see whether the unit is operating in 30 minutes. Frost-free models will
regularly run a defrost cycle.
There is water in the defrost drain pan (on some models):
Is the appliance defrosting?
The water will evaporate. It is normal for water to drip into the defrost pan.
Is it more humid than normal?
When it is humid, expect that the water in the defrost pan will take longer to evaporate.
The motor seems to run too much:
Is there excessive frost or a package preventing the door from closing?
Defrost and clean the appliance, or move the package so the door closes properly.
Is the room temperature warmer than normal?
The motor will run longer under warm conditions. At normal room temperatures, the motor
will run about 40% to 80% of the time. Under warmer conditions, it will run even more.
Has a large amount of contents just been added to the appliance?
Adding a large number of items warms the appliance. The motor normally will run longer to
cool the unit back down.
Is the door closed completely?
Push the door firmly shut. If it will not shut all the way, see The door will not close com-
pletely later in this section.
Are the condenser coils dirty (on some models)?
This prevents heat transfer and makes the motor work harder. Clean the condenser
coils.
Is the door gasket sealed all the way around?
If not, contact a qualified technician.
Felix Storch, Inc.
Page 14
TROUBLESHOOTING
In some units, the center shelf is fixed in place and cannot be removed.
This is because the glycol-filled bottle that contains the temperature
sensors for your alarm and thermometer is best stored in this location.
The center of your refrigerator or freezer will provide the most accurate
temperature readings. For proper temperature monitoring, keep the
bottles in place and do not remove this shelf.
Temperature is too warm:
Are the air vents blocked?
This prevents cold air movement. Move objects away from the air vents.
Is the door opened often?
Be aware that the appliance will warm up when this occurs. In order to keep the unit
cool, try to get everything you need out at one time. Keep contents organized so they
are easy to find and close the door as soon as the items are removed.
Has a large amount of contents just been added to the freezer?
Adding a large number of items warms the unit. It can take several hours for it to
return to normal temperature.
The door will not close completely or is difficult to open:
Are any packages blocking the door?
Rearrange containers so that they fit more tightly and take up less space.
Are the shelves or drawers out of position (on some models)?
Put the shelves and drawers back into their correct positions.
Note: If the problem is not due to any of the above, remember that the compressor on
your new appliance will operate longer than your old one due to its high-efficiency
motor.
TROUBLESHOOTING (cont’d)
ASSISTANCE OR SERVICE
Before calling for assistance or service, please check Troubleshooting. It
may save you the cost of a service call. If you still need help, follow the
instructions below.
When calling, please know the purchase date and the complete model
and serial numbers of your appliance. This information will help us to
respond better to your request.
Replacement Parts
If you need to order replacement parts, we recommend that you only use
factory-specified parts. Factory-specified parts will fit right and work right
because they are made with the same precision used to build every new
SUMMIT® appliance.
Call customer service toll free in the USA:
1-800-287-8799 Monday to Friday 9:00 a.m. – 5:00 p.m. (ET)
Order parts online at www.summitappliance.com/support
Felix Storch, Inc.
Page 15
ONE YEAR LIMITED WARRANTY FOR APPLIANCE
Within the 48 contiguous United States, for one year from the date of purchase, when this
appliance is operated and maintained according to instructions attached to or furnished with
the product, warrantor will pay for factory-specified parts and repair labor to correct defects in
materials or workmanship. Service must be provided by a designated service company.
Outside the 48 states, all parts are warranted for one year from manufacturing defects. Plastic
parts, shelves and cabinets are warranted to be manufactured to commercially acceptable
standards, and are not covered from damage during handling or breakage.
5-YEAR COMPRESSOR WARRANTY
1. The compressor is covered for 5 years.
2. Replacement does not include labor.
ITEMS WARRANTOR WILL NOT PAY FOR:
1. Service calls to correct the installation of your appliance, to instruct you how to use your appliance, to
replace or repair fuses or to correct wiring or plumbing.
2. Service calls to repair or replace appliance light bulbs or broken glass shelves. Consumable parts (such
as filters) are excluded from warranty coverage.
3. Damage resulting from accident, alteration, misuse, abuse, fire, flood, acts of God, improper installation,
installation not in accordance with electrical or plumbing codes, or use of products not approved by
warrantor.
4. Replacement parts or repair labor costs for units operated outside the United States.
5. Repairs to parts or systems resulting from unauthorized modifications made to the appliance.
6. Expenses for travel and transportation for product service in remote locations.
7. The removal and reinstallation of your appliance if it is installed in an inaccessible location or is not
installed in accordance with published installation instructions.
DISCLAIMER OF IMPLIED WARRANTIES – LIMITATION OF REMEDIES
CUSTOMER’S SOLE AND EXCLUSIVE REMEDY UNDER THIS LIMITED WARRANTY
SHALL BE PRODUCT REPAIR AS PROVIDED HEREIN. IMPLIED WARRANTIES,
INCLUDING WARRANTIES OF MERCHANTABILITY OR FITNESS FOR A PARTICULAR
PURPOSE, ARE LIMITED TO ONE YEAR. WARRANTOR SHALL NOT BE LIABLE FOR
INCIDENTAL OR CONSEQUENTIAL DAMAGES. SOME STATES DO NOT ALLOW THE
EXCLUSION OR LIMITATION OF INCIDENTAL OR CONSEQUENTIAL DAMAGES, OR
LIMITATIONS ON THE DURATION OF IMPLIED WARRANTIES OF MERCHANTABILITY OR
FITNESS, SO THESE EXCLUSIONS OR LIMITATIONS MAY NOT APPLY TO YOU. THIS
WARRANTY GIVES YOU SPECIFIC LEGAL RIGHTS AND YOU MAY ALSO HAVE OTHER
RIGHTS, WHICH VARY FROM STATE TO STATE.
WARRANTY
FELIX STORCH, INC.
770 Garrison Avenue
Bronx, New York 10474
Phone: (718) 893-3900
Fax: (844) 478-8799
www.summitappliance.com
For parts and accessory ordering,
troubleshooting and helpful hints,
visit:www.summitappliance.com/support
WARNING! This product may contain chemicals known to the state of California to
cause cancer or birth defects or other reproductive harm. For more information,
visit: www.summitappliance.com/prop65
Chemicals known by the manufacturer to be present in this product in
concentrations higher than threshold limits: NONE.
SÉCURITÉ de l'APPAREIL
Votre sécurité et celle des autres est très importante pour nous.
Nous donnons de nombreux messages de sécurité importants dans ce
manuel et sur votre appareil. Toujours lire et respecter les consignes de
sécurité.
Vous pouvez être gravement blessé ou même tué si vous ne suivez pas
les instructions.
Les messages de sécurité vous diront quel est le danger potentiel,
comment réduire le risque de blessure et ce qui peut arriver si les
instructions ne sont pas suivies.
Brancher sur une prise à 3 broches mise à la terre.
Ne pas enlever la broche de terre, ni utiliser un adaptateur 3/2.
Ne pas utiliser une rallonge.
Veiller à ne pas brancher dans les prises contrôlées par des
interrupteurs muraux.
Coupez l'alimentation avant l'entretien.
Après l'entretien, remplacer toutes les pièces et panneaux avant de
faire fonctionner.
Utiliser des nettoyants ininflammables.
Garder les matériaux et les vapeurs inflammables, tels que l'essence,
loin des appareils.
Utilisez deux personnes ou plus pour déplacer et installer l'appareil.
Les réfrigérateurs avec des tiroirs sont munis de supports anti-
basculement. Toujours installer avant de les utiliser.
Mise au rebut correcte de votre ancien appareil
Les anciens appareils peuvent représenter un danger d'étouffement
pour les enfants.
Enlever les portes de votre ancien appareil.
Laissez les étagères en place.
Si un ancien appareil contient des fluides frigorigènes, il doit être recyclé
par une entreprise de service ou de la cession sous licence.
CONSIGNES DE SÉCURITÉ IMPORTANTES
AVERTISSEMENT: Pour réduire le risque d'incendie, de choc
électrique ou de blessure lors de l'utilisation de votre appareil,
suivez ces précautions de base:
Felix Storch, Inc.
Page 17
INSTRUCTIONS d’INSTALLATION
Risque du poids excessif!
Utilisez deux ou plus personnes pour déplacer et installer
votre appareil. Défaut de le faire peut conduire aux blessures
de dos ou d'autres.
ATTENTION : Vous DEVEZ laisser l'appareil en position verticale pendant 24
heures avant de mettre-le en marche pour permettre au lubrifiant du
compresseur à drainer. Panne de le faire peut nuire le fonctionnement et
la longévité de l'unité.
1. Retirez les matériaux d'emballage.
2. Retirer le ruban adhésif et la colle des surfaces avant d'allumer
l'appareil. Frottez une petite quantité de savon à vaisselle liquide sur
l'adhésif avec vos doigts. Rincer à l'eau tiède et sécher.
3. Ne pas utiliser d'instruments tranchants, alcool à friction, de liquides
inflammables ou de nettoyants abrasifs pour enlever le ruban ou de la
colle. Ces produits peuvent endommager la surface de votre appareil.
4. Lorsque vous déplacez votre appareil :
Votre appareil est lourd. Lors du déplacement de l'appareil pour le
nettoyage ou le service, veiller à protéger le plancher. Toujours tirer
l'appareil tout droit lors du déplacement. Ne pas tortiller ou "marcher"
de l'appareil lorsque vous essayez de le déplacer, parce que les
dommages au sol peut se produire.
5. Nettoyer avant utilisation:
Après avoir enlevé tous les matériaux d'emballage, nettoyer l'intérieur
de votre appareil avant de l'utiliser. Voir les instructions de nettoyage
dans l’article Soins de votre appareil.
6. Certains modèles verticaux ont pieds de nivellement. Niveler comme
nécessaire au fonctionnement optimal.
7. Si votre appareil est équipé de roulettes, après avoir déménagé en
position, verrouiller les freins sur les roulettes fournies avec des
freins. Toujours déverrouiller avant de déplacer l'appareil pour le
nettoyage.
Verrouillage avec éjection de la clé (certains modèles)
Pour verrouiller ou déverrouiller l'appareil, vous devez détenir la clé dans
la serrure en tournant. La serrure est à ressort, de sorte que la clé ne
peut être laissée dans la serrure.
Si la clé est perdue, contactez votre revendeur ou SUMMIT APPLIANCE
pour un remplacement. Toujours donner le modèle et le numéro de série
de votre appareil lorsque vous demandez une clé de remplacement. Les
clés pour la plupart des modèles peuvent être commandées en ligne à
www.summitappliance.com/support
Felix Storch, Inc.
Page 18
EXIGENCES de POSITIONNEMENT
Garder les matériaux et les vapeurs inflammables, tels que
l'essence, loin des appareils. Défaut de le faire peut
entraîner un incendie, une explosion ou la mort.
IMPORTANT: Ne pas installer l'appareil près d'un four, radiateur ou autre
source de chaleur, ni dans un endroit où la température sera
inférieure à 40 ° F (5 ° C). Ne placez pas en plein soleil.
Vérifiez la force du plancher avant d'installer votre appareil. Il doit
supporter le poids d'un appareil entièrement chargé. Prévoyez au moins
1 "(2,5 cm) de l'espace aérien au-dessus et sur les deux côtés de
l'appareil et de 1" (2,5 cm) entre l'arrière de l'appareil et le mur. Si
l'appareil va être placé contre un mur, laissez un espace supplémentaire
sur le côté de la charnière de sorte que la porte peut ouvrir plus large que
sa largeur.
Remarque: Cet appareil peut être installé aux côtés des autres
appareils. Prévoir un dégagement de 3 "(7,5 cm) au sommet et sur
les côtés et ¼" (0,64 cm) entre les appareils. SI VOTRE MODÈLE A
LES LETTRES « BI » PAR LE SUFFIXE, IL EST CONCU POUR
L’USAGE ENCASTRÉ ET N’EXIGER DE L’ESPACE DE
DÉGAGEMENT SAUF A L'ARRIERE.
Risque de choc électrique !
Brancher sur une prise à 3 broches mise à la terre.
Ne pas enlever la broche à terre.
Ne pas utiliser un adaptateur.
Ne pas utiliser une rallonge.
Défaut de suivre ces instructions peut entraîner un incendie, un
choc électrique ou la mort.
Méthode de mise à la terre recommandée
Une alimentation électrique de 115 volts (CA seulement) 60 Hz mise à
terre avec un fusible ou disjoncteur de 15 ou 20 ampères est nécessaire.
Il est recommandé qu'un circuit distinct pour alimenter uniquement votre
appareil soit fourni. Utilisez prises de courant qui ne peuvent pas être
désactivées par un commutateur ou une chaîne de traction. Ne pas
utiliser une rallonge.
Felix Storch, Inc.
Page 19

NIVELER votre APPAREIL (certains modèles verticaux)
1. Repérez les deux pieds de nivellement avant qui peuvent être trouvés
parmi les matériaux d'emballage. Dans de nombreux modèles ces jambes
sont déjà montées dans la face inférieure de l'appareil.
2. Visser ces pieds dans les trous avant sur le fond de l'appareil. L'arrière de
l'appareil repose sur deux supports fixes. (Les modèles encastrés ont
aussi des pieds de niveau à l'arrière qui peuvent fournir le nivellement
plus précis).
3. Réglez les pieds avant, juste assez pour soulever l'armoire du plancher.
Note: Si votre modèle est équipé de roulettes avant, les pieds avant
devraient être abaissés assez pour soulever les rouleaux du plancher
pour assurer que l'appareil ne roule pas vers l'avant lorsque la porte
est ouverte.
4. Placez un outil de nivellement sur le dessus de l'appareil, le premier côté
à l'autre, puis avant à l'arrière. Tourner le pied vers la gauche pour
soulever un coin. Tournez vers la droite pour abaisser un coin.
5. Répétez l'étape 4 jusqu'à ce que l'appareil est de niveau.
6. Après l'appareil est complètement chargé, vérifiez avec le niveau comme
à l'étape 4.
7. Si votre appareil est équipé de roulettes, les deux roulettes avant sont
équipées de freins pour éviter de roulement. Garder les freins bloqués, et
déverrouiller pour déplacer seulement.
UTILISATION de l'APPAREIL
Afin d'assurer la bonne température, vous avez besoin pour permettre une
ventilation adéquate dans l'appareil. Ne pas bloquer les orifices d'aération. Si
les évents sont bloqués, le flux d'air sera empêché, et les problèmes de
température et d'humidité peut se produire. Toujours positionner le contenu
de manière à permettre l'air de circuler entre les étagères ou des
paniersAllow the appliance to cool at least 6 to 8 hours before adding
contents. Allow 24 hours for temperature to stabilize.
Note: Lorsque l'appareil est mis sous tension pour la permière fois, le
compresseur fonctionne constamment, jusqu'à ce que l'appareil est
refroidi. Il peut falloir de 6 à 8 heures (ou plus), en fonction de la
température ambiante et du nombre de fois que la porte de l'appareil est
ouverte. Après l'appareil est refroidi, le compresseur se met en marche et
s'arrête comme requis, pour maintenir l'appareil à la bonne température.
Pour une performance optimale de la température, il est recommandé
que cette unité soit au moins 30% de la pleine pendant l'utilisation. Si
vous utilisez cet appareil uniquement pour stocker de petites charges,
nous recommandons d'ajouter quelques bouteilles d'eau ou des sacs
réfrigérants pour assurer la stabilité de la température.
L'extérieur de votre appareil peut être chaude. C'est normal. La conception et
la fonction principale de l'appareil est d'évacuer la chaleur du colis et l'espace
aérien à l'intérieur de l'appareil. La chaleur est transférée à l'air de la pièce,
ce qui rend l'extérieur de l'appareil se sentir au chaud. (Dans certains
modèles, le condensateur qui devient chaud est juste à l'intérieur des parois
latérales, faisant de ces murs chaud au toucher.)
Felix Storch, Inc.
Page 20
INVERSION de l’OUVERTURE de la PORTE
(certains modèles)
Si vous constatez que la direction de l'ouverture de la porte sur votre appareil est
incommode, vous pouvez le changer. Les trous de l'autre côté ont déjà été
préparés en usine.
Pour les unités à deux portes :
Enlevez le couvercle de la charnière supérieure de la
porte supérieure et enlevez les vis qui fixent la
charnière supérieure.
Soulevez la charnière droite pour dégager l'axe
d'articulation de son support dans le haut de la porte.
Soulevez la porte supérieure pour libérer sa douille de
fond de l'axe d'articulation sur le support de la
charnière centrale.
Retirez les vis de la charnière centrale pour libérer son
axe de la partie supérieure de la porte inférieure.
Soulevez la porte haut et loin de l'axe de la
charnière inférieure.
Retirez les vis de la charnière inférieure.
Retirez les capuchons décoratifs de l'autre côté et
installez la charnière inférieure. Bouchez les trous
du côté d'origine avec les capuchons décoratifs.
Replacez la porte sur l'axe de la charnière
inférieure, puis installez la charnière centrale dans
la porte inférieure.
Insérez les vis dans la charnière centrale et
bouchez les trous sur le côté inverse.
Remplacez la porte supérieure sur le pivot central.
Insérez les vis dans la charnière supérieure et serrez.
Pour les unités à une porte :
Enlevez le couvercle de la charnière supérieure
de la porte et enlevez les vis qui maintiennent la
charnière supérieure.
Soulevez la charnière droite pour dégager l'axe
d’articulation de la douille dans la partie
supérieure de la porte.
Soulevez la porte haut et loin de libérer
sa douille en bas de la axe de la charnière.
Retirer les vis de la charnière inférieure.
Retirez les capuchons décoratifs du côté opposé et boucher les trous de la
côté original avec les capuchons décoratifs.
Déplacez la charnière inférieure du côté opposé et
serrez les vis. Installez les rondelles de blocage et
les écrous s’ils ont été utilisés dans l'installation
d'origine.
Replacez la porte sur l'axe de la charnière
inférieure. Placez la charnière supérieure dans la
porte. Insérez les vis dans la charnière supérieure
et serrez.
Charnière
supérieure
Axe de
charnière
Rondelle en
plastique
Installation
de la charnière
sur le côté droit
Installation
de la charnière
sur le côté gauche
Axe de
charnière
Rondelle en
plastique
Felix Storch, Inc.
Page 21
SOINS de l'APPAREIL
Nettoyage d'un appareil sans givre
(y compris les modèles commençant par SCFF, SCFR, SCUF, SCUR)
Utiliser des nettoyants ininflammables.
Sans givre signifie que vous n'avez pas besoin de dégivrer votre appareil. Le givre
est éliminé par le déplacement de l'air qui collecte de l'humidité et dépose-la sur le
serpentin de refroidissement. Le serpentin de refroidissement se réchauffe
périodiquement assez pour faire fondre le givre, et l'eau coule alors vers le bac de
vidange (situé derrière la grille de base) où elle est évaporée.
Nettoyage complet doit être effectué au moins une fois par an.
1 Débrancher l'appareil ou couper le courant.
2 Retirer tous les contenus.
3 Laver les parois intérieures avec une solution de détergent doux dans de l'eau
tiède ou 2 cuillères à soupe (26 g) de bicarbonate de soude à 2 pintes (0,95 L)
d'eau tiède.
Ne pas utiliser des nettoyants abrasifs tels que les nettoyants pour les
vitres, nettoyants à récurer, liquides inflammables, cires nettoyantes,
détergents concentrés, eaux de Javel ou nettoyants contenant du pétrole
sur les pièces en plastique, l'intérieur, ou la doublure ou le joint de la porte.
Ne pas utiliser des serviettes en papier, tampons à récurer ou autres outils
de nettoyage abrasifs. Ceux-ci peuvent rayer ou endommager les surfaces.
4 Rincer bien et sécher avec un chiffon doux et propre.
5 Utiliser la méthode de nettoyage appropriée pour la finition extérieure.
Métal peint: Laver les surfaces extérieures avec une éponge propre ou un
chiffon doux et un détergent doux dans de l'eau chaude. Ne pas utiliser des
nettoyants abrasifs ou de produits conçus pour l'acier inoxydable. Sécher
soigneusement avec un chiffon doux. Pour une protection supplémentaire
contre les dommages aux surfaces métalliques extérieures peintes,
appliquer de la cire d'appareils (ou de la cire en pâte pour les autos) avec
un chiffon doux et propre. Ne pas cirer les pièces en plastique.
6 Branchez l'appareil ou rebranchez l'alimentation.
7 Remplacer tous les conteneurs.
Nettoyage d'un appareil avec dégivrage de cycle ou manuel
Modèles de dégivrage de cycle utilisent un système où la glace se forme sur la
paroi arrière et fond lorsque le compresseur est éteint. Modèles de dégivrage
manuel accumulent continuellement de la glace sur les parois intérieures.
NE JAMAIS UTILISER UN OBJET MÉTALLIQUE pour enlever la glace de la paroi
arrière. Si nécessaire, utiliser un grattoir en plastique ou un sèche-cheveux.
Nettoyer les surfaces en utilisant les mêmes instructions que pour les modèles
sans givre.
Pour les modèles CSS (en acier inoxydable complètement), utiliser
uniquement des produits de nettoyage fabriqués spécialement pour l'acier
inoxydable.
Felix Storch, Inc.
Page 22
SOINS de l'APPAREIL (suite)
Grille de base (certains modèles)
Pour retirer et remplacer la grille de base :
1. Ouvrez la porte de l'appareil et retirer la grille de base en tirant vers le
bas et dehors par le haut.
2. Remplacer la grille de base en mettant les agrafes dans les
ouvertures dans le panneau de l'appareil. Poussez jusqu'à ce que la
grille de base se mette en place.
Changement de l'ampoule (certains modèles)
NOTE: Pas toutes les ampoules d’appareil sont convenables à votre
appareil. Remplacer par une ampoule de la même taille, la forme, la
taille et la puissance de base. Vous pouvez acheter des bulbes à
www.summitappliance.com/support
1. Débranchez l'appareil ou coupez le courant.
2. Retirez le pare-lumière. La plupart des modèles ne nécessitent pas
d'outils.
3. Remplacez l'ampoule par une ampoule d'appareil de même puissance.
4. Remplacez le pare-lumière.
5. Branchez l'appareil ou rebranchez l'alimentation.
Perte d'alimentation
Après le courant est rétabli, débranchez l'appareil pendant 30 minutes
pour permettre au système de réfrigération de s'égaliser. Pendant ce
temps, garder la porte fermée autant que possible.
Rappelez-vous: Un appareil plein restera froid plus longtemps qu'un
partiellement rempli.
Soins de déménagement
1. Retirez tous les conteneurs.
2. Débranchez l'appareil.
3. Nettoyez-le soigneusement.
4.Scotchez l'appareil fermé et scotchez le cordon électrique à l'armoire.
Lorsque vous arrivez à le nouvel emplacement, reportez-vous aux
sections Instructions d'installation et Sélection de la température pour des
informations sur l'installation et le réglage des commandes.
Felix Storch, Inc.
Page 23
SELECTION de la TEMPÉRATURE
Votre appareil peut avoir un thermostat mécanique (dial) ou
numérique. Instructions de cadran sont ci-dessous.
Instructions numériques sont à la page suivante.
POUR RÉGLER le THERMOSTAT
Votre appareil peut être contrôlé par un thermostat situé à
l'intérieur de l'unité, vers le coin à droite. Tournez le bouton dans
le sens horaire à partir de la position STOP (0) (Arrêt) vers les
numéros plus élevés pour des températures plus froides.
Commandes de température
Des réglages plus élevés sur le bouton (de nombres plus élevés
indiquent des températures plus basses) (pus froides) dans tous les
compartiments de l'appareil. La température à l'intérieur d'un
réfrigérateur peut même descendre en dessous de 32 ° F. Utilisez plus
élevés réglages du thermostat uniquement lorsque requis ou
recommandés. Lorsque la température ambiante est normale, nous
recommandons un réglage moyen.
Les changements de la température ambiante aura une incidence sur
la température à l'intérieur de l'appareil, donc gardez cela à l'esprit
lorsque vous choisissez le réglage du bouton de thermostat.
Dans la position STOP (0), l'appareil ne fonctionne pas (le système de
refroidissement est éteint), mais l'alimentation ne soit pas interrompue
(la lumière est allumée lorsque vous ouvrez la porte du réfrigérateur).
Les températures dans le réfrigérateur et dans le compartiment
congélateur dépendent aussi de combien de fois que vous ouvrez la
porte.
Dans tous les petits réfrigérateurs et congélateurs sans ventilateurs
intérieurs, les températures sont plus froides près du fond, et parfois
près de l'arrière. Placer le contenu en conséquence.
Pour une performance optimale de la température, il est recommandé
que cette unité soit au moins 30% de la pleine pendant l'utilisation. Si
vous utilisez cet appareil uniquement pour stocker de petites
charges, nous recommandons d'ajouter quelques bouteilles d'eau ou
des sacs réfrigérants pour assurer la stabilité de la température.
Felix Storch, Inc.
Page 24
Chaque unité est équipée d'un thermomètre / alarme qui affiche simultanément
les températures intérieures minimales, maximales et
actuelles et fournit un signal visuel et sonore lorsque la
température à l'intérieur de l'appareil tombe en dehors de la
plage de consigne de température.
Le capteur de température, ou sonde, est enfermé dans une
bouteille remplie de glycol que vous insérez dans
l'emplacement à surveiller, comme l'intérieur d'un
réfrigérateur ou un congélateur, une fois que l'appareil a été
programmé. Le thermomètre / alarme lui-même peut être attaché à la porte de
l'appareil avec l'aimant sur l’arrière, ou il peut être placé sur une table ou une
étagère pratique.
L'alimentation du thermomètre traçable / alarme est fournie avec une batterie de
disulfure de fer et de lithium avec une durée de vie de 10 ans. Quand elle est
insérée correctement, l'appareil émet un bip et tous les segments de l'écran LCD
sera activés temporairement. (Notez que les températures d'alarme devront être
remis après le remplacement de la batterie.)
L'affichage de température peut être commuté entre Celsius (° C) et Fahrenheit
(° F) en faisant coulisser le bouton ° C / ° F situé à l'arrière de l'unité.
INSTRUCTIONS pour le THERMOSTAT NUMÉRIQUE
Si vous constatez qu'il est nécessaire de changer le réglage du thermostat
numérique de votre appareil, référez-vous aux instructions suivantes. Le panneau
avant du thermostat est illustré ici:
Pour voir le SET point (point de consigne) :
Presser et relâcher immédiatement la touche SET. L'écran affiche la valeur du
SET point. Attendre 5 secondes et la valeur de la sonde affichera à nouveau.
Pour changer le SET point :
Appuyez et maintenez la touche SET pendant plus de 3 secondes pour changer la
valeur du SET point. Cette valeur sera affichée et la LED "flocon de neige" se met
à clignoter.
Pour changer la valeur du SET point :
Poussez la flèche HAUT ou BAS à la position désirée. Le nouveau réglage sera
mémorisé après 15 secondes, à condition qu'aucune d'autres touches sont
poussées.
Note: La gamme minimum et maximum de votre thermostat est préréglée et
verrouillée par nous, donc elle ne peut pas être facilement déplacée
accidentellement entre les températures du congélateur et du
réfrigérateur. Pour réinitialiser ce verrouillage de la gamme, soit nous
appeler ou trouver de l'information sur notre site Web, sous
Troubleshooting (Dépannage).
melting
snowflake
UP & DOWN arrows
SET key
snowflake
touche SET (Réglage)
flocon
de neige
flocon de neige
de fusion
flèches HAUT et BAS
THERMOMETRE / ALARME
Felix Storch, Inc.
Page 25
THERMOMETRE TRAÇABLE / ALARME (suite)
Fonction des commandes :
Touche MODE / RESET : Appuyez une fois pour réinitialiser enregistrement de
température max / min. Lorsque l'appareil sonne une alarme, appuyez une fois
pour éteindre le signal sonore.
Touche HIGH/LOW : Appuyez une fois pour afficher le réglage de l'alarme haute.
Appuyez deux fois pour afficher le réglage de l'alarme basse. Appuyez trois fois
pour afficher la lecture de la température actuelle.
Touche ALERT ON/OFF : Lorsque l'appareil sonne une alarme, appuyez une fois
pour l'éteindre. Cependant, l'alarme haute ou l’alarme basse seront toujours
clignoter jusqu'à ce que la température remonte à la normale ou la fonction
d'alarme est éteinte.
Programmation des alarmes :
Le thermomètre affiche la température interne de l'appareil surveillé, aussi bien
que les températures maximales et minimales atteintes. Les relevés maximum et
minimum reflètent les températures les plus élevées et les plus basses depuis la
batterie a été introduite ou depuis la dernière pression de la touche MODE /
RESET. Si la température monte au-dessus ou tombe en dessous de la plage de
consigne de température, l'alarme retentit. Par défaut, le réglage d'alarme de la
température élevée est de 8 ° C (46,4 ° F) et le réglage d'alarme à basse
température est de 2 ° C (35,6 ° F). Pour réinitialiser ces limites, suivez ces
instructions :
Réglage d'alarme de la température haute : Appuyez sur la touche HIGH / LOW
une fois, puis appuyez sur MODE / RESET pour entrer dans le mode de
réglage d'alarme de la température haute. Utilisez les flèches HAUTE et
BASSE pour régler la température en conséquence. Appuyez sur MODE /
RESET une fois de plus pour confirmer le réglage.
Réglage d'alarme à basse température : Appuyez sur la touche HIGH / LOW deux
fois, puis appuyez sur MODE / RESET pour entrer dans le mode de réglage
d'alarme de la température basse. Utilisez les flèches HAUTE et BASSE pour
régler la température en conséquence. Appuyez sur MODE / RESET une fois
de plus pour confirmer le réglage.
Par défaut, les alarmes hautes et basses doivent être audibles. Pour activer les
alarmes ON / OFF:
Audible réglage d'alarme haute : Pour vous assurer que l'alarme haute est audible,
appuyez sur la touche HIGH / LOW une fois (pour activer HI-SET sur l'écran).
Puis appuyez sur la touche ALERT ON / OFF une fois pour activer le bip sonore
HAUTE ALARME. Appuyez de nouveau pour désactiver.
Audible réglage d'alarme basse : Pour vous assurer que l'alarme basse est
audible, appuyez sur la touche HIGH / LOW deux fois (pour activer LOW-SET
sur l'écran). Puis appuyez sur la touche ALERT ON / OFF une fois pour activer
le bip sonore BASSE ALARME. Appuyez de nouveau pour désactiver.
NOTE: Pour une sonnerie d'alarme haute et
basse activée, l'affichage doit indiquer HI-
ALARM et LO-ALARM comme indiqué ici.
Plus de détails sur les caractéristiques et l'utilisation du thermometre / alarme
peuvent être trouvés dans le manuel d'utilisation accompagnant l'unité.
Felix Storch, Inc.
Page 26
Mot de passe par défaut réglé en usine:
Le mot de passe par défaut réglé en
usine est 0123. Si le mot de passe par défaut est perdu,
appuyez sur la touche (située à l'intérieur de la boîte de
la batterie) pendant 30 secondes, puis attendre le signal
sonore d'avertissement qui signifie que le mot de passe par
défaut réglé en usine a été restauré.
Pour fixer le mot de passe: Alors que la porte est
ouverte, appuyez sur la touche (située à l'intérieur de
la boîte de la batterie) jusqu'à ce qu'elle tinte, entrez le
mot de passe 0123, puis sur # dans les 10 secondes
pour confirmer. Entrez le mot de passe (1-16 chiffres),
puis appuyez sur # pour confirmer. Un total de 10 mots
de passe peut être réglé.
Note:
Chaque mot de passe commence avec un nombre de 0 à 9 dans l'ordre. Le
premier mot de passe à partir de 0 est le mot de passe par défaut. Par
exemple, utiliser 1xxx, puis 2xxx, etc. pour 10 utilisateurs
.
Changer le mot de passé : Alors que la porte est ouverte, appuyez sur la
touche (située à l'intérieur de la boîte de la batterie) jusqu'à ce qu'elle
tinte, entrez l'ancien mot de passe et appuyez sur # dans les 10 secondes
pour confirmer. Entrez le nouveau mot de passe, puis appuyez sur # pour
confirmer.
Note: Le premier chiffre ne peut être modifié.
Pour ouvrir la porte : Alors que la porte est fermée, appuyez sur la touche
, entrez le mot de passe, puis appuyez encore sur pour confirmer.
Pour verrouiller la porte manuellement : Appuyez sur #.
Réglage de fonction de verrouillage automatique : Réglage du temps de
verrouillage automatique: Appuyez sur la touche (à l'intérieur du boîtier
de la batterie), entrez un nombre (un nombre compris entre 10-99), puis
appuyez sur # pour confirmer. Le temps de verrouillage automatique peut
être réglé entre 10-99 secondes après l'ouverture de la porte. Si le temps est
situé à moins de 10 secondes, la porte ne se verrouille pas automatiquement
que manuellement.
Supprimer les mots de passe d'ouverture de porte : Appuyez sur la
touche , entrez le mot de passe par défaut suivi par 0000, puis appuyez
sur # et tous les mots de passe d'ouverture de porte seront supprimés à
l'exception du mot de passe par défaut.
Note: Pour accéder à la boîte de la batterie, vous devez supprimer
uniquement les deux petites vis sur le haut et le bas de cette couverture.
Ne pas retirer les 4 vis qui maintiennent le clavier et le couvercle à la porte
de l'appareil.
VEROUILLAGE du CLAVIER ( facultatif )
Felix Storch, Inc.
Page 27
FONCTIONNEMENT des MODÈLES SPÉCIFIQUES
NOTE: Modèles avec BI dans le numéro de modèle sont conçus pour un fonctionnement
intégré et ont besoin seulement un jeu minimal sur les côtés et au-dessus de l'unité. Tous
les autres modèles nécessitent 4 pouces de flux d'air sur les côtés et au-dessus des
unités. Tous les modèles fonctionnent mieux quand 2 pouces est prévu entre la paroi
arrière et l'arrière de l'appareil.
Séries FCL44, SCF401SS
Ce sont des congélateurs à dégivrage manuel. Pas de ventilateurs internes sont présents, et
la glace vont s'accumuler le long des serpentins de refroidissement. Périodiquement dégivrer
la glace (recommandé lorsque le niveau de la glace atteint une épaisseur de 1/4 à 1/2 pouce).
NE JAMAIS UTILISER UN INSTRUMENT DE METAL comme vous pouvez endommager les
serpentins de refroidissement, ce qui annulera votre garantie et souvent ne peuvent pas être
réparés. Pour dégivrer, déconnecter de l'alimentation, vider le contenu, fournir un plateau dans
le fond pour recueillir l'eau, et utiliser un sèche-cheveux ou une autre source d'air chaud pour
faire fondre la glace (ou laisser la porte ouverte et l'appareil hors tension pour 24 à 48 heures).
Pour les modèles intégrés (BI) et des informations d'espace, voir la note ci-dessus.
Séries SCFF / Séries SCFR
Ces modèles sont congélateurs ou réfrigérateurs horizontaux, tous complètement sans givre
avec un refroidissement par air forcé. Pas de dégivrage est normalement nécessaire. Pour un
fonctionnement optimal, laisser l'air circuler libre à l'intérieur (ne remplissez pas trop). Le
thermostat est situé à l'arrière en bas sur le côté droit de l'appareil. Les grandes tailles peuvent
avoir des lumières activées par couvercle. Les lumières se produisent un peu de chaleur, donc
soyez prudent de fermer les couvercles solidement pour désactiver.
SCUF18, SCUF20, SCUR18, SCUR20
Le thermostat pour ces modèles est situé sur le sommet extérieur des unités, et est toujours
numérique (voir page 25 pour les instructions). Toutes les unités sont entièrement sans givre
et, normalement, ne nécessitent pas de dégivrage. Si fourni à roulettes (standard), faire
marcher avec au moins deux dans la position verrouillée, et de ne jamais déplacer des unités
avec des contenus à l'intérieur. Si fourni avec des pieds 6 pouces (en option), l'écrou
hexagonal sur le bas des jambes peut être tourné pour niveler l'unité.
Congélateurs VL, VLT de basse température
Ces modèles sont tous des congélateurs de type vertical ou horizontal avec dégivrage
manuel. Garder la porte fermée pour un fonctionnement optimal, et suivre les instructions de
dégivrage pour les modèles FCL44 et SCF401SS ci-dessus. Les thermostats pour ces
modèles sont toujours numérique, donc suivre les indications de la page 25. Les
congélateurs de très basse température peuvent endommager la peau non protégée,
donc toujours porter des gants quand vous ouvrez ces congélateurs et ne jetez jamais
les étiquettes d'avertissement sur l'avant du congélateur! Ces congélateurs fonctionnent
mieux quand une ventilation adéquate est fournie sur le dessus, les côtés et l'arrière de
l'appareil. Le compresseur sur certains modèles est refroidi par un ventilateur, donc soyez sûr
de ne pas bloquer les orifices d'aération sur le boîtier du compresseur. Le fluide frigorigène
dans les congélateurs de basse température est différent de celui utilisé dans les appareils
ménagers, si ne jamais permettre des techniciens non qualifiés tenter de réparer ces unités.
Ces unités fonctionnent mieux sous une certaine charge, alors essayez d'éviter d'opérer vides
ou presque vides. Si nécessaire, remplir avec des cryosacs à au moins 25% du volume du
congélateur.
CP171MED
Ce modèle dispose d'une section de réfrigérateur séparée avec dégivrage automatique sur le
dessus, et une section de congélateur avec dégivrage manuel ci-dessous, chacune avec son
propre compresseur et thermostat pour le contrôle totalement indépendant. Les thermostats
sont tous deux situés sur le dessus, à l'extérieur de l'appareil, et sont plus facilement
accessibles avec la porte du réfrigérateur ouverte. Cet appareil n'a pas de ventilateurs
internes. Décongeler au besoin (voir Séries FCL44, SCF401SS ci-dessus). Pour plus
d'informations de dégagement, voir la Note en haut de cette page.
Felix Storch, Inc.
Page 28
À PROPOS du RAYON FIXE
Si vous constatez un problème avec votre appareil, essayez ces solutions
d'abord pour éviter le coût d'une visite de service inutile.
L’appareil ne fonctionne pas :
Le fusible a sauté ou le disjoncteur est déclenché?
Remplacer le fusible ou réenclencher le disjoncteur.
Est-ce que l'appareil dégivre (sur certains modèles)?
Vérifiez à nouveau pour voir si l'appareil fonctionne en 30 minutes. Les modèles sans
givre exécuteront régulièrement un cycle de dégivrage.
Il y a de l'eau dans le bac de récupération de dégivrage (sur certains
modèles):
Est-ce que l'appareil dégivre?
L'eau va s'évaporer. Il est normal que l'eau dégoutte dans le bac de dégivrage.
Est-il plus humide que la normale?
Quand il est humide, attendez que l'eau dans le bac de dégivrage prendra plus de temps
à s'évaporer.
Le moteur semble fonctionner excessivement :
Y a-t-il trop de givre ou d'un package empêcher la porte de se fermer?
Dégivrer et nettoyer l'appareil, ou déplacer le paquet pour que la porte se ferme
correctement.
Est-ce que la température ambiante est supérieure à la normale?
Le moteur fonctionnera plus longtemps dans des conditions chaudes. À des températures
ambiantes normales, le moteur fonctionne environ 40% à 80% du temps. Dans des
conditions plus chaudes, il fonctionnera encore plus.
Est-ce qu’une grande quantité de contenu vient d'être ajoutée à l'appareil?
L'ajout d'un grand nombre d'éléments réchauffe l'appareil. Normalement le moteur
fonctionnera plus longtemps refroidir l'unité de nouveau.
La porte est-elle complètement fermée?
Poussez la porte bien fermée. Si elle ne ferme pas complètement, voir La porte ne ferme
pas complètement loin dans cette section.
Felix Storch, Inc.
Page 29
DÉPANNAGE
Dans certaines unités, le rayon central est fixé en place et ne peut pas
être enlevé. Ceci est parce que la bouteille remplie de glycol qui contient
les capteurs de température pour votre alarme et thermomètre est le
mieux placée à cet endroit. Le centre de votre réfrigérateur ou congélateur
fournira des relevés de température les plus précis. Pour un bon suivi de
la température, maintenir la bouteille en place et ne pas enlever ce rayon.
Est-ce que les serpentins du condenseur sont sales (sur certains modèles)
Cela empêche le transfert de chaleur et rend le travailler davantage le moteur. Nettoyez
les serpentins du condenseur.
Est le joint de la porte scellé tout autour?
Sinon, contacter un technicien qualifié.
La température est trop chaude :
Sont les fentes d'aération obstruées?
Cela empêche la circulation d'air froid. Déplacer des objets à l'écart des fentes d'aération.
Est-ce que la porte est souvent ouverte?
Il faut savoir que l'appareil se réchauffer lorsque cela se produit. Afin de maintenir l'unité
cool, essayer d'obtenir tout ce dont vous avez besoin en une seule fois. Garder le contenu
organisé de sorte qu'ils sont faciles à trouver et fermer la porte dès que les éléments sont
supprimés.
Est-ce que la porte est souvent ouverte?
Il faut savoir que l'appareil se réchauffe lorsque cela se produit. Afin de maintenir l'unité
fraîche, essayer d'obtenir tout ce dont vous avez besoin en une seule fois. Garder le
contenu organisé de sorte qu'ils soient faciles à trouver et fermer la porte dès que les
éléments sont supprimés.
Est-ce qu'une grande quantité de contenu vient d'être ajoutée au congélateur?
L'ajout d'un grand nombre d'éléments réchauffe l'unité. Il peut prendre plusieurs heures
pour qu'elle revienne à une température normale.
La porte ne ferme pas complètement ou est difficile à ouvrir :
Sont des packages de blocage de la porte?
Réorganiser les contenants de sorte qu'ils soient plus rapprochés et prennent moins de
place.
Sont les étagères ou tiroirs hors de position (sur certains modèles)?
Retourner les étagères et les tiroirs à leurs positions correctes.
Note: Si le problème n'est pas attribuable à ceux ci-dessus, rappelez-vous que le
compresseur sur votre nouvel appareil fonctionnera plus que l'ancien grâce à son
moteur à haut rendement.
DÉPANNAGE (suite)
Felix Storch, Inc.
Page 30
ASSISTANCE OU SERVICE
Felix Storch, Inc.
Page 31
Avant de demander une assistance ou un service, s'il vous plaît
consulter la section Dépannage. Elle peut vous faire économiser le coût
d'un appel de service. Si vous avez encore besoin d'aide, suivez les
instructions ci-dessous.
Lorsque vous appelez, s'il vous plaît connaître la date d'achat et le
modèle et le numéro de série de votre appareil. Cette information nous
aidera à mieux répondre à votre demande.
Pièces de remplacement
Si vous avez besoin de commander des pièces de remplacement, nous
vous recommandons d'utiliser uniquement des pièces spécifiées
d'usine. Les pièces spécifiées d'usine conviendront et fonctionneront
bien parce qu'elles sont fabriquées avec la même précision utilisée pour
fabriquer chaque nouvel appareil de SUMMIT®.
Pour le service à la clientèle, composez sans frais aux États-Unis:
1-800-287-8799 lundi à vendredi 9:00-à-17h00 (HE)
Commander des pièces en ligne à
www.summitappliance.com/support
GARANTIE LIMITÉE
UN AN DE GARANTIE LIMITÉE
Dans les 48 États américains contigus, pendant un an à partir de la date d'achat, lorsque cet
appareil est utilisé et entretenu conformément aux instructions jointes à, ou fournies avec le
produit, le garant paiera pour les pièces spécifiées en usine et pour la main-d’œuvre pour
corriger les vices de matériaux ou de fabrication. Le service doit être fourni par une compagnie
de service désignée. En dehors des 48 États, toutes les pièces sont garanties pendant un an
pour les défauts de fabrication. Les pièces en plastique, étagères et armoires sont garanties
être fabriqués conformément aux normes acceptées dans le commerce et ne sont pas
couvertes contre les dommages ou le bris pendant la manipulation.
GARANTIE DU COMPRESSEUR DE 5 ANS
1. Le compresseur est couvert par la garantie pendant 5 ans.
2. Le remplacement n'inclut pas la main-d’œuvre.
LE GARANT NE SERA PAS TENU DE PAYER POUR CES POINTS :
1. Les appels de service pour rectifier l'installation de votre appareil, pour vous indiquer
comment utiliser votre appareil, remplacer ou réparer des fusibles ou rectifier le câblage ou
la plomberie.
2. Les appels de service pour réparer ou remplacer des ampoules ou des étagères cassées.
Les pièces à usure (telles que des filtres) sont exclues de la couverture de la garantie.
3. Les dommages résultant d'un accident, modification, usage impropre ou abusif, incendie,
inondation, actes de Dieu, mauvaise installation, une installation non conforme aux codes
d'électricité ou de plomberie, ou l'utilisation de produits non approuvés par le garant.
4. Les pièces de rechange ou les frais de réparation pour les appareils utilisés hors des États-
Unis.
5. Les réparations aux pièces ou systèmes résultant de modifications non autorisées
apportées à l'appareil.
6. Les frais de déplacement et de transport pour le service produit dans des endroits éloignés.
7. Le retrait et la réinstallation de votre appareil s’il est installé dans un endroit inaccessible ou
n'est pas installé conformément aux instructions d'installation.
EXCLUSION DE GARANTIES IMPLICITES; LIMITATION DES RECOURS
LE SEUL ET UNIQUE RECOURS DU CLIENT EN VERTU DE CETTE GARANTIE LIMITÉE EST LA
RÉPARATION DU PRODUIT TEL QUE PRÉCÉDEMENT DÉCRIT. GARANTIE IMPLICITE, Y
COMPRIS LES GARANTIES DE QUALITÉ MARCHANDE OU D'ADÉQUATION À UN USAGE
PARTICULIER, SONT LIMITÉES À UN AN. LE GARANT NE SERA PAS RESPONSABLE DES
DOMMAGES DIRECTS OU INDIRECTS. CERTAINS ÉTATS NE PERMETTENT PAS L'EXCLUSION
OU LA LIMITATION DES DOMMAGES DIRECTS OU INDIRECTS, OU LA LIMITATION DE LA
DURÉE DES GARANTIES DE QUALITÉ MARCHANDE OU D'ADAPTATION, DE SORTE QUE CES
EXCLUSIONS OU LIMITATIONS PEUVENT NE PAS S’APPLIQUER À VOUS. CETTE GARANTIE
VOUS DONNE DES DROITS SPÉCIFIQUES ET VOUS POUVEZ AUSSI AVOIR D'AUTRES DROITS
POUVANT VARIER D'UN ÉTAT À L’AUTRE.
FELIX STORCH, INC.
770 Garrison Avenue
Bronx, New York 10474
Téléphone: (718) 893-3900
Télécopieur: (844) 478-8799
www.summitappliance.com
Pour commander des pièces et accessoires,
le dépannage et des conseils utiles, visitez :
www.summitappliance.com/support
ATTENTION!
Ce produit peut contenir des produits chimiques reconnus par l'État de la
Californie pour causer le cancer ou des défauts de naissance et d’autres dangers pour la
reproduction. Pour plus d'informations, visitez le site: www.summitappliance.com/prop65
Produits chimiques reconnus par le fabricant qui sont présents dans ce produit en
concentrations supérieures aux limites permises: AUCUNS.