Loading ...
Loading ...
Loading ...
19
INSTALLATION (cont.)
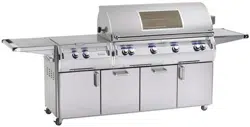
Zone divider
Groove
Groove
Front
INSTALL THE FLAVOR GRIDS
Place the fl avor grids directly onto the studs on the
burners. See Fig. 19-2. The fl avor grids allow heat
from the burners to be evenly distributed throughout
the cooking area. They are stainless steel and will heat
and cool quickly, making your grill very responsive
to the changes you specify in grill temperature. They
are rust resistant and may be cleaned with standard
oven cleaners. Some discoloring will be seen with
use. This is normal for stainless steel and does not
affect the function.
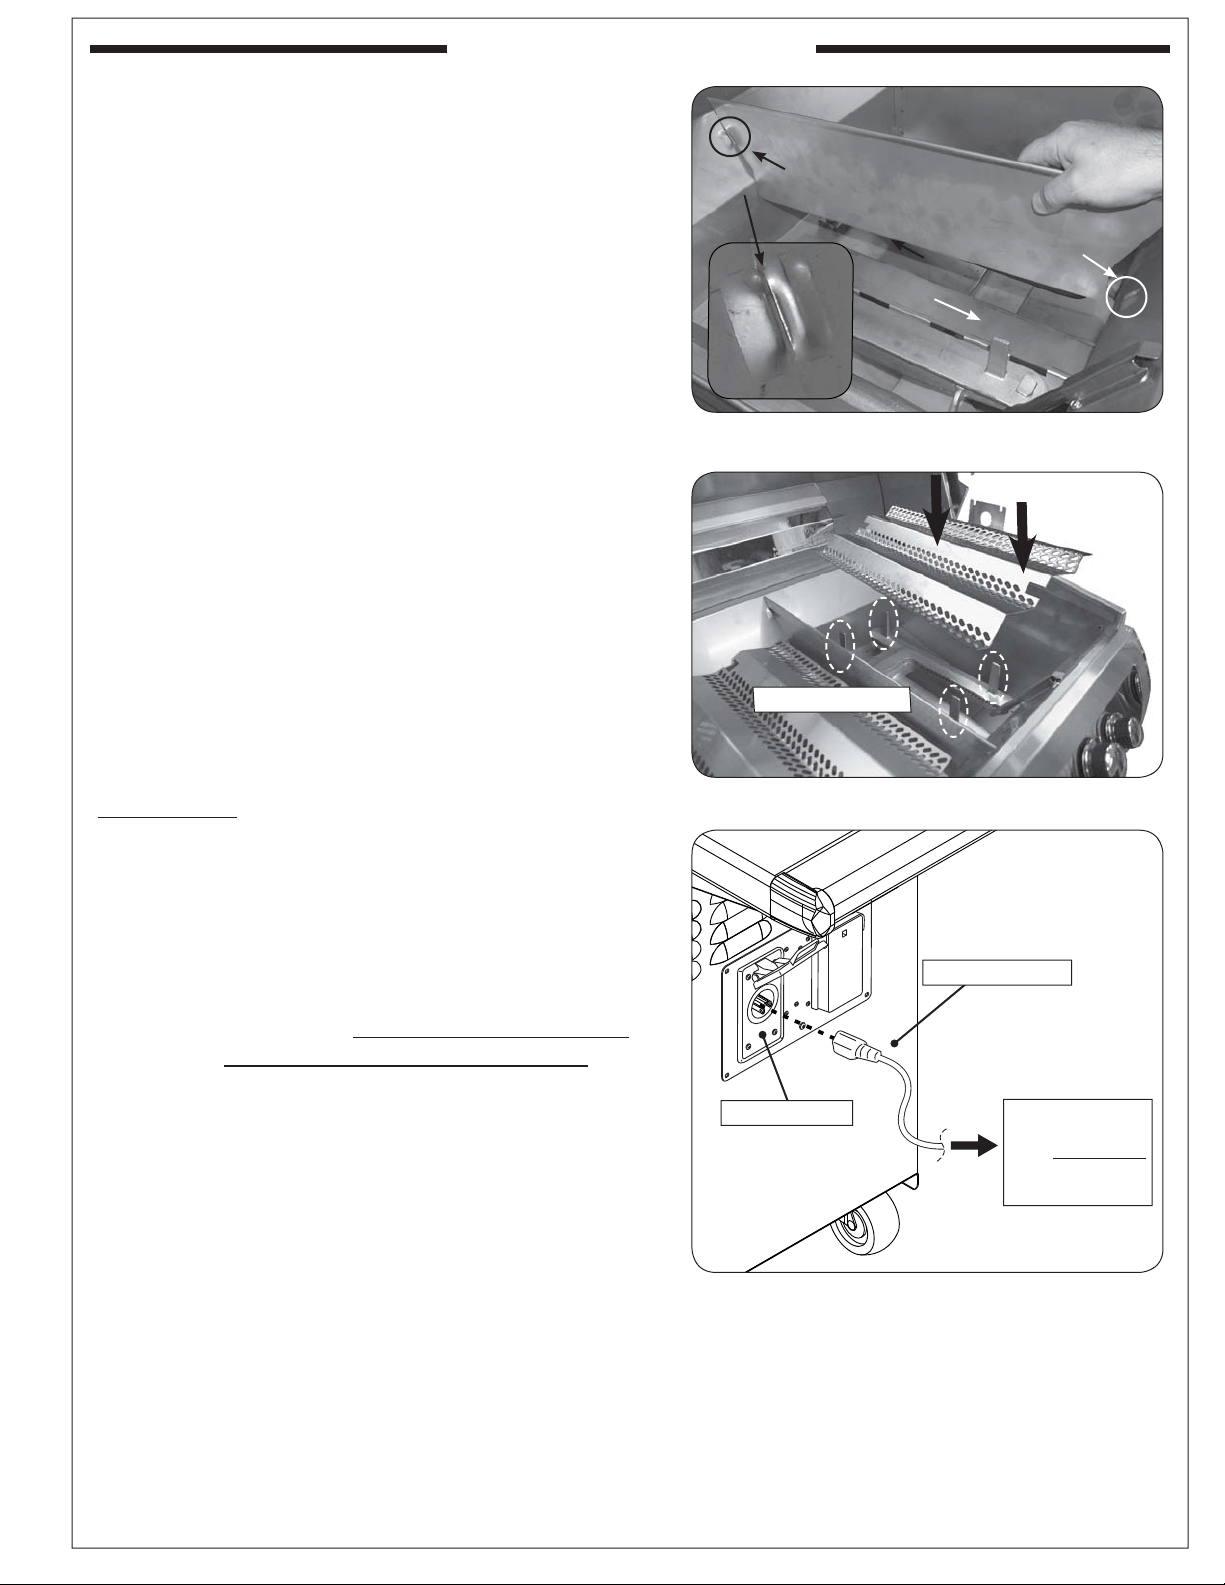
CONNECT THE POWER SUPPLY TO LINE
POWER
Connect the supplied female receptacle end of
the cord to the male inlet plug located on the right
side of the grill. Then connect the male plug end of
the cord to a 120VAC (15 AMP minimum) GFCI
GROUNDED 3-wire receptacle.
WARNING: Electrical Grounding Instructions -
This appliance is equipped with a
three-pronged (grounding) plug for
your protection against shock hazard
and should be plugged directly into
a properly grounded three-prong
receptacle. Do not cut or remove the
grounding prong from this plug.
Fig. 19-2 Install fl avor grids
Place onto studs
Fig. 19-1 Install zone dividers
Fig. 19-3 Connect to line power
Required 120VAC
(15 AMP minimum)
GFCI GROUNDED
3-wire receptacle
(not included)
Male inlet plug
Female receptacle
INSTALL ZONE DIVIDERS
Place the zone dividers as shown (Fig. 19-1) into
the grooves in the inner fi rewall of the grill to allow
for maximum heat control in each zone. Remove
and store during rotisserie use.
Loading ...
Loading ...
Loading ...