Loading ...
Loading ...

• 3 •
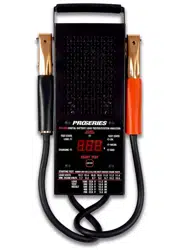
4. OPERATING INSTRUCTIONS
IMPORTANT: For testing 12 volt batteries
only. Suggested operational range
32°F (0°C) to 122°F (50°C) ambient air
temperature.
12 VOLT BATTERY ANALYSIS
Press “START TEST” and wait for 10
seconds. Once automatic test cycle is
completed, your test results will be:
1. GREEN LIGHT = OK
Battery capacity is good. May or may
not be fully charged. Determine state
of charge by checking specic gravity
(use hydrometer). If gravity is less
than full charge, check for possible
charging system trouble or electrical
drain. Recharge battery to fully
charged level.
2. GREEN + YELLOW LIGHTS =
OK BUT WEAK
Review the load test result with the
comparison chart on the tester cover
to see if this battery is “OK” or not. If it
is “OK”, go up to 1ST “OK” state. If it is
not, go down to 3rd “WEAK” state.
3. YELLOW LIGHT = WEAK
Battery capacity is unsatisfactory.
Battery may be either: (1) defective or
(2) partially discharged. To determine
which, check specic gravity. If gravity
is over 1.225, battery is considered
defective. If gravity is under 1.225,
recharge battery and re-test. If cell-
to-cell gravity varies more than 0.025
(25 points), cell trouble may exist. If
charging does not bring gravity to fully
charged level, the battery is either
sulfated or has lost active material.
4. RED LIGHT = BAD
Battery may be defective
(e.g. a bad cell).
NOTE: If pre-test battery voltage is below
12.3V, tester will not allow and should not
perform the load test. Please fully charge
battery and retest.
TEMPERATURE
COMPENSATION
1 STEP =
50 CRANKING AMPS
Battery temperature +20˚F 0˚F -20˚F
Decrease battery rating by 1 STEP 2 STEPS 3 STEPS
If the tester indicates poor battery
condition, allow the battery to stabilize for
a few minutes and check the open circuit
voltage with voltmeter. This is a good
measure of the percent charge in the
battery. The battery is considered charged
if it measures 75% or more. If it failed the
load test with 75% charge or above, it
should be replaced. If the battery charge
measures less than 75%, it should be
charged and load tested again. Replace
the battery if it fails again.
The values in the following chart are for a
12 volt battery.
OPEN CIRCUIT VOLTS PERCENT OF CHARGE
11.7 volts or lower 0
12.0 25
12.2
50
12.4 75
12.6 or higher 100
TESTING THE CHARGING SYSTEM
(After Battery Load test)
1. With the tester still connected to the
battery, press “START TEST” to toggle
the “TEST STATE” lights from “LOAD”
to “CHARGING”.
2. Start the engine and allow it to reach
normal operating temperature.
3. Run engine at 1200 to 1500rpm.
CAUTION: Stay clear of moving
engine parts.
4. Read the results. Illumination of
the RED-“BAD” light indicates a
problem in the charging system that
will undercharge a battery (less than
13.6V), or overcharge the battery
(over 14.8V).
STARTER MOTOR TEST
(12 Volt vehicles only)
This test identies excessive starter
current draw, which makes starting
difcult and shortens battery life. Perform
battery load test-rst to make sure battery
is in “GOOD” condition.
NOTE: ENGINE MUST BE AT NORMAL
OPERATING TEMPERATURE.
1. Connect negative (black) clamp to
the negative (NEG, N, -) battery
post. Connect positive (red) clamp
to the positive (POS, P, +) battery
post. ROCK clamps back and forth to
ensure a good electrical connection.
Do not click “START TEST”.
2. Disable the system ignition so the
vehicle engine will not start.
3. Crank the engine and note the voltage
reading during engine cranking.
4. A meter reading of 9 volts or less
indicates excessive current draw.
This may be due to bad connections,
a failing starter motor, or the
battery is too small for the vehicle’s
requirements.
Loading ...