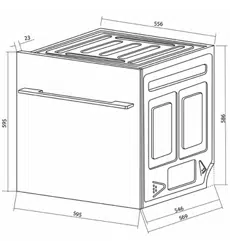
Loading ...
Loading ...
Loading ...
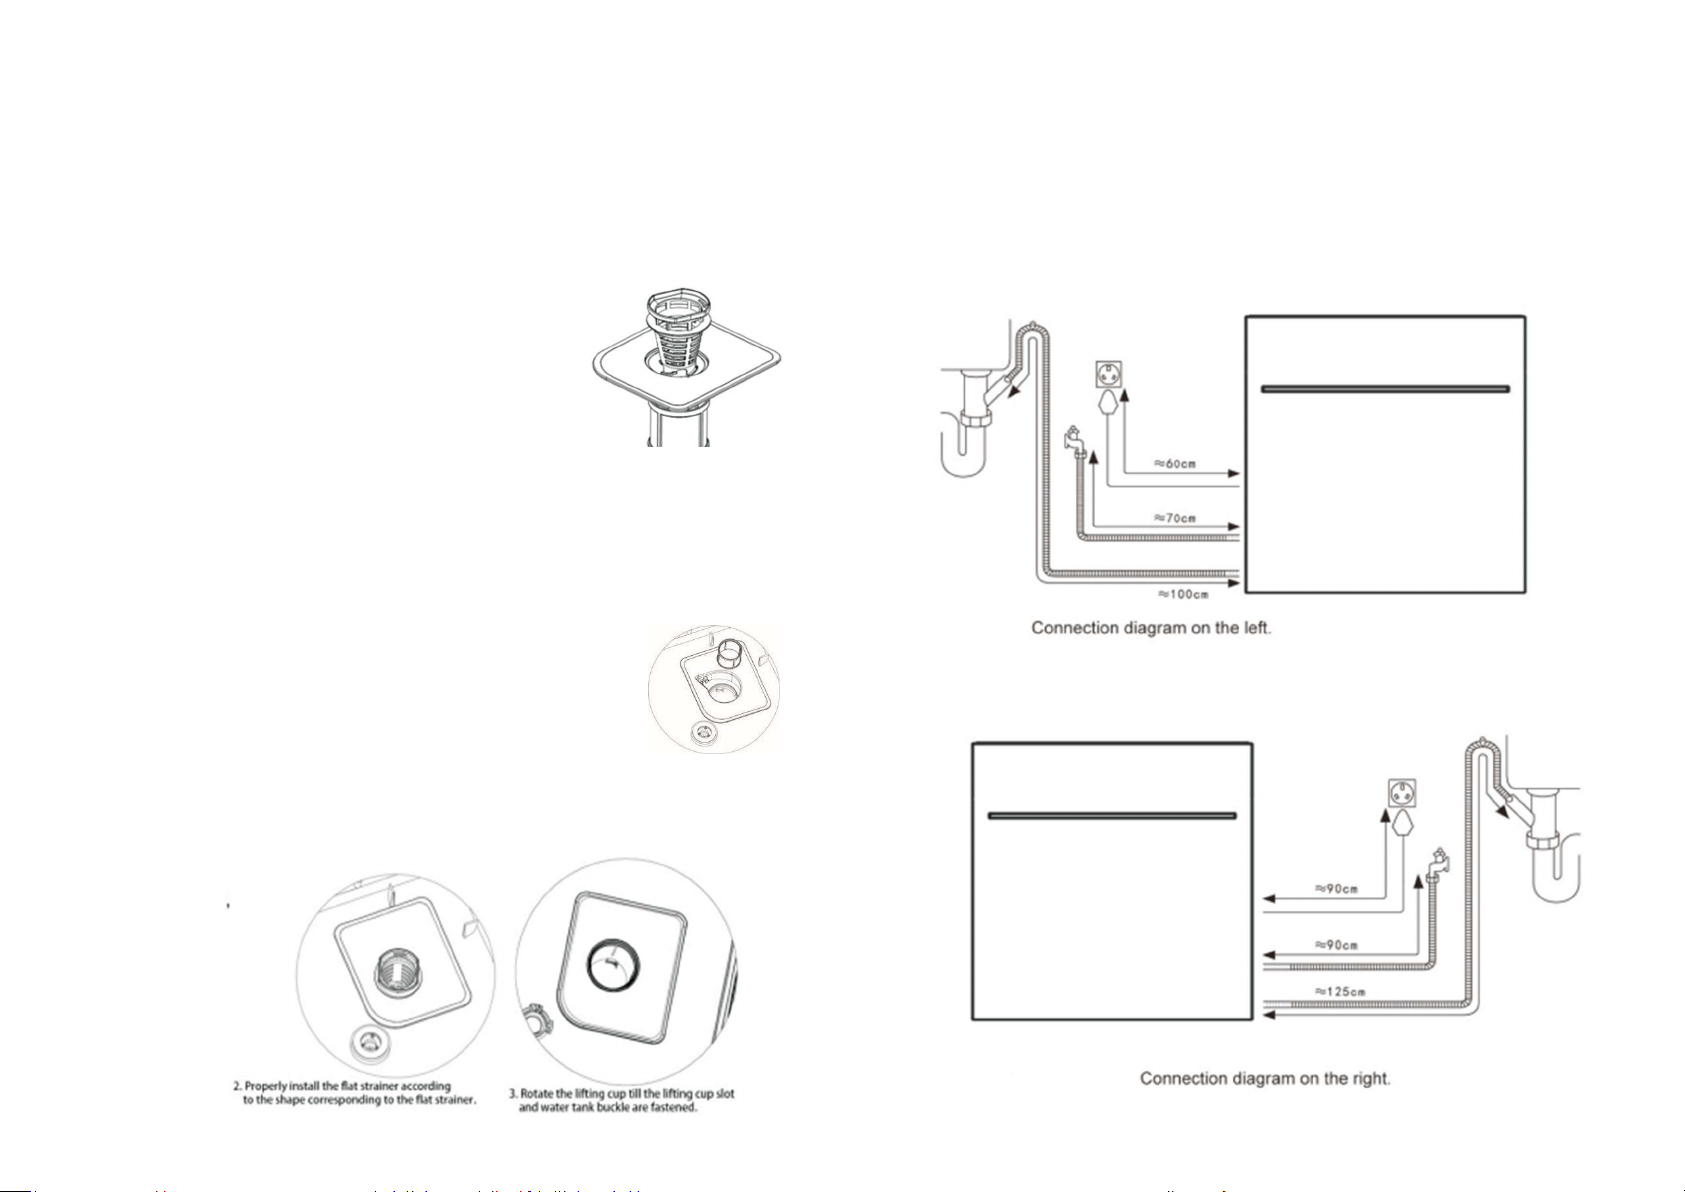
Installation steps
of strainer:
1.place the fine filter
in the water tank.
Removal and cleaning of strainer and filter
3. Lift up and remove the filter. It is normal if there is water under the filter.
4. As shown on the picture, rotate the filter cap and handle, and lift up the filter
cap at the filter cap notch to separate the cap from the handle.
Notice: Never try to separate the filter cap from the handler from both
sides at the same moment; otherwise, the filter may be damaged.
5. First rinse the strainer with hot soapy water, and then wash it with clean water.
6. Take out the handle carefully. Remove all the dirt from one side,
rinse the handle with soap water, then wash it with clean water, and
next wipe it clean with wet cloth.
7. Arrange the filter cap carefully in place, and ensure that the
filter cap is clamped at the fixed position.
8. Re-fasten the filter:
A. Combine the filter cap with the handle.
B. Rotate the filter cap till the lifting cup on the handle is
aligned with the fine filter mesh, and next rotate it clockwise to
clamp them tightly.
C. Rotate the lifting cup till the lifting cup slot and water tank
buckle are fastened.
D. Rotate the filter till the clamping sound of slot is heard and the
filter cannot be rotated anymore; now, the installation of filter
completes.
9. No matter whether the whole lower dish rack (which has
been removed) or the moveable bracket is installed, ensure
that they are refitted correctly. (As described above, the moveable
bracket shall be clamped onto the fixing buckle of lower rack).
10. Install the bracket door.
Place the bracket door on the lower dish rack,
and then install the knife barrel.
Installation Guidelines
Notes on water and electricity connection of dishwasher:
I. The water inlet and drain pipes can be placed on the left or right side according to the installation needs.
2. Choose a place near the water inlet or drain line, and also near a power source with a reliable ground.
3.Connection diagram on the right.
Rotate the lifting cup till the lifting cup
slot and water tank buckle are fastened
32 13
Loading ...
Loading ...
Loading ...