
Welcome
to
the world
of
easy
and healthy eating
with
your NutriChef Vertical
Rotisserie.
Gravity reduces
the fat from the food
placed inside
our
Rotisserie while
the vertical
heating elements crisp
the
exterior and lock
in the
tender juices inside.
At
last,
the
delicious look created by a vertical
rotating
spit is yours
at
home. We believe
that you
will
enjoy
the
tasty treats offered
in
our Rotisserie and we ask
that all
instructions
and
safety procedures be
followed.
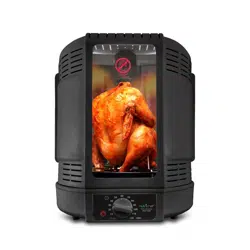
1
NutriChef Vertical Countertop Rotisserie Rotating Oven
• Versatile & Powerful Cooking Appliance
• Reduces Fat from within Your Food
• Rotisserie Spinning-Style Cooking
• Effective & Evenly Cooked Foods
• Thoroughly Cooks and Retains Food Flavor
• Creates Crispy Exterior and Juicy Tender Interior
• Dual High-Powered Heating Elements
• Simple Rotary Dial-Style Timer Operation
• Adjustable Cooking Timer Selection (2 Hour Max)
• See-Through Cooking Window to See When It's Ready
• Swing Door Allows Convenient Entry/Removal
• Excess Fat Drains Off by Gravity
• Revolutionary Vertical Cooking Appliance
• Assists in Creating Desired Crispy Skins
• Easy-to-Clean Dishwasher safe parts
• Includes Poultry Rack, Meat Tower and Drip Tray
• Perfect for Whole Chicken, Breasts, Turkey, Lamb, Beef, Pork, etc.
• Maximum Cooking Temperature Reaches 185°
• 700 Watt Power Output
• Power Cord Length: 4' Feet
• Dimensions (L x W x H): 9.1'' x 9.1'' x 10.2''
What's in the Box:
Skewer Rack with (8) Skewers
Cooking Basket Tower
Roasting Rack
Poultry Tower
Nonstick Drip Tray

IMPORTANT
SAFEGUARDS
When using
this electrical
appliance, these basic safety precautions should
always
be
followed:-
1.
Read
all of the
instructions
and
save
them for reference.
2.
To
protect against any electrical
hazards, DO NOT place
unit
or cord
in
water or
any
other
liquids.
3.
DO NOT touch any
hot
surfaces. Use oven
mitts for
removing
or
touching any
hot
parts. Always place drip
tray
on heat protected surface (i.e.
pot holder)
4.
Close supervision is always necessary when this appliance is used by or near
children.
5.
This unit is basically an oven.
LEAVE
about 4-6 inches open space all around the
exterior
of
this appliance.
6.
UNPLUG
the unit
when
not in
use and before cleaning. Always allow
to cool
before attaching
or
removing any
parts.
7.
Avoid touching moving
parts.
8.
Always
pull the
plug
out from the
wall
-
never
pull the
cord..
..
. Remove
the plug
from the wall before moving the appliance. Use both hands
to
move the
appliance.
9.
DO NOT
let
the cord hang over the edge
of
surfaces. DO NOT place on an
unstable
table,
or
cloth-covered
or hot surface.
10.
DO NOT place the Rotisserie inside an oven nor near a
hot
flame nor electric
burner.
11.
DO NOT operate
this
appliance
if the cord or plug
is damaged,
if the unit
Malfunctions
or
is damaged
in
any way. Return
it to the
store
for service.
12.
DO NOT use this appliance
outdoors.
13.
USE
the
Rotisserie
only for its
intended use and
USE EXTREME CAUTION
when
removing drip
or
disposing
of hot
grease.
14.
To reduce
the
hazard
of
potential shock, this appliance has a polarized plug
(one
blade wider than the other), which
will fit
only one way
in
a polarized wall
outlet.
If
the plug does
not fit,
contact a qualified electrician
for
assistance. Never use
this
plug
with
an extension cord unless
it fits
properly.
DO NOT ATTEMPT
to
defeat
this
safety
feature.
15.
CAUTION
: A
short power supply cord is provided
to
reduce
the
risks
resulting
from
tripping over
or
becoming entangled
in
a longer cord. Extension cords may
be
used only
if
the electrical rating is as great as the electrical rating
of
this
appliance
not
less than 10 amperes, 120 volts.
If
an extension cord is used,
it
should
be
arranged so
that it will not
drape over
the
counter
or
tabletop where
it
can
be
reached by children
or
tripped
over.
16.
ELECTRIC POWER
: If
the electric circuit is overloaded
with
other appliances,
your
Rotisserie may
not
operate properly. The Rotisserie should
be
operated
on
a
separate electrical circuit
from
other operating
appliances.
17.
This appliance is intended
for
household use
only
and NOT
for
commercial
or
industrial use.
SAVE THESE
INSTRUCTIONS
FOR HOUSEHOLD USE ONLY
2
Safety Guidelines
Accessories
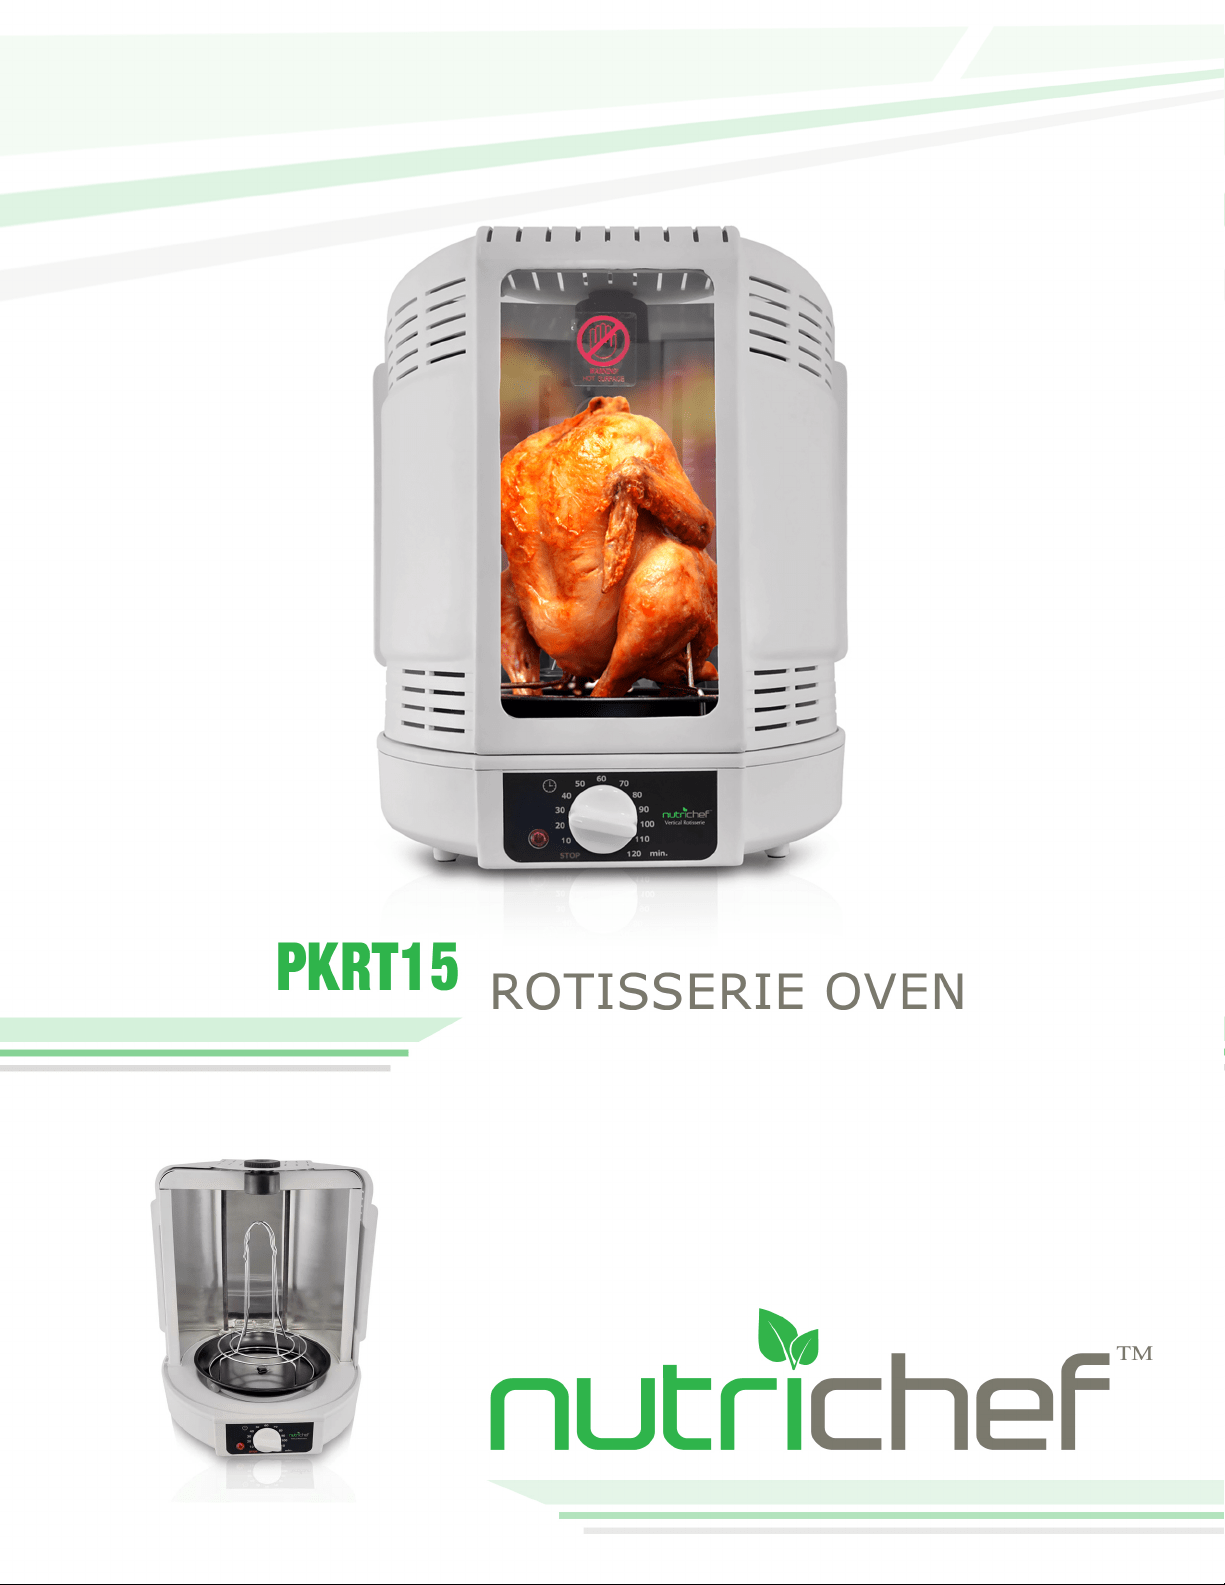
POULTRY RACK
This Rack is designed
to fit
inside the bird and hold
it upright.
Simply slide the bird onto the rack and make sure the legs
are
pointed down and
the
neck
up.
*
With some birds
it
may be necessary
to cut off
part
of the
neck
or pin
down extra large
wings.
*
Make sure
the
bird rotates freely and does
not
touch
any
inside
part of the Rotisserie.
*
Chickens
(not stuffed) need approximately 20
-
30 minutes
per
pound.
*
Always use a
meat thermometer and pierce
in
breast
of
chicken about
3-4 inch.
* Please see Cooking Chart (P.6)
* Leave
at
least
1
inch between
top of
bird and inside
top of
Rotisserie.
* Cooked
birds are more crispy when properly dried.
*
To prepare a bird, place under cold running water,
then
shake
out to
remove excess
water, and finally pat dry
with
absorbent paper
towels.
*
Birds cook faster and look more appetizing when
basted
with
olive
oil or
sauce during last 40 minutes
of
cooking.
Do
not
baste before placing
in Rotisserie.
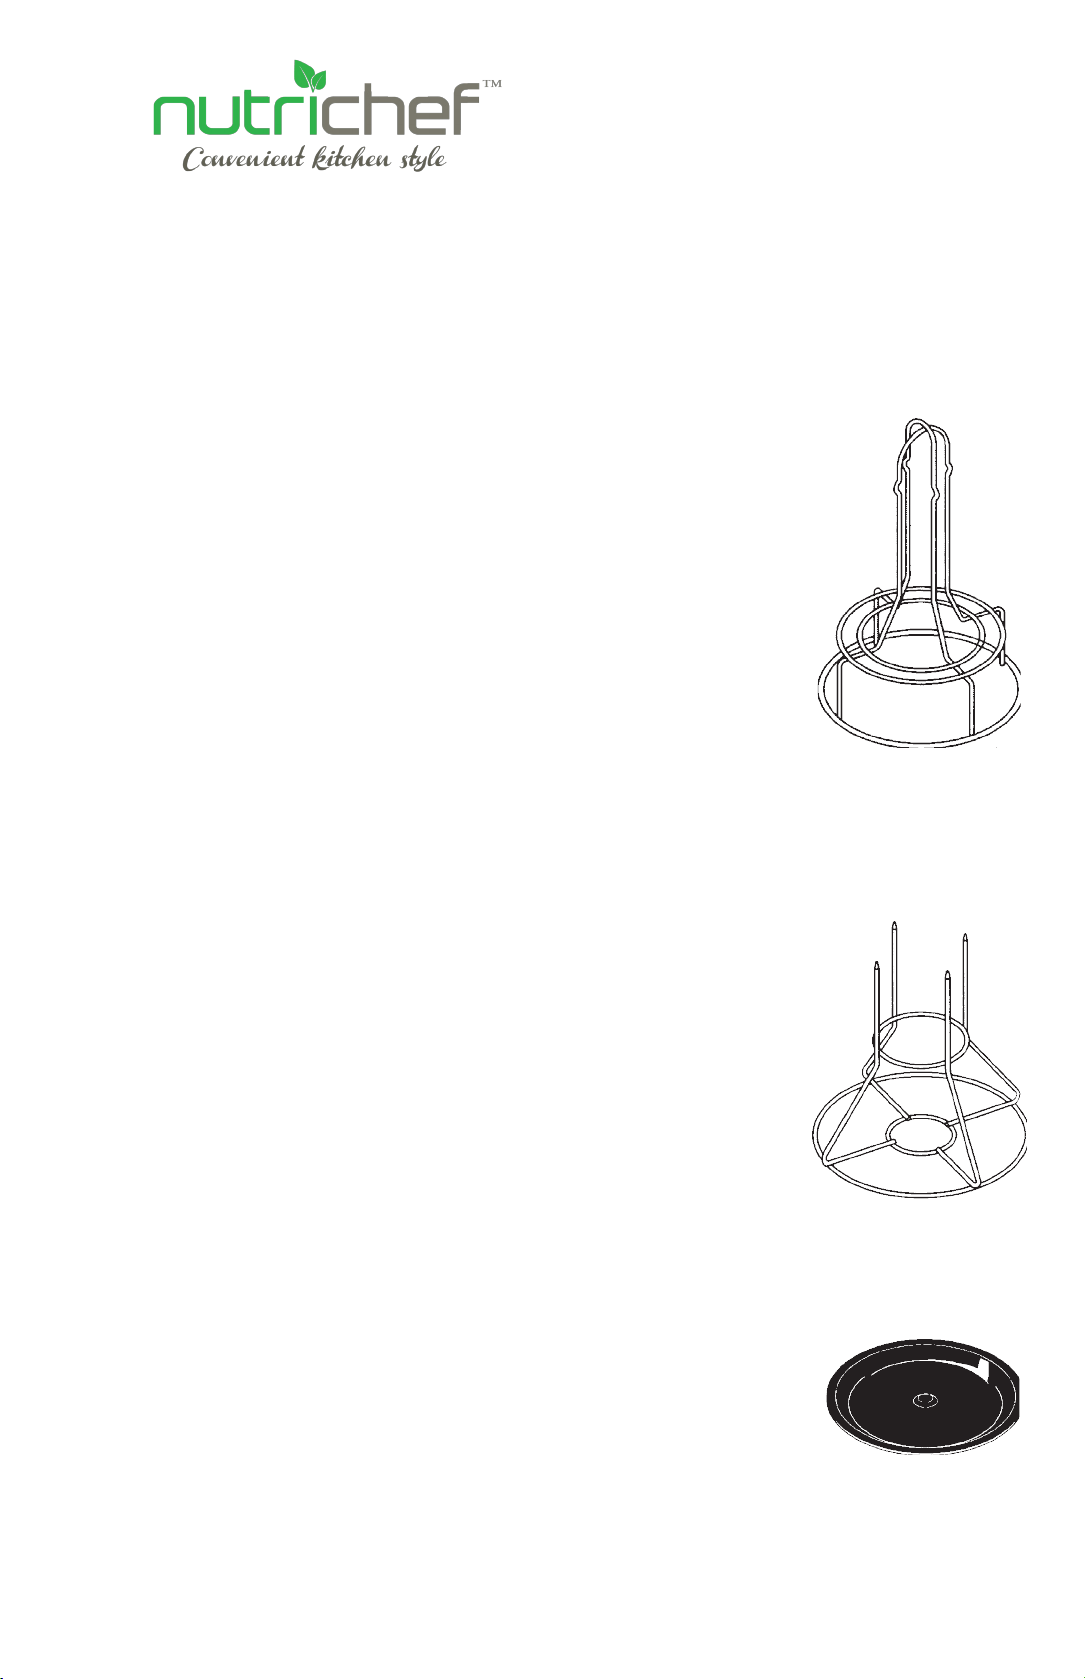
MEAT TOWER
Meat should be pierced onto
the top of the 4
skewer prongs
on the
top of
the Meat Tower. BE CAREFUL NOT TO
PIERCE
YOUR HANDS WHEN PUSHING MEAT DOWN OVER
THE
SKEWERS.
ENSURE THAT THE MEAT ROTATES FREELY AND LEAVE AT
LEAST
1"
FREE SPACE BETWEEN THE TOP OF THE MEAT AND
THE
INSIDE ROOF OF THE ROTISSERIE.
DRIP TRAY
This tray is made
with
a special non-stick coating. Some
birds
are extremely
fat
so
it
may be necessary
to
remove some
of
the
drippings
from time to time during
cooking.
If this
is
necessary, use a siphon or spoon
to
remove the drippings
during
cooking. Be careful
not to
topple the bird and always use
oven
mitts when attempting this
procedure.
Although it
is
convenient
to
baste
food
while cooking (open Swing
Door
and brush from
top to
bottom
as food rotates), you may
wish
to
stop
the
cooking process
for
extra safety and
then reset
the
timer
to
time
left
before stopping
it.
3
Accessories

Recipes
In this
recipe guide, we suggest
what
sauces are best
for
chicken
or
various types
of
meat
but
your own taste preferences
will
be
the final
judge
of
which meats
to
choose.
Sauce
or marinade?
We define a sauce as a mixture
of
ingredients brushed
or
poured
on the food
a
few
minutes before cooking
or for
basting during
cooking.
A
sauce becomes a marinade when
the
food is allowed
to
soak
in it from 3-24
hours,
covered,
in
the
refrigerator.
•
Only a whole uncut chicken
with
skin is never
to
be marinated
as the skin may
burn
in the
cooking process
-
whole chicken should be basted only during
the
last
40
minutes
of cooking!
Measurement Guide
TBSP
-
T
ablespoon
Tsp
-
T
easpoon
Our favorite
-
Garlic Lovers
Bar B Q
Sauce
Great
for
whole chicken, lamb,
beef or
pork
1-5
crushed cloves
of
garlic
1/3
cup catsup
2 1/2
TBSP
honey
2
TBSP
water
1
TBSP
vinegar (white
or
red)
1 1/2
Tsp
A1 Sauce
1/3
Tsp
chilis (powdered
or
crushed)
Sauce
preparation:
-
Crush the garlic and mix into all ingredients. Bring to a boil 1-2 minutes in a saucepan
and
turn
off
heat.
-
Mixture should thicken somewhat. Separate sauce into 2 bowls
-
one for sauce and one
as
a table serving.
For whole
chicken use
P
oultry
Rack
and
brush
on
during
last 40
minutes
of
cooking
-
repeat 2
-3
times.
For meat use
Meat
Tower. Soak
in
sauce a few minutes before piercing on Meat Tower,
and baste during cooking (several times evenly spaced time). Reheat serving sauce
and
serve as table
serving.
* Remember
to
place
food on
accessories outside
the
Rotisserie.
* Excellent as
a
marinade
for
meats
.
•
Cooked birds are more crispy when properly dried.
To prepare a bird, place under
cold
running water, then shake
out to
remove excess water, and
finally pat
dry
with
absorbent paper
towels.
•
Check
to
ensure
that the
P
oultry
Rack
or Meat
Tower
rotates freely
without
touching the heating
elements.
4
Recipes

White Wine
Sauce
4
chicken breasts (skinless and boneless)
or 2
Lbs. roast
of
lamb (boneless)
1
cup white
wine
3-4 oz
red tomato
paste
2
TBSP olive
oil
Sauce
preparation:
-
Stir
in
wine
with
tomato paste and then olive oil.
Use whisk
to
mix evenly
in
a
stirring motion.
Separate sauce, 75%
for
marinade (from 3-24
hours
covered
in the
refrigerator) and balance 25%
for
basting
-
baste every 20 minutes during
cooking.
-
Pierce each chicken breast on
the
Meat Tower
with
breasts
in
an upward
position.
-
Or pierce lamb on Meat
Tower
* Remember
to
place
food on
accessories outside
the Rotisserie.
•
Check
to
ensure
that the Meat
Tower rotates
freely without
touching
the heating
elements. (N.B. Cook as
per chart
Page
6)
Spicy Sauce
Whole chicken,
or 4
chicken breasts,
or 2
Lbs.
pork tenderloin,
or 2
Lbs.
lamb
1/3
cup olive
oil
1/2
Tsp
chili
(crushed
or powdered)
Sauce
preparation:
-
Mix olive oil with chili in a bowl. Separate into 2 servings. One for sauce and the other
as
a
table serving.
Whole chicken
-
use
P
oultry
Rack. Baste
2 - 3
times
in final
40 minutes
of cooking.
Meats and chicken breasts
-
use
Meat
Tower. Soak
first for
a few minutes
or
use as a
marinade. Baste during cooking,
2 - 3 times.
* Remember
to
place
food on
accessories outside
the Rotisserie.
* Excellent as
a
marinade
for meats.
•
Cooked birds are more crispy when properly dried.
To prepare a bird, place under
cold
running water, then shake
out to
remove excess water, and
finally pat
dry
with
absorbent paper
towels.
•
Check
to
ensure
that the
P
oultry
Rack
or Meat
Tower
rotates freely
without
touching the heating
elements. (N.B. Cook as
per chart
Page
6)
5

No time to
prepare
a
sauce?
See
the following
pages
for 3
super
fast
sauces
1.
Use a prepared Taco mix
for 4
chicken
breasts
2.
Teriyaki sauce (excellent
for
whole
chicken).
3.
Prepared salad dressings are also good as marinades ie. Herb
Dressing
T
aco
2
chicken
breasts
1
prepared Taco mix
-
should be about
2
oz.
-
Coat
the
chicken breasts
with the
dry taco mix. Pierce
the
breasts upright on
the
Meat
Tower.
Chicken breasts
-
use
Meat
T
ower
.
* Remember
to
place
food on
accessories outside
the Rotisserie.
•
Check
to
ensure
that the
P
oultry
Rack
or Meat
Tower
rotates freely
without
touching the heating
elements. (N.B. Cook as
per chart
Page
6)
T
eriyaki
Sauce
1
Whole chicken
3-4
Lbs.
Teriyaki sauce
right out of the bottle
Whole chicken
-
use
P
oultry
Rack. Baste
2 - 3
times
in final
40 minutes
of cooking.
* Remember
to
place
food on
accessories outside
the Rotisserie.
•
Cooked birds are more crispy when properly dried.
To prepare a bird, place under
cold
running water, then shake
out to
remove excess water, and
finally pat
dry
with
absorbent paper
towels.
•
Check
to
ensure
that the
P
oultry
Rack
rotates freely without touching the
heating
elements. (N.B. Cook as
per chart
Page
6)
Herb Salad
Dr
essing
2
Lbs. roast
of lamb
Herb salad dressing
right out of the bottle
Excellent as a marinade. Place lamb
in
salad dressing, cover and refrigerate
for
3-24 hours.
Put lamb onto Meat Tower skewers. Keep some extra dressing as a table serving
to add
some zest
to the meat.
Soak
first for
a
few
minutes
or
use as a marinade. Baste during cooking,
2 - 3 times.
* Remember
to
place
food on
accessories outside
the Rotisserie.
* Excellent as
a
marinade
for meats.
•
Check
to
ensure
that the Meat
Tower rotates
freely without
touching
the heating
elements.
6
Sauce Prep

Sauce
preparation:
-
Combine tomato sauce and vinegar
in
a saucepan and bring
to
boil
for 1-2 minutes.
-
Reduce heat
to low
and add sugar
until
dissolved. Add remaining ingredients
and
cook over
low
heat, stirring often
for 5
minutes. Separate
into 2
servings using
25%
for
basting and balance as a table
serving.
Whole chicken
-
use
P
o
ultry
Rack. Baste
2-3
times
in final
40 minutes
of cooking.
Meats and chicken breasts
-
use
Meat
Tower. Soak
first for
a few minutes
or
use as a
marinade. Baste during cooking
2 - 3 times.
* Remember
to
place
food on
accessories outside
the Rotisserie.
* Excellent as
a
marinade
for meats.
•
Cooked birds are more crispy when properly dried.
To prepare a bird, place under
cold
running water, then shake
out to
remove excess water, and
finally pat
dry
with
absorbent paper
towels.
•
Check
to
ensure
that the
P
oultry
Rack
or Meat
Tower
rotates freely
without
touching the heating
elements. (N.B. Cook as
per chart
Page
6)
Cool Sauce
Some
of
our sauces are spicy. This one is
low fat
(0.2 grams/TBSP), and mild and only
to
be served as a table
serving.
2
chicken breasts,
or 2
Lbs. turkey
breast
1 1/2
cups
low fat yogurts
2
scallions fresh and finely
minced
1
TBSP lime
juice
1/2
cup chopped fresh
cilantro
1
Tsp
brown
sugar
2
TBSP
chopped fresh
mint
leaves (or
1
TBSP
if dried)
Add pinch
of
salt, pepper and
hot
pepper sauce
to taste
Sauce
preparation:
-
Combine
all
ingredients and whisk
until
well blended. Cover and refrigerate
for at
least
1
hour. Stir well before serving. This is a table serving sauce
only!
Chicken
or turkey
breasts
-
use
Meat
T
ower
.
* Remember
to
place
food on
accessories outside
the Rotisserie.
•
Check
to
ensure
that the Meat
Tower rotates
freely without
touching
the heating
elements.
7

Cooking Tips
•
NEVER operate rotisserie
without
a
food
load. DO NOT preheat
the
Rotisserie
before
cooking.
•
Raw food usually contains some amount
of
bacteria. For safer food
consumption
we strongly recommend
that all
sauces be separated
into 2
separate bowls. One
for
basting
or
soaking meats and one
to
be used as a table
serving.
•
We recommend
that all
birds be rinsed
in
cold running water and then shake
out
excess
water, and pat dry. Cooked birds are more crispy when properly
dried.
•
Cleaning
the
accessories and drip
tray
can be made easier by
first
spraying
them
with
a vegetable
oil
before any food is placed on
them.
•
Place
all
food
into the
accessories
OUTSIDE OF THE ROTISSERIE. This is
more
convenient and safer
handling.
•
Excess
fat
should be removed
on
a
cutting
board
first
and
then
place
food on
the
accessories.
•
Always use
a meat thermometer to
check
for
complete cooking (see
Chart
P.
6) If you do not own a meat
thermometer
-
when cooking
time is 95%
complete
turn off the timer
open Swing Door and
cut a little into the thickest
part of the food
and check
for
doneness
or
color. BE CAREFUL NOT TO
T
OPPLE
ACCESSORY! Also,
you
may check
to
see
if
the
juices
are running
clear
-
this
indicates
food is likely well cooked.
•
The
timing
given are only a guide and based on
the
temperature
of
refrigerated
food.
•
Before
cutting
up
the
cooked food, allow
to
stand a
few
minutes. The food
will
retain more
of its
juices and is safer
to
cut. Always use a clean sharp
knife.
Care
and
Cleaning
Before using your Magic Chef Vertical
Rotisserie:
Wash
all of
the accessories
-
Poultry Rack, Meat Tower, Drip Tray, Tray Support
in
hot
water
with
detergent
or
soap (or wash
in
a
dishwasher).
The Swing Door can be removed
for
easy cleaning. Turn
the
"Door Knob" (located
on the top
of
the Rotisserie)
counterclockwise
in
order
to
loosen
it
and then
remove
it
by pulling upward. The "Swing Door" can then be
lifted
upward and away
from
the
base.
8
Cooking Tips
Care & Cleaning

Table
of Contents
Page
Important
Safeguards
...............................................................................................................
2
Parts
Identification
....................................................................................................................
4
How
to
Assemble
&
Cook ........................................................................................................
3
Accessories
....................................................................................................................................
4-5
Cooking Temperature Chart
....................................................................................................
5
Recipes ...........................................................................................................................................
6-13
Cooking
Tips .................................................................................................................................
14
Care
&
Cleaning
..........................................................................................................................
14-15
Troubleshooting
..........................................................................................................................
15
Page
Contents
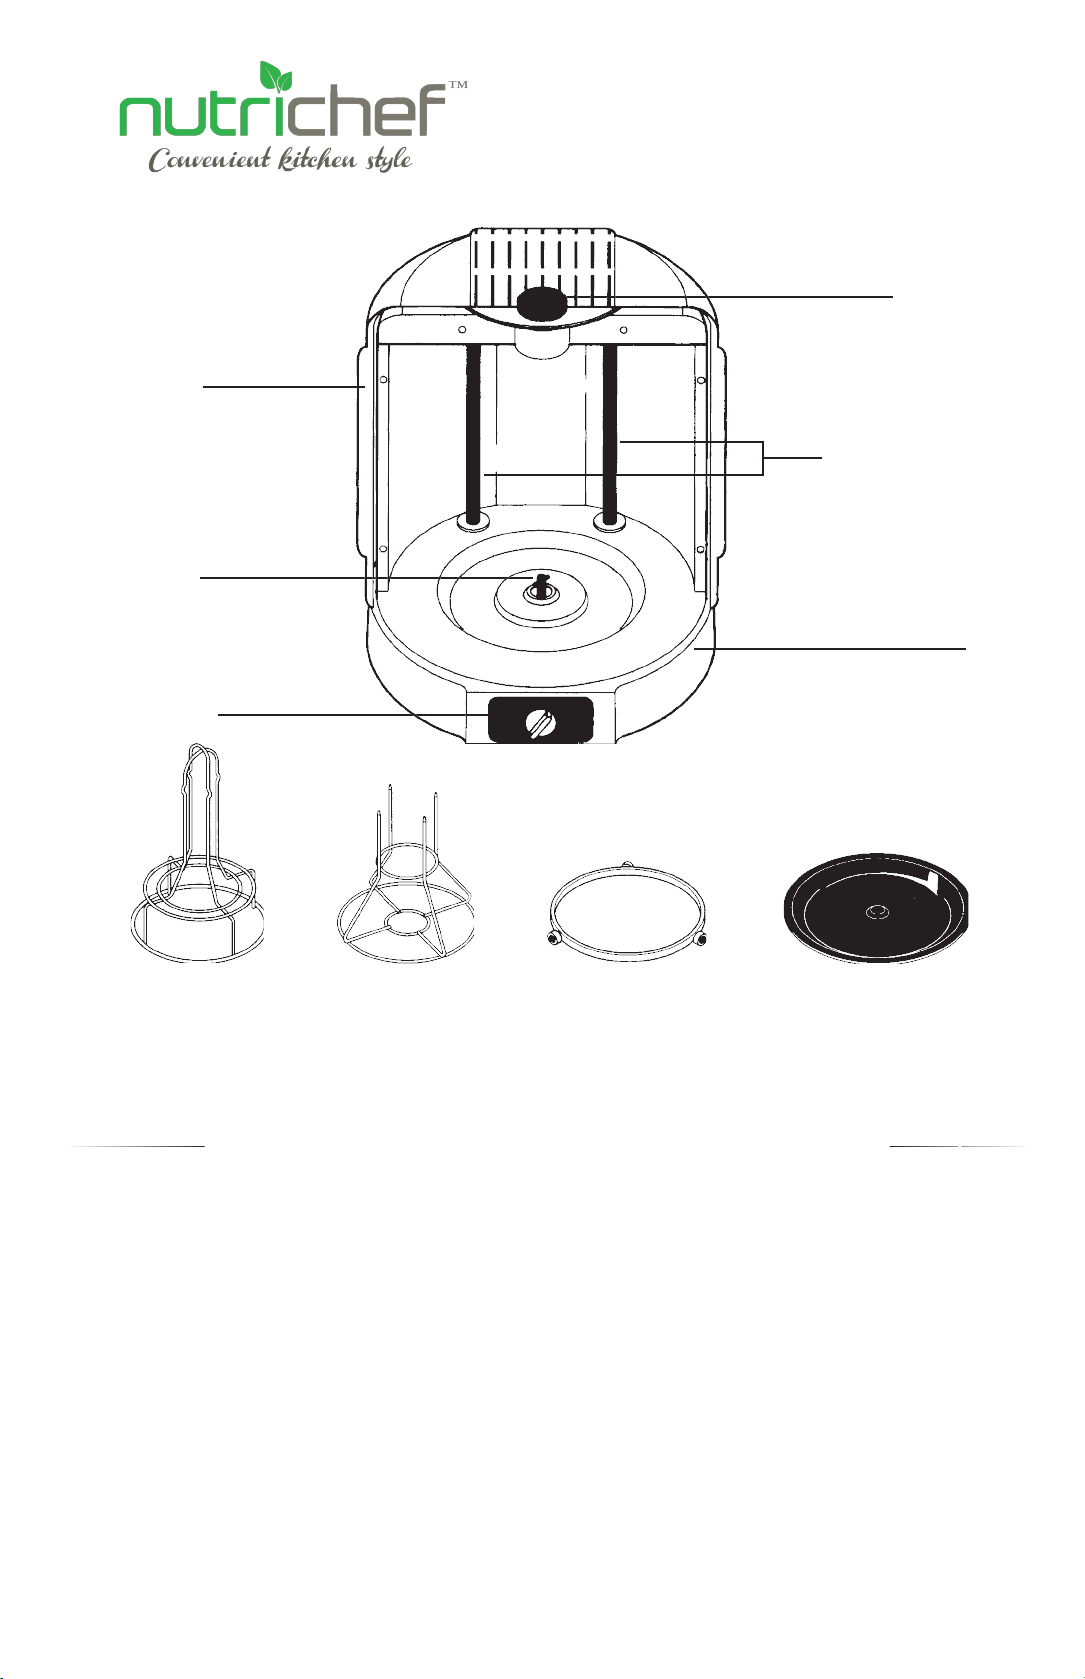
Parts
Identification
Door Knob
Swing
Door
Heating Elements
Drive
Shaft
Base
2
Hour
Timer
Poultry Rack
Meat Tower
Tray
Support
Drip Tray
(with
raised
dimple)
How
to
Assemble
and
Cook
First place the
unit
on a clean dry surface which is heat protected i.e. formica
countertop.
1.
To open
the
Swing Door, slide counterclockwise
until it
stops on
the right hand
side
of the
base
unit.
2.
Place the Tray Support on the base section
of
the Rotisserie so
that it will roll easily
in
a circular manner
in the
specially recessed area
of the
base.
3.
Place the Drip Tray on
top of
the Tray Support
with
the raised dimple upwards
-
the
Drive Shaft
will
naturally align itself
into the
raised under section
of the
Drip Tray.
4.
Choose either the Poultry Rack
or
Meat Tower and then load either one according
to
your recipe outside
of the
Rotisserie
.
5.
Next place the loaded accessory on top
of
the Drip Tray making sure
it
is well
centered.
N.B.
Check
to
ensure
that the Poultry
Rack
or Meat
Tower
rotates freely
without
touching the heating
elements
or
gets jammed
in
any
way.
9
System Layout
Assembly & Cooking

TRAY SUPPORT
This device allows
the food to
rotate. We suggest
cleaning
with
soapy
water after
each
use.
TIMER
The Magic Chef Vertical Rotisserie comes complete
with
a
2
hour
Timer. Simply
dial in
a clockwise manner. The
desired
time according
to
the recipe. There is
no temperature selection
50
60
70
40
80
30
90
as cooking is done solely by time allowed and
the
rotation
of
POWER
20
100
10
110
TIMER OFF
120
Cooking Temperature
Chart
Remember
that
cooking times vary according
to
meat size, shape, amount
of fat, bone,
consistency, and surrounding room temperature.
The chart below lists our testing
results
however,
the
best guide
for
complete cooking
to taste is a meat thermometer.
Meat Weight (Lbs) T
emper
atur
e
Time
Whole
chicken 3
175
-
185
o
F 60
-
85
min.
Whole
chicken 4-5
175
-
185
o
F 80
-
115
min.
Chicken breasts
(4)
1/2
each
175
-
185
o
F 30
-
50
min.
Chicken breast
(whole) 2
175
-
185
o
F 50
-
80
min.
Turkey breast
(whole) 2-3
175
-
185
o
F 50
-
80
min.
Beef
Roast 2
175
-
185
o
F 50
-
85
min.
Lamb
Roast 2
175
-
185
o
F 50
-
85
min.
Pork
Roast 2
175
-
185
o
F 50
-
85
min.
•
Whole chicken cooks
faster
when brushed
with
sauce
or olive oil in the last 40
minutes
of
cooking
- it
rises
to a higher
temperature due
to the effect of the
oil.
The
skin is
also more
crispy!
•
The above temperatures
reflect
foods
which are
considered
to be well done.
1
10
Cooking Temperatures

Regular
Bar B Q
Sauce
Great
for
whole chicken, lamb,
beef or
pork
1/3
cup catsup
2 1/2
TBSP
honey
2
TBSP
water
1
TBSP
vinegar (white
or
red)
1 1/2
Tsp
A1 Sauce
1/3
Tsp
chilis (powdered
or
crushed)
Sauce
preparation:
-
Mix
all
ingredients
in
a saucepan. Bring
to
a boil
1-2
minutes and then
turn off heat.
-
Mixture should thicken somewhat. Separate sauce into 2 bowls
-
one for sauce and one
as
a table serving.
For whole
chicken use
P
oultry
Rack
and
brush
on
during
last 40
minutes
of
cooking
-
repeat 2
-3
times.
For meat use
Meat
Tower. Soak
in
sauce a few minutes before piercing on Meat Tower,
and baste during cooking (several times evenly spaced time). Reheat serving sauce
and
serve as table
serving.
* Remember
to
place
food on
accessories outside
the
Rotisserie.
* Excellent as
a
marinade
for
meats
.
•
Cooked birds are more crispy when properly dried. To prepare a bird, place under
cold
running water, then shake
out to
remove excess water, and
finally pat
dry
with
absorbent paper
towels.
•
Check
to
ensure
that the
P
oultry
Rack
or Meat
Tower
rotates freely
without
touching the heating
elements. (N.B. Cook as
per chart
Page
6)
Red
Wine
Sauce
4
chicken breasts (skinless and boneless)
or 2
Lbs. roast
of
lamb (boneless)
1
cup red
wine
3-4 oz
red tomato paste
2
TBSP olive
oil
Sauce
preparation:
-
Stir
in
wine
with
tomato paste and then olive oil.
Use whisk
to
mix evenly
in
a
stirring motion.
Separate sauce, 75%
for
marinade (from 3-24 hours covered
in the
refrigerator) and balance 25%
for
basting
-
baste every 20 minutes during
cooking.
-
Pierce each chicken breast on
the
Meat Tower
with
breasts
in
an upward position.
-
Or pierce lamb on Meat Tower
* Remember
to
place
food on
accessories outside
the
Rotisserie.
•
Check
to
ensure
that the Meat
Tower rotates
freely without
touching
the heating
elements. (N.B. Cook as
per chart
Page
6)
8
11

Delight
T
onight
Whole Chicken
or
chicken breasts, lamb you name
it -
this is one tasty sauce
1-4
cloves
of
garlic
(crushed)
1/4
Tsp
pepper
1/2
Tsp
paprika
5
TBSP olive
oil
Sauce
preparation:
-
Crush garlic and mix ingredients
in
a
bowl.
Whole chicken
-
use
P
oultry
Rack. Baste
2 - 3
times
in final
40 minutes
of cooking.
Meats and chicken breasts
-
use
Meat
Tower. Soak
first for
a few minutes
or
use as a
marinade. Baste during cooking,
2- 3 times.
* Remember
to
place
food on
accessories outside
the Rotisserie.
* Excellent as
a
marinade
for meats.
¥
Cooked birds are more crispy when properly dried.
To prepare a bird, place under
cold
running water, then shake
out to
remove excess water, and
finally pat
dry
with
absorbent paper
towels.
•
Check
to
ensure
that the
P
oultry
Rack
or Meat
Tower
rotates freely
without
touching the heating
elements. (N.B. Cook as
per chart
Page
6)
Citrus Sauce
2
Lbs Pork
or 2
Lbs. beef
or 2
Lbs. lamb
or 4
chicken
breasts
3/4
cup fresh orange
juice
1/2
TBSP lime
juice
1
TBSP
honey
1 1/2
TBSP
soy sauce
2 1/2
Tsp
cornstarch
1 1/2
TBSP
lemon
juice
Sauce
preparation:
-
Mix all ingredients
in
saucepan and bring
to
boil
1-2
minutes and then
turn off heat.
Let thicken and serve
in 2
portions. One
for
sauce and basting and one
for table
serving.
A
very tangy taste and a healthy
choice.
Meats and chicken breasts
-
use
Meat
Tower. Soak
first for
a few minutes
or
use as a
marinade. Baste during cooking,
2- 3 times.
* Remember
to
place
food on
accessories outside
the Rotisserie.
* Excellent as
a
marinade
for meats.
•
Check
to
ensure
that the
P
oultry
Rack
or Meat
Tower
rotates freely
without
touching the heating
elements. (N.B. Cook as
per chart
Page
6)
12

Oriental
Spicy Peanut Sauce
This one’s a
little
different
-
Do
not
add
the
sauce
to
meat
or
chicken
during cooking.
This
is a table
serving sauce
only!
Choose whole chicken,
or 4
chicken breasts
or 2
Lbs. lamb,
or 2
Lbs.
pork.
2
garlic cloves
(crushed)
1/4
Tsp ginger
powder
1/4
Tsp
crushed (or powdered)
chili
2
TBSP
soy sauce
3
TBSP
creamy peanut
butter
3
TBSP sesame
oil
2
TBSP
white
vinegar
1
TBSP
sugar
Sauce
preparation:
-
Place sesame oil, vinegar, sugar, garlic, chili, ginger, soy sauce
in
a saucepan and
heat
on high setting, stirring constantly.
Last add peanut
butter and cook
for
a few
minutes.
Whole
chicken
-
use
P
oultry
Rack. Baste
with
olive
oil only 2 -3
times
in final 40
minutes
of cooking.
Meats and
chicken breasts
-
use
Meat
Tower. Baste
with
olive
oil
only,
1- 2 times
during last 40 minutes
of cooking.
* Remember
to
place
food on
accessories outside
the Rotisserie.
•
Cooked birds are more crispy when properly dried.
To prepare a bird, place under
cold
running water, then shake
out to
remove excess water, and
finally pat
dry
with
absorbent paper towels.
•
Check
to
ensure
that the
P
oultry
Rack
or Meat
Tower
rotates freely
without
touching the heating
elements. (N.B. Cook as
per chart
Page
6)
Sweet
and
T
angy
This is a
low fat
sauce
or
marinade. Only 0.1 gram
fat
per 1/4 cup
!
Use
for
whole chicken
or 4
chicken breasts
or 2
Lbs. pork
or 2
Lbs.
lamb
2
cups tomato sauce
1/2
cup red
vinegar
2
TBSP
firmly
packed
sugar
1
TBSP
Worcestershire
sauce
2
cloves crushed
garlic
2
Tsp dry
mustard
Pinch
of
pepper
(to
taste)
Pinch
of chili (to taste)
Pinch
of
salt
(to taste)
13

Sweet
and
Sour
We suggest
2
Lbs. pork
roast
2
TBSP olive
oil
2
TBSP
cornstarch
1
can pineapple
chunks
1/4
red
or
green
pepper
1/3
cup red
vinegar
2
TBSP
soy sauce
1
onion
chopped
Sauce
preparation:
-
Add
all
ingredients
into
a saucepan
in
following order: Pour
in
olive
oil
and add
the
onion and red
or
green pepper. Cook a few minutes on high temperature, and
then
add contents
of
can
of
pineapple including juice. Bring
to
a
boil for 2
minutes,
then
reduce heat and next add cornstarch and
stir until
mixture thickens. Finally add
the
vinegar and soy sauce.
-
Separate the sauce
into
2 equal servings
-
one
for
cooking the food and the
remaining
sauce as a table
serving.
Use
Meat
Tower. First soak the pork
for
a few minutes and then
put
on skewers on
Meat
Tower. Place inside
the
Rotisserie and baste during cooking,
2- 3 times.
* Remember
to
place
food on
accessories outside
the Rotisserie.
•
Check
to
ensure
that the Meat
Tower rotates
freely without
touching
the heating
elements. (N.B. Cook as
per chart
Page
6)
T
andoori
Chicken
4
chicken breasts (skinless and
boneless)
5oz milk
2
Tsp garlic
powder
1
Tsp ginger
powder
1
Tsp
chili powder
1
Tsp dried
mint
1
Tsp
salt
pinch
of cinnamon
Sauce
preparation:
- Mix
milk and
all
ingredients
in
a non-metal bowl (metal
or
aluminum could
react
with the spices). Next, put
in
the chicken and marinade
in
refrigerator from 3-24 hours.
-
Place marinated chicken breasts on Meat Tower piercing them so they stand
upward
on
the
meat skewers.
Use
Meat
Tower. Baste during cooking,
2 - 3 times.
* Remember
to
place
food on
accessories outside
the Rotisserie.
* Excellent as
a marinade
•
Check
to
ensure
that the Meat
Tower rotates
freely without
touching
the heating
elements. (N.B. Cook as
per chart
Page
6)
14

?? NEED HELP
??
BEFORE CONTACTING YOUR RETAILER CALL
TOLL-FREE
1-888-888-2433
Wash
the
Swing Door
in hot
water
with
detergent. Rinse and then
dry.
The base
unit
may be wiped
with
a damp cloth both inside and exterior.
REMEMBER,
do
not
place
the
base
in
water
or
any liquid. DO NOT WIPE THE
HEATING
ELEMENTS
-
They
are self cleaning!
After using the Rotisserie, clean
as
per above. REMEMBER: Allow
to
cool before
washing
and
UNPLUG
after
each
use.
Troubleshooting
Problem Solution
Food does
not
rotate
easily
First close Timer and
let
cool. Check
that
food does
not touch any part of heating
elements
or
Swing Door. Pin down the wings
to
the body
of bird
if
wings extremely
large.
No
power
Check
that
Timer is set over 15
minutes.
Double-check power
supply
Drip Tray
smoking
Clean Drip Tray
after
each use.
May have residue
from
previous
cooking.
Food placed
on
Make sure
the
Drip Tray is well centered on
the
the
Drip Tray is
unstable
Tray Support and the raised dimple
of
the Drip
Tray
fits
centrally over
the
Drive
Shaft
Food takes longer
to
cook
than
Maybe
the
Swing Door has been opened so
many
the
suggested time on
Cooking
ti
mes
that
excessive heat loss has occurred
requiring
Chart Page
6
extra time
to
cook. Possibly
the
Swing Door
was
not
completely closed during cooking.
The food is
extra tough requiring a longer cooking
time.
15
Troubleshooting