Loading ...
Loading ...
Loading ...
6
www.insigniaproducts.com
Attaching a wall-mount bracket
(NS-LDVD32Q-10A)
To attach a wall-mount bracket
(NS-LDVD32Q-10A):
1 If the stand is installed, remove the eight screws
that secure the stand to your TV/DVD combo.
2 Secure the wall-mount bracket (not provided) to
the back of your TV/DVD combo using four of
the screws you removed in Step 1. These are
M4*16 (4 mm in diameter and 16 mm in length)
screws.
TV components
Package contents
• TV/DVD combo
•Power cord
•Stand
• Stand cover (NS-LDVD32Q-10A only)
• Remote control with holder
• Remote control batteries (2 AAA)
• Screws for attaching the stand or wall-mount
bracket (8)
• VGA cable (NS-LDVD26Q-10A only)
• Component video cable
• Cleaning cloth
•User Guide
• Quick Setup Guide
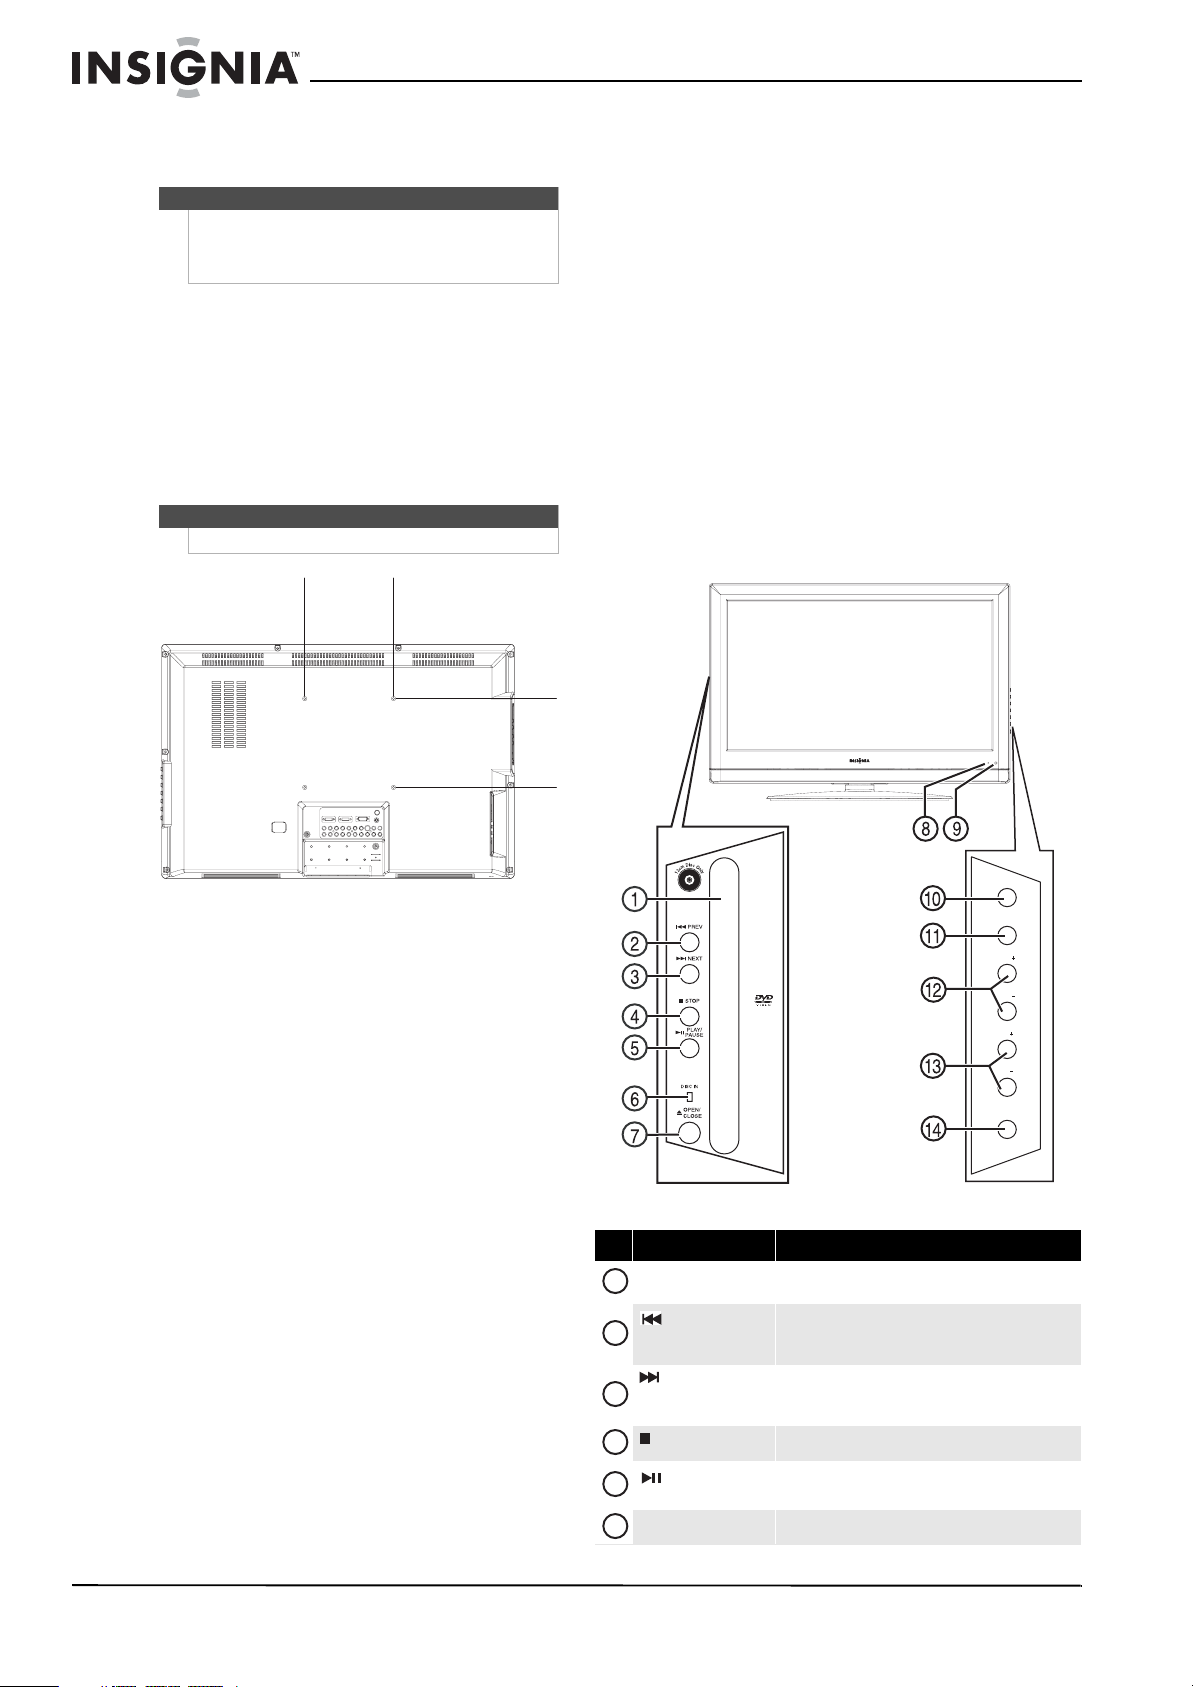
Front
Warning
These instructions are for use by qualified service
personnel only. To reduce the risk of damage or
injury, do not wall-mount your TV/DVD combo
unless you are qualified to do so.
Note
Save the four extra screws for future use.
7.878"
200 mm
7.878"
200 mm
Wall-mount
bracket location
# Item Description
Disc slot Insert a DVD or CD to change to DVD mode and play
the disc.
PREV button
Press to skip to the previous chapter or track. For more
information, see “Playing a DVD” on page 34 or
“Playing an audio CD” on page 34.
NEXT button
Press to skip to the next chapter or track. For more
information, see “Playing a DVD” on page 34 or
“Playing an audio CD” on page 34.
STOP button
Press to stop disc playback.
PLAY/PAUSE
button
Press to change to DVD mode and play or pause a disc.
Disc indicator Lights when a DVD or CD is loaded into the disc slot.
Dis
c
label towards front
POWER
VOL
VOL
INPUT
MENU
CH
CH
1
2
3
4
5
6
Loading ...
Loading ...
Loading ...