Loading ...
Loading ...
Loading ...
Features of Your BISSELLFlip-It
Includedwiththepurchaseof yourFlipIt arethe
followingSpecializedCleaningAccessories...
TheRip-Itwas designedtogivethe userthe
abilityto easilychangebetweentheGentle
CleanTM BrushesandPads.
,
.
TheGentleCleanTM Brushis recommendedfor
useon HardFloorsurfacessuchas tile,vinyl, or
surfacesthat havegroutor creviceswheredirt
andgrime collect.
TheGentleCleanTM Padis intendedfor use
onmoredelicate surfacessuchas sealed
hardwood,laminatesor vinyl.
3. ThePleatedFilter,locatedin thelid of the Dirty
Tankshouldbecleanedperiodically.
Built-In Heater
(On 7340 Flip-It Select Models only).
Tousethe Flip-it select's Built-InHeater,pushthe
powerswitch down.The HeatIndicatorLightwill
comeon.Within25-30 seconds,theflow of water
andsolutionwill be 25°Fwarmer.
WARNING:
Do Not plug in your
cleaneruntil you have
completelyassembledit per
thefollowing instructions
and arefamiliar with all
instructionsand operating
procedures.
WARNING:
Toreducethedskoffire,
useonlyBISSELLHard
andWoodFloorCleaning
SolutionsinyourFlip-It.Use
ofcleaningformulaswhich
containlemonorpineoilmay
damagethisapplianceand
voidthewarranty.Chemical
spotcleanersorsolvent
basedsoil removersshould
notbeused.Theseproducts
may reactwiththeplastic
materialsusedinyourFlip-It
causingcrackingorpitting.
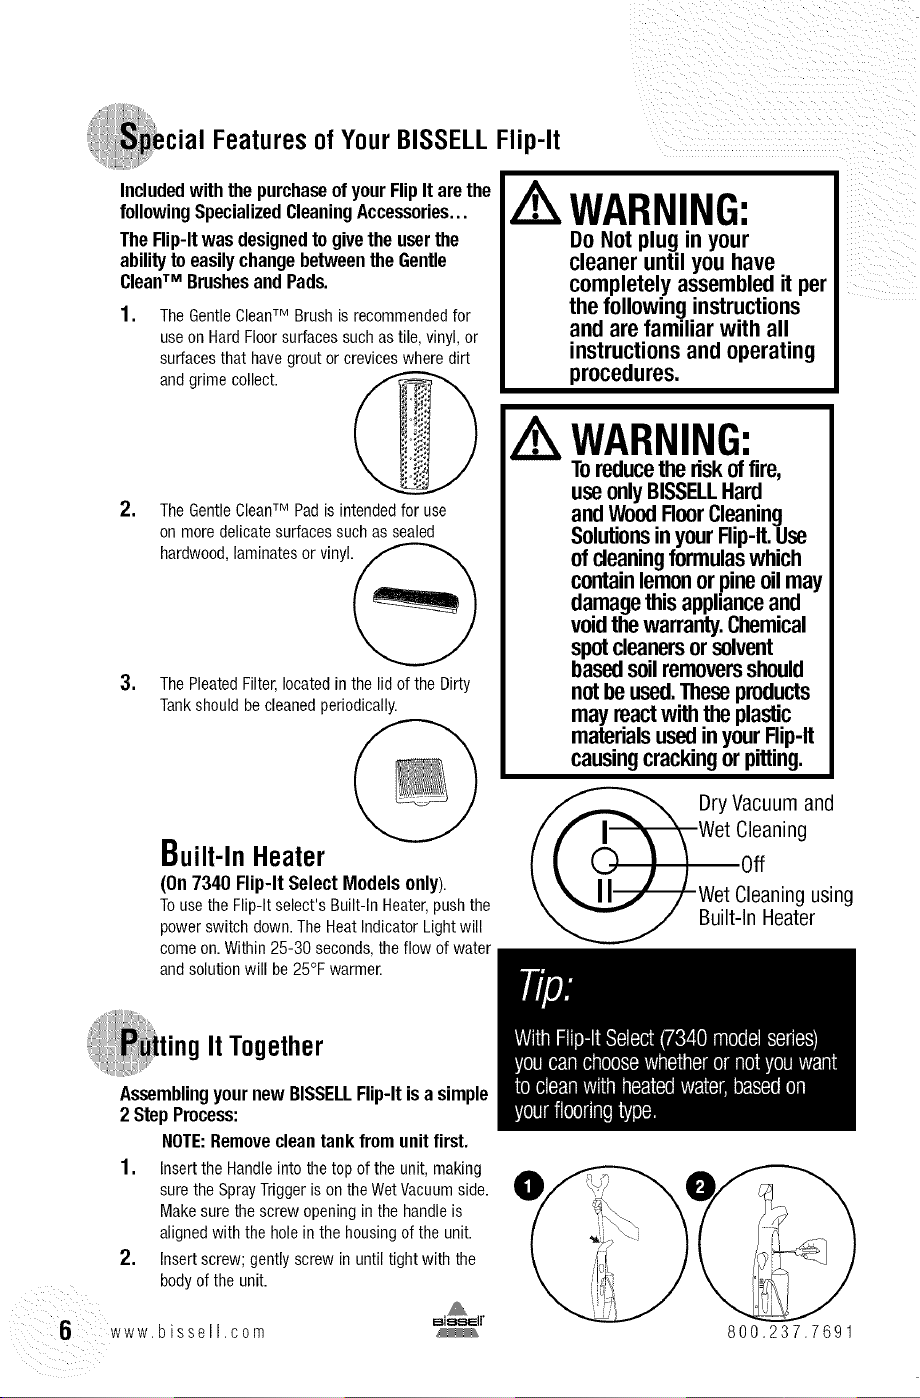
DryVacuumand
Cleaning
-Wet Cleaningusing
Built-InHeater
It Together
6 www.bissell.com
Assembling your new BISSELLFlip-It isa simple
2 Step Process:
NOTE:Remove clean tank from unit first.
1. Insertthe Handleinto thetop of the unit, making
suretheSprayTriggerison the WetVacuumside.
Makesure thescrew openingin the handleis
alignedwith the holein the housingof the unit.
2. Insertscrew; gentlyscrew in until tightwith the
bodyof the unit.
800.237.7691
ug603-6704 5200 306.indd 6 3/1/06 11:29:00 AM
Loading ...
Loading ...
Loading ...