Loading ...
Loading ...
Loading ...
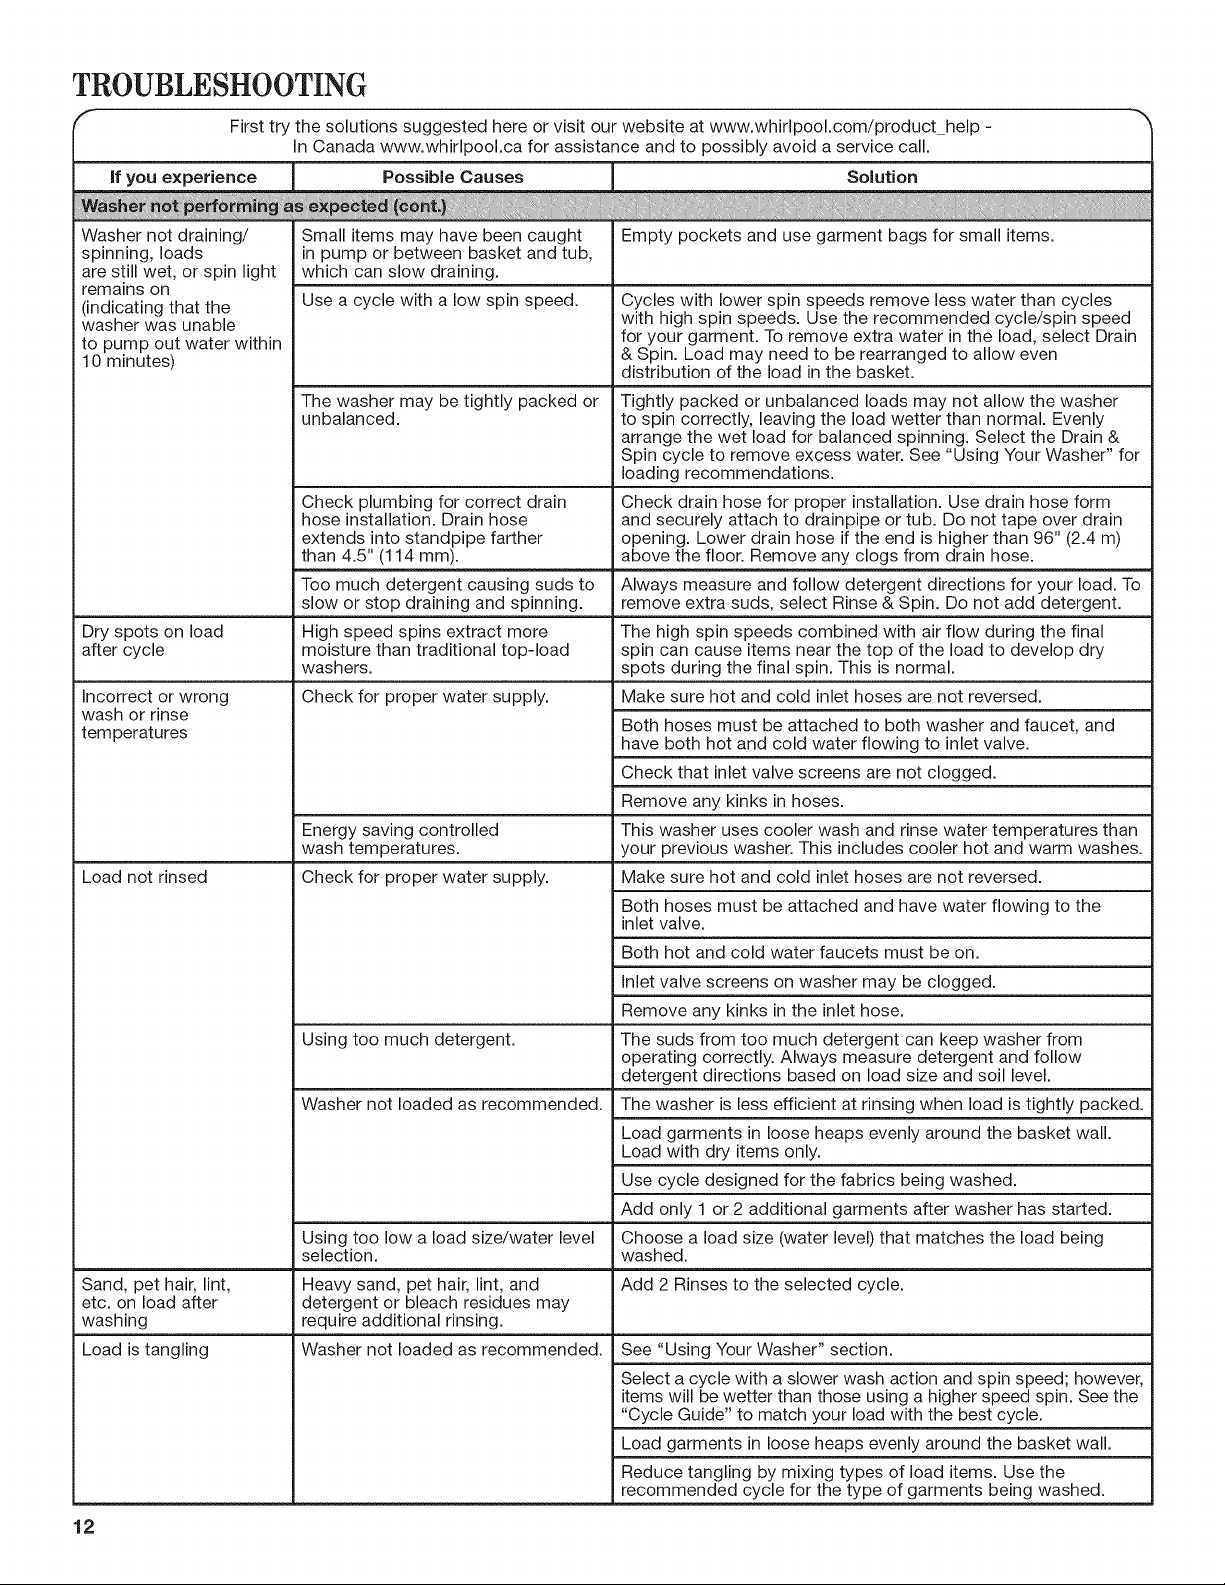
TROUBLESHOOTING
Washer not draining/
spinning, loads
are still wet, or spin light
remains on
(indicating that the
washer was unable
to pump out water within
10 minutes)
First try the solutions suggested here or visit our website at www.whirlpool.com/product_help -
In Canada www.whirlpool.ca for assistance and to possibly avoid a service call.
Solution
Empty pockets and use garment bags for small items.Small items may have been caught
in pump or between basket and tub,
which can slow draining.
Use a cycle with a low spin speed.
The washer may be tightly packed or
unbalanced.
Cycles with lower spin speeds remove less water than cycles
with high spin speeds. Use the recommended cycle/spin speed
for your garment. To remove extra water in the load, select Drain
& Spin. Load may need to be rearranged to allow even
distribution of the load in the basket.
Tightly packed or unbalanced loads may not allow the washer
to spin correctly, leaving the load wetter than normal. Evenly
arrange the wet load for balanced spinning. Select the Drain &
Spin cycle to remove excess water. See "Using Your Washer" for
loading recommendations.
Check plumbing for correct drain Check drain hose for proper installation. Use drain hose form
hose installation. Drain hose and securely attach to drainpipe or tub. Do not tape over drain
extends into standpipe farther opening. Lower drain hose if the end is higher than 96" (2.4 m)
than 4.5" (114 mm). above the floor. Remove any clogs from drain hose.
Too much detergent causing suds to Always measure and follow detergent directions for your load. To
slow or stop draining and spinning, remove extra suds, select Rinse & Spin. Do not add detergent.
Dry spots on load High speed spins extract more The high spin speeds combined with air flow during the final
after cycle moisture than traditional top-load spin can cause items near the top of the load to develop dry
washers, spots during the final spin. This is normal.
Check for proper water supply. Make sure hot and cold inlet hoses are not reversed.Incorrect or wrong
wash or rinse
temperatures
Energy saving controlled
wash temperatures.
Load not rinsed Check for proper water supply.
Using too much detergent.
Washer not loaded as recommended.
Both hoses must be attached to both washer and faucet, and
have both hot and cold water flowing to inlet valve.
Check that inlet valve screens are not clogged.
Remove any kinks in hoses.
This washer uses cooler wash and rinse water temperatures than
your previous washer. This includes cooler hot and warm washes.
Make sure hot and cold inlet hoses are not reversed.
Both hoses must be attached and have water flowing to the
inlet valve.
Both hot and cold water faucets must be on.
Using too low a load size/water level
selection.
Sand, pet hair, lint, Heavy sand, pet hair, lint, and Add 2 Rinses to the selected cycle.
etc. on load after detergent or bleach residues may
washing require additional rinsing.
Load is tangling Washer not loaded as recommended.
Inlet valve screens on washer may be clogged.
Remove any kinks in the inlet hose.
The suds from too much detergent can keep washer from
operating correctly. Always measure detergent and follow
detergent directions based on load size and soil level.
The washer is less efficient at rinsing when load is tightly packed.
Load garments in loose heaps evenly around the basket wall.
Load with dry items only.
Use cycle designed for the fabrics being washed.
Add only 1 or 2 additional garments after washer has started.
Choose a load size (water level) that matches the load being
washed.
See "Using Your Washer" section.
Select a cycle with a slower wash action and spin speed; however,
items will be wetter than those using a higher speed spin. See the
"Cycle Guide" to match your load with the best cycle.
Load garments in loose heaps evenly around the basket wall.
Reduce tangling by mixing types of load items. Use the
recommended cycle for the type of garments being washed.
12
Loading ...
Loading ...
Loading ...