Loading ...
Loading ...
Loading ...
21 22
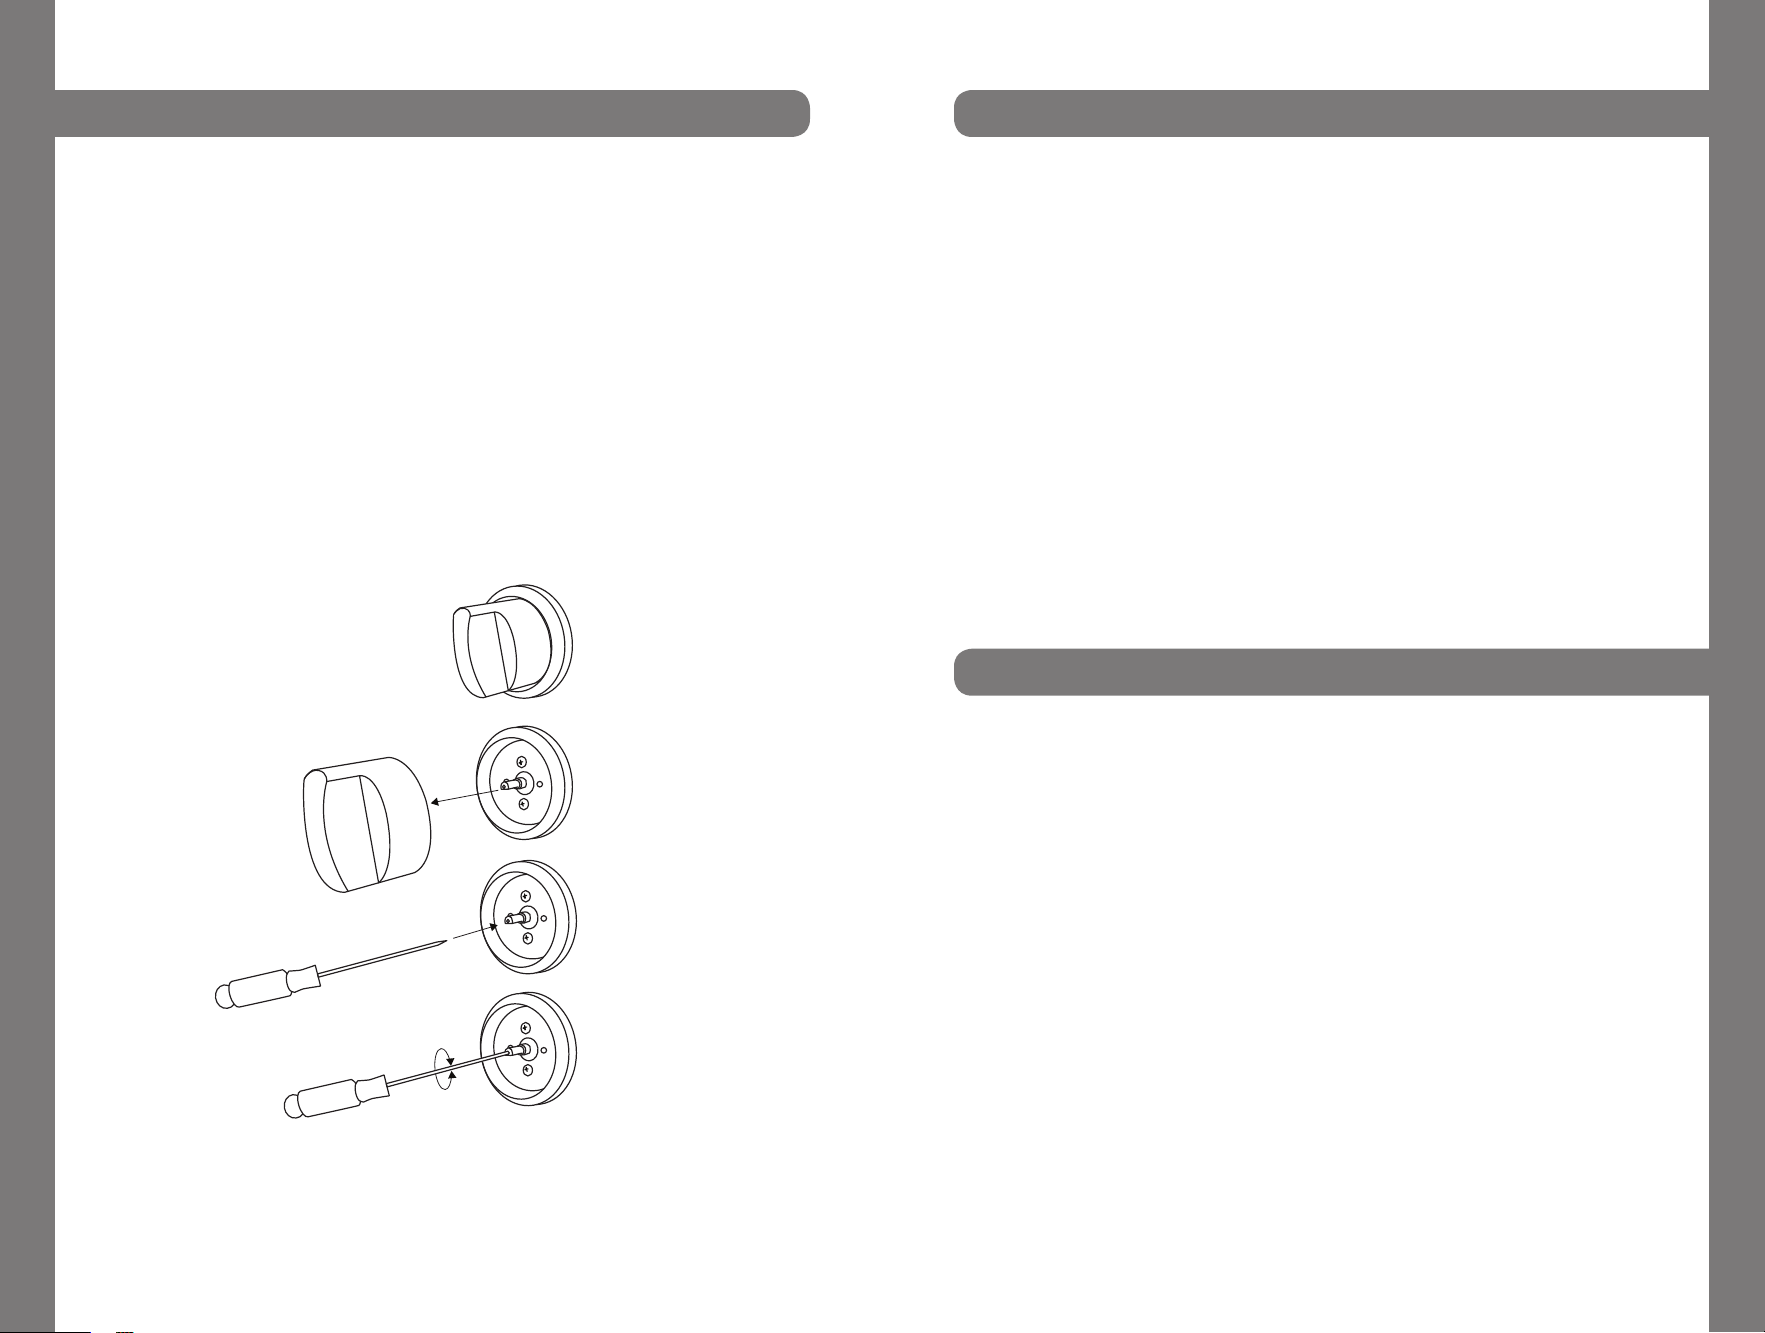
1. Light one burner at a time and set it to the MINIMUM position (small flame).
2. Remove the knob.
3. The range is equipped with a safety valve. Using a small-size slotted screwdriver,
locate the choke screw (see diagram below) and turn to the right or left until the
burner flame is adjusted to desired minimum.
4. Make sure that the flame does not go out when switching quickly from the
MAXIMUM TO THE MINIMUM position.
Flame Adjustment Procedure
2.0 x 50 mm
2.0 x 50 mm
Flame Adjustment
1. Is the range mounted on its legs?
2. Is the back guard securely connected?
3. Has the anti-tip device been properly installed?
4. Does the clearance from the side cabinets comply with the manufacturers’
direction?
5. Is the electricity properly grounded?
6. Is the gas service line connected following the directions of the manufacturer?
7. Have all the proper valves, stoppers, and gaskets been installed between the
range and the service line?
8. Has the gas connection been checked for leaks?
9. Has the range been setup for the type of gas available in the household? (LP,
propane, or natural gas)
10. Does the flame appear sharp blue with no yellow tipping?
11. Has the minimum setting for all burners been adjusted?
All stainless steel body parts should be wiped with hot, soapy water and with a
stainless steel cleanser.
If build-up occurs, do not use steel wool, abrasive cloths, cleaners, or powders. If it is
necessary to scrape stainless steel to remove encrusted materials, soak with hot, wet
cloths to loosen the material, and then use a wood or nylon scraper. DO NOT use
a metal knife, or any other metal tool to scrape stainless steel! Scratches are almost
impossible to remove.
Before using the oven for food preparation, clean thoroughly with a warm soap and
water solution to remove film residues and any dust or debris from installation, then
rinse and wipe dry.
Installation Checklist
Final Preparation
Loading ...
Loading ...
Loading ...