Loading ...
Loading ...
Loading ...
2. 2
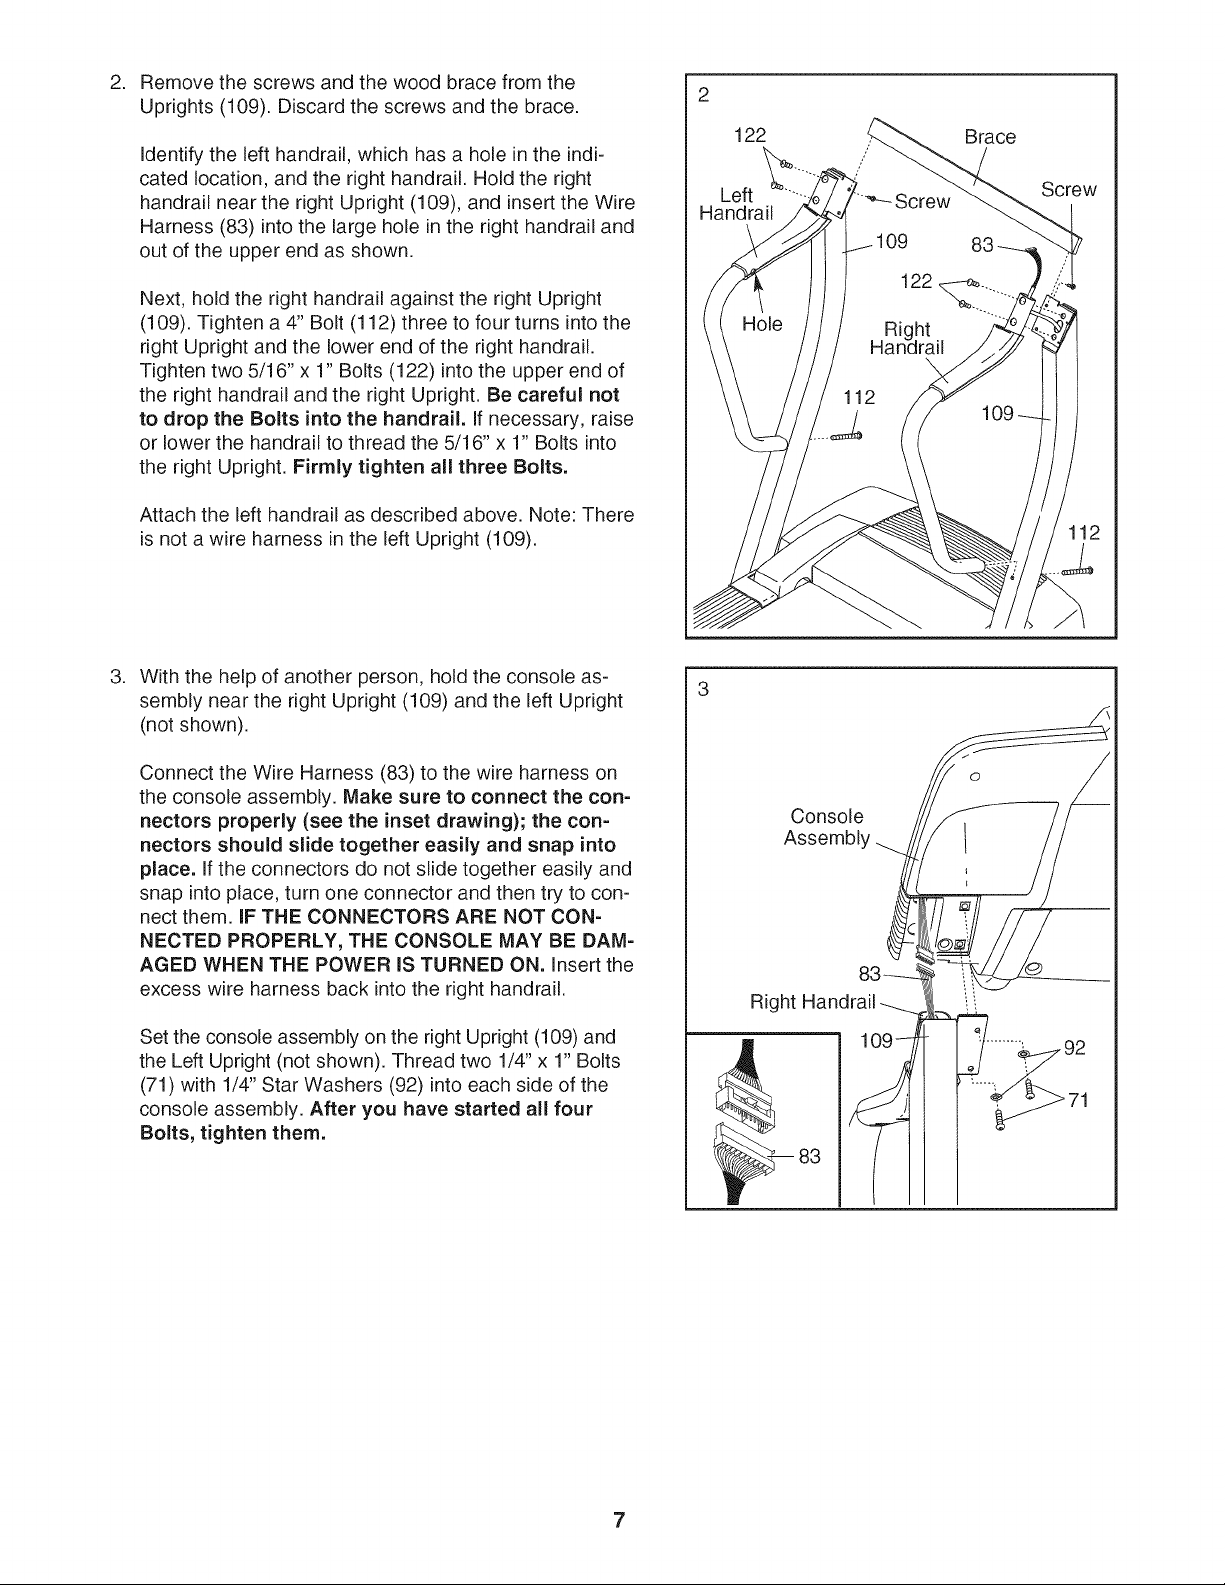
Removethescrewsandthewoodbracefromthe
Uprights(109).Discardthescrewsandthebrace.
Identifythelefthandrail,whichhasa holeintheindi-
catedlocation,andtherighthandrail.Holdtheright
handrailneartherightUpright(109),andinserttheWire
Harness(83)intothelargeholeintherighthandrailand
outoftheupperendasshown.
Next,holdtherighthandrailagainsttherightUpright
(109).Tightena 4"Bolt(112)threetofourturnsintothe
rightUprightandthelowerendoftherighthandrail.
Tightentwo5/16"x 1"Bolts(122)intotheupperendof
therighthandrailandtherightUpright.Becarefulnot
to dropthe Boltsinto the handrail. If necessary, raise
or lower the handrail to thread the 5/16" x 1" Bolts into
the right Upright. Firmly tighten all three Bolts.
Attach the left handrail as described above. Note: There
is not a wire harness in the left Upright (109).
122
Left
Handrail
Brace
Screw
.
With the help of another person, hold the console as-
sembly near the right Upright (109) and the left Upright
(not shown).
Connect the Wire Harness (83) to the wire harness on
the console assembly. Make sure to connect the con-
nectors properly (see the inset drawing); the con-
nectors should slide together easily and snap into
place. If the connectors do not slide together easily and
snap into place, turn one connector and then try to con-
nect them. IF THE CONNECTORS ARE NOT CON-
NECTED PROPERLY, THE CONSOLE MAY BE DAM-
AGED WHEN THE POWER IS TURNED ON. Insert the
excess wire harness back into the right handrail.
Set the console assembly on the right Upright (109) and
the Left Upright (not shown). Thread two 1/4" x 1" Bolts
(71) with 1/4" Star Washers (92) into each side of the
console assembly. After you have started all four
Bolts, tighten them.
3
Console
Right
7
Loading ...
Loading ...
Loading ...