Loading ...
Loading ...
Loading ...
Installation
Instructions
Moving
the
Range
to
Final
Location
1)
Peel
the
protective
plastic
coating
off
of
the
range,
including
the
range
door.
2)
Uncoil
the
power
cord
and
route
it
to
the
electrical
outlet
so
that
it
does
not
become
trapped
behind
the
range
when
it
is
pushed
back.
Do
not
connect
the
power
plug
until
you
are
ready
to
verify
proper
operation.
Carefully
slide
the
range
into
position
taking
the
slack
out
of
the
power
cord
as
you
push
the
unit
into
place.
Be
careful
not
to
kink
the
power
cord
or
gas
line
as
you
push
the
unit
back.
The
anti-tip
foot
should
engage
the
anti-tio
bracket
as
you
slide
it
back.
Re-Installing
the
Door
WARNING
To
avoid
personal
injury
or
damage
to
the
door
from
it
falling
off
its
hinges.
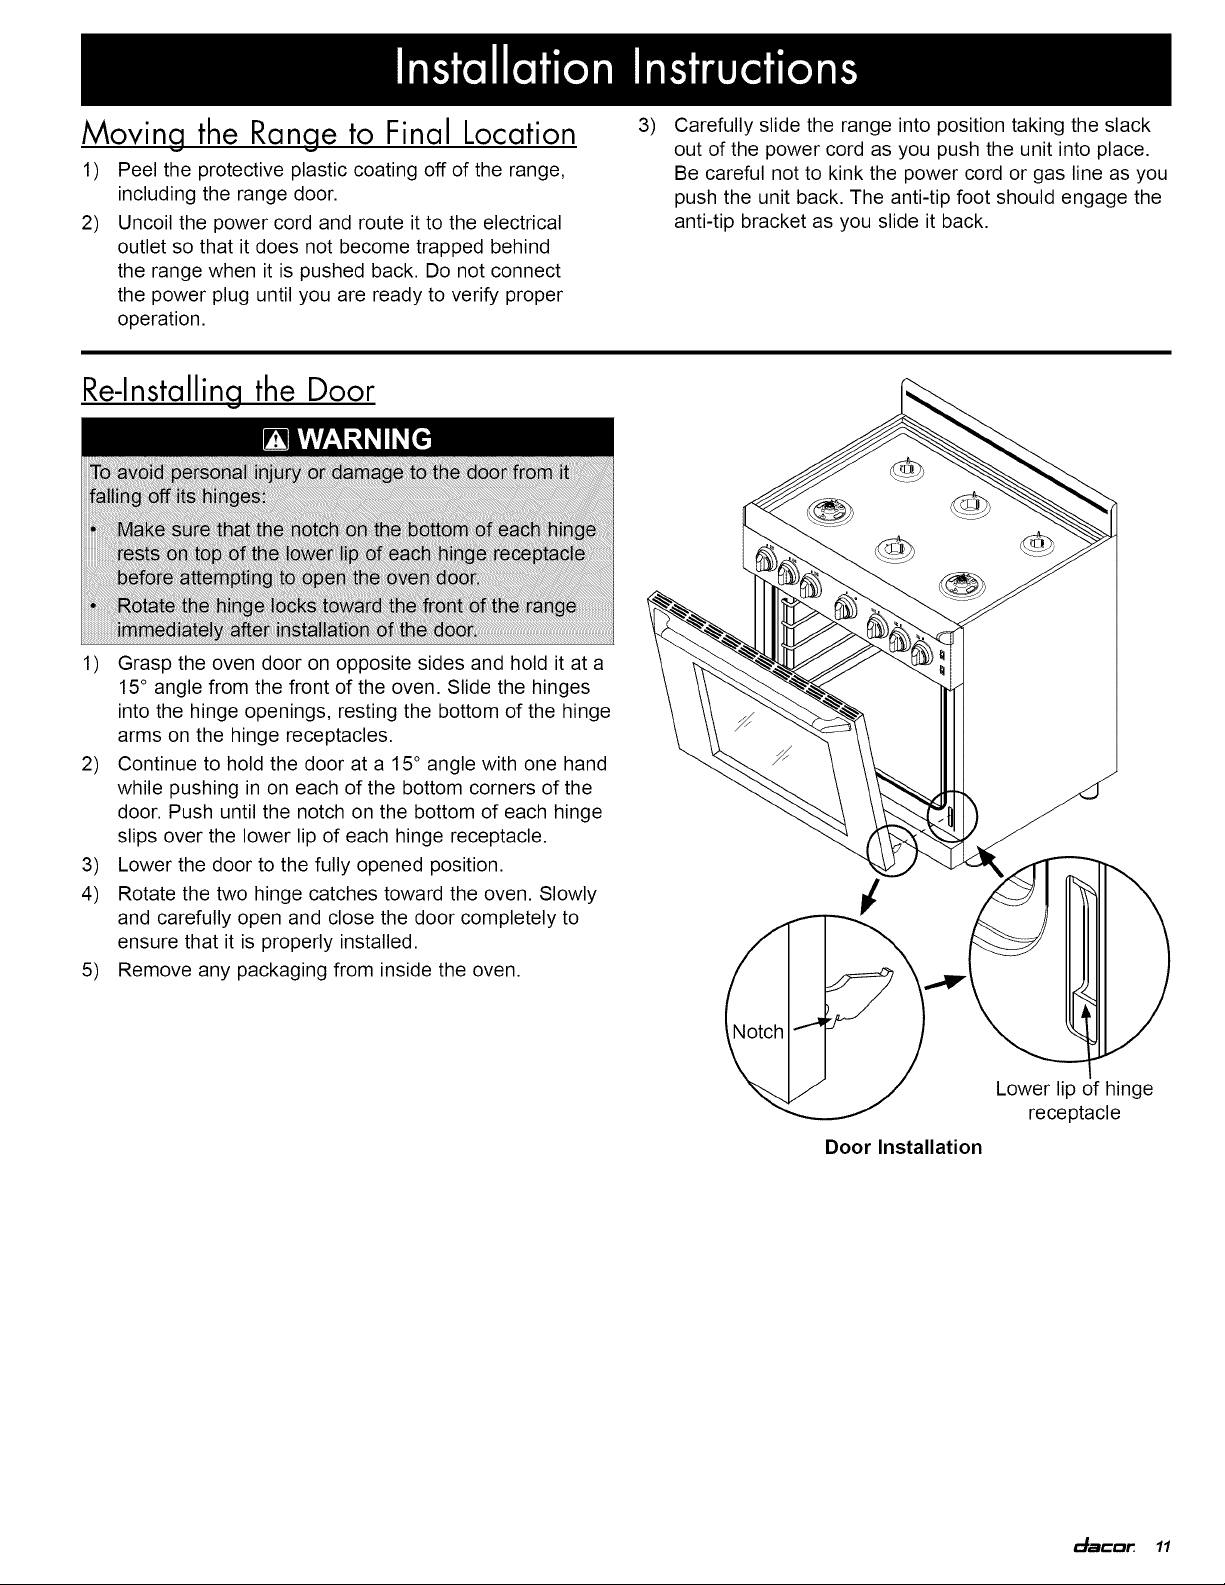
*
Make
sure
that
the
notch
on
the
bottom
of
each
hinge
rests on
lop
of
the
lower
lip
of
each
hinge
receptacle
before
aitempting
to
open
the
oven
door.
Rotate
the
hinge
locks
toward
the
front
of
the
range
immediately
after
installation
of
the
door.
arms
on
the
hinge
receptacles.
2)
Continue
to
hold
the
door
at
a
15°
angle
with
one
hand
while
pushing
in
on
each
of
the
bottom
corners
of
the
door.
Push
until
the
notch
on
the
bottom
of
each
hinge
slips
over
the
lower
lip
of
each
hinge
receptacle.
3)
Lower
the
door
to
the
fully
opened
position.
4)
Rotate
the
two
hinge
catches
toward
the
oven.
Slowly
and
carefully
open
and
close
the
door
completely
to
ensure
that
it
is
properly
installed.
5)
Remove
any
packaging
from
inside
the
oven.
Grasp
the
oven
door
on
opposite
sides
and
hold
it
ata
15°
angle
from
the
front
of
the
oven.
Slide
the
hinges
into
the
hinge
openings,
resting
the
bottom
of
the
hinge
Lower
lip
of
hinge
receptacle
Door
Installation
dacar
11
Loading ...
Loading ...
Loading ...