Loading ...
Loading ...
Loading ...

7
ASSEMBLY INSTRUCTIONS
Before beginning assembly of product, make sure all parts are present.
Compare parts with package contents list and diagram above. If any part is
missing or damaged, do not attempt to assemble the product. Contact
customer service for replacement parts.
Estimated Assembly Time: 15 minutes
Tools required for assembly: Phillips Screwdriver (not included)
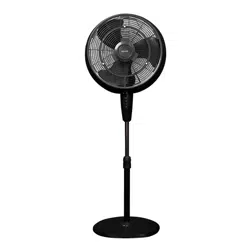
FAN BASE ASSEMBLY – FIG. 1
1. Unscrew the four screws (U) on the base (W), and then attach the external
pole (Q) to the base by tightening the four screws.
2. Remove the height adjustment ring (P) by unscrewing it counterclockwise,
and slide the stand ornament (V) down the external pole and over the
base.
3. Use your finger to pull out the internal pole (O). Slide the height
adjustment ring over the internal pole. Fasten it to the external pole by
turning the ring clockwise while holding the pole. Make sure the height
adjustment ring is tightly fastened before final assembly.
FAN HEAD ASSEMBLY – FIG. 2 & 3
1. Remove the blade cap (B) by turning clockwise. If you are struggling to
remove it, try holding the cap down. Remove the plastic nut (E) by turning
counterclockwise. Discard plastic sleeve (D).
2. Position the rear grille (F) over the motor shaft (G). Make sure the handle
is at the top and the one notch in the rear of the cover fit over the three
prongs on the motor housing (H).
3. Secure the rear grille by turning the plastic nut (E) clockwise and tightening
firmly.
4. Slide the fan blade (C), with the hollow interior of the blade facing towards
the rear grille, onto the motor shaft.
5. Secure the fan blade onto the motor shaft by turning the blade cap
counterclockwise until it is firmly in place
Loading ...
Loading ...
Loading ...
