Loading ...
Loading ...
Loading ...
OPERATING INSTRUCTIONS
SHUT-DOWN:
1. Turn engine "OFF" as directed in the Engine Manual.
2. Turn the water supply "OFF".
3. Pointing the gun in a safe direction, trigger gun momentarily to relieve any
trapped pressure.
4. Once pressure is relieved, disconnect the nozzle assembly.
5. Disconnect and drain gun, wand and hoses.
6. Wipe unit clean and store with gun, wand and hoses in a safe, non-freezing
area.
STORAGE & MAINTENANCE
SPECIFIC MAINTENANCE:
ENGINE: The engine instructions that accompany your unit detail specific
procedures for maintenance of the engine. Following the engine
manufacturer's recommendations will extend engine work life.
PUMP:
The pump oil must be changed after the first 25 hours of operation.
Once the initial oil change has been completed, it is recommended
the oil be changed every 3 months or 250 hour intervals. If oil
appears dirty or milky, changes may be required at a greater
frequency. Use SAE 30 oil, fill only to the center of the oil sight glass
and fill only to the center of the oil sight glass. DO NOT OVERFILL!
NOZZLES:
Water flow through the spray nozzle will erode the orifice, making
it larger, resulting in a pressure loss. Nozzles should be replaced
whenever pressure is less than 85% of the maximum. The frequency
of replacement will depend upon such variables as mineral content
in the water and number of hours the nozzle is used.
QUICK COUPLERS: There is an o-ring seal inside the female quick coupler.
This o-ring will deteriorate or, if the unit is allowed to pump without
the high pressure hose or nozzle attached, the o-ring may be blown
out occasionally. Simply insert a replacement o-ring to correct the
leak. (Additional o-rings can be purchased from your dealer.)
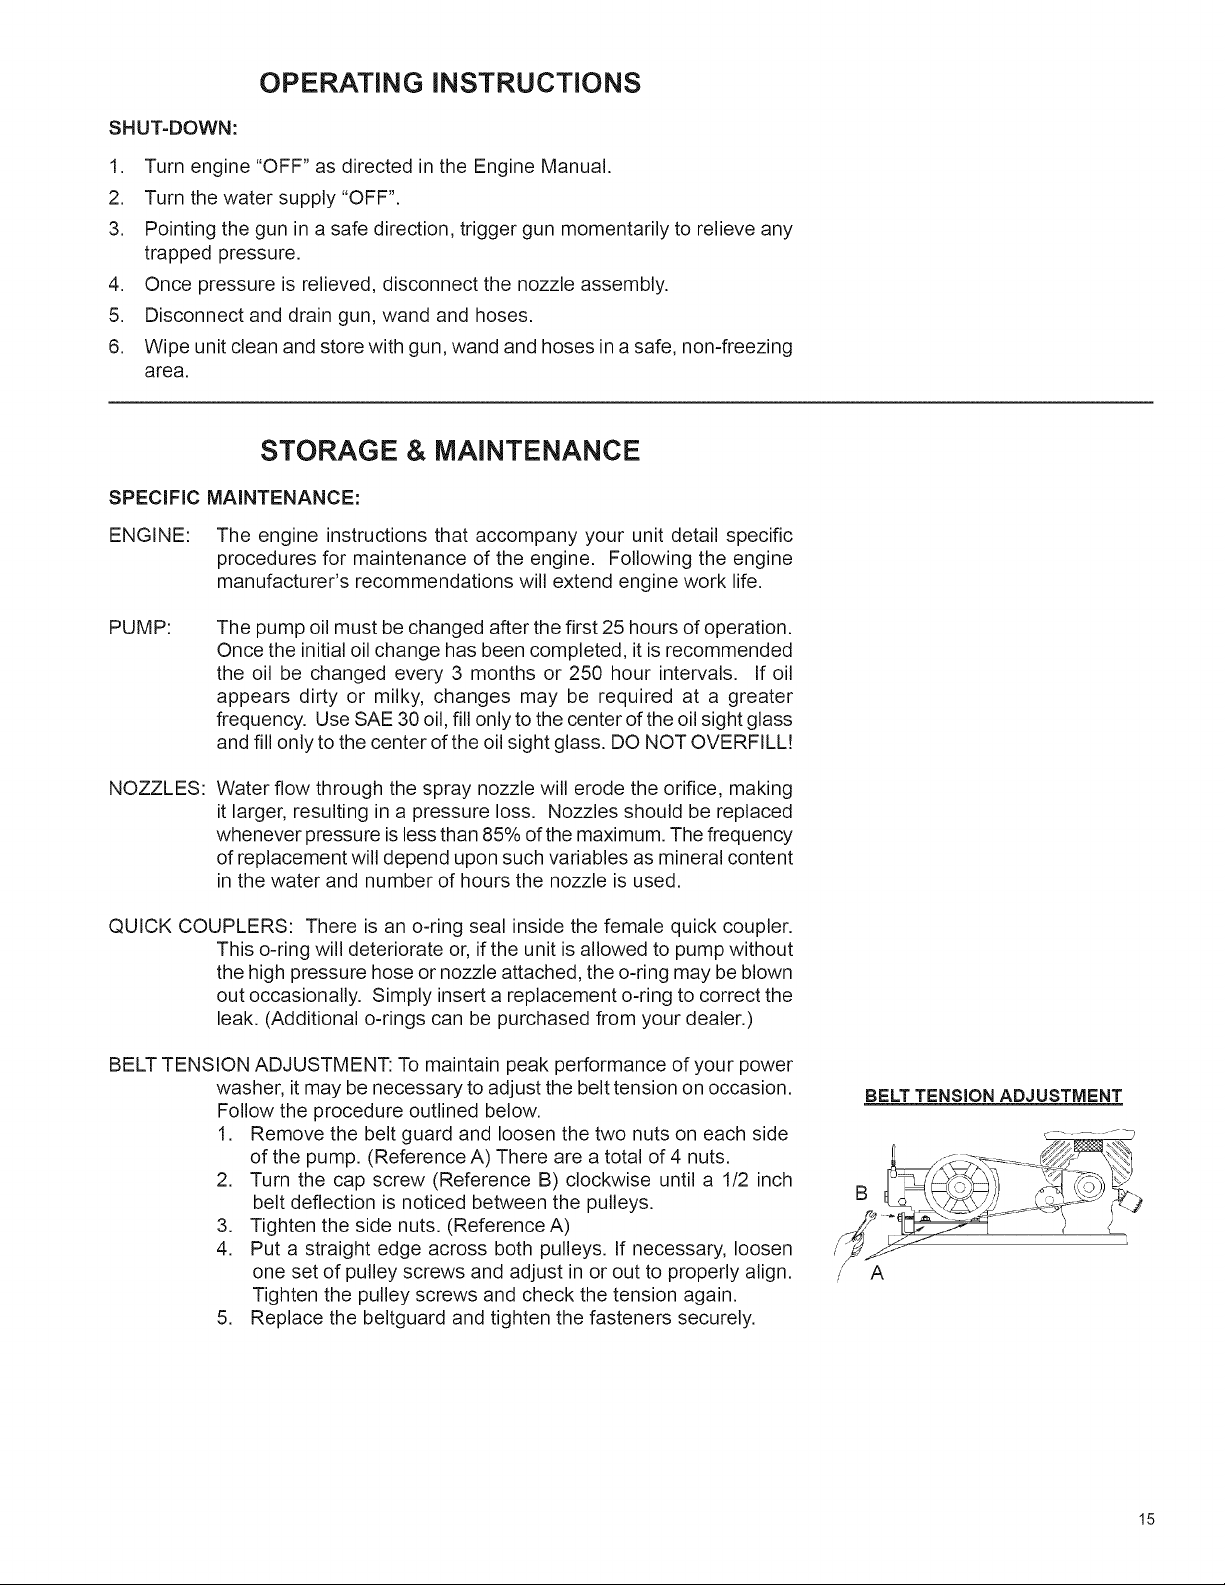
BELT TENSION ADJUSTMENT: To maintain peak performance of your power
washer, it may be necessary to adjust the belt tension on occasion.
Follow the procedure outlined below.
1. Remove the belt guard and loosen the two nuts on each side
of the pump. (Reference A) There are a total of 4 nuts.
2. Turn the cap screw (Reference B) clockwise until a 1/2 inch
belt deflection is noticed between the pulleys.
3. Tighten the side nuts. (Reference A)
4. Put a straight edge across both pulleys. If necessary, loosen
one set of pulley screws and adjust in or out to properly align.
Tighten the pulley screws and check the tension again.
5. Replace the beltguard and tighten the fasteners securely.
BELT TENSION ADJUSTMENT
15
Loading ...
Loading ...
Loading ...