Loading ...
Loading ...
Loading ...
_BII Top H_n_e
Cove_ Screw
Bottom_
nge _
Screw
Door Removal Instructions
looJsNecessa[
Phi os q(sla
5/8
Fxed
Nr@ncn
Hinge
J
s
Screw5 _"
TO DISCONNECT
1, Press outer r_rlq af_aIDst face
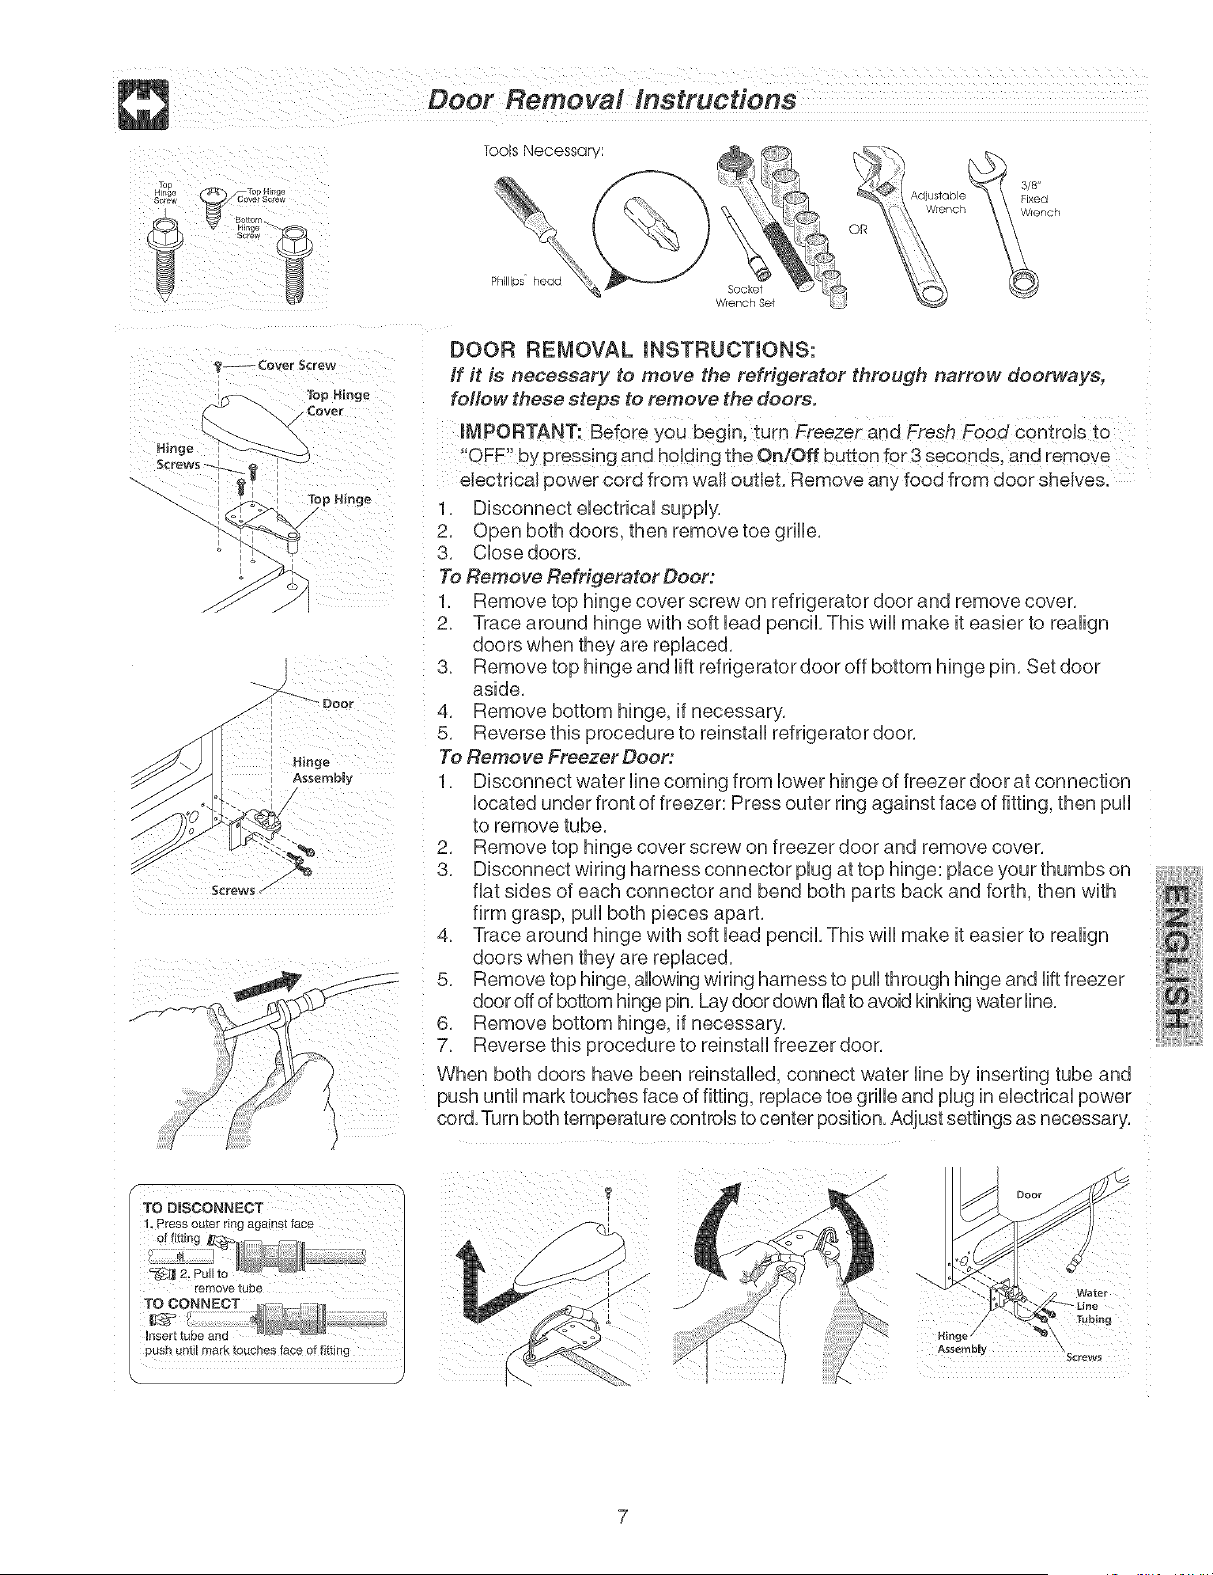
DOOR REMOVAL INSTRUCTIONS:
If it is necessary to move the refrigerator through narrow doorways,
follow these steps to remove the doors.
iMPORTANT: Before you begin, turn Freezer and Fresh Food controls to
"OFF" by pressing and holding the On/Off button for 3 seconds, and remove
eJectncal power cord from wall outlet. Remove any food from door shelves.
1. Disconnect electrical supply.
2 Open both doors, then remove toe griHHe.
3. Close doors.
To Remove Refrigerator Door:
1. Remove top hinge cover screw on refrigerator door and remove cover
2. Trace around hinge with soft lead pencil. This will make it easier to realign
doors when they are replaced.
3 Remove top hinge and lift refrigerator door off bottom hinge pin. Set door
aside.
4. Remove bottom hinge, if necessary.
5, Reverse this procedure to reinstall refrigerator door,
To Remove Freezer Deer:
1. Disconnect water line coming from lower hinge ot freezer door at connection
ocated under front of freezer: Press outer ring against face of fitting, then puii
to remove tube.
2. Remove top hinge cover screw on freezer door and remove cover.
3. Disconnect wiring harness connector plug at top hinge: place your thumbs on
fiat sides of each connector and bend both parts back and forth, then with
firm grasp pull both pueces apart.
4. Trace around hinge with soft lead pencil. This will make it easier to realign
doors when they are replaced.
5. Remove top hinge, allowing wuring harness to pull through hinge and lift freezer
door off of bottom hinge pin. Lay door down fiat to avoid kinking water fine.
6. Remove bottom hinge, if necessary.
7. Reverse this procedure to reinstall freezer door
When both doors have been reinstalled, connect water fine by nserting tube and
push until mark touches face of fitting, replace toe grille and plug in electrical power
cord. Turn both temperatu re controls to center position. Adjust settings as necessary.
[emov8/[u)o £
TO CONNECTs, _, ____ _/_
nsert tube and °_"_' '_'_*
push until mark t¢_uches face of fitting
Wate_
Jl _.J
,_" Hinge
/
Assembly Screws
Loading ...
Loading ...
Loading ...