Loading ...
Loading ...
Loading ...
10
CONVERTING THE UNIT FROM A BRUSHCUTTER TO A
TRIMMER
Removing the Blade
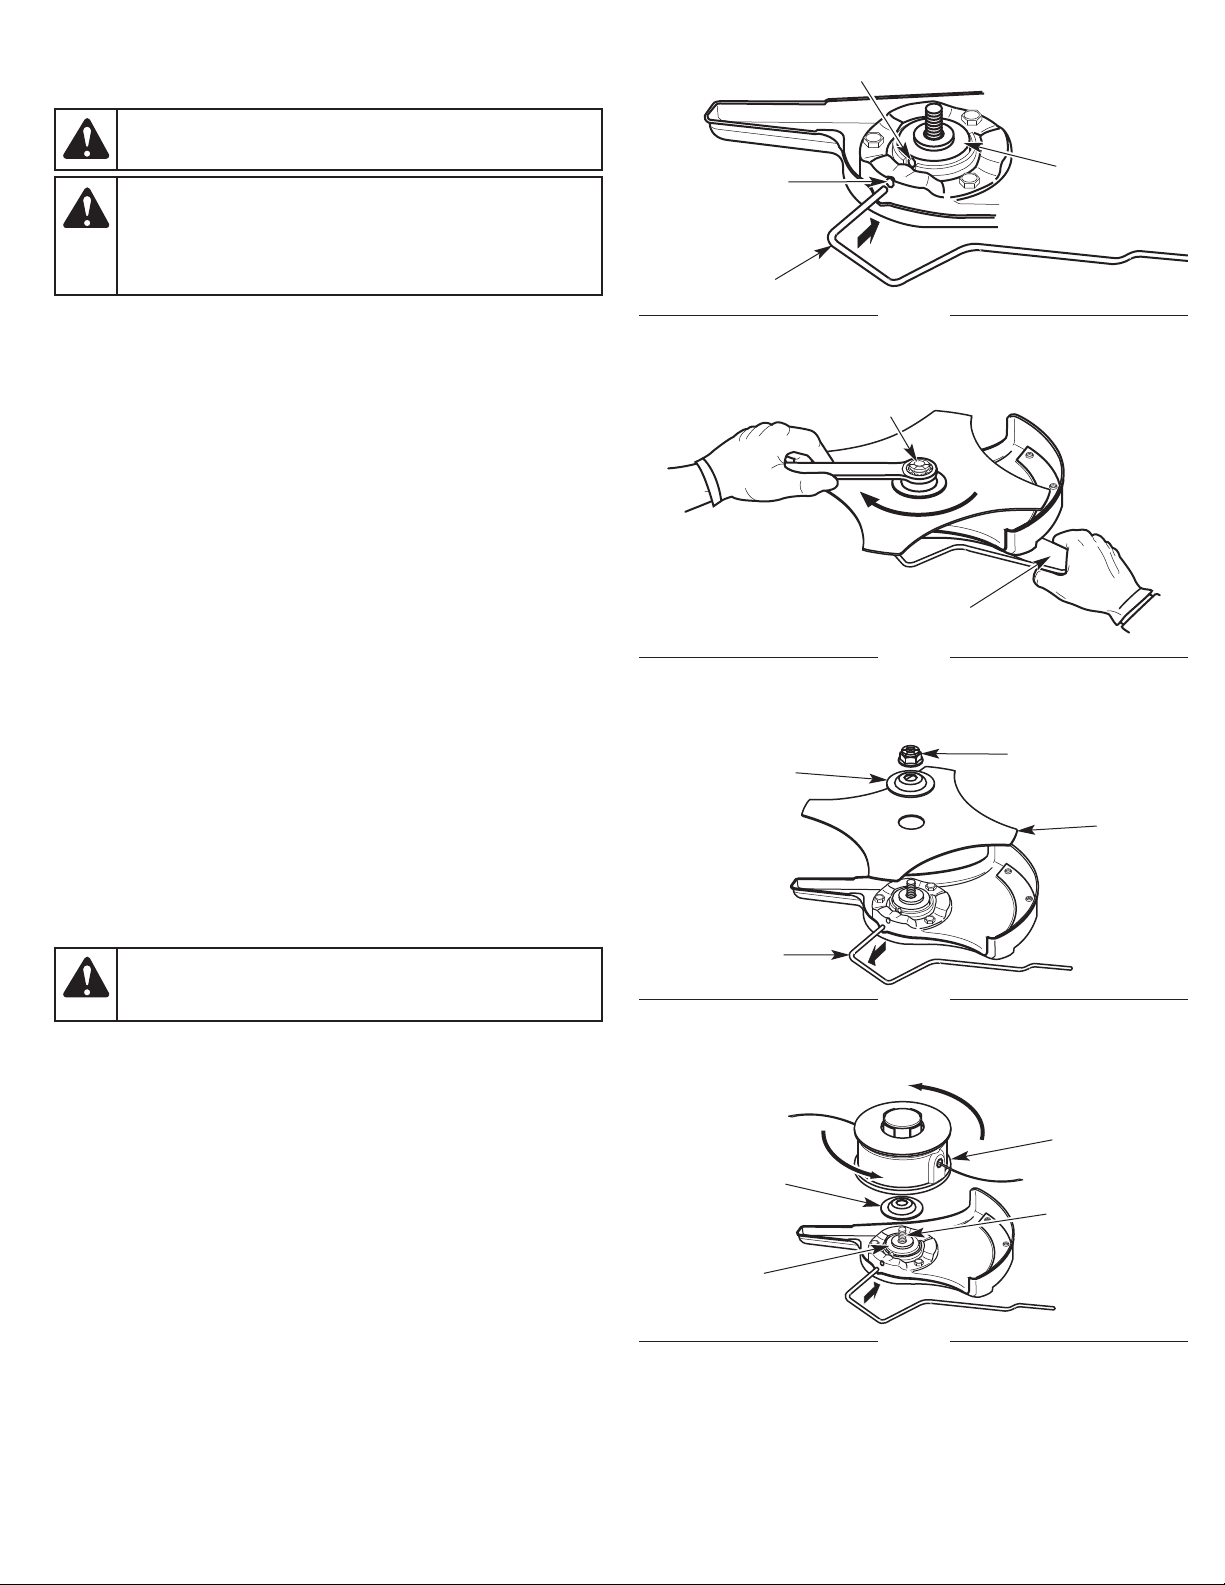
1. Rotate the blade (Fig. 11) until the shaft bushing hole aligns with
the locking rod slot (Fig. 9).
2. Insert the locking rod through the locking rod slot and into the
shaft bushing hole (Fig. 9).
3. Hold the locking rod in place by grasping the other end against
the shaft housing (Fig. 10).
4. While holding the locking rod in place, unscrew the nut by turning
it clockwise with a wrench (Fig. 10).
5. Remove the locking rod (Fig. 11).
6. Remove the blade retainer and blade (Fig. 11).
Installing the Cutting Head
1. Rotate the output shaft bushing until the shaft bushing hole
aligns with the locking rod slot (Fig. 9).
2. Insert the locking rod through the locking rod slot and into the
shaft bushing hole (Fig. 9).
3. Hold the locking rod in place by grasping the other end against
the shaft housing (Fig. 10).
4. While holding the locking rod in place, put the blade retainer on
the output shaft with the flat surface against the output shaft
bushing (Fig. 12).
5. Screw the cutting head counterclockwise onto the output shaft
(Fig. 12). Tighten the cutting head securely.
6. Remove the locking rod.
7. Install the cutting head shield. Refer to Installing and Removing
the Cutting Head Shield.
WARNING:
To avoid serious personal injury, always
wear gloves when handling the blade.
Fig. 9
Fig. 11
Shaft Bushing Hole
Blade Retainer
Output Shaft
Bushing
Locking Rod
Locking Rod Slot
Nut
Blade
Locking Rod
Fig. 10
Shaft Housing
Fig. 12
Blade Retainer
Output Shaft
Output Shaft
Bushing
Cutting Head
Nut
WARNING:
To avoid serious personal injury or damage
to the unit, do not start or operate the unit with the locking
rod inserted into the locking rod slot.
WARNING:
To avoid serious personal injury, always stop
the engine and allow the unit to cool before installing or
removing any parts. Never install or remove parts while the
unit is running. Disconnect the spark plug wire to prevent
the unit from starting accidentally.
Loading ...
Loading ...
Loading ...