Loading ...
Loading ...
Loading ...
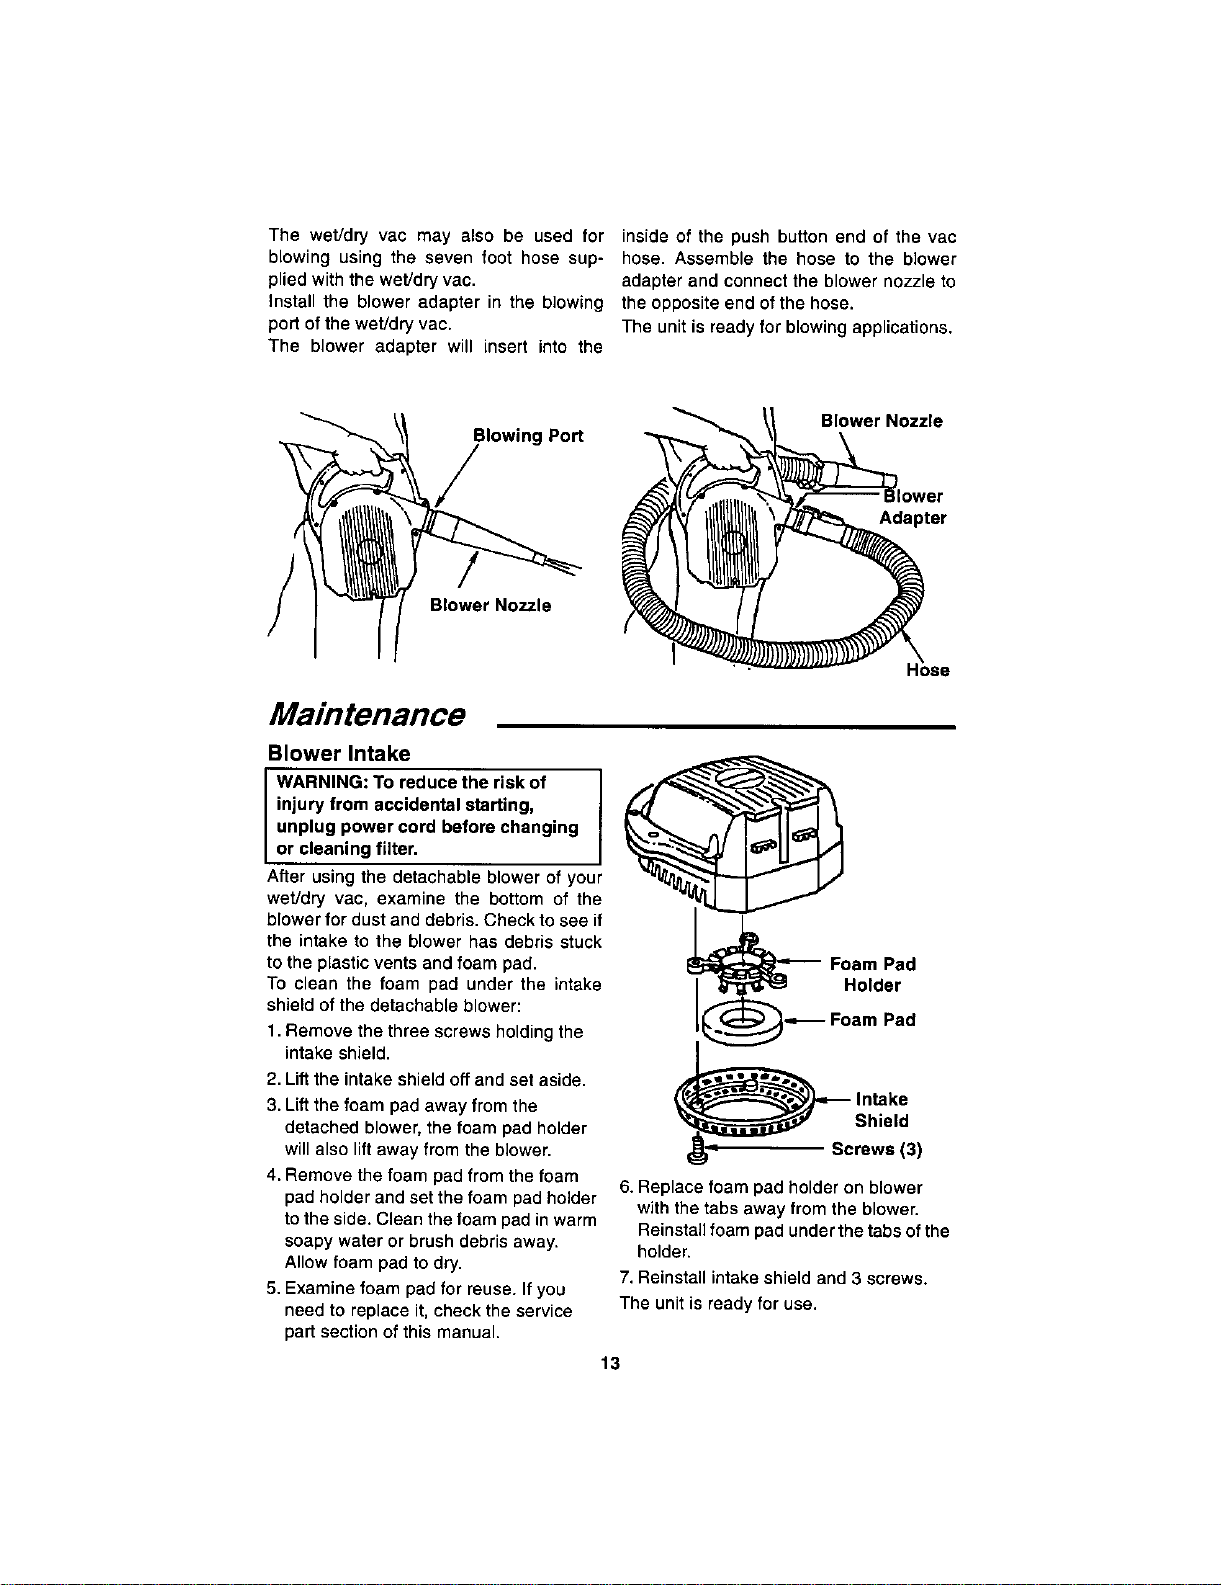
The wet/dry vac may also be used for inside of the push button end of the vac
blowing using the seven foot hose sup- hose. Assemble the hose to the blower
plied with the wet]dry vac. adapter and connect the blower nozzle to
Install the blower adapter in the blowing the opposite end of the hose.
port of the wet/dry vac. The unit is ready for blowing applications.
The blower adapter will insert into the
Blowing Port
Blower Nozzle
Blower Nozzle
Adapter
Maintenance
Blower Intake
WARNING: To reduce the risk of
injury from accidental starting,
unplug power cord before changing
or cleaning filter,
After using the detachable blower of your
wet/dry vae, examine the bottom of the
blower for dust and debris. Check to see if
the intake to the blower has debris stuck
to the plastic vents and foam pad.
To clean the foam pad under the intake
shield of the detachable blower:
1. Remove the three screws holding the
intake shield.
2. Lift the intake shield off and set aside.
3. Lift the foam pad away from the
detached blower, the foam pad holder
will also lift away from the blower.
4. Remove the foam pad from the foam
pad holder and set the foam pad holder
to the side. Clean the foam pad in warm
soapy water or brush debris away.
Allow foam pad to dry.
5. Examine foam pad for reuse. If you
need to replace it, check the service
part section of this manual.
Foam Pad
Holder
Shield
Screws (3)
6. Replace foam pad holder on blower
with the tabs away from the blower.
Reinstall foam pad under the tabs of the
holder.
7. Reinstall intake shield and 3 screws.
The unit is ready for use.
13
Loading ...
Loading ...
Loading ...