Loading ...
Loading ...
Loading ...

10 - English
OPERATION
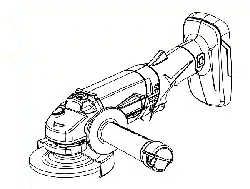
INSTALLING/REMOVING BATTERY PACK
See Figure 4, page i.
To install:
Insert the battery pack.
Make sure the latches on each side of the battery pack
snap in place and that battery pack is secured in the
product before beginning operation.
NOTICE: When placing battery pack in the tool, be
sure raised rib on battery pack aligns with groove
inside the tool and latches snap into place properly.
Improper assembly can cause damage to the tool
and battery pack.
WARNING: Always remove battery pack from
the tool when you are assembling parts, making
adjustments, cleaning, or when not in use. Removing
battery pack will prevent accidental starting that
could cause serious personal injury.
To remove:
Depress the latches on each side of the battery pack.
WARNING: Battery products are always in
operating condition. Therefore, the switch should
always be locked when not in use or carrying at your
side.
LOCK-OFF BUTTON
See Figure 5, page i.
The lock-off button is located on the handle above the
switch trigger. You must depress the lock-off button in
order to pull the switch trigger. The lock resets each time
the trigger is released.
SWITCH TRIGGER
See Figure 5, page i.
To turn the grinder ON, depress and hold lock-off button,
then depress the switch trigger. To turn it OFF, release the
switch trigger.
POSITIONING THE GUARD
See Figures 6 - 7, page ii.
The guard on the grinder should be correctly positioned
depending on which side the handle is mounted. Never
use the grinder without the guard correctly in place.
WARNING: Never place the guard so that it is
in front of the grinder. This could result in serious
injury because sparks and loose particles thrown
from the grinding wheel would be directed toward
the operator. Always place the guard in the correct
location as shown.
To reposition the guard:
Remove the battery pack.
Unlock the guard clasp by pulling the clasp out, away
from the grinder.
Rotatetheguardtoitscorrectpositionasshown.
Locktheguardclasp.
NOTE: Be sure the raised ridge on the guard is seated
in the groove on the bearing cap. Never use the grinder
without the guard in place and properly adjusted.
OPERATING THE GRINDER
See Figure 8, page ii.
Always carefully select and use grinding wheels that are
recommended for the material to be ground. Make sure
that the minimum operating speed of any accessory
wheel selected is 6,500 r/min. or more. The grinding wheel
provided with the grinder is suitable for grinding welds,
preparing surfaces to be welded, grinding structural steel,
and grinding stainless steel.
To operate the grinder:
Secure all work in a vise or clamp to a workbench.
DANGER: Never use the grinder with the guard
removed. It has been designed for use only with
the guard installed. Attempting to use grinder with
guard removed will result in loose particles being
thrown against the operator resulting in serious
personal injury.
Hold the grinder in front and away from you with
both hands, keeping the grinding wheel clear of the
workpiece.
Turn on the grinder and let the motor and grinding
wheel build up to full speed.
Lower the grinder gradually until the grinding wheel
contacts the workpiece.
Keep the grinder tilted at an angle from 5 to 15 de-
grees.
WARNING: To prevent loss of control and pos-
sible serious personal injury, always operate the
grinder with both hands, keeping one hand on the
side handle.
Move the grinder continuously at a steady, consistent
pace.
NOTICE: If the grinder is held in one spot
too long, it will gouge and cut grooves in the
workpiece. If the grinder is held at too sharp an
angle, it will also gouge the workpiece because of
concentration of pressure on a small area.
Use just enough pressure to keep the grinder from
chattering or bouncing.
Loading ...
Loading ...
Loading ...