Loading ...
Loading ...
Loading ...
NOTE: It is best to have someone hold
the box while lifting the fan and protective
packaging out of the carton. Make sure all
shipping materials are removed from fan
before operating.
Note: One of the grill mounting screws
will have a star washer for grounding
purpose. The other 3 screws will not
have a washer.
UNPACKING
6
As you unpack the fan, save the carton
and packing materials in case you want to
move or ship the unit in the future.
Carefully remove all items from the box.
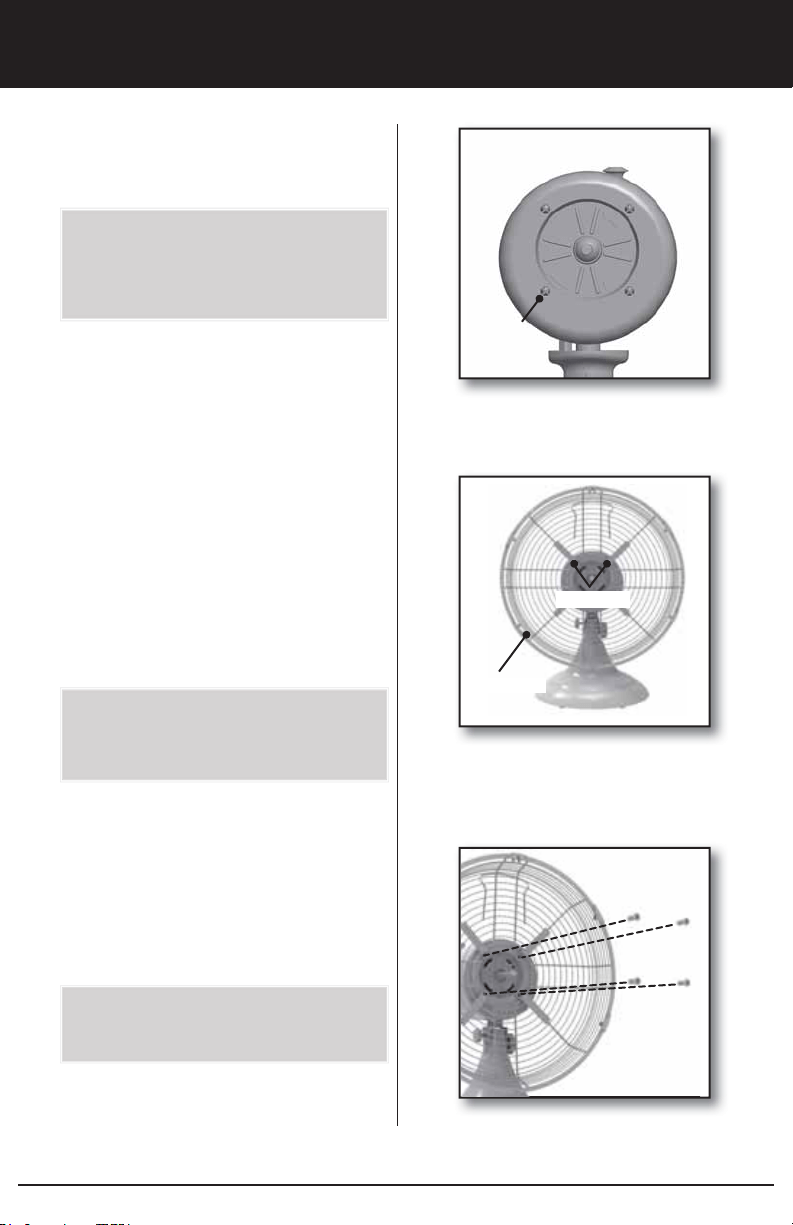
1. Remove the four rear grill mounting
screws from the motor housing. Figure 6.
2. Make sure the rear grill is positioned so
that four of the grill lines are completely
between the top tabs, Figure 7. Then
place the rear grill against the motor
housing, and line up the four tabs on the
back of the grill to the four screw holes
on the front of the motor.
3. To attach the rear grill to the motor
housing, partially install the four grill
mounting screws. Tighten all four
screws. Figure 8.
4. Loosen the screw on the back of the
blade assembly. Figure 9a. Slide the
blade assembly onto the motor shaft.
Figure 9.
5. Tighten the screw on the blade assembly
to secure it to the motor. Make sure that
the end of the screw is positioned within
the notch on the shaft. Figure 10.
GRILL ASSEMBLY:
Figure 6
Grill
Mounting
Screw
Figure 7
Grill Lines
Top Tabs
1
23
4
Figure 8
Caution: Be sure to tighten the screw on
the back of the fan blade to the flat part
of the motor shaft.
61809-01 R20211020
Loading ...
Loading ...
Loading ...