
Loading ...
Loading ...
Loading ...
* Denotes extra hardware provided in separate bag.
INSTALLATION INSTRUCTIONS
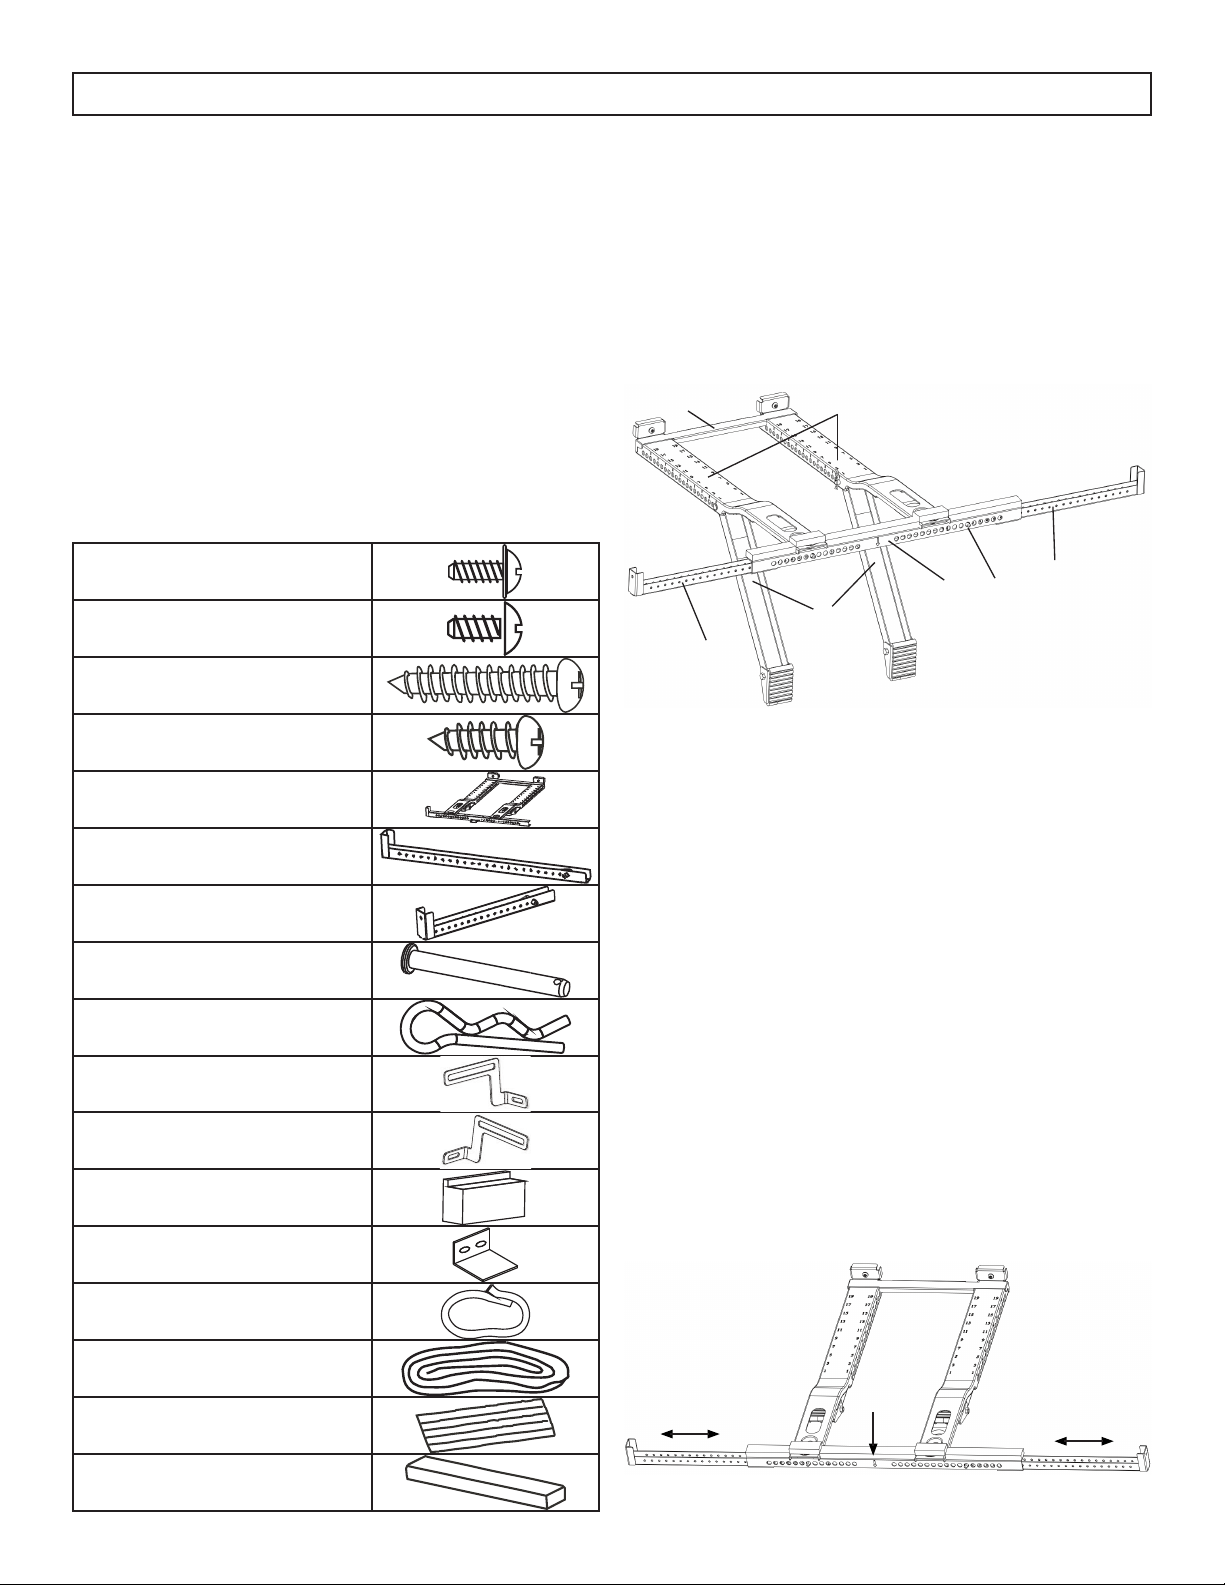
SUPPORT BRACKET DETAILS
1. Rear cross brace
2. Main support
3. Left extension arm
4. Angled support arms
5. Horizontal bracket
6. Spring push pin
7. Right extension arm
REQUIRED TOOLS
• Phillips screwdriver
• Flat head screwdriver
• Pencil
• Measuring Tape
• Carpenter’s Level
• Drill and 1/8” drill bit
Note: Save the shipping carton and packing
materials for future storage or transportation. Please
check the contents of the accessory bags against the
below check list prior to installation.
INCLUDED ACCESSORIES
1/2” type B screw (x2) *
1/4” type B screw (x2) *
1” type A screw (x2) *
1/2” type A screw (x3) *
Support bracket
Right extension arm
Right extension arm (short)
Main support pin (x2) *
Cotter pin (x2) *
Right open window bracket
Left open window bracket
Side arm foam (x2)
Window sash lock
Window sash foam
Window sealing foam
Bracket sealing foam
Additional side arm foam
1
2
3
4
5
6
7
PREPARE THE SUPPORT BRACKET
1. Find the center of the window sill and lightly
mark it with a pencil.
2. Measure the width of the window.
3. Adjust the left extension arm, then install and
adjust the right extension arm to the correct
width by pressing the spring push pins. Note
that the bracket may be slightly offset to the left
of center when placed in the window.
4. Apply the bracket sealing foam to the bottom of
the left and right extension arms.
Important:
• Windows with widths between 26 - 36” should
use the right extension arm.
• Windows with widths between 26 - 26” should
used the short right extension arm
Loading ...
Loading ...
Loading ...