* All Pictures In This Manual Are For Illustrative Purposes Only. Actual Product May Vary.
© 2021 United States Stove Company, 227 Industrial Park Rd., South Pittsburg, TN 37380 Ph. 800-750-2723
THIS MANUAL IS SUBJECT TO CHANGE WITHOUT NOTICE.
Owner’s Instruction and Operation Manual
SAFETY NOTICE: If this heater is not properly installed, a house fire may result. For
your safety, follow the installation instructions. Never use make-shift compromises
during the installation of this heater. Contact local building or fire ocials about
permits, restrictions and installation requirements in your area. NEVER OPERATE
THIS PRODUCT WHILE UNATTENDED.
CAUTION! Please read this entire manual before you install or use your new room
heater. Failure to follow instructions may result in property damage, bodily injury, or
even death. Improper Installation Will Void Your Warranty!
Save These Instructions In A Safe Place For Future Reference.
CALIFORNIA PROPOSITION 65 WARNING:
This product can expose you to chemicals including carbon
monoxide, which is known to the State of California to cause
cancer, birth defects, and/or other reproductive harm. For
more information, go to www.P65warnings.ca.gov
851499H-4603K
1869
COAL ONLY STOVE
THIS STOVE IS NOT A LISTED STOVE.
DO NOT USE THIS HEATER IN A MOBILE HOME OR
TRAILER.
The use of wood in this stove, other than for coal
ignition purposes, is prohibited by law.
Model Number:
2
© 2021 United States Stove Company
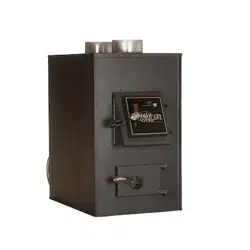
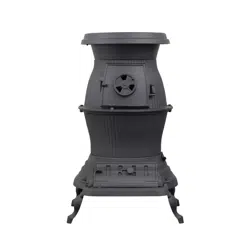
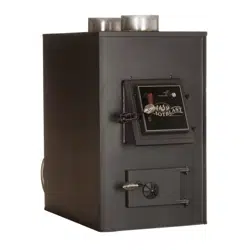
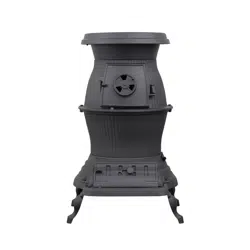
You have purchased a heater from North America's oldest
manufacturer of coal burning products. Our Caboose
Potbelly Stove is reminiscent of the potbelly stoves seen
in the train stations and cabooses of yesteryear. This high
performance potbelly stove is constructed of all cast iron
and is designed to burn coal. Its generous firepot capacity
with shaker grate allows 40 lbs of coal to burn for eight
hours before requiring refueling. Separate ash door with
slide draft control at bottom creates a “forge eect” that
ensures proper combustion.
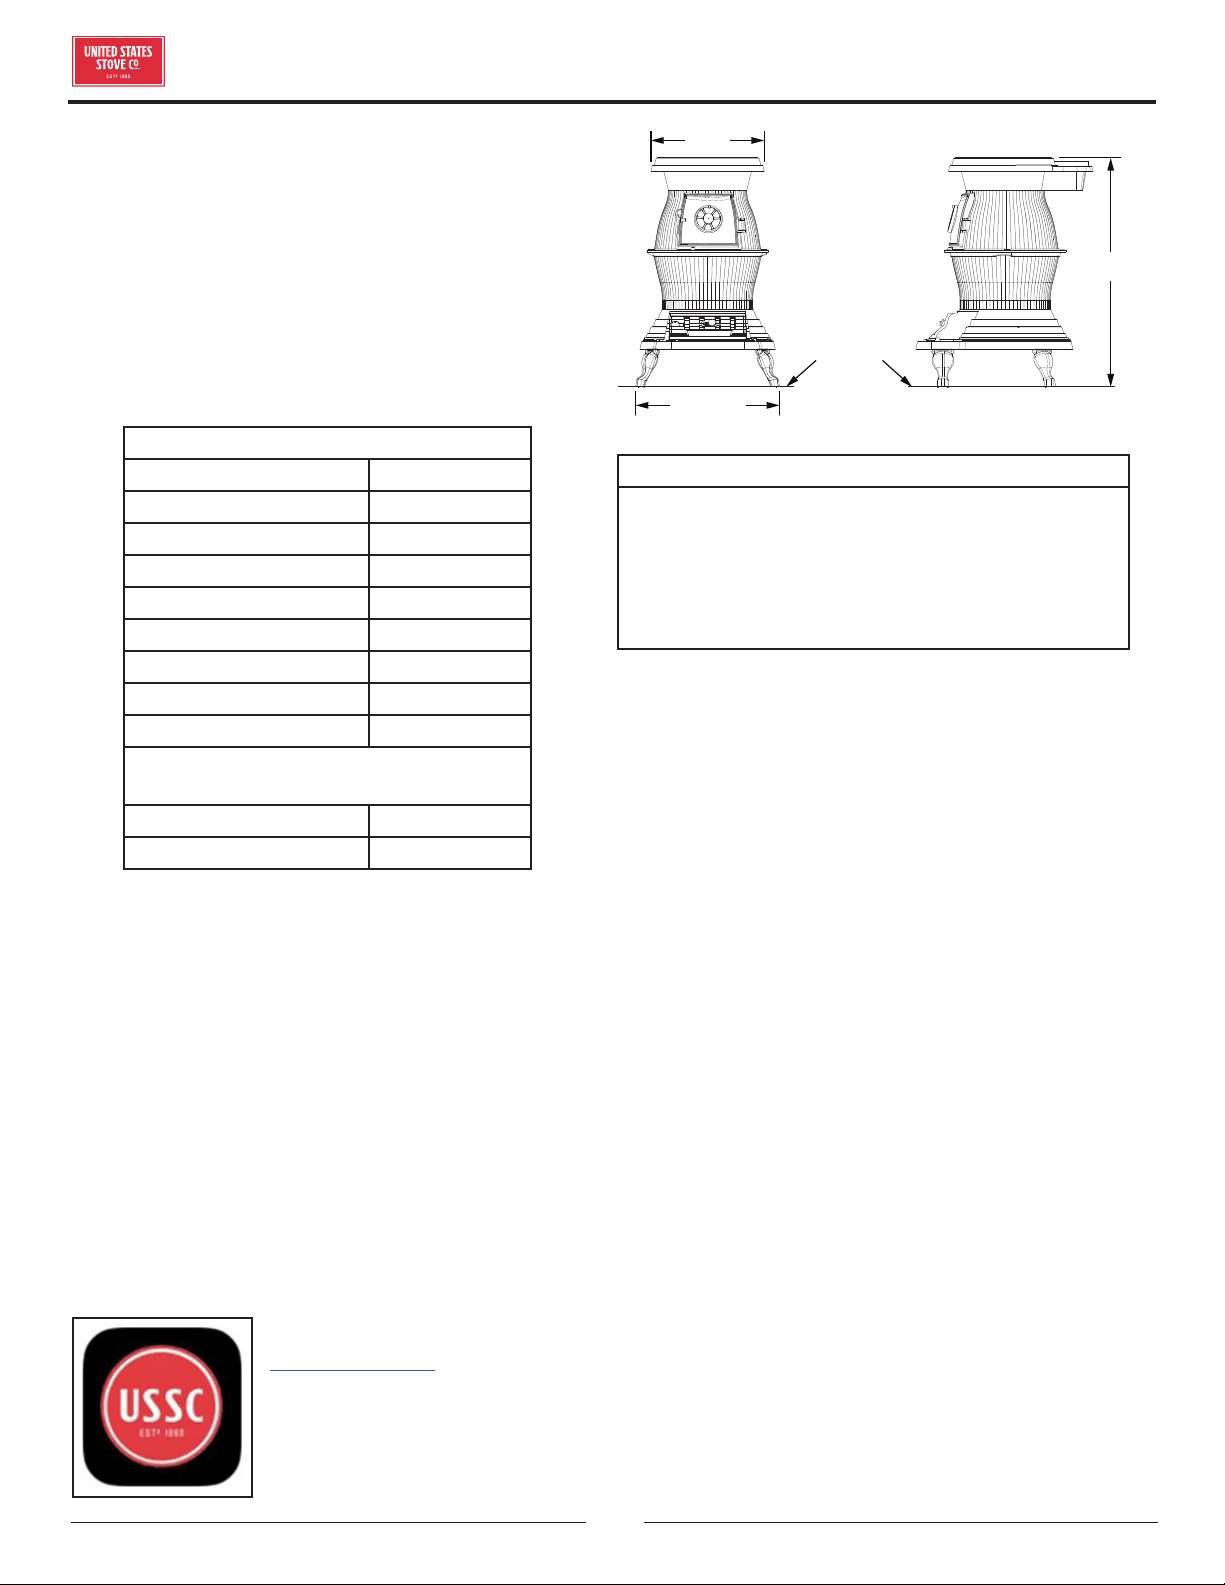
Specifications
Height (Overall) 36”
Width 21.6”
Depth 19.5”
Firebox Capacity 40 lbs
Firebox Depth 10”
Flue Size 6”
Door Opening 8” x 10”
Material 100% Cast Iron
Fuel Coal
NOTE: Bituminous, large nut to small egg or
Anthracite, large egg to small broken.
BTU Rating 80,000
Weight 168 lbs.
15”
FLOOR
PROTECTOR
19-1/2”
36”
SAFETY NOTICE:
IF THIS HEATER IS NOT PROPERLY INSTALLED
A HOUSE FIRE MAY RESULT. FOR YOUR SAFETY,
FOLLOW THE INSTALLATION DIRECTIONS.
CONTACT LOCAL BUILDING OR FIRE OFFICIALS
ABOUT RESTRICTIONS AND INSTALLATION
INSPECTION REQUIREMENTS IN YOUR AREA.
INTRODUCTION
For Customer Service, please call:
1-800-750-2723 Ext 5050 or;
Text to 423-301-5624 or;
Email us at:
customerservice@usstove.com
Note: Register your product online at
www.usstove.com or download the free
app today. This app is available only
on the App Store for iPhone and iPad.
Search US Stove. Save your receipt with
your records for any claims.
© 2021 United States Stove Company
3
INSTALLATION CHECKLIST
Your stove should be installed by a qualified installer only. An NFI qualified Installer can be found at www.nficertified.
org/public/find-an-nfi-pro/
CUSTOMER SERVICE
1-800-750-2723 ext 5050
Text to 423-301-5624
Email to: Customerservice@usstove.com
COMMISSIONING CHECKLIST
This checklist is to be completed in full by the qualified person who installs this unit. Keep this page for future reference.
Failure to install and commission according to the manufacturer’s instructions and complete this checklist will
invalidate the warranty.
Please Print
Customer Name: Telephone Number:
Address:
Model:
Serial Number:
Installation Company Name: Phone Number:
Installation Technician’s Name: License Number:
DESCRIPTION OF WORK
Location of installed appliance: __________________________________________________________________________________
Chimney System: New Chimney System Yes No If yes, Brand _________________________________________
If no, Date of inspection of the existing chimney system: __________________________________________________________
COMMISSIONING
Confirm hearth pad installation as per installation instructions ....................................................................................................
Confirm proper placement of internal parts ..........................................................................................................................................
Check soundness of door gasket and door seals .................................................................................................................................
Confirm clearances to combustibles as per installation instructions in this manual ..............................................................
Check the operations of the air controls .................................................................................................................................................
Confirm all flue pipe and chimney system are secure and sealed ..................................................................................................
Confirm the stove properly drafts when fired .......................................................................................................................................
Check to ensure a CO alarm is installed as per local building codes and is functional ............................................................
Explain the safe operation, proper fuel usage, cleaning and routine maintenance requirements ........................................
Declaration of Completion: As the qualified person responsible for the work described above, I confirm that the appliance
as associated work has been installed as per manufacturer’s instructions and following any applicable building and
installation codes.
Signed: ______________________________________ Print Name: __________________________________Date: ______________
Home Owner: RETAIN THIS INFORMATION FOR FUTURE REFERENCE

4
© 2021 United States Stove Company
SAFETY RULES
Read these rules and the instructions carefully.
1. The installation of this stove must comply with
your local building code rulings. Please observe the
clearances to combustibles. Stove must be 36” from
a combustible wall (wood or plaster board) at rear or
sides.
2. DO NOT install this stove in a mobile home or trailer.
3. Always connect the stove to a chimney and vent to
the outside. Never vent to another room or inside a
building.
4. DO NOT connect a solid fuel burning appliance to
an aluminum Type B gas vent. This is not safe and
prohibited by the NFPA (National Fire Protection
Agency). This stove requires approved masonry or
UL 103 HT factory built chimney.
5. Be sure that your chimney is safely constructed and
in good repair. Have the chimney inspected by the fire
department or a qualified inspector. Your insurance
company may be able to recommend a qualified
inspector.
6. Creosote or soot may build up in the chimney
connector and chimney and can cause a house/
building fire. Inspect the chimney connector and
chimney twice monthly during the heating season
and clean as necessary (see Chimney Maintenance).
7. Provide air for proper combustion from outside the
house into the room where the stove is located. If the
intake is not in the same room, air must have free
access to the room.
8. To prevent injury, do not allow anyone to use this
stove who is unfamiliar with the correct operation of
the stove.
9. Dispose of the ashes in a metal container with a
tight fitting lid. Keep the closed container on a non-
combustible floor or on the ground, well away from all
combustible materials. Keep the ashes in the closed
container until all cinders have thoroughly cooled.
The ashes may be buried in the ground or picked up
by a refuse collector.
10. The special paints used on this stove may give o
some smoke and an odor while they are curing during
the first few fires. Paint discoloration will occur if the
stove is overfired.
11. This stove has a painted surface which is durable
but it will not stand rough handling or abuse. When
installing your stove, please handle with care. Clean
with soap and warm water when stove is not hot. Do
not use any acids or scouring soap, as the will wear
and dull the finish.
12. While the stove is in operation, all persons, young
children especially, should be alerted to the hazards
from high surface temperatures and should keep
away to avoid burns or clothing ignition. Small
children should be carefully supervised when they
are in the same room with the stove.
13. Keep stove area clear and free of all combustible
materials such as gasoline and/or other flammable
vapors and liquids.
© 2021 United States Stove Company
5
ASSEMBLY & INSTALLATION
1. Uncrate and/or unpack the heater, removing all
packing material, being careful not to dispose of the
parts bag.
2. Remove the following contents: (4) Legs with nut and
bolt package, (1) Lid, (1) Lid Lifter, (1) Shaker Grate,
(1) Ash Door, (1) Slide Draft, and (1) Feed Door.
3. Carefully lay the stove on its side, preferably on a soft
surface. Note: Cardboard shipping carton placed flat
works well for this application.
4. Securely attach all four (4) legs to the lower chamber
using nut and bolt package.
5. Carefully return the stove to the upright position and
place it in the desired location.
6. Place the lid in position on top of the plate.
7. Position ash door with slide draft on the front of the
lower chamber.
8. Place shaker grate in the lower chamber.
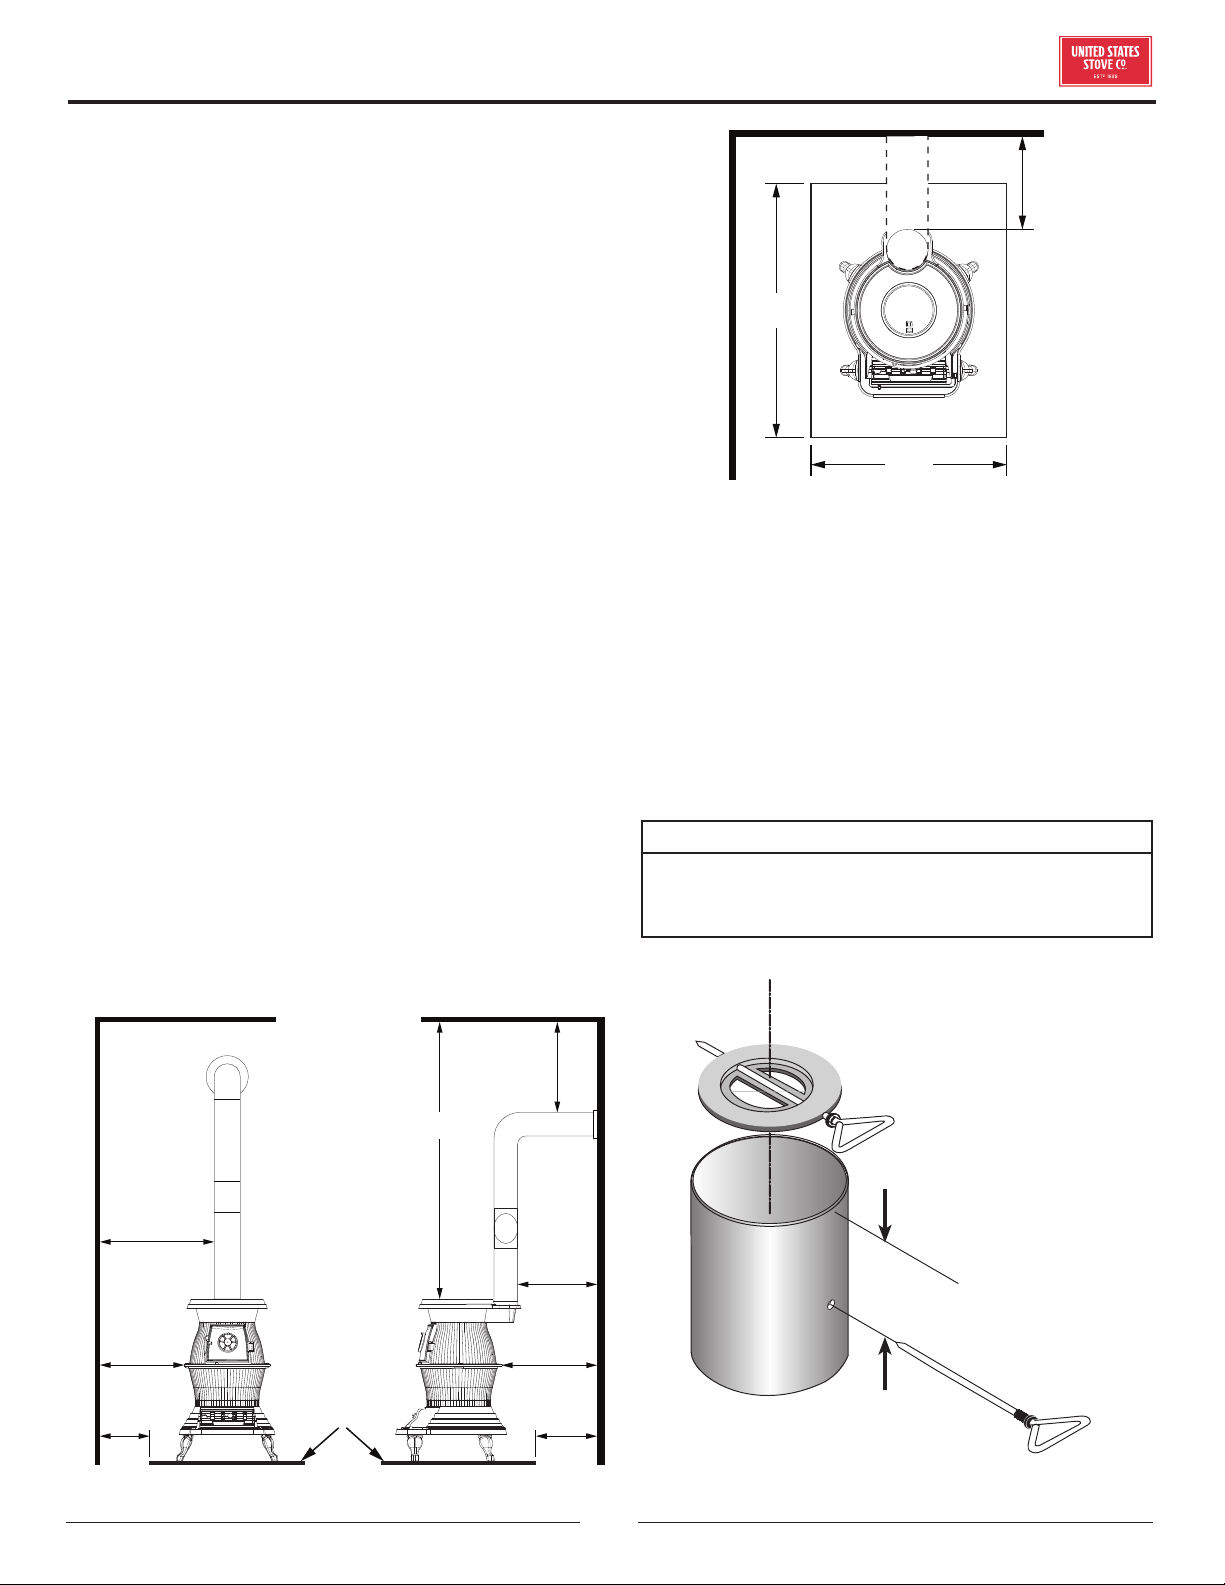
9. Place the heater on solid masonry, or solid concrete.
When the heater is used on a combustible floor, use
a listed floor protector. The floor protector must
comply with UL Standards. The base should extend
at least 18” beyond the door side of the heater and
should extend under the flue pipe (if it is elbowed
towards a wall). After observing the clearances to
combustibles, locate your floor protector accordingly,
and carefully place the stove in your selected
location. Install stovepipe, elbows, and thimble as
necessary, utilizing either a recently cleaned and
inspected masonry chimney or UL 103 HT Factory
Built Chimney, utilizing manufactures instructions.
39-1/2”
36”
42”
36”
18”
60” min
14-1/2” 10-1/4”
FLOOR
PROTECTOR
54”
3
6”
36”
Floor Protector
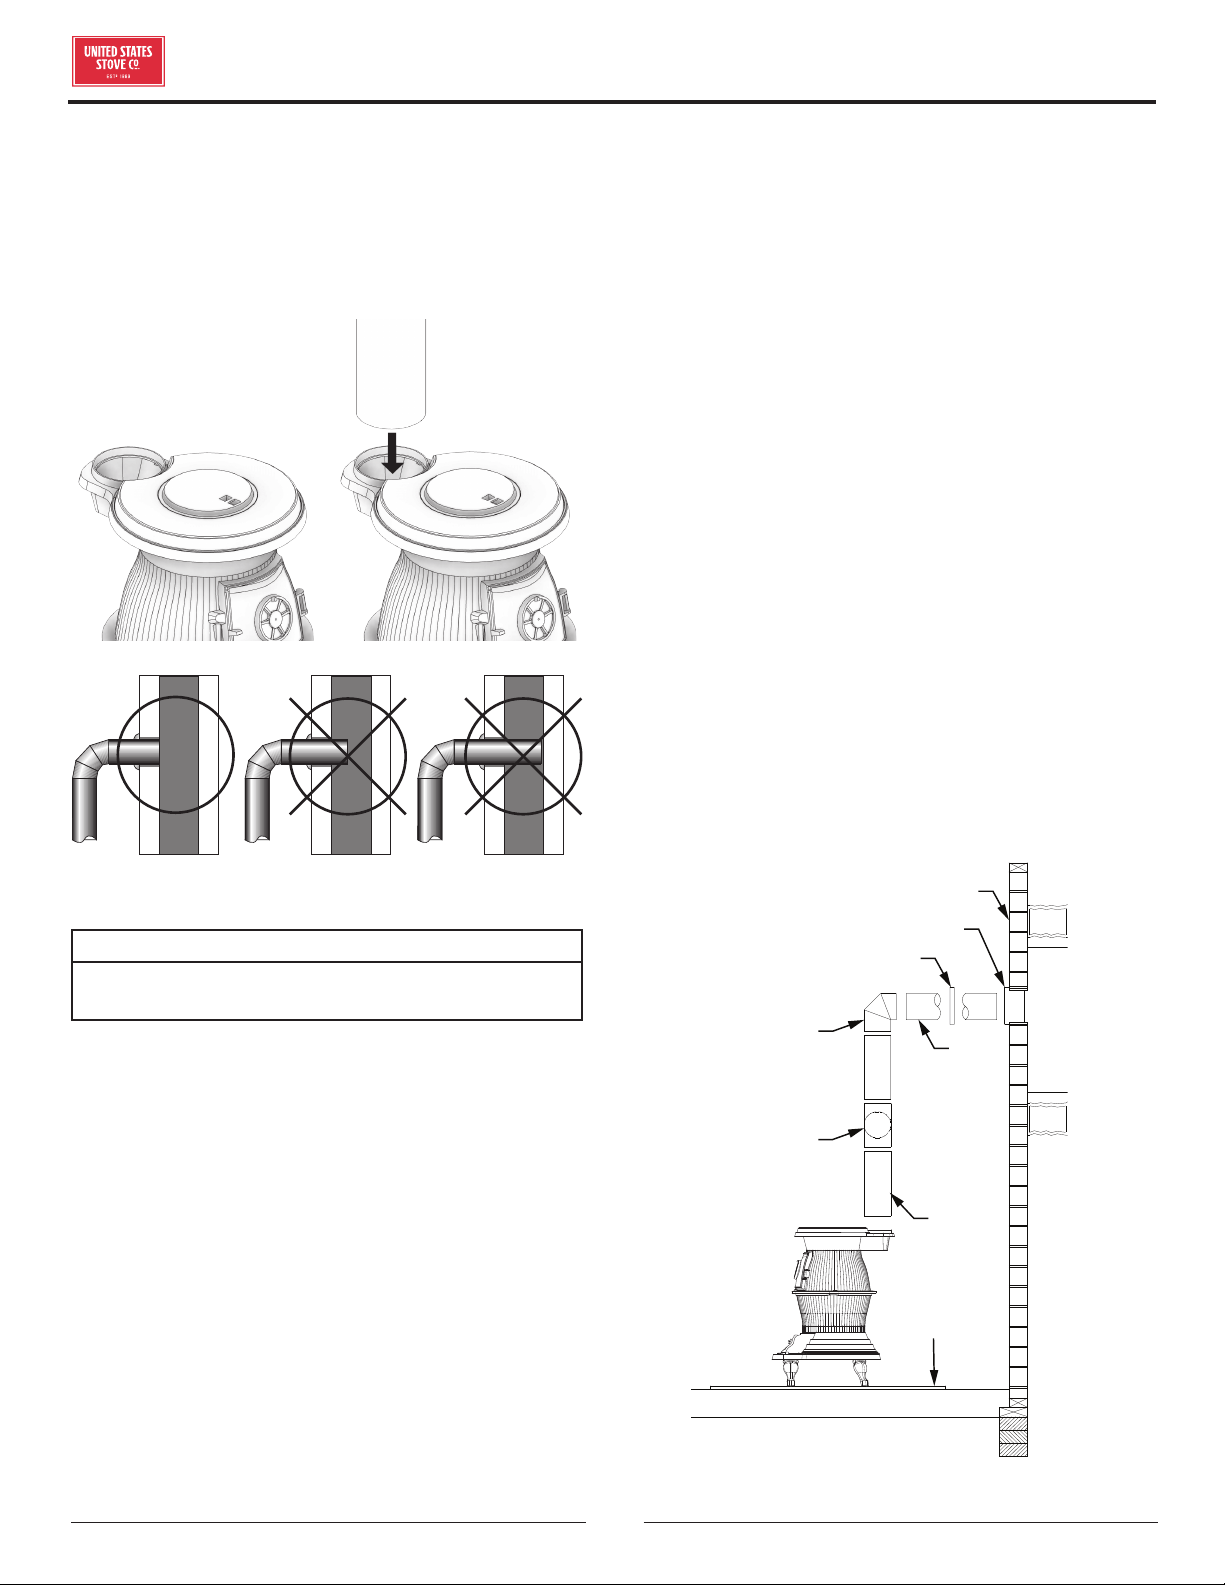
10. The flue pipe draft damper must be installed into
the top end of the first straight section of stove pipe
exiting the stove before the stove is used.
a. Drill two 1/4” holes centered on either side of
the pipe section 6” from the top end of the pipe
Remove the handle from the damper then slide
the damper into the pipe.
b. Align the damper with the holes drilled in step
8a and insert the handle through the holes and
the damper.
NOTE:
THIS DAMPER IS NECESSARY FOR THE PROPER
OPERATION OF THE STOVE. IT MUST BE INSTALLED
BEFORE USE (NO EXCEPTIONS)
6"/15.25 cm
Draft Damper
Installation
6
© 2021 United States Stove Company
ASSEMBLY & INSTALLATION
11. Attach stove piping (see instructions).
12. The stove must have its own flue. Do not connect this
unit to a chimney flue serving other appliances. This
stove has a circular flue outlet and uses a standard 6”
stovepipe. To attach pipe, simply slide the end of the
stove pipe into the flue outlet and secure with metal
screw.
CORRECT WRONG WRONG
Stovepipe/Flue Connections
CAUTION:
KEEP FURNISHINGS AND OTHER COMBUSTIBLE
MATERIALS AWAY FROM THE HEATER.
13. If your chimney continues to draft excessively, then
use a barometric draft regulator.
14. Use three (3) sheet metal screws in each stove
pipe and/or elbow joint to firmly hold the stove pipe
together. Use 6” round black/blue stove pipe, not
galvanized stove pipe .
15. Double check instructions 2 through 7 to be sure you
have the proper clearances shown from the stove and
the connector pipe to combustible surfaces. NOTE: If
a wall is only faced with brick or stone, consider it as
a combustible wall.
16. DO NOT install this stove in a mobile home or trailer.
17. If you have too much draft, then install a 6” cast iron
stove pipe damper in the first joint of the stove pipe.
MASONRY CHIMNEY
The masonry chimney must comply with UL codes. Before
using an existing masonry chimney, clean the chimney
and inspect the flue liner to be sure it is safe to use.
Make repairs before attaching the heater. The connector
pipe and fittings you will need to connect directly to
a masonry chimney are shown. If the connector pipe
must go through a combustible wall before entering the
masonry chimney, consult a qualified mason or chimney
dealer. The installation must conform to local fire codes,
and NFPA 211. Do not connect this heater into the same
chimney flue as the fireplace or flue from another heater.
The chimney used for a heater must not be used to
ventilate the cellar or basement. If there is a cleanout
opening at the base of the chimney, close it tightly.
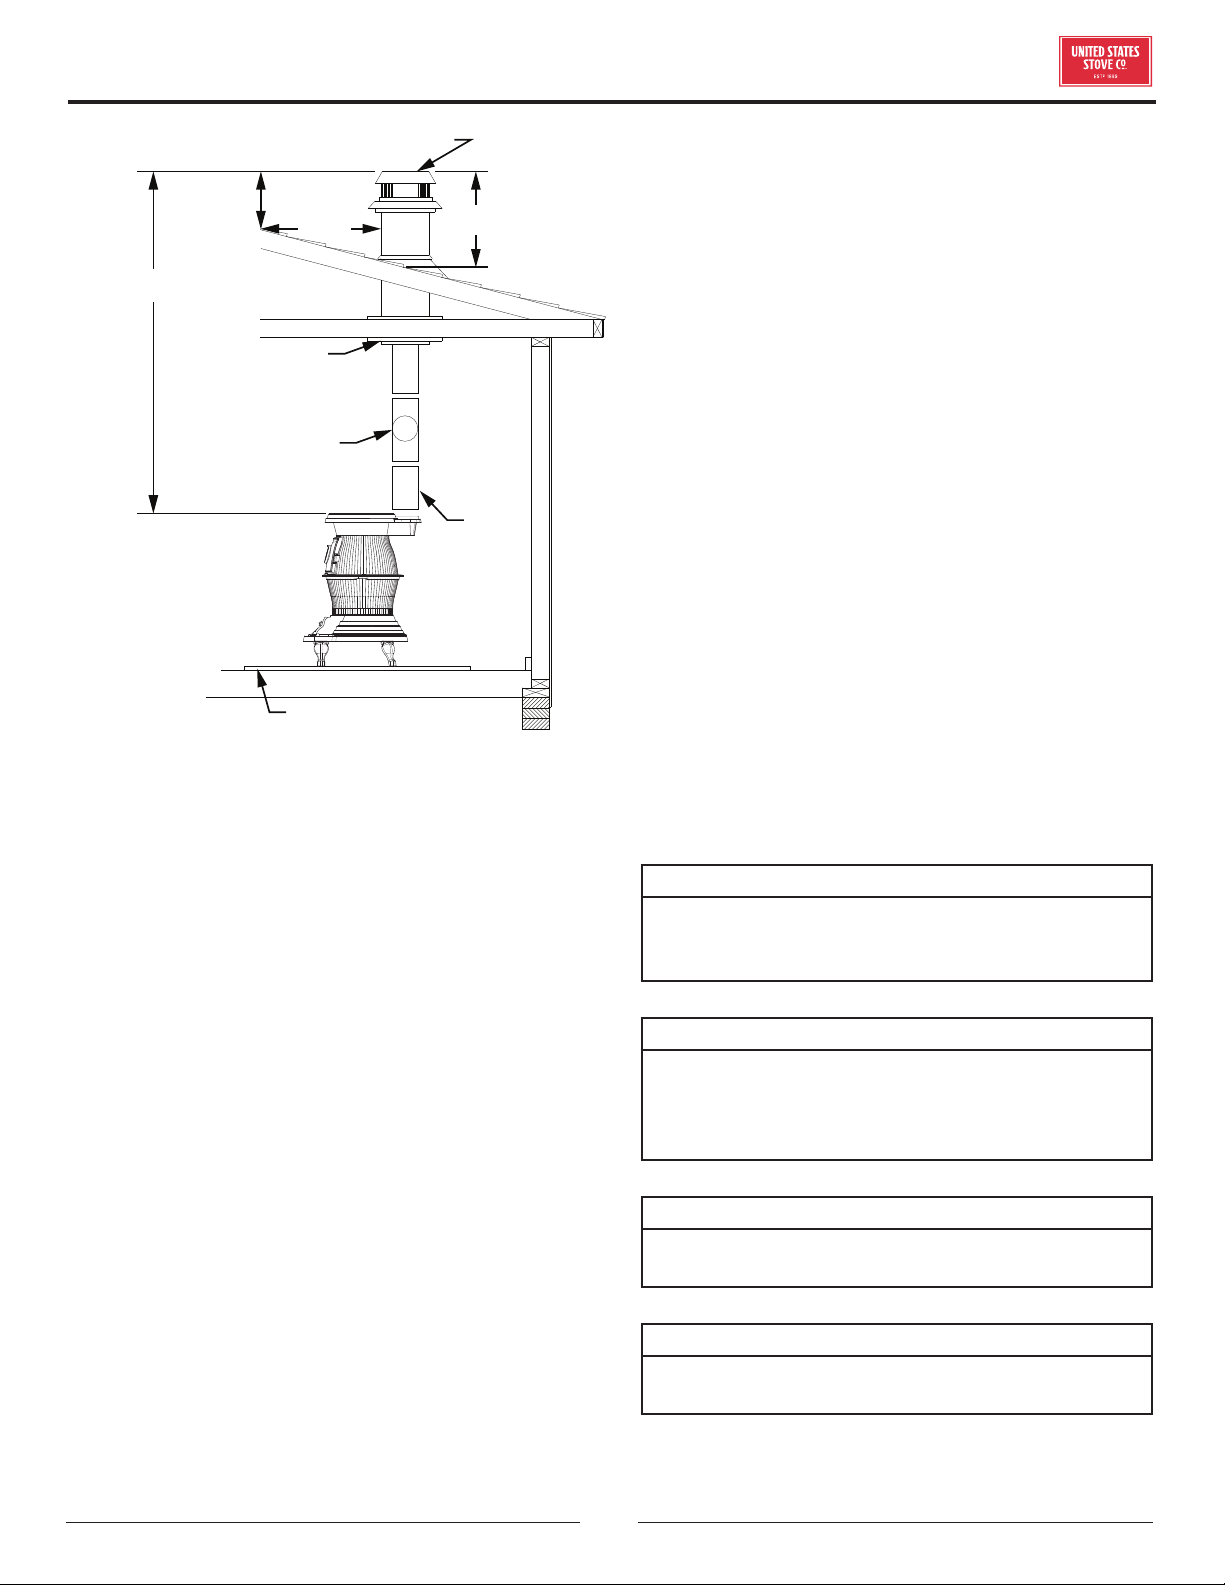
LISTED CHIMNEY
Carefully follow chimney manufacturer's instructions.
Use only 6" black or blued chimney connector, minimum
24 gauge steel and UL 103 HT factory built chimney,
utilizing manufacturers instructions. If your chimney
starts at the ceiling, you will need enough 6” pipe to reach
the ceiling. The top of the chimney must be at least 3 feet
above the roof and be at least 2 feet higher than any point
of the roof within 10 feet.
FLOOR
PROTECTOR
PIPE
ELBOW
PIPE
COLLAR
THIMBLE
BAROMETRIC
DRAFT
REGULATOR
NON-COMBUSTIBLE WALL
FLUE CONNECTION
NON-COMBUSTIBLE WALL
FLUE CONNECTION
NON-COMBUSTIBLE WALL
© 2021 United States Stove Company
7
ASSEMBLY & INSTALLATION
CHIMNEY CAP MANDATORY
3 ft min
2 ft min
10 ft
11 ft min
PIPE
BAROMETRIC
DRAFT
REGULATOR
NON-COMBUSTIBL
E CONSTRUCTION
IN ACCORDANCE
WITH NFPA 211
FLOOR PROTECTOR
PIPE
REDUCER
RULES FOR CONNECTOR PIPE
INSTALLATION
1. The pipe should be firmly attached to the collar top
with 3 screws and sealed with stove cement.
2. Slope any horizontal pipe upward toward the chimney
at least 1/4” for each foot of horizontal run.
3. You must have at least 18” clearance between any
horizontal piping and the ceiling.
4. The pipe cannot extend into the chimney flue.
5. Seal each connector pipe joint with stove cement.
Also seal the pipe at the chimney.
6. Use 3 sheet metal screws at each joint to make the
piping rigid.
7. It is recommended that no more than two (2) 90
degree bends be used in the stove pipe installation as
more than two (2) may decrease the amount of draw
and possibly cause smoke spillage.
NOTE: The chimney connector shall not pass through an
attic, roof space, floor, ceiling, or similar concealed space.
Where passage through a wall or partition of combustible
construction is desired, the installation must conform
with NFPA 211.
OPERATION OF THE STOVE
1. Fully open slide draft on ash door and keep spin
damper on feed door closed.
2. Burn coal only. Use wood for coal ignition purposes
only. Build six (6) small fires upon initial firing. Light
wood using paper, twigs, etc.
3. After the fire has been started and is burning
satisfactorily, close slide draft almost all the way.
4. Open/adjust spin draft on feed door to allow additional
air into the stove (on top of the fire). This will allow a
more ecient burn cycle.
5. Never build extremely large fires in this type stove as
damage to the stove or smoking may result.
6. DO NOT touch the stove after firing
7. Never over fire this stove by building excessively hot
fires as a house/building fire may result.
8. Inspect stove pipe every 90 days. Replace
immediately if stove pipe is rusting or leaking smoke
into the room.
9. This is a cast iron stove. It does not have welded
seams. From time to time you may have to “tune-
up” the stove by refilling and/or replacing the stove
cement or mortar along the seams.
10. If stove begins to glow or turn red, you are over firing.
CAUTION:
OVER FIRING THE APPLIANCE MAY CAUSE A
HOUSE FIRE. IF A UNIT OR CHIMNEY CONNECTOR
GLOWS, YOU ARE OVER FIRING.
CAUTION:
NEVER USE GASOLINE, GASOLINE-TYPE LANTERN
FUEL, KEROSENE, CHARCOAL LIGHTER FLUID, OR
FLAMMABLE LIQUIDS TO START OR “FRESHEN
UP” A FIRE IN THE HEATER.
CAUTION:
USE COAL ONLY. DO NOT USE DRIED LUMBER,
TREATED WOOD ARTIFICIAL OR PRESSED LOGS.
WARNING:
NEVER STORE FLAMMABLE LIQUIDS, ESPECIALLY
GASOLINE. IN THE VICINITY OF THE HEATER.

8
© 2021 United States Stove Company
ASSEMBLY & INSTALLATION
WARNING:
NEVER OPERATE THIS HEATER WITH THE FUEL
DOOR OPEN.
WARNING:
DO NOT OBSTRUCT THE SPACE BENEATH THE
HEATER
SERVICE HINTS
Do not expect a heater to draw. It is the chimney that
creates the draft. Smoke spillage into the house or
excessive buildup of water or creosote in the chimney are
warnings that the chimney is not functioning properly.
Correct problem before using heater. Possible causes are:
1. The connector pipe may push into the chimney too
far, stopping the draft.
2. Do not connect two heaters into the same chimney
flue.
3. The chimney used for a heater must not be used to
ventilate the cellar or basement. If there is a cleanout
opening at the base of the chimney, It must be closed
tightly.
4. If the chimney is operating too cool, water will
condense in the chimney and run back into the
stove. Soot formation will be rapid and may block
the chimney. Operate the heater at a high enough
fire to keep the chimney warm preventing this
condensation.
If the fire burns well but sometimes smokes or burns
slowly, it may be caused by the chimney top being lower
than another part of the house or a nearby tree. The wind
blowing over a house or tree, falls on top of the chimney
like water over a dam, beating down the smoke. The top
of the chimney should be at least 3 feet above the roof
and be at least to 2 feet higher than any point of the roof
within 10 feet.
CREOSOTE FORMATION & NEED FOR
REMOVAL
When solid fuel is burned slowly, it produces tar and other
organic vapors, which combine with expelled moisture
to form creosote. The creosote vapors condense in the
relatively cool chimney flue of a slow burning fire. As a
result, creosote residue accumulates on the flue lining.
When ignited, this creosote makes an extremely hot fire.
The chimney connector and chimney should be inspected
at least twice monthly during the heating season to
determine if a creosote or soot buildup has occurred. If
there is any accumulation, it should be removed. Failure
to remove creosote may cause a house fire. Soot may be
removed by using a chimney brush or other commonly
available materials. Chimney fires burn very hot. If the
chimney connector should glow red, immediately call the
fire department, then reduce the fire by closing the inlet
air control and pour a large quantity of coarse salt, baking
soda or cool ashes on top of the fire in the firebox.
CAUTION:
A CHIMNEY FIRE MAY CAUSE IGNITION OF WALL
STUDS OR RAFTERS WHICH YOU THOUGHT WERE
A SAFE DISTANCE FROM THE CHIMNEY. IF YOU
HAVE A CHIMNEY FIRE, HAVE YOUR CHIMNEY
INSPECTED BY A QUALIFIED PERSON BEFORE
USING AGAIN.
CAUTION:
DO NOT TOUCH THE HEATER UNTIL IT HAS
COOLED.
NOTE:
FOR YOUR SAFETY, WE RECOMMEND INSTALLING
SMOKE DETECTORS IN YOUR HOME IF NOT
ALREADY INSTALLED.

© 2021 United States Stove Company
9
Stoves that are capable of burning coal usually will burn
both Bituminous and Anthracite coal. Anthracite is
perhaps the best coal fuel because of its long even burn
time, high heat output, and cleanliness which make it a
good choice for the home. However, keep in mind it is a
much more dicult fuel to use, requires more care and
patience, is not so widely available, and is usually much
more expensive than Bituminous.
SIZE OF COAL
Most sizes of Bituminous Coal will work in a coal stove;
for best results we recommend large “nut” coal to small
“egg” coal (1-3/4” diameter to 4” diameter). When
burning Anthracite, use “egg” or “broken” with sizes
between 2-5/16” thru 4-3/8”. Note that it is important
to the long life of your stove to buy coal which has been
sized and cleaned. Cleaning ensures removal of rocks and
other minerals. Never use coal smaller than 1” or larger
than 5” in diameter. Small sized coal will smother the fire.
Too large a size of coal will not burn well.
STOVE OPERATION
All coal fires should be started with wood which will allow
the fire to get hot enough to ignite the coal. The best
ignition fires utilize dry pine or other resinous soft woods
as kindling, with hard wood (oak, hickory, ash) added to
increase the heat prior to addition of the coal.
Before starting the fire, open the stove pipe damper (if
equipped), turn the thermostat to high, open the ash
pit door and feed door, place newspaper and finely split
kindling on the grate, light the paper, add larger hard wood
after the kindling is burning brightly. CAUTION: Never
use gasoline, lantern fuel, kerosene, charcoal lighter fluid,
or other flammable liquids to start or freshen up a fire in
any heater. Place the larger pieces of wood on the fire so
that they are slightly separated and form a level for the
addition of coal. It will take 10 to 20 minutes before this
wood is thoroughly ignited. Adding coal too soon will cut
the air supply and smother the fire.
BURNING BITUMINOUS
Once your kindling and wood fire has produced a bed of
well-established coals, start adding coal in layers allowing
each to ignite before adding more. Bituminous has a high
volatile content and, as a result, should be fired with the
“conical method” - with the highest portion of your fire
bed in the center of the firebox. The first flames will be
long and generally orange or yellow and produce quite a
bit of smoke. As the gases burn o the flames become
shorter, change color and produce less smoke.
Once the fire is WELL ESTABLISHED add coal to the
center of the firebox forming the cone. Burning in this
fashion allows heat to drive o the volatile gases, and
turbulence created increases the burn eciency. There
will have to be some experimenting with the individual
setup as no two chimney’s or installations are going to
be the same. Just remember to allow enough air to enter
the firebox and keep the stove pipe damper open so that
volatiles are properly burned. Before refueling, take the
time to break up the cone a little with a poker, especially
if it has caked over or formed a crust. But, be careful not
to mix the coal as this increases the chances of forming
clinkers. When shaking the grate(s) be gentle. Just a few
short movements - a couple of “cranks” - is better than a
lot of agitation. The objective is to remove a small amount
of the ashes without disturbing the fire. Stop when you
see a glow in the ashes or the first red coals fall into the
ash pan. Excessive shaking wastes fuel and can expose
the grate(s) to very high temperatures which can cause
warpage or burnout.
For overnight operation (long duration burn time) shake
the fire and add coal, retaining the center cone. Once the
volatiles are burned o, close the feed door and adjust
the stove pipe damper, if equipped. Then adjust the
thermostat to the desired heat level.
More maintenance will be needed with bituminous coal
than with anthracite coal as more soot will collect on
heating surfaces and in pipes, requiring more frequent
cleaning.
ANTHRACITE
Add a thin layer of coal (preferably smaller chunks) to the
wood fire, being careful not to disturb it too much or cut
o the draft. Then, add a second heavier layer after the
coal is ignited and burning well. If necessary, add a third
layer to bring the coal up to the top of the front liner (not
above!). Be sure to close the ash door.
Before adding further fuel, be sure to leave a red spot of
glowing coals in the center of the firebox to ensure that
the fire has not been smothered and to help ignite the
gases given o by the new charge. A deep charge will give
a more even heat and a longer fire, but it may take one to
two hours before the whole bed is fully ignited.
When the fire is well established and the room is
becoming warm, partially close the dampers. Some
experimenting will have to take place with each particular
setting of all dampers and controls as the chimney
provides the draft necessary to not only exhaust the
smoke, but to pull combustion air into the heater as well
- and no two chimney’s perform the same. Under ideal
draft conditions, one should be able to turn the secondary
air supply below the feed door (some models) to a near
A GUIDE TO BURNING COAL IN YOUR STOVE

10
© 2021 United States Stove Company
A GUIDE TO BURNING COAL IN YOUR STOVE
closed position - but leave the ash pit damper at least
partially open to prevent the fire from going out. Adjust
the stove pipe damper to reduce the draft on the fire.
With anthracite there will be short blue flames above the
coal, except when the fire is started or a new charge is
added. If, however, there is no flame then the fire needs
more air from the bottom (unless it is near the end of its
burn cycle and needs to be recharged).
Only when the coal is burned down to half its original
depth it is time to add fresh coal. When doing so, open the
stove pipe damper and turn the thermostat damper to
high, which will allow the fire to burn o any accumulated
gases. Open the feed door, and with a small rake, hoe, or
hooked poker pull the glowing coals to the front of the
firebox. Try not to disturb the fire too much. Next, add
a fresh charge to the back being careful not to seal o
the top. Close the feed door, but leave the spin damper
(or thermostat) open for a few minutes until the volatile
gases have burned o. It is not necessary to shake down
the ashes each time you refuel the stove. Experience will
be your best teacher.
BANKING THE FIRE
For extended operation, such as overnight, the fire will
need to be banked. To do so heap coal up along the sides
and back of the firebox so that the fire gradually burns it
over a longer period of time. The intensity of the fire will
also be reduced without letting it go out. Follow the same
procedure as for refueling. If possible, avoid shaking, as a
heavier layer of ash will help reduce the intensity of the
fire during this time. After loading, let the fire establish
itself for about 30 minutes. Then close your damper and
automatic control to the point where the house does not
become too cold. It is important that you begin banking
early enough before retiring or leaving that you can make
necessary adjustments after the fire is well established.
To revive a coal fire that is almost out,
(1) open the ash door and stove pipe damper and close the
spin damper under the door to get a good draft through
the grate.
(2) place a thin layer of dry coal over the entire top of
the fire. DO NOT POKE OR SHAKE THE FIRE AT THIS
TIME!
(3) after the fresh coal has become well ignited shake the
grate (just a little), refuel.
DO NOT burn coke, charcoal, high volatile bituminous
coal, sub bituminous, lignite or cannel coal (sometimes
called channel coal or candle coal).
NEVER burn wax or chemically impregnated sawdust
logs - their intended use is for fireplaces only.
NEVER fill the stove above the firebrick or cast iron liner.
For Parts Assistance Call: 800-750-2723 Ext 5051 or Email: parts@usstove.com
The information in this owner’s manual is specific to your unit. When ordering replacement parts the information
in this manual will help to ensure the correct items are ordered. Before contacting customer service write down the
model number and the serial number of this unit. That information can be found on the certification label attached
to the back of the unit. Other information that may be needed would be the part number and part description of the
item(s) in question. Part numbers and descriptions can be found in the “Repair Parts” section of this manual. Once
this information has been gathered you can contact customer service by phone 1-800-750-2723 Ext 5051 or Email
parts@usstove.com.
Model Information
Model Number
Serial Number
HOW TO ORDER REPAIR PARTS
© 2021 United States Stove Company
11
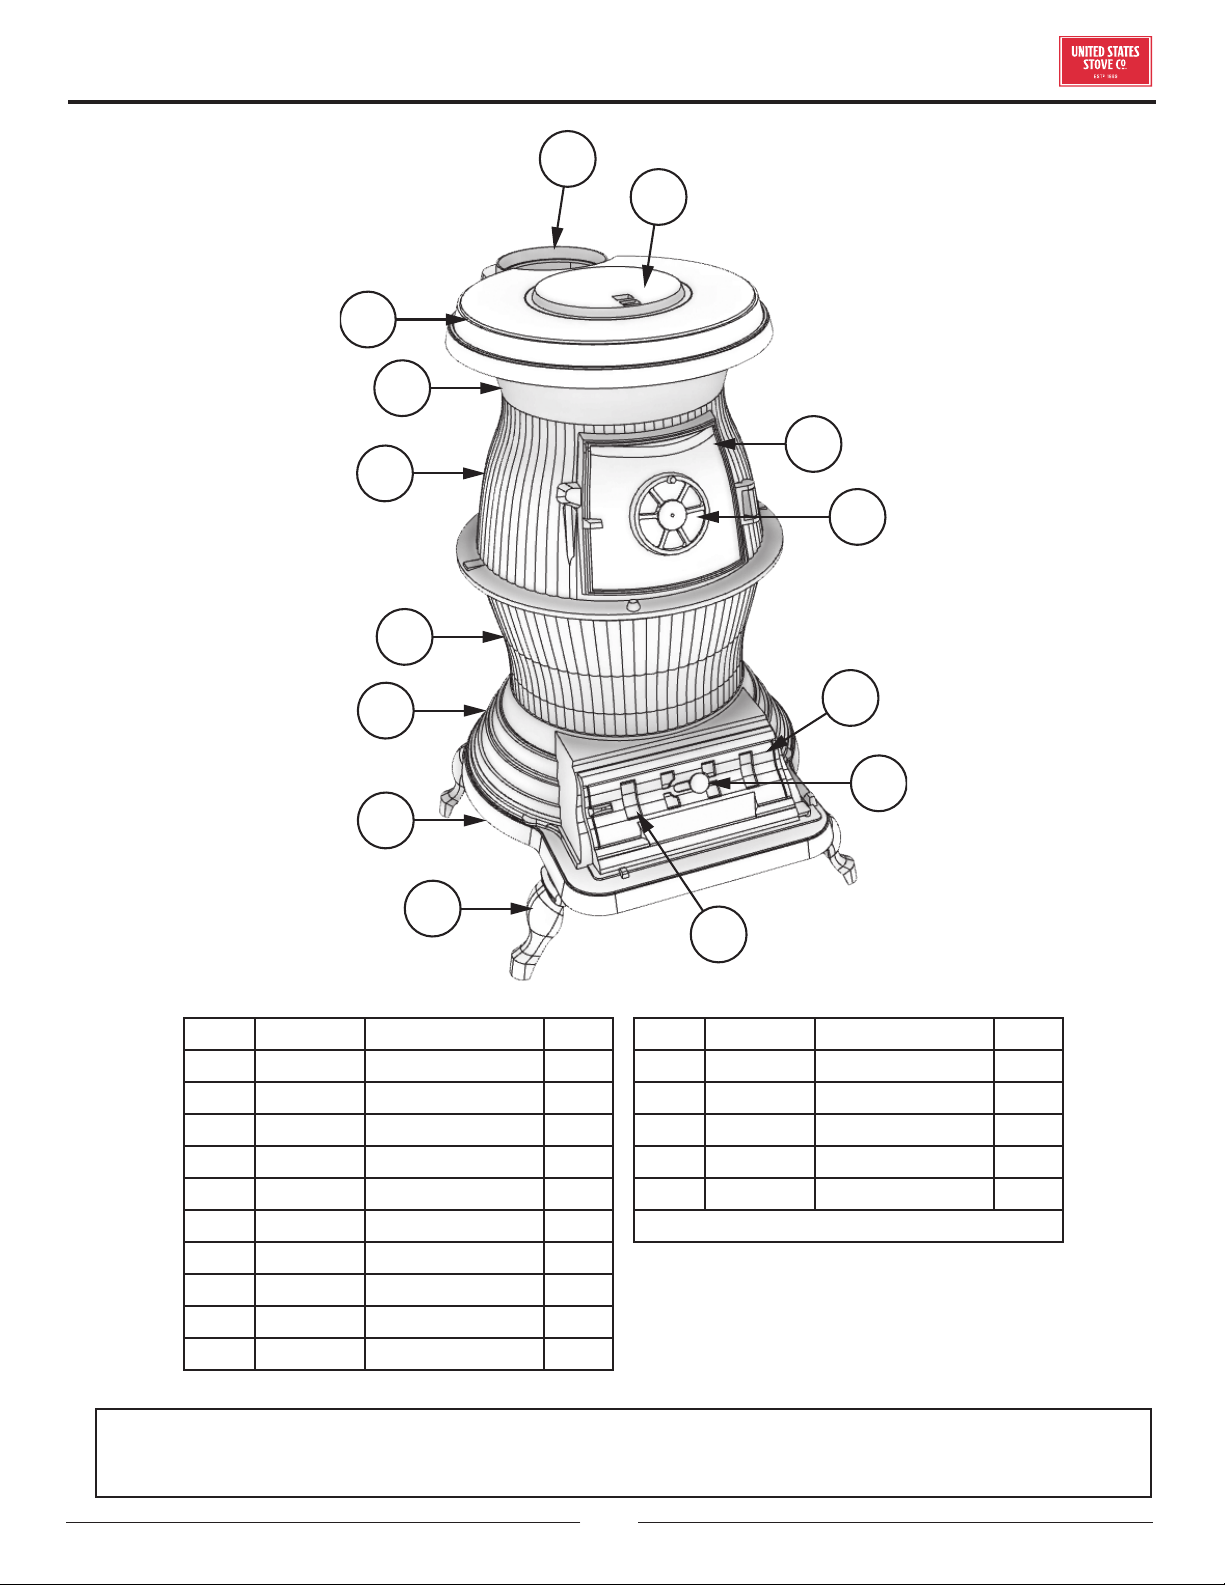
REPAIR PARTS
13
2
14
1
3
12
10
8
9
4
5
6
7
11
IN ORDER TO MAINTAIN WARRANTY, COMPONENTS MUST BE REPLACED USING ORIGINAL
MANUFACTURERS PARTS PURCHASED THROUGH YOUR DEALER OR DIRECTLY FROM THE APPLIANCE
MANUFACTURER. USE OF THIRD PARTY COMPONENTS WILL VOID THE WARRANTY.
Key Part # Description Qty
1 89979 Top Plate 1
2 89980 Upper Chamber 1
3 89981 Feed Chamber 1
4 89982 Burn Chamber 1
5 89983 Lower Chamber 1
6 89984 Base 1
7 89985 Legs 4
8 89987 Slide Draft 1
9 89988 Slide Draft Knob 1
10 89986 Ash Door 1
11 89992 Spin Draft 1
12 89991 Feed Door 1
13 89994 Cook Lid 1
14 89993 Collar Top 1
* 89989 Shaker Grate 1
* 89990 Spring Handle 1
* NOT SHOWN
To order parts:
Call 1-800-750-2723 Ext 5051 or
Email to: parts@usstove.com

12
© 2021 United States Stove Company
It is recommended that your heating system is serviced regularly and that the appropriate Service Interval Record is
completed.
SERVICE PROVIDER
Before completing the appropriate Service Record below, please ensure you have carried out the service as described in
the manufacturer’s instructions. Always use the manufacturer's specified spare part when replacement is necessary.
Service 01 Date: ______________________
Engineer Name: ____________________________________
License No.: ________________________________________
Company: __________________________________________
Telephone No.: _____________________________________
Stove Inspected: Chimney Swept:
Items Replaced: ____________________________________
Service 03 Date: ______________________
Engineer Name: ____________________________________
License No.: ________________________________________
Company: __________________________________________
Telephone No.: _____________________________________
Stove Inspected: Chimney Swept:
Items Replaced: ____________________________________
Service 05 Date: ______________________
Engineer Name: ____________________________________
License No.: ________________________________________
Company: __________________________________________
Telephone No.: _____________________________________
Stove Inspected: Chimney Swept:
Items Replaced: ____________________________________
Service 07 Date: ______________________
Engineer Name: ____________________________________
License No.: ________________________________________
Company: __________________________________________
Telephone No.: _____________________________________
Stove Inspected: Chimney Swept:
Items Replaced: ____________________________________
Service 02 Date: ______________________
Engineer Name: ____________________________________
License No.: ________________________________________
Company: __________________________________________
Telephone No.: _____________________________________
Stove Inspected: Chimney Swept:
Items Replaced: ____________________________________
Service 04 Date: ______________________
Engineer Name: ____________________________________
License No.: ________________________________________
Company: __________________________________________
Telephone No.: _____________________________________
Stove Inspected: Chimney Swept:
Items Replaced: ____________________________________
Service 06 Date: ______________________
Engineer Name: ____________________________________
License No.: ________________________________________
Company: __________________________________________
Telephone No.: _____________________________________
Stove Inspected: Chimney Swept:
Items Replaced: ____________________________________
Service 08 Date: ______________________
Engineer Name: ____________________________________
License No.: ________________________________________
Company: __________________________________________
Telephone No.: _____________________________________
Stove Inspected: Chimney Swept:
Items Replaced: ____________________________________
SERVICE RECORD